Easy New York-Style Sourdough Discard Bagels – Your New Kitchen Win
Hey there, it’s Beau! Let’s talk about that little jar of sourdough discard sitting in your fridge. You know the one. It whispers guilt every time you open the door, a bubbly reminder of good intentions. For the longest time, I’d give mine a solemn salute before… well, letting it go. It felt like wasting a tiny bit of kitchen magic. But what if I told you that same discard is the secret key to the chewiest, shiniest, most satisfying homemade bagels you’ve ever tasted?
That’s right. Today, we’re transforming that “waste” into pure gold: Authentic New York-Style Sourdough Discard Bagels. Now, I can see you maybe leaning back, thinking, “Bagels? Beau, that’s professional bakery stuff.” I promise you, it’s not. If you can stir ingredients together and boil water, you are 100% qualified for this mission. We’re skipping the complicated, 3-day sourdough schedules and using our trusty discard to add incredible flavor and a perfect, tender-yet-chewy crumb. No fancy tools, no obscure ingredients—just you, your kitchen, and the incredible smell of baking bread.
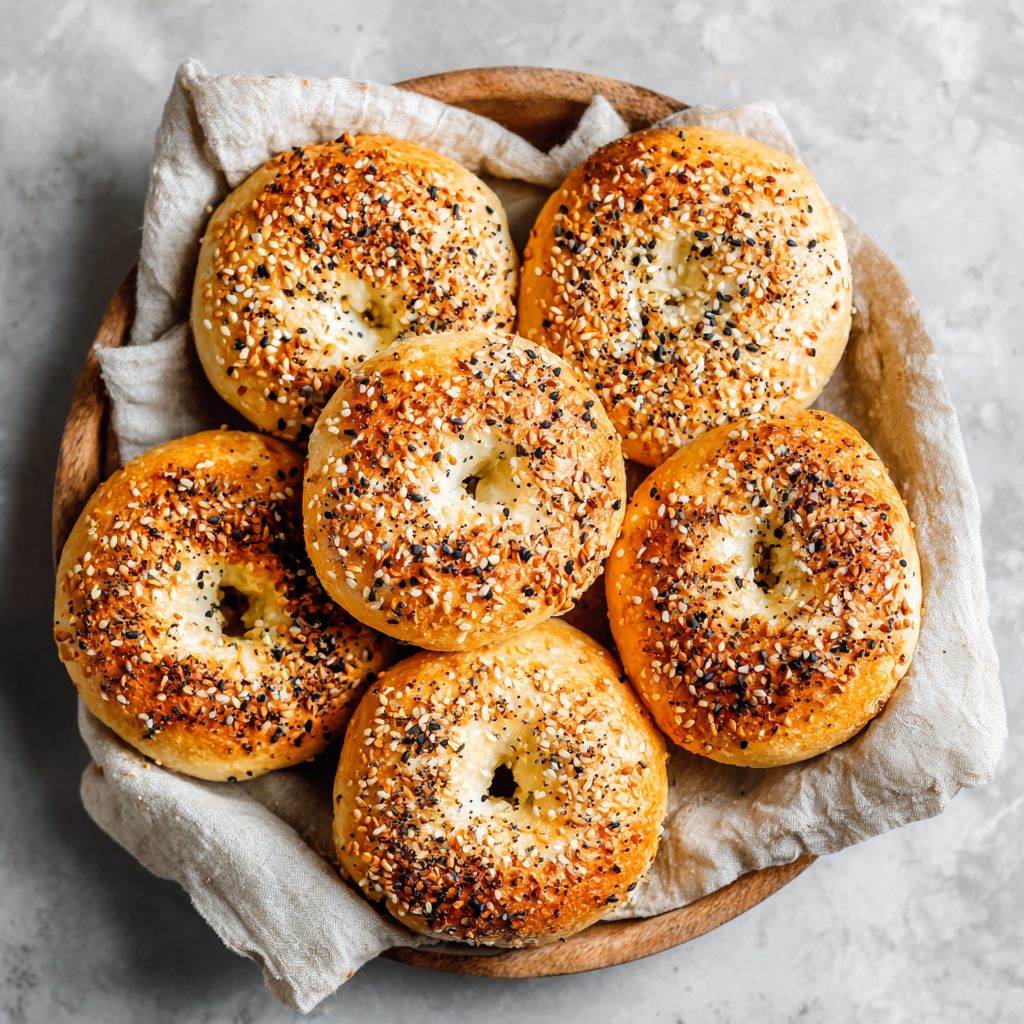
This recipe is my go-to for a relaxed weekend bake. It’s therapeutic, impressive, and the results? Pure, unadulterated breakfast bliss. Imagine pulling a tray of golden, sesame-speckled bagels from your own oven, the crust snapping as you tear one open to slather with cream cheese. That’s not a bakery daydream; it’s about to be your Saturday morning reality. So, let’s roll up our sleeves, rescue that discard, and bake something spectacular together.
The Bagel That Started It All: A Brooklyn Memory
My love affair with bagels isn’t just about the taste—it’s wrapped up in a foggy, cold morning in Brooklyn years ago. I was visiting a friend, jet-lagged and bewildered, when he dragged me out of bed with one phrase: “We’re getting bagels.” We walked a few blocks to this unassuming little shop with a line trailing out the door. The air was thick with the scent of malt and baked flour. I watched, mesmerized, as someone behind the counter pulled a dozen from a giant boiling pot, slid them into the oven, and moments later, presented them in a simple paper bag, still almost too hot to hold.
That first bite was a revelation. It wasn’t just bread with a hole. It was a experience: a crisp, glossy shell that gave way to a dense, steaming, chewy interior with just the faintest tang. It was hearty, simple, and profoundly satisfying. I must have eaten three that weekend. When I got home, I was determined to capture that magic. After more… let’s call them “hockey puck” phases… than I’d like to admit, I realized my sourdough discard was the missing piece. It gave me that depth of flavor and perfect texture I was chasing. Now, every time I shape these dough rings, I’m right back on that Brooklyn street, about to taste a little bit of magic I made myself.
Gathering Your Bagel Toolkit: Simple Ingredients, Big Flavor
Here’s everything you need. The beauty of this recipe is in its simplicity. We’re using the sourdough discard as a flavor powerhouse, and a touch of yeast to guarantee a great rise without the long wait of a full sourdough fermentation. It’s the perfect cheat code for beginners!
- 1 cup (about 240g) sourdough discard – This is your star! Unfed, straight-from-the-fridge discard is perfect. It adds that complex, slight tang and incredible moisture to the crumb. No active starter? No problem. This recipe is designed for discard. Chef’s Insight: The thickness of your discard matters. If it’s very thick, you might need a splash more water. If it’s quite runny, hold back a few tablespoons of water when mixing.
- ¾ cup (180ml) warm water – Aim for around 100°F (38°C)—warm to the touch, not hot. This wakes up the yeast and helps everything come together smoothly.
- 2 tsp instant yeast (optional but recommended) – This is our insurance policy! It ensures a good, predictable rise and a lighter bagel. For a purely sourdough rise (more tang, longer wait), you can omit it, but I love the hybrid method for reliability. Substitution Tip: You can use an equal amount of active dry yeast. Just stir it into the warm water with the sugar and let it foam for 5 minutes before adding other ingredients.
- 2 tbsp sugar – Feeds the yeast and contributes to a beautiful golden-brown crust. Don’t worry, the bagels won’t taste sweet.
- 2 tsp salt – Crucial for flavor development. Use fine sea salt or kosher salt.
- 3 ½ cups (about 455g) bread flour – Bread flour has a higher protein content than all-purpose, which means more gluten. More gluten means that iconic, satisfying chew! Substitution Tip: In a pinch, all-purpose flour works. Your bagels will be slightly less chewy but still delicious.
- For Boiling: 1 tbsp sugar or honey – This creates a sticky surface on the bagel for toppings to cling to and gives that classic shiny, crisp crust.
- For Topping (Go Wild!): Everything Bagel Seasoning, sesame seeds, poppy seeds, dried garlic flakes, coarse salt, or just leave them plain and shiny!
Let’s Make Some Bagels: A Step-by-Step Journey
Ready? Put on some good music, clear a counter, and let’s get our hands in some dough. I’ll walk you through each step with all my favorite hacks.
Step 1: The Mix & Knead
In a large bowl, combine your sourdough discard, warm water, sugar, instant yeast (if using), and salt. Give it a good whisk until it looks like a smooth, messy batter. Now, start adding the bread flour, about a cup at a time, stirring with a sturdy spoon or dough whisk. Once it becomes too shaggy to stir, dump it onto a lightly floured surface. Chef’s Hack: Don’t add all the flour at once! You may not need the full amount, or you might need a touch more. We’re looking for a firm, smooth dough that’s slightly tacky but doesn’t stick to your clean hands.
Now, knead. Use the heel of your hand to push the dough away from you, then fold it back over itself. Give it a quarter turn, and repeat. Do this for 8-10 minutes. Yes, your arm might get a workout! This kneading develops the gluten, which is the secret to the chew. You’ll know it’s ready when the dough is super smooth, elastic, and passes the “windowpane test”: pinch off a small piece and gently stretch it. If you can stretch it thin enough to see light through it without it tearing immediately, you’re golden.
Step 2: The First Rest (The Easy Part)
Place your beautiful ball of dough back in the bowl (lightly oil the bowl first for easy removal), cover it with a damp kitchen towel or plastic wrap, and let it rest. Find a warm, draft-free spot. This is where the magic starts. Let it sit for 1-2 hours. It won’t necessarily double in size like a regular bread dough, but it should look visibly puffy and feel airy when you poke it. Time-Saving Tip: You can also stick the covered bowl in the fridge right now and let it rise slowly overnight (8-12 hours). This develops even more sourdough flavor! Pull it out about an hour before shaping to let it warm up slightly.
Step 3: Shaping Your Rings (Don’t Overthink It!)
Punch down the dough (always fun) and turn it out onto your counter. No need to flour it if the dough isn’t sticky. Use a sharp knife or bench scraper to divide it into 8 equal pieces. Now, to shape: roll each piece into a tight, smooth ball. Press it firmly against the counter, cupping your hand around it in a “C” shape, and make small circular motions until the top is taut. Let the balls rest for 5 minutes—this relaxes the gluten and makes the next step easier.
To form the hole, I use the “poke and stretch” method. Flour your index finger and poke it straight through the center of a ball. Then, gently swing the ring around your finger, stretching the hole to about 1.5 – 2 inches wide. Pro Tip: The hole will shrink during resting and baking, so make it bigger than you think! Place the shaped bagels on a parchment-lined baking sheet.
Step 4: The Quick Rest & The Big Boil (The Secret Step!)
Cover your shaped bagels with that damp towel again and let them rest for 30 minutes. Meanwhile, preheat your oven to a hot 425°F (220°C) and bring a large, wide pot of water to a rolling boil. Add the tablespoon of sugar or honey to the water. This is what gives New York bagels their signature crust!
Gently lower 2-3 bagels at a time into the boiling water using a slotted spoon or spider strainer. They’ll sink, then float. Boil for 30-60 seconds per side. The longer you boil, the thicker and chewier the crust. I do a full minute per side for that classic dense chew. Remove them, let the excess water drip off, and place them back on the parchment-lined sheet. Chef’s Hack: Immediately after boiling, while the surface is still wet and sticky, sprinkle on your toppings! They’ll adhere perfectly.
Step 5: Bake to Golden Perfection
Bake your bagels for 20-25 minutes. You’re looking for a deep, golden-brown color and a firm, crisp crust. Rotate the tray halfway through for even baking. Your kitchen will smell unreal. When you tap the bottom of a bagel, it should sound hollow. Transfer them to a wire rack immediately—this prevents the bottoms from steaming and getting soft. Now, the hardest part: try to let them cool for at least 20 minutes before tearing into one. I never make it.
Serving Up Your Homemade Masterpiece
Okay, they’re cooled (mostly). Now for the fun! A perfectly fresh bagel needs little more than a generous schmear of cream cheese. For the full experience, go for full-fat Philadelphia-style. But let’s get creative:
The Classic: Toasted, with a thick layer of scallion cream cheese, sliced tomato, red onion, capers, and lox. This is the ultimate weekend treat.
The Breakfast Slam: Slice and toast your bagel, then top with a fried egg, a slice of sharp cheddar, and a few slices of avocado. Maybe a dash of hot sauce.
The Simple Sweet: Lightly toasted with good butter and a drizzle of local honey or a sprinkle of cinnamon sugar.
These bagels are also fantastic for sandwiches at lunch. Their sturdy structure holds up to hearty fillings like turkey, mustard, and Swiss without getting soggy. Store them in a paper bag at room temp for a day, or slice and freeze them for up to 3 months. Just pop a frozen slice straight into the toaster!
Make It Your Own: Delicious Recipe Twists
Once you’ve mastered the basic recipe, the world is your bagel shop! Here are a few of my favorite spins:
- Everything But The…: This is the crowd-pleaser. Before baking, brush with a little water and press on a heavy coating of Everything Bagel Seasoning. The sesame, garlic, onion, and salt are just magic.
- Cinnamon Raisin Comfort: When mixing the dough, add 1.5 tsp of ground cinnamon to the dry flour. After the first rise, knead in ¾ cup of plump raisins (soak them in warm water for 10 minutes first to prevent burning). Boil as usual, then sprinkle with cinnamon sugar before baking.
- Savory Parmesan & Herb: Knead in ½ cup of finely grated Parmesan cheese and 2 tbsp of dried Italian herbs (like oregano, basil, thyme) into the dough. Top with more Parmesan and a pinch of flaky salt after boiling.
- Whole Wheat Honey: Swap out 1.5 cups of the bread flour for whole wheat flour. Replace the white sugar in the dough with honey. You’ll get a nuttier, heartier bagel that’s incredible with almond butter.
- “Everything” Vegan: The base recipe is already vegan (if you use sugar, not honey, in the boil)! Just ensure your toppings are plant-based, and slather with your favorite vegan cream cheese or avocado.
Easy New York-Style Sourdough Discard Bagels : Perfect for Beginners
Description
These New York–style sourdough discard bagels are the perfect way to turn leftover starter into something truly special. The discard adds a gentle tang, while a small amount of yeast guarantees a reliable rise—no multi-day fermentation required. With a classic boil-then-bake method, you’ll get that iconic chewy interior and glossy crust right from your own oven.
Ingredients
Bagel Dough
-
1 cup (240 g) sourdough discard, unfed
-
¾ cup (180 ml) warm water (about 100°F / 38°C)
-
2 teaspoons instant yeast
-
2 tablespoons sugar
-
2 teaspoons salt
-
3½ cups (about 455 g) bread flour
Boiling Bath
-
Water
-
1 tablespoon sugar or honey
Toppings (optional)
-
Everything bagel seasoning
-
Sesame seeds
-
Poppy seeds
-
Dried garlic or onion flakes
Instructions
-
Mix the Dough
In a large bowl, whisk together discard, warm water, sugar, yeast, and salt.
Add flour gradually and mix until a firm dough forms. -
Knead
Knead on a lightly floured surface for 8–10 minutes until smooth, elastic, and slightly tacky. -
First Rise
Place dough in a lightly oiled bowl, cover, and let rise 1–2 hours, until puffy. -
Shape
Divide dough into 8 equal pieces. Roll into balls, then poke a hole through the center and gently stretch to form bagels. -
Rest
Place shaped bagels on a parchment-lined tray, cover, and rest 30 minutes. -
Boil
Preheat oven to 425°F (220°C).
Bring a large pot of water to a boil and add sugar or honey.
Boil bagels 30–60 seconds per side, then return to tray and add toppings. -
Bake
Bake for 20–25 minutes, until deep golden brown.
Cool on a rack before slicing.
Notes
-
Bread flour matters: Higher protein = better chew.
-
Don’t skip the boil: This step creates the classic bagel crust.
-
Adjust hydration: If dough feels too sticky, add flour 1 tablespoon at a time.
-
Bigger holes are better: They shrink during baking.
A Few Final Thoughts From My Kitchen to Yours
This recipe has become a staple in my home, and it’s evolved with every batch. I once tried to speed up the rise by putting the bowl on a heating pad… and accidentally made a “warm spot” so hot it partially cooked one side of the dough. We don’t talk about the lopsided bagels that resulted. Lesson learned: patience (and room temperature) is a virtue.
I also love that this recipe builds confidence. Shaping gets easier every time. You’ll learn exactly how your dough should feel. And the moment you pull that first successful batch from the oven? That’s a victory you get to eat. It’s more than a bagel; it’s proof that you can create incredible things from simple, honest ingredients—even the ones you thought were just discard.
Bagel FAQs: Your Questions, Answered
Q: My dough is really sticky and hard to handle. What did I do wrong?
A: This usually means it needs a bit more flour or more kneading. Add flour a tablespoon at a time while kneading until it becomes smooth and only slightly tacky. Humidity plays a big role, so don’t be afraid to adjust!
Q: Can I skip the boiling step? It seems fussy.
A: I really don’t recommend it! Boiling is the non-negotiable step that sets the crust, gives the bagel its shiny, chewy exterior, and helps the interior stay dense and moist. It’s what makes a bagel a bagel, not a roll with a hole. It takes less than 5 minutes total—you’ve got this!
Q: My bagels came out dense and heavy. How do I fix that?
A: A few culprits: 1) The dough wasn’t kneaded enough to develop gluten. 2) The yeast might be old. Test it in some warm water with a pinch of sugar—it should foam. 3) They were over-boiled. Try 30 seconds per side next time. 4) The oven might not be hot enough—use an oven thermometer to check.
Final Thoughts: Your Kitchen, Your Victory
So, there you have it. What started as a guilty glance at a jar of sourdough discard has transformed into a tray of golden, chewy, impossibly satisfying homemade bagels. You didn’t just bake; you reclaimed a bit of kitchen alchemy, turning something often wasted into a tangible triumph.
Remember that first bite I described from Brooklyn? That feeling isn’t locked away in a special shop in New York. It’s in the warmth of your own kitchen, in the snap of a crust you created, in the quiet pride of a Saturday morning well spent. This recipe is more than a set of instructions—it’s an invitation to slow down, to get your hands in the dough, and to experience the profound joy of making something truly wonderful from scratch.
Don’t be discouraged by a lopsided shape or a batch that’s a little too chewy. Each one is a lesson, and every lesson makes the next batch even better. You’ve now got the knowledge, the tricks, and the confidence to make this a ritual. Freeze them, gift them, or devour them all yourself. You’ve earned it.
In the end, these bagels are a celebration of simplicity, resilience, and flavor. They’re proof that great food doesn’t need to be complicated—it just needs care, a few good ingredients, and a cook like you willing to give it a shot.
Now, go rescue that discard. Your next kitchen win is waiting to be boiled, baked, and blissfully enjoyed.
Happy Baking,
Beau