Easy Garlic Parmesan Knots – Your New Secret Weapon for Feeding a Crowd
Hey friends, Beau here from Feastical! Let’s talk about one of life’s greatest simple pleasures: the smell of garlic and butter wafting from your oven. It’s the universal signal that something incredibly delicious is about to happen. And if that something is soft, fluffy, and generously coated in a savory garlic-Parmesan glaze, well, you’ve just won the day.
Today, I’m sharing my go-to recipe for the easiest, most crowd-pleasing Garlic Parmesan Knots you’ll ever make. We’re talking about that magical appetizer or side dish that disappears from the plate faster than you can say “more, please.” The best part? These little bundles of joy start with a simple shortcut—refrigerated biscuit dough—so you’re only 20 minutes away from warm, homemade bread perfection. No one needs to know how easy it was; our secret. I’ve doubled the batch because, trust me, one tube is never enough. Whether you’re hosting game night, need a killer side for pasta night, or just want to treat yourself, these knots are your answer. So, preheat that oven, and let’s turn simple ingredients into something spectacular together!
The Knot That Ties Us All Together
This recipe always takes me right back to my first-ever “big” dinner party. I was fresh out of college, living in an apartment where the kitchen was barely bigger than the oven itself. I had ambitiously decided to make a from-scratch lasagna for ten friends. You can probably guess how that went. The noodles stuck together, the cheese sauce broke, and I was in a full-blown kitchen panic with guests due to arrive in an hour.
My mom, sensing my stress through the phone, gave me the best advice: “Beau, no one cares about the main course if you wow them with the bread. Go to the store, get a tube of biscuits, some butter, and garlic powder. Now.” I did exactly as I was told. Twenty minutes later, I pulled a tray of golden, buttery, garlicky knots out of the oven. The entire apartment smelled like an Italian bistro. My friends arrived, and those humble knots were the absolute star of the night. They were devoured before the lasagna (which was… edible) even hit the table. It was a powerful lesson: great food isn’t about being fancy; it’s about being flavor-packed and made with a dash of love. These knots have been my secret weapon ever since.
Gathering Your Flavor Arsenal
Here’s everything you need to create this buttery magic. Remember, the quality of your ingredients directly translates to flavor, so let’s break it down!
- 2 (16 oz) tubes refrigerated buttermilk biscuits: This is our brilliant shortcut! The buttermilk variety gives us a tangy, tender, and fluffy base that’s perfect for soaking up all that garlic butter goodness. Don’t stress if you can only find the regular grands; they work great too!
- 1/2 cup unsalted butter, melted: I insist on unsalted butter here. It lets us control the sodium level perfectly and allows the pure, rich flavor of the butter to shine through without competing with salt.
- 1/4 cup freshly grated Parmesan cheese: Please, for the love of all that is cheesy and good, grab a block of Parmigiano-Reggiano or Pecorino Romano and grate it yourself. The pre-grated stuff in a canister contains anti-caking agents that prevent it from melting into that smooth, creamy coating we’re after. Fresh is best!
- 1 1/2 tsp garlic powder: You might be wondering, “Fresh garlic, Beau?” While I love fresh garlic, powder is the move here. It distributes evenly, doesn’t burn in the oven, and gives us that consistent, nostalgic garlic bread flavor we all crave.
- 1 tsp dried oregano & 1 tsp dried parsley flakes: This is our Italian-inspired flavor base. The oregano brings a subtle earthy warmth, while the parsley adds a touch of color and a classic flavor note. If you have an Italian seasoning blend, feel free to use a teaspoon of that in place of the oregano for a more complex herb profile.
- 1/2 tsp salt: This balances the richness of the butter and cheese. If you only have salted butter, you can likely reduce or omit this extra salt. Always taste your butter mixture first!
Let’s Get Tying! Your Foolproof Guide
Ready to make some magic? Follow these steps, and you’ll have a tray of golden perfection in no time. I’ve sprinkled in all my favorite chef hacks to make it even easier.
Step 1: Preheat and Prep. Crank that oven to 400°F (200°C). This high heat is key for getting a beautiful golden-brown exterior while keeping the inside soft and fluffy. While it’s heating, line a large baking sheet with parchment paper. Not only does this prevent sticking, but it makes cleanup an absolute dream. No scrubbing required!
Step 2: Shape the Knots. Pop open those biscuit tubes (the best sound in the world, right?). Instead of leaving them as whole biscuits, we’re going to get more bang for our buck. Take each biscuit and cut it in half. This doubles our yield and makes for perfectly bite-sized knots. Now, roll each half into a little rope, about 6 inches long. Don’t worry about it being perfect! If it’s a little sticky, a light dusting of flour on your hands works wonders. Then, simply tie each rope into a loose knot. It doesn’t have to be a fancy sailor’s knot—just a simple loop and tuck. Place each knotted piece on your prepared baking sheet about an inch apart.
Step 3: Bake to Golden Glory. Slide that baking sheet into your preheated oven and let them bake for 8-10 minutes. I always start checking at the 8-minute mark. You’re looking for a beautiful, deep golden brown on top. The smell will be incredible.
Step 4: Whisk the Liquid Gold. While the knots are baking, this is your window to make the magic sauce. Melt your butter, then whisk in the freshly grated Parmesan, garlic powder, oregano, parsley, and salt. Give it a good whisk until it’s all combined into a fragrant, glorious sauce.
Step 5: The Critical Toss! This is the most important step, my friends. The moment those knots come out of the oven, you need to toss them in the garlic butter mixture while they are still screaming hot. I like to dump them all into a large bowl, pour the sauce over them, and use a big spoon to gently toss and coat every single nook and cranny. The heat from the knots will help them absorb all that flavor perfectly. If you wait for them to cool, they just won’t soak it up the same way.
How to Serve These Buttery Beauties
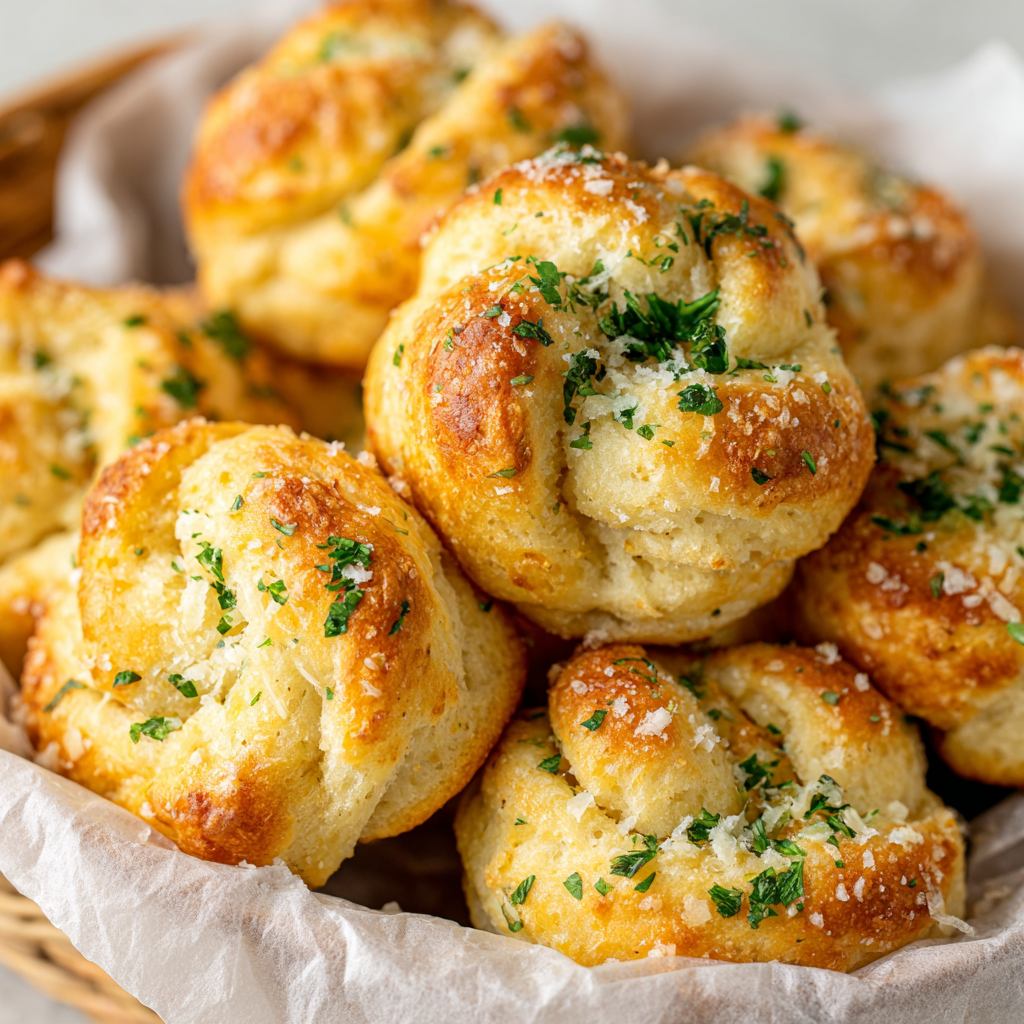
Presentation is part of the fun! You’ve just made something amazing—let’s show it off. I love piling these garlic Parmesan knots high in a rustic wooden bowl or on a simple ceramic platter. The golden-brown color and flecks of green herbs are a feast for the eyes before anyone even takes a bite.
No knot is complete without its dipping partner. For a classic move, serve them with a side of warm marinara sauce. The tangy tomato cuts through the richness of the butter beautifully. If you’re feeding a crowd with diverse tastes, offer a little trio of dips: marinara, a cool and creamy ranch, and maybe even a garlic aioli for the true garlic lovers in the room. These knots are the ultimate sidekick to a big family-style pasta dish, a fresh green salad, or a steamy bowl of soup. Honestly, they’re so good they can easily stand alone as the main event!
Mix It Up! 5 Flavorful Twists
Once you’ve mastered the classic, the world of flavor is your oyster! Here are a few of my favorite ways to shake things up.
- Spicy ‘Nduja Kick: Love heat? Finely chop a tablespoon of ‘nduja or soppressata and mix it right into the melted butter mixture. The spicy, fatty salumi will infuse the entire coating with an incredible depth of flavor and a gentle kick.
- Everything Bagel Seasoning: Before baking, brush the shaped knots with a little egg wash and give them a generous sprinkle of everything bagel seasoning. Bake as directed, then toss in the garlic-Parmesan butter. You get crunch, flavor, and garlic—a true win-win.
- Cheesy Herb Blast: Add 2 tablespoons of shredded mozzarella or Italian blend cheese to the butter mixture. The mozzarella will get wonderfully stringy and cheesy. Finish with a sprinkle of fresh chopped basil after tossing for a bright, fresh note.
- Vegan Delight: Easily make these vegan by using plant-based biscuit dough (check the labels!), vegan butter, and a high-quality vegan Parmesan alternative. The method and result are just as satisfying!
- Truffle Infusion: Feeling fancy? Add a teaspoon of white truffle oil to the melted butter mixture. It adds an incredible, luxurious aroma and flavor that will make these feel like they came from a five-star restaurant.
Beau’s Kitchen Confidential
This recipe has evolved so much since that first panicked dinner party. I’ve learned that the key is absolutely in the toss—hot knots, cold sauce. I once tried brushing the butter on before baking, and while it was still tasty, it didn’t have that same infused, glossy quality. The post-bake toss is non-negotiable for maximum flavor.
A funny story: I once was filming a quick video of me making these and was talking to the camera while vigorously shaking the bowl to toss them. Let’s just say my tossing skills were a little too vigorous, and a few knots made a break for it, flying right out of the bowl and onto the floor. My dog, Pepper, thought it was the best day of his life. So, learn from my mess—use a bowl that’s honestly a little too big for the job, and toss gently!
Your Questions, Answered
Q: Can I make these garlic knots ahead of time?
A: You can! Shape the knots and place them on the baking sheet. Cover them tightly with plastic wrap and refrigerate for up to 4 hours before baking. Let them sit at room temp for 10 minutes while the oven preheats. You can also mix the butter coating ahead of time and gently reheat it to liquefy before tossing.
Q: My dough is too sticky to roll. Help!
A: No worries! This happens. Just give your hands a very light coating of flour or even a quick spritz of cooking spray. This creates a barrier and makes the dough much easier to handle without adding too much extra flour, which can make the knots tough.
Q: How do I reheat leftovers so they’re not soggy?
A: The air fryer is your best friend here! Reheat at 350°F for 2-3 minutes until crispy and warm. You can also use a conventional oven at 350°F for 5-7 minutes. Avoid the microwave, as it will make them soft and chewy.
Q: Can I use fresh minced garlic instead of powder?
A: You can, but be cautious. Fresh garlic has a much stronger, sharper flavor and can burn easily in the butter sauce, becoming bitter. If you want to try it, I’d recommend using one small, finely minced clove and sautéing it very gently in the butter for just 30 seconds before taking it off the heat to use in the recipe.
Easy Garlic Parmesan Knots – Buttery, Fluffy & Addictively Good
Description
Nothing beats the aroma of garlic and butter wafting from the oven. These soft, fluffy knots coated in a savory garlic-Parmesan glaze are your ultimate crowd-pleaser. Using refrigerated biscuit dough, they’re just 20 minutes away from homemade bread perfection. Game night, pasta night, or solo indulgence—these knots deliver every time.
Ingredients
Knots:
-
2 (16 oz) tubes refrigerated buttermilk biscuits
-
1/2 cup unsalted butter, melted
-
1/4 cup freshly grated Parmesan cheese
-
1 1/2 tsp garlic powder
-
1 tsp dried oregano
-
1 tsp dried parsley flakes
-
1/2 tsp salt
Optional Dips:
-
Marinara sauce, ranch, or garlic aioli
Instructions
1. Preheat & Prep:
-
Oven: 400°F (200°C)
-
Line a large baking sheet with parchment paper
2. Shape the Knots:
-
Cut each biscuit in half
-
Roll each half into a 6-inch rope
-
Tie into a loose knot and place ~1 inch apart on the baking sheet
3. Bake:
-
8–10 minutes until golden brown
4. Make Garlic Butter Sauce:
-
Melt butter, whisk in Parmesan, garlic powder, oregano, parsley, and salt
5. Toss Knots:
-
Immediately after baking, toss hot knots in the butter mixture until fully coated
6. Serve:
-
Pile on a platter or bowl
-
Serve with your favorite dipping sauce
Notes
-
Make Ahead: Shape and refrigerate up to 4 hours; reheat butter before tossing
-
Sticky Dough: Lightly flour hands or use cooking spray
-
Reheat Leftovers: Air fryer 350°F for 2–3 min or oven 350°F for 5–7 min
-
Fresh Garlic: Can substitute 1 small clove, sauté lightly to avoid bitterness
Nutrition
- Calories: 110 kcal Approx. per knot
- Fat: 7 g
- Carbohydrates: 9 g
- Protein: 2 g
Nutritional Note (Because We Care!)
Let’s be real—these are a treat, and we’re here for every buttery, carby bite! While they’re not exactly a health food, it’s always good to know what you’re enjoying. The approximate nutritional info per knot is around 110 calories, 7g of fat, 9g of carbs, and 2g of protein.
The fat primarily comes from the butter and cheese, which provide richness and flavor. The carbs are from the biscuit dough, giving us that energy-boosting, fluffy texture we love. To make this part of a balanced meal, I love serving them alongside a big protein-packed salad or a lean grilled chicken breast. Food is all about balance and joy, and these knots bring a whole lot of joy to the table!
Your New Go-To Recipe Awaits
And there you have it, my friends—the recipe for the easiest, most delicious Garlic Parmesan Knots that are guaranteed to become a regular in your kitchen rotation. They’re proof that you don’t need to be a professional chef or spend hours in the kitchen to create something that truly wows. It’s about simple ingredients, a little technique, and a whole lot of love.
I hope this recipe brings as much laughter and empty plates to your table as it has to mine over the years. If you make them (and I really hope you do!), tag me on social @feastical with #FeasticalEats. I love seeing your creations! Now, go preheat that oven and get ready for the best 20-minute kitchen adventure. Until next time, happy cooking!