The Cutest Easter Dessert for Your Celebration: Let’s Make Some Magic!
Hey there, friend! Beau here, welcoming you back to the Feastical kitchen. Can you feel it? That little buzz in the air? The sun’s sticking around a bit longer, flowers are popping up, and there’s a certain… pastel-colored energy everywhere. That’s right, Easter is hopping our way! And while I’m all for a beautiful ham and those deviled eggs that vanish in 2.5 seconds, my heart really sings when it’s time for dessert. But let’s be real—sometimes, after a big feast, we need something sweet that’s also a whole lot of fun.
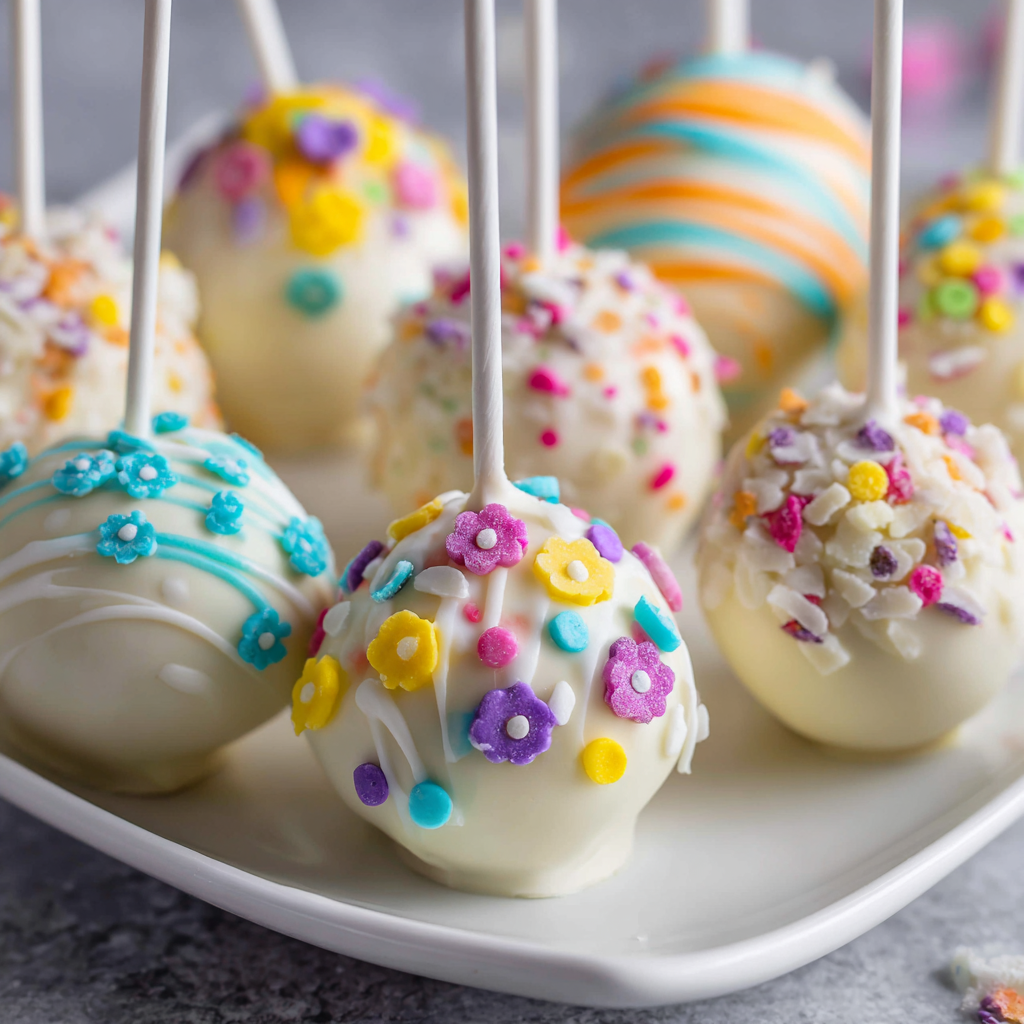
That’s where these Easy Easter Cake Pops come in. Imagine this: moist, tender cake mixed with just the right amount of creamy frosting, all hand-shaped into adorable little Easter eggs. We’re talking bigger-than-usual cake balls, friends—no fussy sticks needed!—dipped in a blanket of smooth white chocolate and dressed up in their festive Sunday best with colorful drizzles and dots. They’re the ultimate crowd-pleaser, the perfect project to get the kids involved (seriously, little hands are the best egg shapers), and they bring a splash of pure, edible joy to your table. They taste like a celebration and look like a springtime dream. So, tie on your favorite apron, clear off a bit of counter space, and let’s create a dessert that’s as fun to make as it is to eat. Trust me, these aren’t just cake pops; they’re edible Easter memories in the making.
Why These Cake Eggs Have a Special Place in My Heart
This recipe always takes me right back to my niece Lily’s first Easter where she was actually “helping” in the kitchen. She was about four, covered in what I swear was more frosting than the cake, and her mission was clear: to make the “most bootiful eggs for the bunny.” We used our hands to squish the cake and frosting together, and her serious little face as she tried to roll perfect oval shapes was everything. They were more like lumpy potatoes than eggs, but her pride was absolute. When we dipped them in chocolate and she got to drizzle the colors, it was pure magic. Her colorful zigzags looked more like abstract art, but to everyone at our table, they were masterpieces. That’s the spirit I want to bring to your kitchen. It’s not about perfection; it’s about the laughter, the slightly sticky fingers, and the proud moment when you set a platter of these homemade goodies on the table. Every time I make them now, I think of Lily’s concentrated frown and subsequent beaming smile. Food memory? More like a food hug.
Gathering Your Easter Egg Squad: Ingredients & Insights
Here’s the beautiful part: this recipe is brilliantly simple and designed for success. Let’s break down what you’ll need and why, along with my favorite chef-y swaps and tips.
- 1 box cake mix (any flavor), baked and cooled – This is our superstar shortcut! I’m a huge fan of using a simple vanilla or yellow cake mix as a blank canvas—it lets the decorations really shine. Chef’s Insight: Bake the cake the day before and let it cool completely. A dry-ish, cool cake crumbles perfectly. Feeling homemade? Go for it! Your favorite from-scratch chocolate or lemon cake would be divine here.
- 1 (16 oz) tub frosting – The glue that holds our edible eggs together! Vanilla or cream cheese frosting are my top picks. Pro Tip: Start with about 2/3 of the tub and add more only if needed. You want the mixture to hold together when squeezed, not feel greasy.
- 1 lb white almond bark (or vanilla candy melts) – This is for our main, sleek white coating. I prefer almond bark for its stable texture and easy melting. Why This Works: It sets firm and has a lovely sheen, giving us that perfect “Easter egg” base.
- Colorful candy melts – This is where the party starts! Grab a few small bags in pastel pinks, blues, yellows, and greens. These are for our decorative drizzles and dots.
- Resealable sandwich bags (or small piping bags) – Our makeshift piping tools! These make decorating foolproof and keep cleanup a breeze.
- Optional but Helpful: A 2-tablespoon cookie scoop for perfectly portioned eggs, wax or parchment paper, and a baking sheet for freezing.
Step-by-Step: Let’s Build Some Easter Eggs!
Ready to play with your food? Follow these steps for guaranteed cute and delicious results.
Step 1: Prepare the Cake Base – Get Your Hands Dirty!
Crumble your completely cooled cake into a large mixing bowl. I mean it—get in there with your fingers! You want fine, even crumbs, no big chunks. This tactile part is oddly satisfying. Now, spoon in about half to two-thirds of your frosting. Use a spatula or, again, your hands, to mix until it’s fully combined. Do the squeeze test: grab a handful and squeeze. It should hold together firmly without oozing frosting. If it’s too dry, add a bit more frosting. My Hack: If you accidentally go overboard with frosting and the mix gets too sticky, you can add a tablespoon or two of dry cake mix or even some crushed graham cracker crumbs to balance it out.
Step 2: Shape the Eggs – Channel Your Inner Bunny!
Use your 2-tablespoon scoop to portion the mixture. This keeps your eggs uniform. Roll each portion into a ball between your palms, then gently shape it into an oval/egg shape. Don’t stress about them being identical—real eggs aren’t! Place each formed egg on a wax paper-lined baking sheet. Once the tray is full, pop it into the freezer for a solid hour. Critical Tip: This freezing step is non-negotiable! It firms up the eggs so they don’t fall apart when we dip them. It also helps the chocolate coating set quickly and smoothly.
Step 3: Coat with Chocolate – The Magic Blanket!
Melt your white almond bark according to package directions, usually in a deep, microwave-safe bowl in 30-second intervals, stirring well between each. Chef’s Secret: For ultra-smooth dipping, add a teaspoon of coconut oil or shortening to the melted bark. Remove a few eggs from the freezer at a time (keep the rest cold!). Using a fork or a dipping tool, lower an egg into the chocolate, swirl to coat completely, let the excess drip off, and gently slide it back onto the wax paper. If a “foot” of chocolate pools, you can use a toothpick to trim it before it sets. Let the chocolate harden completely at room temperature.
Step 4: Decorate – Unleash Your Picasso!
Now for the best part! Place your colored candy melts into separate resealable bags (one color per bag). Microwave at 50% power in 30-second bursts, kneading the bag between bursts, until completely smooth. Key Move: Always use 50% power to avoid scorching the candy! Snip a TINY corner off each bag—you can always make the hole bigger, but you can’t make it smaller. Pipe stripes, zigzags, polka dots, or swirly patterns over your hardened white eggs. Let your creativity (or your kids’ creativity) run wild! Let the decorations set fully.
How to Serve Your Masterpiece Eggs
Presentation is half the fun! Don’t just toss these beauties in a bowl. For a stunning Easter table centerpiece, nestle them in a bed of green-colored coconut “grass” on a large platter. You can also place each one in a mini pastel cupcake liner for individual servings—great for a buffet. Arrange them on a cake stand layered with pretty spring napkins or even in a rustic basket lined with a checked towel. They’re perfect alongside a pot of coffee after brunch or boxed up as the sweetest “to-go” favor for your guests. However you present them, be prepared for the “oohs” and “aahs” and the immediate question: “You MADE these?!”
Mix It Up! Fun Variations to Try
This recipe is your playground. Here are a few twists to make it your own:
- The Chocolate Lover’s Dream: Use a chocolate cake mix with chocolate frosting. Dip in dark chocolate candy melts and decorate with gold or white drizzle for a sophisticated look.
- Spring Citrus Burst: Bake a lemon cake mix and pair it with lemon frosting. Dip in white chocolate and decorate with yellow and green candy melts. It’s like a bite of sunshine!
- Funfetti Fiesta: Use a funfetti cake mix and vanilla frosting. The colorful sprinkles inside the cake make for a fun surprise when you bite into the egg!
- Allergy-Friendly/Dietary Swap: Use your favorite gluten-free cake mix and frosting. Ensure your chocolate and candy melts are also gluten-free/dairy-free as needed (many are!).
- “Nesting” Eggs: After dipping in white chocolate, immediately roll the bottom half in crushed graham crackers or toasted coconut to create a “nest” effect before adding your colorful drizzle on top.
Beau’s Chef Notes & Kitchen Confessions
This recipe has evolved from a slightly frustrating cake-pop-on-a-stick endeavor to this chill, no-stick-required winner. The “big egg” format is a game-changer—way less fussy. My main kitchen confession? I’ve absolutely, on more than one rushed holiday, used a store-bought pound cake, crumbled it up, and mixed it with frosting. It worked like a charm! The goal is joy, not stress. Also, these eggs have a funny way of disappearing before the event. I now enforce a strict “one for the chef, one for the tray” policy to ensure there are enough left for guests. Learn from my mistakes!
FAQs & Troubleshooting: Your Questions, Answered
Q: My cake pop mixture is too wet and sticky! Help!
A: No worries—this happens! Pop the whole mixture into the fridge for 20-30 minutes to firm up. You can also add a sprinkle of dry cake mix, bread crumbs, or even crushed vanilla wafers to absorb the excess moisture.
Q: Why did my chocolate crack after dipping?
A: This is almost always a temperature issue. If the cake balls are too cold (straight from the deep freezer) and the chocolate is very warm, the contraction causes cracks. Let the cake balls sit out of the freezer for 3-4 minutes before dipping. Also, make sure your chocolate isn’t too hot.
Q: Can I make these ahead of time?
A: Absolutely! You can shape the eggs and freeze them for up to a month in an airtight container. Thaw in the fridge before dipping and decorating. Fully finished cake eggs keep beautifully in the fridge for up to 5 days.
Q: My candy melt drizzle is too thick/too runny. What did I do wrong?
A: Consistency is key. If it’s too thick, the bag is hard to squeeze. Microwave for a few more seconds or add a tiny dot of coconut oil. If it’s too runny and spreads everywhere, let it sit for a minute to cool slightly and thicken up.

Easy Easter Cake Pops : Festive Easter Egg Cake Balls
Description
Looking for a fun, festive dessert that’s easy to make and perfect for Easter celebrations? These Easter Cake Pops (shaped like little eggs) are a guaranteed hit. They’re made with crumbled cake and frosting, dipped in white chocolate, and decorated with colorful drizzles. No special tools, no sticks, and no baking skills required beyond a simple cake — just mix, shape, dip, and decorate.
Ingredients
-
1 box cake mix, baked and fully cooled (any flavor)
-
1 (16 oz) tub frosting (vanilla or cream cheese works best)
-
1 lb white almond bark or white candy melts
-
1–2 cups colored candy melts (pastel colors for decorating)
-
Optional: 1 teaspoon coconut oil or shortening (for smoother melting)
Instructions
-
Crumble the cake
Place the cooled cake in a large bowl and crumble it into fine crumbs using your hands. -
Mix with frosting
Add about 2/3 of the frosting and mix well. Squeeze some mixture in your hand — it should hold together. Add more frosting only if needed. -
Shape the eggs
Scoop about 2 tablespoons of mixture and roll into a ball, then gently shape into an egg oval. Place on a parchment-lined tray. -
Freeze to firm
Freeze shaped eggs for 45–60 minutes until firm. -
Melt the coating
Melt white almond bark or candy melts in the microwave in 30-second intervals, stirring each time. Add a little coconut oil if needed for smoother texture. -
Dip
Using a fork, dip each egg into the melted coating. Let excess drip off and place back on parchment paper. Let set completely. -
Decorate
Melt colored candy melts in small bags or bowls. Snip a tiny corner of the bag and drizzle lines, dots, or zigzags over the eggs. Let decorations harden.
Notes
-
Cool cake completely before mixing or the texture becomes greasy.
-
Don’t over-add frosting — too much makes soft, hard-to-dip eggs.
-
Freeze before dipping so eggs hold their shape.
-
Dip a few at a time and keep the rest cold.
-
If coating cracks: let frozen eggs sit out 3–4 minutes before dipping.
A Quick Note on Nutrition & Details
Let’s keep it real—these are a celebratory treat, meant to be enjoyed for the happiness they bring! Here are the details for planning your feast:
- Prep Time: 15 minutes (plus cake baking/cooling time)
- Chill Time: 1 hour
- Total Time: 1 hour 15 minutes (active time)
- Servings: Makes about 25-30 adorable cake eggs
- Calories: Approximately 210 per cake egg
- Storage: Store in a single layer in an airtight container in the refrigerator for up to 5 days. They can also be frozen for up to a month; thaw in the fridge.
Final Thoughts from My Kitchen to Yours
And there you have it! Your guide to creating the most delightful, festive, and downright fun Easter dessert on the block. Remember, the magic isn’t in achieving bakery-perfect lines (though if you do, high five!). The magic is in the shared experience, the laughter around the kitchen counter, and the proud moment you present something made with love. These Easy Easter Cake Pops are more than a recipe; they’re a invitation to play, to create, and to make the holiday a little bit sweeter. So from my Feastical family to yours, I wish you a delicious, joyful, and absolutely wonderful Easter celebration. Now, go make some magic—and save one of those eggs for the chef!
Happy Baking,
Beau Collier