Easter Chocolate Cupcakes: Your New Go-To Spring Celebration Treat!
Hey there, friend! Beau here, from Feastical. Can you smell that? It’s the scent of spring in the air—fresh grass, blooming flowers, and… is that chocolate? You bet it is. There’s something absolutely magical about baking for Easter. It’s the first big, bright, feel-good holiday after winter, and the dessert table deserves to be the star of the show.
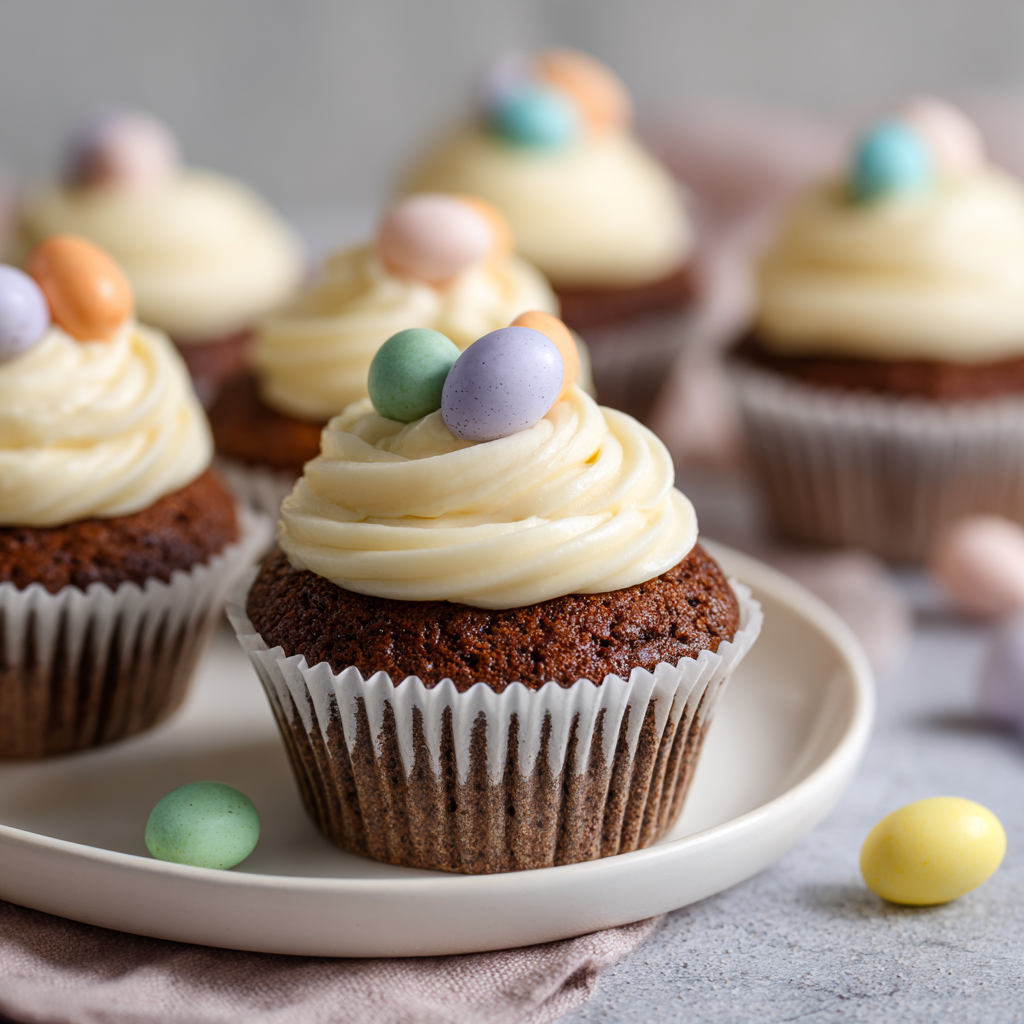
That’s where these little bundles of joy come in. These aren’t just any cupcakes. These are my Easter Chocolate Cupcakes with Creamy Vanilla Frosting, and they are pure, unadulterated happiness on a cake liner. Imagine this: a cupcake so moist and deeply chocolatey it practically melts on your tongue, crowned with a cloud of vanilla frosting so smooth and fluffy you’ll want to eat it with a spoon. The final touch? A cheerful sprinkle of pastel chocolate eggs that just screams “celebration.”
Whether you’re hosting a big Easter brunch, need a show-stopper for the neighborhood potluck, or just want to make a regular Tuesday feel special, this recipe is your ticket. I’ve kept it wonderfully simple because, around here, we believe fantastic food shouldn’t be a fuss. So, tie on your favorite apron, preheat that oven, and let’s create some sweet, delicious memories together. This is more than baking; it’s an act of joy, and I’m so glad you’re here for it.
The Sweetest Easter Memory: A Kitchen Covered in Flour
My love for these cupcakes goes way back to when I was maybe eight years old, standing on a wobbly step-stool in my Nana’s kitchen. The counters were a disaster zone of mixing bowls, cocoa powder dust (a good portion of which was on my face), and a rainbow assortment of sprinkles. Nana was the queen of “a little bit of this, a little dash of that” cooking, but for Easter cupcakes, she followed a recipe card stained with chocolate fingerprints—her mother’s recipe.
The magic moment was always when she’d pour in the hot water. I’d watch, wide-eyed, as the thick batter suddenly turned into a silky, liquid chocolate river. “That’s the secret, Beau,” she’d whisper, like she was telling me the location of a hidden treasure. “It makes them extra fudgy.” My job was the “egg placement engineer,” a title I took very seriously. Arranging those little candy eggs on top felt like decorating a tiny, delicious world. Every year, that simple act of baking together—the mess, the laughter, the anticipation of that first bite—was Easter to me. This recipe is my homage to that feeling. It’s my Nana’s hug in dessert form, and now I get to share it with you.
Gathering Your Sunshine: What You’ll Need
Here’s the beautiful part: this recipe uses simple, pantry-friendly ingredients. No fancy equipment or hard-to-find items here! Let’s break it down so you know exactly why each component is a VIP (Very Important Pantry item).
For the Chocolate Cupcakes:
- 1 cup all-purpose flour: The trusty foundation. For a slightly lighter crumb, you can swap in cake flour. For a gluten-free version, a 1:1 GF blend works wonderfully (see variations below!).
- ½ cup unsweetened cocoa powder: This is where the chocolate magic happens! Use natural cocoa powder for that classic, slightly tangy chocolate flavor. Chef’s Insight: For an even richer, darker cupcake, use Dutch-processed cocoa. It’s less acidic and gives a deeper color.
- ¾ tsp baking soda: Our leavening agent. It reacts with the cocoa and acidic ingredients to give our cupcakes a beautiful, tender rise.
- ¼ tsp salt: Never skip this! Salt is the flavor enhancer that makes the chocolate taste more chocolatey and balances the sweetness perfectly.
- ¾ cup granulated sugar: Sweetness and tenderness, all in one. This amount gives us a perfectly balanced cake that isn’t overly sweet, letting the frosting shine.
- ½ cup milk: Whole milk is ideal for richness, but any milk you have works—dairy or non-dairy like oat or almond milk.
- ¼ cup vegetable oil: Oil keeps these cupcakes incredibly moist, much more so than butter would in this quick-mix method. Canola or a light olive oil works too.
- 1 large egg, at room temperature: The binder. A room-temperature egg incorporates more smoothly. Just pop it in a bowl of warm water for 5 minutes if you forgot to take it out earlier!
- 1 tsp pure vanilla extract: The flavor booster. It adds a warm, complex note that complements chocolate beautifully.
- ½ cup hot water (or hot coffee!): The SECRET WEAPON! Pouring in hot liquid at the end “blooms” the cocoa powder, intensifying its flavor, and creates a thin batter that bakes up into the most moist, tender crumb imaginable. Using hot coffee will make the chocolate flavor even deeper without tasting like coffee.
For the Vanilla Frosting:
- ½ cup (1 stick) unsalted butter, softened: The base of our fluffy cloud. Softened is key! It should leave a slight indent when you press it. Unsalted lets us control the salt level.
- 2 cups powdered sugar, sifted: Sifting is a non-negotiable hack for lump-free, silky frosting. It incorporates air and makes whipping a dream.
- 1–2 tbsp milk or heavy cream: Start with one tablespoon to reach your perfect spreading consistency. Heavy cream will give you an even richer, more luxurious frosting.
- 1 tsp vanilla extract (or the seeds from ½ a vanilla bean!): For that true, beautiful vanilla flavor. Using a vanilla bean paste or real seeds gives you those gorgeous little speckles.
For the Topping:
- Mini chocolate eggs or pastel candy eggs: The festive crown! I love the mixed pastel colors for Easter, but any small chocolate candies will do. Get creative!
Let’s Get Baking: Your Step-by-Step Joy Guide
Ready? Let’s turn these ingredients into something spectacular. Follow these steps, and don’t forget to read my little chef hacks along the way—they’re like having me right there in the kitchen with you!
- Preheat & Prep: Preheat your oven to 350°F (175°C). Line a standard 12-cup muffin pan with your favorite cupcake liners. Pro Tip: For easy cleanup and perfect cupcake bottoms, give the top of the pan a quick spritz of baking spray. It prevents any sticky overflow!
- The Dry Team: In a large mixing bowl, whisk together the flour, cocoa powder, baking soda, salt, and granulated sugar. Keep whisking until you see no more streaks of cocoa or flour. This isn’t just mixing; it’s aerating. You’re giving your dry ingredients a head start on being light and lump-free.
- The Wet Team Joins In: Make a well in the center of your dry ingredients. Pour in the milk, vegetable oil, egg, and vanilla extract. Using a hand mixer (or a sturdy whisk and some elbow grease), beat everything on medium speed for about 1-2 minutes. You’re looking for a thick, shiny, and beautifully chocolatey batter. Scrape down the sides of the bowl to make sure everything is incorporated.
- The Magic Pour: Now, with the mixer on low, slowly and carefully stream in the hot water (or coffee!). The batter will become very thin—this is exactly what you want! Don’t panic. It might look more like chocolate soup than cake batter, but I promise you, this is the secret to that incredibly moist texture. Mix just until it’s smooth and combined.
- Fill & Bake: Using a ladle, large cookie scoop, or just a measuring cup, divide the batter evenly among the prepared liners, filling each one about ⅔ of the way full. This gives them room to rise into perfect little domes. Slide the pan into the center of your preheated oven and bake for 16-18 minutes. The test? A toothpick inserted into the center of a cupcake should come out with just a few moist crumbs attached, not wet batter.
- The All-Important Cool Down: As soon as they’re out of the oven, transfer the cupcakes from the pan to a wire rack. This stops the cooking process and prevents soggy bottoms. Let them cool completely before you even think about frosting. I know it’s hard to wait, but warm cupcakes will melt your beautiful frosting into a puddle!
- Create the Fluffy Cloud (Frosting Time!): While the cupcakes cool, make your frosting. In a clean bowl, beat the softened butter on medium-high speed for 2-3 minutes until it’s pale, creamy, and smooth. This step incorporates air, which is the foundation of fluffiness. Reduce the speed to low and gradually add the sifted powdered sugar, about ½ cup at a time, until fully combined. Add the vanilla and 1 tablespoon of milk/cream. Beat on high speed for another 2-3 minutes until incredibly light and fluffy. If it’s too thick, add the remaining liquid a teaspoon at a time.
- Frost & Festoon: Once the cupcakes are completely cool, it’s showtime! You can spread the frosting on with a knife for a rustic look, or for those beautiful swirled tops, fit a piping bag with a large star tip (I love a Wilton 1M or 2D) and pipe away. Finish each one with a generous sprinkle of your mini chocolate eggs. Go on, be generous—it’s a celebration!
Presenting Your Masterpiece: How to Serve with Style
You’ve created something wonderful, so let’s show it off! Presentation is the final, joyful step. I love arranging these cupcakes on a simple, tiered cake stand for a party—it adds height and makes them look extra special. For a family-style Easter brunch, pile them high on a vintage platter or a simple wooden board lined with a checkered napkin.
Pair them with a pot of freshly brewed coffee, a pitcher of cold milk for the kids (and the kids at heart), or even a glass of sparkling rosé for the adults. They are the perfect sweet ending to a hearty meal. And remember, part of the fun is in the reveal—that moment when you bring them out to the “oohs” and “aahs.” Soak it in, chef. You earned it!
Make It Your Own: Delicious Twists & Swaps
Love the base recipe but want to shake things up? Here are some of my favorite ways to play with this classic:
- Citrus Zing: Add the zest of one orange to the cupcake batter for a stunning chocolate-orange flavor. It’s a bright, springy twist that’s absolutely divine.
- Peanut Butter Paradise: Swap the vanilla frosting for a peanut butter frosting (just replace half the butter with creamy peanut butter). Top with mini peanut butter cups for an epic flavor combo.
- Spring Berry Swirl: Before baking, drop a small spoonful of raspberry or strawberry jam into the center of each cupcake batter-filled liner. It bakes into a sweet, fruity surprise!
- Gluten-Free & Dairy-Free Friendly: This recipe is incredibly adaptable. Use a trusted 1:1 gluten-free flour blend and ensure your cocoa is GF. For dairy-free, use non-dairy milk, vegan butter sticks for the frosting, and top with dairy-free chocolate eggs.
- “Nest” Topping: For an adorable look, press a circle of toasted coconut flakes into the frosting around the edge of the cupcake to form a “nest,” then place a few mini eggs in the center.
Beau’s Kitchen Notes & Stories
This recipe has been my Easter constant for years, but it’s evolved in the best ways. One year, I ran out of vanilla for the frosting and used almond extract instead. It was a happy accident that tasted like wedding cake! Another time, my nephew decided to “help” by adding a handful of sprinkles directly into the batter. We ended up with confetti chocolate cupcakes, and they were a huge hit. The moral? Don’t be afraid to play.
The biggest lesson I’ve learned is that the hot water step is non-negotiable. I once rushed it and used room-temp water, and the cupcakes were just… fine. Not magical. So trust the process. Also, if your frosting ever seems too soft, just pop the bowl in the fridge for 15 minutes, then re-whip. Kitchen challenges are just opportunities for new hacks!
Your Questions, Answered (Let’s Troubleshoot!)
Q: My cupcakes sank in the middle! What happened?
A: This is usually an issue with leavening or oven temp. Make sure your baking soda is fresh (test it with a little vinegar—it should bubble furiously). Also, avoid over-mixing the batter after adding the dry ingredients, and don’t open the oven door too early! The rush of cold air can cause a collapse.
Q: Can I make these ahead of time?
A> Absolutely! Bake the cupcakes up to 2 days ahead, let them cool completely, and store them in an airtight container at room temperature. Frost them the day you plan to serve them for the best texture. Unfrosted cupcakes also freeze beautifully for up to 2 months.
Q: My frosting is too runny/grainy. Help!
A: Runny frosting means your butter might have been too soft or you added too much liquid. Chill it and re-whip. Grainy frosting means your powdered sugar wasn’t fully incorporated or wasn’t sifted. Keep beating! The friction will help dissolve the sugar. You can also add a tiny pinch of salt to help balance and mask any graininess.
Q: Can I use this batter to make a cake?
A> You sure can! This recipe is perfect for a 9-inch round cake. Grease and flour two pans, divide the batter, and bake for 25-30 minutes at the same temperature, or until a toothpick comes out clean.

Easter Chocolate Cupcakes with Creamy Vanilla Frosting
Description
These Easter Chocolate Cupcakes are soft, moist, and deeply chocolatey, topped with a fluffy vanilla frosting and decorated with colorful mini eggs. They’re easy to make, perfect for spring celebrations, and great for baking with family. If you want a reliable, crowd-pleasing dessert, this is your go-to recipe.
Ingredients
Chocolate Cupcakes
-
1 cup all-purpose flour
-
1/2 cup unsweetened cocoa powder
-
3/4 teaspoon baking soda
-
1/4 teaspoon salt
-
3/4 cup granulated sugar
-
1/2 cup milk (dairy or non-dairy)
-
1/4 cup vegetable oil
-
1 large egg, room temperature
-
1 teaspoon vanilla extract
-
1/2 cup hot water or hot coffee
Vanilla Frosting
-
1/2 cup (115 g) unsalted butter, softened
-
2 cups powdered sugar, sifted
-
1–2 tablespoons milk or cream
-
1 teaspoon vanilla extract
Decoration
-
Mini chocolate eggs or pastel candy eggs
-
Sprinkles (optional)
Instructions
-
Prep
-
Heat oven to 350°F (175°C).
-
Line a 12-cup muffin pan with cupcake liners.
-
-
Mix Dry Ingredients
-
In a bowl, whisk flour, cocoa powder, baking soda, salt, and sugar.
-
-
Add Wet Ingredients
-
Add milk, oil, egg, and vanilla. Mix until smooth (about 1–2 minutes).
-
-
Add Hot Liquid
-
Slowly stir in the hot water or coffee. Batter will be thin — that’s correct and makes the cupcakes extra moist.
-
-
Fill & Bake
-
Fill liners about 2/3 full.
-
Bake 16–18 minutes until a toothpick comes out with a few moist crumbs.
-
Cool completely on a rack.
-
-
Make Frosting
-
Beat butter until creamy.
-
Gradually beat in powdered sugar.
-
Add vanilla and 1 tablespoon milk/cream. Beat until fluffy. Add more liquid if needed.
-
-
Frost & Decorate
-
Spread or pipe frosting onto cooled cupcakes.
-
Top with mini chocolate eggs and sprinkles.
-
Notes
-
Use hot coffee instead of water to deepen chocolate flavor (it won’t taste like coffee).
-
Don’t overmix once combined — mix just until smooth.
-
Cool completely before frosting or the frosting will melt.
-
If frosting is too soft, chill it 10–15 minutes, then whip again.
-
Want bakery-style looks? Use a piping bag with a star tip.
Nutritional Information (A Quick Note)
While we’re all about indulgence and celebration here at Feastical, I know some folks like to have the info. Here’s a general breakdown per cupcake (with frosting and assuming the recipe makes 12): Approximately 260 calories, 12g fat, 36g carbohydrates, 2g protein, 1g fiber, 25g sugar. Remember, these are estimates, and the exact values can change based on the specific brands of ingredients you use and any substitutions you make. The real nutrition? The joy of baking and sharing something made with love. That’s always calorie-free.
Final Thoughts
And just like that, friend—we’ve baked our way to Easter.
From that wobbly step-stool in my Nana’s flour-dusted kitchen to yours, these chocolate cupcakes have traveled through decades, through countless celebrations, through the exact moment when batter becomes magic and simple ingredients become memory. That’s the thing about recipes like this one. They’re never really just about the food.
Sure, these cupcakes are impossibly moist. Yes, that vanilla frosting is essentially edible clouds. And absolutely, those pastel eggs on top are the cutest thing you’ll put on a dessert table all spring. But what makes this recipe your new go-to isn’t the technique—it’s what happens when you make it.
It’s the tiny fingers sneaking candy eggs before you’ve even piped the frosting. It’s the laughter when someone gets cocoa powder on their nose. It’s the text you’ll send your mom with a photo captioned, “Made your mom’s recipe today.” It’s the way a simple cupcake can say I’m glad you’re here better than words ever could.
This Easter, as you set out your tiered stand or your vintage platter, as you pour that first cup of coffee and watch someone take their first bite, remember: you didn’t just bake cupcakes. You created a moment. You carried forward a tradition—maybe Nana’s, maybe your own, maybe one you’re starting right now. That’s the sweetest ingredient of all.
So here’s to chocolate. Here’s to spring. Here’s to sticky counters, imperfect swirls, and the people we share them with.