Crispy Herb-Crusted Cheesy Chicken Bites – Your New Favorite Weeknight Hero
Forget Frying, Let’s Get Baking!
Hey friends, Beau here from Feastical! Tell me if this sounds familiar: you’re craving something crispy, cheesy, and undeniably delicious, but the thought of dealing with a vat of splattering oil just makes you want to order takeout instead. I get it. We’ve all been there. But what if I told you that you can get all the satisfying crunch and flavor of your favorite fried chicken appetizer, right in your own oven, with minimal mess and maximum joy?
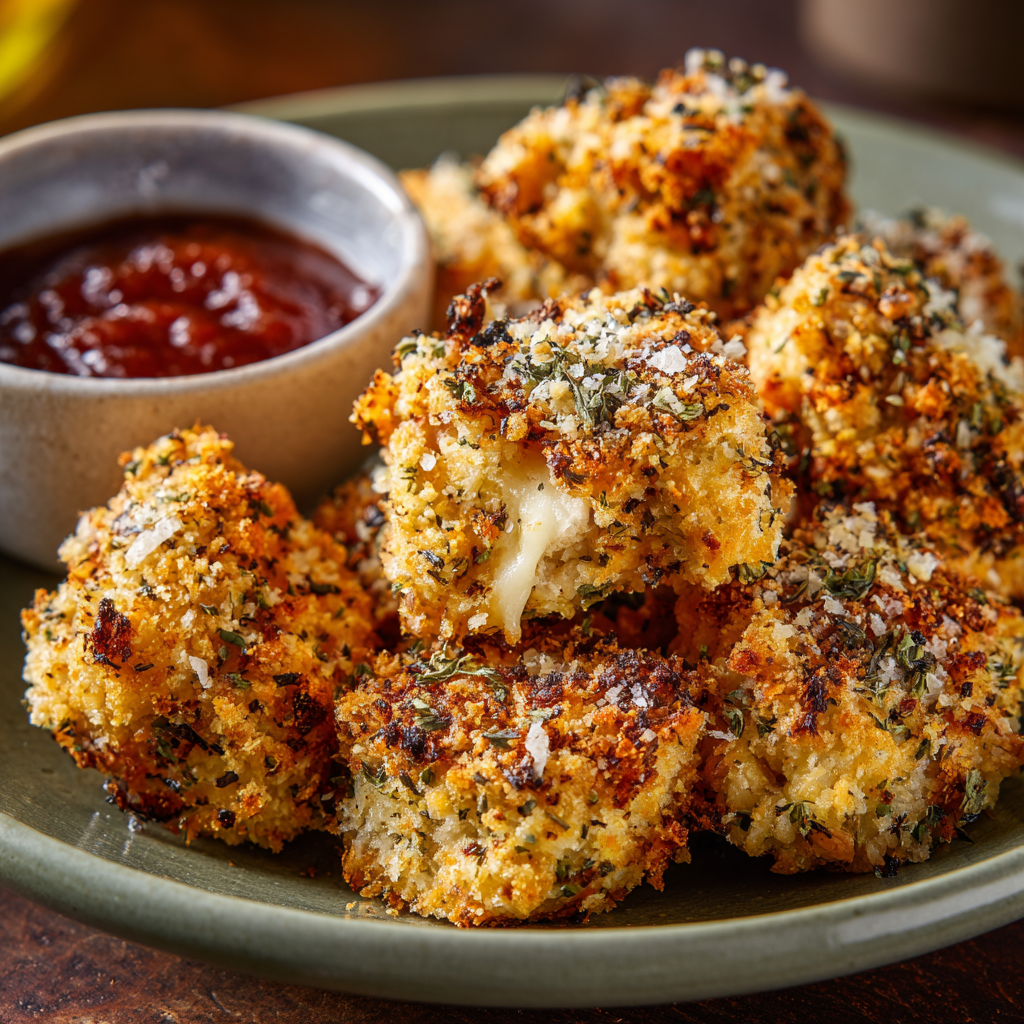
That’s the magic behind these Crispy Herb-Crusted Cheesy Chicken Bites. We’re talking about tender chunks of chicken breast, hugged by a blanket of melty mozzarella and savory Parmesan, all rolled up in a golden, herb-infused crust. They bake up into little puffs of perfection that are impossible to resist. They’re the perfect party appetizer, a killer salad topper, or a downright fun weeknight dinner that the whole family will go nuts for. So, let’s preheat that oven and turn a simple ingredient list into something truly Feastical.
The Little Bite That Started It All
This recipe always takes me back to my grandma’s kitchen. She wasn’t a fancy chef, but she was a wizard with simple ingredients. Her version involved shaking chicken pieces in a paper bag with seasoned flour and pan-frying them in a cast-iron skillet. The kitchen would fill with this incredible aroma of herbs and browning chicken that felt like a warm hug. My brother and I would hover by the stove, hoping to sneak a piece straight from the pan the second she turned her back.
My recipe is a loving nod to hers—a little updated for our modern, busy lives. I swapped the frying for baking to keep things light and easy, and I added that double-cheesy punch because, well, cheese makes everything better. It’s that same soul-satisfying flavor, but designed for you to make any night of the week without a mountain of dishes. It’s food that brings people together, and that’s what Feastical is all about.
Gathering Your Flavor All-Stars
One of the things I love most about this recipe is its beautiful simplicity. You probably have most of this stuff in your kitchen right now. Here’s what you’ll need to feed a happy crew of four.
- 2 cups chicken breast, cut into bite-sized pieces: I like to use breast for its lean, quick-cooking nature, but chicken thighs work wonderfully too for an even juicier result! The key is to cut them into uniform, 1-inch pieces so they all cook at the same time. No one gets a raw bite while another is overcooked!
- 1 cup shredded mozzarella cheese: This is our melty, gooey superstar. I recommend shredding a block of low-moisture mozzarella yourself for the best melt. The pre-shredded stuff often has anti-caking agents that can make it a little grainy.
- ½ cup grated Parmesan cheese: Parmesan brings that salty, nutty, umami punch that takes the flavor to the next level. Freshly grated is always a game-changer, but the stuff in the green can will work in a pinch!
- ½ cup breadcrumbs (preferably Italian-style): This is our crunch-creator. The Italian-style ones come pre-mixed with classic herbs like oregano and basil. If you only have plain breadcrumbs, just add an extra ½ teaspoon of Italian seasoning to the mix.
- 1 tbsp Italian seasoning: The aromatic heart of the dish! Give the jar a little shake and smell before you use it—if the aroma isn’t popping, it might be time for a new one. Fresh herbs equal vibrant flavor.
- 1 tbsp olive oil: A good glug of olive oil not only helps the coating stick but also encourages that beautiful, golden-brown crispiness in the oven. It’s our “fry without frying” secret weapon.
- Salt and pepper, to taste: Don’t be shy here! Seasoning the chicken directly is crucial for building flavor from the inside out. I start with ½ tsp of salt and a few good cracks of black pepper.
Let’s Build Some Bites: Your Step-by-Step Guide
Ready to see how these little miracles come together? It’s a one-bowl, one-pan situation that’s as easy as it is delicious. Follow these steps, and you’ll be a pro in no time.
- Preheat and Prep. First things first, get that oven roaring hot to 400°F (200°C). This high heat is the key to getting a crispy crust without drying out the chicken. While it’s warming up, line a baking sheet with parchment paper. This isn’t just for easy cleanup (though that’s a huge win); it also prevents the cheesy bits from sticking and tearing our beautiful crust. Chef’s Hack: For extra crispiness, place a wire rack on top of the baking sheet. This allows hot air to circulate all around the bites, making them evenly golden and crunchy.
- The Magic Mix. In a medium-sized bowl, we’re going to combine almost everything. Add your chicken pieces, olive oil, mozzarella, Parmesan, breadcrumbs, Italian seasoning, salt, and pepper. Now, roll up your sleeves and use your hands to toss it all together. Yes, your hands! They’re your best kitchen tool. You want to make sure every single nook and cranny of every chicken piece is coated in that cheesy, herby, breadcrumb-y goodness. The mixture might seem a little loose, but trust the process—it will melt and fuse into a perfect crust in the oven.
- Arrange with Care. Now, take your beautifully coated chicken bites and spread them out on your prepared baking sheet. This next part is important: give them a little space! Make sure they aren’t touching each other. If they’re too crowded, they’ll steam instead of bake, and we’ll lose that crucial crispiness we’re working so hard for. A single, uncrowded layer is the goal.
- Bake to Perfection. Slide that baking sheet into your preheated oven and let the magic happen. We’re going to bake them for 15-20 minutes. Now, here’s a pro move: set a timer for 10 minutes. When it goes off, pull the tray out and flip each bite over. This ensures we get an even, all-around golden-brown crust. They’re done when the chicken is cooked through (no pink inside, and the juices should run clear) and the exterior is a gorgeous, crispy gold.
- The Hardest Part: Let Them Rest! I know, the aroma is intoxicating and you just want to dive in. But patience, young grasshopper! Let the bites rest on the pan for about 5 minutes after they come out of the oven. This allows the cheese to set slightly so they don’t fall apart when you pick them up, and it lets the juices redistribute throughout the chicken, guaranteeing a moist and tender bite every single time.
How to Serve These Golden Gems
Okay, the bites are resting (good job being patient!), so let’s talk about how to serve them up. The possibilities are almost endless!
For the ultimate game day spread or party platter, pile them high on a plate with a couple of dipping sauces. My go-tos are a creamy marinara for that pizza-parlor vibe, a cool and tangy ranch, or a spicy sriracha mayo for a kick.
Turning this into a full meal? Toss a handful of these warm, crispy bites over a fresh green salad for the best protein-packed croutons you’ve ever had. Or, nestle them next to some creamy mashed potatoes and roasted green beans. They also make an incredible filling for wraps or pita pockets with a drizzle of tzatziki sauce. Get creative!
Make It Your Own: Fun Flavor Twists
This recipe is like a blank canvas, just begging for your personal touch. Once you’ve mastered the classic version, try one of these fun twists!
- Buffalo Bleu: Toss the baked bites in a few tablespoons of buffalo wing sauce right when they come out of the oven. Serve with a side of chunky blue cheese dressing for dipping. Instant sports bar favorite!
- Garlic Parmesan Lover’s Dream: Add 2-3 minced garlic cloves (or 1 tsp garlic powder) to the original mix. After baking, while they’re still hot, toss them in a bowl with an extra tablespoon of grated Parmesan and some chopped fresh parsley.
- Gluten-Free & Low-Carb Friendly: This is an easy swap! Simply replace the breadcrumbs with an equal amount of almond flour, crushed pork rinds, or your favorite gluten-free panko-style breadcrumbs. The method stays exactly the same.
- Spicy Southwest Fiesta: Swap the Italian seasoning for a taco seasoning blend. Use a pepper jack cheese instead of mozzarella, and add a pinch of chili powder or cayenne to the breadcrumb mix. Serve with salsa and avocado crema.
Beau’s Kitchen Notes & Stories
This recipe has become a real workhorse in my kitchen. I’ve lost count of how many times it’s saved me when friends dropped by unexpectedly. I once made a triple batch for a last-minute potluck, and they were gone so fast I’m not sure everyone even got to taste them! The recipe has evolved, too. My first attempt was a bit of a mess—I overcrowded the pan and ended up with steamed chicken nuggets. Lesson learned! Giving them space is non-negotiable. The other key is not to skimp on the cheese. It acts as both flavor and glue, creating that incredible, crispy-chewy crust we all love. This is a no-stress, high-reward kind of dish, so have fun with it!
Your Questions, Answered!
I’ve made these bites a million times, and I’ve heard all your awesome questions. Here are the answers to the most common ones.
- Q: Can I make these ahead of time?
A: Absolutely! You can assemble the raw, coated chicken bites on the baking sheet, cover them tightly with plastic wrap, and refrigerate for up to 8 hours before baking. You might need to add 1-2 minutes to the baking time since they’ll be going in cold.
- Q: My coating isn’t sticking to the chicken. What did I do wrong?
A: This usually happens if there’s not enough “glue.” Make sure you’re adequately coating the chicken in the olive oil first before adding the dry ingredients. Using your hands to really massage and press the coating onto each piece is the best technique.
- Q: Can I use an air fryer instead of an oven?
A: You bet! Air fryers are fantastic for this recipe. Arrange the bites in a single layer in your air fryer basket (you may need to cook in batches) and air fry at 375°F (190°C) for 10-12 minutes, shaking the basket halfway through. They get incredibly crispy!
- Q: How do I store and reheat leftovers?
A: Store any leftovers in an airtight container in the fridge for up to 3 days. To reheat, pop them back in a 375°F oven or air fryer for 5-7 minutes until hot and crispy. Avoid the microwave, as it will make them soft.

Crispy Herb-Crusted Cheesy Chicken Bites : Baked & Full of Flavor
Description
Tender chicken bites coated in a melty, cheesy, herb-infused crust. Crispy on the outside, juicy on the inside, and perfect for dinner, snacks, or party platters.
Ingredients
-
2 cups chicken breast, cut into 1-inch pieces (or thighs for extra juiciness)
-
1 cup shredded mozzarella cheese (low-moisture preferred)
-
½ cup grated Parmesan cheese
-
½ cup Italian-style breadcrumbs (or plain + ½ tsp Italian seasoning)
-
1 tbsp Italian seasoning
-
1 tbsp olive oil
-
Salt & pepper, to taste
Instructions
1. Preheat & Prep
-
Preheat oven to 400°F (200°C).
-
Line a baking sheet with parchment paper. Optional: use a wire rack for extra crispiness.
2. Coat the Chicken
-
In a medium bowl, combine chicken, olive oil, mozzarella, Parmesan, breadcrumbs, Italian seasoning, salt, and pepper.
-
Use your hands to mix thoroughly, ensuring each piece is well coated.
3. Arrange & Bake
-
Spread chicken bites on the baking sheet in a single layer.
-
Bake 15–20 minutes, flipping halfway through for even browning.
-
Chicken is done when cooked through and the exterior is golden and crispy.
4. Rest & Serve
-
Let rest 5 minutes before serving.
-
Serve with your favorite dipping sauces: marinara, ranch, sriracha mayo, or tzatziki.
Notes
-
Assemble coated chicken bites ahead and refrigerate up to 8 hours before baking.
-
Store leftovers in an airtight container, fridge up to 3 days.
-
Reheat in oven or air fryer at 375°F for 5–7 minutes to keep them crispy.
-
Air fryer option: 375°F for 10–12 minutes, shaking halfway.
Nutrition
- Calories: 280Cal Per Serving
- Fat: 14g
- Carbohydrates: 8g
- Protein: 30g
Nutritional Info (Because Knowledge is Power!)
I’m all about feel-good food, and that includes knowing what you’re putting into your body. Here’s a general breakdown per serving (assuming the recipe serves 4). Remember, these are estimates and can vary based on the specific brands and amounts you use.
Calories: ~280 | Protein: ~30g | Carbohydrates: ~8g | Fat: ~14g
The beauty of this recipe is that it’s packed with high-quality protein from the chicken, keeping you full and satisfied. By baking instead of frying, we significantly cut down on unnecessary fats. Using part-skim cheeses can lighten it up a bit more, and as mentioned in the variations, using almond flour can make it a fantastic low-carb option. It’s a balanced, wholesome dish you can feel great about serving.
Your New Go-To Recipe Awaits
And there you have it! From my grandma’s kitchen to yours, a recipe that’s built for real life. It’s simple, satisfying, and sure to become a regular in your meal rotation. The best part about cooking is the joy it brings—the joy of creating something delicious, the joy of sharing it with people you love, and the joy of finding a recipe that just works.
I really hope you love these Crispy Herb-Crusted Cheesy Chicken Bites as much as I do. Give them a try this week and let me know how it goes! Tag me on social @Feastical or shoot me an email. I love seeing your kitchen creations.
Final Thoughts: Your New Weeknight Secret is Out of the Bag
Well, friends, we’ve reached the end of our crispy, cheesy journey. From a nostalgic memory in my grandma’s kitchen to a foolproof recipe for your busy modern life, these chicken bites are more than just a meal—they’re your ticket to a stress-free, delicious dinner that feels like a celebration.
Remember, the real magic of this recipe isn’t just in the blend of herbs and cheese (though that’s pretty magical). It’s in its power to bring people together. It’s the kind of food that has everyone gathering in the kitchen, sneaking a bite before they hit the table, and asking, “When are you making these again?”
You now have everything you need: a simple method, fun twists to keep it exciting, and the confidence to make a dish that’s guaranteed to impress. So, don’t save it for a special occasion. Turn an ordinary Tuesday into something Feastical. You’ve got this.
I can’t wait to hear about your own kitchen adventures with this recipe. Now go forth and bake up some joy
Until next time, keep your spatula close and your appetite closer!
– Beau