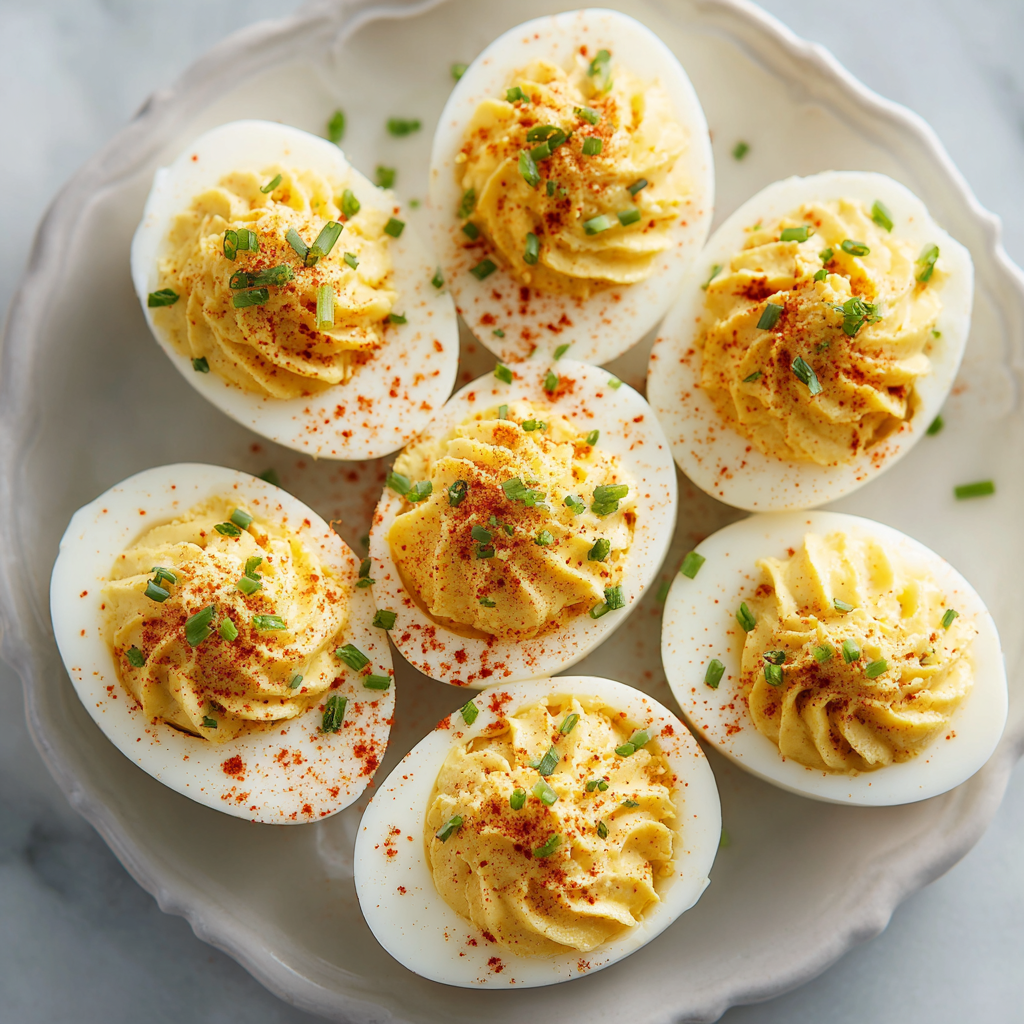
The Unbeatable, Irresistible Charm of the Perfect Deviled Egg
Hey there, friend! Beau here, welcoming you back to Feastical. Let’s talk about a culinary icon so perfect, it needs no introduction, yet always deserves a grand welcome: the deviled egg. Is there any other dish that can effortlessly bridge the gap between a fancy cocktail party, a backyard barbecue, and a humble weeknight snack? I don’t think so. That creamy, tangy, slightly mysterious filling tucked into a tender egg white boat is more than just food; it’s a memory on a platter, a guaranteed conversation starter, and the first thing to disappear from any table it graces.
But here’s my chef’s confession: for years, I treated deviled eggs as a simple, throw-together recipe. A little mayo, a squirt of mustard, mash, done. It wasn’t until I brought a rushed, sadly bland batch to a friend’s potluck and saw them linger sadly next to a glorious, garnished tray that I had a revelation. The humble deviled egg is a canvas. It’s a perfect, protein-packed base waiting for your personality. Mastering the classic version is your kitchen rite of passage, and from there? The flavor world is your oyster (or, well, your egg).
So today, we’re going deep on deviled egg excellence. We’ll nail the foolproof, silky-smooth, perfectly seasoned classic that will have people begging for your secret. And because I love a good kitchen adventure, I’m sharing three of my favorite flavor twists that will take your eggs from classic to legendary. Grab your eggs and your sense of fun—let’s make some magic.
A Tower of Eggs and Laughter: My Deviled Egg Awakening
My love affair with deviled eggs truly began at my Great-Aunt Clara’s annual spring luncheon. Picture this: a sun-drenched porch, tables draped in gingham, and a centerpiece that wasn’t flowers, but a literal tiered tower of deviled eggs. She must have made six dozen. As a kid, I was in awe. This wasn’t just a side dish; it was the main event.
I was appointed “sprinkle master,” tasked with dusting each egg with a final, perfect shower of paprika from her special little shaker. I took my job deadly seriously, hovering over each platter. But when I turned to ask her a question, my elbow caught the edge of the tower. Time froze. In slow motion, I watched as three levels of creamy, beautiful eggs slid into a delicious, messy heap on the tablecloth. My heart sank. Aunt Clara just looked at the catastrophe, then at my horrified face, and burst out laughing. “More for us to taste-test, Beau!” she chuckled, handing me a fork. We stood there, eating the “casualties” straight from the table, and she explained how a little extra vinegar was her secret. In that messy, joyful moment, I learned that the best food isn’t about perfection—it’s about sharing, laughing, and maybe keeping your elbows in when near egg towers.
Gathering Your Flavor Arsenal: The Classic Base
Here’s what you’ll need to create a dozen perfect, creamy classic deviled egg halves. I’ve added my little chef insights for each—because knowing the why makes you a better cook!
- 6 large eggs: The star. Large eggs give you the ideal white-to-yolk ratio. Pro tip: Eggs that are a week or so old peel easier than brand-new ones! If you’re in a pinch, that’s a handy hack.
- 3 tablespoons mayonnaise: This is your creaminess foundation. Use a good-quality, real mayo (like Duke’s or Hellmann’s/Best Foods) for the richest flavor. For a tangier twist, sub in Greek yogurt for half of it.
- 1 teaspoon yellow mustard: It’s not just for color! Yellow mustard gives that iconic, gentle tang. Feeling fancy? A smooth Dijon mustard adds a more sophisticated, sharp note.
- 1/2 teaspoon white vinegar or pickle juice: The secret weapon for brightness! White vinegar is clean and sharp, while pickle juice (from dill or sweet pickles) adds a layer of briny, complex flavor. This little bit cuts through the richness perfectly.
- Salt & pepper, to taste: Don’t you dare forget to season your filling! I start with 1/8 tsp salt and a few cracks of black pepper, then taste and adjust. The yolks need it.
- Paprika, for garnish: The classic red crown. Sweet paprika is traditional, but a sprinkle of smoked paprika? Game-changer. It adds a whisper of barbecue-like depth.
Crafting Perfection: Your Step-by-Step Roadmap
Follow these steps, and you’ll have the most foolproof, crowd-pleasing deviled eggs in your neighborhood. I’m walking you through every stage with my favorite kitchen hacks.
Step 1: The Foolproof Boil. Place your eggs in a single layer in a saucepan. Cover them with cold water by about an inch. Bring the pot to a rolling boil over high heat. The second it hits a full boil, slap the lid on, turn off the heat, and set a timer for 10 minutes. This “off-heat” method is my go-to because it prevents that ugly green ring around the yolk and ensures tender, not rubbery, whites.
Step 2: The Ice Bath Shock. While the eggs cook, prepare an ice bath (a big bowl of water and ice). When the timer dings, use a slotted spoon to immediately transfer the hot eggs to the ice bath. Let them chill for at least 15 minutes. This stops the cooking and, crucially, contracts the egg inside the shell, making peeling a million times easier.
Step 3: The Great Peel. Tap each egg all over on the counter to crackle the shell. Start peeling from the wider end (where there’s usually an air pocket) under a tiny trickle of running water—the water helps loosen the membrane. You’ll get clean, smooth eggs every time.
Step 4: Halve & Harvest. Slice each peeled egg lengthwise with a sharp, thin knife. Gently pop the yolks out into a medium bowl. Arrange your empty white halves on your serving plate. See how they’re like little waiting canoes? Adorable.
Step 5: The Creamy Alchemy. To the yolks, add your mayo, mustard, vinegar or pickle juice, salt, and pepper. Now, mash and stir! I like to use a fork first to break up the yolks, then switch to a small whisk or silicone spatula to beat the mixture until it’s utterly smooth and creamy. No lumps allowed! Taste it—this is your moment. Need more tang? A dash more vinegar. More zip? More mustard. Make it yours.
Step 6: The Grand Fill. You can simply spoon the filling back into the wells. But for a truly pro look, spoon the filling into a zip-top bag, snip off a corner (about 1/2 inch), and pipe it in with a swirl. It’s so satisfying and looks incredible.
Step 7: The Final Flourish. Just before serving, give each egg its signature dusting of paprika. This keeps the color vibrant and adds that final pop of flavor and color.
Plating Your Masterpiece: Serving with Style
Presentation is part of the fun! Don’t just plop these beauties on a plate. A dedicated deviled egg tray with little grooves is a great investment if you make these often. No tray? Get creative. A simple platter works wonders. Line it with fresh lettuce leaves, kale, or a bed of fresh herbs like dill or parsley for a pop of green that makes the eggs shine.
For a casual gathering, I love scattering some extra garnishes around the plate—a few extra bacon bits from our variation, some whole chives, or cornichons on the side. It looks abundant and inviting. Remember, serve them chilled! I like to make the filling and prep the whites, then fill and garnish about an hour before the party starts. That way, they’re perfectly cool and the flavors have had a chance to mingle.
Play With Your Food! 3 Delicious Flavor Twists
Once you’ve mastered the classic, the kitchen playground opens up. Here are three of my absolute favorite ways to jazz up the base recipe.
1. Bacon Cheddar Ranch: To the classic yolk filling, mix in 1 tablespoon of ranch dressing (powder or bottled), 2 tablespoons of finely shredded sharp cheddar cheese, and 1 tablespoon of finely crumbled cooked bacon. Pipe into the whites and top with a tiny sprinkle of cheddar, a bacon bit, and a sliver of fresh chive. It’s like a loaded potato, but in egg form!
2. Spicy Sriracha Lime: Add 1 teaspoon (or more!) of Sriracha and 1 teaspoon of fresh lime juice to the yolk mix. For an extra kick, fold in a teaspoon of finely minced jalapeño (seeds removed for less heat). Pipe and top with a tiny slice of jalapeño, a drizzle of Sriracha, and a sprinkle of black sesame seeds or chili flakes.
3. Avocado Lime with Tajín: This is a fresher, brighter twist. Swap out half of the mayonnaise for the flesh of one small, ripe avocado. Add 1 teaspoon of fresh lime juice and a pinch of cumin to the yolk mix. Blend until super smooth. The filling will be a lovely pale green. Garnish with a cilantro leaf and a magical sprinkle of Tajín seasoning for that sweet, salty, chili-lime punch.
Beau’s Kitchen Notebook: Extra Thoughts & Stories
This recipe has evolved in my kitchen from a last-minute item to a purposeful delight. I learned the hard way that over-seasoning the filling is a real danger—you can always add, but you can’t take away! My biggest evolution was embracing the pipe. For years, I was a spoon guy. But seeing the beautiful, swirled rosettes you get from a piping bag (or even a zip-top with the corner cut) just elevates the whole experience. It feels special.
One time, I was experimenting with a “everything bagel” deviled egg and accidentally used garlic powder instead of onion powder. Let’s just say they were… potent. A friendly reminder to always label your spice jars! The recipe is forgiving, so don’t stress. Have fun, taste as you go, and make it your own. That’s what home cooking is all about.
Your Questions, Answered: Deviled Egg FAQs
Q: My eggs are impossible to peel! Help!
A: The ice bath is key! Also, using slightly older eggs (1-2 weeks old) helps. Peeling under a small stream of cool running water lets the water get under the shell and membrane, making it slide right off.
Q: Can I make deviled eggs ahead of time?
A: Absolutely! You can hard-boil and peel the eggs up to 2 days in advance, keeping them in a sealed container in the fridge. You can also make the filling 1 day ahead and store it separately. Fill the whites no more than a few hours before serving for the best texture.
Q: My filling is a bit runny. What did I do wrong?
A> This usually means a bit too much mayo or add-ins. The fix is easy! Chill the filling in the fridge for 20-30 minutes to firm up before piping. You can also add a tiny pinch of extra mashed yolk or a sprinkle of finely grated cheese to help thicken it.
Q: What’s the best way to transport deviled eggs?
A: A dedicated egg carrier is fantastic. Otherwise, use a deep container and place the eggs snugly so they don’t slide. Put a damp paper towel under the rack or plate to keep things from sliding, and keep them chilled with an ice pack if traveling far.
Classic Deviled Eggs (Plus 3 Delicious Flavor Twists!)
Description
Hey there, friend! Beau here, and today we’re celebrating a true icon: the deviled egg. Simple, nostalgic, and endlessly lovable, this little bite somehow fits in everywhere—from holiday tables to backyard cookouts to “I just need a snack” moments. When done right, deviled eggs are creamy, tangy, perfectly seasoned, and impossible to stop eating. This recipe nails the classic version first (because fundamentals matter!), with easy tips to make them smooth, flavorful, and party-ready every single time.
Ingredients
-
6 large eggs
-
3 tbsp mayonnaise
-
1 tsp yellow mustard
-
½ tsp white vinegar or pickle juice
-
Salt, to taste
-
Black pepper, to taste
-
Paprika (sweet or smoked), for garnish
Instructions
-
Boil the eggs
Place eggs in a saucepan in a single layer. Cover with cold water by about 1 inch. Bring to a rolling boil, cover, turn off heat, and let sit for 10 minutes. -
Ice bath
Transfer eggs immediately to an ice bath and let cool for at least 15 minutes. -
Peel & halve
Peel the eggs and slice them lengthwise. Gently remove yolks and place them in a bowl. -
Make the filling
Mash yolks with mayonnaise, mustard, vinegar (or pickle juice), salt, and pepper until smooth and creamy. -
Fill the eggs
Spoon or pipe the filling back into the egg whites. -
Garnish & serve
Sprinkle lightly with paprika just before serving.
Notes
-
Older eggs peel easier: Eggs that are 1–2 weeks old are much easier to peel than very fresh ones.
-
Ice bath matters: It stops cooking and helps the shell release cleanly.
-
Taste before filling: Adjust salt, vinegar, or mustard while the yolks are still in the bowl.
-
Pipe for polish: A zip-top bag with the corner snipped gives you an instant “fancy” look.
-
Chill before serving: Deviled eggs taste best when cold.
Nutritional Snapshot (For the Classic Base)
Let’s be real—we don’t eat deviled eggs because they’re a “diet food.” We eat them because they’re delicious! But it’s always good to know what’s on your plate. This info is for one classic deviled egg half.
Prep Time: 15 mins | Cook Time: 12 mins | Total Time: 30 mins | Servings: 12 halves
Calories: ~60 | Protein: 3g | Carbohydrates: <1g | Fat: 5g
Eggs are a fantastic source of high-quality protein and essential nutrients like choline. The fats come primarily from the mayo and the egg yolk itself. Remember, the variations will alter these numbers slightly (adding avocado, cheese, or bacon changes the fat and protein profile). Enjoy them as part of a balanced spread!
The Last Bite: Keep the Party Going
And there you have it, my friend—your complete guide to deviled egg domination, from the timeless classic to three wildly tasty spins. I hope this inspires you to see this potluck staple in a whole new light. It’s a dish that welcomes creativity, rewards a little care, and always, always brings people together.
So the next time you need a guaranteed hit, whether it’s for Easter brunch, a summer picnic, or just a Tuesday treat, you’ve got this. Whip up a batch, maybe try that avocado lime twist, and watch them vanish. And when someone asks, “What’s your secret?” you can just smile and say, “A little love, and a dash of pickle juice.”
Did you try a variation? Invent one of your own? I’d love to hear about it! Tag me @feastical or drop a comment on the blog. Now, if you’ll excuse me, I have a tower of eggs to carefully reconstruct… Happy cooking!
– Beau