Chocolate Peanut Butter Rice Cakes: Your New Favorite Snack Obsession
Hey friends, Beau here! Let’s talk about that 3 PM slump. You know the one. Your energy is dipping, your stomach is staging a minor rebellion, and you’re staring into the pantry abyss, willing something magical and satisfying to appear. You want something sweet, but you don’t want to crash. You want something crunchy, but you also crave that creamy, comforting feel. And let’s be real, you probably don’t want to dirty every bowl in the kitchen.
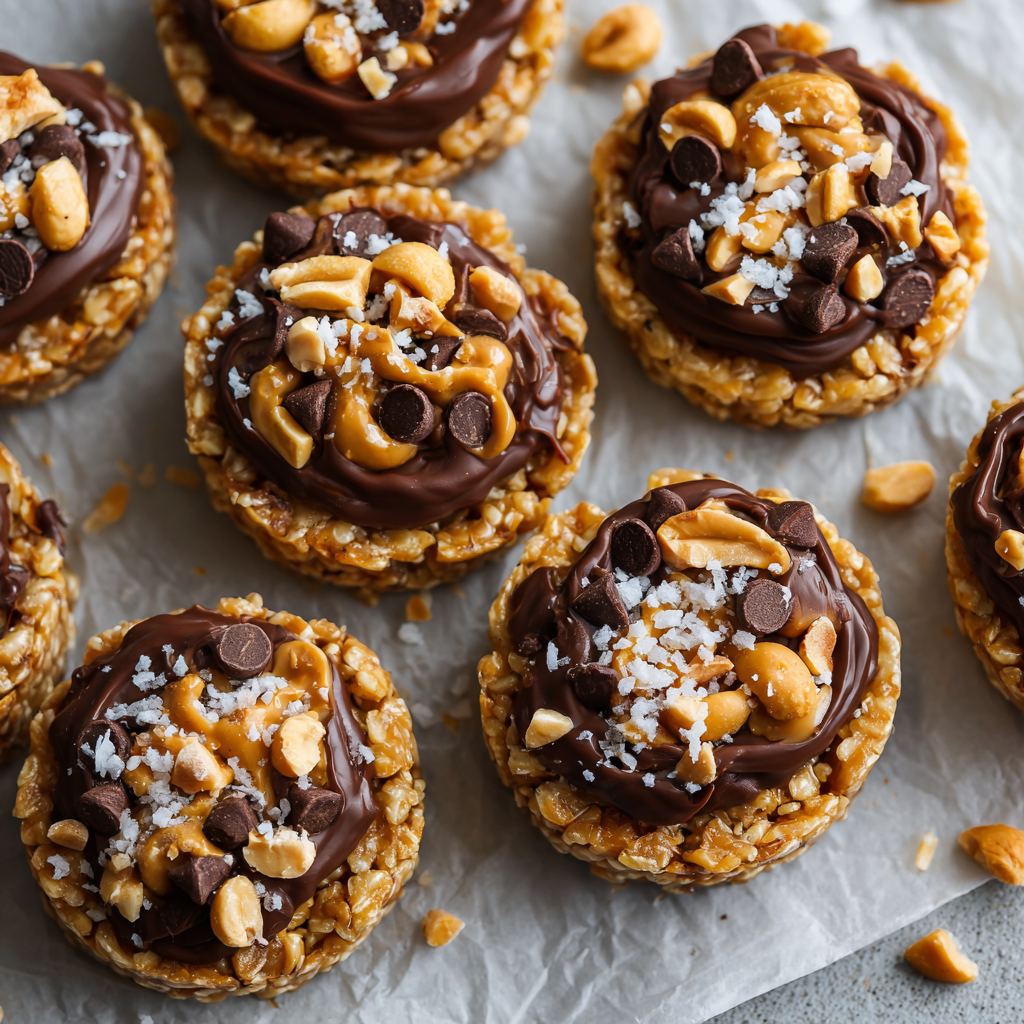
Well, my snack-loving friends, I have the answer. It’s been blowing up all over social media for a reason, and after tweaking and tasting more batches than I can count, I’m so excited to share my ultimate take on these Viral Chocolate Peanut Butter Rice Cakes.
This isn’t just a recipe; it’s a snack-time revelation. We’re taking humble rice cakes and transforming them into crispy, creamy, chocolate-drenched discs of pure joy. They’re the perfect intersection of a treat and a tidy little protein-packed pick-me-up. They require zero baking, are naturally gluten-free, and are so simple that you’ll have them stashed in the fridge before your favorite podcast finishes an episode. So, let’s banish boring snacks and make something that truly tastes like a happy little high-five.
A Crunchy Walk Down Memory Lane
This recipe takes me right back to my grandma’s kitchen. She wasn’t a fancy chef, but she was a wizard with simple ingredients. Her after-school special was always a rice cake with a thick schmear of peanut butter and a sprinkle of chocolate chips that she’d let melt just a little from the warmth of the peanut butter. It was our little secret, a perfect, no-fuss treat that felt like a major indulgence.
When I saw this upgraded, chocolate-covered version trending online, it was like a flood of those warm, fuzzy memories came rushing back. It was my grandma’s smart snack, all grown up and dressed to impress. It proves that the best food ideas often aren’t complicated new inventions; they’re beloved classics, reimagined with a little extra love (and a whole lot of chocolate). Making these now feels like connecting with that joyful, simple part of my food journey, and I can’t wait for you to make your own memories with them.
Gathering Your Snack Squad: The Ingredients
One of the best things about this recipe is its beautiful simplicity. You only need a handful of pantry staples to create something truly spectacular. Here’s the lineup and a few of my chef-y insights to help you build the best version possible.
- 26 Plain or Lightly Salted Rice Cakes: I like the classic large, round ones for maximum canvas space. The light saltiness is a perfect base that plays so well with the sweet chocolate and rich peanut butter. Chef’s Tip: If you can only find unsalted, don’t worry! We’ll be adding flaky salt at the end, which will do the trick.
- 32 oz Creamy Peanut Butter: This is your creamy dream layer! I recommend a “no-stir” natural peanut butter or a standard creamy one for the best, smoothest spreading consistency. The oil separation in some natural brands can make it a bit tricky to get an even layer. Substitution Tip: Any nut or seed butter works wonderfully here. Almond butter, cashew butter, or even sunflower seed butter for a nut-free version are all fantastic.
- 24 oz Chocolate Chips: This is where you can really make it your own. I adore the deep, rich flavor of dark chocolate chips (and they often have less sugar), but semi-sweet is a classic crowd-pleaser. Dietary Swap: Want to keep it dairy-free or vegan? Just grab your favorite dairy-free chocolate chips! They melt and set just as beautifully.
- Flaky Sea Salt (for topping): Don’t you dare skip this! A sprinkle of flaky salt like Maldon is the secret weapon. It heightens the chocolate flavor, cuts through the richness, and gives you those delightful salty-sweet bursts in every single bite.
- Optional Toppings for Extra Flair: This is your playground! A sprinkle of chopped roasted peanuts for extra crunch, a dusting of shredded coconut for a tropical vibe, or even a final drizzle of melted almond butter for a gorgeous marbled effect. Go wild!
Let’s Get Building: Your Step-by-Step Guide
Alright, team, it’s assembly line time! This process is fast, fun, and almost meditative. Put on some tunes, clear a little counter space, and let’s create some snack magic.
- Line ‘Em Up: Grab two large baking sheets and line them with parchment paper. This is a non-negotiable step for easy cleanup and preventing any sticky situations. Lay out all your rice cakes in a single layer, giving them a little personal space. Chef’s Hack: If your rice cakes are particularly crumbly, you can give them a very gentle spritz with water from a spray bottle. This helps the peanut butter adhere without making them soggy!
- The Peanut Butter Layer: Now, take your peanut butter and get spreading! I like to use a small offset spatula for this—it gives you so much control—but a butter knife works perfectly too. Spread a generous, thick layer all the way to the edges. We’re creating a sealed, creamy barrier that the chocolate won’t seep through. Don’t be shy here; this is the soul of the snack!
- Melt the Chocolate: Time to melt our chocolatey blanket. You have two great options here. For the Double Boiler Method, place a heatproof bowl over a pot of simmering water (make sure the bottom of the bowl isn’t touching the water). Stir the chocolate chips constantly until they’re smooth and glossy. This method gives you the most control. For the Microwave Method, pop the chips in a microwave-safe bowl and heat in 30-second bursts, stirring thoroughly between each burst. Stop when there are just a few lumps left and stir until they melt completely. This prevents the chocolate from scorching. Chef’s Tip: If your melted chocolate seems a bit thick, you can stir in a tiny teaspoon of coconut oil to make it smoother and easier to spread.
- The Chocolate Blanket: Using a spoon or your offset spatula, dollop and spread the melted chocolate over the peanut butter layer. I love to make swirly, rustic patterns—it doesn’t have to be perfect! Just make sure you cover most of the surface. This is where the magic really starts to look the part.
- The Grand Finale (Toppings!): Immediately after covering each rice cake with chocolate, give it a graceful sprinkle of that flaky sea salt and any other toppings you’re using. If you wait too long, the chocolate will start to set and the toppings won’t stick. This is your moment to be an artist!
- The Big Chill: Carefully slide the baking sheets into the fridge (if you have space) or the freezer. They’ll need about 15-20 minutes to set up completely. You’ll know they’re ready when you tap the chocolate and it’s firm and doesn’t give. Chef’s Hack: The freezer is your best friend if you’re impatient like me. It speeds up the process dramatically!
How to Serve & Savor Your Creation
Once they’re set, you’re ready for the best part: eating! You can enjoy these straight from the fridge for a cool, firm bite, or let them sit out for a minute or two if you prefer a slightly softer chocolate texture.
I love stacking a few on a wooden board for a casual, shareable snack when friends come over—they’re always a huge hit. For a more decadent feel, you can even crumble one over a bowl of vanilla ice cream. Pack one in a little parchment paper sleeve for a lunchbox treat, or just sneak one directly from the container while standing in front of the open fridge. I won’t judge; I do it, too.
Get Creative: Fun Flavor Twists & Swaps
The basic formula is a masterpiece, but it’s also an incredible canvas for your cravings. Here are a few of my favorite ways to mix it up:
- The “Elvis” Special: Add a layer of thinly sliced banana over the peanut butter before you add the chocolate. It’s like a frozen, portable Elvis sandwich!
- Rocky Road Rendezvous: Before the chocolate sets, sprinkle on mini marshmallows and a few chopped almonds. Hello, childhood nostalgia!
- White Chocolate Wonderland: Swap the dark chocolate for melted white chocolate and top with dried cranberries and pistachios for a festive, sweet-and-tart combo.
- Double Crunch Delight: Mix a handful of crispy rice cereal into your peanut butter before spreading. It adds a whole new dimension of fun texture.
- SunButter Sensation (Nut-Free): Use SunButter instead of peanut butter and top with dairy-free chocolate and pumpkin seeds for a completely nut-free, allergy-friendly version that’s just as delicious.
Beau’s Kitchen Notes & Stories
I’ve made these so many times that the process is now muscle memory. It’s my go-to recipe when I need a hostess gift, a potluck contribution, or just a little meal prep for my own week. The recipe has evolved in my kitchen, too—I started out meticulously smoothing the chocolate, but now I love the rustic, swirly look. It feels more homemade and full of heart.
A funny kitchen story? The first time I made a double batch, I ran out of parchment paper and thought, “Eh, wax paper is basically the same, right?” Friends, it is not. Let’s just say I spent more time scraping chocolate off wax paper than I did making the actual snacks. We live and we learn! Always use parchment.
Your Questions, Answered!
Q: My chocolate cracked when I bit into it. What did I do wrong?
A: This usually means the chocolate was spread on too thickly or was tempered a bit too hot. No worries, it still tastes amazing! Next time, try stirring in a 1/2 teaspoon of coconut oil to the melted chocolate to make it more flexible once set.
Q: Can I make these ahead of time and freeze them?
A: Absolutely! They are a fantastic freezer food. Layer them in an airtight container with parchment paper between the layers to prevent sticking. They’ll keep perfectly for up to a month. You can eat them straight from the freezer—they have a great frozen candy bar texture!
Q: My peanut butter layer is tearing the rice cakes. Help!
A: This is a common issue with crumbly rice cakes or very thick peanut butter. Try warming your peanut butter for 10-15 seconds in the microwave to make it more spreadable. And remember, a gentle hand is key!
Q: Are these actually healthy?
A> I like to think of them as a “better-for-you” treat! They’re made with real ingredients and provide a good hit of protein and healthy fats from the peanut butter, which is more satisfying than a sugar-filled candy bar. As with all good things, they’re perfect as part of a balanced diet.

Chocolate Peanut Butter Rice Cakes : The Viral Snack You’ll Want on Repeat
Description
Chocolate Peanut Butter Rice Cakes
Your New Favorite Snack Obsession
A crunchy, creamy, naturally gluten-free treat that’s quick, no-bake, and perfect for snacking anytime.
Ingredients
-
26 plain or lightly salted rice cakes – large, round ones work best
-
32 oz creamy peanut butter – any nut or seed butter works (almond, cashew, SunButter)
-
24 oz chocolate chips – dark, semi-sweet, or dairy-free
-
Flaky sea salt – for finishing
Optional Toppings:
-
Chopped roasted peanuts
-
Shredded coconut
-
Drizzled almond butter
-
Mini marshmallows or pumpkin seeds
Instructions
-
Prep the Rice Cakes:
Line two large baking sheets with parchment paper. Arrange rice cakes in a single layer with a little space between them. -
Spread the Peanut Butter:
Warm peanut butter slightly if needed. Spread a generous, even layer onto each rice cake using a butter knife or offset spatula. Cover edges completely to prevent chocolate seepage. -
Melt the Chocolate:
-
Double Boiler Method: Place a heatproof bowl over simmering water (bottom of bowl not touching water). Stir constantly until smooth.
-
Microwave Method: Heat in 30-second bursts, stirring between each, until just melted. Add ½–1 tsp coconut oil if chocolate is too thick.
-
-
Top with Chocolate:
Spoon or spread melted chocolate over the peanut butter layer. Rustic, swirly patterns are perfect—perfection isn’t required! -
Add Finishing Touches:
Sprinkle flaky sea salt immediately, along with any optional toppings. Work quickly before chocolate sets. -
Chill to Set:
Refrigerate or freeze for 15–20 minutes until chocolate is firm. The freezer speeds up the process if you’re impatient!
Notes
-
Prevent Tearing: Warm peanut butter for easier spreading; use a gentle hand.
-
Avoid Cracking Chocolate: Stir in coconut oil for more flexibility if chocolate sets too thickly.
-
Storage: Layer with parchment paper in an airtight container. Fridge: up to 2 weeks; Freezer: up to 1 month.
The Nutritional Lowdown (Per Rice Cake)
Here’s a general breakdown to help you plan. Remember, this can vary based on the specific brands of ingredients you use!
- Prep Time: 15 minutes
- Chill Time: 15 minutes
- Total Time: 30 minutes
- Calories: ~366
- Protein: ~9g
- Fat: ~24g
- Carbohydrates: ~28g
- Fiber: ~3g
- Sugar: ~11g
Final Thoughts from My Kitchen to Yours
And there you have it! The snack that’s taken over my kitchen and my heart. I love this recipe because it proves that you don’t need complicated techniques or a million ingredients to make something truly special and satisfying. It’s about taking a few simple, good things and putting them together with a little bit of joy.
I really hope you give these Chocolate Peanut Butter Rice Cakes a try. Whip up a batch, stash them away for a rainy (or crazy-busy) day, and experience that little moment of peace and pleasure for yourself. And when you do, I’d love to hear about it! Tag me @Feastical on social media so I can see your beautiful creations.
Happy snacking, friends!
Beau