
When a Classic Gets a Cozy, Sliceable Upgrade
Hey there, friend! Beau here, welcoming you back to my kitchen corner at Feastical. You know that moment when a craving hits, but you’re torn between something elegantly delicious and something you can eat with your hands while curled up on the couch? I live in that delicious tension, and today, I’ve got the perfect solution that’s been my recent obsession: Chocolate-Covered Strawberry Bar Squares.
We all adore the romance of a classic chocolate-dipped strawberry, right? That glossy shell giving way to juicy berry sweetness is a flavor combo for the ages. But let’s be real—dipping a dozen strawberries can be a messy, “is-this-chocolate-setting-yet?” kind of affair. I wanted to capture that magic in a form that’s built for sharing, for gifting, for keeping in the fridge for a sweet little moment whenever you need it. Enter these dreamy dessert bars.
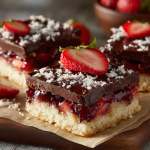
Imagine this: a buttery, shortbread-like crust that crumbles just right. A layer of sweet-tart strawberry filling that’s jammy but fresh, singing with real berry flavor. And finally, a sleek, crackly blanket of pure chocolate that ties it all together. It’s the entire chocolate-covered strawberry experience, but in a neat, portable, utterly moreish square. Whether you’re prepping for a book club, need a show-stopper for a potluck, or just want to treat yourself on a Tuesday afternoon, these bars are your new secret weapon. They taste like a celebration but feel as simple and comforting as your favorite weekend bake. So, tie on that apron—let’s make something wonderful.
A Berry Sweet Memory: My First (Slightly Melty) Success
This recipe takes me straight back to my first apartment kitchen, which was about the size of a postage stamp and twice as warm. I was determined to impress a group of friends with a fancy dessert on a budget. Fancy chocolates? Out of my price range. A fancy tiered cake? Out of my skill zone. But strawberries were in season, and I had a bag of chocolate chips. The original plan was the classic dip, but my kitchen was so hot the chocolate refused to set, leaving me with a plate of delicious but decidedly sloppy berries.
Not one to be defeated, I looked at the mess and thought, “What if I just lean into this?” I smashed the berries into a rough compote, crumbled some graham crackers I had on hand, and layered it all in a pan with the still-melty chocolate. After a frantic chill in the fridge, I sliced it into squares. They were messy, imperfect, and a total hit. My friends raved about the “deconstructed” vibe. That kitchen fail-turned-win was the spark for this recipe. I’ve refined it over the years (thank goodness for a proper crust!), but the soul of it—that joyful, improvisational, “make it work” spirit—is still baked right in.
Gathering Your Sweet Supplies
Here’s everything you’ll need to create these little squares of joy. I’ve tossed in some notes and swaps because I believe your kitchen, your rules!
For the Buttery Crust:
- 1 cup (2 sticks) unsalted butter, melted – Melted butter is our shortcut to a tender, crumbly crust without the fuss of cutting in cold butter. It creates that perfect sandy texture. Chef’s Insight: Let it cool for a minute after melting so it doesn’t cook the flour!
- ½ cup granulated sugar – Just enough sweetness to complement the tangy berries and rich chocolate.
- 2 cups all-purpose flour – The backbone of our crust. For a nuttier flavor, you could swap out ½ cup for almond flour.
- ¼ teaspoon salt – Never skip this! Salt is the flavor amplifier that makes the sweet elements truly pop.
For the Vibrant Strawberry Filling:
- 1 ½ cups chopped fresh strawberries – The star of the show! Use ripe, fragrant berries for the best flavor. Frozen work in a pinch—just thaw and drain them really well to avoid a soggy layer.
- 2 tablespoons strawberry jam – This is my little flavor-boosting hack. It intensifies the berry taste and helps the filling set beautifully. Any berry jam you love will do.
- 1 teaspoon cornstarch – Our thickening agent. It turns the juicy berries into a lush, spreadable layer that won’t soak the crust.
For the Luscious Chocolate Topping:
- 1 cup semi-sweet chocolate chips – I prefer semi-sweet to balance the sweetness, but dark or milk chocolate are fantastic choices. Use good-quality chips—you’ll taste the difference!
- 1 tablespoon coconut oil or butter – This is the magic trick for a glossy, sliceable chocolate layer that doesn’t crack into shards. Coconut oil gives a super-shiny finish, while butter adds a creamy richness.
Let’s Build Some Layers: Your Step-by-Step Guide
Ready to layer up the goodness? Follow these steps, and I’ll walk you through with all my favorite kitchen hacks.
- Prep & Preheat: First, let’s get organized—my grandma called it “mise en place” and it saves so much stress. Preheat your oven to 350°F (175°C). Line an 8×8-inch baking pan with parchment paper, leaving some overhang on two sides. This is your lifesaver for lifting the whole slab of deliciousness out later for easy slicing. No wrestling with the pan!
- Make the Crust: In a medium bowl, stir the melted (and slightly cooled) butter, sugar, flour, and salt together. It’ll look a bit like wet sand—perfect! Dump it into your prepared pan and press it down firmly and evenly. I use the bottom of a measuring cup to really pack it in; a solid crust is key. Pop it in the oven and bake for 15-18 minutes, just until the edges are lightly golden. It will smell like buttery dreams. Let it cool on a rack while you make the filling.
- Create the Strawberry Heart: In a small saucepan, combine your chopped strawberries, jam, and cornstarch. Cook this over medium heat, stirring often, for about 5-7 minutes. You’ll see it go from juicy and loose to thickened and glossy. The strawberries will soften but still have some texture. Pro Tip: Give it a taste! Want it tangier? A tiny squeeze of lemon juice is magic here. Let it cool for a few minutes off the heat, then spread it evenly over your slightly warm crust.
- Blanket It in Chocolate: Now for the fun part. Melt your chocolate chips and coconut oil (or butter) together. You can do this in a bowl over a pot of simmering water (a double boiler) or in the microwave in 30-second bursts, stirring well between each. Stir until it’s velvety smooth. Pour this gorgeous chocolate over the strawberry layer and gently tilt the pan to spread it into an even, luxurious coat.
- The Final Chill: This is the test of patience! Carefully transfer the pan to the refrigerator. Let it chill for at least 2 hours, until the chocolate topping is completely set. I know, it’s hard to wait, but this ensures you get those clean, beautiful squares. For the cleanest slices, I sometimes even pop a hot knife into a glass of hot water, wipe it dry, and cut.
How to Serve These Show-Stopping Squares
Presentation is part of the fun! Once fully set, use the parchment paper overhang to lift the entire block onto a cutting board. Slice into 16 squares (or 9 for more generous portions—no judgment here!).
These bars are gorgeous all on their own, but a little flair never hurts. For a fancy touch, dust them with a light shower of powdered sugar just before serving. Want to echo the classic strawberry vibe? Place a tiny sliver of fresh strawberry or a single raspberry on top of each square. Serving them at a party? Stack them on a cake stand for a beautiful, approachable centerpiece. They’re perfect with a cup of coffee for an afternoon pick-me-up or as the grand finale to a casual dinner with friends. Store any leftovers (a rare occurrence!) in an airtight container in the fridge.
Make It Your Own: Delicious Twists & Swaps
The beauty of this recipe is its versatility. Play with these ideas and create your own signature bar!
- Nutty Crunch: Add ½ cup of finely chopped toasted pecans or almonds to the crust mixture before pressing it in.
- Berry Medley: Swap the strawberries for raspberries, blackberries, or a mix! The jam should match or complement your berry choice.
- White Chocolate Dream: Use high-quality white chocolate chips for the topping. It’s a stunning, sweeter contrast to the berry filling.
- “Cheesecake” Style: For an ultra-creamy layer, blend 4 oz of softened cream cheese into the strawberry filling after it has cooled slightly.
- Dairy-Free/Vegan: Use a plant-based butter, ensure your chocolate chips are dairy-free, and swap the jam for a vegan-friendly brand. It works like a charm!
Beau’s Bench Notes
This recipe has been a living, evolving thing in my kitchen. The first time I made the “official” version for Feastical, I was so nervous about the filling being too runny that I used *double* the cornstarch. Let’s just say we ended up with more of a strawberry paste layer—still tasty, but not the juicy vibe I wanted. It was a great reminder that cooking is about feel. Trust the process and trust your eyes: when the filling coats the back of a spoon and leaves a clear path when you run your finger through it, you’re golden.
Also, a confession: I am notoriously impatient with the chilling step. I’ve tried to slice these after only an hour, and let’s just say it was more of a “spoon dessert” than bar squares. The wait is worth it for those clean, Instagram-worthy slices. But if you dig in with a fork straight from the pan? I won’t tell a soul.
Your Questions, Answered
Q: Can I use frozen strawberries?
A: Absolutely! Thaw them completely first, and drain off ALL the excess liquid. You might even want to pat them dry with a paper towel. Using frozen berries with too much liquid will make your filling too runny.
Q: My chocolate topping cracked when I sliced. What happened?
A: This usually means the chocolate got too cold or hardened too quickly. Next time, try using butter instead of coconut oil, as it stays a bit more pliable when chilled. Also, let the bars sit at room temperature for 5-10 minutes before slicing, and use a hot, dry knife.
Q: Can I make these ahead of time?
A: They are the *perfect* make-ahead dessert! They keep beautifully in the fridge, tightly covered, for up to 4 days. The flavors even meld and get better.
Q: The crust seems too crumbly when I mix it. Did I do something wrong?
A> Nope, that’s exactly right! That sandy, crumbly texture is what gives us that delicate, shortbread-like base once it’s baked. Just be sure to press it very firmly into the pan.
Chocolate-Covered Strawberry Bar Squares : A Sweet & Simple Dessert Remix
Description
A buttery shortbread crust, jammy strawberry layer, and glossy chocolate topping — all the flavors of a classic chocolate-covered strawberry in easy sliceable bars.
Ingredients
For the Crust
-
1 cup (2 sticks) unsalted butter, melted
-
½ cup granulated sugar
-
2 cups all-purpose flour
-
¼ tsp salt
For the Strawberry Filling
-
1 ½ cups chopped fresh strawberries (or thawed, well-drained frozen)
-
2 tbsp strawberry jam
-
1 tsp cornstarch
For the Chocolate Topping
-
1 cup semi-sweet chocolate chips
-
1 tbsp coconut oil or butter
Instructions
1. Prepare the Pan
-
Preheat oven to 350°F (175°C).
-
Line an 8×8-inch pan with parchment paper, leaving overhang for easy lifting.
2. Make the Crust
-
In a bowl, mix melted butter, sugar, flour, and salt until sandy.
-
Press firmly and evenly into the pan.
-
Bake 15–18 minutes, until edges are lightly golden.
-
Cool slightly.
3. Make the Strawberry Filling
-
In a small saucepan, combine strawberries, jam, and cornstarch.
-
Cook on medium heat 5–7 minutes, stirring, until thickened and glossy.
-
Let cool slightly, then spread over the warm crust.
4. Add the Chocolate Layer
-
Melt chocolate chips with coconut oil or butter (microwave in 30-second intervals or double boiler).
-
Stir until smooth.
-
Pour over strawberry layer and spread evenly.
5. Chill
-
Refrigerate for at least 2 hours, or until fully set.
-
Lift out using parchment and slice into squares.
Notes
-
Let the chocolate sit at room temp 5–10 minutes before cutting to prevent cracking.
-
Press the crust firmly — loose crust = crumbly slices.
-
For cleaner slices, heat your knife in hot water and dry between cuts.
Nutritional Information*
*Please note: This is an estimate provided for informational purposes. For precise dietary calculations, use your preferred nutrition calculator with the exact brands and quantities you use.
- Prep Time: 15 minutes
- Cook Time: 20 minutes
- Chill Time: 2 hours
- Total Time: 2 hours 35 minutes
- Servings: 16 squares
Per Square (approximate): ~210 calories, 12g fat (7g saturated fat), 25g carbohydrates, 1g fiber, 15g sugar, 2g protein.
One Last Sweet Thought…
And there you have it—my heartfelt homage to the chocolate-covered strawberry, reimagined for lazy Sundays, last-minute gatherings, and everything in between. What I love most about this recipe is how it turns a few simple, humble ingredients into something that feels truly special. It’s a reminder that great food doesn’t have to be complicated; it just has to be made with a little bit of joy.
I hope these bars find their way into your kitchen and become a part of your own story—the treat you make for a friend who needs cheering up, the sweet secret you keep in the back of the fridge, or the dessert that makes a regular Tuesday feel a little festive. If you make them, I’d love to hear about it! Tag me over on social or drop a comment on the blog. Now, go enjoy the fruits (and chocolate) of your labor. Happy baking!
With flavor,
Beau