
Chocolate-Covered Cherry Cake: Your New Favorite Slice of Nostalgia
Hey there, friend! Beau here, welcoming you back to my kitchen. You know, I’ve always believed that the very best recipes are the ones that do more than just fill your belly—they fill your heart. They’re the dishes that transport you with a single bite, wrapping you up in a warm, fuzzy blanket of memory and pure, unadulterated joy. And if I had to pick one dessert that absolutely *nails* that feeling, it would be this show-stopping, soul-soothing, downright decadent Chocolate-Covered Cherry Cake.
Think about it: that classic candy combination is iconic for a reason. The deep, dark chocolate. The bright, juicy burst of cherry. It’s a romance in flavor form. But we’re not just making a candy replica here. Oh no. We’re taking that beloved duo and turning it into a full-blown, three-layer celebration cake that’s as beautiful as it is delicious. This is the kind of cake you make for Valentine’s Day to see your sweetheart’s eyes light up. It’s the cake you bake for an anniversary, a birthday, or just a Tuesday when you need a reminder that life is sweet.
I’ve poured all my love for feel-good, comforting desserts into this recipe. We’re talking about a supremely moist and tender chocolate cake that practically melts on your tongue, layered with a sweet-tart cherry filling that oozes with every slice, all wrapped up in a silky-smooth dark chocolate frosting that’s so good, you might just find yourself eating it by the spoonful. (No judgment here—I’ve been there!) So, tie on your favorite apron, put on some good music, and let’s create some magic together. This is more than a cake; it’s an experience.
A Sweet Memory: Where It All Began
This cake has a special little story, and it takes me right back to my grandma’s linoleum-floored kitchen. Every Sunday after church, without fail, she’d have a little glass bowl on her counter filled with those classic, foil-wrapped chocolate-covered cherries. It was our ritual. I’d help her with the roast, and my reward was sneaking one (or two) of those precious treats. I loved the way the chocolate shell would crack under the slightest pressure, giving way to that liquid cherry center. It felt like a tiny, delicious secret.
Years later, when I was first finding my footing in the kitchen, I wanted to recreate that feeling for my wife on our first Valentine’s Day as a married couple. A simple box of candies felt too small for the occasion, but the memory was too big to ignore. So, I started experimenting. I baked my go-to chocolate cake, whipped up a frosting I hoped was worthy of the name, and spooned a simple cherry filling between the layers. The moment we cut into it, that cherry goodness started to spill out, and I was instantly transported back to those sunny Sunday afternoons. It was a hit, and it’s been a Collier family legend ever since. It just goes to show that the most powerful ingredient in any dish is always a dash of nostalgia.
Gathering Your Delicious Cast of Characters
Alright, let’s get our mise en place! That’s just a fancy chef-term for getting all your ingredients measured and ready to go. It makes the baking process feel like a calm, organized dance instead of a frantic scavenger hunt. Here’s everything you’ll need to bring this beauty to life.
For the Chocolate Cake:
- 1¾ cups all-purpose flour: The trusty foundation of our cake. For a slightly lighter crumb, you can swap it 1:1 with cake flour.
- ¾ cup unsweetened cocoa powder: This is where the deep chocolate flavor lives! Use a good-quality cocoa powder—I prefer Dutch-processed for its rich, mellow flavor, but natural works great, too.
- 2 cups granulated sugar: For the perfect level of sweetness that balances the cocoa’s bitterness.
- 1½ teaspoons baking powder & 1½ teaspoons baking soda: Our dynamic leavening duo! They work together to give this cake its impressive rise and tender texture.
- 1 teaspoon salt: Never skip the salt! It’s the flavor enhancer that makes all the chocolate and cherry notes pop.
- 2 large eggs: They’re the binding agents that give our cake structure and a lovely, rich texture.
- 1 cup buttermilk: The secret weapon for an incredibly moist and tender crumb! No buttermilk? No problem! Make a quick substitute by adding 1 tablespoon of white vinegar or lemon juice to a cup of regular milk and let it sit for 5 minutes.
- ½ cup vegetable oil: Oil keeps the cake moist for days longer than butter-based cakes. I use a neutral oil like canola or grapeseed.
- 2 teaspoons vanilla extract: The aromatic backbone that makes everything taste more… well, more like itself!
- 1 cup hot water or hot coffee: Now, don’t be scared! The hot liquid “blooms” the cocoa powder, intensifying its chocolate flavor. The coffee won’t make it taste like coffee—it just makes the chocolate taste richer and deeper. I highly recommend it!
For the Luscious Cherry Filling:
- 1 can (21 oz) cherry pie filling: This is our convenient, flavor-packed shortcut! It’s got the perfect balance of cherries and thick, glossy sauce.
- Optional: A splash of almond extract: If you really want to level up, add about ¼ to ½ teaspoon. Almond and cherry are a match made in heaven, and it echoes that classic candy flavor beautifully.
For the Silky Chocolate Frosting:
- 1 cup (2 sticks) unsalted butter, softened: The base of our frosting. “Softened” is key! It should be at room temperature so it whips up light and fluffy.
- ¾ cup unsweetened cocoa powder: Double the chocolate, double the fun!
- 3½ cups powdered sugar: This gives the frosting its structure and sweetness. Sift it if it’s lumpy for an extra-smooth finish.
- ¼ cup heavy cream: This creates that luxurious, silky texture. You can use milk, but the cream gives it a richer, more stable consistency.
- 1 teaspoon vanilla extract: Because even frosting needs a little vanilla love.
- A pinch of salt: To cut through the sweetness and balance everything out.
Let’s Bake: The Step-by-Step Magic
Ready to get your hands dirty? Follow these steps, and you’ll have a stunning, professional-looking cake that’s straight from the heart. I’ve sprinkled in my favorite chef hacks to make sure you feel confident every step of the way.
Step 1: Preheat and Prep. First things first, get that oven preheating to a toasty 350°F (175°C). Now, let’s get our cake pans ready. You’ll need three 8-inch round pans. My foolproof method? I trace the bottom of a pan on parchment paper, cut out the circles, and place them in the bottom of the pans. Then, I give the sides a good coating of butter or baking spray and a light dusting of flour or cocoa powder. This little ritual guarantees your cakes will release perfectly every single time. No more cake-wrecking heartbreaks!
Step 2: The Dry Team Assembles. In the bowl of your stand mixer (or a large bowl if you’re using a hand mixer), we’re going to whisk together all our dry ingredients: the flour, cocoa powder, sugar, baking powder, baking soda, and salt. Give them a good whisk for about a minute. This isn’t just about combining; it’s about aerating the flour and making sure those leaveners are evenly distributed for a uniform rise. See? We’re already building a better cake.
Step 3: Bring in the Wet Crew. Now, with your mixer on low speed, add in the eggs, one at a time, followed by the buttermilk, vegetable oil, and vanilla extract. Mix just until everything is combined. The batter will be lovely and thick at this point. Now, here comes the fun part. Slowly pour in the hot water or coffee. The batter will become very thin and liquidy—this is totally normal and exactly what we want! Don’t panic. This thin batter is the secret to that incredibly moist, almost fudgy crumb.
Step 4: Bake to Perfection. Carefully divide the batter evenly between your three prepared pans. I like to use a kitchen scale for ultimate precision, but if you don’t have one, a measuring cup works just fine. Slide them into your preheated oven and bake for 30-35 minutes. You’ll know they’re done when a toothpick inserted into the center comes out with a few moist crumbs attached, but no wet batter. Chef’s Hack: Rotate your pans halfway through baking to ensure they bake evenly.
Step 5: The All-Important Cool Down. This might be the hardest step: you have to let the cakes cool. Take them out of the oven and let them rest in their pans for about 10 minutes. Then, run a knife around the edge, and invert them onto a wire rack to cool completely. I’m serious about completely cool. If you try to frost a warm cake, you’ll have a melty, sliding mess on your hands. Patience is a virtue, especially in baking!
Step 6: Whip Up That Dreamy Frosting. While the cakes are cooling, let’s make the frosting. In a large bowl, beat the softened butter and cocoa powder together until they’re smooth and combined. Gradually add in the powdered sugar, about a cup at a time, alternating with splashes of the heavy cream and the vanilla. Once it’s all in, beat the living daylights out of it on medium-high speed for 2-3 minutes. You’ll see it transform from a dull brown to a lighter, fluffier, and much more spreadable frosting. That beating incorporates air, making it light as a cloud.
Step 7: The Grand Assembly! Place your first cake layer on your cake stand or plate. Spoon about half of the cherry pie filling onto the center and spread it out evenly, leaving about a half-inch border around the edge. This prevents the filling from squishing out when you add the next layer. Place the second cake layer on top and repeat with the remaining filling. Top with the final cake layer. Now, take about a third of your frosting and do a “crumb coat”—a very thin layer all over the cake to seal in any crumbs. Pop the whole thing in the fridge for 15 minutes to set. Then, use the remaining frosting to beautifully cover the top and sides of the cake. Don’t worry about it being perfect—a few swoops and swirls just add to the homemade charm!
How to Serve This Masterpiece
Presentation is the final flourish! I love to garnish this cake with a few simple touches that make it look like it came straight from a patisserie. A crown of fresh, stem-on cherries on top is always a showstopper. You could also sprinkle the top with some chocolate shavings, a dusting of cocoa powder, or even a few slivered almonds for a little crunch that plays off that optional almond extract.
When it’s time to slice, use a sharp, thin-bladed knife. Run it under hot water, wipe it dry, and then make your cut. The heat will glide right through the chocolate frosting and cleanly into the cake, giving you those picture-perfect slices where the cherry layer is proudly on display. Serve it up with a cold glass of milk, a hot cup of coffee, or even a glass of red wine for the ultimate grown-up treat. This cake is rich, so a little slice goes a long, delicious way.
Make It Your Own: Fun Recipe Twists
One of the best things about cooking is making a recipe your own. Feel free to play with this one! Here are a few of my favorite variations:
- The Black Forest Twist: Add a layer of sweetened whipped cream on top of the cherry filling before adding the next cake layer. Garnish with more whipped cream and chocolate curls for a classic Black Forest gateau vibe.
- Boozy & Bold: For an adult-only version, add a tablespoon of Kirsch (cherry liqueur) or Chambord (black raspberry liqueur) to the cherry filling. You can also brush a little on the cake layers themselves for an extra flavor punch.
- Chocolate Ganache Drip: Feeling extra decadent? Instead of frosting the entire cake, do a simple crumb coat, then pour a warm, glossy chocolate ganache over the top, letting it drip artfully down the sides. It’s pure drama.
- Gluten-Free Friendly: You can easily make this cake gluten-free by using a 1:1 gluten-free all-purpose flour blend. I’ve had great success with this swap, and the cake is just as moist and delicious.
- Fresh Cherry Filling: If you have the time and fresh cherries are in season, you can make a homemade filling. Pit about 2 cups of cherries, cook them down with a little sugar and lemon juice until syrupy, and thicken with a cornstarch slurry.
Beau’s Kitchen Confidential
This recipe has been a living, evolving thing in my kitchen for years. The first time I made it, I was so nervous about the thin batter that I almost added more flour! I’m so glad I trusted the process. Over time, I started adding the hot coffee instead of water, and it was a total game-changer. The depth of flavor it adds is incredible.
Another funny story: I once made this for a potluck and transported it in my car. I had to brake a little hard, and the top layer slid right off! I arrived with a slightly lopsided cake, which I quickly dubbed my “Leaning Tower of Yum-za.” You know what? It was the first cake to disappear. It just goes to show that even the “imperfect” bakes are full of perfect flavor and love. Don’t stress about it being flawless. The love you bake into it is the most important ingredient.
Print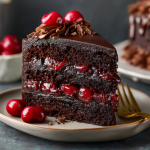
Chocolate-Covered Cherry Cake: Decadent, Dreamy, and Full of Nostalgia
Description
Chocolate-Covered Cherry Cake
Ingredients
For the Cake
-
1 box devil’s food cake mix (15.25 oz)
-
1 can cherry pie filling (21 oz)
-
3 large eggs
-
1 teaspoon almond extract (optional but amazing)
For the Chocolate Ganache Frosting
-
1 cup semi-sweet chocolate chips
-
½ cup heavy cream
-
2 tablespoons unsalted butter
-
1 teaspoon vanilla extract
For Topping (Optional but Delicious)
-
Fresh cherries or maraschino cherries for garnish
-
Chocolate shavings or curls
Instructions
1️⃣ Make the Cake
-
Preheat oven to 350°F (175°C). Grease and flour a 9×13-inch baking pan (or line with parchment).
-
In a large mixing bowl, combine the cake mix, cherry pie filling, eggs, and almond extract.
-
Mix gently by hand or with a spatula until combined — don’t overmix! You want to keep the cherries intact.
-
Pour batter into the prepared pan and spread evenly.
-
Bake for 30–35 minutes or until a toothpick inserted in the center comes out clean.
-
Let the cake cool completely in the pan.
2️⃣ Make the Ganache
-
In a small saucepan over low heat, warm the heavy cream just until it starts to steam — don’t boil.
-
Remove from heat and add chocolate chips and butter. Let sit for 1–2 minutes.
-
Whisk until smooth and glossy. Stir in vanilla extract.
-
Allow the ganache to cool slightly (about 10 minutes) until it thickens enough to spread.
3️⃣ Frost and Finish
-
Spread ganache evenly over the cooled cake.
-
Chill in the fridge for about 20 minutes to set the chocolate.
-
Garnish with cherries and chocolate shavings if desired.
-
Slice and serve!
Storage
-
Store covered in the refrigerator for up to 5 days.
-
For longer storage, freeze individual slices for up to 2 months — thaw before serving.
Notes
-
Add a splash of coffee (2 tablespoons) to the batter for a richer chocolate flavor.
-
For an extra cherry punch, drizzle a little cherry juice from the pie filling over the cake before frosting.
-
You can also bake it in two 9-inch round pans for a layer cake look.
Your Questions, Answered!
I’ve gotten a lot of questions about this cake over the years, so I’ve compiled the most common ones here to help you out.
Q: My cake layers sunk in the middle. What happened?
A: This is usually a sign of too much leavening or under-baking. Make sure your baking powder and soda are fresh! Also, resist the urge to open the oven door during the first 25 minutes of baking, as a rush of cold air can cause the cake to fall. Finally, make sure that toothpick test comes out clean.
Q: Can I make this cake ahead of time?
A: Absolutely! You can bake the cake layers up to two days in advance. Let them cool completely, then wrap them tightly in plastic wrap and store them at room temperature. You can also freeze them for up to a month. The frosting can be made a day ahead and stored in the fridge; just let it come to room temperature and re-whip it before using. I prefer to assemble the cake the day I’m serving it for the freshest taste and texture.
Q: My frosting is too thick/too thin. How can I fix it?
A: Frosting is all about texture. If it’s too thick and difficult to spread, beat in another tablespoon or two of heavy cream. If it’s too thin and runny, you likely need to add a bit more powdered sugar. Add it a quarter cup at a time until it reaches your
Final Thoughts: A Cake That Feels Like Home
So, there you have it. This Chocolate-Covered Cherry Cake is more than just a list of ingredients and steps—it’s a passport to a sweeter, simpler time. It’s the taste of a cherished memory, baked into a form you can share with the people you love most. Whether you’re celebrating a milestone or simply celebrating the fact that you made it through another week, this cake turns an ordinary moment into something extraordinary.
Don’t be intimidated by its stunning appearance. Every step, from the surprisingly thin batter to the final flourish of frosting, is designed with heart and home bakers in mind. Trust the process, embrace any happy little accidents (like my famous “Leaning Tower of Yum-za”), and remember that the warmth and love you pour into it are what truly make it special.
So, go ahead. Preheat that oven. Fill your kitchen with the unforgettable aroma of chocolate and nostalgia. I have a feeling that after one bite, this won’t just be a recipe you tried—it will become a new tradition, a story you’ll tell, and your new favorite slice of nostalgia.
Happy Baking,
Beau