Cheesecake Dip: Your New Go-To No-Bake Dessert (Seriously, It’s Magic)
Forget the Oven, Let’s Talk Dip
Hey friends, Beau here! Let’s be real for a second. Is there anything more universally loved than a thick, creamy slice of cheesecake? That rich, tangy cream cheese filling, the buttery crumb crust, the sweet burst of a berry topping… it’s pure dessert heaven. But sometimes, heaven requires a whole lot of patience, a water bath, and the constant, nail-biting worry of a cracked top. I don’t know about you, but my cravings rarely have that kind of time.
That’s exactly why I’m so obsessed with this little miracle we’re making today: No-Bake Cheesecake Dip. This is everything you adore about classic cheesecake, transformed into a creamy, dreamy, dippable cloud of joy. Imagine all the flavor, whipped up in about ten minutes flat, with zero baking required. It’s the ultimate party hero, a weeknight treat savior, and the answer to that “I need something sweet, stat!” feeling we all get.
Whether you’re hosting a game-day gathering, a last-minute potluck, or just having a cozy movie night on the couch, this dip is your secret weapon. It’s impossibly easy, endlessly customizable, and guaranteed to have everyone hovering around the bowl, graham cracker in hand, asking for the recipe. So, let’s ditch the complicated steps and dive into the easiest, most satisfying dessert you’ll make all year.
The “Aha!” Moment That Started It All
This recipe has a special place in my heart because it was born from a near-disaster. Picture this: It’s my niece’s birthday party, and I, the “chef uncle,” had proudly promised a towering, beautiful New York-style cheesecake. I had it all planned out. But as fate would have it, my oven decided to call it quits that very morning. There I was, staring at a bowl of perfectly mixed filling with no way to bake it.
Panic set in for about thirty seconds. Then, my kitchen instincts kicked in. I looked at that creamy base, looked at the whipping cream sitting in my fridge, and had a thought: “What if I just… lighten this whole thing up and call it a dip?” I folded the whipped cream into the cheesecake filling, poured it into a big dish, and surrounded it with every dippable thing I could find—strawberries, pretzels, cookies. I presented it with a sheepish grin, calling it my “Deconstructed Cheesecake Dip.”
Friends, it was a bigger hit than the fancy cheesecake ever would have been. The kids loved the fun, interactive element, and the adults appreciated how light and refreshing it was. It was a beautiful reminder that sometimes the best recipes aren’t born from perfection, but from a little bit of chaos and a whole lot of creativity.
Gathering Your Dream Team: The Ingredients
One of the best things about this recipe is its beautiful simplicity. You only need a handful of pantry staples to create pure magic. Here’s the lineup and my little chef insights for each one.
- 8 oz Cream Cheese, softened: This is the star of the show, providing that classic, tangy cheesecake flavor and a lusciously thick base. Chef’s Tip: Softening your cream cheese is non-negotiable! Take it out of the fridge at least 30-60 minutes before you start. If it’s still cool, you’ll end up with a lumpy dip. For a quick fix, you can microwave it on low power for 10-15 seconds, but be careful not to melt it!
- 1 cup Powdered Sugar: We use powdered sugar instead of granulated for a reason. It dissolves instantly into the cream cheese, giving us a perfectly smooth texture without any grittiness. It also helps thicken the dip beautifully.
- 1 tsp Vanilla Extract: A splash of pure vanilla extract adds a warm, aromatic depth that makes the whole dip taste more complex and homemade. Don’t skip it!
- 1 cup Heavy Whipping Cream: This is our magic wand for creating that light, airy, mousse-like texture. When whipped, it folds into the cream cheese base and makes the entire dip fluffy and cloud-like. Substitution Tip: If you’re in a pinch, you can use 1 ½ cups of frozen whipped topping (like Cool Whip), thawed. The texture will be slightly different, but it’s still delicious!
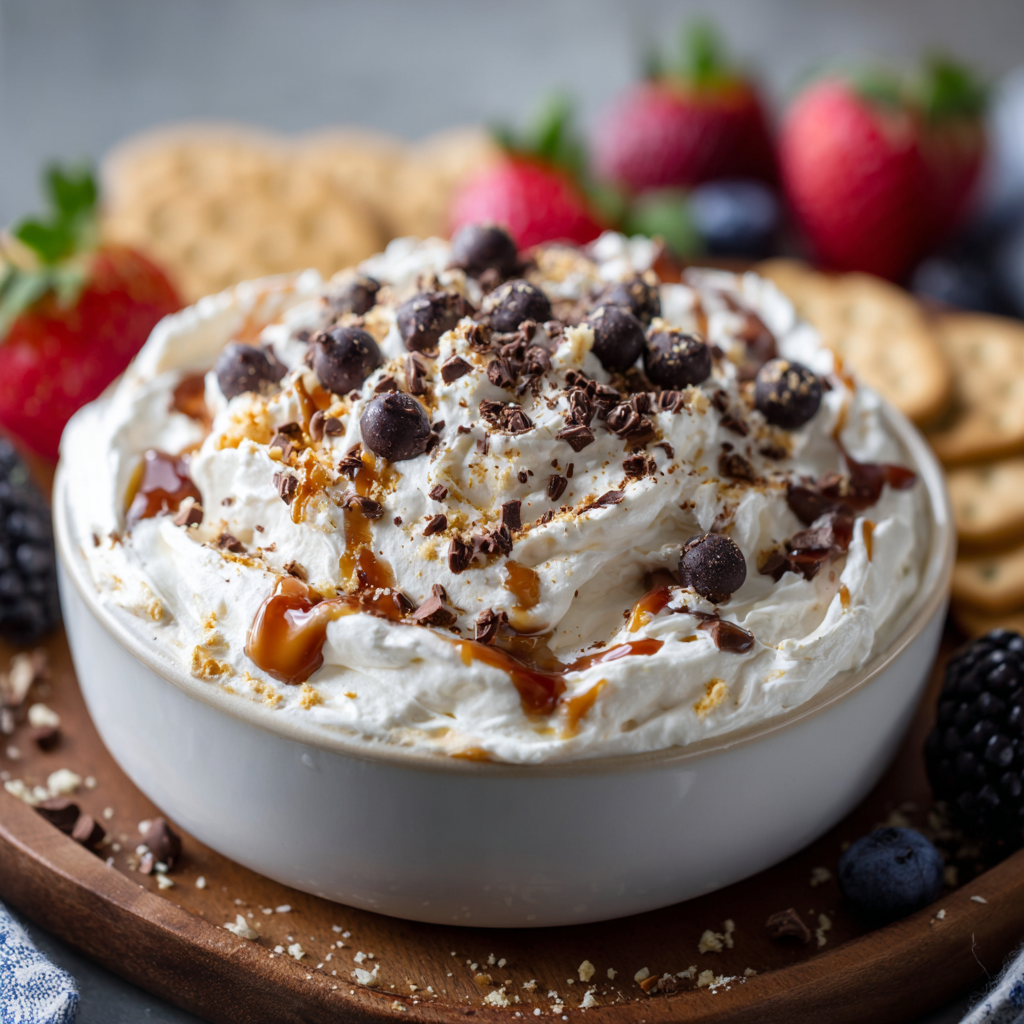
- Your Favorite Toppings & Dippers: This is where you get to be an artist! I love a mix of mini chocolate chips, crushed graham crackers, a drizzle of caramel or strawberry sauce, and a pile of fresh berries. For dipping, grab graham crackers (a classic!), vanilla wafers, pretzel rods (for that sweet & salty kick!), apple slices, or sturdy cookies.
Let’s Get Whipping: Your Foolproof Steps
Ready to see how quickly this comes together? Follow these steps, and you’ll be a dip-making pro in no time. I’ve sprinkled in my favorite hacks to make it even easier.
- Beat the Cream Cheese Until Smooth. Add your beautifully softened cream cheese to a large mixing bowl. Using a hand mixer or a stand mixer fitted with the paddle attachment, beat it on medium speed for about 1-2 minutes until it’s completely smooth, creamy, and free of any lumps. Chef’s Hack: Scrape down the sides and bottom of the bowl with a spatula halfway through to ensure every bit gets perfectly creamy.
- Incorporate the Sweetness. Now, add the powdered sugar and vanilla extract to the bowl with the cream cheese. Start mixing on low speed initially to avoid a powdery cloud, then increase to medium-high and beat for another 1-2 minutes. You’re looking for a pale, smooth, and well-combined mixture. Give it another good scrape down the bowl to make sure everything is incorporated.
- Whip the Cream to Stiff Peaks. Here’s a crucial step! In a separate, clean, and completely dry mixing bowl, pour in your cold heavy whipping cream. Using a whisk attachment or clean beaters, whip the cream on medium-high speed until stiff peaks form. What does that mean? When you lift the beaters out of the bowl, the peak of cream should stand straight up and not droop over. Pro Tip: A cold bowl and beaters help the cream whip up faster and higher. I sometimes pop my bowl in the freezer for 10 minutes before I start.
- The Gentle Fold. This is where we bring it all together. Take about one-third of your whipped cream and add it to the cream cheese mixture. Use a spatula to gently fold it in. This means you’re cutting through the center, sliding along the bottom of the bowl, and folding the mixture over on itself. This initial addition helps lighten the thick cream cheese base. Once that’s incorporated, gently fold in the remaining whipped cream until no white streaks remain. Be patient and gentle—you want to keep all that lovely air you whipped into the cream!
- Chill and Serve! Spoon your glorious, fluffy cheesecake dip into a serving bowl. You can enjoy it immediately, but for the best, firmest texture, I highly recommend covering it and popping it in the fridge for at least 15-30 minutes. This gives the flavors a chance to meld and the dip to set up perfectly.
Plating Up the Fun: How to Serve Your Masterpiece
Presentation is half the fun with a dip like this! You can keep it super simple with just one big bowl in the center of the table, but if you want to really wow your guests, let’s get creative.
I love using a wide, shallow bowl or a rustic wooden board. Pour the dip into the bowl and create a beautiful “topping bar” around it. Think of it like a sundae bar, but for cheesecake! Place little bowls filled with different toppings: one with fresh raspberries and blueberries, another with mini chocolate chips and sprinkles, a small jar of hot fudge sauce, and a pile of crushed Oreos. This lets everyone customize their perfect bite.
For the dippers, arrange them artfully around the board or on a separate platter. Create a variety of textures and flavors: the crunch of graham crackers, the tartness of green apple slices, the saltiness of pretzel rods, and the buttery goodness of shortbread cookies. The contrast is what makes every single bite exciting!
Make It Your Own: Endless Flavor Twists
The basic recipe is a perfect canvas for your culinary creativity. Once you’ve mastered the classic, try one of these delicious variations!
- Lemon Berry Bliss: Add the zest of one lemon and a tablespoon of fresh lemon juice to the cream cheese mixture. Top the finished dip with a swirl of homemade or store-bought blueberry or raspberry preserves.
- Salted Caramel Pretzel Crunch: Fold ½ cup of crushed pretzels right into the dip for a salty crunch. Drizzle the top generously with caramel sauce and finish with an extra sprinkle of flaky sea salt.
- Chocolate Lover’s Dream: Sift ¼ cup of unsweetened cocoa powder in with the powdered sugar. You might need an extra tablespoon or two of powdered sugar to balance the bitterness. Fold in mini chocolate chips and top with chocolate shavings.
- Pumpkin Spice Delight: Perfect for fall! Fold ½ cup of pure pumpkin puree and 1 ½ teaspoons of pumpkin pie spice into the cream cheese mixture. Top with crushed gingersnaps for dipping.
- Lighter Option: For a slightly lighter version, you can use Neufchâtel cheese (the 1/3 less fat cream cheese) and swap the heavy cream for the whipped topping alternative. The flavor is still fantastic!
Beau’s Back-Pocket Tips & Stories
This recipe has become such a staple in my home that I’ve lost count of how many times I’ve made it. It’s evolved from that initial “oven failure” rescue into my most-requested party dish. One of my favorite memories is making a giant batch for a summer picnic and watching a group of kids completely ignore the cupcakes in favor of this dip—they were using giant strawberry slices as spoons, and it was the cutest thing I’ve ever seen.
My biggest piece of advice? Don’t be afraid to experiment. I once added a tablespoon of instant espresso powder for a tiramisu-inspired version, and it was a total game-changer. This dip is forgiving, fun, and meant to be played with. Make it once as written, then let your cravings guide you on the next one!
Your Questions, Answered!
I’ve gotten a lot of questions about this dip over the years, so I’ve compiled the most common ones here to help you out.
- My dip is lumpy. What happened? This almost always means your cream cheese wasn’t soft enough. Next time, make sure it’s truly at room temperature. If you’re stuck with a lumpy dip, you can try pressing it through a fine-mesh sieve—it’s a bit of a hassle, but it can save the batch!
- Can I make this ahead of time? Absolutely! This dip is a fantastic make-ahead dessert. Prepare it up to 24 hours in advance, cover tightly, and store in the fridge. I’d recommend adding any crunchy toppings (like graham crackers or pretzels) right before serving so they don’t get soggy.
- Why did my dip get watery? If your whipped cream was slightly over-whipped and starting to break (turning into butter), it can release liquid. Also, if you’re using fruit toppings that are very juicy, that liquid can seep into the dip. Always pat fresh fruit dry and add juicy toppings just before serving.
- Can I freeze cheesecake dip? I don’t recommend it. The texture of the dairy changes dramatically when frozen and thawed, becoming grainy and separated. It’s best enjoyed fresh from the fridge.

Cheesecake Dip : Creamy No-Bake Dessert Dip with Endless Toppings
Description
No-Bake Cheesecake Dip
Creamy, fluffy, and irresistible—your new go-to dessert in under 10 minutes!
Prep Time: 10 min | Chill Time: 15–30 min (optional) | Servings: 8
Ingredients
-
8 oz cream cheese, softened
-
1 cup powdered sugar
-
1 tsp vanilla extract
-
1 cup heavy whipping cream
-
Toppings & dippers (suggestions): graham crackers, vanilla wafers, pretzels, cookies, fresh berries, chocolate chips, caramel or fruit sauce
Instructions
-
Beat cream cheese: In a large bowl, beat softened cream cheese on medium speed until smooth and lump-free (1–2 min). Scrape down sides.
-
Add sugar & vanilla: Mix in powdered sugar and vanilla extract, starting on low speed, then medium-high until fully combined (1–2 min).
-
Whip cream: In a separate cold bowl, whip heavy cream to stiff peaks. Lift beaters—peaks should stand straight.
-
Fold cream into cream cheese: Fold one-third of whipped cream into cream cheese mixture gently. Then fold in the remaining whipped cream until smooth and airy.
-
Chill & serve: Transfer dip to a serving bowl. Chill 15–30 minutes for firmer texture. Serve with dippers and toppings.
Notes
-
Avoid lumps: Always use fully softened cream cheese.
-
Over-whipped cream: Stop as soon as stiff peaks form; over-whipping can release liquid.
-
Make ahead: Prep up to 24 hours in advance; add crunchy toppings right before serving.
-
Freezing: Not recommended—texture changes dramatically.
Nutrition
- Calories: 210 Cal Per Serving
- Fat: 16g
- Carbohydrates: 15g
- Protein: 2g
A Quick Peek at the Nutrition
Now, let’s be clear—this is a dessert, and a decadent one at that! But I believe all foods can fit into a happy, balanced life. Here’s a general breakdown per serving (based on 8 servings without additional toppings). Remember, this is an estimate and can vary based on your specific ingredients and substitutions.
- Calories: ~210
- Carbohydrates: ~15g
- Protein: ~2g
- Fat: ~16g
To lighten it up, see the variation above using Neufchâtel and whipped topping. You can also focus on serving it with fresh fruit dippers like berries and apple slices to add fiber and nutrients to your dessert. It’s all about balance and enjoyment!
Final Thoughts Whip, Dip, and Enjoy!
And there you have it, my friends—the incredible, no-fuss, always-impressive Cheesecake Dip. It’s more than just a recipe; it’s a reminder that the best food is often the simplest, the most shareable, and the most fun. It’s about gathering people around a bowl, sharing stories, and creating those little moments of joy that stick with you long after the last bite is gone.
I hope this recipe becomes a trusted favorite in your kitchen, just like it is in mine. It’s proof that you don’t need fancy equipment or complicated techniques to make something truly special. So, what are you waiting for? Grab your mixer, whip up a batch, and get ready for the compliments to roll in.
I’d love to hear how you make it your own! Tag me @Feastical on social media or drop a comment on the blog with your favorite flavor twists. Happy dipping!
With a full heart and a happy spoon,
Beau