Cheeseburger Tots: Your New Secret Weapon for Game Day & Gatherings
Hey friends, Beau here! Let’s cut straight to the chase: if you’re looking for a recipe that will disappear faster than you can say “more, please,” you’ve just hit the jackpot. Today, we’re taking a deep dive into one of my all-time favorite crowd-pleasers – Cheeseburger Tots. Imagine everything you adore about a perfectly messy, cheese-dripping, pickle-topped burger, but transformed into a crispy, poppable, finger-food masterpiece. That’s exactly what we’re creating.
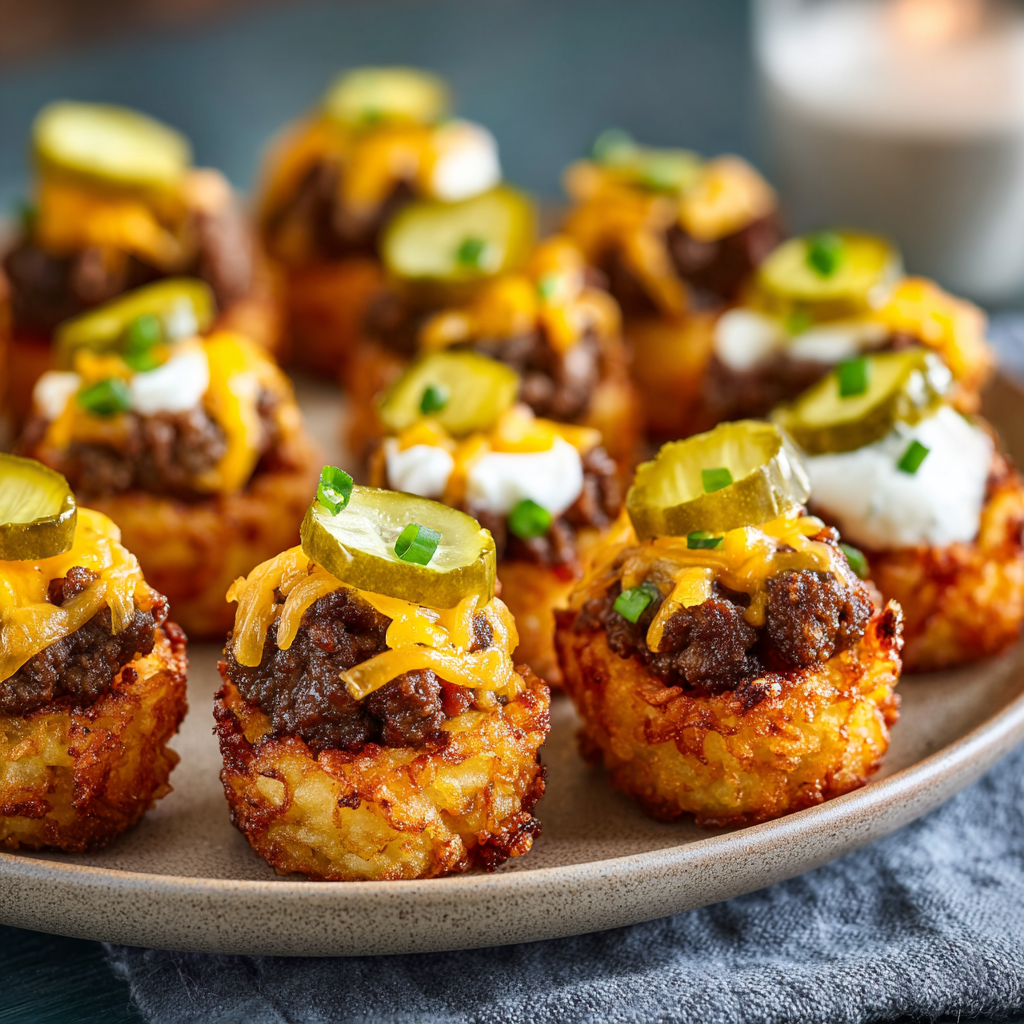
These aren’t just another appetizer; they’re a conversation starter. They’re the dish that makes people hover around the oven, asking “Are they ready yet?” They’re the reason your party suddenly gets a whole lot louder and happier. The beauty of this recipe lies in its brilliant simplicity. We’re using a genius shortcut (hello, frozen tater tots!) to create edible little cups, then loading them up with savory, seasoned beef and a mountain of melty cheddar. A tangy pickle and a drizzle of special sauce finishes the whole delicious deal.
Whether you’re gearing up for the big game, hosting a casual backyard bash, or just want to turn Tuesday night dinner into a fun family affair, these Cheeseburger Tots deliver every single time. They’re approachable for kitchen newbies and impressive enough for seasoned cooks. So, preheat that oven, grab your favorite mini muffin tin, and let’s make some magic happen. Get ready for the ultimate crispy, cheesy, and totally addictive party bite!
The Game Day Lightbulb Moment
I have to be honest, this recipe was born from a bit of kitchen chaos and a serious craving. Picture this: It’s a quintessential autumn Sunday. My living room is packed with friends, all yelling at the TV, and my spread of usual game day snacks—wings, dips, chips—is starting to feel… predictable. I wanted something that captured the essence of classic game-day food but in a new, fun format. I also had a serious hankering for a cheeseburger but didn’t want to fire up the grill for just one.
Staring into my freezer, I saw a bag of tater tots. In my pantry, a sack of potatoes. (The eternal debate: shortcut or scratch? For speed and consistent crispiness, the tots won that day.) The idea just clicked. What if the tots were the bun? A crispy, potato-y vessel for all my favorite burger fixings? One experimental batch later, covered in melted cheese and a mess of burger sauce, and my friends declared them an instant legend. Now, they’re not just a recipe; they’re a ritual. No game day, no gathering, is complete without a tray of these golden, cheesy bites. They’re my edible memory of laughter, friendly rivalry, and the simple joy of really, really good food.
Gathering Your Flavor Squad: Ingredients & Chef Insights
Here’s the beautiful part: this recipe requires no fancy, hard-to-find ingredients. It’s all about taking simple, beloved components and assembling them with love and a few pro tips. Let’s break it down.
- 1 (32 oz) bag frozen tater tots: This is our foundation and brilliant shortcut. They bake into the perfect crispy cup. Chef’s Insight: Don’t thaw them! Straight from the freezer is best for structure. For a from-scratch version, you can use finely shredded russet potatoes, squeezed very dry, but for ease and consistency, frozen is my game-day MVP.
- 1 lb ground beef (80/20 blend recommended): The star of our burger filling. The 80/20 blend has enough fat to stay juicy and flavorful after baking. Substitution Tip: Ground turkey, chicken, or even a plant-based ground “meat” work wonderfully here. Just make sure to season well and add a touch of olive oil if using a very lean protein.
- 1/2 cup diced yellow onion: Sweetness and texture. We cook it right with the beef. Chef’s Insight: If you have an onion-hater in the crowd, you can grate it on a microplane. It will practically dissolve into the beef, adding flavor without detectable texture.
- 1 cup shredded sharp cheddar cheese: The glorious, melty glue. Pro Tip: Shred your own cheese from a block! Pre-shredded cheese contains anti-caking agents that can make it less melty and smooth. The extra minute of shredding makes a world of difference in that gooey factor.
- Dill pickle slices (for topping): The essential tangy, crunchy finish. I use classic hamburger dill chips. Fun Twist: Try spicy pickles, bread & butter chips for a sweet touch, or even a tiny spoonful of relish mixed into the beef filling.
- Burger sauce or Thousand Island dressing (for drizzle): The “special sauce” that ties it all together. Quick Hack: Make your own by mixing 1/2 cup mayo, 2 tbsp ketchup, 1 tbsp sweet pickle relish, 1 tsp white vinegar, and a pinch of paprika, garlic powder, and onion powder.
- Salt & freshly cracked black pepper to taste: Never underestimate the power of proper seasoning. Season your beef mixture generously.
- Nonstick cooking spray: Crucial for easy removal. Give that muffin tin a good spritz!
Let’s Build These Bite-Sized Burgers: Step-by-Step
Alright, team. Let’s get our hands (figuratively) dirty. Follow these steps, and you’ll have a tray of golden perfection in no time. I’m sprinkling in my favorite kitchen hacks along the way.
- Heat Things Up & Prep Your Pan: Crank your oven to 425°F (220°C). This high heat is key for maximum crispiness. While it warms, generously spray your mini muffin tin with nonstick spray. Don’t be shy here—we want easy, clean releases later.
- Form the Tot “Nests”: Place 3-4 frozen tater tots into each muffin cup. It might look a little messy and uneven—that’s perfect! Pop the tray into the preheated oven and bake for 10 minutes. This initial bake softens the tots so we can shape them.
- The Shaping Hack: Carefully pull the tray out (it’s hot!). Now, here’s my favorite trick: use the bottom of a small shot glass, a small spice jar, or the handle of a wooden spoon to press the softened tots down into the cup, pushing them up the sides. You’re creating a little potato cup. Press firmly! Once shaped, return the tray to the oven for another 10-15 minutes, until the edges are deep golden brown and crispy. This is the most important step for structure—don’t rush it!
- Cook the Savory Filling: While the tot cups crisp up, let’s make the filling. In a skillet over medium-high heat, cook the ground beef and diced onion together, breaking up the meat with a spoon. Cook until no pink remains and the onions are soft. Drain any excess grease (a little is fine for flavor). Season generously with salt and pepper. I sometimes add a pinch of garlic powder here too, because why not?
- The Grand Assembly: When your tot cups are gloriously crispy and golden, remove them from the oven. Leave the oven on! Immediately spoon the hot beef mixture into each cup, filling them nearly to the top. Then, pile on a generous pinch of your shredded cheddar cheese. The heat from the beef and tots will start melting it right away.
- The Final Melt: Slide the loaded tot cups back into the oven for just 3-5 more minutes, or until the cheese is completely melted, bubbly, and irresistible.
- Garnish & Serve with Flair: Pull the tray out and let it cool for just a minute (the cheese is molten lava!). Top each Cheeseburger Tot with a dill pickle slice and finish with a zig-zag drizzle of that burger sauce. Use a small spoon or squeeze bottle for control. Serve immediately while they’re hot, crispy, and magical!
How to Serve These Crowd-Pleasing Bites
Presentation is part of the fun! I like to transfer these to a large serving platter or a wooden board. Scatter a few extra pickle slices and fresh herbs like chopped chives or parsley around the edges for a pop of color. Place a small bowl of extra burger sauce in the center for dippers in the crowd.
For a true “burger bar” experience, set out small bowls of additional toppings and let people customize: crispy cooked bacon bits, diced tomatoes, a drizzle of yellow mustard or ketchup, even some caramelized onions for the adventurous. Serve them straight from the tray if you want that rustic, communal feel—just put a stack of napkins right next to it, because things are about to get deliciously messy.
Get Creative: 5 Fun Twists on the Classic
The basic recipe is a flawless 10, but part of being in the kitchen is playing with your food! Here are some of my favorite ways to mix it up.
- The Bacon Cheeseburger Tot: Mix 1/2 cup of finely chopped cooked bacon into the beef filling. Top with a blend of cheddar and smoked gouda cheese for an incredible smoky flavor.
- The “Big Mac” Style Tot: Add 1 teaspoon of mustard and 1 tablespoon of finely minced dill pickle to the beef filling. Use a blend of cheddar and American cheese. For the sauce, mix equal parts mayo, ketchup, and sweet relish with a dash of vinegar and a sprinkle of onion powder.
- The BBQ Ranch Burger Tot: Toss the cooked beef with 3 tablespoons of your favorite BBQ sauce instead of just salt and pepper. After the cheese melts, top with a drizzle of cool ranch dressing and a crispy fried onion string.
- The Breakfast Burger Tot: Perfect for brunch! Use seasoned breakfast sausage instead of beef. Top with a melty slice of American cheese and a tiny dollop of maple syrup or a sprinkle of maple pepper after baking.
- The Veggie-Lover’s Tot: Skip the meat! Sauté finely chopped mushrooms, bell peppers, and zucchini until tender. Mix in a can of drained black beans or lentils for protein. Season with taco or fajita seasoning, top with pepper jack cheese, and finish with avocado crema.
Beau’s Kitchen Notebook
This recipe has seen many iterations in my kitchen. The first time, I tried smashing a single tot flat—it was a disaster. The “nest” method was the game-changer. I’ve also learned that letting the shaped cups get really, really crispy before filling is non-negotiable. A soft cup will turn soggy under the weight of the juicy beef.
A funny story: I once made a triple batch for a huge party and, in my hurry, forgot to spray the muffin tins. Let’s just say we spent more time surgically extracting tots with spoons than we did eating them that first round. Learn from my mistake: SPRAY THAT PAN! These little guys have evolved from a game-day experiment to one of the most requested recipes I’ve ever created. That’s the power of combining familiar comforts in a new, shareable way.
Your Questions, Answered: FAQ & Troubleshooting
- Can I make these ahead of time? You can! Prepare the tot cups through step 3 (shaping and initial crisping). Let them cool, then store in an airtight container at room temp for a day. You can also cook the beef filling ahead and refrigerate it. When ready to serve, reheat the filling, assemble, and bake for the final 5 minutes to melt the cheese. The fresh assembly guarantees maximum crispiness.
- My tots are sticking to the pan! Help! First, ensure you’re using enough nonstick spray. Second, let them cool in the pan for about 2-3 minutes after the final bake. The cups will firm up and release more easily. A small offset spatula or a butter knife can help gently pry them out.
- Can I use a regular muffin tin? Absolutely! You’ll just get fewer, larger “burger bites.” Use 4-5 tots per cup and adjust baking times slightly (they may need a few extra minutes to crisp up). They become more of a hearty handheld snack.
- How do I keep them warm for a party? After the final bake, you can place them on a parchment-lined baking sheet and keep them in a 200°F (95°C) oven for up to 30 minutes. Add the cold pickle and sauce right before serving so they stay crunchy and fresh.

Cheeseburger Tots : Crispy, Cheesy & Crowd-Pleasing Party Bites
Description
These Cheeseburger Tots are everything you love about a classic cheeseburger—savory beef, melty cheese, tangy pickles—packed into crispy, bite-sized potato cups. They’re easy to make, fun to eat, and guaranteed to vanish fast at parties, game days, or casual family dinners. Thanks to frozen tater tots and a mini muffin tin, you get maximum crunch with minimum effort.
Ingredients
-
1 (32 oz) bag frozen tater tots
-
1 lb ground beef (80/20 recommended)
-
½ cup yellow onion, finely diced
-
Salt & freshly ground black pepper, to taste
-
1 cup sharp cheddar cheese, freshly shredded
-
Dill pickle slices, for topping
-
Burger sauce or Thousand Island, for drizzling
-
Nonstick cooking spray
Optional quick burger sauce:
Mix ½ cup mayonnaise, 2 tbsp ketchup, 1 tbsp sweet pickle relish, 1 tsp white vinegar, and a pinch of paprika, garlic powder, and onion powder.
Instructions
-
Preheat & Prep
Preheat oven to 425°F (220°C). Generously spray a mini muffin tin with nonstick spray. -
Make the Tot Cups
Place 3–4 frozen tater tots into each muffin cup. Bake for 10 minutes.
Remove carefully and press the softened tots down and up the sides using a small glass or spoon handle to form a cup.
Return to oven and bake another 10–15 minutes, until golden and crispy. -
Cook the Beef Filling
While tots bake, cook ground beef and onion in a skillet over medium-high heat until beef is browned and onions are soft.
Drain excess fat and season well with salt and pepper. -
Assemble
Spoon beef into each crispy tot cup and top with shredded cheddar cheese. -
Melt & Finish
Bake 3–5 minutes, just until cheese is melted and bubbly. -
Garnish & Serve
Top each bite with a pickle slice and a drizzle of burger sauce. Serve hot!
Notes
-
Don’t thaw the tots — frozen helps them hold their shape.
-
Press firmly when shaping the cups for sturdy, crispy edges.
-
Shred your own cheese for the best melt.
-
Let them cool 2–3 minutes before removing from the pan to prevent sticking.
A Quick Nutritional Glance
Please note: The following is an approximate estimate per Cheeseburger Tot bite, calculated using the standard ingredients. Values can vary based on specific brands, cheese fat content, and any modifications you make.
- Calories: ~120 kcal
- Fat: 7g
- Carbohydrates: 8g
- Protein: 5g
- Sodium: ~250mg (varies greatly with beef, cheese, and sauce seasoning)
Remember, these are appetizer bites meant for sharing and enjoyment! To lighten them up, you can use lean ground beef or turkey, opt for low-fat cheese, and go easy on the sauce drizzle. Balance them out with a big, fresh salad or veggie platter on the side.
Final Thoughts
Let’s be real—food is more than fuel. It’s memory, laughter, and connection. And that’s exactly what these Cheeseburger Tots are all about. They’re not just a clever mash-up of flavors; they’re an experience. They transform the humble tater tot into a crispy, edible canvas for everything we love about a classic burger, creating a bite-sized moment of pure joy.
Whether you’re feeding a rowdy game-day crowd, hosting a casual get-together, or simply treating your family to a fun weeknight dinner, this recipe delivers. It meets you where you are—forgiving for beginners, inspiring for seasoned cooks, and endlessly adaptable to your cravings. That’s the true beauty of it.
So, the next time you’re staring into the freezer wondering what to make, remember this little flavor powerhouse. Grab those tots, fire up the oven, and get ready for the compliments to roll in. You’re not just making an appetizer; you’re creating the highlight of the party.
Thanks for cooking with me today. Now go make some memories—one crispy, cheesy, totally addictive bite at a time.