
Butter Cracker Peppermint Bark: Your New Holiday Obsession
Hey friends, Beau here! Can you smell it? That crisp, chilly air mixed with the sweet scent of sugar cookies and… is that a hint of peppermint? It’s officially that magical time of year, and my kitchen is buzzing with all the cozy, festive recipes that make the season so special. Today, I’m bursting with excitement to share one of my all-time favorite holiday hacks: Butter Cracker Peppermint Bark.
Now, I know what you might be thinking. “Beau, bark is just chocolate and candy. What’s the big deal?” Oh, my friend. Let me stop you right there. This isn’t just any bark. This is the ultimate sweet-and-salty symphony that will completely change your holiday dessert game. We’re taking humble, buttery crackers and transforming them into an impossibly delicious, crunchy base for a layer of creamy white chocolate and a festive avalanche of crushed peppermint.
The best part? This isn’t some fussy, day-long kitchen project. This is a “wow-factor” treat you can whip up in less than 30 minutes with zero baking required. It’s perfect for last-minute gifts, potlucks where you want to be the hero, or just for treating yourself during a cozy night watching holiday movies. So, grab your favorite apron and let’s make some magic happen. This Butter Cracker Peppermint Bark is about to become your most-requested holiday recipe.
The Accidental Discovery That Started It All
This recipe has a fun little origin story. A few years back, I was hosting a massive “Friendsgiving” potluck, and I was in charge of desserts. I’d planned an elaborate lineup, but at the last minute, I realized I had a whole crew of friends with various dietary preferences and a serious collective sweet tooth. I was scrambling, looking for something that could please everyone without requiring a trip to the store.
I opened my pantry and saw a sleeve of Ritz crackers, a bag of white chocolate chips from a previous baking spree, and a giant bag of candy canes left over from the previous Christmas. A lightbulb went off. I remembered seeing a version of a “cracker toffee” online and thought, “What if I gave it a major holiday upgrade?” I threw it all together, crossed my fingers, and set it out on the table.
Friends, it was the first platter to be completely demolished. People were raving about the “unbelievable texture” and the “genius salty-sweet combo.” They couldn’t believe it was made with crackers! That happy accident, born from pantry desperation, is now a Feastical holiday staple. It just goes to show that the best recipes often come from a little bit of chaos and a whole lot of heart.
Gathering Your Bark-Making Squad
One of the things I love most about this recipe is its beautiful simplicity. You only need a handful of ingredients to create something truly spectacular. Here’s your shopping list, complete with my chef-y notes to help you nail it.
- 110 butter crackers (such as Ritz): This is the foundation of our masterpiece! The subtle saltiness and incredible buttery flavor of Ritz crackers are the secret weapons here, cutting through the sweetness of the chocolate and creating a flavor that’s complex and utterly addictive. Chef’s Insight: Don’t sub with a bland cracker; that buttery taste is non-negotiable for the magic!
- 48 ounces white chocolate melting wafers or vanilla-flavored candy coating: This is our glorious glue. I highly recommend using high-quality melting wafers over regular white chocolate chips. Wafers are specifically designed to melt smoothly and set firmly, giving you that perfect “snap” when you break the bark. Substitution Tip: If you must use chips, add an extra teaspoon of oil to help them melt more evenly.
- ½ teaspoon peppermint extract (optional): This is your flavor booster! The candies on top give crunch and bursts of mint, but this extract infuses the entire white chocolate layer with a cool, refreshing peppermint essence. Chef’s Insight: A little goes a long way! Too much can taste medicinal, so measure carefully.
- 2 teaspoons vegetable or coconut oil: This is our little kitchen hack for achieving super-smooth, dippable chocolate. The oil helps thin the melted wafers just enough to make spreading over the crackers a total breeze.
- 50 soft peppermint candies, crushed: This is where the festive crunch and vibrant color come from! You can use candy canes, Starlight mints, or any soft peppermint candy. Chef’s Hack: Place them in a zip-top bag and use a rolling pin to crush them. It’s a fantastic way to work out any pre-holiday stress!
- Red and green sprinkles: Let’s get festive! Sprinkles add a pop of color and a fun, celebratory feel. Use jimmies, nonpareils, or even holiday-shaped quins.
- Optional: 4 ounces dark chocolate, melted for drizzling: I am a huge fan of this optional step. A zigzag of dark chocolate not only looks gorgeous and professional, but it adds another layer of deep, rich flavor that complements the white chocolate and peppermint beautifully.
Let’s Build Some Bark: Your Step-by-Step Guide
Ready to create? This process is fast, fun, and almost foolproof. I’ll walk you through each step with all my favorite tips and tricks to ensure your bark is absolutely perfect.
- Line a large baking sheet with parchment paper. Arrange crackers in a single, tight layer.This is our prep stage, and it’s crucial for a stress-free finish. Don’t skip the parchment paper! It guarantees your bark will lift off the pan easily without any sticking. When arranging your crackers, get them as close together as possible. We’re creating one solid base, so they should be touching on all sides. A little overlap is totally fine—we’re going for rustic and delicious, not necessarily perfect!
- In a microwave-safe bowl, melt white chocolate with oil in 30-second intervals, stirring until smooth. Add peppermint extract if using.Here’s where patience is your best friend. Do not try to melt the wafers in one long blast. The low-and-slow method is key. Microwave for 30 seconds, stir well, then another 30 seconds, and stir again. It might seem like it’s not melting at first, but keep stirring—the residual heat will do the work. Once it’s almost completely smooth, you can do a final 15-second blast if needed. Stir in the peppermint extract right at the end. Chef’s Hack: If your chocolate seems too thick, add another ½ teaspoon of oil until it’s a pourable, spreadable consistency.
- Pour the melted chocolate over the crackers and spread evenly with a spatula.Okay, work quickly but confidently here! Pour the melted chocolate right into the center of your cracker base. Using an offset spatula or the back of a spoon, gently spread the chocolate out to the edges, making sure every single cracker gets a generous coating. Don’t worry if it’s not perfectly smooth—the toppings will hide any imperfections, and it’s meant to look homemade and joyful!
- Immediately sprinkle crushed peppermint candies and holiday sprinkles over the top.Immediately is the key word here! You want to add your toppings while the chocolate is still wet and sticky so they adhere perfectly. Don’t be shy! Grab handfuls of the crushed peppermint and sprinkles and shower that bark with festive goodness. Cover every inch for maximum crunch and color.
- Optional: Drizzle with melted dark chocolate and add extra toppings for texture and flair.Feeling fancy? This is your moment. Melt your dark chocolate with a tiny bit of oil (same method as before), then transfer it to a zip-top bag. Snip a very tiny corner off the bag and wave it back and forth over your bark to create beautiful, professional-looking drizzles. You can also add a sprinkle of flaky sea salt or crushed pretzels at this stage for an extra salty kick.
- Let cool completely at room temperature or refrigerate until set. Break into pieces and enjoy.The hardest part: waiting! You can let the bark set up at room temperature if your kitchen is cool, but I usually pop it in the refrigerator to speed things up. It should be firm to the touch and make a satisfying “crack” when you break it. Once set, use your hands to break it into rustic, uneven pieces. I love the organic, fun look of hand-broken bark!
How to Serve Your Festive Masterpiece
You’ve made this gorgeous bark, now how do you show it off? This treat is incredibly versatile. For a casual family treat, I just pile the pieces high on a beautiful wooden board or in a big festive bowl right in the middle of the kitchen counter—it never lasts long!
If you’re gifting it, you can get really creative. Stack pieces in clear cellophane bags tied with a pretty ribbon for a simple, sweet present for neighbors, teachers, or your mail carrier. For a real showstopper gift, layer the pieces in a decorative tin between sheets of parchment paper. It travels well and looks incredibly thoughtful.
And let’s not forget the party platter! Arrange this bark alongside other holiday cookies, some cheese and fruit, and maybe a few of my No-Fuss Chocolate Dipped Shortbread cookies. The variety of textures and flavors will make your dessert spread the talk of the town.
Mix It Up! Fun Flavor Twists
Once you’ve mastered the classic, the fun really begins. This recipe is a fantastic canvas for your creativity. Here are a few of my favorite ways to mix it up:
- The Salty Sweet Supreme: Swap out half of the peppermint candies for crushed, salty pretzel pieces. The combo of peppermint, white chocolate, and pretzel is a next-level flavor explosion.
- Chocolate Lover’s Dream: Use a base of chocolate crackers (like Famous Chocolate Wafers) instead of Ritz. Top with semi-sweet or milk chocolate and then the peppermint. It’s a deep, rich chocolate experience.
- Nutty Noel: Add a half-cup of finely chopped toasted almonds or pecans to your sprinkle mix. The nuttiness adds a wonderful warmth and complexity that feels very grown-up and elegant.
- Fruity Festive: Not a huge peppermint fan? No problem! Use crushed freeze-dried strawberries or raspberries instead of the peppermint for a beautiful pink hue and a tangy, fruity flavor.
- Dairy-Free Delight: You can easily make this vegan! Use a high-quality dairy-free white chocolate and ensure your crackers are vegan-friendly (check the label). The method remains exactly the same.
Beau’s Kitchen Confidential
This recipe has evolved so much since that first Friendsgiving panic-attack batch. I’ve learned that a heavier hand with the peppermint crushing (I like some bigger chunks for texture) is a good thing. I’ve also started using a pizza cutter to score the bark lightly before it fully sets if I want neater, more uniform pieces for gift boxes—a little pro-tip for you!
One of my favorite kitchen memories involving this bark was the year my nephew, who was about four at the time, “helped” me by taste-testing every single sprinkle. His face was covered in red and green, and he declared it “the best sparkle candy ever.” That’s the spirit of this recipe—it’s about fun, family, and a little bit of mess. Don’t stress over perfection. Embrace the delicious chaos!
Your Bark Questions, Answered!
Over the years, I’ve gotten a lot of questions about this recipe. Here are the answers to the most common ones to ensure your success.
Q: My chocolate seized up and got clumpy! What did I do wrong?
A: Ah, the dreaded seize! This usually happens if a tiny bit of steam or water gets into your melting chocolate. Always make sure your bowl and utensils are completely dry. If it happens, don’t panic! Try stirring in a bit more vegetable oil, one teaspoon at a time, until it smooths out again.
Q: Can I use chocolate chips instead of melting wafers?
A: You can, but it’s trickier. Chocolate chips have stabilizers to help them hold their shape, so they don’t melt as smoothly. If you use them, be sure to add the full 2 teaspoons of oil (or even a touch more) and stir like crazy to get it smooth. Melting wafers are still my #1 recommendation for foolproof results.
Q: How far in advance can I make this?
A> This bark is a fantastic make-ahead treat! Stored in an airtight container at cool room temperature (or in the fridge if your house is warm), it will stay fresh and delicious for up to 2 weeks. The crackers may soften slightly over time, but it will still taste amazing.
Q: My bark is sticky and won’t break. Help!
A> This means it hasn’t set completely. Pop it back in the refrigerator for another 30-60 minutes. If you used a chocolate that doesn’t set firmly (like some chocolate chips), it might remain a bit softer. It will still be delicious, just a bit messier to eat!
Butter Cracker Peppermint Bark
Description
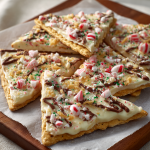
A quick, no-bake holiday treat featuring buttery crackers, creamy white chocolate, and festive peppermint crunch. Perfect for gifting, party platters, or just indulging during cozy winter nights.
Ingredients
-
110 butter crackers (e.g., Ritz) – buttery, salty, perfect for crunch
-
48 oz white chocolate melting wafers or vanilla candy coating
-
½ tsp peppermint extract (optional, for extra minty flavor)
-
2 tsp vegetable or coconut oil (helps smooth chocolate for spreading)
-
50 soft peppermint candies, crushed (candy canes or Starlight mints)
-
Red and green sprinkles (for festive flair)
-
Optional: 4 oz dark chocolate, melted, for drizzling
Instructions
1. Prep
-
Line a large baking sheet with parchment paper.
-
Arrange crackers in a single, tight layer (touching is fine; slight overlap okay).
2. Melt Chocolate
-
In a microwave-safe bowl, melt white chocolate with oil in 30-second intervals, stirring in between until smooth.
-
Stir in peppermint extract, if using.
3. Spread Chocolate
-
Pour melted chocolate evenly over crackers.
-
Use a spatula to spread to edges, ensuring all crackers are coated.
4. Add Toppings
-
Immediately sprinkle crushed peppermint candies and holiday sprinkles over the chocolate.
-
Optional: Drizzle melted dark chocolate over the top and add extra toppings (like flaky sea salt or crushed pretzels).
5. Set
-
Let bark cool completely at room temperature or refrigerate until firm.
-
Once set, break into rustic, uneven pieces.
Notes
-
Use a dry, clean bowl and utensils to prevent chocolate from seizing.
-
For chocolate chips, add extra oil for smooth melting.
-
Store in an airtight container at cool room temperature or fridge for up to 2 weeks.
Nutrition
- Calories: 80–100 Cal Per Serving
- Sugar: ~8–10g
- Fat: 5–7g
- Carbohydrates: 10–12g
Nutritional Info (For Your Peace of Mind)
Now, let’s be real—this is a celebratory treat, and it’s all about indulgence! But I believe in transparency, so here’s a general breakdown. Remember, these are estimates and can vary based on the specific brands you use and the size of your bark pieces.
Yield: About 100 bite-sized pieces
Prep Time: 15 minutes
Cook Time: 10 minutes (melting time)
Total Time: 25 minutes, plus setting time
Per Piece (approximate):
Calories: 90 | Fat: 5g | Carbs: 9g | Sugar: 7g
The beauty of making it yourself is that you control the portions and ingredients. You can use a sugar-free chocolate alternative if you prefer, or simply enjoy a piece or two to satisfy your sweet tooth as part of a balanced diet. Life’s too short not to enjoy a little festive sparkle!
Final Thoughts from My Kitchen to Yours
Well, there you have it, friends—my complete guide to the most addictive, easy, and festive Butter Cracker Peppermint Bark on the planet. This recipe is a perfect example of what Feastical is all about: taking simple, feel-good ingredients and turning them into something magical that brings people together.
I hope this recipe fills your kitchen with laughter, your home with the wonderful smell of peppermint, and your holiday season with a whole lot of delicious joy. If you make it (and I really hope you do!), I’d love to see your creation. Tag me on social @Feastical or @BeauCollier so I can share in the fun.</p