The Snack That Feels Like a Hug: My Love Letter to Apples & Nut Butter
Hey friends, Beau here from Feastical! Let’s be real for a second. We all have those days. You know the ones. You’re running between meetings, scrambling to get the kids to practice, or just trying to remember if you actually had lunch. Your stomach starts singing that familiar, grumbly tune, and the siren call of the vending machine or a bag of chips gets louder and louder. It’s in these moments that we need a hero—a snack that’s not just fast, but truly good for us. Something that feels like a treat but fuels our bodies without the dreaded sugar crash.
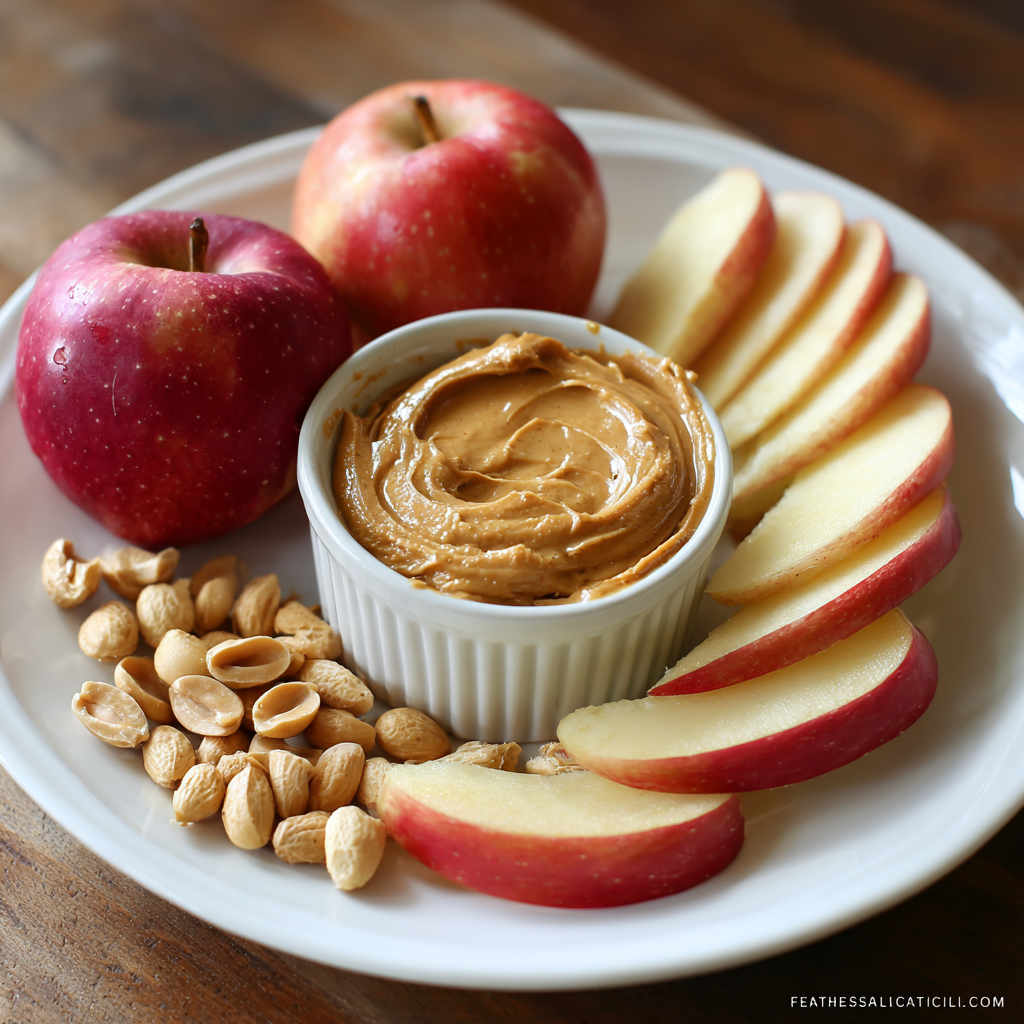
Well, I’m here to tell you about the ultimate snack MVP that has saved my hangry self more times than I can count: the beautiful, timeless, and utterly perfect duo of crisp apples and creamy nut butter. This isn’t just slicing an apple and plopping some peanut butter on a plate. Oh no. This is an art form, a moment of delicious peace in a chaotic day, and honestly, one of the most satisfying flavor and texture combos on the planet.
We’re talking about that incredible crunch giving way to sweet, juicy tartness, followed immediately by the rich, salty, velvety smoothness of nuts. It’s a symphony in your mouth that takes all of five minutes to create. It’s naturally gluten-free, packed with fiber to keep you full and healthy fats to keep you energized, and it’s so portable you can take this gourmet snack anywhere. So, grab your favorite knife and let’s turn this simple concept into your new go-to kitchen ritual. I’m going to share all my chef-y secrets to make it absolutely legendary.
A Core Memory: Why This Combo Means So Much
This snack takes me right back to my grandma’s kitchen table. After school, I’d burst through her screen door, greeted by the always-present smell of something baking. But before any cookies were allowed, there was the “appetizer.” Grandma Collier would be at the counter, her hands moving with a quiet, practiced ease. She’d take a giant, gorgeous Red Delicious apple (her favorite, though I’ve branched out since then!) and slice it perfectly around the core into wedges.
Then came the magic. She wouldn’t just scoop peanut butter from the jar. Oh no. She’d spoon some into a little ramekin, drizzle in just a tiny bit of honey, and give it a swirl with her knife. She called it her “fancy peanut butter sauce.” We’d sit at her checkered tablecloth, dipping our apple slices and talking about my day. It wasn’t about the food itself; it was about the pause, the connection, the simple act of sharing something wholesome and delicious. It was my first lesson that the best food isn’t always the most complicated—it’s the food made with a little bit of love and intention. That’s the feeling I want to bring to you with this recipe.
Gathering Your A-Team: It’s All About Quality
The beauty of this “recipe” is its simplicity, which means each ingredient really gets to shine. Choosing great components here makes all the difference. Here’s what you’ll need for one perfect serving.
- 1 Apple (any variety): This is your star! The variety you choose changes the entire game. Chef’s Insight: For a tart, firm crunch that holds up beautifully against creamy butter, go for Granny Smith. For a super sweet and juicy experience, Honeycrisp or Fuji are my go-tos. Gala and Braeburn offer a lovely middle ground. Don’t be afraid to mix and match!
- 2 tbsp Nut Butter: The creamy co-star. Substitution Tip: While classic peanut butter is always a winner, try almond butter for a slightly more sophisticated, earthy flavor, or cashew butter for incredible creaminess. For a nut-free option, sunflower seed butter (sunbutter) is a fantastic and delicious alternative that gives a similar experience.
- Optional Toppings: This is where you get to play!
- A sprinkle of Cinnamon: Adds warmth and helps regulate blood sugar. It’s a no-brainer pairing with apples.
- A drizzle of Honey or Maple Syrup: For a touch of extra natural sweetness if your apple is a bit tart or your nut butter is unsweetened.
- Chia Seeds or Hemp Hearts: An easy boost of omega-3s, fiber, and protein. They add a fun little crunch, too!
- Dark Chocolate Chips or Cacao Nibs: Because apples, nut butter, and chocolate are a holy trinity. A few chips sprinkled on top feel decadent.
- Raisins or Dried Cranberries: For little chewy, sweet bursts.
- Granola: For the ultimate crunch factor.
- Secret Weapon: A Squeeze of Lemon Juice: Not listed above, but keep a lemon half in your fridge. A quick squeeze over your sliced apples prevents them from turning brown, keeping your snack looking fresh and appetizing for hours. This is my #1 pro tip!
Building Your Masterpiece: A Step-by-Step Guide with Chef Hacks
Okay, let’s get into it! I’m walking you through this step-by-step like you’re right here in the Feastical kitchen with me. We’re going for maximum flavor and minimum fuss.
Step 1: The Wash & Dry
First things first, give that beautiful apple a good rinse under cool water. I like to give it a gentle scrub with my hands to remove any waxy residue. Dry it completely with a kitchen towel. A dry apple is easier to handle and slice safely. Chef Hack: If you’re really prepping for later, you can wash your apples in a sink with a splash of vinegar and water, which helps remove more of the surface wax and pesticides, then dry thoroughly.
Step 2: The Slice (Safely and Smartly!)
Place your apple on a stable cutting board. To safely core and slice, I have two favorite methods. Method 1 (The Wedge): Slice the apple straight down next to the core on all four sides. You’ll be left with four clean pieces of apple and a rectangular core to discard. Then, lay each flat piece on its side and slice it into wedges. Method 2 (The Classic Slice): Simply slice the apple crosswise into round, thin slices. Use a small round cookie cutter or even a knife tip to pop out the core from each slice. This method is fantastic for little kids and makes for perfect dippers! Chef Hack: If you, like me, sometimes can’t get through a whole apple in one sitting, slice just half of it and save the other half (with the core and seeds still intact) for later. It will brown much less quickly than pre-sliced pieces.
Step 3: The Anti-Browning Shield
This is the step that separates the pros from the amateurs! As soon as your apple is sliced, squeeze a little fresh lemon juice over all the pieces. Use your fingers or a pastry brush to gently coat each slice. The citric acid in the lemon juice acts as a barrier against oxygen, which is what causes the browning. Don’t worry, you won’t taste it—it just keeps your apples looking bright, fresh, and gorgeous.
Step 4: The Nut Butter Prep
Scoop your two tablespoons of nut butter into a small bowl. If your nut butter has been sitting in the pantry, give the jar a really good stir first to reincorporate the natural oils. Now, taste it. Is it a little thick? Add a tiny drop of warm water or a drizzle of honey and stir. This will loosen it up to a perfect, dippable consistency. Chef Hack: For the ultimate luxurious experience, warm the nut butter for 10-15 seconds in the microwave. It becomes incredibly pourable, aromatic, and feels like a warm hug for your apple slices.
Step 5: The Assembly & Garnish
Arrange your beautiful, non-browned apple slices on a plate or in a container. Place your bowl of prepared nut butter right in the center. Now, unleash your inner artist with those toppings! A flurry of cinnamon, a artistic drizzle of honey, a sprinkle of chia seeds… go for it! This is your snack. Make it beautiful and make it yours.
How to Serve It Up: Beyond the Plate
While a simple plate is perfect, let’s think outside the box! For a fun, interactive snack for kids (or kids-at-heart), spear apple slices onto skewers or popsicle sticks and serve them with the nut butter dip on the side—it’s an instant party. Pack it for lunch by using a small, airtight container for the nut butter and placing the lemon-juice-treated apple slices right next to it in a divided container. For a more elegant dessert platter, arrange an assortment of different apple varieties with multiple small bowls of different nut butters and toppings for a build-your-own apple bite bar. It’s a total crowd-pleaser!
Shake It Up: 5 Delicious Twists to Try
Once you’ve mastered the classic, the flavor world is your oyster! Here are a few of my favorite ways to remix this perfect snack:
- The “Apple Pie” Twist: Use almond butter, and top your apples with a drizzle of honey, a generous sprinkle of cinnamon, and a few raisins. It tastes just like a deconstructed apple pie!
- The Tropical Vacation: Swap the nut butter for coconut butter (manna) and top with unsweetened shredded coconut and a few macadamia nuts. Close your eyes and you’re on a beach.
- The Chocolate Lover’s Dream: Use peanut butter, drizzle with melted dark chocolate, and add a tiny sprinkle of flaky sea salt. Unreal.
- The Savory-Sweet Option: This one’s for the adventurous! Try spreading sharp white cheddar cheese on your apple slice first, then a tiny dollop of almond butter. Trust me on this one.
- The Protein Power-Up: Stir a scoop of vanilla or chocolate protein powder into your nut butter with a tiny bit of milk or water to thin it out. Now your snack is a serious fuel-up.
From My Kitchen to Yours: A Few Parting Thoughts
This recipe has evolved so much from my grandma’s simple swirl of honey. I’ve used this combo as a base for everything from post-workout fuel to a quick canapé for unexpected guests (just top a slice with nut butter, a sliver of prosciutto, and a sage leaf—you’re welcome). I once tried to get fancy and caramelize the apples in a pan with butter and cinnamon before adding the nut butter. It was delicious, but it definitely crossed the line from “5-minute snack” into “dessert territory.” Sometimes, simple is best.
The real beauty of apples and nut butter is its flexibility. It’s a recipe that asks “what do you feel like today?” and then becomes exactly that. It’s forgiving, hard to mess up, and always, always satisfying. It’s a reminder that taking five minutes for yourself to create something nourishing is an act of self-care. So don’t just eat—savor, experiment, and enjoy.
Your Questions, Answered!
Q: My nut butter is super hard and oily. How do I get it to a dippable consistency?
A: This is the most common issue! Natural nut butters love to separate. First, make sure you stir the entire jar vigorously when you first open it. For a stubborn jar, you can warm the closed jar in a bowl of warm water for 10-15 minutes, then stir. For your serving, if it’s still thick, just add a tiny bit of a neutral oil (like avocado or light olive oil), warm water, or honey to your two tablespoons and stir until it smooths out.
Q: How can I keep my apple slices from turning brown if I’m packing them for lunch?
A: The lemon juice trick is your best friend! A light coating is all you need. You can also use a rubber band to keep the apple halves together if you’ve only sliced partway through. There are also kitchen gadgets like the Apple-Prepper that core and slice an apple but keep it held together in its original shape until you’re ready to eat it. So cool!
Q: Can I use apple sauce instead of apple slices?
A: Absolutely! While you lose the satisfying crunch, it becomes a different, but still delicious, snack. Try layering unsweetened applesauce in a jar with your nut butter and granola for a killer parfait.
Q: What’s the best apple for this? You mentioned a few, but I’m overwhelmed at the store!
A> Don’t be overwhelmed! It’s all about personal taste. My all-around, never-fail recommendation is Honeycrisp. It’s sweet, tart, incredibly crisp, and juicy. It’s the perfect balance for any nut butter. Think of it as the crowd-pleasing choice. If you see one, grab it!

Apples with Nut Butter
Description
We all have those days—when lunch was a blur, dinner feels miles away, and the vending machine is calling our name. What we really need in those moments is a snack that fuels our body and soothes the soul. Enter: the timeless duo of crisp apples and creamy nut butter.
Ingredients
-
1 Apple (Honeycrisp = balanced sweet & tart, Granny Smith = crisp & tart, Fuji = super sweet—pick your vibe)
-
2 tbsp Nut Butter (peanut, almond, cashew, or sunflower for nut-free)
Optional Toppings:
-
Cinnamon (warmth + blood sugar balance)
-
Honey or maple syrup (extra sweetness)
-
Chia seeds or hemp hearts (fiber + omega-3 boost)
-
Dark chocolate chips or cacao nibs (decadence!)
-
Raisins, cranberries, or granola (chewy/crunchy contrast)
-
Fresh lemon juice (pro tip: prevents browning)
Instructions
1. Wash & Dry: Rinse and dry your apple so it’s easy to slice.
2. Slice It: Either wedge around the core or slice into rings (kid-friendly and fun to dip).
3. Keep It Fresh: Toss slices with a squeeze of lemon juice to prevent browning.
4. Prep the Nut Butter: Stir well, loosen with a drizzle of honey or warm water if too thick. Microwave 10–15 seconds for a warm, pourable dip.
5. Plate It Up: Fan out apple slices, place nut butter in a small bowl, and sprinkle on your toppings.
Notes
-
Apple Pie Vibes: Almond butter + honey + cinnamon + raisins.
-
Tropical Treat: Coconut butter + shredded coconut + macadamias.
-
Chocolate Fix: Peanut butter + melted dark chocolate + flaky salt.
-
Savory-Sweet: Apple slice + sharp cheddar + almond butter (trust me).
-
Protein Power: Stir protein powder into your nut butter for a fueling snack.
Nutrition
- Calories: 290 Cal
- Carbohydrates: 30g
- Fiber: 7g
- Protein: 10g
The Good Stuff: Nutritional Breakdown (Approximate)
Prep Time: 5 min | Servings: 1
This info is for one serving using a medium apple and 2 tbsp of natural peanut butter. Toppings will alter values.
- Calories: 290
- Protein: 10g
- Carbohydrates: 30g
- Fiber: 7g
- Sugar: 20g (Natural)
- Fat: 16g
Final Thoughts: More Than Just a Snack
In a world that constantly shouts for our attention with flashy packaging and fad diets, the humble apple and a spoonful of nut butter is a quiet, nourishing whisper. It’s a reminder that the best things are often the simplest, and that true wellness isn’t about restriction—it’s about finding joy in foods that love us back.
This isn’t just a snack; it’s a five-minute pause. It’s a moment of intention in a hectic day, a small act of self-care that says, “I deserve something good.” It’s a connection to memories, like the ones in my grandma’s kitchen, and an invitation to create new ones of your own.