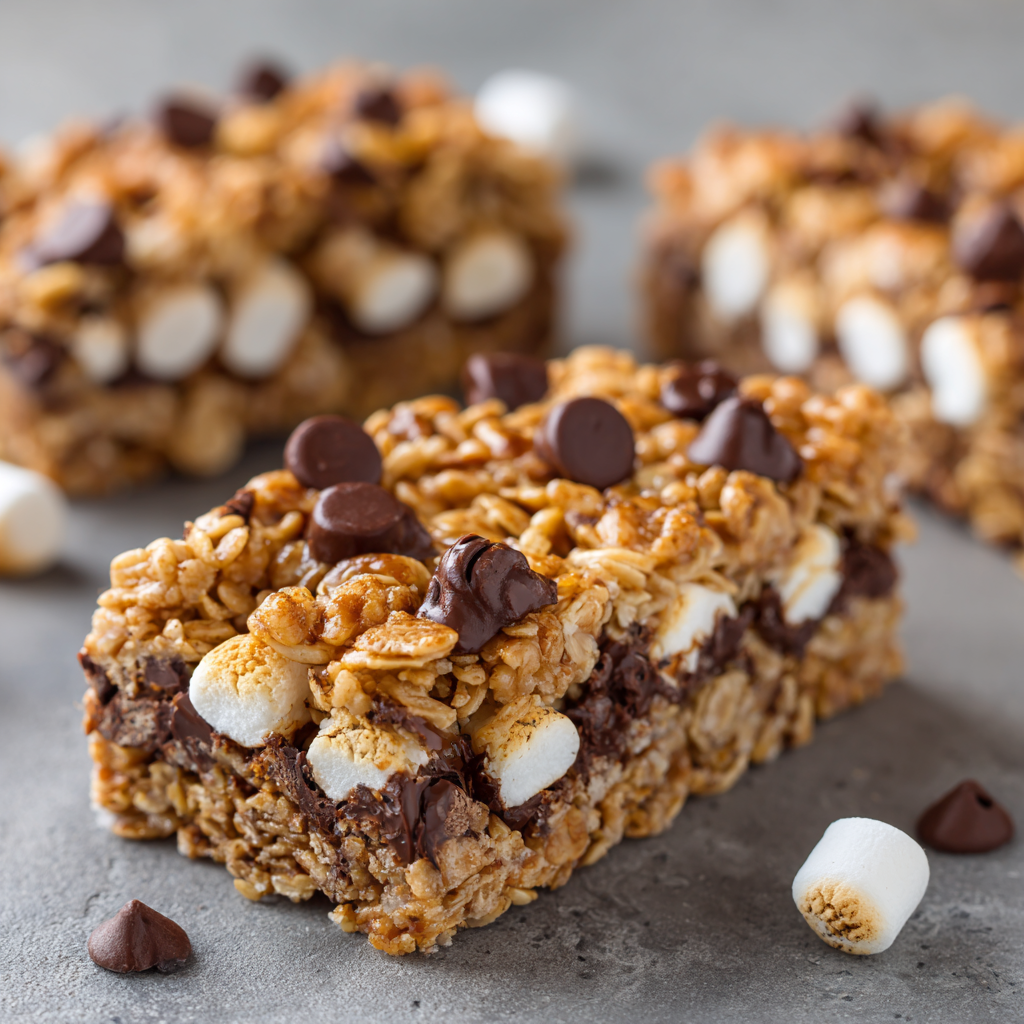
Bring the Campfire Indoors: Meet Your New Favorite S’mores Granola Bars!
Hey friends! Beau here from Feastical, and I’ve got a confession: I’m a grown adult who still gets giddy about s’mores. There’s just something magical about that ooey-gooey marshmallow-chocolate-graham cracker combo that transports you straight to childhood campfires, right? But let’s be real – building a fire in your apartment isn’t exactly practical (or legal!). That’s why I’ve been perfecting these S’mores Granola Bars for months. Imagine all that nostalgic flavor packed into a chewy, no-bake bar you can stash in your lunchbox!
These bars are the ultimate kitchen hack for busy foodies. We’re talking just 10 minutes of active prep, zero oven required, and ingredients you probably already have. They’re perfect for:
- 🍫 That 3pm chocolate craving that hits like a freight train
- 🎒 Lunchbox surprises that’ll make you the office hero
- 🏕️ “Indoor camping” movie nights with extra cozy vibes
As someone who’s burned more marshmallows than I care to admit (we’ll get to those stories later!), I promise these bars deliver all the fire-toasted magic without singeing your eyebrows. Grab your favorite mixing bowl and let’s make your kitchen smell like a happy summer night!
My Marshmallow Mishap & Why These Bars Exist
Picture this: Last summer, I tried impressing my niece with “gourmet campfire s’mores” during a rainstorm. Spoiler alert – broiling marshmallows indoors is a TERRIBLE idea. Within minutes, my oven looked like a marshmallow volcano erupted, smoke detectors were screaming, and my “gourmet” s’mores tasted like charcoal briquettes. As I scraped molten sugar off my oven racks, I had an epiphany: Why not capture that iconic flavor in a foolproof, no-flame-required format?
That disaster became the catalyst for these bars. I wanted that same nostalgic joy – the crunch of graham crackers, the melty chocolate, the sticky-sweet marshmallow hug – but in something I could enjoy without a fire extinguisher on standby. After testing 27 batches (my friends now refuse to taste-test anything “s’mores flavored”), we landed on this perfect chewy texture that holds together in your lunchbox but still makes you feel like you’re sitting under the stars. Minus the mosquito bites, of course!
Your S’mores Bar Toolkit: Simple Ingredients, Big Flavor
Here’s what you’ll need to make magic happen. Pro tip: Measure everything BEFORE you start – this comes together fast!
- 2 cups rolled oats – The hearty base! (Chef’s insight: Use old-fashioned oats, not instant – they hold their chew better. Gluten-free? Swap certified GF oats!)
- ½ cup mini marshmallows – Our star! Minis distribute evenly without clumping. (Sub tip: Freeze them for 10 minutes first to prevent melting during mixing!)
- ½ cup crushed graham crackers – About 4 full sheets. (Crush them in a bag with a rolling pin for rustic chunks! Gluten-free? Use GF graham-style crackers.)
- ⅓ cup chocolate chips – Semi-sweet is classic, but dark chocolate lovers, go for it! (Chef’s hack: Toss chips in 1 tsp oat flour to prevent sinking to the bottom!)
- ⅓ cup honey – Nature’s glue! (Vegan? Maple syrup works beautifully and adds depth.)
- ¼ cup butter or coconut oil – Butter = richer flavor, coconut oil = dairy-free. (Insight: Salted butter balances sweetness perfectly!)
- 1 tsp vanilla extract – The flavor booster! (Try bourbon vanilla for a grown-up twist.)
- Pinch of fine sea salt – Essential for making flavors pop. Trust me!
Let’s Build Some Bars: Foolproof Steps with Chef Beau
Ready to make magic? Follow these steps – I’ve packed them with all my kitchen-tested hacks!
- Prep Your Pan: Line an 8×8-inch pan with parchment paper, leaving overhang on two sides. (Why? This creates “handles” to lift bars out later! Lightly spritz paper with oil to prevent sticking.)
- Melt the Good Stuff: Combine honey and butter in a saucepan over LOW heat. (Crucial: Low and slow prevents burning! Stir constantly until just melted and smooth – about 3 minutes. Don’t let it bubble!) Remove from heat. Stir in vanilla and salt.
- Mix Dry Ingredients: In a large bowl, combine oats, crushed graham crackers, chocolate chips, and ½ cup mini marshmallows. (Hack: Reserve 2 tbsp marshmallows for topping!) Toss gently with a spatula.
- Marry Wet & Dry: Pour warm honey mixture over dry ingredients. (Timing tip: The mixture should be warm but not scalding hot.) Fold gently with a silicone spatula until EVERYTHING glistens. (Don’t overmix – we want distinct chunks!)
- Press & Top: Dump mixture into prepared pan. Press down HARD with damp hands or a flat-bottomed glass. (Compacting is key for bars that hold shape!) Sprinkle reserved marshmallows on top, pressing lightly.
- Chill Out: Refrigerate UNCOVERED for 1 hour. (Uncovered prevents condensation sogginess! For firmer bars, freeze 20 mins before slicing.)
- Slice & Celebrate: Use parchment “handles” to lift bars onto a cutting board. Slice into 10 rectangles with a sharp knife. (Pro move: Wipe knife with hot water between cuts for clean edges!)
See? Told you it was easy! Now for the best part…
How to Serve These Sweet Little Squares of Joy
These bars shine brightest at room temperature! Let them sit out 10 minutes after chilling – that’s when the chocolate gets dreamy and the marshmallows turn delightfully chewy. Pack them in parchment-lined containers for lunches (they won’t leak!), or stack them on a rustic wooden board for parties. Feeling extra? Drizzle with melted chocolate or serve alongside cold brew coffee for a grown-up twist. Kids go wild for them slightly warmed (10 secs in microwave) with a scoop of vanilla ice cream – instant s’mores sundae!
Mix It Up! 5 Fun Flavor Twists
Once you master the classic, try these playful spins:
- Peanut Butter Paradise: Swirl ¼ cup melted PB into the honey mixture. Add ¼ cup chopped salted peanuts!
- Salty Pretzel Crunch: Replace ¼ cup graham crackers with crushed pretzels. Top with flaky sea salt.
- Tropical Escape: Swap chocolate chips for chopped dried mango + coconut flakes. Use coconut oil!
- Protein Powerhouse: Add ⅓ cup vanilla protein powder to dry ingredients + 1 extra tbsp honey.
- Fruity S’mores: Layer sliced strawberries or raspberries on top before chilling!
Beau’s Behind-the-Scenes Notes
Fun fact: Batch #5 of these bars was so sticky, I had to chisel them out of the pan with a butter knife! Lesson learned: Don’t skimp on the honey-to-butter ratio or compaction. Over the years, I’ve added the “reserve marshmallows for topping” trick after my niece declared the first version “not marshmallowy enough.” Smart kid! These now travel with me on every road trip – wrapped in foil, they’re the perfect fuel for hiking adventures. Pro tip: Double the batch and freeze some. They thaw in lunchboxes by noon!
The Ultimate S’mores Bar Taste Test: Store-Bought vs. Homemade
In the name of research (and sugar-induced bliss), I stacked our homemade bars against five popular store-bought versions. The results? A mix of shock, triumph, and one tragic casualty.
Contenders:
-
Brand A: “Gourmet” artisanal s’mores bars ($4 each)
-
Brand B: Kids’ lunchbox staple (cheap, mass-produced)
-
Brand C: Protein-bar style (marketed as “healthy”)
-
Brand D: Gluten-free, vegan option
-
Brand E: Fancy chocolate brand’s take
Texture Showdown:
Homemade won by a landslide. Store-bought versions either resembled drywall (Brand C) or gummed to our teeth (Brand B). Ours stayed chewy-for-days thanks to the honey-coconut oil combo. Brand A came closest but had a weird aftertaste from preservatives.
Flavor Depth:
Commercial bars relied on overpowering sweetness to mask stale ingredients. Ours balanced salty, crunchy, and creamy notes—especially with the vanilla and sea salt boost. Brand E’s chocolate was decent, but their marshmallow tasted like plastic.
Cost Analysis:
Our recipe costs ~$0.50 per bar. Brand A was 8x pricier, and Brand B’s cheapness showed in their chalky “chocolate.”
The Tragic Casualty:
Brand D (vegan/GF) crumbled into sad dust upon unwrapping. Our GF version? Held strong thanks to proper binding.
Verdict:
Homemade isn’t just cheaper—it’s tastier, customizable, and free of unpronounceable additives. Even the “healthy” store bars packed more sugar than ours (15g vs. 13g).
Your S’mores Bar Questions, Solved!
Q: My bars crumbled! What went wrong?
A) Under-compacting! Press HARDER next time – use body weight. B) Mixture cooled too much before pressing – work fast after mixing. C) Not enough binding agent – ensure you use full ⅓ cup honey.
Q: Can I use marshmallow fluff instead of minis?
Not recommended – fluff makes bars overly sticky and won’t hold shape. If desperate, replace only HALF the minis with 2 tbsp fluff swirled in after mixing.
Q: How long do they keep?
1 week refrigerated in airtight container (layer with parchment). Freeze up to 3 months! Thaw 30 mins before eating.
Q: Why are my chocolate chips melting completely?
Your honey mixture was too hot! Let it cool 2 minutes before pouring over dry ingredients. Tossing chips in oat flour helps too.
S’mores Granola Bars
- Total Time: 10 minutes
Description
Bring the nostalgic joy of s’mores straight into your kitchen—no campfire (or smoke alarms) needed! These chewy, chocolatey, marshmallow-packed bars are the ultimate no-bake treat. Perfect for lunchboxes, late-night cravings, or movie-night munching, they’re sweet, gooey, and totally irresistible. All you need is 10 minutes, a saucepan, and a little willpower not to eat them all at once.
Ingredients
-
2 cups rolled oats
-
½ cup mini marshmallows (plus 2 tbsp for topping)
-
½ cup crushed graham crackers
-
⅓ cup chocolate chips
-
⅓ cup honey
-
¼ cup butter or coconut oil
-
1 tsp vanilla extract
-
Pinch of sea salt
Instructions
-
Prep pan: Line an 8×8″ pan with parchment, leaving overhang. Lightly spray with oil.
-
Melt & mix: In a saucepan, melt honey and butter over low heat, stirring until smooth. Remove from heat, stir in vanilla and salt.
-
Combine dry: In a bowl, mix oats, graham crumbs, marshmallows, and chocolate chips.
-
Stir it up: Pour warm mixture over dry ingredients. Fold quickly until coated.
-
Pack & top: Press into pan firmly. Top with reserved marshmallows, pressing gently.
-
Chill: Refrigerate 1 hour or freeze 20 mins.
-
Slice & serve: Lift out and cut into 10 bars. Store chilled in an airtight container.
Notes
-
PB S’mores: Add ¼ cup melted peanut butter to honey mix.
-
Gluten-free? Use GF oats and grahams.
-
Want crunch? Add chopped pretzels or peanuts.
-
Feeling fruity? Top with sliced strawberries before chilling.
- Prep Time: 10 min
Nutrition
- Calories: 170Cal Per Bar
- Sugar: 13g
- Fat: 7g
- Carbohydrates: 24g
- Fiber: 2g
- Protein: 2g
Nutritional Per Serving (1 bar):
Calories: 170 | Fat: 7g (Sat 4g) | Carbs: 24g | Fiber: 2g | Sugar: 13g (Added 10g) | Protein: 2g
Note: Values approximate. Using coconut oil reduces sat fat by 2g.
Final Thoughts: Why These Bars Are More Than a Snack
These s’mores granola bars are a edible hug—a way to savor campfire nostalgia without the smoke alarm symphony. They’re proof that simple ingredients, when treated right, can outshine fancy packaging. Whether you’re meal-prepping lunches, craving midnight sweetness, or need a hike-ready pick-me-up, these bars deliver joy in every chew. So tie on your apron, channel your inner child, and let’s make life a little sweeter—one no-bake bar at a time.