Easy Easter Fudge: Your No-Bake Ticket to Springtime Bliss
Hey there, friend! Beau here, welcoming you back to the Feastical kitchen. Can you feel it? That little shift in the air? The days are getting longer, the flowers are starting to peek out, and there’s this unmistakable buzz of anticipation for sunny afternoons and gathered tables. For me, spring, and especially Easter, has always been about two things: vibrant color and shared sweetness. It’s about creating moments that feel as bright and joyful as a basket full of pastel eggs.
But let’s be real for a second. Sometimes, between planning the big meal, hiding eggs for the hunt, and playing host with the most, the thought of tackling a complicated dessert can feel… well, exhausting. That’s exactly why I’m head-over-heels for this Easy Easter Fudge. This isn’t just a recipe; it’s a lifeline. A promise that you can create something stunningly beautiful, incredibly delicious, and downright celebratory without ever turning on your oven.
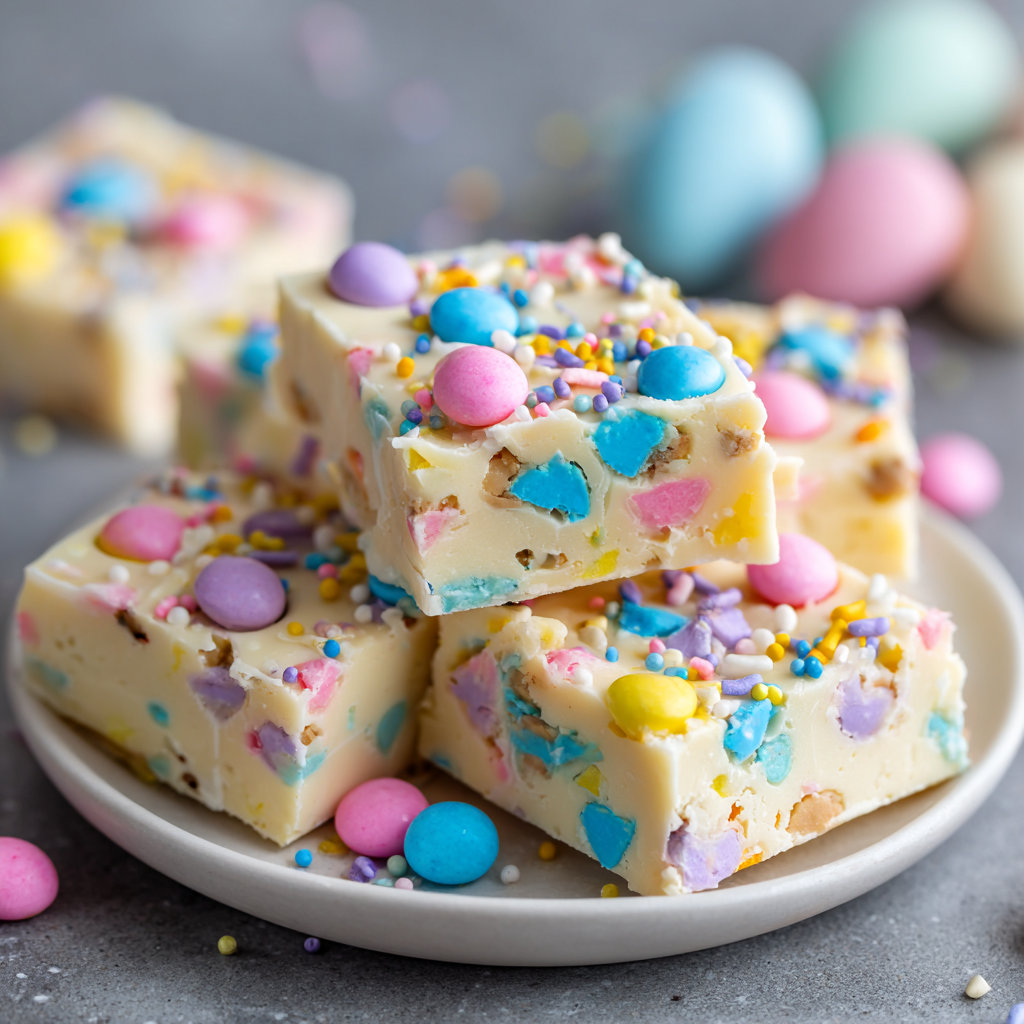
Imagine the creamiest, dreamiest white chocolate fudge, so smooth it practically melts on your tongue, packed with cheerful bursts of colorful pastel candies. It looks like you fussed for hours, but our little secret is that it comes together in one saucepan in about 10 minutes flat. This fudge is the edible embodiment of a warm spring hug. It’s perfect for gifting to neighbors, setting out as the star of your dessert table, or simply stashing in the fridge for when you need a little square of pastel-perfect happiness. So, grab your favorite saucepan and let’s make some magic that’s as simple as it is spectacular.
A Sweet Slice of Memory
This recipe always takes me back to my grandma’s linoleum-floored kitchen. She was a wizard with a can of sweetened condensed milk, and Easter weekend was her grand performance. While the grown-ups were elbow-deep in ham glazes and potato salad, she’d beckon me over to her “candy station.” There was no fancy double boiler—just a trusty, well-loved saucepan and a wooden spoon.
I was her official “candy stirrer” and, more importantly, her “color consultant.” She’d pour out bags of bright jelly beans and those tiny, pastel-coated chocolate eggs, and my job was to pick the prettiest mix to fold into her glossy white fudge. The concentration was intense! She’d let me press a few extra pieces on top, creating a mosaic that felt like my own masterpiece. The real magic wasn’t in the eating (though that was divine), but in that shared, quiet moment of creation amidst the holiday chaos. It taught me that the best recipes aren’t about perfection; they’re about the stories and the smiles you stir into the pot. This is my homage to her—a no-fuss, all-joy treat that’s just begging for you to create your own sweet memory with it.
Gathering Your Pastel Palette: Ingredients & Insights
One of the best parts of this recipe is its beautiful simplicity. You only need a handful of pantry staples to create pure magic. Here’s what you’ll need, along with my little chef notes to guide you.
- 3 cups white chocolate chips: This is the foundation of our fudge. I recommend a good-quality brand for the smoothest melt and richest flavor. Chef’s Insight: White chocolate can be a bit finicky. Make sure yours is real white chocolate, which contains cocoa butter. If you’re feeling adventurous, you can swap half for semi-sweet or milk chocolate chips for a marbled effect!
- 1 (14 oz) can sweetened condensed milk: The secret weapon! This miracle ingredient gives the fudge its iconic creamy, firm-yet-soft texture and its luxurious sweetness. Substitution Tip: There’s no perfect 1:1 swap here, as this is the key to the no-bake structure. For a different vibe, you could try using canned vanilla or coconut frosting as a base in other fudge recipes, but for this classic, stick with the sweetened condensed milk.
- 2 tablespoons butter: Just a couple tablespoons adds a lovely richness and helps create a beautiful sheen on the finished fudge. Use unsalted or salted—your choice! I usually go with unsalted to control the overall saltiness.
- 1 teaspoon vanilla extract: A splash of pure vanilla is like adding a little background music—it enhances all the other flavors and rounds out the sweetness perfectly. For a fun twist, try almond or clear vanilla extract!
- 1 cup pastel Easter candies: The star of the show! This is where your personality shines. Chef’s Insight: I love a mix of textures. Try ½ cup chopped pastel candy-coated chocolates (like mini eggs) and ½ cup pastel M&M’s or sprinkles. If using larger candies like full-sized mini eggs, give them a rough chop so they distribute evenly and are easier to bite into.
Let’s Make Some Magic: Step-by-Step Fudge Fun
Ready? This is where the fun happens. Put on some tunes, and let’s transform these simple ingredients into a holiday showstopper.
Step 1: Prep Your Stage. Before you even turn on the stove, line an 8×8 inch baking pan with parchment paper. Let the paper overhang on two sides—this creates “handles” that will let you lift the entire slab of fudge out later for picture-perfect cutting. Trust me, this little hack is a game-changer. Give your pan a quick light spray under the parchment to help it stick in place.
Step 2: The Gentle Melt. In a medium-sized saucepan, combine your white chocolate chips, the entire can of sweetened condensed milk, and the butter. Now, here’s the crucial part: use LOW heat. We are not boiling, we are gently coaxing. Turn the burner to its lowest setting. Stir constantly and patiently with a wooden spoon or silicone spatula. Why constant stirring? It prevents the sweetened condensed milk from scorching on the bottom and encourages the chocolate to melt evenly without seizing. You’ll watch it go from a lumpy mess to a gloriously smooth, velvety lake in about 5-7 minutes.
Step 3: Flavor & Fold. Once your mixture is completely smooth and no lumps remain, remove the saucepan from the heat immediately. Stir in that teaspoon of vanilla extract—it will sizzle and smell amazing. Now, let the mixture cool for just 60-90 seconds. This brief cooldown is a pro tip: if the fudge base is too hot when you add the candies, they might melt or bleed their colors. We want pretty pops of color! After it cools slightly, gently fold in about ¾ of your pastel candies. Use a folding motion to distribute them evenly without deflating that creamy texture.
Step 4: Set & Sprinkle. Quickly pour your gorgeous, candy-studded mixture into your prepared pan. Use your spatula to spread it into an even layer. Now, take the remaining ¼ cup of candies and artfully press them onto the surface. This isn’t just for looks (though it is stunning); it tells everyone exactly what deliciousness is inside!
Step 5: The Big Chill. Pop the pan into the refrigerator, uncovered, for at least 2-3 hours, or until it’s completely firm to the touch. Don’t try to rush this at room temperature—the chill is what gives it the perfect fudge texture. For super clean cuts, you can even let it set overnight.
Step 6: The Grand Finale – Cutting! Use the parchment paper handles to lift the fudge slab onto a cutting board. With a large, sharp knife, wipe the blade clean with a hot, damp cloth between cuts for the cleanest, most professional-looking squares. I usually cut it into 16 generous pieces for sharing, or 64 tiny, two-bite pieces for a party platter.
Sharing the Sweetness: How to Serve Your Easter Fudge
This fudge is a superstar all on its own, but how you present it can turn it into an unforgettable part of your celebration.
For your Easter table, pile the squares on a beautiful cake stand or a vintage platter. Scatter a few extra loose pastel candies or edible flowers around the base for a truly Instagram-worthy moment. It pairs fantastically with a pot of after-dinner coffee or a glass of cold milk.
Thinking of gifts? This is my go-to! Pick up some clear cellophane bags and pastel ribbon from the craft store. Stack a few squares in a bag, tie it with a ribbon, and attach a handmade tag. It’s a heartfelt, homemade gift that neighbors, teachers, and friends will absolutely adore. You can even layer different colored fudges in a mason jar for a stunning “fudge jar” gift.
And for every day? Keep it in an airtight container in the fridge (it stays firmer and fresher that way). Then, whenever you need a little moment of spring or a sweet treat with your afternoon tea, it’s right there waiting for you.
Make It Your Own: Delicious Twists & Swaps
The beauty of this base recipe is its incredible versatility. Once you’ve mastered the classic, try one of these fun spins!
- Springtime Swirl: After pouring the fudge into the pan, drop small spoonfuls of prepared strawberry or key lime frosting on top. Use a toothpick to swirl it gently into the white fudge for a gorgeous pastel marbled effect.
- Bunny Bait Crunch: Before adding the candies, fold in 1 cup of pastel-colored popcorn, ½ cup of broken pretzel sticks, and ½ cup of mini marshmallows for a fun, crunchy, sweet-and-salty version.
- Dark Chocolate & Sea Salt: Swap the white chocolate chips for dark chocolate chips. Omit the pastel candies and instead, after smoothing into the pan, sprinkle the top generously with flaky sea salt and maybe some chopped toasted almonds.
- Fruity Pastel Bliss: Use ½ cup of freeze-dried raspberries or strawberries (lightly crushed) and ½ cup of white chocolate chips instead of pastel candies. The freeze-dried fruit adds an incredible pop of tart flavor and a beautiful color without any moisture.
- Vegan-Friendly Version: Use high-quality vegan white chocolate chips and a can of full-fat coconut milk mixed with ¾ cup of powdered sugar (simmered together to thicken slightly) as a substitute for the sweetened condensed milk. Fold in vegan-friendly candies or sprinkles!
Beau’s Kitchen Confidential: A Few Parting Thoughts
This recipe has been my springtime sidekick for years, and it’s evolved in the silliest ways. One year, in a pre-coffee haze, I accidentally used a whole stick of butter instead of two tablespoons. The result? An incredibly rich, almost butterscotchy fudge that my friends demanded I recreate! (I don’t recommend this regularly, but it was a happy accident.)
The biggest lesson this fudge has taught me is to not fear simplicity. In a world of intricate layer cakes and fancy techniques, there’s a profound joy in a dessert that just… works. Every single time. It’s forgiving, it’s fast, and it makes people ridiculously happy. That’s the Feastical spirit right there. Don’t stress if your candies sink a little or if your top isn’t perfectly symmetrical. That homemade charm is what makes it special. It means you made it with your own two hands, and that’s the sweetest ingredient of all.
Your Fudge Questions, Answered!
Q: My fudge turned out grainy. What happened?
A: This usually means the white chocolate got too hot or was stirred too vigorously, causing it to “seize.” Next time, keep the heat on low and stir gently and constantly. Also, ensure you’re using real white chocolate chips, not “white baking morsels” which have different properties.
Q: Can I use the microwave instead of the stove?
A: Absolutely! Combine ingredients in a large microwave-safe bowl. Heat in 30-second bursts, stirring well after each, until completely smooth. This method gives you even more control over the heat.
Q: How long does this fudge keep, and how should I store it?
A: Stored in an airtight container in the refrigerator, it stays fresh and firm for up to 2 weeks. You can also freeze it for up to 3 months! Just thaw in the fridge overnight. It’s best served chilled.
Q: My candies melted/bled color into the fudge! Help!
A: No worries—it still tastes amazing! This happens if the fudge base is too hot when you mix them in. Next time, let the melted mixture cool for a full 2 minutes off the heat before folding. Using higher-quality chocolate candies can also help, as their coating is often more stable.

Easy Easter Fudge (No-Bake Pastel Candy Fudge)
Description
This Easy Easter Fudge is the perfect quick dessert when you want something festive without turning on the oven. It’s smooth, creamy, and packed with pastel candies for a cheerful holiday look. With just a few ingredients and one pan, you can make a batch in minutes — great for Easter tables, gifts, or a simple sweet snack.
Ingredients
-
3 cups white chocolate chips
-
1 can (14 oz / 400 g) sweetened condensed milk
-
2 tablespoons butter
-
1 teaspoon vanilla extract
-
1 cup pastel Easter candies (mini eggs, pastel M&M’s, or chopped candy-coated chocolates)
Instructions
-
Prepare Pan
Line an 8×8-inch (20×20 cm) pan with parchment paper, leaving overhang on the sides for easy lifting. -
Melt the Base
In a saucepan over low heat, combine white chocolate chips, sweetened condensed milk, and butter. Stir constantly until fully melted and smooth (about 5–7 minutes).Microwave option: Heat in a microwave-safe bowl in 30-second bursts, stirring between each, until smooth.
-
Add Flavor
Remove from heat and stir in vanilla extract. Let cool for about 1 minute. -
Add Candies
Fold in about ¾ cup of the Easter candies. -
Spread & Decorate
Pour mixture into prepared pan and spread evenly. Press remaining candies on top. -
Chill
Refrigerate for 2–3 hours or until firm. -
Cut
Lift out using parchment, cut into squares, and serve.
Notes
-
✅ Use low heat — white chocolate can scorch or turn grainy if overheated.
-
✅ Let the mixture cool briefly before adding candies so colors don’t bleed.
-
✅ For cleaner cuts, warm your knife under hot water and wipe dry between slices.
-
✅ Store fudge in the fridge for best texture.
-
✅ Chop large candies so every piece gets some crunch.
A Quick Note on Nutrition
Let’s keep it real—this is a celebratory treat, a dessert meant to be savored and shared joyfully. While I’m all about balance in the kitchen, this fudge is pure, unapologetic indulgence. The estimated nutritional information below is for a single square (based on 16 servings from the recipe) and is provided as a general guideline. Actual values can vary based on the specific brands of ingredients you use and the exact size of your cuts.
Remember, the best “diet” for the soul sometimes includes a homemade square of pastel fudge made with love. Enjoy it mindfully, share it generously, and savor every sweet, creamy bite as part of your holiday celebration!
Wrapping It Up With a Bow (Or a Sprinkle!)
And there you have it, friend! Your guide to creating the easiest, most festive Easter treat imaginable. This pastel candy fudge is more than just a no-bake dessert; it’s a little edible piece of spring joy, a conversation starter for your table, and a testament to the fact that incredible food doesn’t have to be complicated.
I hope this recipe finds its way into your tradition, creating its own silly, sweet stories in your kitchen. Maybe you’ll be the cool aunt who brings the legendary fudge, or the neighbor who starts a delicious annual gifting tradition. However you share it, you’re sharing a little piece of that Feastical feeling: warmth, simplicity, and connection, one delicious square at a time.
Happy Easter, and happy cooking! Don’t forget to tag me @feastical if you make it—I love seeing your colorful creations.
With a full heart and a sweet tooth,
Beau Collier