The Ultimate Crowd-Pleaser: Let’s Talk Chili Cheese Dip
Hey friends, Beau here from Feastical! Gather ’round, because we’re about to dive into one of the most sacred, communal, and downright delicious dishes known to humankind: the legendary Chili Cheese Dip. We’re not just making a snack; we’re crafting the centerpiece of your next game day, movie marathon, or “I-deserve-a-treat” Tuesday night. This isn’t just a recipe; it’s a warm, gooey, flavor-packed hug in a dish, and I am so excited to share my favorite version with you.
Let’s be real. We’ve all been to that party where the dip is the undeniable star. The one where folks hover around the table, chips in hand, engaging in deep philosophical debates about sports or the latest streaming show, but their eyes keep drifting back to that bubbling, cheesy, glorious concoction. That’s the power we wield as home cooks. With just a handful of simple ingredients and about 25 minutes, you can become the hero of the gathering. This recipe is my go-to because it strikes the perfect balance between ridiculously easy and profoundly satisfying. It’s the culinary equivalent of your favorite cozy sweater—comforting, reliable, and always a good idea. So, preheat that oven, grab your favorite baking dish, and let’s create some magic that’s guaranteed to have everyone asking, “Can I get the recipe?”
A Dip That Defined My Football Sundays
This dip takes me right back to my childhood living room, where the TV was permanently tuned to football on autumn Sundays. The air was crisp outside, but inside, it was a sanctuary of warmth, laughter, and the unmistakable aroma of something cheesy baking in the oven. My dad was (and is) a serious football fan, and my mom was the undisputed MVP of game day snacks.
Her version of this dip was her secret weapon. She’d pull it out of the oven right as the pre-game show started, the cheese still erupting in lazy bubbles. That sizzle was our family’s dinner bell. We’d all descend, armed with a mountain of salty tortilla chips. For those few hours, differences in team allegiance were set aside. The only competition was who could snag the perfect chip-load—one laden with just the right amount of meaty chili, velvety cheese, and a hit of cooling sour cream. It was more than fuel for the game; it was the glue of our tradition. That dip taught me that the best recipes aren’t about fancy techniques; they’re about creating a feeling of home and togetherness. Every time I make it now, that feeling comes right back with the first whiff from the oven.
Your Flavor Toolkit: Gathering the Goods
Here’s the beautiful part: this dip is a masterpiece of simplicity. Each ingredient plays a crucial role in building that iconic flavor and texture. Let’s break it down:
- 1 can (15 oz) Chili (with or without beans): This is your flavor foundation! I’m a “with beans” guy for the extra texture and heartiness, but the “without” camp is totally valid. Chef’s Insight: Don’t be afraid to explore! Try a vegetarian chili for a meat-free twist, or kick it up with a “hot” variety. Using a quality brand you already love is the key here.
- 1 block (8 oz) Cream Cheese, softened: The secret weapon for luxurious, clingy creaminess. Pro Tip: Let it sit on the counter for a good 30-60 minutes before you start. A soft block spreads like a dream and melts evenly. In a pinch, you can microwave it for 15-20 seconds, but do not let it get hot and oily!
- 2 cups Shredded Cheddar Cheese: The star of the show! I highly recommend shredding your own from a block—it melts smoother and doesn’t contain the anti-caking agents found in pre-shredded bags. Substitution Tip: A Monterey Jack blend is fantastic for a mellower melt, or pepper jack for a spicy kick!
- 1/2 cup Sour Cream (optional): This is your flavor harmonizer. Swirled in at the end, it adds a lovely tang that cuts through the richness and brings all the flavors into balance. For a lighter touch, Greek yogurt works too!
- 1/4 tsp Garlic Powder: A little umami magic. It blends seamlessly into the background, amplifying the savory notes without shouting “garlic!”
- Optional Toppings: This is where you make it your own! Sliced green onions for fresh crunch, diced jalapeños (fresh or pickled) for heat, a drizzle of hot sauce or salsa, a sprinkle of crispy bacon bits, or even a handful of fresh cilantro.
Let’s Get Cooking: Building Your Dip Layer by Layer
Ready? This is the fun part. Follow these steps, and you’re guaranteed dip perfection.
- Preheat & Prep: First things first, crank that oven to 375°F (190°C). This gives it time to come to the perfect temperature while you assemble. Grab an 8×8 baking dish, a 9-inch pie plate, or even a 10-inch oven-safe skillet (my personal favorite for serving straight to the table!).
- The Creamy Base: Take your beautifully softened cream cheese and plop it right into the center of your dish. Now, using a spoon or a small offset spatula, spread it into an even layer across the bottom. Think of this as laying down the plush, creamy carpet for all the other ingredients. Chef’s Hack: If the cream cheese is still being a little stubborn, dip your spreading tool in hot water—it will glide like butter!
- The Hearty Middle: Open that can of chili and give it a quick stir. Now, spoon it evenly over the cream cheese layer. Use the back of your spoon to gently spread it, but don’t feel you need to mix it with the cream cheese. We want those distinct, glorious layers. This chili layer is the flavor-packed surprise in the middle.
- The Cheesy Blanket: Here comes the gold! Sprinkle all two cups of that gorgeous shredded cheddar over the chili. Be generous and make sure you get coverage all the way to the edges. As it melts, it will form that irresistible, bubbly, golden-brown crust we’re all dreaming of.
- The Bake-Off: Carefully slide your assembled masterpiece into the preheated oven. Now, the hardest part: the wait. Bake for 20-25 minutes. You’re looking for the cheese to be fully melted, the edges to be bubbly and active, and the whole dish to be heated through. If you want more browning on top, you can pop it under the broiler for the last 60-90 seconds—just watch it like a hawk!
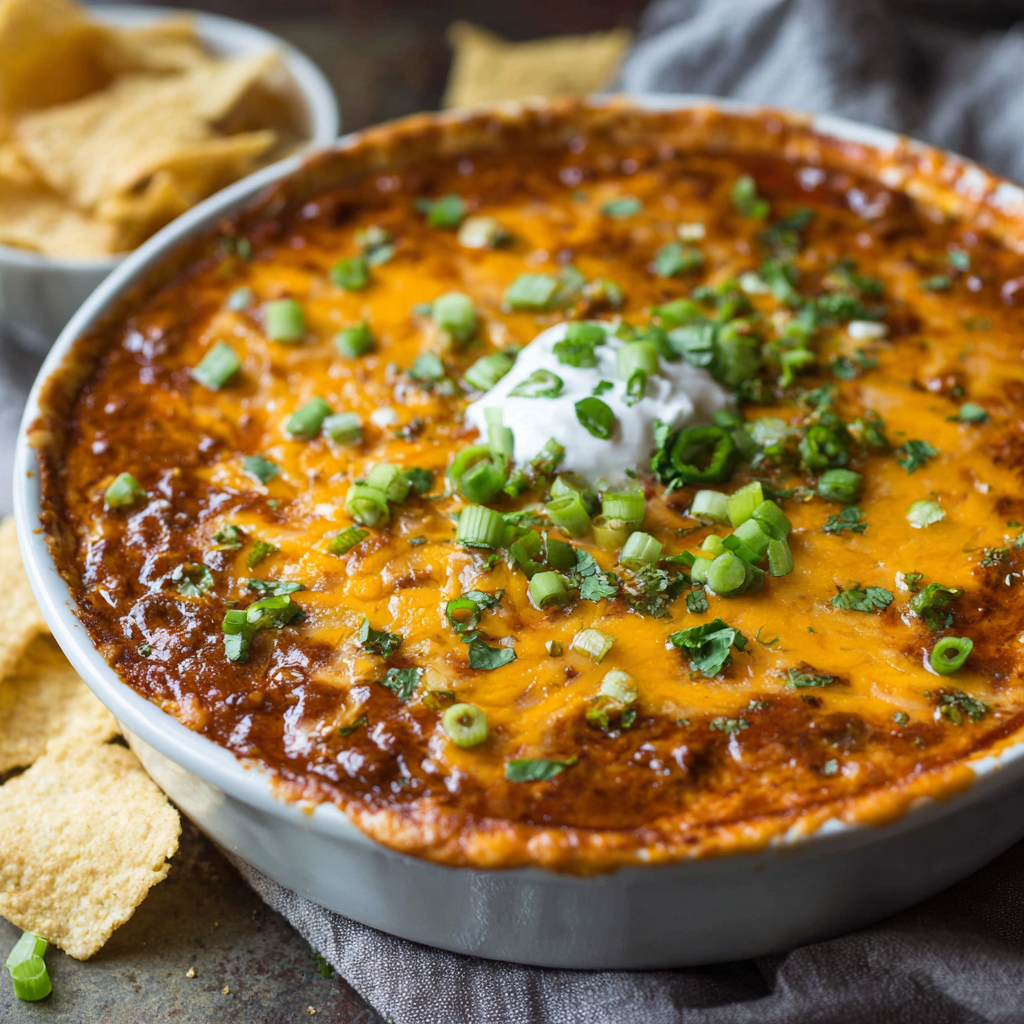
- The Finishing Touches: Pull that beautiful, bubbling dish out of the oven (careful, it’s hot!). Let it sit for just 2-3 minutes—this helps it set slightly so it’s scoopable, not lava-like. If you’re using the sour cream, now’s the time to dollop it on and gently swirl it in. Then, artfully scatter your chosen toppings. The vibrant green of onions or the pop of color from jalapeños makes it look as incredible as it tastes.
Shortcut Alert! In a serious time crunch? You can absolutely make this in the microwave. Layer everything in a microwave-safe bowl and heat on high in 1-minute intervals, stirring well between each, until it’s completely hot and melted. It won’t have the same baked texture, but the flavor will still be 100% there!
How to Serve This Cheesy Masterpiece
Presentation is part of the fun! I love serving this dip right in the skillet or dish it baked in—it keeps it hot and has that rustic, “dig in” vibe. Place it on a trivet in the center of your table with serving tools and dippers all around.
Now, for the vehicles to get this dip into your mouth:
- The Classic: Sturdy, restaurant-style tortilla chips are the undisputed champion. They have the perfect scoop-shaped architecture.
- The Crunchy Alternative: Thick, ridged potato chips, pretzel rods, or even crispy bagel chips offer a fantastic salty contrast.
- The Veggie Route: For a lighter option, offer bell pepper strips, cucumber rounds, carrot sticks, or endive leaves.
- Think Outside the Chip Bowl: This dip is magical spooned over crispy french fries or tater tots for the ultimate loaded situation. It’s also incredible as a filling for baked potatoes or a topping for hot dogs!
Make It Your Own: Delicious Twists & Swaps
Once you’ve mastered the classic, the world is your cheesy oyster. Here are a few of my favorite ways to mix it up:
- The “Fully Loaded” Taco Dip: After baking, top with shredded lettuce, diced tomatoes, sliced black olives, and a extra dollop of guacamole alongside the sour cream. It’s a dip-salad hybrid that’s irresistible.
- The Buffalo Chicken Swap: Replace the canned chili with 2 cups of shredded cooked chicken tossed in 1/2 cup of buffalo sauce. Use a blue cheese dressing instead of sour cream for the finish. Game changer!
- Breakfast for Dinner Dip: Use a can of chili without beans, and after baking, top with crispy crumbled breakfast sausage and a few fried eggs. Serve with toast points for dipping. Yes, really.
- Spicy White Chicken Chili Version: Use a can of white chicken chili as your base. Swap the cheddar for pepper jack cheese. Top with chopped cilantro and a squeeze of lime. A brighter, zestier flavor profile.
- Dietary-Friendly Tweaks: Easily make this gluten-free by ensuring your chili and toppings are GF. For a vegetarian version, use a high-quality veggie chili. To make it vegan, use plant-based cream cheese, shredded vegan cheddar, vegan sour cream, and a vegan chili.
Beau’s Kitchen Confidential
This recipe has been a living, evolving entity in my kitchen for years. The biggest “aha” moment came when I stopped mixing everything together and started layering. That simple change created a more interesting eating experience—you get that cool, creamy base, the warm chili middle, and the sharp, melted cheese top all in one bite. Perfection!
One funny story: I once brought this to a potluck and set it next to a beautifully arranged, delicate veggie platter. Let’s just say the veggie platter went home nearly full, and my dish looked like it had been licked clean (by very polite, chip-wielding wolves). A proud moment, indeed. The recipe has also survived my most experimental phase, which involved adding a layer of refried beans (solid, but makes it VERY hearty) and another time where I foolishly used extra-hot chili without warning my guests. Learn from my mistakes: know your crowd’s heat tolerance!
Your Dip Questions, Answered
Q: My dip turned out a bit watery/oily. What happened?
A: This usually stems from the chili. Some canned chilis have more liquid than others. Next time, try draining off a little of the excess liquid from the can before layering. Also, ensure your cream cheese was truly softened, not melted, as melted cream cheese can sometimes separate.
Q: Can I make this chili cheese dip ahead of time?
A: Absolutely! Assemble the dip completely in your baking dish (right up through adding the shredded cheese), cover tightly with plastic wrap, and refrigerate for up to 24 hours. When you’re ready, let it sit on the counter for 20-30 minutes while the oven preheats, then bake as directed. You may need to add 5-10 minutes to the bake time since it’s starting cold.
Q: What are the best leftovers like, and how do I reheat them?
A: Leftovers are a beautiful thing! The dip will thicken as it cools. Reheat it gently in the microwave at 50% power, stirring frequently, or in a small saucepan over low heat with a splash of milk to bring back the creamy consistency. It makes an amazing next-day baked potato topping!
Q: I don’t have an oven-safe dish. Can I still make this?
A> Of course! You can mix everything (except toppings) in a microwave-safe bowl and use the microwave method mentioned in the steps. Or, combine everything in a saucepan and heat it slowly on the stovetop over medium-low heat, stirring constantly until hot and blended.

Chili Cheese Dip : Hot, Gooey & Game Day Ready
Description
Chili Cheese Dip is one of those recipes that never lets you down. It’s warm, creamy, and packed with bold, comforting flavor—exactly the kind of dish that brings people together around the table. With just a few pantry staples and minimal prep, you can have a bubbling, crowd-pleasing dip ready in under 30 minutes. Whether it’s game day, movie night, or a casual get-together, this classic always steals the show.
Ingredients
-
1 can (15 oz) chili (with or without beans)
-
8 oz cream cheese, softened
-
2 cups shredded cheddar cheese
-
½ cup sour cream (optional)
-
¼ tsp garlic powder
-
Optional toppings: sliced green onions, diced jalapeños, hot sauce, salsa, or bacon bits
Instructions
-
Preheat the Oven
Preheat your oven to 375°F (190°C). Lightly grease an 8×8-inch baking dish, pie plate, or oven-safe skillet. -
Spread the Cream Cheese
Spread the softened cream cheese evenly over the bottom of the dish. -
Add the Chili
Spoon the chili evenly over the cream cheese layer. Gently spread it out without mixing the layers. -
Top with Cheese
Sprinkle the shredded cheddar cheese evenly over the chili. Add the garlic powder over the top. -
Bake
Bake uncovered for 20–25 minutes, until the cheese is fully melted and bubbly around the edges. -
Finish & Serve
Remove from the oven and let sit for 2–3 minutes. Dollop and lightly swirl in sour cream if using, then add your favorite toppings. Serve warm.
Notes
-
Soften the cream cheese fully for smooth spreading and even melting.
-
Drain excess liquid from the chili if it looks very thin to prevent a watery dip.
-
Shred your own cheese for the creamiest melt—pre-shredded cheese can be grainy.
-
Keep it warm in a small slow cooker or warming tray for parties.
-
Make it ahead: Assemble, cover, and refrigerate up to 24 hours before baking.
A Note on Nutrition
Friends, let’s be real: this is a celebratory, indulgent, shareable dish. It’s about joy and community, not counting every gram. That said, I believe in mindful eating, so here’s a general breakdown per serving (assuming 8 servings) to help you plan your feast. Remember, these are estimates and can vary based on the specific brands of chili and cheese you use, and how generously you scoop!
Approximately per serving: Calories: 290 | Protein: 10g | Carbohydrates: 8g | Fat: 24g | Fiber: 1g
You can easily lighten it up by using low-fat cream cheese, reduced-fat cheddar, and light sour cream. Serving it with a mountain of fresh veggie dippers alongside your chips is also a fantastic way to balance the plate. But sometimes, you just need that classic, full-flavor experience, and that’s more than okay—it’s encouraged.
Wrapping It All Up
And there you have it, my friends—my heart and soul poured into one hot, bubbly dish. This Chili Cheese Dip is more than the sum of its simple parts. It’s a catalyst for conversation, a comfort on a quiet night, and the undeniable MVP of any party spread. It proves that you don’t need complicated techniques or a pantry full of exotic ingredients to make something truly memorable.
So the next time you hear “What should we make for the game?” or “I have people coming over in an hour!” you’ll know exactly what to do. Whip up this dip, watch it disappear, and bask in the compliments. Most importantly, share it with people you love. Because at Feastical, we believe food tastes best when it’s shared. Now, go forth and get dipping! And be sure to tag me @Feastical when you make your version—I love seeing your kitchen creations.
Final Thoughts
At the end of the day, this isn’t just a recipe—it’s an invitation. An invitation to gather, to share, and to create those little moments of joy that turn into lasting memories. Whether it’s the roar of a touchdown, the quiet comfort of a weeknight, or the laughter of friends around your table, this Chili Cheese Dip has a way of making moments feel a little more special.
It’s a reminder that great food doesn’t have to be complicated. With a few simple ingredients, a little warmth from the oven, and a whole lot of heart, you can create something that brings people together—no culinary degree required. So here’s to the dips that disappear first, the chips that snap under the weight of cheesy goodness, and the conversations that flow just a little easier because of them.