Hey, Let’s Beat the Heat with a Healthy Frozen Treat!
Hey friends, Beau here from Feastical! Is it just me, or is the summer sun doing its absolute best to turn our kitchens into saunas? The thought of turning on the oven right now feels like a serious act of bravery. If you’re dreaming of something sweet, cold, and satisfying but don’t want to undo all that good summer energy, I’ve got you. Today, we’re stepping away from the stovetop entirely and heading straight to the freezer.
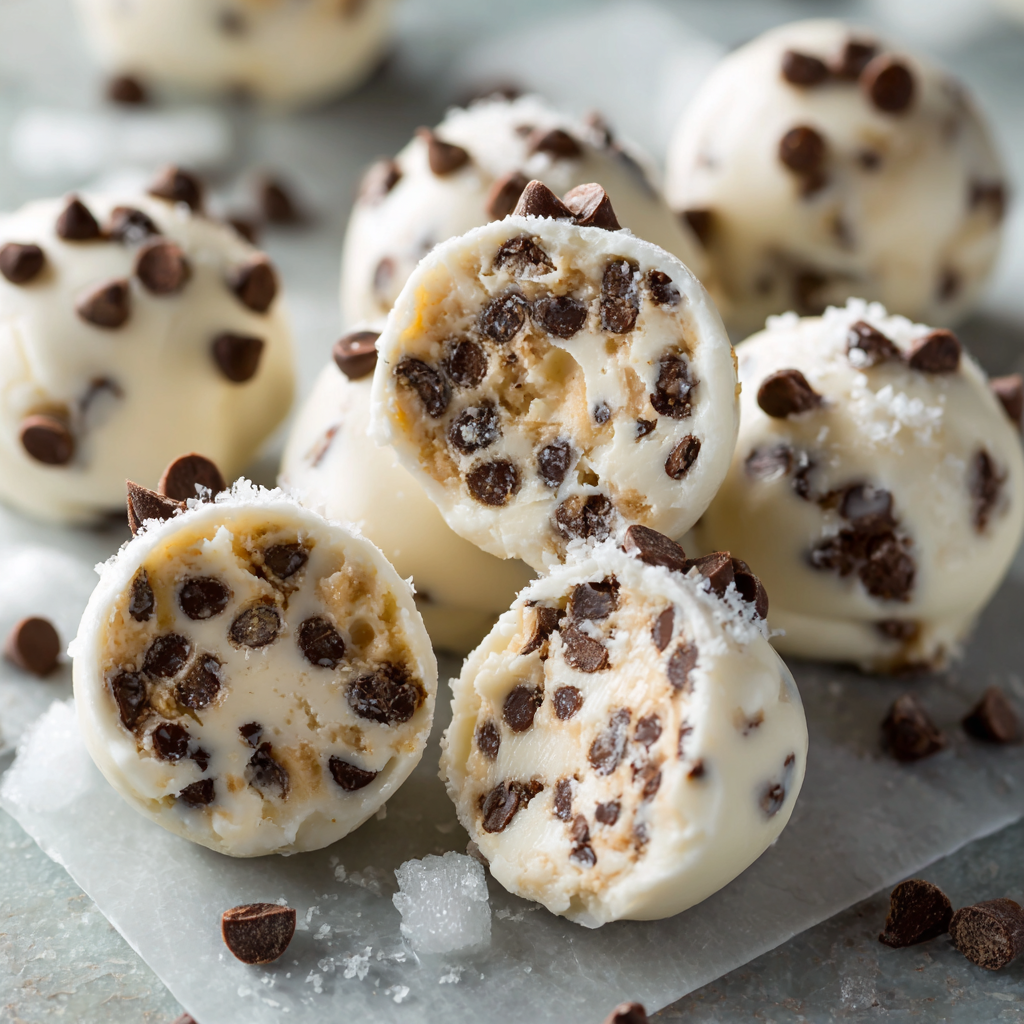
Let me introduce you to my latest obsession: Frozen Chocolate Chip Yogurt Bites. Imagine the best parts of cookie dough—that creamy, vanilla-kissed base and little bursts of chocolate—but light, refreshing, and packed with protein. These little frozen nuggets are the ultimate hack for when a sweet craving hits. They’re perfect for post-pool snacking, a quick after-dinner treat, or even stashing in a lunchbox to keep things cool. The best part? You only need a bowl, a spoon, and about 10 minutes of your time. No fancy equipment, no baking, just pure, feel-good deliciousness. So, let’s grab that tub of Greek yogurt and make a mess (a very small, tidy one, I promise) that ends in frosty, chocolatey bliss.
A Trip Down Memory Lane: Ice Cream Trucks & Kitchen Experiments
This recipe takes me right back to being a kid, glued to the window in the dead of summer, listening for the magical jingle of the ice cream truck. My allowance was always burning a hole in my pocket, ready for a rocket pop or a chocolate-dipped vanilla cone. But as I got older and started my own journey with food, I wanted to recreate that joy—that instant, cooling happiness—in a way that felt a bit more like the “grown-up” cook I was trying to be.
My first attempts were… interesting. Frozen banana blobs that turned brown, “nice cream” that melted in seconds, and let’s not talk about the granola bar incident. But then, one sweltering afternoon, I was staring into my fridge: a giant tub of Greek yogurt, a jar of almond butter from my morning toast, and a half-eaten bag of mini chocolate chips left over from cookies. In a moment of “why not?” genius, I stirred them all together, dolloped the mixture onto a tray, and crossed my fingers. Two hours later, I popped one in my mouth. It was cold, creamy, subtly sweet, and had that undeniable cookie dough vibe. It was a total “AHA!” moment. It wasn’t just a substitute for ice cream; it was its own wonderful thing. Now, I keep a container of these bites in my freezer at all times. Consider them my homemade, healthy answer to that childhood ice cream truck jingle.
Gathering Your Flavor Crew: Simple Ingredients, Big Impact
Here’s the beautiful part: this recipe is a masterclass in simplicity. Each ingredient plays a specific role, and together, they create magic. Let’s break it down.
- 1 cup plain or vanilla Greek yogurt: This is our superstar base. I prefer full-fat Greek yogurt for ultimate creaminess and staying power, but any fat level works. Chef’s Insight: The thickness of Greek yogurt is key—it freezes better than regular yogurt, which can get icy. If you’re dairy-free, a thick, plain coconut or almond milk yogurt will work, but check the texture after mixing.
- 2 tablespoons almond butter or peanut butter: This is the secret weapon! It adds richness, a hint of nutty flavor, and helps bind everything together for a perfect, fudgy texture. Substitution Tip: Any nut or seed butter you love works here. Sunflower seed butter is a fantastic nut-free option.
- 1 tablespoon honey or maple syrup: Just a touch of natural sweetness to balance the tang of the yogurt. Chef’s Insight: If your nut butter is very sweet or you’re using vanilla yogurt, you can reduce this to 2 teaspoons. For a vegan version, pure maple syrup is the way to go.
- ½ teaspoon vanilla extract: Non-negotiable for that classic, comforting cookie dough flavor. It rounds out all the other notes perfectly.
- ½ cup mini chocolate chips: The “chip” in our chocolate chip bite! I insist on mini chips. They distribute more evenly in each bite, so you get chocolate in every single one. Chef’s Insight: For a darker, richer flavor, use mini dark chocolate chips. If you need dairy-free, check for Enjoy Life brand chips.
- Optional: A tiny pinch of sea salt: This is my pro move. Salt makes sweet things taste sweeter and deeper. Just a pinch elevates these from “yum” to “WOW.”
Let’s Make Some Magic: Your Foolproof, No-Bake Guide
Ready? This is so easy, you’ll have it memorized after one batch. Let’s do this step-by-step, with all my favorite little hacks along the way.
Step 1: The Big Mix. Grab a medium-sized mixing bowl. Plop in your Greek yogurt, nut butter, honey (or maple syrup), and vanilla extract. Now, take a spatula or a sturdy spoon and stir, stir, stir until it’s completely smooth and homogeneous. You shouldn’t see any streaks of nut butter. Chef’s Hack: If your nut butter is super thick and cold from the fridge, warm it for 10 seconds in the microwave first. It’ll blend into the yogurt like a dream.
Step 2: Chocolate Chip Party. Pour in those glorious mini chocolate chips (and your optional pinch of salt). Fold them in gently but thoroughly. You want every scoop to be loaded with chocolate. Chef’s Tip: Reserve a small handful of chips for later. Trust me on this.
Step 3: Scoop & Shape. Line a baking sheet, plate, or tray with parchment paper. No parchment? A silicone baking mat works great too. Now, take a teaspoon or a small cookie scoop (my weapon of choice for uniform bites) and drop small mounds onto the sheet. They should be about the size of a heaping teaspoon. Chef’s Hack: For a prettier finish, after you scoop each mound, use the back of a clean spoon to gently flatten the top just a tad and press a few of those reserved chocolate chips on top. It makes them look bakery-fancy!
Step 4: The Big Chill. Carefully slide the tray into your freezer. We need a solid, uninterrupted freeze for at least 2 hours. They should be completely firm to the touch. Chef’s Pro-Tip: If you’re not in a rush, let them do a “flash freeze” for about 90 minutes on the tray first, *then* transfer them to an airtight container or bag. This prevents them from sticking together in one giant frozen clump in the container. Think of them like little frozen meatballs—you want them individual!
Step 5: Store & Enjoy! Once solid, pop your bites into a freezer-safe bag or container. They’ll keep happily for up to 2 months (if they last that long!). When a craving strikes, just grab a few and let them sit for a minute or two to take the hardest edge off the cold. Then, enjoy the creamy, cold, chocolatey satisfaction.
How to Serve These Frozen Gems: Get Creative!
Sure, you can eat them straight from the container (no judgment from me!), but let’s have a little fun with presentation.
For a quick, stunning dessert, pile a few into a small bowl and drizzle with a tiny bit of melted peanut butter or a dark chocolate shell. Add a few fresh berries on the side. Instant dessert plate! For kids (or kids at heart), stick a popsicle stick into each bite before freezing for a fun, handheld “frozen yogurt pop.” They’re also the perfect topping for a bowl of warm oatmeal or overnight oats—the contrast of hot and cold is incredible. My favorite summer move? Pack a small reusable container with them for a day at the beach or park. They act as both a snack and a cooler pack for other items, slowly thawing to the perfect eating texture by the time you’re ready for them.
Mix It Up! 5 Delicious Twists on the Classic
Once you’ve mastered the basic formula, the flavor world is your oyster! Here are a few of my favorite riffs:
- Berry Bliss: Swap the chocolate chips for ⅓ cup of freeze-dried strawberry or raspberry pieces (crushed slightly). The berries stay crunchy and add a fantastic fruity tang.
- Tropical Vacation: Use coconut yogurt, swap the nut butter for 2 tablespoons of coconut cream (the solid part from a can), and mix in ¼ cup of chopped dried mango and 2 tablespoons of toasted coconut flakes. Close your eyes, and you’re on a beach.
- Cookie Dough Deluxe: Add 2 tablespoons of oat flour (just blend rolled oats!) to the mix for a more dough-like texture. Fold in mini M&Ms along with the chocolate chips for a confetti cookie effect.
- Mocha Chip: Dissolve 1-2 teaspoons of instant espresso powder into the vanilla extract before adding it to the yogurt. Use dark chocolate chips. A perfect afternoon pick-me-up.
- Birthcake Batter: Use vanilla yogurt, swap the nut butter for 2 tablespoons of cashew butter (it’s milder), and add ¼ teaspoon of almond extract and a sprinkle of rainbow sprinkles. Funfetti, but make it healthy!
A Few Final Thoughts from My Kitchen to Yours
This recipe has become my go-off, my culinary security blanket for hot days. I’ve made it for book club, after yoga class, and for my neighbor’s kids who now call me “The Yogurt Bite Man.” The beauty is in its flexibility. Over time, I’ve learned that a tiny dash of cinnamon is amazing in the classic version, and that if you only have regular-sized chocolate chips, giving them a rough chop with a knife works just fine. The recipe evolves with you. One funny fail? I once tried to make a giant “yogurt bark” version by spreading the whole batch on a tray. It froze like a dream but shattered into chaotic, messy shards when I tried to break it. Stick to the bites—they’re portion-controlled perfection. Remember, cooking is about joy, not perfection. If your bites aren’t perfectly round, they’ll taste just as incredible.
Your Questions, Answered!
Q: My bites are really icy/hard. What did I do wrong?
A: This usually points to the yogurt. Make sure you’re using thick, strained Greek yogurt. Regular yogurt has more water, which forms ice crystals. Also, don’t skip the nut butter! Its fat content helps create a creamier freeze. Let them sit at room temp for 3-5 minutes before eating.
Q: Can I make these without any sweetener?
A> You can, but they’ll be quite tangy. The sweetener balances the yogurt’s acidity. If you want to skip it, I’d recommend using a pre-sweetened vanilla yogurt and maybe adding a few chopped dates or a mashed ripe banana for natural sweetness.
Q: How long do they really last in the freezer?
A> In an airtight container, they’re good for 1-2 months. After that, they might start to develop a little “freezer taste” or get frosty. But let’s be real—they’ve never lasted that long in my house!
Q: My mixture is too runny to scoop! Help!
A> No panic. Pop the whole bowl into the fridge for 20-30 minutes. The cold will firm up the yogurt and nut butter, making it much easier to handle. You can also add a tablespoon of oat flour or ground flaxseed to thicken it up.
Frozen Chocolate Chip Yogurt Bites : Healthy No-Bake Summer Snack
Description
These creamy, cookie-dough–style yogurt bites are sweet, cold, protein-packed, and super simple to make. No baking, no equipment — just mix, scoop, freeze, and enjoy!
Ingredients
-
1 cup plain or vanilla Greek yogurt
-
2 tbsp almond butter or peanut butter
-
1 tbsp honey or maple syrup
-
½ tsp vanilla extract
-
½ cup mini chocolate chips
-
Pinch of sea salt (optional)
Instructions
In a bowl, stir together Greek yogurt, nut butter, honey (or maple syrup), and vanilla until smooth and creamy.
Fold in the mini chocolate chips and a tiny pinch of salt.
(Optional: save a few chips to press on top.)
Line a tray or plate with parchment paper. Scoop small spoonfuls (about 1 heaping teaspoon each) onto the tray.
Freeze for 2 hours, or until completely firm.
Transfer the frozen bites to a container or freezer bag.
They keep well for up to 2 months.
Notes
-
Use Greek yogurt — regular yogurt will freeze icy.
-
Warm your nut butter for 10 seconds if it’s too thick.
-
If the mixture is too runny, chill it in the fridge for 20–30 minutes before scooping.
-
Let the bites soften for 1–2 minutes before eating for the best texture.
The Good Stuff: What’s In Your Bite?
I’m not a nutritionist, but I love knowing that what I’m eating is fueling me well. Here’s the general breakdown per bite (assuming the recipe makes about 20):
- Calories: ~60
- Fat: 3g (mostly the good kind from nut butter!)
- Carbohydrates: 5g
- Protein: 2g
- Sugar: 4g (primarily from the natural honey and chocolate)
Compared to a scoop of ice cream or a handful of candy, these are a powerhouse. That protein from the Greek yogurt and nut butter helps keep you full and satisfied, making them a smart snack choice. They’re a fantastic way to curb a sweet tooth with real, simple ingredients. Remember, these numbers can vary based on the specific brands and ingredients you use, but the core benefits remain: a satisfying, portion-controlled treat that feels indulgent but isn’t.
Wrapping It All Up with a Bow (or a Parchment Paper)
So there you have it, my friends—the simplest, most satisfying frozen treat in my arsenal. These Frozen Chocolate Chip Yogurt Bites are proof that you don’t need complicated techniques or hours in the kitchen to make something truly delightful. They’re about embracing simplicity, playing with flavors, and giving yourself permission to enjoy a cool, sweet bite that makes you feel good inside and out.
Final Thoughts: A Scoop of Summer Serenity
And that, my friends, is the full story of my beloved Frozen Chocolate Chip Yogurt Bites. From a desperate fridge forage to a freezer staple, this little recipe embodies everything I love about cooking: creativity born from limitation, joy found in simplicity, and the pure magic of turning a few basic ingredients into something that feels like a hug from the inside.
As we wrap up, I want to leave you with this thought: the best recipes aren’t just about feeding our bodies; they’re about nourishing our moments. This recipe is a pause button. It’s the few minutes of quiet stirring while the world outside shimmers with heat. It’s the shared smile over a cold, chocolatey bite with someone you love. It’s the personal victory of making something wonderful for yourself, exactly as you like it.
Don’t get bogged down in perfection. If your bites are lopsided, if you only have big chocolate chips, if you use peanut butter instead of almond—it’s all going to be delicious. Your kitchen, your rules. This is a formula for freedom and a foundation for endless fun. Let it be a starting point for your own experiments.
Thank you for letting me share this corner of my kitchen with you. I hope these frozen bites become your secret weapon for sweet, cool relief all season long. May your summer be filled with simple pleasures, cool treats, and the confidence to create your own delicious moments.
Stay cool, stay creative, and most importantly, stay kind to yourself in the process.
With gratitude and a freezer full of bites,
Beau
od food and cool treats,
mmerrecipes #frozentreats #nobakedessert #healthydessert #yogurtbites #mealprep #kidfriendly