Hey, Let’s Make Some Crunchy, Tangy Magic!
Is there anything that sings the song of summer quite like a perfect pickle? I’m not talking about the ones you fish out of a dusty shelf at the store. I’m talking about the kind that crunch with a sound that echoes through your kitchen, the kind that balance that perfect dance of sweet, tangy, and savory in every single bite. The kind that, frankly, taste like a little jar of pure, unadulterated joy.
Well, my friend, get ready to meet your new favorite kitchen project. Today, we’re diving headfirst into the world of Old-Fashioned Sweet Refrigerator Pickles. Now, before you get nervous and start picturing a complicated canning process with giant pots and special tongs, let me stop you right there. This is the “no-fuss, all-flavor” route to pickle paradise. There’s no sterilizing, no water-bath canning, and absolutely zero pressure. It’s just you, some crisp cucumbers, a killer sweet-and-sour brine, and your trusty refrigerator doing all the heavy lifting.
These pickles are a throwback to a simpler time—the kind of treat you’d find in Grandma’s icebox, ready to be plopped on a plate next to a juicy burger or a pile of pulled pork. They’re crisp, they’re incredibly easy, and they have this magical way of making any meal feel just a little more special. So, if you’re ready to add a jar of sunshine to your fridge, grab your favorite cutting board and let’s get to it. This is one of those recipes that’s about to become a staple in your feel-good food rotation.
The Jar That Started It All
I’ll never forget the first time I truly met a refrigerator pickle. I was about ten years old, spending a sweltering summer week at my Grandad’s house. His air conditioning was, as he put it, “the wind through the screen door,” and we’d spent the whole morning running through the sprinkler. We came in, starving, and he pulled out a plate of leftover fried chicken. Then, from the very back of his fridge, he produced a mason jar filled with the most beautiful, translucent, golden cucumber slices.
He popped the lid, and this incredible tangy-sweet aroma just billowed out. He forked a few onto my plate next to the chicken. That first crunchy, cool, sweet-and-sour bite was a revelation. It cut through the richness of the chicken perfectly and cooled me down from the inside out. I must have eaten half the jar, and Grandad just chuckled, saying, “Took me three days to make those, and you polished them off in three minutes.” From that day on, I was hooked. Making these pickles always brings me right back to that sticky summer afternoon, sitting at his formica table, feeling completely and utterly content. It’s more than a recipe; it’s a little edible time machine.
Gathering Your Pickle Posse: The Ingredients
Part of the beauty of this recipe is its simplicity. You likely have most of this in your pantry already! Here’s the lineup for that magic brine and the crisp stars of the show.
- 8 medium pickling cucumbers: Look for firm, dark green cucumbers without any soft spots. “Pickling” cucumbers are shorter and stouter than English ones, and they stay much crisper! If you can only find regular ones, that’s okay—just try to get them as fresh as possible.
- 1 small yellow onion, thinly sliced: This adds a wonderful, mild sharpness that mellows beautifully in the brine. A sweet Vidalia onion is a fantastic alternative for an even milder flavor.
- 3 cloves garlic (optional, for flavor): My little chef’s hack? I always include it! It gives a subtle, savory backbone that makes the sweet and tangy notes pop even more. If you’re not a garlic fan, feel free to leave it out.
- 3 cups white vinegar or apple cider vinegar: This is your tang! White vinegar gives a clean, sharp acidity, while apple cider vinegar adds a slightly fruity, complex note. I often use half and half for the best of both worlds.
- 2 cups cold water: This balances the sharpness of the vinegar so it doesn’t overwhelm your taste buds.
- 2 ½ cups granulated sugar: I know, it seems like a lot! This is what makes them “sweet” pickles, creating that classic, syrupy brine that we all love. For a less sweet version, you can start with 2 cups and adjust to your taste.
- 1 tablespoon pickling salt or kosher salt: Important! Use a salt without iodine or anti-caking agents, as they can cloud the brine and sometimes give an off-flavor. Pickling salt or pure kosher salt is the way to go.
- 1 teaspoon ground turmeric: This is our secret weapon for that gorgeous golden-yellow color and a very subtle earthy flavor. It’s a classic in sweet pickles!
- 1 teaspoon dried dill: This introduces that classic “pickle” herbaceous note. If you have fresh dill, use about a tablespoon of the fronds (the wispy parts).
- ½ teaspoon celery seed: These tiny seeds pack a punch! They add a warm, slightly bitter, and aromatic flavor that makes the whole brine taste more complex and layered.
Let’s Get Pickling: Your Step-by-Step Guide
Ready to see some magic happen? This process is so straightforward and satisfying. I’ll walk you through each step with a few of my favorite kitchen hacks to ensure pickle perfection.
- Prep the Vegetables Like a Pro. First, give your cucumbers a good wash under cool water. I don’t bother peeling them—the skin gives them great color and helps them stay crisp. Now, grab a sharp knife or a mandoline (my secret for paper-thin, even slices!) and slice those cucumbers into rounds about ¼-inch thick. Too thin, and they can get floppy; too thick, and the brine won’t penetrate as well. ¼-inch is the sweet spot! Thinly slice your onion, and if you’re using the garlic, just give the cloves a gentle smash with the side of your knife to release their flavor. No need to chop!
- Create the Golden Elixir (The Brine). This is where the flavor is born! Grab a medium-sized saucepan and add your vinegar, water, sugar, salt, turmeric, dill, and celery seed. Whisk it all together and place it over medium heat. Now, your only job is to stir it occasionally until the sugar and salt have completely dissolved. You don’t need to bring it to a rolling boil—just heat it until it’s steaming hot and you see no more sugar crystals at the bottom of the pan. This usually takes about 5-7 minutes. Once it’s ready, take it off the heat and let it cool for about 10-15 minutes. You want it warm, but not scalding hot when you pour it over the cucumbers.
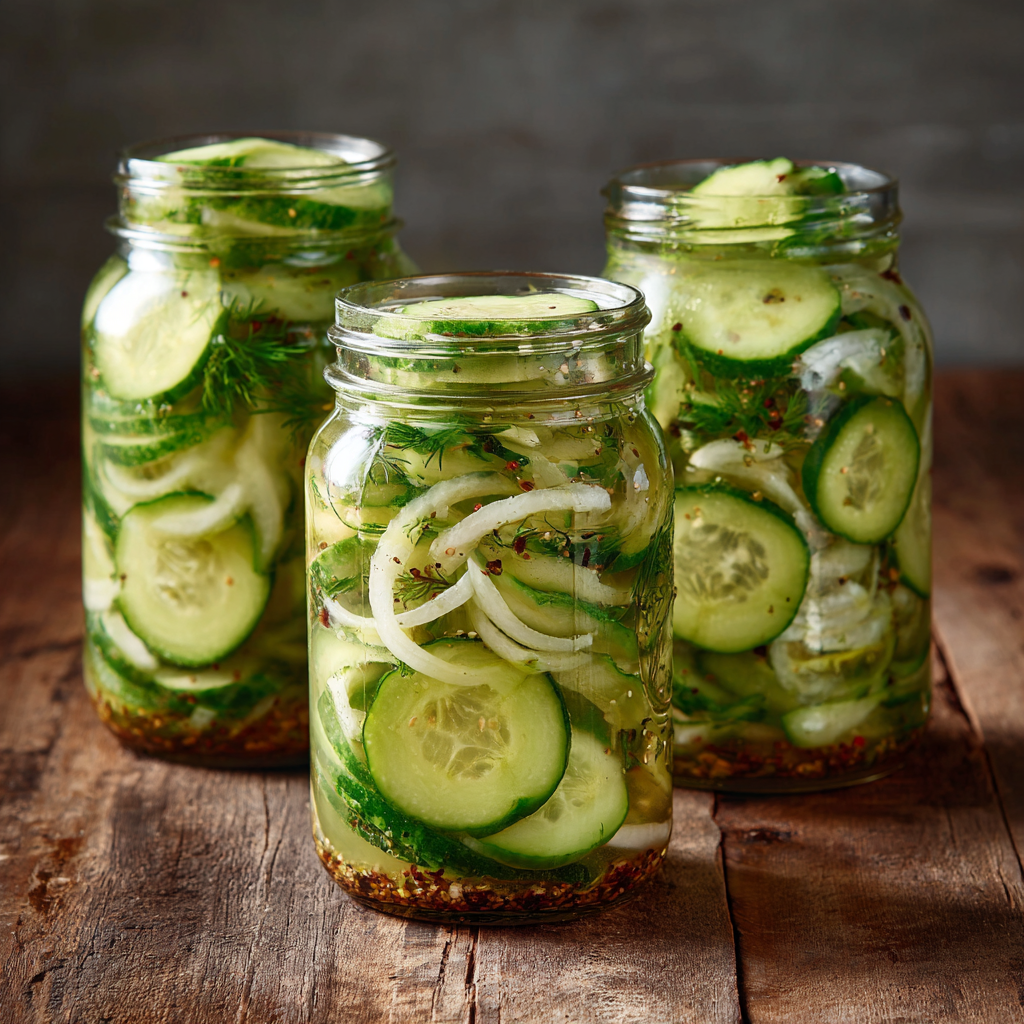
- The Art of the Jar Pack. While your brine is cooling, it’s time to pack your jars. You can use one large glass container (like a 2-quart jar) or a few smaller mason jars—whatever you have on hand! Just make sure they’re clean. Start layering your cucumber slices, onion slivers, and garlic cloves into the jar(s). Pack them in fairly tightly, but don’t crush them. I like to create little alternating layers of cucumber and onion—it looks pretty and ensures every bite is flavorful.
- The Big Pour & The Seal. Carefully pour the warm brine over the packed vegetables. I like to use a ladle to avoid spills. Make sure all the cucumber slices are completely submerged under the liquid. This is crucial for even pickling! If a few floaters are being stubborn, you can wedge a leftover onion slice on top to hold them down. Once they’re all in, seal the jar with a tight-fitting lid.
- The Waiting Game (The Hardest Part!). Here’s the only part that requires a smidge of patience. Let the sealed jars sit on your countertop until they come to room temperature, which usually takes about an hour. Then, it’s time for the fridge! The magic happens here. You can technically eat them after 24 hours, but trust me on this: the flavor gets infinitely better with time. Let them hang out in the fridge for at least 3 days, and ideally 5, for that perfect, deep, old-fashioned pickle flavor.
How to Serve These Tangy Treasures
Okay, you’ve waited patiently, and now you have a jar of liquid gold in your fridge. How do you enjoy it? Let me count the ways!
The classic move is, of course, right next to a classic deli sandwich or a messy, delicious BBQ plate. The crisp, sweet-tangy bite cuts through rich, savory foods like a dream. I love piling them on top of a hot dog or a bratwurst for an incredible crunch. But don’t stop there! Chop them up and mix them into chicken or tuna salad for an amazing texture and flavor boost. They’re also a secret weapon for brightening up a simple green salad or a creamy potato salad.
And let’s be real—some of the best ones are eaten straight from the jar, with a fork, while you’re standing in front of the open fridge, contemplating life. I won’t tell anyone.
Get Creative! Fun Flavor Twists
Once you’ve mastered the classic, feel free to play with the recipe! It’s a wonderful canvas for your own creativity. Here are a few of my favorite twists:
- Spicy Sweet Heat: Add 1-2 thinly sliced jalapeños or a teaspoon of red pepper flakes to the jar with the cucumbers. The sweet and spicy combo is absolutely addictive.
- Garden Herb Delight: Swap the dried dill for a few sprigs of fresh tarragon and a couple of bay leaves. It gives the pickles a wonderfully sophisticated, almost anise-like flavor.
- Bread & Butter Style: Add 1 teaspoon of mustard seeds and ½ teaspoon of whole allspice berries to the brine for that classic, spiced bread and butter pickle profile.
- Lower-Sugar Option: You can reduce the sugar to 1 ½ cups and replace the other cup with a sugar substitute like monk fruit or erythritol that measures 1:1 like sugar. The texture of the brine might be slightly less syrupy, but the flavor will still be great!
- Pickled Veggie Medley: Don’t have enough cucumbers? Throw in some thinly sliced sweet bell peppers, cauliflower florets, or even carrot coins! The brine works its magic on almost any sturdy vegetable.
Beau’s Kitchen Notes & Stories
This recipe has been a living, evolving thing in my kitchen for years. The first time I made it, I was so impatient I tried one after just 12 hours and was so disappointed! They were just vinegary cucumbers. I learned that the wait is non-negotiable—it’s when the alchemy happens. The cucumbers and onions release their water, the brine soaks in, and everything transforms.
A funny story: I once accidentally used hot brine straight from the stove and poured it over the cucumbers. They immediately went from crisp to slightly cooked and soft. It was a sad, sad day for pickles. That’s how I learned the “cool slightly” step is there for a very important reason! Always let that brine cool down a bit to keep that perfect crunch intact.
Your Pickle Questions, Answered!
I’ve gotten a lot of questions about this recipe over the years. Here are the most common ones to help you on your pickling journey.
- Q: How long do these pickles last in the fridge?
A: Because they’re refrigerator pickles and not canned for shelf-stability, they’ll keep beautifully for about 3-4 weeks in the fridge. Always make sure the veggies are submerged in the brine, and use a clean fork to take them out to prevent contamination. - Q: My pickles turned out soft, not crisp. What happened?
A: The most common culprit is the brine being too hot when poured over the cucumbers, which gently “cooks” them. Another reason can be using overripe or old cucumbers. Always start with the freshest, firmest cukes you can find and let your brine cool adequately! - Q: Can I reuse the brine?
A: You can absolutely use it once more for a second batch! The flavor will be a little less intense, but it still works great. Just make a fresh batch of sliced cucumbers and onions, and pour the existing brine over them. After that, the brine will be too diluted to be effective. - Q: Is the turmeric just for color?
A: Mostly, yes! It gives that classic golden hue. But it does contribute a very subtle, earthy, slightly peppery flavor that is a key part of the old-fashioned pickle taste. You can leave it out if you don’t have any, but I highly recommend it.
Old-Fashioned Sweet Refrigerator Pickles : Crisp, Tangy & Easy
Description
Old-Fashioned Sweet Refrigerator Pickles
Prep Time: 15 minutes
Cook Time: 5 minutes
Chill Time: 3–5 days (for best flavor)
Total Time: 15 minutes + chill
Ingredients
Produce
-
8 medium pickling cucumbers, sliced into ¼-inch rounds
-
1 small yellow onion, thinly sliced
-
3 garlic cloves, lightly smashed (optional)
Brine
-
3 cups white vinegar or apple cider vinegar (or half and half)
-
2 cups cold water
-
2 ½ cups granulated sugar
-
1 tablespoon pickling salt or kosher salt
-
1 teaspoon ground turmeric
-
1 teaspoon dried dill (or 1 tablespoon fresh dill fronds)
-
½ teaspoon celery seed
Instructions
. Prep the vegetables
-
Wash cucumbers thoroughly.
-
Slice into ¼-inch rounds (a mandoline works great).
-
Thinly slice the onion and lightly smash garlic cloves, if using.
2. Make the brine
-
In a medium saucepan, combine: vinegar, water, sugar, salt, turmeric, dill, and celery seed.
-
Heat over medium, stirring until the sugar and salt fully dissolve (5–7 minutes).
-
Do not boil.
-
Remove from heat and let cool 10–15 minutes — the brine should be warm, not hot.
3. Pack the jars
-
Use one 2-quart jar or several smaller jars.
-
Layer cucumbers, onions, and garlic cloves in the jars.
-
Pack firmly but do not crush.
4. Add the brine
-
Pour warm brine over the vegetables until completely submerged.
-
Use an onion slice to weigh down any floating cucumbers.
-
Seal jars with lids.
5. Chill
-
Allow jars to cool to room temperature for about 1 hour.
-
Transfer to the refrigerator.
-
Notes
-
With sandwiches, burgers, BBQ plates, hot dogs, or brats
-
Chopped into tuna or chicken salad
-
On potato salad, green salads, or grain bowls
-
A Quick Nutritional Glance
Let’s be real, we’re not eating pickles for their vitamin content—we’re eating them for pure, unadulterated joy! But it’s still good to know what you’re enjoying. The nutritional info below is an estimate per ¼-cup serving. Remember, most of the brine is not consumed, so the actual sugar and sodium intake per pickle slice is likely lower.
These pickles are naturally gluten-free, dairy-free, and vegan, making them a fantastic condiment or side for almost any diet. The primary things to be aware of are the sugar and sodium content, which is typical for any sweet pickle recipe. If you’re watching your sugar intake, please see the “Lower-Sugar Option” in the variations section above!
Final Thoughts
And there you have it! Your very own guide to creating a batch of Old-Fashioned Sweet Refrigerator Pickles. This recipe is more than just a list of ingredients and steps; it’s an invitation to slow down, to create something with your own two hands, and to fill your kitchen with the kind of smells that build memories.
It’s a recipe that proves the best food doesn’t have to be complicated. It just has to be made with a little bit of love and a whole lot of flavor. I hope this recipe finds its way into your regular rotation and that you get as much joy out of making (and eating!) them as I do. Now, go forth and pickle! And don’t forget to tag @Feastical if you share your beautiful creations online. I love seeing your kitchen wins!
Stay hungry, friends!
– Beau