Your New Favorite Comfort Food Just Got a Major Upgrade
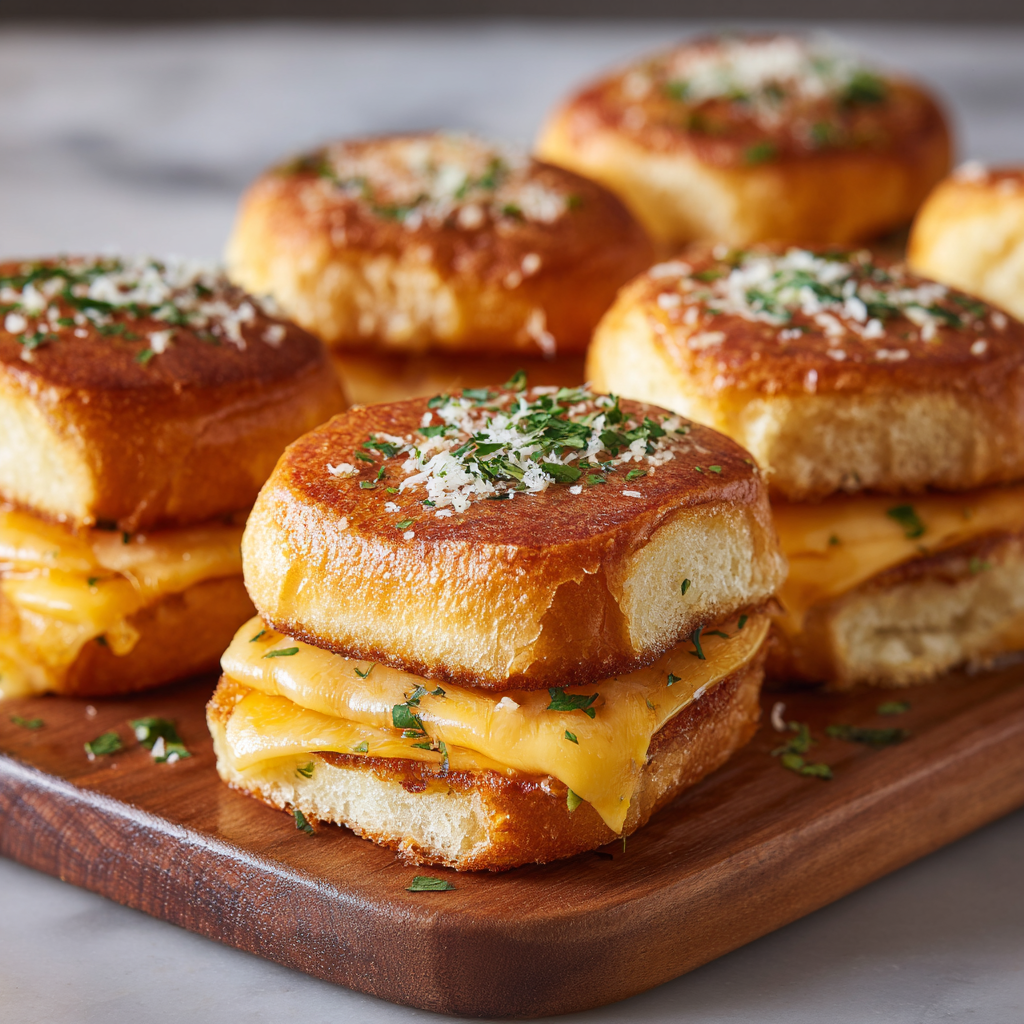
Hey friends, Beau here! Let’s talk about one of life’s greatest, simplest pleasures: grilled cheese. That golden, crispy, buttery exterior giving way to a river of molten, stretchy cheese is a feeling we never outgrow. It’s a culinary hug, pure and simple. But what if I told you we could make this classic even better? Get ready to meet your new obsession: Mini Grilled Cheese on Hawaiian Rolls.
We’re taking everything you love about the original and turning it into a party-ready, dunkable, shareable (or not, I won’t tell) masterpiece. These sliders are the perfect bite-sized combination of sweet, savory, and seriously cheesy. They’re the ultimate sidekick to a steamy bowl of tomato soup, the star of your game day spread, or the quickest, most satisfying weeknight dinner you’ll ever throw together. So, grab your favorite skillet and let’s make some magic happen. This isn’t just a recipe; it’s a whole mood.
A Slice of Childhood, Reimagined
This recipe takes me right back to my grandma’s linoleum-floored kitchen. She was the undisputed Queen of Comfort Food, and her grilled cheese was legendary. It wasn’t fancy—just white bread and American cheese fried in a scary amount of margarine (it was the 80s, after all). But the sound of that sizzle and the sight of her expertly flipping each sandwich with her trusty spatula are burned into my memory. That sandwich was her answer to skinned knees, bad report cards, and rainy afternoons.
My Mini Grilled Cheese on Hawaiian Rolls is my grown-up, slightly more refined tribute to her. It captures that same soul-warming essence but with a fun, communal twist. Instead of one big sandwich, we make a whole platter of little ones, perfect for pulling apart and sharing with the people you love. It’s my way of keeping her tradition alive, one gooey, golden-brown slider at a time.
Gathering Your Gooey, Golden Goods
Part of the beauty of this recipe is its simplicity. You only need a handful of ingredients to create something truly spectacular. Here’s your shopping list, complete with a few of my chef-y insights to make it your own.
- 24 King’s Hawaiian Original Sweet Rolls: This is the game-changer! Their signature soft, slightly sweet flavor is the perfect contrast to the salty, savory cheese and herbs. Chef’s Insight: Don’t separate the rolls! We’re keeping them connected to create a sheet of sliders for easy assembly and that gorgeous, pull-apart effect.
- 12 slices sharp cheddar cheese: I’m a big believer in using a good, sharp cheddar for its bold flavor and excellent melt. Substitution Tip: Feel free to mix it up! A combination of half cheddar and half mozzarella or gouda will give you an even gooier, more complex cheese pull.
- 8 tbsp (1 stick) unsalted butter, softened: This is the key to that irresistible, crispy crust. Using unsalted butter lets you control the salt level. Pro Hack: Softened butter is non-negotiable for easily spreading that herby goodness. If you forgot to take it out of the fridge, you can gently microwave it for 10-second bursts until spreadable.
- 1 tsp garlic powder: We’re using powder instead of fresh garlic here to infuse the butter with flavor without any risk of burning. It’s the secret to that “what is that amazing smell?!” factor.
- 1 tsp dried oregano & 1 tbsp dried parsley: This dynamic duo brings a subtle, aromatic earthiness that makes these sliders taste gourmet. Substitution Tip: No oregano? Use dried Italian seasoning for a similar vibe. Fresh chopped herbs are fantastic too, but you’ll need to use about three times the amount.
- Optional Twist: Shredded Parmesan cheese: For an extra layer of flavor and a seriously next-level cheesy, crispy crust, sprinkle this on the buttered tops before grilling. Trust me on this one.
Let’s Get Grillin’: Your Step-by-Step Roadmap to Slider Heaven
Okay, team, let’s fire up the griddle! This process is as fun as it is easy. Follow these steps, and you’ll be a slider master in no time.
- Prep the Rolls: Without separating the individual rolls, take your whole sheet of 24 Hawaiian rolls and carefully slice the entire block in half horizontally, creating a top “lid” and a bottom “base.” A long, serrated bread knife is your best friend here—use a gentle sawing motion for a clean cut. Chef’s Hack: If the rolls are a bit domed on top, you can slice off that very top dome to create a flatter surface. (P.S. The cook gets to eat those domed tops as a snack. It’s the law.)
- Build the Cheese Stack: Place the bottom half of the rolls in a baking dish or on a sheet of parchment paper for easy transport. Now, lay your slices of cheddar cheese evenly over the entire surface. Don’t be shy—cover every inch! If you’re using a cheese blend, just scatter it evenly. Once the cheese is beautifully layered, gently place the top half of the rolls back on, like putting a lid on the cheesiest treasure chest ever.
- Whip Up the Magic Herb Butter: In a small bowl, combine your softened stick of butter, garlic powder, oregano, and parsley. Mix it all together until it’s smooth, fragrant, and fully incorporated. This herby butter is what’s going to take these sliders from “yum” to “OH MY GOSH, WHAT IS THIS?!”
- Butter Up for Golden Goodness: Using a spoon or a small spatula, generously spread the herb butter mixture all over the top of the rolls. Get it into every nook and cranny! This is what creates that incredible, crispy, flavor-packed crust. For the optional (but highly recommended) Parmesan crust, now is the time to sprinkle that shredded Parmesan evenly over the buttered top.
- The Main Event: Grill It to Perfection: Heat a large non-stick skillet or griddle over medium-low heat. This is crucial! We need low and slow heat to melt the cheese completely without burning the beautiful, buttery exterior. Once the skillet is hot, carefully place the entire block of rolls into the skillet, butter-side down. You should hear a gentle sizzle. Grill for 4-6 minutes, peeking occasionally, until the bottom is a deep, golden brown.
- The Big Flip & Final Grill: Now for the slightly tricky but totally doable part! Carefully slide a large, wide spatula under the entire block of rolls. Using your other hand (or a second spatula for support), confidently flip the whole thing over. You’ve got this! Grill for another 3-5 minutes on the second side, until it’s also golden and you can see the cheese inside is gloriously melted. If your skillet is small, you can absolutely do this in two batches.
- Serve with Style: Carefully transfer your masterpiece to a cutting board. Using a sharp knife, slice along the pre-scored lines to separate the sliders into individual mini grilled cheese sandwiches. Watch that cheese pull! Serve immediately while they’re hot, gooey, and at their absolute peak of deliciousness.
How to Serve These Golden Gems
Presentation is part of the fun! I love piling these mini grilled cheese sliders high on a big wooden board or a rustic platter. It just feels welcoming and abundant. Of course, the classic pairing is with a big, steaming bowl of creamy tomato soup for the ultimate dunking experience. The sweet roll, savory cheese, and tangy tomato soup are a flavor trifecta that can’t be beat.
But don’t stop there! These sliders are incredibly versatile. Serve them alongside a crisp green salad for a light(er) lunch, pile them onto a plate with some crispy bacon and eggs for a brunch everyone will remember, or set them out with a few different dipping sauces—like a spicy marinara, a cool ranch, or even a sriracha mayo—for your next party. They disappear fast, so make a double batch!
Get Creative: 5 Fun Twists on the Classic
Once you’ve mastered the basic recipe, the playground is open! Here are a few of my favorite ways to mix things up.
- The Pizza Party: Before adding the top bun, spread a thin layer of pepperoni slices and a tablespoon of pizza sauce over the cheese. You can even add a sprinkle of mini pepperoni on top with the Parmesan for a full pizza experience.
- The Bacon Jam Bliss: Swap out half the cheese for a layer of creamy Brie or Camembert and top it with a few spoonfuls of onion bacon jam. This is the ultimate gourmet upgrade for your next get-together.
- The “Everything Bagel”: Change up your butter blend! Mix in 2 tablespoons of Everything Bagel seasoning with the butter instead of the Italian herbs. It’s savory, salty, and utterly addictive.
- Breakfast for Dinner: Layer on some thin slices of deli ham and a scrambled egg mixture before adding the top bun. It’s a full breakfast, conveniently packaged in a slider.
- The Veggie Lover’s Dream: Add a layer of very thinly sliced tomatoes, fresh spinach, and a few slices of avocado (add the avocado after cooking) for a fresh, colorful twist.
Beau’s Kitchen Chronicles: A Few Parting Thoughts
This recipe has become a Feastical fan favorite for a reason—it’s foolproof and always a hit. I’ve made it for everything from fancy potlucks to lazy Sunday nights in my sweatpants. One of my funniest kitchen fails was the first time I tried to flip the whole block; I was a little too confident and didn’t use a big enough spatula. Let’s just say I had a “deconstructed” grilled cheese for a minute there. The lesson? Use a big spatula and flip with confidence (and maybe over the sink!). Over time, I’ve learned that letting the skillet properly pre-heat and not rushing the grilling process is the true secret to that perfect, un-burnt, golden crust. Happy cooking, everyone!
Your Questions, Answered!
I’ve gotten a lot of great questions about this recipe over the years. Here are the answers to the most common ones.
- Q: My cheese isn’t fully melting before the outside burns. What am I doing wrong?
A: This almost always means your heat is too high! Grilled cheese is a lesson in patience. Keep it at a steady medium-low to give the heat time to penetrate the rolls and melt the cheese without scorching the beautiful, buttery crust. - Q: Can I make these in the oven instead of on the stovetop?
A: Absolutely! For a larger batch, bake them at 350°F (175°C) for about 15-20 minutes, or until the tops are golden and the cheese is bubbly. The stovetop method gives a crisper crust, but the oven is great for hands-off cooking. - Q: Can I prepare these ahead of time?
A: You sure can! Assemble the entire block (including buttering the top), wrap it tightly in plastic wrap, and keep it in the fridge for up to 24 hours. When you’re ready, just pop it straight into the hot skillet or oven. You may need to add a couple of minutes to the cook time since it’s starting cold. - Q: My rolls are sticking to the pan! Help!
A: A good non-stick skillet is key here. If you’re using cast iron or stainless steel, make sure it’s well-seasoned or use a very thin layer of neutral oil (like avocado or canola) in the pan before adding the rolls.

Mini Grilled Cheese on Hawaiian Rolls : Gooey, Golden & Perfect with Tomato Soup
Description
This recipe takes me straight back to my grandma’s linoleum-floored kitchen. Her grilled cheese was legendary—not fancy, mind you. Just white bread, American cheese, and an unapologetic amount of margarine (it was the 80s). But the smell, the sizzle, the flip of her well-loved spatula—it could fix skinned knees, bad report cards, and rainy afternoons alike.
Ingredients
Here’s all you need to create this cheesy masterpiece:
For the Sliders
-
24 King’s Hawaiian Sweet Rolls
Don’t separate them—keep them in one big connected sheet for true slider glory. -
12 slices sharp cheddar cheese
Or mix with mozzarella, provolone, or gouda for even gooier pulls. -
8 tbsp (1 stick) unsalted butter, softened
-
1 tsp garlic powder
-
1 tsp dried oregano
-
1 tbsp dried parsley
-
Optional: Shredded Parmesan for a crispy, cheesy crust
Instructions
Slice the entire block of rolls horizontally to create a top “lid” and bottom “base.” Use a long serrated knife for a clean cut. If the tops are very domed, shave off the tiniest bit for a flatter grilling surface (chef’s snack!).
Place the bottom rolls on parchment or in a baking dish. Cover every inch with cheddar (or your cheese blend). Top with the roll “lid.”
Mix softened butter with garlic powder, oregano, and parsley until smooth and fragrant.
Spread the herb butter generously over the top of the rolls. If using Parmesan, sprinkle it on now.
Preheat a large non-stick skillet or griddle over medium-low.
Place the entire sheet of rolls in, butter-side down. Cook 4–6 minutes, until deeply golden.
Use a large spatula (or two!) to flip the whole block. Grill another 3–5 minutes until the top is golden and the cheese is fully melted.
Transfer to a cutting board, slice along the roll lines, and serve immediately. The cheese pull is exceptional—don’t blink.
Notes
These little guys shine in any situation:
-
Classic style: With creamy tomato soup for the ultimate dunk
-
Partyboard-ready: Pile onto a big wooden board
-
Brunch mode: Serve with bacon, eggs, and fruit
-
Snack attack: Add dipping sauces—marinara, ranch, sriracha mayo, honey mustard
-
Lunch companion: Pair with a simple salad
They disappear fast—consider a double batch.
Nutrition
- Calories: 220Cal Per Slider
- Fat: 14 g
- Carbohydrates: 18 g
- Protein: 7g
Let’s Talk Nutrition (The Real Talk)
Friends, let’s be real: this is a comfort food recipe, and it’s meant to be enjoyed as part of a balanced life. It’s not a salad, and it’s not trying to be! That said, here’s a general breakdown of what you’re looking at per slider (this is an estimate and can vary based on specific ingredients used). This recipe makes about 12-16 sliders, depending on how you slice them.
Estimated per Slider:
Calories: ~220 kcal | Carbohydrates: ~18 g | Fat: ~14 g | Protein: ~7 g | Sodium: ~300 mg
Dietary Note: This recipe contains gluten (from the rolls) and dairy (from the butter and cheese). For a gluten-free version, you could try this with your favorite gluten-free slider buns. For dairy-free, use plant-based butter and your favorite melty vegan cheese.
Final Bite
And there you have it! My ultimate, gooey, golden, herby Mini Grilled Cheese on Hawaiian Rolls. This recipe is more than just a list of ingredients and steps; it’s an invitation to create your own delicious memories in the kitchen. It’s about taking a simple, beloved classic and giving it a fun, shareable twist that brings people together. I hope this recipe finds its way to your table again and again, for cozy nights in, big family gatherings, and everything in between.
If you make them (and you totally should!), I’d love to see your creations! Tag me @Feastical on social media so I can share in the cheesy, golden goodness. Now, go forth and get your grill on!
With a full heart and an even fuller plate,
Beau