Your New Favorite Morning Ritual is Here
Hey friends, Beau here! Let’s be real for a second. How many of your mornings feel like a frantic race against the clock? You’re scrambling to get dressed, find your keys, and maybe, just maybe, grab something that vaguely resembles breakfast before you dash out the door. I’ve been there more times than I’d like to admit, usually ending up with a sad granola bar from the depths of my pantry or worse—nothing at all.
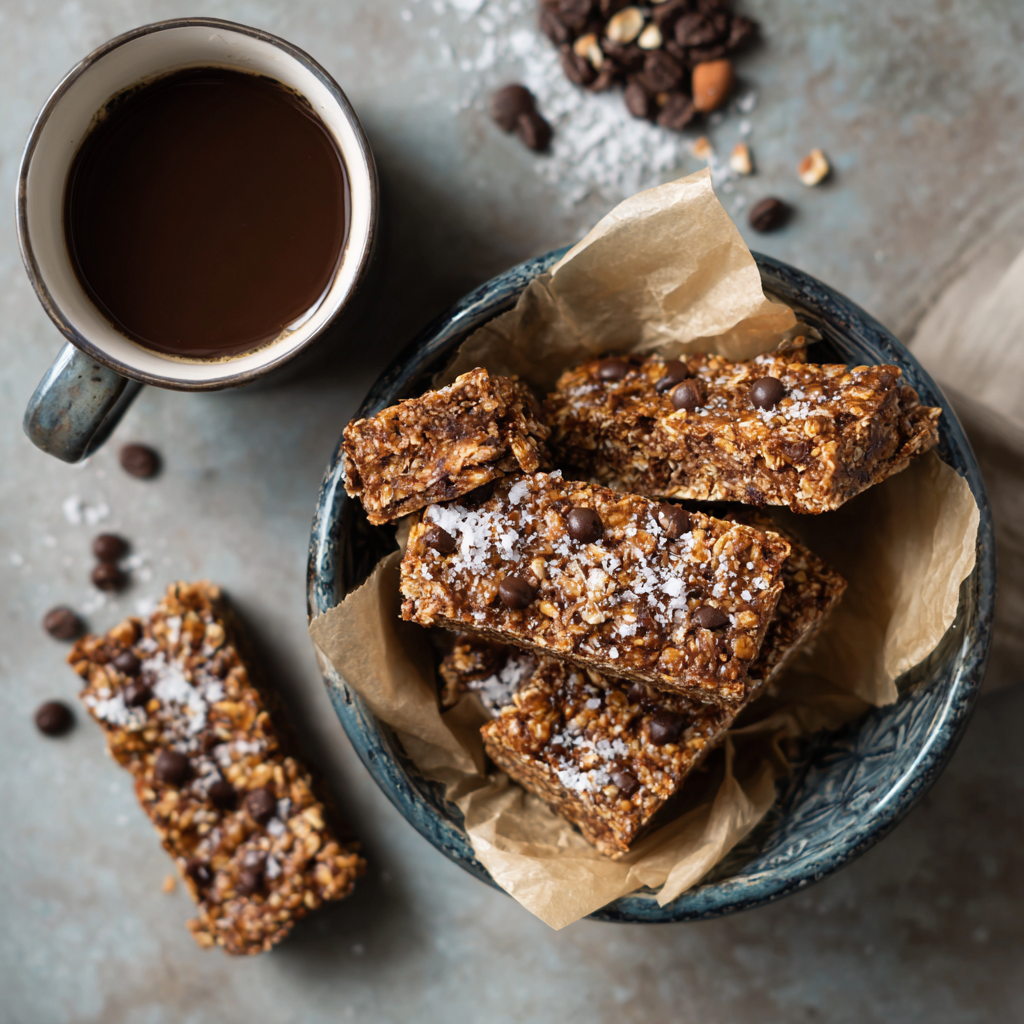
But what if your morning fuel could be something you actually look forward to? Something that feels like a treat but fuels your body like a champion? That’s exactly why I created these Mocha Crunch Breakfast Bars.
Imagine this: the rich, soul-warming combo of chocolate and coffee, all wrapped up in a chewy, crunchy, no-bake bar that’s packed with hearty oats and protein. It’s like your favorite mocha latte decided to get a gym membership and transform into the most convenient breakfast ever. These bars are your secret weapon for busy mornings, your pre-workout boost, or that 3 PM slump savior. They’re simple to make, incredibly forgiving, and they freeze like a dream. So, let’s ditch the morning scramble and make a batch of deliciousness that actually has your back.
The Coffee Shop Epiphany
This recipe was born from a serious addiction to my local coffee shop’s mocha muffin. Every Tuesday, after my early morning grocery run, I’d treat myself. That hit of chocolate and coffee was my weekly joy. But one day, I looked at the nutrition label (a dangerous pastime for a comfort food chef) and my eyes just about popped out of my head. The sugar! The calories! It was a dessert masquerading as breakfast.
I knew I could do better. I wanted that same cozy, indulgent flavor but in a form that would power me through my day, not put me in a food coma by 10 AM. That afternoon, I raided my own pantry. Oats for heartiness, almond butter for protein and healthy fats, a scoop of my chocolate protein powder, and of course, a shot of my morning espresso. I mixed, I pressed, I crossed my fingers and let it chill. The result? A bar that tasted even better than that muffin—more complex, less sugary, and deeply satisfying. It was a total game-changer. Now, that weekly coffee shop trip is just for the coffee, and my breakfast is waiting for me right at home.
Gathering Your Mocha-Making Magic
Here’s the beautiful part: you probably have most of this in your kitchen already. This isn’t a fussy recipe, and I’ve built in plenty of room for you to get creative. Let’s break it down.
- 1½ cups Rolled Oats: Our sturdy, chewy foundation. Rolled oats (old-fashioned) give the best texture. Chef’s Insight: If you need these to be gluten-free, just make sure your oats are certified GF! Quick oats will work in a pinch but can make the bars a bit denser.
- 1 scoop Chocolate or Mocha Protein Powder: This is our secret weapon for staying power. It adds a major protein boost and deepens that chocolate flavor. Substitution Tip: No protein powder? No problem! Swap it for ¼ cup of oat flour or more rolled oats. The bars will be a bit less firm but just as tasty.
- 2 tbsp Cocoa Powder: For that rich, non-negotiable chocolate depth. Use the best quality you have—it makes a difference!
- ½ cup Almond Butter: Our “glue” and a source of healthy fats and protein. Substitution Tip: Any nut or seed butter works wonderfully here. Peanut butter will give you a killer peanut mocha vibe, and sunflower seed butter is a fantastic nut-free option.
- ⅓ cup Honey or Maple Syrup: This is our natural sweetener and what helps bind everything together. Chef’s Insight: I love the floral notes of honey, but pure maple syrup keeps this recipe fully vegan. Agave nectar works too!
- ¼ cup Brewed Espresso or Strong Coffee: The “mocha” star of the show! This infuses every bite with that warm, aromatic coffee flavor. Pro Hack: If you don’t have espresso going, instant espresso powder dissolved in hot water is perfect. Or, just use strongly brewed coffee.
- 1 tsp Vanilla Extract: The flavor enhancer that makes everything taste more… everything. It rounds out the chocolate and coffee beautifully.
- ¼ tsp Salt: Don’t you dare skip this! Salt makes the chocolate pop and balances the sweetness.
- ¼ cup Mini Chocolate Chips: For those melty little pockets of joy. Substitution Tip: Use dark, milk, or even vegan chocolate chips. Cacao nibs are a great lower-sugar, crunchy alternative.
- ¼ cup Crispy Rice Cereal or Chopped Nuts: This is where our “crunch” comes from! Cereal gives a light, airy texture, while nuts (like almonds or pecans) add a deeper toastiness.
Let’s Build These Bars: A Step-by-Step Dance
This is the fun, no-stress part. We’re not baking, so there’s no risk of burning. It’s all about mixing and pressing. You’ve got this!
Step 1: Prep Your Pan. First things first, grab an 8×8-inch baking pan. Line it with parchment paper, leaving some overhang on two opposite sides. This is my favorite chef hack—it creates a “sling” that lets you lift the entire block of bars out effortlessly for clean, easy slicing. No more digging them out of the pan!
Step 2: The Dry Team Assembles. In a large mixing bowl, add your rolled oats, protein powder, cocoa powder, and that all-important salt. Give this a good whisk. You’re not just mixing; you’re making sure that cocoa and protein powder are evenly distributed, so every single bar has the perfect chocolatey flavor.
Step 3: The Wet Team Unites. Now, grab a medium saucepan. Add your almond butter, honey (or maple syrup), brewed coffee, and vanilla extract. Place this over low heat. We’re not trying to cook it, just warm it up gently. Stir constantly until everything is melted, smooth, and beautifully combined. You’ll know it’s ready when it’s silky and pours easily. This should only take 2-3 minutes. Pro Tip: Warming this mixture is key! It makes the almond butter runny and the honey easier to mix, ensuring no dry pockets in your bars.
Step 4: The Grand Unification. Slowly pour the warm, wet mixture over the dry ingredients. Grab a sturdy spatula and start mixing. It might seem dry at first, but keep folding! The mixture will come together into a thick, fudgy “dough.” Once it’s mostly combined, fold in your chocolate chips and your chosen crunch element (crispy rice or nuts).
Step 5: Press with Purpose! Transfer the mixture into your prepared pan. Now, here is the most critical step for the perfect bar texture: PRESS IT DOWN FIRMLY. I mean it! Use the bottom of a measuring cup or a glass, and really compact that mixture. Press it down evenly into every corner. The more you press, the better the bars will hold together later. Don’t be shy!
Step 6: The Patience Game. Pop the pan into the refrigerator for at least 1 hour, or into the freezer for 20-30 minutes if you’re impatient like me. This chilling time is what sets the bars and makes them sliceable. Once it’s firm, use the parchment paper sling to lift the whole block onto a cutting board. Slice into 8 rectangular bars (or 9 squares for smaller portions).
How to Serve & Savor Your Masterpiece
Okay, they’re made, they’re gorgeous… now what? The beauty of these bars is in their versatility.
For the ultimate grab-and-go breakfast, just wrap each bar individually in parchment paper or plastic wrap and store them in a container in the fridge or freezer. Grab one as you head out the door.
But if you have a spare minute, let’s make it an experience. I love having one with a hot cup of coffee (shocking, I know!) or a cold glass of almond milk. For a next-level treat, I’ll sometimes warm a bar in the microwave for 10-15 seconds. It makes the chocolate chips all melty and turns it into a warm, comforting dessert-like breakfast. Crumble one over a bowl of Greek yogurt for a deconstructed parfait situation. However you eat it, you’re winning the morning.
Make It Your Own: Delicious Twists & Swaps
This recipe is a fantastic blueprint. Once you’ve mastered the basic mocha, feel free to play with your food! Here are a few of my favorite variations:
- Rocky Road: Fold in ¼ cup of mini marshmallows along with the chocolate chips. It’s a fun, nostalgic twist that the kids (and let’s be honest, you) will love.
- Peanut Butter Cup: Swap the almond butter for peanut butter and use peanuts for your crunch element. It’s a classic combo that never fails.
- Tropical Escape: Omit the coffee and add ¼ cup of chopped dried mango and 2 tablespoons of unsweetened shredded coconut. It’s a completely different, sunny flavor profile!
- Double Chocolate Cherry: Swap the crunchy mix-in for ¼ cup of dried tart cherries. The cherry-chocolate combination is pure elegance.
- Super Seed Power: For a nut-free version, use sunflower seed butter and add 2 tablespoons each of chia seeds and pumpkin seeds for an extra nutrient kick.
A Few More Crumbs of Wisdom from My Kitchen
This recipe has been a staple in my kitchen for years, and it’s evolved with me. I once, in a pre-coffee haze, used chili-spiced cocoa powder by accident. It was a happy accident! A little pinch of cayenne pepper can add a really fun, grown-up kick. I’ve also learned that the type of protein powder you use can change the texture slightly. Whey-based powders tend to make firmer bars, while plant-based ones (like pea or brown rice) can be a bit more crumbly, but just as delicious. The main thing is to have fun and not stress. Cooking is about joy, not perfection.
Your Questions, Answered!
Q: My bars are too crumbly! What did I do wrong?
A: Ah, the most common issue! This usually boils down to two things: not enough binding agent or not pressing firmly enough. Next time, try adding an extra tablespoon of almond butter or honey. And really, I mean really, put some muscle into that pressing step. If they still crumble, don’t despair—you’ve just made a fantastic “mocha granola” that’s perfect for sprinkling over yogurt!
Q: Can I make these without protein powder?
A: Absolutely! As mentioned in the ingredients, just replace the one scoop with ¼ cup of additional rolled oats or oat flour. The bars will be slightly less firm and have less protein, but they’ll still be utterly delicious and hold together well.
Q: How long do these bars last?
A: In an airtight container in the fridge, they’re perfect for up to 2 weeks. For long-term storage, they freeze beautifully for up to 3 months. I always have a stash in my freezer for emergency snack attacks.
Q: My mixture was too wet/greasy. Why?
A: This can happen if your nut butter is particularly oily. Don’t worry! Just add a few more tablespoons of rolled oats or a sprinkle of crispy rice cereal until the mixture comes back to a thick, moldable consistency.

Mocha Crunch Breakfast Bars with Oats & Almond Butter
Description
Mocha Crunch Breakfast Bars
Chewy, chocolatey, coffee-infused no-bake bars with oats, protein, and irresistible crunch.
A fast, energizing breakfast or snack that stores beautifully and requires zero baking.
Ingredients
Dry Ingredients
-
1½ cups rolled oats (old-fashioned)
-
1 scoop chocolate or mocha protein powder
-
2 tbsp cocoa powder
-
¼ tsp salt
Wet Ingredients
-
½ cup almond butter
-
⅓ cup honey or maple syrup
-
¼ cup brewed espresso or strong coffee
-
1 tsp vanilla extract
Mix-Ins
-
¼ cup mini chocolate chips
-
¼ cup crispy rice cereal or chopped nuts (almonds, pecans, etc.)
Instructions
Line an 8×8-inch pan with parchment paper, leaving overhang on two opposite sides for easy lifting.
In a large bowl, whisk together oats, protein powder, cocoa powder, and salt until evenly combined.
In a saucepan over low heat, gently warm almond butter, honey/maple syrup, brewed espresso, and vanilla.
Stir until smooth and pourable (2–3 minutes). Do not boil.
Pour the warm mixture over the dry ingredients.
Mix thoroughly with a spatula until a thick, fudgy dough forms.
Fold in chocolate chips and crispy rice cereal or nuts.
Transfer mixture to the prepared pan and press down very firmly using a measuring cup or glass to compact it tightly and evenly.
Refrigerate for at least 1 hour, or freeze 20–30 minutes, until firm.
Lift out using the parchment sling and cut into 8 bars (or 9 squares).
Notes
-
Eat straight from the fridge or freezer
-
Warm 10–15 seconds in the microwave for a soft, melty version
-
Crumble over Greek yogurt for a quick parfait
-
Pair with hot coffee or cold milk for a complete breakfast boost
Nutrition
- Calories: ~200–220 Cal Per Serving
- Carbohydrates: 18g
- Protein: 10g
Fueling Your Body & Soul
Now, I’m a chef, not a dietitian, but I believe in knowing what’s going into your body. These bars are designed to be a balanced, energizing start to your day. The rolled oats provide complex carbs and fiber for sustained energy, the almond butter and protein powder deliver a powerful punch of protein and healthy fats to keep you full and satisfied, and the touch of natural sweetener makes it a treat you’ll actually crave.
Based on the ingredients listed (and assuming 8 bars per batch), each bar contains approximately:
Calories: 200-220 | Protein: 10g | Carbohydrates: 18g | Fat: 12g
Remember, these are estimates and can vary based on your specific ingredient brands and any substitutions you make. The key takeaway is that you’re eating a real, whole-food-based snack that’s miles ahead of anything you’d find in a vending machine.
Final Thoughts
And there you have it, friends—your new secret weapon for busy, beautiful mornings. These Mocha Crunch Breakfast Bars are more than just a recipe; they’re a little act of self-care. Taking twenty minutes to make a batch is a promise to your future self that you’re worth a delicious, nourishing start to the day.
I hope you love making (and eating!) them as much as I do. If you give them a try, I’d be absolutely thrilled if you tagged me @feastical on social media so I can see your creations. Now, go forth, conquer your kitchen, and fuel your day with something truly fabulous. Happy cooking!
Beau