Beat the Heat with My Coolest Creation Yet!
Hey friends! Beau here from Feastical, and holy moly – is it just me or is this summer heat turning our kitchens into saunas? When that thermometer climbs, the last thing I wanna do is fire up the oven. That’s exactly why I’m obsessed with these Frozen Greek Yogurt Granola Bars. Picture this: a chewy, nutty oat base hugging a thick layer of tangy-sweet Greek yogurt, all studded with jewel-toned berries that burst with freshness. They’re like sunshine and a cool breeze in bar form! Perfect for stashing in your freezer for grab-and-go breakfasts, post-workout refuels, or that 3pm slump when you need something frosty and fabulous. And the best part? Zero baking required – just mix, freeze, and munch. Whether you’re wrangling kids, hustling to meetings, or just craving a guilt-free treat that tastes like vacation, these bars are your new warm-weather BFF. Let’s make your freezer the happiest place in the house!
Sweaty Aprons & Frozen Dreams
This recipe takes me straight back to my first food festival gig – picture me, a nervous newbie chef, sweating buckets under a tent in 95°F heat while demo-ing “summer desserts.” My fancy chocolate mousse? A puddle. My berry tartlets? Soggy mess. Just as panic set in, my wise Aunt Deb (who ran an ice cream shop for 30 years) texted: “Freeze it, Beau!” That night, I raided my fridge – Greek yogurt, granola, frozen berries – and smashed ’em together in a pan. Next day? Game-changer. Those wobbly, imperfect bars sold out in an hour! Folks kept saying, “It’s like frozen yogurt you can hold!” Now, every time I pull these from the freezer, I grin remembering Aunt Deb’s voice crackling through my Bluetooth speaker: “Told ya, kiddo. Keep it cool.”
Your Chillaxed Shopping List
Gather these simple heroes – pantry staples meet fridge favorites! Pro tip: Use room-temp almond butter for easier mixing.
- Whole Rolled Oats (2 cups): The hearty backbone! Old-fashioned oats give that perfect chew. Gluten-free? Swap certified GF oats!
- Creamy Almond Butter (1 cup): Binds the base with nutty richness. Allergic? Sunflower seed butter works beautifully.
- Honey (⅓ cup + 3 tbsp): Nature’s glue! Raw honey adds floral notes. Vegan? Maple syrup’s your friend.
- Chopped Almonds (½ cup): For crunch! Toast ’em first for extra depth (350°F for 5 mins).
- Salt (¼ tsp): Secret weapon! Balances sweetness in both layers.
- Full-Fat Plain Greek Yogurt (2 cups): Non-negotiable for creaminess that doesn’t ice up. Low-fat? It’ll get icy – trust me, go full-fat!
- Vanilla Extract (1 tsp): Warmth in every bite. Splurge on pure vanilla if you can!
- Mixed Berries (¾ cup total): I use raspberries, blueberries, blackberries. Frozen berries? Thaw & pat dry first to avoid sogginess!
Let’s Build Some Frosty Magic!
No fancy skills needed – just follow these chill steps:
- Prep Your Pan: Line an 8×8″ baking pan with parchment paper, leaving overhang on two sides (your “handles” for lifting bars later!). Lightly spritz with oil. Chef hack: Fold paper corners like wrapping a gift for snug fit!
- Mix the Base: In a big bowl, combine oats, almond butter, honey (⅓ cup), chopped almonds, and salt. Stir with a wooden spoon or spatula until it looks like sticky, chunky cookie dough. Too dry? Add 1 tsp honey. Too wet? Sprinkle in extra oats.
- Press It Like You Mean It: Dump mixture into the pan. Use damp hands to press HARD into an even layer. Seriously – press harder than you think! This prevents crumbly bars.
- Whip Up the Yogurt Layer: In another bowl, whisk Greek yogurt, remaining honey (3 tbsp), vanilla, and salt until silky smooth. Taste! Want it sweeter? Add another tbsp honey.
- Spread & Dream: Pour yogurt over the base. Tilt pan gently to spread evenly. Tap pan on counter 5 times to release air bubbles.
- Berry Bomb: Scatter berries over yogurt, pressing lightly so they stick. Artistry moment: Make pretty patterns or go rustic-chic with a random scatter!
- Deep Freeze: Pop pan flat in freezer. Freeze 3-4 hours until ROCK solid. Impatient? Speed it up by putting pan on a chilled baking sheet first.
- Slice & Stash: Lift bars out using parchment handles. Place on cutting board. With a hot knife (run under hot water, dry fast), slice into 12 bars. Hot knife = clean cuts through frozen yogurt! Store in airtight container with parchment between layers.
How to Serve Your Frosty Bites
Grab ’em straight from the freezer – they’re delightfully firm but biteable after 2 mins out of the cold! For breakfast, pair with iced coffee. As dessert? Drizzle with melted dark chocolate or a dollop of whipped cream. Picnic-ready: Wrap individually in parchment + foil. Kids adore them “as-is” in lunchboxes – no syrup needed! Pro tip: For fancy brunch vibes, stand bars upright in a glass jar filled with granola like edible flowers.
Shake Up Your Flavor Game!
Customize these bars like your favorite froyo shop:
- Tropical Escape: Swap berries for diced mango + toasted coconut flakes. Use coconut yogurt instead of Greek!
- Peanut Butter Cup: Replace almond butter with PB, and mix mini chocolate chips into the base. Top with banana slices.
- Cherry Garcia Vibes: Fold chopped dark cherries + dark chocolate chunks into yogurt layer before freezing.
- Protein Powerhouse: Stir 2 scoops vanilla protein powder into the yogurt mix. Add chia seeds to the base.
- Apple Pie: Cook down diced apples with cinnamon, use in place of berries. Add crushed graham crackers to base.
The Science Behind the Perfect Frozen Yogurt Bar
Ever wonder why some frozen yogurt bars turn into icy bricks while others stay creamy and dreamy? It all comes down to food science—and a few clever tricks to keep your treats luscious straight from the freezer.
Why Greek Yogurt is the MVP
Greek yogurt is thicker than regular yogurt because it’s strained to remove excess whey, leaving behind a protein-rich, low-moisture base. This is key for freezing because:
-
Less water = fewer ice crystals. (Nobody wants a crunchy, grainy texture!)
-
Higher fat content = smoother mouthfeel. Full-fat yogurt freezes softer than low-fat or non-fat versions.
-
Protein helps stabilize the structure, preventing the bar from turning into a popsicle.
The Magic of Natural Sweeteners
Honey isn’t just for flavor—it’s a natural antifreeze! Sugar (in this case, honey) lowers the freezing point of liquids, keeping the yogurt layer softer. That’s why these bars stay biteable straight from the freezer, unlike sugar-free versions that freeze rock-solid.
The Granola Base: A Texture Powerhouse
Oats and nuts are hygroscopic, meaning they absorb moisture. This helps the base stay chewy instead of soggy. Pressing it firmly ensures it binds together, preventing crumbles when you take a bite.
Pro Tip: If you’ve ever had a granola bar fall apart, it’s likely because the mixture wasn’t packed tightly enough. Use damp hands (or even a flat-bottomed glass) to press the base down hard—this compacts the ingredients so they hold together.
Berry Science: Preventing the “Purple Swirl” Effect
Fresh berries release juice when frozen, which can bleed into the yogurt. To avoid this:
-
Pat them dry before adding.
-
Freeze the yogurt layer first, then press berries in after an hour.
-
Use freeze-dried berries for intense flavor without extra moisture.
Understanding these little tricks means you can tweak the recipe without disaster—swap ingredients confidently, knowing how each one affects the final texture!
The Ultimate Make-Ahead Breakfast Hack
Mornings are chaotic. Between hitting snooze, scrambling to get dressed, and remembering where you left your keys, breakfast often gets skipped. But these frozen yogurt granola bars? They’re the hero you need.
Why They’re the Perfect Grab-and-Go Breakfast
-
No cooking, no mess. Just grab one from the freezer and go.
-
Balanced macros: Protein from yogurt, fiber from oats, healthy fats from nuts.
-
Portion-controlled—no mindless cereal snacking.
-
Kid-approved. Even picky eaters love the sweet-tangy combo.
Meal Prep Like a Pro
-
Double the batch. These keep for 2-3 months in the freezer, so make a big tray on Sunday.
-
Wrap individually. Use parchment paper + foil (or reusable beeswax wraps) for easy packing.
-
Pair with other quick breakfasts:
-
On-the-go smoothie packs (pre-portion freezer bags with fruit + spinach, dump in blender with yogurt).
-
Hard-boiled eggs for extra protein.
-
A handful of nuts for added crunch.
-
Coffee Shop Dupe—At Home!
Ever pay $7 for a “yogurt parfait bar” at a café? Now you can make 12 for the same price. For a fancy coffee shop vibe:
-
Drizzle with melted chocolate (just 10 seconds in the microwave).
-
Sprinkle with sea salt for a sweet-salty kick.
-
Serve with iced coffee (cold brew + a splash of oat milk = perfection).
Bonus: These bars are great for postpartum meals, college dorm life, or busy workweeks—any situation where you need real food, fast.
The Unexpected Health Benefits (Yes, It’s Actually Good for You!)
At first glance, these bars might seem like “just a dessert,” but they’re secretly packed with nutrition. Here’s why you can feel good about eating them:
1. Probiotic Power
Greek yogurt contains live active cultures, which support gut health. Even after freezing, many beneficial bacteria survive, helping digestion and immunity.
2. Blood Sugar Friendly
Unlike store-bought granola bars (which often have hidden sugars), these use natural sweeteners (honey/maple syrup) and fiber-rich oats to prevent sugar spikes.
3. Muscle Recovery
The protein + carb combo makes these ideal post-workout snacks. The yogurt provides casein protein (slow-digesting, great for overnight recovery), while the honey helps replenish glycogen.
4. Heart-Healthy Fats
Almond butter and nuts provide monounsaturated fats, which help lower bad cholesterol.
5. Antioxidant Boost
Berries are loaded with polyphenols, which fight inflammation. Frozen berries retain most of their nutrients, so you’re not missing out!
But… Are They Really Healthy?
Yes—but moderation is key. One bar is about 210 calories, so it’s a smart snack, not an all-you-can-eat situation. If weight loss is your goal, try:
-
Smaller portions (cut into 16 squares instead of 12).
-
Reducing honey by 1-2 tbsp.
-
Adding chia seeds for extra fiber.
Bottom line: These bars are way better than processed snacks, but they’re still a treat—enjoy mindfully!
Beau’s Backstage Tips
These bars have come a LONG way since that sweaty food festival! Originally, I used regular yogurt – big mistake. It froze into a tart ice cube! Greek yogurt was the hero for its thick, low-moisture magic. Funny story: Once, I subbed walnuts for almonds without toasting… my taste tester (aka my dog, Biscuit) stole a bar! Safe to say, he approved. Storage wisdom: They keep beautifully 2-3 months in freezer. If they get frosty, spritz container with cooking spray first – stops ice crystals! Lastly, don’t stress perfection. My first batch looked like a toddler’s art project, but tasted like heaven.
Your Burning Questions, Answered!
Q: Can I use store-bought granola instead of making the base?
A: Totally! Use 2.5 cups of chunky granola. But mix in 1-2 tbsp extra honey/almond butter so it binds when frozen. Avoid oily granolas – they get soggy.
Q: My bars crumble when I cut them! Help?
A: Two fixes: 1) Press base FIRMLY (I kneel on a cutting board over the pan!). 2) Freeze longer – 5 hours minimum if your freezer runs warm. Crumbles? Sprinkle over oatmeal!
Q: Why full-fat yogurt? Can I use flavored?
A> Full-fat stays creamier when frozen. Low-fat turns icy. Flavored yogurts work (like vanilla), but adjust added honey – taste before freezing!
Q: How do I prevent berry stains on the yogurt layer?
A> Pat berries dry thoroughly! Or, freeze just the base + yogurt first (1 hour), then add berries + freeze again. No more pink swirls!

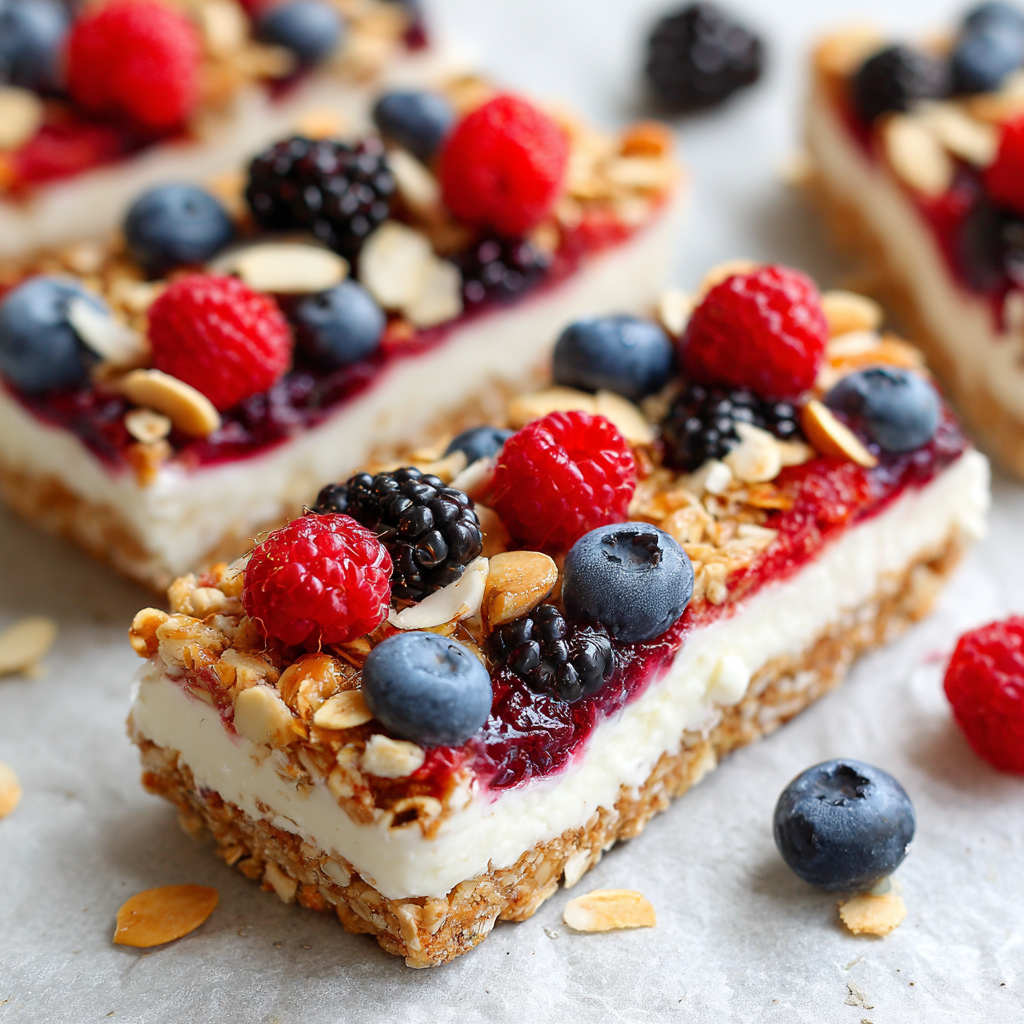
Frozen Greek Yogurt Granola Bars
Description
Need a frosty escape from summer’s heat? These Frozen Greek Yogurt Granola Bars are your new chill-out champions! With a chewy oat-almond base, creamy vanilla yogurt, and a berry burst on top, they’re the perfect freezer stash snack—no oven required. Breakfast, post-gym boost, or sweet treat? These bars have you covered. Just mix, freeze, slice, and enjoy the coolest bite of the season.
Ingredients
Base:
-
2 cups rolled oats
-
1 cup creamy almond butter
-
⅓ cup honey
-
½ cup chopped toasted almonds
-
¼ tsp salt
Yogurt Layer:
-
2 cups full-fat plain Greek yogurt
-
3 tbsp honey (or more to taste)
-
1 tsp vanilla extract
-
Pinch of salt
Toppings:
-
¾ cup mixed berries (fresh or thawed frozen, patted dry)
Instructions
-
Prep pan: Line 8×8” pan with parchment, leaving overhang. Lightly spray.
-
Make base: Mix oats, almond butter, honey, almonds, and salt. Stir until thick and sticky.
-
Press: Pack into pan firmly—use damp hands or the back of a spoon.
-
Mix yogurt: Combine yogurt, honey, vanilla, and salt until smooth.
-
Assemble: Spread yogurt over base evenly. Tap pan to settle. Top with berries.
-
Freeze: Freeze flat 3–4 hours until solid.
-
Cut & store: Lift out, slice with hot knife, and store in airtight container with parchment between layers.
Notes
-
Use full-fat yogurt for creamy texture—low-fat = icy!
-
Pat berries dry to avoid yogurt streaks.
-
Press the base hard to prevent crumbles.
-
Cut with a hot knife for clean slices.
Nutrition
- Calories: 210 Cal Per Bar
- Sugar: 10g
- Fat: 12g
- Carbohydrates: 19g
- Protein: 8g
Nutrition Per Bar (Approximate)
🔥 Calories: 210 | 💪 Protein: 8g | 🍞 Carbs: 19g | 🥑 Fat: 12g | 🌾 Fiber: 3g | 🍬 Sugar: 10g
Final Thoughts: Why This Recipe is a Keeper
These Frozen Greek Yogurt Granola Bars aren’t just a summer fling—they’re a year-round staple. Whether you need:
-
A heatwave-friendly dessert (no oven required!),
-
A breakfast that doesn’t suck,
-
A healthier alternative to ice cream,
…this recipe delivers.
Best part? They’re impossible to mess up. Even if your first batch looks “rustic” (read: messy), they’ll still taste amazing. So grab those ingredients, embrace the no-bake life, and keep it cool, friends!