Valentine’s Cheesecake Hearts: Your New Sweetheart of a Dessert
Hey there, friends! Beau here, welcoming you back to Feastical, your cozy corner for food that feels like a celebration. With Valentine’s Day just around the corner, I know the pressure is on to create something special. You want a dessert that whispers “you’re amazing,” not one that screams from a stressed-out kitchen. Forget the fussy, five-hour pastry projects. This year, we’re making magic with these unbelievably creamy, dreamy, and downright adorable Valentine’s Cheesecake Hearts.
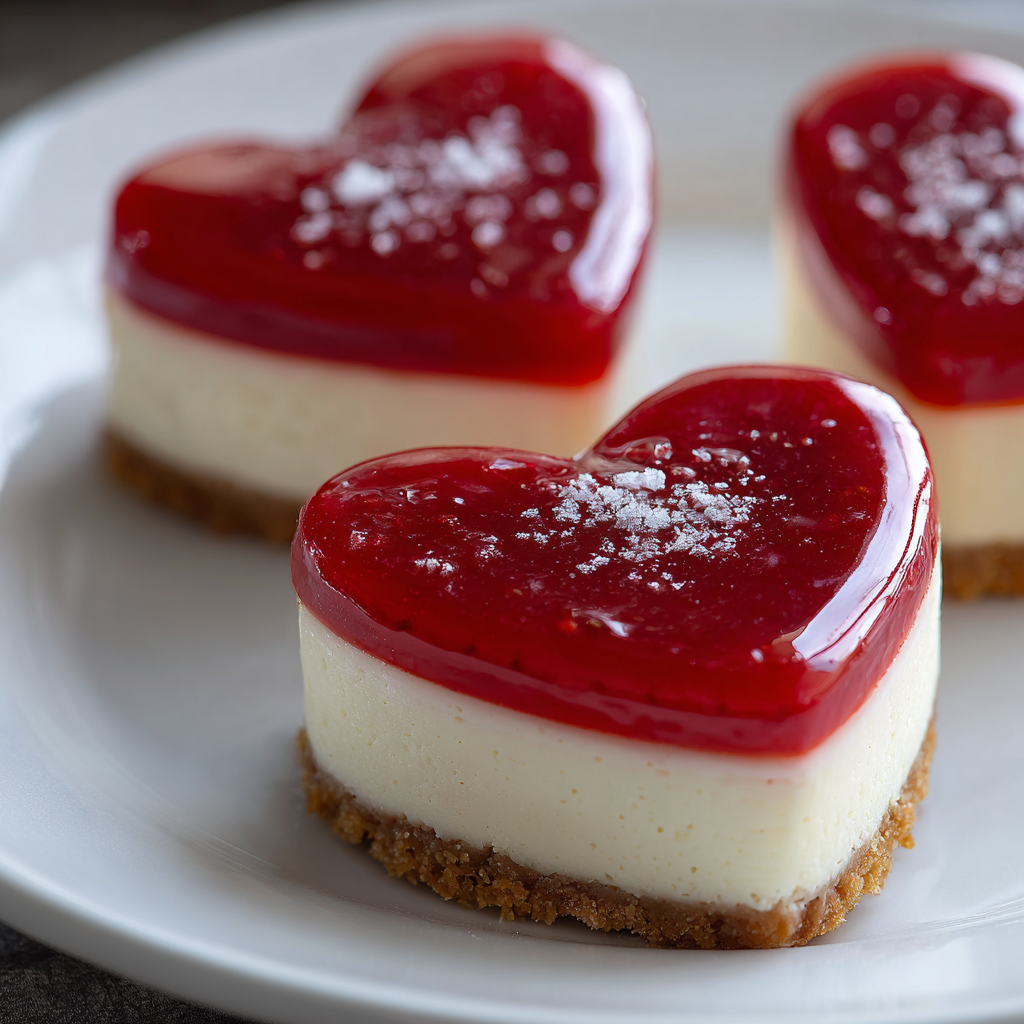
Imagine this: a velvety-smooth cheesecake, so rich it practically melts on your tongue, baked into the most charming little heart shapes. Each one gets a buttery graham cracker hug at the bottom and a glossy, jewel-toned topping of strawberry glaze or tangy raspberry coulis. They’re elegant enough to make your sweetheart’s eyes light up, but simple enough that you can whip them up without breaking a sweat. Whether you’re planning a romantic dinner for two or just want to show your friends and family some love, these mini cheesecakes are my go-to recipe for spreading joy, one delicious bite at a time. So, let’s preheat that oven and get ready to bake a little love into our lives!
A Cheesecake Kind of Love
This recipe takes me right back to my first Valentine’s Day with my now-wife. I was a young, eager cook, dead-set on impressing her with a from-scratch, grand gesture of a dessert. I attempted a towering, multi-layer chocolate cake. Friends, it was a disaster. The layers slid, the frosting was grainy, and my kitchen looked like a flour bomb had gone off. In a last-minute panic, I remembered my grandma’s simple, no-fail cheesecake recipe. I didn’t have a springform pan, so I used a muffin tin and did my best to shape the topping into a heart with some strawberry jam. They were lopsided, a little messy, but made with 100% heart.
Her face when she saw them? Pure, unadulterated joy. It wasn’t about a perfect, magazine-worthy dessert. It was about the love and the effort. That’s the spirit I’ve baked into these Valentine’s Cheesecake Hearts. They’re my way of saying that the best food, the food that truly connects us, doesn’t have to be complicated. It just has to be made with a little bit of your story stirred in.
Gathering Your Love Potion Ingredients
Here’s the beautiful part: you only need a handful of simple, high-quality ingredients to create pure dessert magic. Using the best you can find truly makes a difference here, because each component shines through. Let’s break it down.
For the Buttery Crust:
- 1 cup graham cracker crumbs: This is our foundation, providing that classic, slightly sweet, and toasty flavor. Chef’s Insight: You can buy pre-crumbled crumbs, but crushing whole graham crackers in a zip-top bag with a rolling pin is a fantastic (and fun!) way to release any pent-up energy.
- 2 tablespoons granulated sugar: Just a touch to sweeten the deal and help the crust crisp up beautifully.
- 4 tablespoons (½ stick) unsalted butter, melted: This is the glue that holds our crust together and gives it that irresistible, rich flavor. Substitution Tip: For a nuttier flavor, try using browned butter. It adds a whole new dimension of deliciousness!
For the Creamy, Dreamy Filling:
- 16 oz (two 8-oz blocks) full-fat cream cheese, softened: This is the star of the show, so please use full-fat! It’s what gives us that luxuriously creamy, stable texture. Chef’s Hack: To soften cream cheese quickly, take it out of the foil and microwave it on 50% power for 15-second intervals. You want it pliable but not melted or hot.
- ½ cup granulated sugar: We use less sugar than many recipes because we want the tangy cream cheese flavor to be the hero, not just the sweetness.
- 1 teaspoon pure vanilla extract: The warm, aromatic backbone of our filling. It rounds out all the flavors perfectly.
- 2 large eggs, at room temperature: These are our binding agents, giving the cheesecake its structure. Room temperature eggs incorporate much more smoothly into the batter, preventing overmixing. Pro Tip: Place cold eggs in a bowl of warm water for 5-10 minutes to bring them to temp fast.
- ¼ cup sour cream: This is my secret weapon! Sour cream adds a subtle tang and an incredible amount of velvety moisture, ensuring our mini cheesecakes stay creamy and never dry.
For the Glamorous Topping (Choose Your Adventure!):
- Strawberry Glaze (store-bought or homemade): A classic for a reason! It’s sweet, shiny, and screams Valentine’s Day. A fantastic, no-fuss option.
- Raspberry Coulis: My personal favorite. It’s a simple blend of fresh or frozen raspberries, a spoonful of sugar, and a squeeze of lemon juice, all whirled together and strained for a elegant, seed-free, tangy sauce.
Crafting Your Edible Valentines: A Step-by-Step Guide
Ready to create some kitchen magic? Follow these steps, and you’ll be a cheesecake-heart-hero in no time. I’ve sprinkled in my best chef hacks to ensure your success.
- Preheat and Prep: Start by preheating your oven to 325°F (160°C). This lower temperature is key for a gentle, even bake that prevents cracking and gives us that perfect creamy texture. While it heats up, generously grease your heart-shaped muffin pan or silicone molds. Chef’s Hack: If using a metal pan, I highly recommend lining the cavities with heart-shaped parchment papers for foolproof removal. A light spritz of cooking spray on the pan before pressing in the crust also works wonders.
- Create the Crust: In a medium bowl, stir together the graham cracker crumbs and sugar. Pour in the melted butter and mix until the mixture resembles wet sand and holds together when you pinch it. Divide this mixture evenly among your prepared molds (about a heaping tablespoon per heart). Use a small glass, a measuring spoon, or your fingers to press it down firmly and evenly into the bottom. We want a solid foundation! Pop the pan in the oven and bake for 5-7 minutes. This pre-bakes the crust, giving it a wonderful toasty flavor and preventing it from getting soggy. Set it aside to cool slightly while you make the filling.
- Whip Up the Filling: In a large mixing bowl, beat the softened cream cheese and sugar together on medium speed until it is completely smooth, creamy, and free of any lumps. This is the most important step! Scrape down the bowl and beater thoroughly. Now, beat in the vanilla extract. Next, add the eggs one at a time, mixing on low speed just until the yolk disappears into the batter after each addition. Finally, mix in the sour cream, again, just until everything is combined and smooth. Chef’s Golden Rule: DO NOT overmix after adding the eggs! Overbeating incorporates too much air and can cause the cheesecakes to puff up and crack as they bake. We’re going for smooth, not fluffy.
- Assemble and Bake: Pour the gorgeous, velvety filling over the slightly cooled crusts, dividing it evenly among the molds. Gently tap the pan on the counter a few times to release any large air bubbles. Slide the pan into the preheated oven and bake for 15-18 minutes. You’re looking for the edges to be set, but the centers should still have a slight jiggle when you gently shake the pan—like Jell-O. They will continue to set as they cool. This “carryover cooking” is your best friend for achieving that perfect creamy center.
- The All-Important Cool Down: Once baked, remove the pan from the oven and let the cheesecake hearts cool completely at room temperature on a wire rack. Do not try to remove them while warm! After they’ve cooled, transfer the entire pan to the refrigerator to chill for at least 2-3 hours, but preferably overnight. This patient chilling step is non-negotiable for that firm, sliceable-yet-creamy texture we all love in a cheesecake.
- The Grand Finale – Topping! Once your cheesecake hearts are thoroughly chilled, it’s time for the fun part. Carefully run a small offset spatula or a thin knife around the edges of each heart to loosen them, then gently pop them out. If you used silicone molds, they should release like a dream. Now, artfully drizzle or spoon your chosen topping over each heart. The vibrant red against the creamy white cheesecake is simply stunning.
Sharing the Love: How to Serve Your Masterpiece
Presentation is the final touch of love! You’ve put in the work, now let’s make these little hearts shine. For a simple, elegant look, place each cheesecake heart on a clean, white plate. That beautiful red topping will just pop. If you’re feeling fancy, you can add a tiny dusting of powdered sugar, a fresh mint leaf, or even a few fresh raspberries or sliced strawberries on the side.
These are perfect for a romantic dessert for two. Arrange two hearts on a shared plate, light a candle, and you’ve got a restaurant-quality dessert right at home. Hosting a Galentine’s party or family gathering? Create a stunning dessert platter! Arrange all the cheesecake hearts on a beautiful board or cake stand. It’s a guaranteed showstopper that lets everyone grab their own little piece of happiness.
Make It Your Own: Delicious Twists on the Classic
One of the best things about this recipe is how easily you can customize it. Feel like playing? Here are a few of my favorite variations:
- Chocolate Lovers’ Dream: Replace the graham cracker crumbs with chocolate wafer or Oreo cookie crumbs (filling removed). For the filling, add ¼ cup of sifted cocoa powder when you add the sugar, and fold in ½ cup of mini chocolate chips at the end.
- Lemon Berry Bliss: Add the zest of one lemon and a tablespoon of fresh lemon juice to the filling for a bright, sunny twist. Top with the raspberry coulis—the lemon and raspberry combo is a classic for a reason!
- White Chocolate Raspberry: Melt 4 oz of high-quality white chocolate and let it cool slightly. Beat it into the cream cheese and sugar mixture. Top with the raspberry coulis for a truly decadent treat.
- Nutty Crunch: Swap out half of the graham cracker crumbs for finely ground toasted almonds or pecans for a crust with incredible depth and flavor.
- Dairy-Free Delight: Use your favorite plant-based cream cheese and butter, and swap the sour cream for a plain, unsweetened dairy-free yogurt. The method remains exactly the same!
Beau’s Kitchen Chronicles
This recipe has been a labor of love, quite literally. Over the years, I’ve learned that the secret isn’t just in the ingredients, but in the rhythm of making it. I always put on a little Motown music when I’m whipping up the filling—it keeps me from overmixing! I also have a funny story about the first time I made these for my kids’ school bake sale. I was so proud, until I realized I’d accidentally used a teaspoon of almond extract instead of vanilla. Let’s just say we had “Amaretto-Style” Cheesecake Hearts that year, and they were a surprising hit! The moral of the story? Don’t be afraid of happy accidents in the kitchen. They often lead to the best discoveries.
Your Cheesecake Questions, Answered!
I’ve gotten a lot of questions about this recipe over the years. Here are the ones I hear most often:
Q: My cheesecakes cracked on top! What did I do wrong?
A: Don’t worry, they still taste amazing! Cracking usually happens for one of three reasons: the oven was too hot, the cheesecakes were overbaked, or the batter was overmixed after the eggs were added. Remember our gentle jiggle and low-speed mixing next time. But hey, that’s what the gorgeous berry topping is for—it covers any and all imperfections beautifully!
Q: Can I make these ahead of time?
A: Absolutely! In fact, I highly recommend it. These cheesecake hearts taste even better the next day after the flavors have had time to meld. You can bake and chill them (without the topping) up to 2 days in advance. Add the glaze or coulis right before serving for the freshest look and taste.
Q: I don’t have a heart-shaped pan. Can I use a regular muffin tin?
A: Of course! You’ll make adorable, round mini cheesecakes that are just as delicious. The baking time should be roughly the same. Just be sure to grease the tin well or use cupcake liners for easy removal.
Q: How should I store leftovers?
A> Keep any leftover cheesecake hearts (lucky you!) covered tightly in the refrigerator. They’ll stay fresh and delicious for up to 5 days.

Valentine’s Cheesecake Hearts: Creamy, Dreamy & Full of Love
Description
Hey there, friends! Beau here, welcoming you back to Feastical, your cozy corner for food that feels like a celebration. With Valentine’s Day just around the corner, we’re skipping the stress and embracing simplicity with a dessert that’s creamy, dreamy, and full of heart—literally. These Valentine’s Cheesecake Hearts are rich, velvety mini cheesecakes baked into sweet heart shapes, finished with a buttery graham crust and a glossy berry topping. Elegant, impressive, and surprisingly easy, they’re the perfect way to say “I love you” without spending hours in the kitchen.
Ingredients
For the Buttery Crust
-
1 cup graham cracker crumbs
-
2 tbsp granulated sugar
-
4 tbsp (½ stick) unsalted butter, melted
For the Creamy Filling
-
16 oz (2 blocks) full-fat cream cheese, softened
-
½ cup granulated sugar
-
1 tsp vanilla extract
-
2 large eggs, room temperature
-
¼ cup sour cream
For the Topping (Choose One)
-
Strawberry glaze or
-
Raspberry coulis (blend raspberries, 1 tbsp sugar, and 1 tsp lemon juice, then strain)
Instructions
-
Prep the Pan & Oven
Preheat oven to 325°F (160°C). Lightly grease a heart-shaped muffin pan or silicone mold. (If using metal, line with parchment for easy removal.) -
Make the Crust
In a bowl, combine graham crumbs, sugar, and melted butter until the texture resembles wet sand. Press a heaping tablespoon into each mold. Bake for 5–7 minutes, then set aside to cool slightly. -
Mix the Filling
Beat softened cream cheese and sugar until smooth and creamy. Add vanilla, then beat in eggs one at a time on low speed. Stir in sour cream until just combined—don’t overmix! -
Fill & Bake
Spoon the filling over crusts, dividing evenly. Tap the pan gently to remove air bubbles. Bake for 15–18 minutes, until edges are set but centers still jiggle slightly. -
Cool & Chill
Cool completely at room temperature, then refrigerate for at least 3 hours (or overnight) until firm and creamy. -
Top & Serve
Carefully remove cheesecakes from molds. Spoon your chosen topping over each heart and garnish with fresh berries or mint if desired.
Notes
-
Quick Softening Trick: Microwave cream cheese (unwrapped) for 15 seconds at 50% power—just until pliable.
-
Smooth Texture Secret: Avoid overmixing after adding eggs—less air means fewer cracks.
-
Make Ahead: Cheesecake hearts keep beautifully for up to 2 days in the fridge before topping.
A Quick Bite on Nutrition
Now, let’s be real—these are a treat, through and through. We’re here for joy and celebration, not a diet food. But for those who like to know, here’s a general breakdown per cheesecake heart (with graham crust and strawberry glaze). Remember, these are estimates and can vary based on your specific ingredients.
- Calories: ~240
- Fat: 18g
- Carbohydrates: 17g
- Sugar: 13g
- Protein: 4g
The main sources of calories are the cream cheese and butter, which are also what make these so irresistibly rich and satisfying. It’s all about balance—enjoy one or two of these beauties mindfully as part of your celebration!
Your Sweet Finale
And there you have it, my friends—everything you need to create a Valentine’s Day dessert that’s straight from the heart. These cheesecake hearts are more than just a recipe; they’re a reminder that the most meaningful food is often the simplest, made with good ingredients and a generous dash of love. I am so grateful you chose to spend this time in the kitchen with me.
I’d love to see your beautiful creations! Tag me @FeasticalBeau on social media or use the hashtag #Feastical so I can share in your sweet success. However you celebrate, and whoever you share them with, I hope these little bites bring a whole lot of joy to your table. Happy baking!
With love and a full heart,
Beau
***