Blackberry Tiramisu: Your New Go-To No-Bake Showstopper
Hey friends, Beau here! Let’s be real for a second. Is there anything more universally loved than a classic tiramisu? That dreamy, coffee-soaked, mascarpone-layered masterpiece is a dessert table legend for a reason. But what if I told you we could take that iconic comfort and give it a fresh, vibrant, sun-kissed makeover? Get ready to fall in love with your new favorite summer dessert: Blackberry Tiramisu.
This isn’t just a recipe; it’s a mood. It’s the dessert you bring to a backyard barbecue that makes everyone’s eyes light up. It’s the treat you whip up on a warm evening when turning on the oven feels like a punishable offense. We’re swapping out the strong coffee for a sweet-tart blackberry syrup that’s so good you’ll want to put it on everything, and layering it with our signature pillowy, vanilla-kissed mascarpone cream.
It’s elegant enough for a dinner party but simple enough for a Tuesday night victory dance. So, if you’re ready to create something incredibly delicious that requires exactly zero baking, you’re in the right kitchen. Grab your favorite mixing bowl, and let’s make some magic happen!
A Berry Sweet Memory
This recipe was born from a happy accident and a serious blackberry surplus. A few summers back, my partner and I went a little overboard at a “pick-your-own” farm. We came home with buckets of berries, their dark juice staining our fingers and a big, dumb grin on our faces. After making jam, pies, and smoothies until we could barely see straight, we still had a mountain left.
I was staring at this berry bounty, wondering what to create next, when I saw a half-eaten classic tiramisu in the fridge. A lightbulb went off. What if we swapped the espresso for a fruity syrup? The result was nothing short of spectacular. The first bite was a revelation—all the familiar, comforting texture of tiramisu, but with a bright, sunny, berry-forward flavor that just screams summer. It was an instant hit, and it’s been a Feastical favorite ever since. It just goes to show that the best kitchen creations often come from a little bit of chaos and a whole lot of fruit!
Gathering Your Sunshine Ingredients
Here’s your shopping list for this burst of berry bliss. The beauty of this dish is in its simplicity, so using quality ingredients really makes a difference!
- 4 cups fresh or frozen blackberries: Don’t stress if fresh aren’t in season! Frozen berries work beautifully here and are often more affordable. They break down into a gorgeous syrup just as well as their fresh counterparts.
- 1 cup granulated sugar: This sweetens our vibrant blackberry syrup. If your berries are super sweet, you can scale this back to 3/4 cup, but I find a full cup gives us the perfect balance against the tart lemon and rich mascarpone.
- 2 tbsp lemon juice & Zest of 1 lemon: This is our secret weapon! The lemon juice brightens the berry flavor, preventing the syrup from being one-note sweet, while the zest adds little pops of citrusy fragrance throughout the dessert.
- 16 oz mascarpone cheese: The heart and soul of any tiramisu! Make sure it’s at room temperature before you start. This is non-negotiable for a silky-smooth, lump-free cream. Cold mascarpone is a stubborn beast to whip.
- 1 cup powdered sugar: We use powdered sugar in the cream because it dissolves instantly, giving us an impossibly smooth texture. No gritty surprises here!
- 2 cups heavy whipping cream, cold: The “pillowy” part of our pillowy cream. For the best volume, make sure your cream, and even your mixing bowl, are ice-cold. I sometimes pop my bowl in the freezer for 10 minutes before I start.
- 1 tsp vanilla extract: A little warmth and depth to complement the berries. Feel free to use the seeds from a vanilla bean for an extra-special touch.
- 2 packages ladyfingers (Savoiardi-style): These dry, crisp cookies are the traditional choice for a reason. They hold their structure just enough when dipped, giving us that perfect soft-but-not-mushy texture we’re after.
- Optional for garnish: fresh blackberries, mint leaves, extra lemon zest: This is your moment to be an artist! A little garnish makes the dessert look professionally styled and adds fresh flavor and texture.
Let’s Build This Beauty: Step-by-Step
Ready to assemble our masterpiece? Follow these steps, and you’ll be a tiramisu pro in no time. I’ve packed in all my favorite chef hacks to make this foolproof.
Step 1: Create the Blackberry Elixir
In a medium saucepan, combine your blackberries, granulated sugar, lemon juice, and lemon zest. Cook this over medium heat for 5-7 minutes. You’ll hear it start to bubble and pop—that’s the berries breaking down and releasing their incredible juice. Use a wooden spoon or potato masher to gently help them along. Once it looks like a gorgeous, jammy pot of purple goodness, remove it from the heat. Now, here’s a crucial step for a silky-smooth texture: strain the syrup through a fine-mesh sieve into a bowl, pressing down on the solids with the back of a spoon to get every last drop of that flavorful liquid. Discard the seeds and pulp. Let this syrup cool completely. I sometimes pop it in the fridge to speed things up. Chef’s Hack: A warm syrup will turn your ladyfingers into mush, so patience is key here!
Step 2: Whip Up the Dreamiest Cream
Now for the cloud-like layer that brings it all together. In a large, cold bowl, beat your cold heavy cream and vanilla extract together. Start on low speed and gradually increase to high. Watch it like a hawk! You’re looking for soft peaks—that means when you lift the beaters out, the cream will form peaks that gently curl over at the tips. In a separate bowl, let’s tackle the mascarpone. Remember, it should be at room temp! Add the powdered sugar and use a spatula or whisk (an electric mixer on low is fine too) to mix it until it’s smooth and creamy. Now, the magic: gently fold the whipped cream into the mascarpone mixture. “Folding” is a fancy term for being gentle! Use a spatula to cut down through the center, scoop along the bottom, and fold it over the top. Repeat just until no white streaks remain. Overmixing will deflate your beautiful cream, so be kind to it.
Step 3: The Grand Assembly
Grab your 9×13 dish. Now, for the fun, slightly messy part! Take a ladyfinger and give it a very quick dip—I’m talking one second per side—into the cooled blackberry syrup. You want it to be coated and softened, but not saturated and falling apart. Think “moist,” not “soggy.” Line the bottom of your dish with a single layer of these dipped cookies. You might need to break a few to fill in the gaps—no problem! Spread half of your luxurious mascarpone cream over the ladyfingers in an even layer. Now, repeat the process: another layer of quickly-dipped ladyfingers, followed by the remaining cream. Smooth the top with your spatula.
Step 4: The Torturous (But Essential) Chill
This is the hardest part: waiting. Cover the dish tightly with plastic wrap and refrigerate it for at least 6 hours, but honestly, overnight is pure perfection. This waiting period is when the alchemy happens. The ladyfingers soften further, the flavors meld together, and the whole dessert sets up into a sliceable, dreamy, cohesive wonder.
Step 5: The Grand Finale – Serving
When you’re ready to serve, take it out of the fridge and behold your creation! Scatter a handful of fresh blackberries over the top, sprinkle on some bright lemon zest, and tuck in a few fresh mint leaves for a pop of color and freshness. Slice, serve, and get ready for the compliments to roll in.
How to Serve Your Blackberry Tiramisu
Presentation is part of the fun! While serving it right from the baking dish is perfectly charming (and my go-to for family-style gatherings), you can also elevate it for a special occasion. For a stunning individual presentation, use a round cookie cutter to create neat, cylindrical portions. Place each portion in the center of a plate and garnish with a single perfect blackberry and a tiny mint sprig.
What to serve it with? It’s fantastic all on its own, but a drizzle of extra blackberry syrup on the plate looks beautiful. For the ultimate indulgence, a small glass of dessert wine like a Moscato d’Asti or a late-harvest Riesling pairs incredibly well with the berry and citrus notes. For a non-alcoholic option, a sparkling lemonade or even a cold brew coffee (a little nod to the original!) makes a great companion.
Make It Your Own: Delicious Twists & Swaps
One of the best things about this recipe is its versatility. Feel free to play with it and make it your own!
- Mixed Berry Bliss: Don’t limit yourself to just blackberries! Use a mix of raspberries, blackberries, and blueberries for a “summer berry” tiramisu that’s bursting with different flavors and colors.
- Lemon Blueberry Swap: Swap the blackberries for blueberries and add an extra tablespoon of lemon zest to the syrup. It’s a classic, unbeatable flavor combination that feels fresh and bright.
- Boozy Berry Kick: Want an adult-only version? After straining the blackberry syrup, stir in a tablespoon or two of Chambord (black raspberry liqueur) or even a little Grand Marnier for a citrusy punch.
- Gluten-Free & Vegan Friendly: For a gluten-free version, use your favorite gluten-free ladyfingers or even thin slices of gluten-free pound cake. For a vegan twist, use vegan mascarpone (or a blend of vegan cream cheese and coconut cream) and coconut whipped cream. The berry syrup is already naturally vegan!
- Individual Jars: For a portable, no-mess option, layer the dipped ladyfinger pieces and cream in individual mason jars or glasses. They’re adorable and perfect for picnics or parties.
Beau’s Kitchen Notes
This recipe has evolved a bit since that first berry-filled experiment. I’ve found that adding the lemon zest directly to the syrup, rather than just the juice, makes a world of difference in the final flavor. It perfumes the entire dessert. I also used to be timid with the dipping, but I’ve learned that a confident, quick dip is the true secret to the perfect ladyfinger texture—soft, but with a slight bite. One of my funniest kitchen fails was the first time I made this; I was so impatient I used warm syrup and ended up with a delicious but structurally unsound tiramisu soup! We ate it with a spoon and it was still fantastic, but lesson learned: let that syrup cool!
Your Questions, Answered!
Q: My mascarpone cream is lumpy! What did I do wrong?
A: This almost always happens when the mascarpone cheese is too cold. It’s a finicky ingredient! Always, always let it sit on the counter for at least 30-60 minutes before you start. If you do end up with lumps, you can try to beat it with an electric mixer on low for a few seconds to smooth it out, but prevention is the best cure.
Q: Can I make this dessert ahead of time?
A: Absolutely! In fact, I highly recommend it. Making it the day before you plan to serve it is ideal. The flavors have more time to develop and meld, and it sets up perfectly. Just add the fresh garnishes right before serving so they look their best.
Q: My whipped cream won’t form peaks. Help!
A: This is usually a temperature issue. Your cream, bowl, and beaters all need to be very cold. If your kitchen is warm, try placing your bowl of cream into a larger bowl filled with ice water while you whip it. Also, make sure you’re using heavy whipping cream, not half-and-half or milk.
Q: How long will the leftovers last in the fridge?
A: It will keep beautifully, covered tightly, for 2-3 days. The ladyfingers will continue to soften, but it will still be delicious. I wouldn’t recommend freezing it, as the creamy layer can become grainy when thawed.

Blackberry Tiramisu: A Bright, Fruity No-Bake Dessert Twist
Description
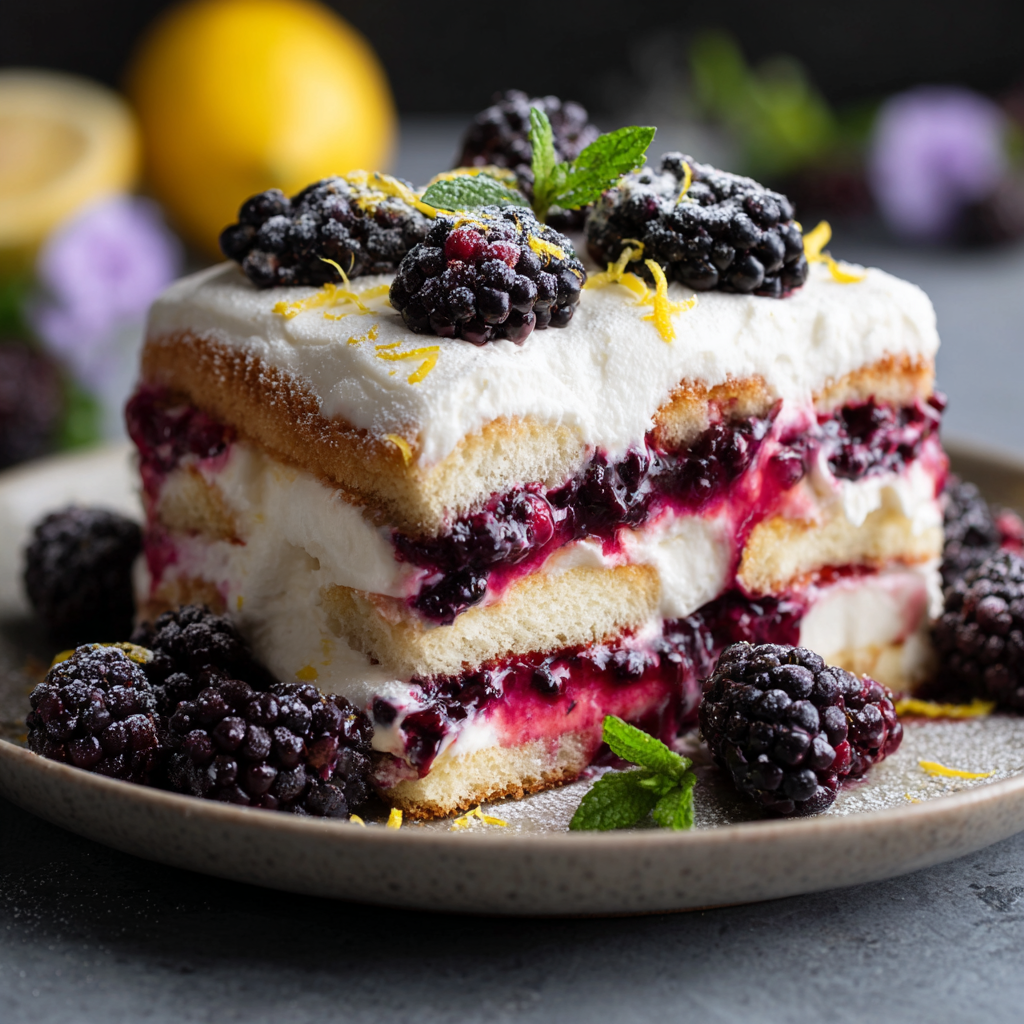
This isn’t just tiramisu—it’s a vibrant, fruity twist on a classic dessert. Sweet-tart blackberry syrup replaces coffee, while a pillowy, vanilla-kissed mascarpone cream layers perfectly over ladyfingers. Elegant enough for a dinner party, simple enough for a weeknight treat, and zero baking required!
Ingredients
For the Blackberry Syrup:
-
4 cups fresh or frozen blackberries
-
1 cup granulated sugar (adjust based on berry sweetness)
-
2 tbsp lemon juice
-
Zest of 1 lemon
For the Mascarpone Cream:
-
16 oz mascarpone cheese, room temperature
-
1 cup powdered sugar
-
2 cups heavy whipping cream, cold
-
1 tsp vanilla extract
For Assembly:
-
2 packages ladyfingers (Savoiardi-style)
-
Optional garnish: fresh blackberries, mint leaves, extra lemon zest
Instructions
Step 1: Make the Blackberry Syrup
-
In a medium saucepan, combine blackberries, granulated sugar, lemon juice, and zest.
-
Cook over medium heat for 5–7 minutes, gently mashing berries.
-
Strain through a fine-mesh sieve into a bowl, pressing to extract juice. Discard solids.
-
Let syrup cool completely. Chef’s Tip: Warm syrup will make ladyfingers soggy—patience is key!
Step 2: Whip the Mascarpone Cream
-
In a cold bowl, beat heavy cream and vanilla extract until soft peaks form.
-
In a separate bowl, combine mascarpone and powdered sugar until smooth.
-
Gently fold whipped cream into mascarpone mixture until fully incorporated. Avoid overmixing.
Step 3: Assemble the Tiramisu
-
Quickly dip ladyfingers (1 second per side) into cooled blackberry syrup and line the bottom of a 9×13 dish.
-
Spread half of the mascarpone cream over the ladyfingers.
-
Repeat: another layer of dipped ladyfingers, followed by remaining cream. Smooth the top.
Step 4: Chill
-
Cover tightly with plastic wrap and refrigerate for at least 6 hours, preferably overnight, to let flavors meld and dessert set.
Step 5: Serve & Garnish
-
Scatter fresh blackberries, mint leaves, and lemon zest over the top.
-
Slice and serve. Optional: drizzle extra syrup or serve with dessert wine or sparkling lemonade.
Notes
-
Mixed Berry: Use a combination of raspberries, blackberries, and blueberries.
-
Lemon Blueberry: Swap blackberries for blueberries and add extra lemon zest.
-
Boozy: Stir in 1–2 tbsp Chambord or Grand Marnier into the syrup.
-
Gluten-Free / Vegan: Use gluten-free ladyfingers or pound cake; vegan mascarpone and coconut cream.
-
Individual Portions: Layer in mason jars or glasses for a portable, elegant treat.
Nutrition
- Calories: 310 Cal Per Serving
- Fat: 21g
- Carbohydrates: 26g
Quick Nutritional & Prep Info
(Please note: The following is an approximate estimate based on the ingredients used. For precise dietary information, I recommend using a dedicated nutritional calculator with your specific brands.)
Prep Time: 20 mins | Chill Time: 6 hours | Total Time: 6 hrs 20 mins
Servings: 12
Calories per serving: ~310 | Fat: 21g | Carbohydrates: 26g | Protein: 4g
This dessert is a treat, and it’s rich, so a little goes a long way! The blackberries provide a source of Vitamin C and fiber, and by making it at home, you’re controlling the sugar. It’s a wonderful way to enjoy a decadent dessert with a fruity, fresh twist.
Final Thoughts from My Kitchen to Yours
Well, there you have it, friends—my all-time favorite summer dessert that never fails to bring a smile. This Blackberry Tiramisu is proof that you don’t need fancy techniques or a hot oven to create something truly memorable and share-worthy. It’s about taking a classic, adding a splash of seasonal color, and creating a new tradition.
I hope this recipe brings as much joy to your table as it has to mine. It’s a celebration of simple ingredients, a little bit of kitchen creativity, and the pure happiness that comes from sharing a delicious homemade treat with the people you love. Now, I’d love to hear from you! Did you try it? What variations did you create? Tag me on social @Feastical so I can see your beautiful creations. Until next time, keep your spatula close and your joy for cooking closer.
Happy cooking,
Beau