Ditch the Sad Desk Lunch: Your New Favorite Tex-Mex Escape is Here!
Hey friends, Beau here! Let’s be real for a second. How many times have you stared into the sad, fluorescent-lit abyss of your refrigerator at 7 AM, wondering what in the world you’re going to pack for lunch? You’re faced with the usual suspects: a questionable leftover, a wilted salad kit, or the siren call of an overpriced takeout menu. I’ve been there, and my stomach has staged more than one midday protest.
But what if I told you that in about 30 minutes, you could have a week’s worth of lunches that you’ll actually look forward to? Lunches that are bursting with flavor, packed with protein to keep you powered through the afternoon, and so darn satisfying you’ll feel like you’re treating yourself at a cozy cantina instead of slogging through another workday.
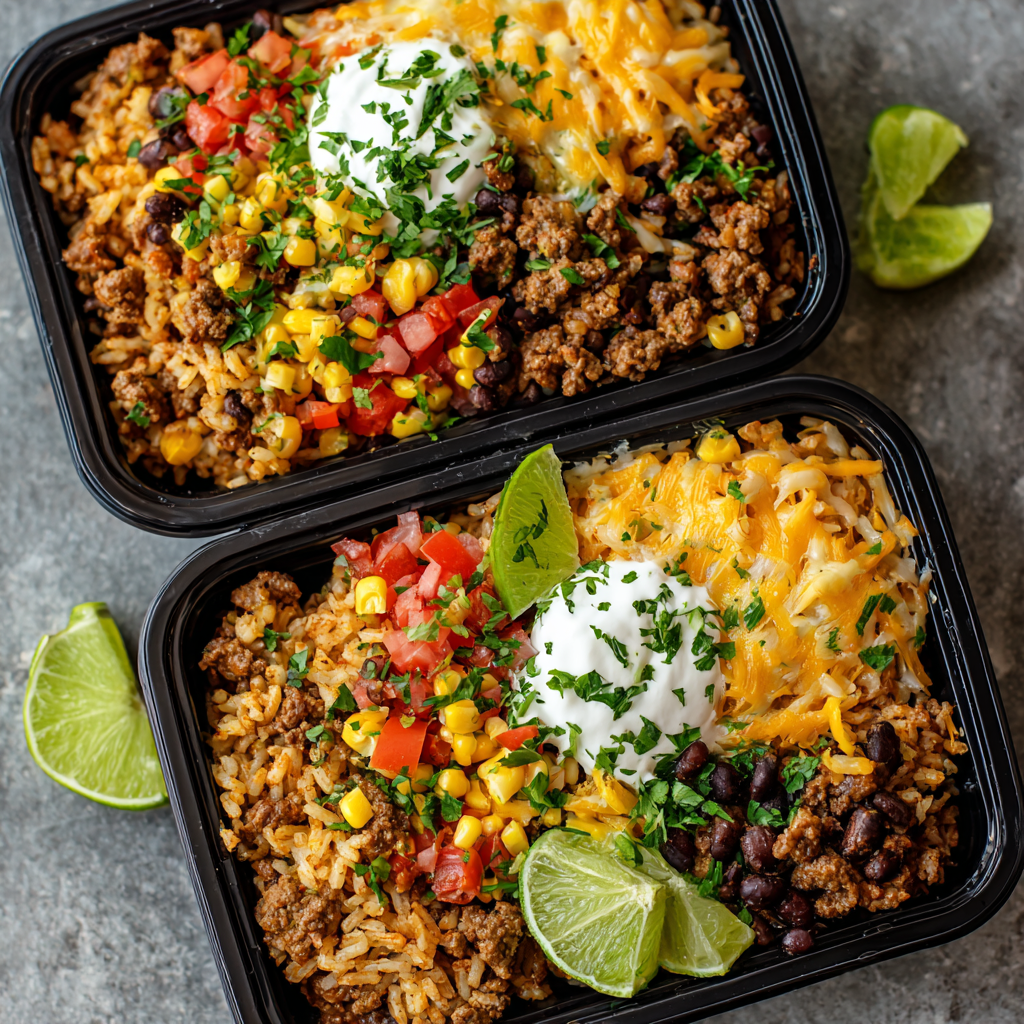
That’s the magic of these Cheesy Beef Enchilada Meal Prep Bowls. We’re taking everything you adore about a gooey, saucy, fully-loaded enchilada—the savory seasoned beef, the fluffy Spanish rice, the sweet pops of corn, the hearty black beans, and the fresh zip of pico de gallo—and we’re packing it all into one incredibly convenient, grab-and-go container. It’s bold, it’s balanced, and it’s about to become your meal prep MVP. So, grab your favorite skillet and let’s turn your lunch game from “meh” to “¡Olé!”
A Tale of Two Tacos: Where My Love for Tex-Mex Began
My obsession with these flavors didn’t start in a fancy kitchen; it started at a wobbly Formica table in my Nana’s sun-drenched Arizona kitchen. Every Friday night was “Fiesta Friday.” The air would be thick with the scent of toasting cumin and chilies, and the counter would be a vibrant buffet of toppings: diced onions, fresh cilantro, a mountain of shredded cheese, and a bowl of her legendary (and secret recipe) salsa.
My job was to brown the beef. I’d stand at the stove, wooden spoon in hand, watching the plain ground beef transform into something magical the moment that seasoning hit the hot pan. It was like a flavor explosion in slow motion. The best part was building my own plate—a little of this, a lot of that, a squeeze of lime over everything. These meal prep bowls are my grown-up, meal-prepping homage to those chaotic, joyful, and deeply delicious Friday nights. They capture that same spirit of building a meal you love, one delicious layer at a time.
Gathering Your Flavor Arsenal: What You’ll Need
Here’s your shopping list for deliciousness! Don’t sweat it if you’re missing an item or two—I’ve included my favorite swaps and chef insights to make this recipe your own.
- 1 lb lean ground beef: I like 90/10 or 93/7 lean beef. It gives you all that rich, meaty flavor without a ton of excess grease to drain. Chef’s Tip: Ground turkey or chicken works beautifully here for a lighter option!
- 1 packet low-sodium taco or enchilada seasoning: The convenience king! Using a low-sodium version lets you control the salt level. Chef’s Insight: If you have 5 extra minutes, make your own blend with chili powder, cumin, garlic powder, and a pinch of oregano. It’s a game-changer!
- 2 cups cooked Spanish or Mexican-style rice: This is the fluffy, tomato-infused foundation of our bowl. You can use store-bought, or cook up a batch from scratch. Substitution Tip: Plain brown rice, cilantro-lime rice, or even cauliflower rice for a low-carb twist are all fantastic.
- 1 cup canned corn, drained: It brings a touch of sweetness and a wonderful pop of texture. Chef’s Tip: For a next-level flavor, quickly char the corn in a dry skillet before adding it to the bowls!
- 1 cup black beans, rinsed and drained: A powerhouse of fiber and plant-based protein. Rinsing them gets rid of that starchy can liquid and makes them taste fresher.
- 1 cup pico de gallo: The fresh, zesty heart of the bowl! You can find it in the refrigerated section, or whip up a simple batch with diced tomato, red onion, cilantro, and a squeeze of lime.
- ½ cup shredded cheese (optional, for melting over beef): I say “optional,” but let’s be real, the cheese is what makes it “cheesy”! A Mexican blend, cheddar, or Monterey Jack are all perfect. For a dairy-free option, a sprinkle of nutritional yeast can add a cheesy flavor.
- 4 lime wedges: Don’t you dare forget these! A squeeze of fresh lime juice right before eating brightens up every single component.
- ½ cup light sour cream or Greek yogurt: This is our cool, creamy finisher. Greek yogurt adds a tangy protein boost, while sour cream is a classic.
- Chopped parsley or cilantro, for garnish: A little green for a fresh finish! If you’re one of those folks who thinks cilantro tastes like soap, flat-leaf parsley is your best friend.
Let’s Get Building: Your Step-by-Step Roadmap to Meal Prep Glory
This isn’t a complicated culinary operation; it’s a simple, satisfying assembly line. Follow these steps, and you’ll have four gorgeous bowls ready for the fridge in no time.
- Cook the Beef to Savory Perfection. Grab your trustiest skillet and get it over medium heat. Crumble in that beautiful ground beef and cook it up, breaking it apart with your spoon, until it’s no longer pink. This usually takes about 7-8 minutes. If you’re using a higher-fat beef, now’s the time to drain off that excess grease. Then, sprinkle over your seasoning packet and add a good splash of water (about ¼ cup). Let it simmer together for 2-3 minutes until it thickens into a glorious, fragrant sauce. Chef’s Hack: This is the moment! Turn off the heat and stir in your shredded cheese. Let the residual heat melt it into a gooey, cheesy beef masterpiece. Your future self will thank you.
- The Art of the Assembly Line. Get out your four meal prep containers. I’m a big fan of the glass ones with compartments, but any containers will do the trick. Now, let’s build from the bottom up! Start by dividing your fluffy Spanish rice evenly between the four bowls. This is our sturdy, flavorful base. Next, spoon that glorious cheesy beef directly over the rice. Pro-Tip: Let the beef cool for a few minutes before adding it to the containers. This prevents steam from making the rice mushy.
- Load Up the Good Stuff. Now for the colorful part! Artfully (or just enthusiastically) arrange your corn and black beans around the beef. Then, crown it all with a generous scoop of that bright, fresh pico de gallo. See how the colors are coming together? You’re not just making lunch; you’re creating edible art.
- The Grand Finale: Garnish & Pack. Don’t skip the fresh touches—they make all the difference. Tuck a lime wedge into the side of each bowl. For the sour cream or Greek yogurt, I highly recommend using a tiny separate container or a little silicone cup placed on top of the bowl. This keeps it fresh and cool and prevents it from melting into everything when you reheat. Finally, sprinkle the whole thing with a flourish of chopped cilantro or parsley. Boom. You’re done.
- Store and Serve Like a Pro. Pop the lids on and stash these beauties in the fridge. They’ll stay fresh and delicious for up to 4 days. When lunchtime calls, simply reheat the main bowl (without the sour cream cup and lime) in the microwave for 1.5-2 minutes, or until piping hot. Then, squeeze that lime wedge over everything, dollop on the cool sour cream, give it a quick stir, and dive into a world of flavor.
How to Serve Your Enchilada Bowl Masterpiece
You’ve done the hard work, now let’s enjoy the rewards! The beauty of these bowls is in their built-in convenience, but a few extra touches can make your midday meal feel extra special.
If you’re eating at home, consider transferring your heated bowl to a real plate and giving it a final fresh garnish. A few extra cilantro leaves or a thin slice of avocado on the side can make it feel like a restaurant-quality dish. For the ultimate “cantina at your desk” experience, serve it with a side of crunchy tortilla chips for scooping. They’re perfect for getting every last bit of beans, beef, and cheese. And that lime wedge? It’s non-negotiable. That final squeeze of acidic brightness is the secret ingredient that ties the whole hearty, cheesy, savory bowl together.
Make It Your Own: Delicious Twists & Swaps
This recipe is like your favorite pair of jeans—it’s a perfect base that you can dress up or down depending on your mood. Here are a few of my favorite ways to mix it up:
- Go Green with a Taco Salad: Swap the Spanish rice for a bed of chopped romaine or crunchy iceberg lettuce. It turns your warm bowl into a vibrant taco salad. Just pack the dressing (a mix of sour cream and lime juice works great) separately!
- Kick Up the Heat: Are you a spice lover like me? Add a diced jalapeño (seeds and all for maximum fire) to the beef as it cooks. Or, stir a tablespoon of chipotle in adobo into the sour cream for a smoky, spicy crema.
- Vegetarian Fiesta: Skip the beef altogether! Use a plant-based ground “meat” or double up on the black beans and corn. For an extra-hearty veggie version, add some sautéed diced zucchini and bell peppers.
- Breakfast for Lunch Enchilada Bowl: Yep, you read that right. Use seasoned breakfast sausage or chorizo instead of beef, and swap the rice for a layer of crispy hash browns or scrambled eggs. Top with pico and avocado. Trust me on this one.
- The “Everything but the Kitchen Sink” Bowl: Got leftovers? This is the perfect place for them! A little leftover roasted sweet potato, some sautéed mushrooms, or a handful of quinoa can all find a happy home in this bowl.
Beau’s Kitchen Confidential: A Few Parting Thoughts
This recipe has been a staple in my own meal prep rotation for years, and it’s evolved in the best ways. I once, in a frantic pre-vacation fridge clean-out, used a jar of leftover salsa instead of pico de gallo and a cup of cooked quinoa that was hiding behind the milk. The result was still absolutely delicious! The moral of the story? Don’t be afraid to play with your food. This isn’t a fussy French pastry; it’s a hearty, forgiving Tex-Mex hug in a bowl. The core formula is simple: a grain + a protein + beans/veggies + fresh toppings. Memorize that, and you can conquer lunch forever.
Your Questions, Answered! (FAQs & Troubleshooting)
I’ve gotten a lot of DMs about this recipe over on Instagram, so let me tackle the most common head-scratchers right here.
Q: My rice gets so mushy when I reheat it! What am I doing wrong?
A: Ah, the soggy rice syndrome! Two things: First, make sure your beef mixture has cooled down a bit before you assemble the bowls. Adding piping-hot beef to the rice creates steam that gets trapped in the container. Second, when you reheat, don’t overdo it. 1.5 to 2 minutes is usually plenty. The goal is to heat it through, not cook it again.
Q: Can I freeze these bowls?
A: You can, but with a caveat. The beef and rice freeze and reheat beautifully. However, the fresh elements like pico de gallo and corn will become watery and lose their texture upon thawing. My advice? Freeze just the beef and rice layers, then add fresh beans, corn, and pico when you’re ready to eat.
Q: The beef seems a little dry after reheating. Help!
A: No problem! The solution is in the simmer. When you’re cooking the beef with the seasoning, make sure you add that splash of water and let it simmer until it creates a light sauce. That extra bit of moisture gets absorbed into the meat and protects it from drying out in the fridge and microwave. You can also add an extra tablespoon of water to the container before reheating.
Q: What other protein can I use?
A: The world is your oyster… or, more accurately, your taco! Shredded rotisserie chicken, ground turkey, ground pork, or even a can of drained and rinsed lentils (toss them with the seasoning) are all incredible in this.
Breaking It Down: The Nutritional Lowdown
I’m all about feel-good food that makes you feel good, and part of that is knowing what you’re putting into your body. Here’s a general breakdown of what you’re getting in one of these power-packed bowls (calculated using lean beef, light sour cream, and including the cheese). Remember, these are estimates and can vary based on your specific ingredients.
Print
Cheesy Beef Enchilada Meal Prep Bowls : Bold, Balanced, and Ready to Grab
Description
Skip the soggy salads and overpriced takeout—these Cheesy Beef Enchilada Meal Prep Bowls are your new go-to for bold, crave-worthy lunches. Imagine tender, seasoned beef smothered in melty cheese, nestled over fluffy Spanish rice, and topped with sweet corn, hearty black beans, and zesty pico de gallo. Each bite delivers the smoky-sweet magic of a classic enchilada, all in one convenient, protein-packed bowl. They’re fresh, satisfying, and meal-prep friendly—aka your ticket to stress-free, flavor-filled workdays.
Ingredients
-
1 lb lean ground beef (90/10 or 93/7)
-
1 packet low-sodium taco or enchilada seasoning
-
¼ cup water
-
½ cup shredded cheese (cheddar, Monterey Jack, or Mexican blend)
-
2 cups cooked Spanish or Mexican rice
-
1 cup canned corn, drained (char for extra flavor!)
-
1 cup black beans, rinsed and drained
-
1 cup pico de gallo
-
½ cup light sour cream or Greek yogurt
-
4 lime wedges
-
Fresh cilantro or parsley for garnish
Instructions
-
Cook the Beef
Brown the ground beef in a skillet over medium heat (7–8 mins). Drain any grease, then stir in seasoning and water. Simmer 2–3 mins until thickened. Stir in cheese off the heat until melted and gooey. -
Assemble the Bowls
Divide rice evenly between 4 meal prep containers. Top with cheesy beef, then arrange corn, black beans, and pico de gallo around it. -
Add the Finishing Touches
Garnish with cilantro or parsley, and tuck in a lime wedge. Store sour cream or yogurt in a small separate cup to keep it fresh. -
Store & Reheat
Refrigerate up to 4 days. Reheat the main bowl (without toppings) for 1½–2 minutes. Add sour cream and lime juice just before serving.
Notes
-
Swap beef for ground turkey or rotisserie chicken for a lighter twist.
-
Freeze the beef and rice layers for easy future lunches.
-
Add jalapeños or chipotle for a fiery kick!
Nutrition
- Calories: 460 Cal Per bowl
- Fat: 20g
- Carbohydrates: 35g
- Protein: 32g
Per Serving (Approximately):
Calories: ~460 | Protein: 32g | Carbohydrates: 35g | Fat: 20g
Why this is such a winning combo? That 32 grams of protein is a powerhouse! It comes from the lean beef and black beans, and it’s essential for keeping you full, satisfied, and energized throughout the afternoon, so you can skip the 3 PM vending machine run. The carbs from the rice and beans provide steady energy, while the fat from the beef and cheese helps with nutrient absorption and flavor. It’s a truly balanced meal designed to fuel your busy life deliciously.
Final Thoughts: More Than a Meal, It’s a Mindset
This recipe is about more than just fueling your body for the week; it’s about reclaiming a small moment of your day. It’s a reminder that you deserve a lunch that brings you genuine joy, not just one that fills a hole. It’s a tribute to the power of a little planning and a lot of flavor.
So this Sunday, put on some music, channel your inner Nana, and fill your kitchen with the incredible aroma of toasting spices. You’re not just prepping food; you’re prepping for success. You’re investing in a week of easier mornings, happier afternoons, and lunches that you’ll actually look forward to. That’s a transformation worth celebrating.
I can’t wait to see your masterpiece. Tag me @FeasticalBeau with #Feastical!
With flavor and gratitude,
Beau