
Your New Go-To Dessert: 2-Ingredient Peanut Butter Fudge
Hey friends, Beau here from Feastical! Let’s be real for a second. We all have those moments. It’s 4 PM, the day is getting long, and a serious sugar craving hits you like a ton of bricks. Or maybe you just remembered you promised to bring a treat to your kid’s class party… tomorrow. Or perhaps a friend is stopping by, and you want to offer something sweet and homemade without spending the next two hours in the kitchen.
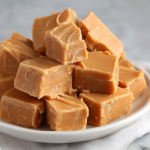
Whatever the scenario, I’ve got your back. Today, we’re making what might just be the easiest, most mind-blowingly simple dessert in my entire recipe arsenal: 2-Ingredient Peanut Butter Fudge. Yes, you read that right. Just two ingredients stand between you and a pan of creamy, rich, melt-in-your-mouth fudge that tastes like a little square of pure joy.
This isn’t just a recipe; it’s a kitchen miracle. It requires zero baking, almost no cleanup, and comes together in less than five minutes of active work. If you can stir two things together in a bowl, you can make this fudge. So, let’s banish the idea that making candy is hard or intimidating. Grab your favorite jar of peanut butter and let’s create some sweet, simple magic together.
The Happy Accident That Started It All
I’ll never forget the first time I stumbled upon this recipe. It was a blisteringly hot summer day, years ago, and my air conditioner had decided to take an unscheduled vacation. The last thing I wanted to do was turn on the oven, but my niece and nephew were visiting, and their little faces were begging for something sweet.
We were rummaging through the pantry, and all we had was a jar of peanut butter and a lonely container of vanilla frosting left over from a birthday months prior. In a moment of “what’s the worst that could happen?” inspiration, we melted the frosting, stirred in the peanut butter, and poured it into a pan. We crossed our fingers and waited.
What emerged from the fridge 20 minutes later was nothing short of legendary. It was smooth, it was sweet, it was undeniably fudge. The kids were ecstatic, and I was a believer. It became our little secret, our “magic trick” dessert. It’s a reminder that sometimes the most beloved recipes aren’t the complicated, fussy ones, but the simple, happy accidents that bring everyone together.
Gathering Your Two Magical Ingredients
This is the part where you’ll truly appreciate the beauty of this recipe. Here’s your shopping list—I promise it won’t break the bank or require a trip to a specialty store.
- 1 (16-ounce) jar of Creamy Peanut Butter: This is the star of the show, so choose wisely! I recommend using a standard, shelf-stable brand like Jif or Skippy. Their texture is perfect for this, and they’re already sweetened, which helps the fudge set up beautifully. Chef’s Insight: Avoid the “natural” kind that separates, as the extra oil can prevent the fudge from firming up properly. If it’s all you have, give it a really, really good stir first!
- 1 (16-ounce) can of Vanilla Frosting: The unsung hero that makes the magic happen. Any common brand like Betty Crocker or Pillsbury works perfectly. The frosting acts as the sweetener and the base that melts down to create that classic fudge texture. Substitution Tip: While vanilla is classic, feel free to experiment! Chocolate frosting makes for an incredible chocolate-peanut butter cup-style fudge. Just make sure it’s the same size can.
Let’s Make Some Magic: Your Foolproof Fudge Steps
Okay, team. Get ready to be amazed. This process is so fast, you might blink and miss it. I recommend having everything ready to go before you start.
- Prep Your Pan: First things first, grab an 8×8 or 9×9-inch baking pan. Lining it with parchment paper is my number one chef hack here. Just let a little extra paper hang over the sides. This creates “slings” that make it incredibly easy to lift the entire block of fudge out for clean, stress-free slicing later. No more wrestling with a stuck-on mess!
- The Great Emptying: Scoop the entire jar of creamy peanut butter into a large, microwave-safe mixing bowl. Using a bigger bowl than you think you need is another pro-tip—it gives you plenty of room to stir without making a mess on your countertops.
- Melt the Frosting: Now, take your can of vanilla frosting. This is crucial: remove the foil seal and the lid completely. Place the open can (you can pop the frosting out into a separate microwave-safe bowl if you prefer) into the microwave. Heat it on high for about 60 seconds. Keep an eye on it! You’re looking for it to be completely melted and pourable, almost like a thick glaze. Chef’s Note: If it’s not quite there, heat in 15-second bursts until it is. We don’t want it boiling, just melted.
- The Grand Stir-In: Carefully pour the hot, melted frosting directly over the peanut butter in the bowl. The heat from the frosting will slightly warm the peanut butter, making everything blend together like a dream. Now, take a sturdy spatula and stir, stir, stir! Keep going until the two ingredients are completely unified into one smooth, luscious, homogenous mixture. You shouldn’t see any streaks of frosting or lumps of peanut butter.
- Spread and Smooth: Working relatively quickly, pour your beautiful fudge mixture into your prepared pan. Use your spatula to spread it into an even layer. For that picture-perfect top, I like to dip the spatula in a little warm water and smooth it over the surface—this gives it a gorgeous, glossy finish.
- The Patience Part: Now, the hardest part: waiting. You can let the fudge set up at room temperature for about an hour, or for a faster set, pop it into the refrigerator for 15-30 minutes. It’s ready when it’s firm to the touch.
- Slice and Serve: Once set, use the parchment paper slings to lift the fudge block out of the pan and onto a cutting board. Using a sharp knife, slice it into small squares. I find that a 6×6 grid gives you 36 perfect, bite-sized pieces. Wiping the knife clean between cuts helps get those super clean edges.
How to Serve Your Fudge Masterpiece
You’ve done it! You’ve created a tray of pure happiness. Now, let’s talk about presentation. While eating it straight from the pan with your fingers is a totally valid (and time-honored) option, here are a few fun ways to make it extra special.
For a simple, classic look, arrange the little fudge squares on a beautiful plate or a rustic wooden board. If you’re gifting it, stack a few pieces in a clear cellophane bag, tie it with a cute ribbon, and you’ve got a heartfelt, homemade present that looks like it came from a fancy candy shop.
Feeling fancy? Give your fudge a little chef’s kiss right before serving. A tiny sprinkle of flaky sea salt on top of each square balances the sweetness perfectly. You could also press a single, whole roasted peanut into the center of each piece while the fudge is still soft for a decorative and delicious touch.
Mix It Up! Fun Flavor Twists
The beauty of this base recipe is that it’s a fantastic canvas for your creativity. Once you’ve mastered the classic, try one of these delicious variations!
- The Chocolate Lover: Swap the vanilla frosting for chocolate frosting! It’s like a Reese’s Peanut Butter Cup in fudge form. You can also stir in 1/2 cup of mini chocolate chips after you’ve combined the main ingredients.
- The Nutty Professor: Use crunchy peanut butter instead of creamy for a delightful texture. Or, stir in 1/3 cup of chopped peanuts, pecans, or walnuts for an extra crunch.
- The Sweet & Salty: This is my personal favorite. After spreading the fudge in the pan, generously sprinkle the top with coarse sea salt or even crushed pretzel pieces. The contrast is absolutely addictive.
- The Cookie Monster: Gently fold in 1/2 cup of crushed Oreo cookies or Nutter Butter biscuits for a fun, chunky fudge experience.
- Dairy-Free/Vegan Delight: This recipe is naturally dairy-free if you use a vegan-friendly frosting (many common brands are accidentally vegan—just check the label!) and a standard peanut butter. It’s an awesome inclusive treat!
Beau’s Kitchen Confidential
Over the years, this fudge has been my trusty sidekick for more potlucks, movie nights, and “I-need-a-dessert-STAT” emergencies than I can count. It’s evolved from that first hot-day experiment into a true Feastical staple. One of my favorite memories is bringing it to a neighborhood block party and watching people’s jaws drop when I told them it only had two ingredients. They didn’t believe me until I made a fresh batch right there on someone’s counter in under five minutes! It’s a recipe that builds confidence in the kitchen, and that’s what I love most about it.
Your Fudge Questions, Answered!
I’ve made this fudge a thousand times, and I’ve heard all your questions. Here are the answers to the most common ones.
- My fudge is too soft. What did I do wrong? This usually happens for one of two reasons. First, you might have used a “natural” peanut butter with lots of added oil. Second, it might just need more chilling time! Pop it back in the fridge for another 30-60 minutes. If it’s still soft, it will still taste delicious—just eat it with a spoon!
- Can I use a different nut butter? Absolutely! Almond butter or cashew butter work wonderfully. Just make sure they are the creamy, non-natural separation kind for the best results. The flavor will be different, but just as tasty.
- How should I store this fudge? Because of the frosting, this fudge is best stored in an airtight container in the refrigerator. It will stay perfectly fresh and firm for up to two weeks (if it lasts that long!). You can also freeze it for up to three months.
- Can I melt the frosting on the stovetop? You sure can! If you don’t have a microwave, simply empty the frosting into a small saucepan and melt it over low heat, stirring constantly, until it’s smooth and pourable.
2-Ingredient Peanut Butter Fudge
Description
2-Ingredient Peanut Butter Fudge
The quickest, creamiest fudge you’ll ever make—just peanut butter + frosting, zero baking, minimal cleanup, and ready in under 5 minutes of active prep.
Ingredients
-
1 (16 oz) jar creamy peanut butter – smooth and sweetened (avoid natural/separated varieties if possible)
-
1 (16 oz) can vanilla frosting – any common brand like Betty Crocker or Pillsbury
Optional Toppings:
-
Flaky sea salt
-
Whole roasted peanuts
-
Chocolate chips, crushed cookies, or pretzels
Instructions
1. Prep Your Pan
-
Line an 8×8 or 9×9-inch baking pan with parchment paper, leaving extra overhang for easy lifting later.
2. Melt the Frosting
-
Scoop frosting into a microwave-safe bowl.
-
Microwave on high for 60 seconds. Stir, then heat in 15-second bursts until pourable but not boiling.
3. Combine with Peanut Butter
-
Place peanut butter in a large mixing bowl.
-
Pour melted frosting over the peanut butter.
-
Stir vigorously until fully smooth and homogenous.
4. Spread in Pan
-
Pour mixture into prepared pan.
-
Smooth evenly with a spatula (dip spatula in warm water for a glossy finish).
5. Chill
-
Let fudge set at room temperature ~1 hour or refrigerate 15–30 minutes until firm.
6. Slice & Serve
-
Lift fudge using parchment paper overhang.
-
Slice into small squares (~6×6 grid).
-
Optional: sprinkle toppings or press in whole peanuts.
Notes
-
Use a dry bowl and utensils to prevent sticking or seizing.
-
Natural peanut butter may need extra chilling to firm up.
-
Store in an airtight container in the fridge for up to 2 weeks, or freeze up to 3 months.
Nutrition
- Calories: 140 Cal Per Serving
- Sugar: 13g
- Fat: 8g
- Carbohydrates: 15g
- Protein: 3g
Nutritional Information (Approximate)
Let’s keep it real—this is a treat, through and through. It’s all about indulgence and joy. Here’s a general nutritional breakdown per small square (based on a yield of 36 pieces), but please remember this can vary based on the specific brands you use.
- Calories: 140
- Fat: 8g
- Carbohydrates: 15g
- Sugar: 13g
- Protein: 3g
This fudge is a wonderful, portion-controlled way to satisfy a sweet craving. Just one little square is incredibly rich and satisfying!
Final Thoughts from My Kitchen to Yours
And there you have it, friends. The secret to impossibly easy, delightfully delicious peanut butter fudge is out of the bag. This recipe proves that you don’t need a culinary degree or a pantry full of obscure ingredients to make something truly special. All you need is a little know-how, a sense of adventure, and a deep, abiding love for peanut butter.
I hope this recipe becomes a trusted friend in your kitchen, just like it is in mine. It’s a reminder that cooking and baking should be fun, accessible, and always, always about sharing the love. So, what are you waiting for? Go whip up a batch, and don’t forget to tag me @Feastical on social media so I can see your beautiful creations! Happy cooking!
With a full heart and an even fuller plate,