A Cozy Peanut Butter Snacking Cake for Anytime Cravings
Hey there, friend! Beau here, welcoming you back to my kitchen. You know that feeling around 3 PM? When your energy dips, your focus wanes, and a little voice in your head starts whispering sweet nothings about something… satisfying? Not a full-blown, fancy dessert, but a simple, soulful treat that feels like a warm hug. That, my friends, is the sacred territory of the snacking cake.
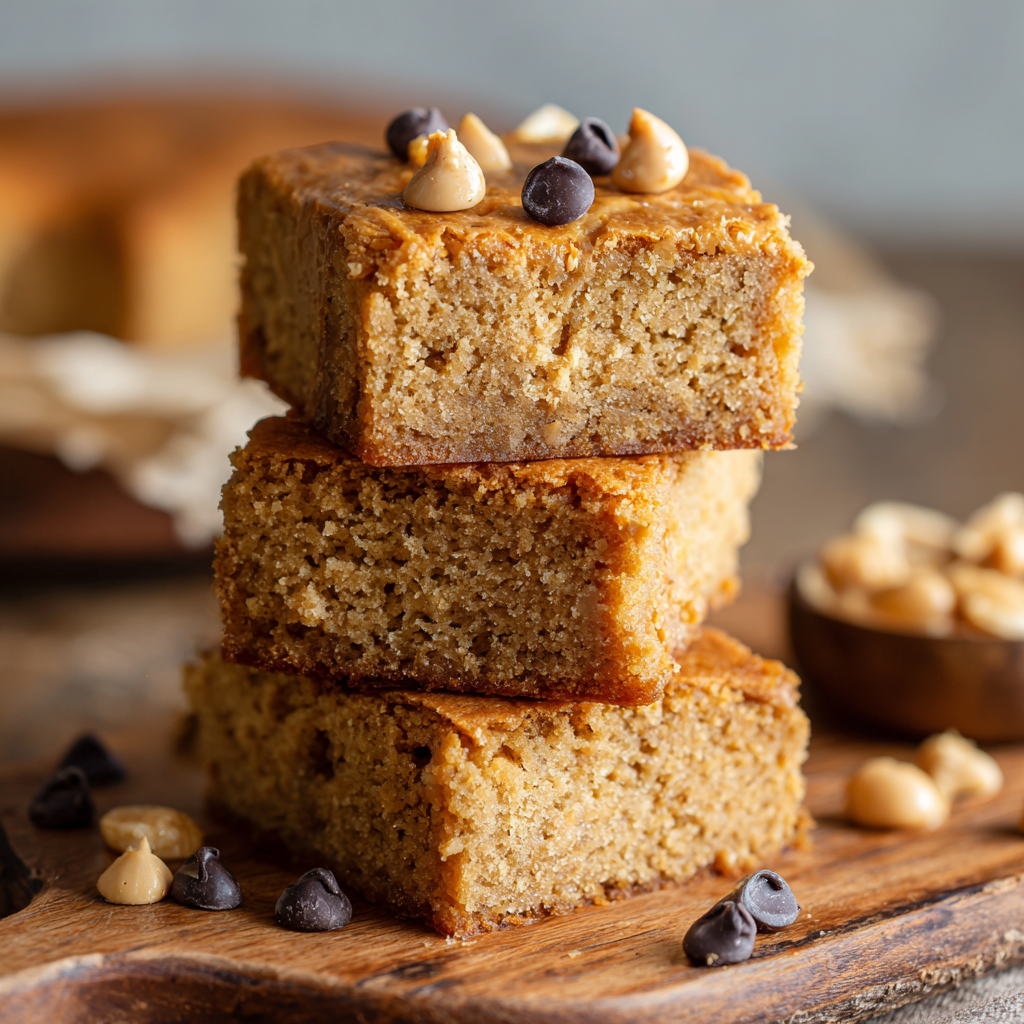
And today, we’re making the undisputed champion of that category: a Peanut Butter Snacking Cake. This isn’t a fussy, multi-layer masterpiece. Oh no. This is a soft, buttery, incredibly moist cake that lives on your counter, patiently waiting for you to slice off a humble square with your morning coffee, pack into a lunchbox, or enjoy as a just-because reward after a long day.
I’ve doubled the batch because, trust me, you’ll want extra. It’s the kind of easy, one-bowl wonder that brings people together. The rich peanut butter flavor is pure nostalgia, and the crumb is so tender it practically melts in your mouth. So, let’s ditch the complicated recipes and dig into something real, simple, and deeply delicious. Grab your favorite mixing bowl, and let’s get baking!
The Snacking Cake That Started It All
This cake takes me right back to my grandma’s linoleum-floored kitchen. She wasn’t a pastry chef; she was a “get-it-done” cook who believed in the power of a good, simple treat. Her version of this cake was always tucked under a glass dome on the counter, a permanent fixture next to the fruit bowl.
I remember sneaking slivers as a kid, the tines of my fork making quiet scrapes against the plate. It was our secret, mine and the cake’s. She never iced it, believing the peanut butter’s richness was glory enough. And you know what? She was right. That humble cake taught me a foundational Feastical philosophy: food doesn’t need to be fancy to be fantastic. It just needs to be made with love and be ready when you need it most. This recipe is my homage to her—a little more refined, but with the same beautiful, comforting soul.
Gathering Your Ingredients (Let’s Chat About Them!)
This is where the magic starts. We’re using simple pantry staples, but each one plays a star role. Let’s break it down so you understand the “why” behind the “what.”
- 1/2 cup (4 oz) unsalted butter, melted: This gives our cake a rich, buttery backbone and that wonderfully soft crumb. Chef’s Insight: Melting the butter means we don’t need a mixer! We’re whisking by hand today, friends. If you only have salted butter, just reduce the added salt in the dry ingredients by 1/4 teaspoon.
- 1/2 cup (128 g) creamy peanut butter: The star of the show! I use a standard, no-stir creamy peanut butter for consistent results. The natural, oily kind can sometimes separate and alter the texture.
- Scant 1/2 cup (80 g) granulated sugar & Scant 1/2 cup (80 g) brown sugar, packed: We’re using a blend! The white sugar provides sweetness and tenderness, while the brown sugar brings moisture and a subtle molasses warmth that pairs perfectly with peanut butter. A “scant” cup means you fill the measuring cup just *slightly* less than full.
- 2 large eggs: Our binding agents and structure-builders. Make sure they’re at room temperature to blend seamlessly into the batter.
- 1 teaspoon vanilla extract: The flavor enhancer. It rounds out all the other ingredients and makes the whole cake taste… more.
- 2 cups + 4 tablespoons (560 g) all-purpose flour: I give the weight in grams for precision, but spooning and leveling your flour (don’t scoop!) works perfectly. This is our foundation.
- 2 teaspoons baking powder & 1 teaspoon baking soda: Our dynamic leavening duo! They work together to give this cake its perfect, gentle rise. Check the dates on your containers—old leaveners are the number one cause of flat cakes.
- 3/4 teaspoon salt: Crucial for balancing the sweetness and making the peanut butter flavor pop. Don’t you dare skip it!
- 1 cup milk: The hydrator. Whole milk will give you the richest result, but any milk you have on hand will work beautifully.
Let’s Bake This Thing: Simple Steps to Cake Heaven
Ready? This is where we turn those simple ingredients into something magical. It’s a straightforward process, but I’ll walk you through every step with my favorite chef hacks to ensure perfection.
- Preheat and Prep. Fire up your oven to 350°F (175°C). Now, take an 8×12-inch baking dish (or a 9×13 for a slightly thinner cake) and grease it well. My pro-move? I then line it with a sling of parchment paper, leaving an overhang on the two long sides. This little trick lets you lift the entire cake out for effortless cooling and slicing. No more wrestling with a hot pan!
- The Wet Team Assembles. In a large bowl, whisk together your melted butter and peanut butter. You’ll get a smooth, gloriously fragrant paste. Chef’s Tip: If your peanut butter is cold from the fridge, warm the measured amount for 10-15 seconds in the microwave to make it easier to blend.
- Sweeten the Deal. Add both sugars to the peanut butter mixture and whisk vigorously for a good minute. You want it to be well-combined. Now, crack in the eggs and pour in the vanilla. Whisk again until the batter is smooth and slightly paler in color.
- The Dry Team Unites. In a separate, medium-sized bowl, whisk together your flour, baking powder, baking soda, and salt. This isn’t just mixing; you’re aerating the flour and ensuring the leaveners are evenly distributed, which is key for an even rise. No one wants a baking soda pocket in their slice!
- The Grand Union. Here’s the secret to a tender cake: don’t overmix! Add about one-third of your dry ingredients to the wet and gently fold them in with a spatula until just combined. Follow that with half of the milk. Repeat with another third of the dry, the rest of the milk, and finally the last of the dry ingredients. Mix until you no longer see streaks of flour. A few small lumps are totally fine—they’re better than a tough, overworked cake.
- Get Creative (Optional, but Fun!). This is your moment! If you’re adding chocolate chips, mashed banana, or any other twists, fold them in gently now.
- Into the Oven! Pour the batter into your prepared pan and use a spatula to spread it into an even layer. For a little extra flair, you can sprinkle some crushed peanuts or a few extra chocolate chips on top. Bake for 25-30 minutes. The cake is done when the top is golden and springs back when lightly touched, and a toothpick inserted into the center comes out clean or with a few moist crumbs.
- The Patience Test. This is the hardest part. Let the cake cool in the pan on a wire rack for at least 30 minutes before you attempt to slice it. A warm cake is delicate, and waiting ensures you get clean, beautiful slices instead of a crumbly mess. You can do it!
How to Serve Your Masterpiece
This cake is a chameleon. It’s glorious all on its own, but here are a few of my favorite ways to serve it up:
- The Purist’s Plate: A simple square, maybe still a little warm from the pan, with a tall glass of cold milk. This is the classic, and it never fails.
- The Afternoon Upgrade: Warm a slice for 15 seconds in the microwave and top it with a thin schmear of extra peanut butter that gets all melty and glorious. It’s next-level.
- The Dessert Dream: Take it up a notch! Serve a slice with a scoop of high-quality vanilla bean ice cream and a drizzle of chocolate sauce. Suddenly, your humble snacking cake is a restaurant-worthy dessert.
- The Lunchbox Hero: Cool the cake completely, slice it into squares, and pack them in airtight containers. It’s the perfect lunch treat or after-school surprise for the family.
Make It Your Own: Delicious Recipe Variations
One of the best things about this recipe is its flexibility. Feel free to play with it! Here are a few twists I absolutely love:
- Chocolate Chip Bliss: Fold in 1/2 cup of mini chocolate chips or chopped dark chocolate. The melty pockets of chocolate against the peanut butter cake are a match made in heaven.
- Banana-Peanut Butter Combo: Mash one very ripe banana and fold it in with the wet ingredients. It adds incredible moisture, natural sweetness, and a flavor combo that’s pure comfort.
- A Touch of Warmth: Add 1/2 teaspoon of cinnamon to the dry ingredients. It gives the cake a subtle, cozy depth that’s just wonderful.
- For the Crunch Lovers: Sprinkle the top of the batter with 1/4 cup of crushed, roasted peanuts before baking for a delightful textural contrast.
- Gluten-Free Swap: You can easily use a 1:1 gluten-free all-purpose flour blend in place of the regular flour. The texture will be just as lovely!
Beau’s Chef’s Notes & Kitchen Confessions
This recipe has been a staple in my kitchen for years, and it’s evolved in tiny ways. I initially used all white sugar, but adding brown sugar was a game-changer for moisture. I’ve also learned that this cake is a fantastic “clean out the pantry” project. A handful of leftover Reese’s Pieces? Toss ’em in! Some lonely oats? Sprinkle them on top!
One time, I was filming a video for the site and, in my excitement, I completely forgot the baking soda. The cake baked up… dense. Really dense. We lovingly called it the “Peanut Butter Brick.” It still tasted good, but it was a hilarious reminder that those leavening agents are non-negotiable! So double-check your bowls, friends. We learn by doing, and sometimes by laughing at our delicious mistakes.
Your Questions, Answered!
Over the years, I’ve gotten a few repeat questions about this cake. Here’s the scoop to help you troubleshoot:
Q: My cake is dry. What happened?
A: The most common culprit is overbaking. Ovens can vary, so start checking at the 22-minute mark. Also, be sure you’re using a “scant” cup measurement for the sugars—too much sugar can actually dry out a bake. And finally, don’t overmix the batter once the flour is added!
Q: Can I use natural peanut butter?
A> You can, but it can be tricky. The natural oils tend to separate, which can lead to a greasy or dense cake. If it’s all you have, make sure you stir it incredibly well before measuring, and be prepared for a slightly different texture. For guaranteed results, standard creamy peanut butter is your best bet.
Q: Can I make this into cupcakes?
A> Absolutely! This batter will make about 18 standard cupcakes. Line your muffin tin, fill the cups 2/3 full, and bake at the same temperature for 18-22 minutes, or until a toothpick comes out clean.
Q: How should I store this cake?
A> Once completely cool, store it in an airtight container at room temperature for up to 3 days. It also freezes beautifully! Wrap individual slices in plastic wrap and then place them in a freezer bag for up to 3 months. Thaw at room temperature or warm gently in the microwave.

Peanut Butter Snacking Cake : Soft, Buttery & Easy to Make
Description
Hey friends, Beau here! This is your 3 PM savior: a soft, tender, and buttery cake with rich peanut butter flavor that feels like a warm hug. Perfect for coffee breaks, lunchboxes, or just a small “me-time” treat. No layers, no fuss—just straight-up comfort in cake form.
Ingredients
Wet Ingredients:
-
1/2 cup (4 oz) unsalted butter, melted
-
1/2 cup (128 g) creamy peanut butter
-
Scant 1/2 cup (80 g) granulated sugar
-
Scant 1/2 cup (80 g) packed brown sugar
-
2 large eggs, room temperature
-
1 tsp vanilla extract
-
1 cup milk (whole milk preferred)
Dry Ingredients:
-
2 cups + 4 tbsp (560 g) all-purpose flour
-
2 tsp baking powder
-
1 tsp baking soda
-
3/4 tsp salt
Optional Toppings / Mix-ins:
-
Chocolate chips (1/2 cup)
-
Crushed roasted peanuts (1/4 cup)
-
Mashed banana (1 very ripe)
Instructions
1. Preheat & Prep:
-
Preheat oven to 350°F (175°C).
-
Grease your pan and line with parchment paper, leaving overhang on long sides for easy cake removal.
2. Mix Wet Ingredients:
-
Whisk together melted butter and peanut butter until smooth.
-
Add sugars, eggs, and vanilla. Whisk until slightly pale and fully combined.
3. Mix Dry Ingredients:
-
Whisk together flour, baking powder, baking soda, and salt.
4. Combine:
-
Gently fold in one-third of the dry ingredients, then half the milk. Repeat until all ingredients are incorporated. A few small lumps are fine—don’t overmix!
-
Optional: Fold in chocolate chips, banana, or other mix-ins now.
5. Bake:
-
Pour batter into prepared pan and smooth the top. Sprinkle toppings if desired.
-
Bake 25–30 minutes, or until a toothpick inserted in the center comes out clean or with a few moist crumbs.
6. Cool:
-
Let cool at least 30 minutes before slicing. For neat slices, lift the cake from the pan using the parchment overhang.
Notes
-
Chocolate Chip Bliss: Fold in 1/2 cup chocolate chips.
-
Banana-Peanut Butter Combo: Add 1 mashed ripe banana to wet ingredients.
-
Warm Spice: 1/2 tsp cinnamon in dry mix adds cozy depth.
-
Crunch Lovers: Top with 1/4 cup crushed roasted peanuts.
-
Gluten-Free Swap: Use 1:1 gluten-free flour blend.
-
Cupcakes: This batter makes ~18 standard cupcakes; bake 18–22 minutes at 350°F.
Nutrition
- Calories: 215 Cal per Slice
- Sugar: 12 g
- Fat: 10 g
- Carbohydrates: 7g
- Protein: 4 g
Nutritional Information (For Your Info!)
Hey, I believe in balance! Enjoying a homemade treat is part of a happy life. Here’s a rough nutritional breakdown per slice (based on 16 slices without any add-ins), so you can enjoy it mindfully.
- Calories: 215
- Fat: 10g
- Carbohydrates: 27g
- Sugar: 12g
- Protein: 4g
- Sodium: 190mg
Remember, these are estimates and can vary based on your specific ingredients. Adding chocolate chips or other mix-ins will change these values. The beauty of baking it yourself is you control what goes in!
Final Thoughts from My Kitchen to Yours
And there you have it! Your new go-to recipe for when life calls for a simple, soul-satisfying treat. This Peanut Butter Snacking Cake is more than just a list of ingredients; it’s a reminder that the best foods are often the simplest ones. They’re the ones that don’t require a special occasion, the ones that are there for you on a quiet Tuesday afternoon.
I hope this recipe finds a permanent spot in your rotation, just like it has in mine. It’s a little piece of Feastical I’m so happy to share with you. Now, I’d love to hear from you! Did you add a twist? Did it become an instant family favorite? Tag me on social @feastical or drop a comment on the blog—I love seeing your creations.
Until next time, happy baking, and remember: keep it simple, keep it soulful, and always save room for a snack.
– Beau