Your New Favorite Holiday Bite: No-Bake Gingerbread Truffles
Hey friends, Beau here! Can you smell it? That magical, spicy-sweet aroma of gingerbread that seems to float through the air the moment December hits? It’s the scent of cozy sweaters, twinkling lights, and gatherings filled with laughter. For me, that flavor is the holidays. But let’s be real, between shopping, decorating, and trying to remember where you stored all the gift wrap, who has time to bake and decorate a gingerbread house from scratch?
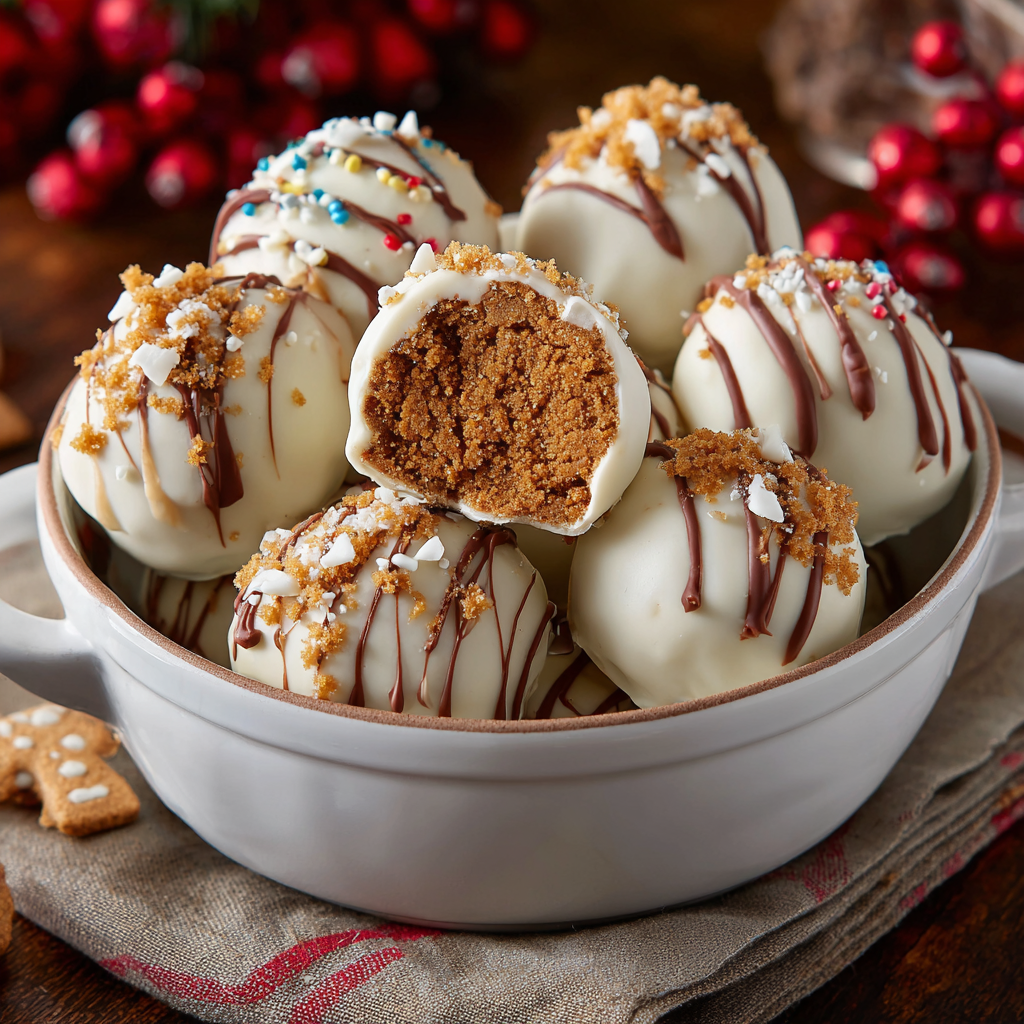
That’s exactly why I’m so head-over-heels for these Gingerbread Truffles. They capture all the warm, spiced, soul-soothing goodness of your favorite holiday cookie, but without ever turning on your oven. We’re talking a rich, creamy center with a delightful crunch, all wrapped up in a smooth, snowy white chocolate coat. They look like a million bucks on a dessert platter, but I promise you, they are deceptively simple to make. Whether you’re a kitchen newbie or a seasoned pro, this is the kind of foolproof recipe that brings everyone together. So, let’s roll up our sleeves, put on some festive tunes, and create a treat that’s basically a hug in truffle form.
A Sweet Slice of Memory
This recipe always takes me right back to my grandma’s kitchen. Every Christmas Eve, she’d make her famous gingerbread men. The whole house would smell like molasses and spice, and my brother and I would fight over who got to press in the raisin buttons. One particularly chaotic year, a whole tray of cookies came out, well, let’s just say they were a little… *crisp*. A baking mishap turned them into gingerbread rocks! But my grandma, never one to waste a thing, just smiled, tossed those hardened soldiers into a towel, and whacked them with a rolling pin until they were fine crumbs. She mixed them with a little cream cheese, rolled them into balls, and drizzled them with the white chocolate she had left over from her famous fudge. And just like that, a kitchen “disaster” became our family’s most requested holiday treat. These truffles are my homage to her—a reminder that the best creations often come from a little bit of love and a happy accident.
Gathering Your Truffle-Making Gear
You only need a handful of simple ingredients to create this holiday magic. Here’s the lineup for about 56 bite-sized pieces of joy (trust me, you’ll want this many!).
- 2 (16 oz) boxes of Gingersnap Cookies: This is the flavor foundation! We’re using store-bought gingersnaps for maximum ease and that perfect spicy-sweet crunch. Pro Chef Tip: Don’t skimp on the brand here; grab one you know and love, as their molasses and spice level will directly influence your truffles.
- 16 oz Cream Cheese, softened: Our magical binder and the source of that luscious, creamy texture. Insider Hack: Let it sit on the counter for a good 30-45 minutes before you start. A soft cream cheese blends seamlessly, while a cold one will leave you with a lumpy, frustrating mess.
- 32 oz White Almond Bark (2 lbs), melted: This is our snowy, dreamy coating. I love almond bark (also called candy coating) for this because it melts like a dream, sets beautifully, and doesn’t have the finicky tempering requirements of real chocolate. Easy Swap: If you prefer, you can use high-quality white chocolate chips, but add a teaspoon of coconut oil to help them thin out for dipping.
- Sprinkles, Edible Glitter, or Crushed Gingersnaps for decorating (optional): This is where you let your personality shine! A little festive bling makes these truffles look professionally made and adds a fun textural contrast.
Let’s Make Some Magic: The Step-by-Step Guide
Okay, team, it’s go time! This process is a breeze, and I’ll be right here with you, sharing all my little hacks to make it even smoother.
- Crush Those Cookies!First, we need to turn those sturdy gingersnaps into a fine, sandy crumb. You have a couple of options here. The easiest way is to use a food processor. Just pulse the cookies in batches until they look like dark, spicy sand. No food processor? No problem! Toss the cookies into a large zip-top bag, squeeze out the air, and get therapeutic with a rolling pin. Crush them until you have a consistent, fine texture. A few tiny bits are okay for character, but you want it mostly fine for a smooth truffle center.
- The Big Mix-Up.In a large mixing bowl, combine your beautiful gingersnap crumbs with that perfectly softened cream cheese. Now, get in there with your hands! A spatula works, but I find using my hands is the fastest and most effective way to ensure everything is evenly incorporated. You’re looking for a mixture that holds together when you pinch it, kind like a thick, fragrant cookie dough. Chef’s Secret: If you have a stand mixer with a paddle attachment, you can let it do the work on low speed for about a minute. Just scrape down the sides to make sure no dry pockets remain.
- Roll, Roll, Roll Your Balls.Now for the fun part! Using a small cookie scoop (a #60 scoop, which holds about a tablespoon, is perfect), portion out the mixture. Roll each portion between your palms to form a smooth, one-inch ball. Place each one on a baking sheet lined with parchment paper. Pro Tip for Neatness: If the mixture starts sticking to your hands, give them a quick rinse in cold water and dry them off. The slight moisture will prevent sticking without adding extra liquid to your truffles.
- The Chill Out Session.This step is non-negotiable, my friends. Pop that entire tray into the freezer for at least 30-45 minutes. You want these guys to be firm and cold all the way through. This “flash freeze” is what prevents them from falling apart when we dip them into the warm almond bark. A firm truffle = a perfectly coated truffle.
- The Grand Dip & Decorate.While the truffles are chilling, melt your almond bark according to the package directions. I like to do this in a deep, microwave-safe bowl, melting in 30-second bursts and stirring well in between. Key Hack: For the absolute smoothest dipping process, transfer about a third of the melted coating to a tall, narrow cup or glass. This gives you the depth you need to fully submerge the truffle. Using a fork or a dipping tool, lower a cold truffle into the coating. Tap the fork gently on the edge of the bowl to let the excess drip off. Then, gently slide the coated truffle back onto the parchment-lined tray. Now, act fast! While the coating is still wet, shower it with your chosen sprinkles or decorations. If you wait, the shell will set and nothing will stick!
- The Final Set.Let the truffles sit at room temperature until the coating is completely hard and firm. This usually takes about 15-20 minutes. If you’re in a hurry, you can pop them in the fridge for 5-10 minutes to speed things up. And voilà! You’ve just created a stunning, professional-looking holiday treat.
Sharing the Sweetness: How to Serve Your Truffles
Presentation is half the fun! These truffles are superstars on any holiday dessert table. I love piling them high on a beautiful cake stand or a rustic wooden board. For a real showstopper, arrange them in a festive pattern—maybe a tree shape or a simple wreath. They also make the most heartfelt, homemade gifts. Tuck a dozen into a clear cellophane bag, tie it with a big red ribbon, and stack them in a festive tin. Give them to your mail carrier, your kid’s teacher, your neighbors… you’ll instantly become the most popular person on the block. Serve them alongside a pot of strong coffee, a mug of hot cocoa, or even a glass of cold milk. They are the perfect little bite of festive cheer.
Make Them Your Own: Delicious Recipe Twists
Once you’ve mastered the classic, feel free to get creative! Here are a few of my favorite ways to mix things up:
- Spice Lover’s Dream: Add an extra pinch (about 1/4 to 1/2 teaspoon) of ground cinnamon, cloves, or even a dash of black pepper to the crumb mixture for an extra-warm, complex spice kick.
- The Surprise Center: For a gooey, fun surprise, press a mini marshmallow or a soft caramel square into the center of each truffle before you roll it into a ball. When you bite in, you get a burst of melty goodness!
- Dark Chocolate Dip: Not a white chocolate fan? No worries! Melt dark or semi-sweet chocolate chips with a teaspoon of coconut oil and use that for dipping instead. The bittersweet chocolate paired with the spicy gingerbread is a match made in heaven.
- Dairy-Free Delight: You can easily make this recipe dairy-free! Use your favorite vegan cream cheese and dairy-free white chocolate for coating. The gingersnaps are often naturally vegan, but just double-check the ingredient list to be sure.
- Boozy Bliss (For the Grown-Ups): Add a tablespoon of spiced rum, bourbon, or Irish cream to the truffle mixture along with the cream cheese. It adds a wonderful, grown-up depth of flavor.
Beau’s Kitchen Chronicles
Over the years, I’ve made hundreds of batches of these truffles, and let me tell you, I’ve learned a thing or two. The first time I made them, I was impatient and didn’t chill the balls long enough. Let’s just say I ended up with gingerbread “blobs” instead of perfectly round truffles—still delicious, but not exactly pretty! Another time, I tried to melt the almond bark on too high a heat and it seized up into a grainy mess. The fix? A tiny splash of neutral oil (like vegetable or canola) and vigorous stirring can sometimes bring it back. The moral of the story: patience and low, slow heat are your best friends in the kitchen. This recipe has evolved from my grandma’s salvage operation into my most requested holiday gift. Every time I make them, I think of her, and that’s the best ingredient of all.
Your Truffle Questions, Answered!
Let’s tackle some common questions to ensure your truffle-making is a smashing success.
- Q: My truffle mixture is too soft/sticky. What did I do wrong?A: This usually happens if the cream cheese was too warm or you didn’t crush the cookies finely enough. Don’t panic! Just cover the bowl and pop it into the fridge for 20-30 minutes to firm up. It will be much easier to roll after a little chill session.
- Q: Can I make these ahead of time?A: Absolutely! They are the perfect make-ahead treat. Once fully set, store them in a single layer in an airtight container in the fridge for up to 2 weeks. You can also freeze them for up to 3 months. Just thaw in the refrigerator before serving.
- Q: My almond bark/chocolate is too thick for dipping. Help!A: This is a common issue. Simply thin it out by stirring in a teaspoon of solid coconut oil or paramount crystals at a time until it reaches a smooth, dippable consistency. Think of it like warm pancake batter.
- Q: Why did my coating crack after dipping?A: Cracking often occurs if the truffle centers are too cold and the temperature difference between the frozen center and warm coating is too extreme. Let the truffles sit out of the freezer for 5-10 minutes before dipping to let them warm up just a tiny bit. It makes all the difference!

Christmas Gingerbread Truffles
Description
No-Bake Gingerbread Truffles
Prep Time: 30 min | Chill Time: 30–45 min | Yield: ~56 bite-sized truffles
Cozy, spiced, creamy, and coated in dreamy white chocolate—these truffles are holiday magic in every bite.
Ingredients
Truffle Base:
-
2 (16 oz) boxes gingersnap cookies
-
16 oz cream cheese, softened
Coating:
-
32 oz white almond bark or white chocolate, melted
-
Optional: sprinkles, edible glitter, or crushed gingersnaps for decoration
Optional Twists:
-
Extra spices: cinnamon, cloves, black pepper
-
Surprise center: mini marshmallow or soft caramel
-
Dark chocolate dip
-
Dairy-free: vegan cream cheese + dairy-free chocolate
-
Boozy: 1 tbsp spiced rum, bourbon, or Irish cream
Instructions
1. Crush the Cookies
-
Use a food processor or a rolling pin inside a zip-top bag.
-
Aim for fine crumbs with a few tiny bits for texture.
2. Mix With Cream Cheese
-
Combine crumbs and softened cream cheese in a large bowl.
-
Mix by hand or use a stand mixer on low until evenly incorporated.
-
Mixture should hold together when pinched.
3. Shape the Truffles
-
Using a tablespoon or small cookie scoop, form 1-inch balls.
-
Place on a parchment-lined baking sheet.
-
If sticky, rinse hands with cold water.
4. Chill
-
Freeze for 30–45 minutes until firm.
-
Ensures truffles hold their shape during dipping.
5. Dip & Decorate
-
Melt almond bark in 30-second bursts, stirring between.
-
Use a tall, narrow cup for dipping.
-
Submerge truffles, tap off excess, and return to parchment.
-
Decorate immediately while coating is wet.
6. Set
-
Let truffles sit at room temperature 15–20 minutes or chill 5–10 minutes in the fridge until coating hardens.
Notes
-
Too soft? Chill mixture 20–30 min.
-
Thick chocolate? Stir in coconut oil or paramount crystals until smooth.
-
Cracking coating? Let truffles warm slightly before dipping.
-
Extra flavor? Add a splash of apple cider, spices, or liquor to the base.
Nutrition
- Calories: 188 kcal per truffle
- Sugar: 14 g
- Fat: 11 g
- Carbohydrates: 20 g
Quick Bite of Info
Okay, let’s talk real talk. These are a decadent holiday treat, and we’re here to enjoy every single bite! But for those who like to know the details, here’s a general nutritional breakdown per truffle (based on a yield of 56). Remember, these are estimates and can vary based on your specific ingredients.
- Calories: 188 kcal
- Fat: 11 g
- Saturated Fat: 7 g
- Carbohydrates: 20 g
- Sugar: 14 g
- Protein: 2 g
- Sodium: 90 mg
- Cholesterol: 15 mg
As always, my philosophy is to savor the foods you love, especially when they’re made with love and shared with people you care about. So enjoy every spicy, sweet, creamy bite!
Wrapping It All Up With a Bow
Well, there you have it, my friends—the complete guide to creating the most irresistible, no-fuss holiday treat. These Gingerbread Truffles are more than just a dessert; they’re a memory maker, a gift from the heart, and a guaranteed way to spread a little extra joy this season. I hope this recipe brings as much warmth and happiness to your kitchen as it has to mine. Remember, cooking isn’t about being perfect; it’s about the love you stir into every batch.
Now I’d love to hear from you! Did you add a fun twist? Have a kitchen story of your own? Share your truffle triumphs (or hilarious mishaps) with me in the comments below or over on Instagram by tagging @Feastical. Happy holidays, and happy cooking!
With love and a full plate,
Beau