Who Knew Candy Corn Had a Secret Superpower?
Hey there, friend! Beau here, welcoming you back to Feastical. You know what I love almost as much as a perfectly golden-brown casserole? A kitchen hack that feels like a little bit of magic. The kind that makes you look at a humble ingredient in a whole new light and impresses everyone without requiring a culinary degree. Today, we’re pulling off one of my all-time favorite bits of kitchen wizardry: we’re making Homemade Butterfingers.
Yes, you read that right. The crispy, flaky, impossibly addictive candy bar you know and love. But here’s the twist that’ll make your jaw drop: we’re making them with just two main ingredients. And one of them is the most divisive, love-it-or-hate-it candy of all time: candy corn.
Before you click away, hear me out! I was a skeptic, too. But when you melt down candy corn, something incredible happens. It transforms from those little tri-colored cones into a sweet, molten base that, when mixed with peanut butter, creates a texture that’s a dead ringer for the classic Butterfinger filling. It’s got that same satisfying snap, that same melt-in-your-mouth crispiness. All we have to do is dip it in chocolate, and voilà—you’ve just created a candy bar masterpiece in your own kitchen.
This recipe is perfect for when a sweet tooth strikes, for holiday treat plates, or for just wowing your friends with your confectionery skills. It’s simple, it’s fun, and it’s downright delicious. So, let’s grab our bowls and uncover the secret life of candy corn together!
The Accidental Discovery That Started It All
This recipe takes me back to my first Halloween in my own apartment. I’d bought a giant bag of candy corn, convinced I’d have dozens of trick-or-treaters. Turns out, living on a third-floor walk-up isn’t exactly a hot spot for costumed kids. So there I was, staring at a mountain of leftover candy corn, determined not to let it go to waste.
I started experimenting. I melted some down for a caramel-like dip, stirred it into frosting, and then, on a whim, I globbed a spoonful of melted candy corn into a bowl of peanut butter I was eating. I gave it a stir, let it cool for a second, and took a tentative bite. My eyes went wide. The texture wasn’t gooey or soft; it was crispy. It shattered into a million little pieces just like a Butterfinger! I remember calling my mom right away, my voice probably an octave too high, saying, “You are NOT going to believe what I just made!” I spent the rest of the night dipping my creation in chocolate, feeling like a certified kitchen genius. It’s a memory that always reminds me that some of the best recipes aren’t found in fancy cookbooks—they’re born from a little curiosity and a lot of leftover candy.
Gathering Your Magical Ingredients
See? I told you it was simple. Here’s your short-and-sweet grocery list. But don’t let the simplicity fool you—each ingredient plays a starring role.
- 16 oz Candy Corn: This is the foundation of our “crispy” filling. The magic is in the melting! Chef’s Insight: Don’t worry about the colors blending; when melted, it all turns a lovely golden-amber color. If you’re making this outside of the Halloween season, you can often find “Indian Corn” or just plain yellow-and-orange corn year-round in the baking aisle.
- 1 cup Creamy Peanut Butter: This is our flavor and texture partner. Substitution Tip: For the most authentic Butterfinger taste, stick with a standard, no-stir creamy peanut butter like Jif or Skippy. The stabilizers in them help create the perfect texture. If you use natural peanut butter (the kind that separates), the final result might be a bit oilier and less crisp. For a nut-free version, sunflower seed butter works amazingly well and gives a similar color and flavor profile!
- Chocolate for Dipping (about 12-16 oz): The glorious finishing touch. Chef’s Insight: I’m a fan of using good-quality chocolate chips or melting wafers. Milk chocolate is the classic choice, but semi-sweet is fantastic if you prefer a little less sweetness. For an extra-professional finish, add a teaspoon of coconut oil to the melted chocolate to make it smoother and shinier.
Let’s Make Some Magic: The Step-by-Step Guide
Okay, friends, put on your favorite apron and let’s get to it. This process is straightforward, but a few key tips will ensure candy-making success. Read through all the steps before you begin—it’ll make everything flow like a dream.
Step 1: The Meltdown (The Most Important Step!)
Dump your entire bag of candy corn into a large, microwave-safe bowl. Glass is best here. Now, here’s the secret: PATIENCE. We’re going to melt the candy corn at 50% power in 30-second intervals. After each interval, take the bowl out and give it a really good stir. It will look soupy and weird at first, then it will start to smooth out. This should take about 4-5 minutes total. Chef’s Hack: Why 50% power? High heat is the enemy of candy. It can cause the sugars to seize up and become a grainy, unworkable mess. Low and slow is the name of the game for a silky-smooth melt.
Step 2: The Peanut Butter Party
Once your candy corn is completely melted and smooth (no lumps!), work quickly. Immediately add the full cup of peanut butter to the hot candy. Stir, stir, stir! The mixture will become very thick and might even seem a bit stiff—that’s totally normal. It’s the peanut butter working its magic and starting to set up the crispy structure. Chef’s Hack: If you find it really difficult to stir, you can pop the bowl back in the microwave for just 15 seconds to loosen it up a bit.
Step 3: Press and Impress
Line a 9×13 inch baking pan with wax paper or parchment paper (a little non-stick spray underneath helps it stay put). Scrape the thick peanut butter-candy mixture into the pan. Now, for a neat trick: take another sheet of wax paper and place it directly on top of the mixture. Use your hands (or the bottom of a flat glass or measuring cup) to press the mixture into an even, flat layer. This top layer of paper prevents it from sticking to your hands! Press it to about a ¼ to ½-inch thickness.
Step 4: The Patience Game
Now, we wait. Let the pan sit at room temperature until the slab is completely firm to the touch. This usually takes about 30 minutes. You can speed this up by popping it into the refrigerator for 15-20 minutes, but I find room-temperature cooling gives the best texture.
Step 5: The Big Cut
Once firm, lift the entire slab out of the pan using the parchment paper. Place it on a cutting board. Using a sharp knife, cut it into small rectangles or squares. Think classic “fun size” candy bar proportions! Chef’s Hack: Wiping your knife with a little warm water between cuts can help you get cleaner edges.
Step 6: The Chocolate Bath
Melt your chocolate in another microwave-safe bowl, again using 30-second intervals at 50% power, stirring until smooth. Using a fork or a dipping tool, dip each peanut butter square into the chocolate, tap off the excess, and place it on a parchment-lined baking sheet. Chef’s Hack: For that signature Butterfinger look, use the tines of your fork to make wavy lines in the chocolate on top before it sets!
Step 7: Set and Serve
Let the chocolate set completely. You can leave them at room temperature if your kitchen is cool, or pop the whole tray into the fridge for about 10 minutes to speed things up. Once the chocolate is hard, they’re ready to devour!
How to Serve Your Homemade Butterfingers
Presentation is part of the fun! You can keep it casual and pile them high in a big bowl for a party—I promise they’ll be the first thing to disappear. For a more elegant touch, arrange them on a festive platter, maybe with some other homemade treats like rice crispy squares or chocolate-dipped pretzels.
These are the perfect addition to a holiday cookie box or a Halloween treat bag. Package them in little cellophane bags tied with a ribbon, and you’ve got a incredibly thoughtful, homemade gift that people will absolutely rave about. They also make a fantastic after-school snack (in moderation, of course!) or a sweet little pick-me-up with your afternoon coffee.
Get Creative! 5 Fun Flavor Twists
Once you’ve mastered the classic, the playground is open! Here are a few of my favorite ways to mix things up.
- The Nutty Professor: Swap the creamy peanut butter for crunchy peanut butter for an extra textural element. You can also use almond butter or cashew butter for a different, equally delicious flavor profile.
- The Salty-Sweet Sensation: After dipping in chocolate, but before it sets, sprinkle the tops with a tiny pinch of flaky sea salt. It cuts the sweetness and elevates the flavor to gourmet levels.
- The Triple-Chocolate Threat: Use dark chocolate for dipping and stir a handful of mini chocolate chips into the peanut butter mixture before pressing it into the pan for an ultra-chocolatey experience.
- The “Not-Nutter” Butterfinger: As mentioned, sunflower seed butter is a fantastic nut-free alternative. It gives a remarkably similar taste and color!
- The Spooky Sprinkle Version: Perfect for Halloween! Use orange and black sprinkles, or even Halloween-colored nonpareils, to decorate the tops right after dipping.
Beau’s Chef’s Notes & Kitchen Confessions
This recipe has been a staple in my kitchen for years, and it’s evolved a bit. I used to try and melt the candy corn on high power to save time, which led to more than one batch of grainy, ruined candy. I learned the hard way so you don’t have to! The low-and-slow method is non-negotiable.
Another funny story: I once tried to double the batch in the same-sized bowl. Let’s just say I spent more time cleaning melted candy corn off my microwave turntable than I did actually making the candy. Lesson learned—use a big bowl and give the ingredients plenty of room to be stirred without drama. The beauty of this recipe is in its simplicity, so don’t overcomplicate it. Enjoy the process!
Your Questions, Answered!
Q: My candy corn mixture seized up and got grainy. What did I do wrong?
A: This is almost always caused by too much heat. You likely used full power in the microwave or heated it for too long without stirring. Unfortunately, there’s no fixing seized sugar. The best bet is to start over—but this time, stick to 50% power and stir diligently!
Q: Can I use the stovetop instead of a microwave?
A: Absolutely! Use a double boiler (a heatproof bowl set over a pot of simmering water, making sure the bottom of the bowl doesn’t touch the water) to melt the candy corn. This method gives you even more control over the heat and is very gentle.
Q: How should I store these, and how long do they last?
A: Store them in an airtight container at room temperature for up to two weeks. You can layer them between sheets of parchment paper so they don’t stick together. If your kitchen is very warm, the fridge is fine, but let them come to room temperature for the best texture and flavor.
Q: My mixture is too sticky to handle when cutting. Help!
A: This means it needed more time to cool and set. Pop the whole pan into the refrigerator for another 15-20 minutes until it’s firm. Also, if you used natural peanut butter, it can lead to a softer texture.

Homemade 2-Ingredient Butterfingers
Description
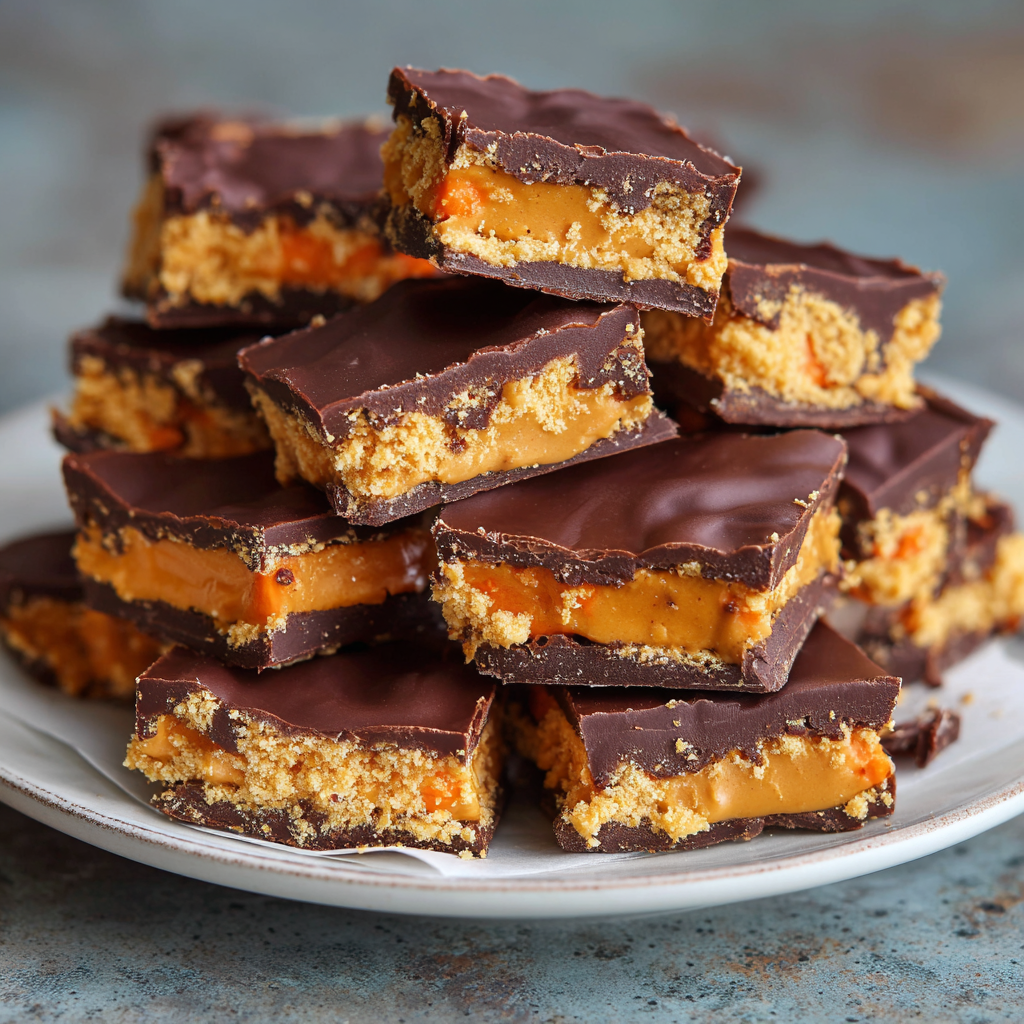
Who knew candy corn had a secret superpower? When melted and mixed with peanut butter, it magically transforms into a crispy, flaky filling that tastes just like a Butterfinger bar. Coat it in chocolate, and you’ve got a homemade candy bar that will wow friends and family with minimal effort.
Ingredients
-
16 oz candy corn
-
1 cup creamy peanut butter (regular, no-stir brands work best)
-
12–16 oz milk or semi-sweet chocolate (for coating)
Instructions
-
Melt Candy Corn
Place candy corn in a microwave-safe bowl. Heat at 50% power in 30-second bursts, stirring each time, until completely melted and smooth (about 4–5 minutes). -
Mix with Peanut Butter
Quickly stir in the peanut butter until fully combined. The mixture will be thick and start to set as it cools. -
Press Into Pan
Line a 9×13-inch pan with parchment. Spread the mixture evenly, pressing to about ½-inch thick. Let it cool at room temperature or in the fridge until firm. -
Cut Into Pieces
Lift the slab out of the pan and cut into rectangles or squares with a sharp knife. -
Dip in Chocolate
Melt the chocolate (again at 50% power, stirring often). Dip each piece, shaking off excess, and place on parchment to set. -
Serve and Enjoy
Let the chocolate harden, then store in an airtight container at room temperature for up to 2 weeks.
Notes
-
Crunchy twist: Use crunchy peanut butter for added texture.
-
Nut-free option: Swap in sunflower seed butter.
-
Gourmet upgrade: Sprinkle flaky sea salt on top before the chocolate sets.
-
Holiday fun: Decorate with sprinkles to match the season.
Nutrition
- Calories: 140Cal per piece
- Sugar: 15g
- Fat: 7g
- Carbohydrates: 17g
- Protein: 2g
A Quick Note on Nutrition
Let’s be real, friends—these are a treat! I’m all about balance. Enjoy them mindfully as part of a happy, varied diet. The nutritional info is an estimate and can vary based on the specific brands of ingredients you use. Each piece is a little bundle of energy, perfect for when you need a sweet boost. If you’re looking for ways to lighten them up slightly, using dark chocolate (which often has less sugar) is a great option, and opting for a peanut butter with no added sugar can also help. But sometimes, you just need a classic, satisfying homemade candy bar, and that’s more than okay!
Final Thoughts from My Kitchen to Yours
Well, there you have it! The candy bar hack that never fails to bring a smile to my face. It’s a testament to the fact that the most incredible creations often come from the simplest places. You don’t need fancy equipment or hard-to-find ingredients—just a bag of candy corn, a jar of peanut butter, and a sense of adventure.
I hope you give this recipe a try. It’s a fantastic one to make with kids (they’ll be mesmerized by the melting candy corn!) or to whip up when you need a last-minute dessert that looks like you spent all day in the kitchen. Most of all, I hope it brings a little bit of Feastical’s feel-good magic into your home.
If you make them, I’d love to see your creations! Tag me on social @Feastical or leave a comment on the blog. Now, go forth and make some magic!
Happy cooking,