Christmas Ornament Oreos: Your New Favorite No-Bake Holiday Treat!
Hey friends, Beau here! Can you feel it? That crispness in the air, the twinkle of lights starting to appear on houses, the undeniable urge to wear your coziest sweater? That’s right, the holiday season is upon us, and my kitchen is officially buzzing with all the festive, feel-good energy. I live for this time of year—the smells, the sounds, and most importantly, the food that brings everyone together.
But let’s be real for a second. As much as I love spending a whole day crafting intricate, from-scratch cookies, sometimes life has other plans. Between shopping for gifts, hosting family, and trying to actually enjoy the magic of the season, we all need a kitchen shortcut that doesn’t feel like a shortcut. A recipe that delivers maximum wow-factor with minimal fuss. That’s where these unbelievably cute Christmas Ornament Oreos come in.
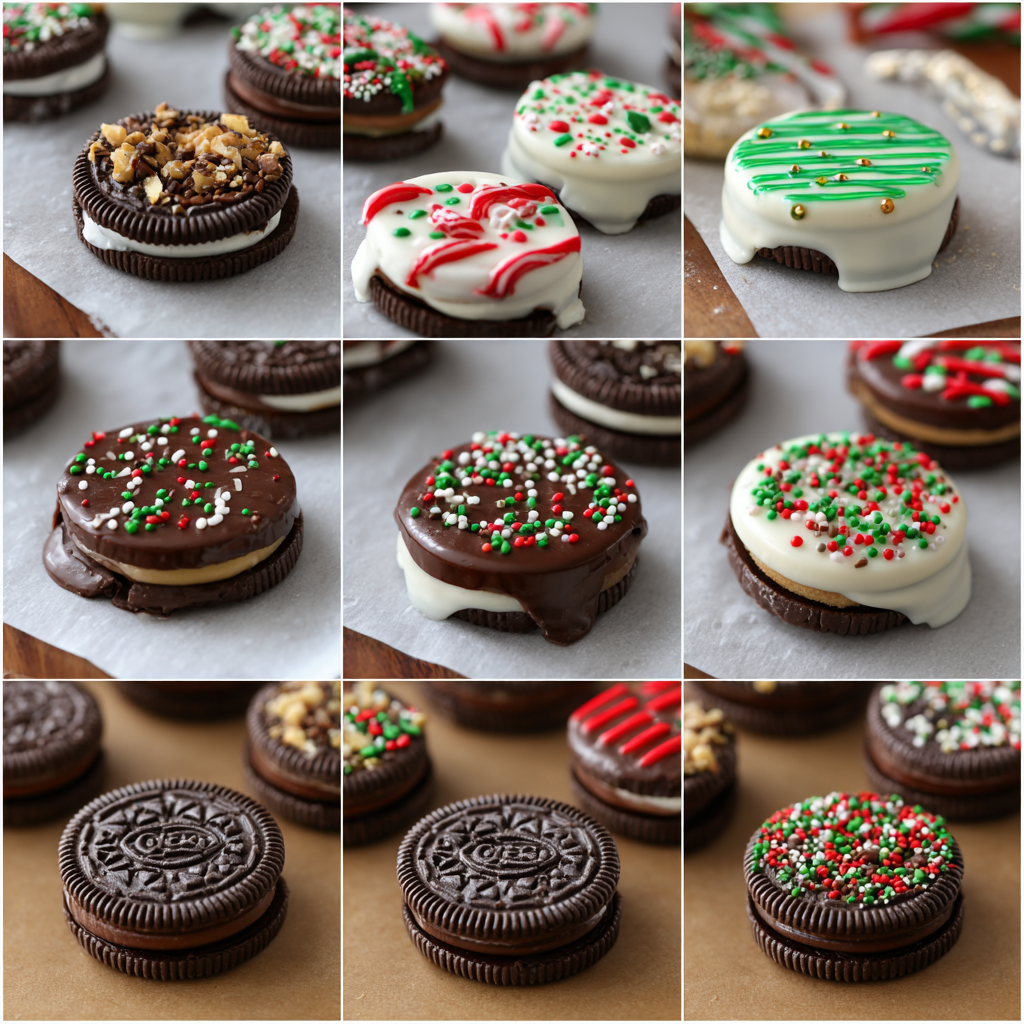
Imagine this: classic Oreo cookies, dipped in smooth, creamy chocolate and dressed up like little holiday ornaments. They’re fun, festive, and require absolutely zero baking. I’m talking about a project that’s perfect for a solo kitchen session with your favorite holiday playlist or an incredibly fun activity to do with kids. In just about 30 minutes, you can have a platter of edible decorations that look almost too good to eat… almost! So, grab your favorite apron, and let’s turn these simple ingredients into a holiday showstopper that’s sure to become a new tradition.
A Messy Kitchen and a Sweet Memory
This recipe always takes me back to one particularly chaotic, yet wonderful, Christmas Eve at my grandma’s house. I was probably eight years old, and my main job was to stay out of the way of the serious cooks orchestrating the big dinner. But my grandma, being the brilliant woman she was, knew a busy kid is a happy kid. She sat me down at the kitchen table with a box of cookies, some melted chocolate she had leftover from her famous fudge, and every sprinkle and candy decoration she owned.
There was no plan, just pure, unadulterated creativity. I made a glorious mess, creating what I thought were masterpieces. My “ornaments” were lopsided, covered in a thick layer of chocolate, and probably had more sprinkles on the table than on the cookies. But the joy in that process, the feeling of being included in the kitchen magic, has stuck with me forever. These Oreo ornaments are my grown-up, slightly more polished version of that memory. They capture that same spirit of simple, hands-on fun. It’s proof that the best holiday treats aren’t always the most complicated ones—they’re the ones made with a little bit of love and a whole lot of sprinkles.
Gathering Your Ornament-Making Kit
One of the best things about this recipe is how simple the ingredient list is. It’s all about assembly and decoration! Here’s what you’ll need to make about two dozen of these edible ornaments.
- 24 Oreo Cookies: The classic choice! The sturdy construction of an Oreo is perfect for dipping. Feel free to experiment with other flavors—Peppermint Oreos during the holidays are a game-changer!
- 12 oz White Chocolate or Candy Melts: This is your “paint.” I often use candy melts because they’re formulated to melt smoothly and set firmly. White chocolate is delicious, but make sure it’s high-quality to avoid seizing. Chef’s Insight: You can dye white chocolate or light-colored candy melts with gel food coloring to create red, green, or even blue ornaments!
- Holiday Sprinkles and Edible Decorations: This is where your personality shines! Use jimmies, nonpareils, sugar pearls, or even crushed candy canes. Go wild!
- 24 Mini Peanut Butter Cups or Rolos (unwrapped): This is our secret weapon for creating the little “cap” on top of the ornament. Peanut butter cups give a great color contrast, while Rolos offer a caramel-y surprise.
- 1 tbsp Coconut Oil (optional): A little secret for achieving a super-smooth, dippable chocolate. It thins the melted chocolate just enough for a perfect coating. You can use vegetable oil if that’s what you have on hand.
- Optional: Lollipop Sticks or String Licorice: If you want to hang these on your tree (for a very short time, I might add!) or present them as pops, these are essential.
Let’s Build Some Edible Ornaments: A Step-by-Step Guide
Okay, team, it’s go time! This process is so much fun. Clear a little space on your counter, line your baking sheets, and let’s get decorating. I’ll walk you through each step with a few of my favorite kitchen hacks to ensure your ornaments are absolutely flawless.
Step 1: The Melt-Down (The Most Important Step!)
Place your chocolate or candy melts in a microwave-safe bowl. I like to use a deep, narrow bowl—it makes dipping the entire Oreo much easier. Microwave on high for 30 seconds, then stop and stir. Repeat this process, stirring well each time, until the chocolate is completely smooth and liquid. Chef’s Hack: Do NOT be tempted to microwave for a full minute or two straight. This is the #1 way to burn your chocolate and turn it into a grainy, clumpy mess. Patience is key! If you’re using the coconut oil, stir it in now. It will make the chocolate glossier and easier to work with.
Step 2: The Big Dip
Line a baking sheet with parchment paper. This is non-negotiable—it prevents sticking and makes cleanup a breeze. Now, take your first Oreo. If you’re using lollipop sticks, gently twist the cookie apart and press the stick into the filling, then sandwich it back together. For the classic ornament, just hold the cookie by its edges. Submerge it completely into the melted chocolate. Use a fork or a dipping tool to lift it out, gently tapping off any excess chocolate. Chef’s Hack: That tapping motion is crucial for a smooth, even coat without big drips down the side. Place the dipped cookie carefully onto your parchment-lined tray.
Step 3: The Bling Station
This is the fun part, and you have to work relatively quickly before the chocolate sets. Immediately after placing the cookie on the tray, shower it with your chosen sprinkles and decorations. Don’t be shy! This is your chance to make each ornament unique. Want a classic look? A simple line of red sugar pearls does the trick. Feeling festive? Go for a mix of green and red jimmies. Chef’s Hack: If you’re adding larger decorations, like a sugar pearl “bow,” press it on gently with your finger to make sure it adheres.
Step 4: The Finishing Touch (The Ornament Cap)
Before the chocolate fully sets, take one of your mini peanut butter cups or Rolos and press it firmly onto the top center of the Oreo. This creates the iconic metal cap that holds the hook of a real ornament. Press down just enough so it sticks, but not so hard that you crack the cookie underneath. This small detail is what truly sells the “ornament” illusion!
Step 5: The Patience Game
Now, we wait. You can let the ornaments set at room temperature, which might take 20-30 minutes, or you can pop the entire tray into the refrigerator for about 10-15 minutes to speed up the process. The chocolate will become firm to the touch. And just like that, you’re done!
How to Serve Up These Holiday Jewels
Presentation is part of the fun with these treats! You’ve put in the creative work, now let’s show them off.
The most classic way is to arrange them on a festive platter as part of your holiday cookie spread. They add incredible visual interest and are always a conversation starter. For a really stunning effect, stack them in a pyramid or circle on a cake stand.
If you added lollipop sticks, you can stand them up in a mug filled with sugar or candy canes to create an edible centerpiece. For a truly magical touch, tie a short piece of ribbon or string licorice through the “cap” and gently hang a few on your Christmas tree—just make sure you take them down before your guests arrive, or you might find a curious nibbler has taken a bite out of your decoration!
They also make fantastic food gifts. Package a few in a clear cellophane bag tied with a ribbon for a homemade, heartfelt present for teachers, neighbors, or friends.
Mix It Up! 5 Fun Variations to Try
The basic recipe is a blank canvas for your holiday creativity. Once you’ve mastered the classic, try one of these delicious twists!
- The Peppermint Swirl: Use dark chocolate or chocolate candy melts for dipping. Once decorated, drizzle with melted white chocolate and immediately sprinkle with crushed candy canes for a cool, minty flavor.
- Snowy Forest: Dip the Oreos in white chocolate. Before adding the cap, cover the entire top with white sanding sugar or shredded coconut to look like snow. Use a tiny piece of a green fruit roll-up to make a little ribbon loop on the cap.
- Nut-Free Fun: Instead of a peanut butter cup for the cap, use a Rolo, a Hershey’s Kiss, or even a small dollop of hardened chocolate to ensure the treat is safe for everyone.
- Golden Glam: For an elegant, sophisticated look, use golden Oreos and dip them in white or dark chocolate. Decorate with gold sanding sugar and edible gold leaf flakes for a truly luxurious ornament.
- The Grinch: Use green candy melts. After dipping, add a small red heart sprinkle near the bottom. It’s an adorable nod to everyone’s favorite holiday grouch!
Beau’s Chef Notes: Lessons from My Kitchen
This recipe has evolved so much since that first messy Christmas Eve. I’ve learned that the type of chocolate really matters—a good quality melting wafer will save you a lot of headache. I also used to try and decorate with tweezers for “perfection,” but I’ve since learned that the charm of these ornaments is in their slight imperfections. They’re handmade with love, and that’s what makes them special.
One of my favorite kitchen fails was the year I tried to use cheap chocolate chips. Let’s just say I ended up with a bowl of thick, un-dippable cement and a lesson learned! Now, I always keep a bag of good candy melts in the pantry during December, just in case a last-minute baking urge (or a surprise visit from friends) strikes.
FAQs & Troubleshooting: Your Questions, Answered!
Q: My chocolate is thick and clumpy! What did I do wrong?
A: Ah, the dreaded seized chocolate! This usually happens if a tiny drop of water or steam gets into the melting chocolate, or if it’s overheated. To fix it, try stirring in a teaspoon of coconut oil or vegetable shortening. If it’s really bad, it’s often easier to start over. Remember: low and slow when melting!
Q: My decorations are falling off. How can I make them stick?
A: The key is timing! You have to add the sprinkles while the chocolate is still wet and tacky. If you wait too long, they won’t adhere. If you’re finding the chocolate sets too quickly, try working in smaller batches, dipping and decorating 4-5 cookies at a time.
Q: Can I make these ahead of time?
A: Absolutely! These are a great make-ahead treat. Once set, store them in a single layer in an airtight container at room temperature for up to 5 days. You can also separate layers with parchment paper. I don’t recommend freezing them, as the condensation when they thaw can make the decorations soggy.
Q: Are there any other cookies I can use besides Oreos?
A> For sure! Any similarly sturdy sandwich cookie will work. I’ve had great success with Nutter Butters (they look like little gifts!) and even some store-brand chocolate sandwich cookies. Just make sure they’re firm enough to handle the dipping process without breaking.

Christmas Ornament Oreos
Description
Christmas Ornament Oreos
Ingredients
-
24 Oreo cookies (any flavor)
-
12 oz white chocolate or candy melts (red, green, or dyed with gel food coloring)
-
1 tbsp coconut oil (optional, for smoother coating)
-
Holiday sprinkles & edible decorations
-
24 mini peanut butter cups or Rolos (for ornament “caps”)
-
Optional: lollipop sticks or string licorice (for pops or hanging)
Instructions
-
Melt Chocolate
-
Place chocolate/candy melts in a microwave-safe bowl. Heat in 30-second bursts, stirring until smooth. Stir in coconut oil if using.
-
-
Dip Cookies
-
Line a baking sheet with parchment.
-
Dip each Oreo fully into melted chocolate, using a fork to lift and tap off excess. Place on tray.
-
-
Decorate
-
While chocolate is still wet, add sprinkles, sugar pearls, or crushed candy canes. Press larger decorations gently so they stick.
-
-
Add Ornament Cap
-
Immediately press a mini peanut butter cup or Rolo onto the top center of each Oreo to create the ornament “cap.”
-
-
Set
-
Let sit at room temp 20–30 minutes or refrigerate 10–15 minutes until firm.
-
Notes
-
Snowy Forest: White chocolate + shredded coconut or sanding sugar.
-
Nut-Free: Use Rolos, Kisses, or a dollop of chocolate instead of peanut butter cups.
-
Golden Glam: Golden Oreos + white/dark chocolate + gold sanding sugar.
-
Grinch: Green candy melts + red heart sprinkle.
Nutrition
- Calories: 170 calories per cookie
- Sugar: 15g
- Fat: 9g
- Carbohydrates: 20g
Nutritional Info (Approximate)
Let’s be real—these are a holiday treat, a celebration in cookie form! But it’s always good to know what you’re enjoying. The nutritional information below is per cookie ornament, assuming you get 24 from the recipe. Remember, these are estimates and can vary based on the specific brands of ingredients you use.
Per Cookie: Calories: 170 | Carbohydrates: 20g | Fat: 9g | Sugar: 15g | Protein: 2g
These are a fun, indulgent dessert perfect for sharing. The joy they bring is worth every delicious bite!
Final Thoughts: The Joy of Simple Traditions
Well, friends, there you have it. A recipe that’s less about precision and more about joy. These Christmas Ornament Oreos are proof that you don’t need to be a professional pastry chef to create something truly special and memorable for the holidays. They’re about the experience—the laughter, the sprinkles on the floor, the pride of creating something beautiful with your own two hands.
I hope this recipe brings as much light and happiness to your kitchen as it has to mine. So from my Feastical family to yours, I wish you the happiest of holidays filled with good food, great company, and maybe a few edible ornaments. Now, go forth and create!
Don’t forget to tag me @Feastical on social media if you make them—I love seeing your creations!
Happy cooking,