Tiramisu Truffles: Your New Favorite No-Fork-Needed Dessert
Hey friends, Beau here! Let’s be real for a second: sometimes you need a dessert that’s a total showstopper. The kind of thing that makes people’s eyes light up the second you bring it out. But, and this is a big but, sometimes you also don’t have the time (or the energy) to layer a delicate Italian dessert in a fancy dish, carefully dust each portion, and hope it doesn’t turn into a soupy mess while you’re serving it. I’ve been there more times than I’d like to admit! That’s exactly why I became obsessed with creating the perfect Tiramisu Truffle. We’re talking all the iconic, dreamy flavors of classic tiramisu—the rich coffee, the creamy mascarpone, the soft ladyfingers, the bitter cocoa—all rolled up into one incredible, pop-in-your-mouth bite. No plates, no forks, no fuss. Just pure, unadulterated joy. These little guys are perfect for parties, potlucks, holiday gatherings, or just for stashing in your fridge for a sneaky 3 pm treat (your secret is safe with me). So, let’s ditch the dishes and dive into making these irresistibly Italian truffles together. Trust me, your taste buds will thank you.
A Sweet Slice of Memory
My love affair with tiramisu started not in a fancy restaurant, but in my Nonna’s kitchen. Well, my best friend Mike’s Nonna, to be exact. I spent half my childhood at their house, and the scent of freshly brewed espresso and sweet yeast was practically woven into the wallpaper. One Sunday, after a massive family dinner, Nonna brought out this beautiful, layered dessert dusted with what looked like chocolate. I’d never seen anything like it. She placed a generous slice in front of me with a wink. One bite and I was transported. The creamy, coffee-soaked layers were magic. But the best part was watching Mike, his little sister, and all the cousins try to sneak finger-fulls of the filling from the leftovers in the kitchen when they thought no one was looking. That’s the spirit I wanted to capture with these truffles—that same sense of playful, communal, finger-licking goodness. It’s all the nostalgia of that first life-changing bite, but designed for grabbing, sharing, and creating new memories (without the need to sneak around!).
Gathering Your Truffle Toolkit
Part of what makes this recipe so brilliant is its simplicity. You only need a handful of key players to create something truly spectacular. Here’s what you’ll need:
- 1 cup mascarpone cheese – This is the non-negotiable star of the show. Mascarpone is an Italian cream cheese that’s richer, thicker, and less tangy than its American cousin. It gives tiramisu its signature luxurious texture. Chef’s Tip: Make sure it’s cold and firm right out of the fridge for easier mixing.
- 1½ cups crushed ladyfingers – These dry, delicate sponge cakes (often called Savoiardi) are the traditional base. Their mild sweetness and airy texture soak up the coffee perfectly. Substitution Tip: In a pinch, vanilla wafers or even graham crackers will work, though the flavor will be slightly different.
- ¼ cup brewed espresso or strong coffee, cooled – This is where the deep, robust coffee flavor comes from. I strongly recommend a freshly brewed espresso or strong dark roast for the most authentic taste. Chef’s Insight: Using cooled coffee is crucial! Warm coffee will melt the mascarpone and make your mixture too runny.
- ½ tsp vanilla extract – A little splash of vanilla enhances all the other flavors and adds a warm, comforting aroma.
- ½ tsp rum or coffee liqueur (optional) – This is the “adults-only” upgrade! A tiny bit of dark rum, Kahlúa, or Marsala wine adds incredible depth. Feel free to leave it out for a family-friendly version—the truffles will still be amazing.
- 1 cup white or dark chocolate, melted (for coating) – This is our tasty shell! White chocolate complements the creamy interior beautifully, while dark chocolate adds a wonderful bittersweet contrast. Use high-quality baking bars for the best melt and flavor.
- Unsweetened cocoa powder (for dusting) – The classic tiramisu finish! A light dusting of high-quality cocoa powder (I prefer Dutch-processed for its deep color and smooth flavor) adds that final touch of bitterness and elegance.
Let’s Get Rolling: Your Foolproof Truffle Method
Don’t let the fancy name fool you—this process is a breeze. I’ve broken it down step-by-step with all my best kitchen hacks to ensure your truffle-making is a total success.
Step 1: Make the Filling
In a medium-sized bowl, gently whisk together the cold mascarpone, cooled espresso, vanilla extract, and your optional liqueur until it’s just combined and smooth. Chef’s Hack: Avoid over-mixing here! We want to keep that mascarpone fluffy and airy, not dense. Now, add your crushed ladyfingers. I like to crush mine by putting them in a zip-top bag and rolling a rolling pin over them—it’s a great way to get out any frustrations of the day! Fold the cookie crumbs into the mascarpone mixture until a soft, slightly sticky dough forms. It should hold together when you press it. Pop this bowl into the refrigerator for a solid 30 minutes. This chill time is non-negotiable—it firms up the mixture, making it a million times easier to roll.
Step 2: Shape & Chill
Once your mixture is nicely chilled, it’s time to get your hands dirty! Using a small cookie scoop (a melon baller or even a teaspoon works too), portion out the mixture. I aim for about 1 tablespoon per truffle. Roll each portion quickly between your palms to form a neat ball. Pro Tip: If the mixture is sticking to your hands too much, lightly dampen them with water or put a tiny bit of neutral oil on your palms. This creates a non-stick barrier. Place each rolled truffle on a parchment or wax paper-lined baking sheet. Once they’re all rolled, send that tray back into the fridge for another 15-20 minutes. This second chill ensures they’re firm and won’t fall apart when we dip them.
Step 3: Dip & Dust (The Fun Part!)
Now for the magic! Melt your chocolate in a heatproof bowl set over a pot of simmering water (a double boiler) or in short bursts in the microwave, stirring frequently until smooth. Using a fork, a dipping tool, or even two spoons, carefully dip each chilled truffle into the melted chocolate, rolling it around to coat it completely. Gently tap the fork on the edge of the bowl to let any excess chocolate drip off—this prevents a big chocolate puddle from forming at the base (we call that a “foot”). Place the dipped truffle back onto the parchment paper. You have two options for the cocoa dusting: either dust them lightly while the chocolate is still wet so it sticks, or wait until the chocolate shell has fully set and then give them a gentle dusting right before serving. Both ways work great!
Step 4: Set & Store
Let the chocolate coating set completely. You can leave them at room temperature if your kitchen is cool, but I usually just pop the whole tray back in the fridge for about 10-15 minutes to speed things up. Once set, transfer your beautiful tiramisu truffles to an airtight container. They MUST be stored in the refrigerator due to the fresh cheese and will keep happily for up to 5 days. If you’re making them for a party, they are absolutely perfect made a day ahead.
How to Serve These Little Beauties
Presentation is part of the fun! While these truffles are delicious straight from the fridge, I like to let them sit at room temperature for about 5-10 minutes before serving to take the edge off the chill and let the flavors really sing. For a simple, elegant look, arrange them on a beautiful platter or in a shallow bowl. If you’re feeling fancy, you can place each one in a mini paper candy cup—it looks professional and makes them super easy to pick up. For a dinner party, I love serving a couple of truffles alongside a freshly brewed espresso or a small glass of amaretto. It feels incredibly special and is a conversation starter every single time. Remember, food that brings people together is what Feastical is all about, and these truffles are guaranteed to do just that.
Get Creative: Delicious Twists on a Classic
Once you’ve mastered the basic recipe, the world is your tiramisu truffle! Here are a few of my favorite ways to mix things up:
- The Cocoa Core: Skip the chocolate dip entirely! Instead, roll the set truffle balls directly in unsweetened cocoa powder. It’s faster, less messy, and delivers a super intense coffee-cocoa punch. Just be warned: these are a bit messier to eat, but oh-so-worth it.
- Topped Off: Elevate your truffles with a gorgeous garnish. Immediately after dipping, while the chocolate is still wet, top each one with a chocolate coffee bean, a delicate chocolate curl, or a tiny sprinkle of sea salt for a sweet-and-salty situation.
- Dark Side: Are you a dark chocolate devotee? Use a high-quality bittersweet or dark chocolate (70% cacao) for the coating. Its deep, complex bitterness pairs phenomenally well with the sweet, creamy filling.
- Nutty Note: Add a wonderful crunch and nutty flavor by stirring 2-3 tablespoons of very finely ground toasted hazelnuts or almonds into the filling mixture. You could also roll the finished truffles in crushed nuts instead of cocoa.
- Dairy-Free Delight: You can absolutely make this vegan! Use a plant-based mascarpone alternative (many stores carry them now), ensure your ladyfingers and chocolate are dairy-free, and use a non-dairy milk to thin your coffee if needed.
Beau’s Chef’s Notes & Kitchen Stories
This recipe has evolved from a bit of a kitchen disaster! The first time I tried it, I got impatient and used warm coffee. Let’s just say I ended up with tiramisu soup instead of truffle dough. Lesson learned: patience and cold ingredients are key! Over time, I’ve found that a cookie scoop is the ultimate tool for getting evenly sized truffles, and that chilling the shaped balls is the secret weapon against dip-day disasters. These truffles have become my go-to gift during the holidays. I pack them in little gift boxes lined with parchment paper, and they’re always a massive hit. More than once, I’ve had friends text me asking for the recipe before they’ve even left my driveway!
Your Tiramisu Truffle Questions, Answered!
Q: My mixture is too soft to roll! What did I do wrong?
A: This usually means one of two things: either your mascarpone was too warm to start with, or you didn’t chill the mixture long enough. Don’t panic! Just pop the whole bowl back into the fridge for another 20-30 minutes. If it’s still too soft, you can add a few more tablespoons of crushed cookie crumbs to help absorb the moisture and firm it up.
Q: Can I freeze these truffles?
A: You can! Place the undipped, shaped truffle balls on a parchment-lined tray and freeze until solid. Then transfer them to a freezer-safe bag or container for up to 2 months. When you’re ready to serve, let them thaw in the fridge, then dip and dust as usual.
Q: The chocolate coating is clumpy and hard to work with. Help!
A: This is likely seized chocolate! Chocolate is very sensitive to moisture. Make sure your truffle balls are completely chilled and dry before dipping. If your chocolate does seize, try adding a tiny amount of neutral oil (like coconut or vegetable oil) and stirring vigorously—this can sometimes bring it back.
Q: I don’t have espresso. What can I use?
A: No problem! Just make a very strong cup of coffee using your preferred method. Instant espresso powder dissolved in hot water is also a fantastic and convenient option that I use all the time.

Tiramisu Truffles
Description
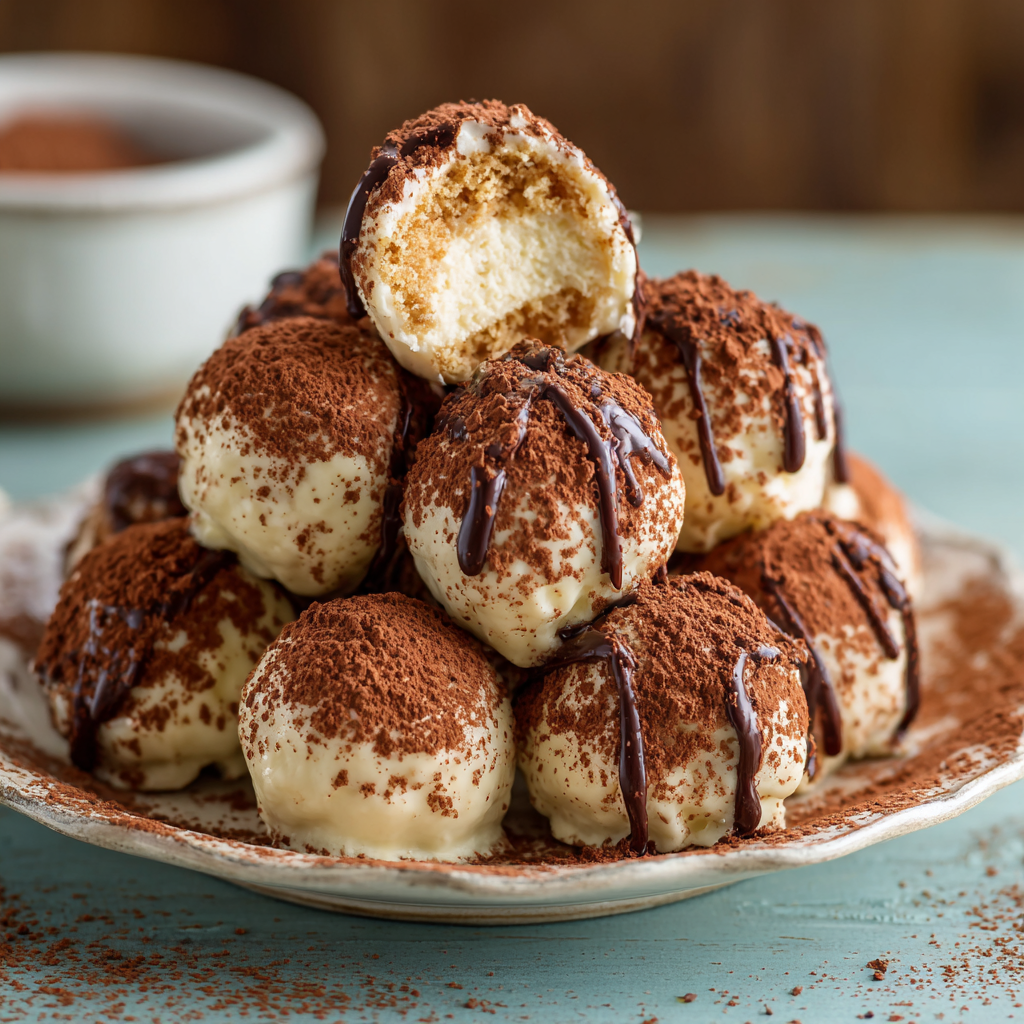
Sometimes, you want the classic tiramisu flavor without the fuss of layering, dusting, and serving delicately. These Tiramisu Truffles pack all the iconic flavors—rich coffee, creamy mascarpone, soft ladyfingers, and a chocolatey finish—into bite-sized, finger-friendly treats. Perfect for parties, gifts, or a sneaky afternoon indulgence!
Ingredients
-
1 cup cold mascarpone cheese
-
1½ cups crushed ladyfingers (or substitute with vanilla wafers/graham crackers)
-
¼ cup brewed espresso or strong coffee, cooled
-
½ tsp vanilla extract
-
½ tsp rum or coffee liqueur (optional)
-
1 cup white or dark chocolate, melted (for coating)
-
Unsweetened cocoa powder, for dusting
Instructions
1. Make the Filling
-
In a medium bowl, gently whisk together mascarpone, cooled espresso, vanilla, and optional liqueur until smooth.
-
Fold in the crushed ladyfingers until a soft, slightly sticky dough forms.
-
Chill in the fridge for 30 minutes to firm up.
Tip: Don’t overmix! Keep the mascarpone light and fluffy.
Notes
-
Cocoa Core: Roll truffles in cocoa powder instead of chocolate for a more intense flavor.
-
Nutty Twist: Add finely ground toasted nuts to the filling or coat the finished truffles.
-
Dark Chocolate Lover: Use 70% cacao for a rich, bittersweet finish.
-
Dairy-Free: Use plant-based mascarpone, dairy-free chocolate, and non-dairy coffee to make vegan truffles.
Nutrition
- Calories: 120 kcal (per truffle
- Fat: 8 g
- Carbohydrates: 10 g
Nutritional Info (Because Knowledge is Power!)
Okay, let’s be clear: these are a treat, through and through. But it’s always good to know what you’re enjoying! The estimated nutritional information per truffle (assuming a yield of 24) is approximately:
- Calories: ~120 kcal
- Fat: 8g
- Carbohydrates: 10g
- Protein: 2g
Remember, these values can vary based on the specific brands of ingredients you use, the size of your truffles, and how much chocolate coating you use. The primary sources of calories are the mascarpone cheese and the chocolate, providing energy from fats and carbohydrates. Enjoy them mindfully as part of a balanced diet—one or two are perfect for satisfying a serious sweet tooth!
Final Thoughts
And there you have it, friends! Your complete guide to making unbelievably delicious Tiramisu Truffles right in your own kitchen. This recipe is a testament to the idea that the best food doesn’t have to be complicated. It’s about capturing a feeling, a memory, and a whole lot of flavor in one simple, bite-sized package. I hope these truffles bring as much laughter and joy to your table as they have to mine. Remember, cooking is an adventure—don’t be afraid to get your hands a little dirty and make the recipe your own. Now, I’d love to hear from you! Did you try the classic version or one of the fun twists? Tag me @Feastical on social media with your creations. Until next time, happy cooking!