
Your New Favorite Frosting Awaits
Hey there, friend! Beau here from Feastical, and I have to ask: have you ever had one of those days where only a serious dose of chocolate and peanut butter will do? You know the ones. Maybe it’s a rainy Tuesday, maybe you’re celebrating a big win, or maybe you just looked at your spatula and decided it was time for a kitchen adventure. Whatever the reason, I’m so glad you’re here. Because today, we’re whipping up what I genuinely believe is one of the greatest creations to ever come out of a mixing bowl: my legendary Silky, Sweet & Nutty Chocolate Peanut Butter Frosting.
This isn’t just any frosting. This is the kind of frosting that makes people’s eyes go wide. The kind that gets you asked for the recipe before the cake is even cut. It’s luxuriously rich, perfectly fluffy, and has that iconic sweet-and-salty combo we all crave. It spreads like an absolute dream on a classic chocolate layer cake, pipes into gorgeous swirls on top of peanut butter cupcakes, and let’s be real—it’s also 100% spoon-worthy straight from the bowl. I’ve built this recipe to be incredibly simple, because the best things in life (and the kitchen) shouldn’t be complicated. So, preheat your stand mixer (or flex those arm muscles!), and let’s make something magical together.
The Frosting That Started It All
I’ll never forget the first time this frosting truly saved the day. It was my nephew Leo’s eighth birthday, and I, the “cool uncle who bakes,” had volunteered to make the cake. I baked these beautiful dark chocolate layers, let them cool, and went to make my usual chocolate buttercream. Disaster struck. I was out of confectioners’ sugar. The party was in two hours, and the grocery store was a madhouse. Panic mode: engaged.
But then, I saw it. A nearly full jar of creamy peanut butter and a can of cocoa powder, sitting right next to my trusty butter. In a moment of pure, desperate genius, I threw it all together, crossed my fingers, and hit mix. What emerged from that bowl was nothing short of a miracle. It was smoother, richer, and more delicious than anything I’d planned. I slathered it on that cake, sprinkled on some chopped peanuts, and brought it to the party. Leo took one bite, looked at me with chocolate all over his face, and said, “Uncle Beau, this is the best cake ever.” That’s the power of this frosting. It’s not just a recipe; it’s a kitchen hero, a happy accident, and a reminder that sometimes the best creations come from a little bit of chaos and a whole lot of heart.
Gathering Your Dream Team: The Ingredients
Part of what makes this recipe so foolproof is the short, sweet ingredient list. Each one plays a starring role, so let’s get to know them a little better. Here’s what you’ll need:
- ½ cup unsalted butter, softened: This is the base of our frosting, providing structure and that classic, creamy mouthfeel. Using unsalted lets us control the salt level. Chef’s Insight: “Softened” is key! Leave it on the counter for about 30-60 minutes. It should yield gently to pressure but not be melty. If you forget, you can cut it into tablespoons and microwave it for 5-second bursts until just pliable.
- ½ cup creamy peanut butter: The co-star of the show! I prefer standard creamy peanut butter (like Jif or Skippy) for its smooth, spreadable consistency and slight sweetness. The oils in natural peanut butter can sometimes separate and make the frosting greasy. Sub Tip: If you’re a texture person, feel free to use chunky! It adds a wonderful peanutty crunch.
- ½ cup unsweetened cocoa powder: This is where our deep, chocolatey flavor comes from. Use a good-quality cocoa powder you enjoy the taste of. Dutch-processed will give a darker color and mellower flavor, while natural cocoa powder is a bit more acidic and sharp. Both work beautifully here!
- 3 cups confectioners’ sugar (aka powdered sugar): This sweetens the deal and gives the frosting its light, fluffy structure. Because it’s so fine, it dissolves instantly, preventing any grittiness. Pro Hack: I always sift mine! It’s an extra step, but it guarantees a silky-smooth texture with no lumps.
- 1 teaspoon vanilla extract: The flavor enhancer. It rounds out the chocolate and peanut butter notes and adds a layer of warm, aromatic complexity. Don’t skip it!
- 3–5 tablespoons milk or cream: This is our consistency wizard. Whole milk, 2%, or even heavy cream will work. Cream will make it slightly richer. We add it slowly because humidity and ingredient temperatures can affect how much you need.
- Pinch of salt (optional): I almost always add this. It’s not to make the frosting salty, but to make it taste more chocolatey and more peanut buttery by balancing the sweetness. Trust me on this one.
Crafting Your Masterpiece: Step-by-Step Instructions
Alright, team! Let’s get mixing. This process is a breeze, but a few little tips along the way will ensure frosting perfection.
Step 1: The Creamy Foundation
Grab your large mixing bowl and your hand mixer or stand mixer fitted with the paddle attachment. Toss in your softened butter and that glorious ½ cup of peanut butter. Now, beat them together on medium-high speed for a good 2-3 minutes. We’re not just mixing here; we’re aerating. You want it to become light, pale, and perfectly smooth. This initial creaming is the secret to a fluffy, not dense, frosting. Scrape down the sides of the bowl with a spatula to make sure everything is incorporated.
Step 2: Chocolate Integration
Time for the cocoa powder! Sprinkle it into the butter-peanut butter mixture. Start your mixer on low speed unless you want a cocoa powder cloud all over your kitchen (been there, done that, don’t recommend it!). Once the powder is somewhat incorporated, crank the speed up to medium and beat for another minute. You’ll see it transform into a thick, dark, and incredibly fragrant paste. Scrape the bowl again—this is a good habit to get into!
Step 3: The Sweet Build
Here comes the confectioners’ sugar. Add it gradually, about one cup at a time, mixing on low speed after each addition. Once all three cups are in, let the mixer run on low for another 30 seconds. It will look dry and crumbly, and you might think you’ve gone wrong. You haven’t! This is exactly what we want. This slow incorporation prevents a sugar snowstorm and helps the sugar dissolve properly.
Step 4: Fluff & Flow
Now, pour in your vanilla extract and 3 tablespoons of your milk or cream. Place a kitchen towel over your mixer (trust me, another messy lesson learned) to catch any initial splashes. Start on low, then gradually increase the speed to medium-high. Beat for a full 2-3 minutes. Watch the magic happen! It will go from that crumbly mess to light, fluffy, and spreadable. If it still seems too thick for your liking, add more milk, one tablespoon at a time, until it reaches your desired consistency. For spreading, I like it like a thick cloud. For piping, I add a touch more liquid so it flows smoothly through the tip without straining your hand (or your piping bag!). This is also the time to add that optional pinch of salt. Give it one final quick mix to combine.
How to Serve This Frosting Fame
You’ve done it! You’ve created a bowl of chocolate peanut butter heaven. Now, let’s put it to work. The obvious choice is slathering it generously on a classic chocolate cake. For a next-level experience, try it between the layers of a yellow butter cake—the flavor contrast is incredible. It’s the perfect topping for a batch of fudgy brownies, turning them from a snack into a decadent dessert.
If you’re feeling fancy, fit a piping bag with a large star tip (I’m a sucker for a Wilton 1M or 2D) and pipe elegant, high swirls onto cupcakes or a sheet cake. For a final flourish, a sprinkle of chopped roasted peanuts adds crunch, a light dusting of cocoa powder looks professional, or a drizzle of melted chocolate takes it over the top. And hey, if you just grab a graham cracker or a spoon and dive in, I fully support that decision. Your kitchen, your rules!
Make It Your Own: Delicious Variations
The beauty of this recipe is its versatility. Feel free to play around and create your own signature version!
- The Crunch Lover: Swap the creamy peanut butter for chunky! Those little peanut bits add a fantastic textural surprise in every single bite.
- The Warm Spice: Add ½ to 1 teaspoon of ground cinnamon to the dry ingredients. It gives the frosting a subtle, warm depth that pairs amazingly well with chocolate and peanut butter. It’s like a hug in frosting form.
- The Marbled Marvel: After your frosting is made, gently swirl in 2-3 tablespoons of cooled, melted chocolate (semi-sweet or dark) with a butter knife. Don’t overmix! You want beautiful, bold streaks of chocolate running through it.
- The Dietary Swap: To make this dairy-free, use a plant-based butter stick (like Miyoko’s or Earth Balance) and your favorite unsweetened non-dairy milk (oat milk works great!). For a vegan version, ensure your sugar is vegan-friendly (some are processed with bone char) and use the dairy-free swaps.
- The Flavor Twist: Add a tiny splash of espresso powder dissolved in the milk. It won’t taste like coffee; it will just make the chocolate flavor taste even richer and more intense.
Beau’s Chef’s Notes
This recipe has been my go-to for years now, and it’s evolved in little ways. I used to just dump all the sugar in at once and would inevitably end up with a tiny dust storm on my counter. I learned the hard way, so you don’t have to! The salt tip was another late addition. I made it once for a friend who said, “This is amazing, but it just needs… something.” I added a pinch of salt, and she immediately said, “THAT’S it!” It’s been a staple ever since. Remember, baking is about joy, not perfection. If your frosting is a little too soft, pop it in the fridge for 15 minutes. If it’s too thick, add a splash more milk. You’ve got this.
Frosting FAQs & Troubleshooting
Q: My frosting is too runny! What did I do wrong?
A: Don’t worry, we can fix it! This usually happens if the butter was too soft or a bit too much liquid was added. The easiest solution is to chill it in the refrigerator for 20-30 minutes to let the fats firm up, then re-whip it. If it’s still too soft, you can beat in a little more confectioners’ sugar, a quarter cup at a time, until it thickens up.
Q: Can I use natural peanut butter?
A: You can, but proceed with caution. Natural peanut butters often have oil that separates and can make the frosting greasy and thin. If it’s all you have, be sure to stir the jar extremely well to fully incorporate the oil before measuring. You will likely need less milk, so add it very slowly.
Q: How far in advance can I make this?
A: You can make it up to 2-3 days in advance! Keep it in an airtight container in the refrigerator. When you’re ready to use it, let it sit on the counter to come to room temperature (this is crucial for spreadability), then give it a quick re-whip with your mixer to bring back its fluffy texture.
Q: Why is my frosting gritty?
A: Grittiness usually means the confectioners’ sugar wasn’t fully dissolved. This can happen if you add the sugar too quickly or don’t mix it long enough after adding the liquid. Sifting your sugar first is the best prevention. If it’s gritty now, just keep beating! The extended mixing time should help dissolve those sugar particles.
Print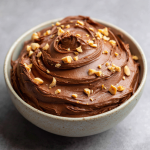
Chocolate Peanut Butter Frosting
Description
This frosting is rich, smooth, and perfectly fluffy, combining chocolate and peanut butter in the ultimate sweet-and-salty combo. It’s amazing on cakes, cupcakes, brownies, or just eaten straight from the bowl.
Ingredients
-
½ cup (1 stick) unsalted butter, softened
-
½ cup creamy peanut butter (standard brands recommended for smoothness)
-
½ cup unsweetened cocoa powder
-
3 cups confectioners’ sugar, sifted if possible
-
1 teaspoon vanilla extract
-
3–5 tablespoons milk or heavy cream
-
Pinch of salt (optional, but recommended to enhance flavor)
Tip: Start with 3 tablespoons of milk, then adjust for your desired consistency.
Instructions
-
Cream Butter & Peanut Butter:
Beat butter and peanut butter together on medium-high speed for 2–3 minutes until light and smooth. Scrape down the bowl. -
Add Cocoa:
Sprinkle in cocoa powder and start mixing on low to avoid a powder cloud. Once partially incorporated, increase to medium speed and mix 1 more minute. Scrape the bowl again. -
Incorporate Sugar:
Add confectioners’ sugar gradually, one cup at a time, on low speed. Mix an extra 30 seconds after the last cup—frosting may look dry or crumbly; this is normal. -
Add Vanilla & Milk:
Pour in vanilla and 3 tablespoons milk. Beat on low to start, then increase to medium-high for 2–3 minutes until light, fluffy, and spreadable. Adjust milk if needed for consistency. Add optional pinch of salt and mix briefly.
Notes
-
-
Runny: Chill 20–30 minutes, then re-whip; add sugar if needed.
-
Gritty: Sift sugar and mix longer.
-
Using Natural Peanut Butter: Stir thoroughly and add milk slowly.
-
Make-Ahead: Refrigerate 2–3 days in an airtight container; re-whip after reaching room temp.
-
Nutrition
- Calories: 170 CaL per 2 tbsp
- Sodium: 55mg
- Fat: 11g
- Carbohydrates: 15mg
Nutritional Information*
*Please note: This is an estimate provided for informational purposes only. I’m a chef, not a nutritionist, so values can vary based on specific ingredients used.
Per Serving (2 tbsp):
Calories: ~170 | Total Fat: 11g | Saturated Fat: 5g | Trans Fat: 0g | Cholesterol: 15mg | Sodium: 55mg | Total Carbohydrates: 19g | Dietary Fiber: 1g | Sugars: 17g | Protein: 2g
This is a treat, through and through! It’s perfect for topping your favorite desserts and sharing with friends and family. Enjoy it as part of a balanced diet filled with lots of other delicious things.
Final Sweet Thoughts
Well, friend, we’ve reached the end of our frosting journey. I hope you’re as excited to make this as I am every single time. This Chocolate Peanut Butter Frosting is more than just a recipe; it’s a tool for making someone’s day a little brighter, for turning a simple cake into a celebration, and for enjoying the pure, simple joy of creating something delicious with your own two hands.
I’d love to hear how it turns out for you! Did you add cinnamon? Did you pipe it onto a giant birthday cake? Tag me on social @feastical or drop a comment on the blog. Sharing our kitchen adventures is my favorite part of this whole Feastical community. Now, go forth and frost! Until next time, happy baking.