
Let’s Make Some Magic: The Ultimate Vanilla Buttercream
Hey friends, Beau here! Let’s have a real kitchen chat for a second. How many times have you slaved over a beautiful cake, only to top it with a frosting that’s just… meh? Maybe it’s too sweet, maybe it’s gritty, or maybe it just doesn’t have that soul-satisfying richness you were dreaming of. I’ve been there. We’ve all been there. That’s why today, we’re going back to basics—but we’re making it spectacular. We’re ditching the overly sweet, one-note frostings and we’re making a Classic Vanilla Buttercream that’s in a league of its own. This isn’t just butter and sugar, folks. This is a silky, luxurious, custard-kissed cloud of perfection. The secret weapon? Egg yolks. Yep, that gorgeous, golden yolk adds a depth of flavor and a velvety texture that will absolutely ruin you for any other frosting. It’s the kind of frosting that makes you close your eyes after the first bite. It’s the stuff of birthday legends and cupcake fame. So, tie on your favorite apron, grab your trusty mixer, and let’s create something unforgettable together. This is the only vanilla buttercream recipe you’ll ever need.
The Birthday Cake That Started It All
This recipe takes me right back to my grandma’s kitchen, with its checkered curtains and the constant, warm smell of sugar and butter. Every year for my birthday, she’d let me stand on a wobbly wooden stool and “help” her make my cake. Her frosting was always different from the ones my friends had. It wasn’t stark white; it had a beautiful, pale yellow hue. It wasn’t cloyingly sweet; it was rich and almost elegant. I never knew why until I was finally old enough to pay real attention. While other recipes just creamed butter and sugar, she’d separate eggs, carefully sliding the yolks into her mixing bowl with a practiced hand. She’d whisper that it was her “little secret” for a frosting that tasted like it came from a fancy bakery. That subtle, custard-like flavor was the taste of pure love and kitchen wisdom. This recipe is my homage to her. It’s a nod to the old ways, the tricks that our grandparents knew that made simple food extraordinary. It’s more than frosting; it’s a delicious, edible memory.
Gathering Your A-Team: The Ingredients
Simple ingredients, incredible results. That’s the Feastical promise. Here’s what you’ll need to create this masterpiece. Let’s break it down, because every player has a role!
- ½ cup (1 stick) unsalted butter, softened – This is the foundation. Unsalted lets you control the salt level. Chef’s Tip: “Softened” is KEY. It should give slightly when you press it, but not be oily or melted. Leave it on the counter for 1-2 hours before you start. In a pinch? Cut it into tablespoons and microwave for 5-second bursts until perfect.
- ⅛ teaspoon salt – Don’t you dare skip this! Salt is the flavor enhancer that cuts the sweetness and makes the vanilla pop. It’s the difference between flat and fantastic.
- 4 cups confectioners’ sugar (aka powdered sugar) – This gives us that smooth, melt-in-your-mouth texture that granulated sugar can’t. Substitution Tip: If you’re out, you can make your own by blending 1 cup granulated sugar with 1 tablespoon of cornstarch until it’s a fine powder.
- 2 large egg yolks, beaten – Here’s our superstar! The yolks provide an incredible richness, a beautiful color, and that signature custard depth. Safety First: Use pasteurized eggs if you have any concerns about consuming raw egg yolks.
- 1 teaspoon vanilla extract – Use the good stuff! Pure vanilla extract makes a world of difference compared to imitation. This is the main flavor voice, so let it sing.
- 2 tablespoons milk (or heavy cream) – This is our liquid to bring it all together. Start with 2 tablespoons and add more as needed to reach your perfect spreading consistency. Heavy cream will make it even richer and creamier.
Let’s Get Mixing: Step-by-Step to Frosting Heaven
Alright, team. Let’s do this. Follow these steps, and you’ll have flawless frosting every single time. I’m talking you through it like you’re right here in the kitchen with me.
Step 1: The Creamy Foundation. In a large mixing bowl, combine your softened butter and that all-important ⅛ teaspoon of salt. Using an electric hand mixer or a stand mixer fitted with the paddle attachment, beat on medium-high speed for 2-3 minutes. We’re not just mixing; we’re aerating. You want it to become pale in color, light, and fluffy. This step incorporates air, which is what gives your frosting that gorgeous, cloud-like texture instead of being dense and heavy. Scrape down the sides of the bowl with a spatula to make sure everything is getting loved equally.
Step 2: The Sweet Embrace. Now, with your mixer on low speed, gradually add the confectioners’ sugar, one cup at a time. I mean it—gradually. If you dump it all in at once, you and your entire kitchen will be wearing a sweet, white cloud. After each cup is added, let the mixer run until the sugar is fully incorporated before adding the next. Once all the sugar is in, crank the speed up to medium and beat for another full minute. This ensures any little sugar lumps are completely beaten out and the mixture is perfectly smooth.
Step 3: The Golden Touch. In a small separate bowl, lightly beat your two egg yolks with a fork just to break them up. Reduce your mixer speed to low and slowly pour in the beaten yolks and your teaspoon of vanilla extract. Let it mix until just combined—this should only take about 30 seconds. You’ll immediately see the color transform into a beautiful pale yellow. Marvel at it! That’s the magic happening.
Step 4: Bringing It All Together. Finally, it’s time for the milk. With the mixer still on low, add your two tablespoons of milk. Once it’s incorporated, stop the mixer, scrape down the bowl again, and then turn the mixer to medium-high speed. Now, beat the living daylights out of it for a good 2-3 minutes. This is where the magic *really* happens. Watch as it transforms from a somewhat gritty mixture into an impossibly smooth, light, and spreadable masterpiece. If it seems too thick, add more milk, one teaspoon at a time. If it’s too thin (unlikely, but possible), add a bit more confectioners’ sugar.
How to Serve & Showcase Your Masterpiece
You’ve made it! Now, let’s put this golden goodness to work. This buttercream is incredibly versatile.
For Cakes: For a 9×13 sheet cake, this recipe is the perfect amount. For a two-layer 8-inch cake, I’d recommend making a double batch so you can generously frost between the layers and all over the outside. Use an offset spatula for smooth, professional-looking sides, or a spoon to create beautiful, rustic swirls.
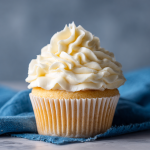
For Cupcakes: This will frost 18-24 cupcakes, depending on how generous you are! For a classic bakery look, fit a piping bag with a large star tip (I love a Wilton 1M or 2D) and pipe tall, beautiful swirls onto each cooled cupcake. It feels fancy but is so easy.
For Cookie Sandwiches: This is a next-level move. Spread a thick layer between two sugar cookies, oatmeal cookies, or even chocolate chip cookies for the most decadent homemade sandwich cookie you’ve ever tasted.
Pro Tip: Always, always make sure your cakes or cupcakes are completely cooled to room temperature before you frost. Otherwise, your beautiful frosting will melt right off!
Get Creative: Flavor Twists & Swaps
The classic vanilla is perfect, but who doesn’t love options? Here are a few of my favorite ways to mix it up.
- Chocolate Dream: Reduce the confectioners’ sugar by ¼ cup and add ½ cup of good-quality unsweetened cocoa powder (sifted!) along with it. You might need an extra tablespoon of milk to get to the right consistency.
- Citrus Zing: Replace the vanilla extract with ½ teaspoon of almond extract and add the finely grated zest of one lemon or orange. The almond and citrus combo is unreal.
- Berry Blast: After the frosting is made, gently fold in ¼ cup of freeze-dried strawberry or raspberry powder (just blend freeze-dried berries in a blender until fine). It gives an incredible, natural fruit flavor and a gorgeous pink hue.
- Rich & Creamy: Simply swap the milk for an equal amount of heavy cream. It amplifies the richness and makes it even more decadent.
- Vegan/Pasteurized Swap: Concerned about raw egg? You can achieve a similar richness by swapping the egg yolks for ¼ cup of store-bought pasteurized liquid egg product. For a fully vegan version, use a high-quality plant-based butter (the kind that comes in sticks, not tubs) and replace the milk with your favorite non-dairy alternative. The flavor profile will be slightly different, but still delicious!
Beau’s Chef Notes & Kitchen Stories
This recipe has been my go-to for years, and it’s evolved through plenty of happy (and messy) accidents. I once was filming a video for the site and, in my excitement, added the sugar with the mixer on high. Let’s just say my dog, Biscuit, had a sweet dusting for days and we had to pause for a serious clean-up. Lesson learned! The slow add is non-negotiable. I’ve also found that if your kitchen is really warm, popping the finished frosting into the fridge for 10-15 minutes before piping can help it hold its shape beautifully. This frosting is a testament to the idea that sometimes, the old ways are the best ways. That little extra step of adding egg yolk is what separates a good frosting from a legendary one.
Frosting FAQs: Your Questions, Answered
Q: My frosting is too runny! What did I do wrong?
A: The most likely culprit is butter that was too soft or even slightly melted. Don’t worry! Pop the whole bowl into the refrigerator for 20-30 minutes to let the butter firm up, then re-whip it. You can also add a bit more confectioners’ sugar, a quarter cup at a time, to help thicken it.
Q: Why is my frosting gritty?
A: This is almost always because the confectioners’ sugar wasn’t fully incorporated. When you add the sugar, make sure you’re beating it on low until it’s *just* mixed in, and then beat it on high for a full minute or two at the end. This ensures any tiny sugar granules are completely dissolved.
Q: Can I make this ahead of time?
A: Absolutely! You can make it up to 2 days ahead. Store it in an airtight container in the refrigerator. When you’re ready to use it, let it come to room temperature on the counter for about an hour, then re-whip it in your mixer for a minute or two to bring back its smooth, spreadable texture.
Q: Is it safe to eat raw egg yolks?
A: This is important. There is a minimal risk associated with consuming raw eggs. To eliminate this risk entirely, please use pasteurized eggs or pasteurized liquid egg yolks. This is especially crucial if you are serving the frosting to young children, the elderly, pregnant individuals, or anyone with a compromised immune system.
Classic Vanilla Buttercream Frosting
Description
Ever baked a cake that deserved a frosting as spectacular as it looked? This Classic Vanilla Buttercream isn’t just sweet—it’s silky, rich, and perfectly balanced. Thanks to a touch of egg yolk, it has a custard-like depth that elevates any cake, cupcake, or cookie sandwich. Simple ingredients, extraordinary results—let’s make magic in your kitchen.
Ingredients
-
½ cup (1 stick) unsalted butter, softened
-
⅛ teaspoon salt
-
4 cups confectioners’ sugar
-
2 large egg yolks, beaten (use pasteurized if preferred)
-
1 teaspoon vanilla extract
-
2 tablespoons milk or heavy cream (more as needed)
Tip: Ensure butter is softened but not melted for the best texture.
Instructions
-
Cream the Butter: In a large bowl, beat butter and salt on medium-high for 2–3 minutes until light and fluffy. Scrape down the bowl.
-
Add Sugar Slowly: With mixer on low, add sugar 1 cup at a time. Beat on medium for 1 minute after all sugar is incorporated.
-
Mix in Yolks & Vanilla: Slowly add beaten egg yolks and vanilla. Mix until just combined, about 30 seconds.
-
Add Milk & Finish: Add milk, scrape the bowl, then beat on medium-high for 2–3 minutes until light, smooth, and spreadable. Adjust consistency with more milk or sugar as needed.
Notes
-
If frosting is runny, chill for 20–30 mins and re-whip.
-
If frosting is gritty, beat longer at high speed to dissolve sugar.
-
Make ahead: Store in airtight container up to 2 days in the fridge. Re-whip before use.
Nutrition
- Calories: 130 Cal per 2 tbsp serving
- Fat: 5g
- Cholesterol: 30mg
Nutritional Information*
*This is an estimated nutritional breakdown. Remember, we’re making frosting—it’s a treat, meant to be enjoyed in celebration!
Prep Time: 10 minutes
Yield: ~2½ cups (enough for one 9×13 cake or 18-24 cupcakes)
Serving Size: 2 tablespoons
Per Serving:
Calories: 130 | Total Fat: 5g | Saturated Fat: 3g | Trans Fat: 0g | Cholesterol: 30mg | Sodium: 30mg | Total Carbohydrates: 21g | Dietary Fiber: 0g | Sugars: 20g | Protein: 0.5g
Final Thoughts
And there you have it, my friends. You’re now armed with the recipe for what I truly believe is the world’s best vanilla buttercream. It’s not just a topping; it’s the crowning glory of any bake. It has history, heart, and a secret ingredient that makes all the difference. So the next time you’re baking a cake for a birthday, an anniversary, or just a Tuesday that needs a little brightening, I hope you give this a try. Remember, the best kitchens are filled with laughter, a little bit of mess, and a whole lot of love. Now, go forth and frost!
I’d love to hear how it turns out for you! Tag me @feastical on Instagram or pop over to Feastical.com and leave a comment on this post. Happy baking!