No-Bake Snowman Oreo Pops (Vegan Edition): Your New Favorite Holiday Project!
Hey friends, Beau here from Feastical! Is there anything better than that feeling when December rolls around? The air gets crisp, the lights go up, and suddenly, all I want to do is spend my time in a cloud of powdered sugar and holiday cheer. But let’s be real—between gift shopping, party planning, and trying to remember where you stored the good wrapping paper, the last thing you need is a complicated, fussy recipe that dirties every bowl you own. Am I right?
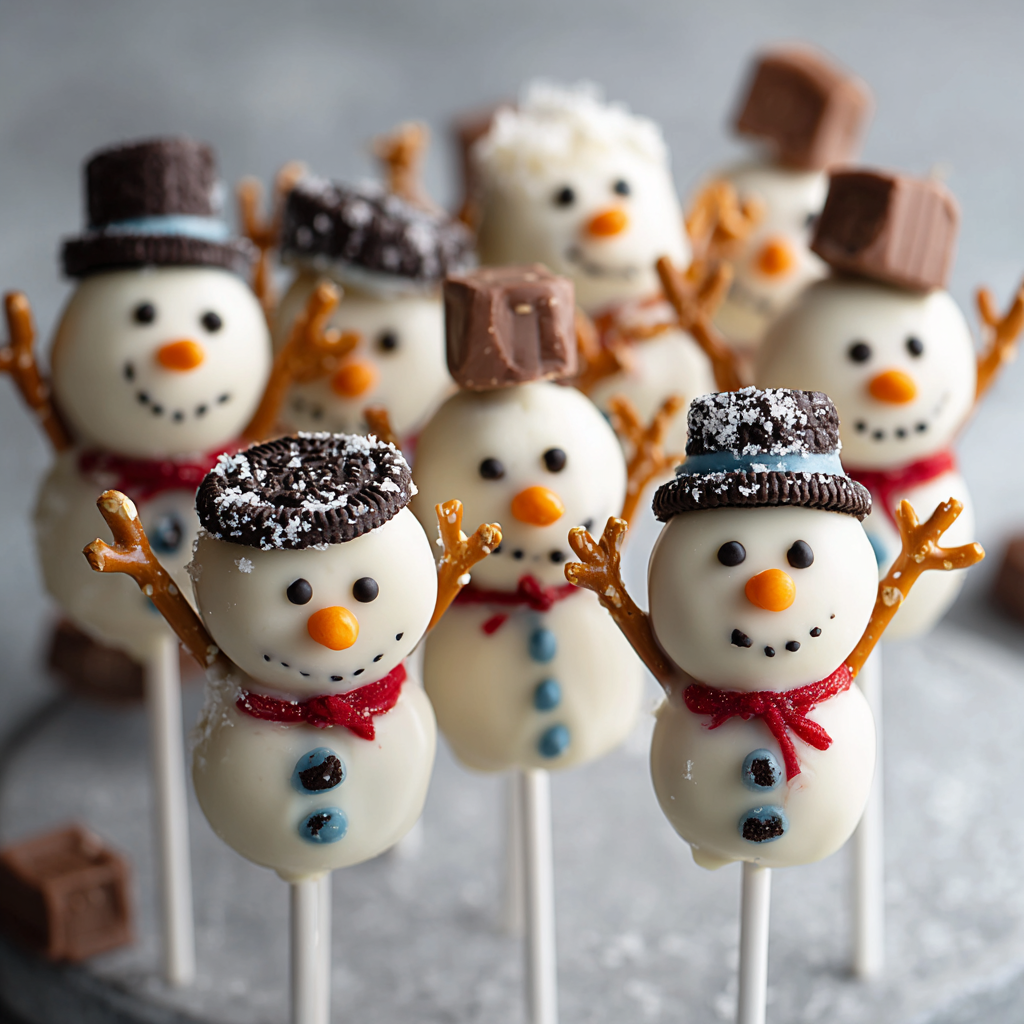
That’s exactly why I’m so crazy about these unbelievably cute No-Bake Snowman Oreo Pops. We’re talking about charming, chocolatey, and downright adorable treats that are bursting with holiday spirit. They’re made with simple ingredients, require zero oven time, and are completely vegan-friendly! Whether you’re hosting a festive cookie swap, looking for a super fun activity to do with the kids (or your inner child!), or need the perfect edible gift that will absolutely wow everyone, these little snowman pals are your answer. They’re simple, soulful, and so satisfying to create. So, grab your favorite mug of cocoa, put on some holiday tunes, and let’s make some magic together!
A Snowy Kitchen Memory
This recipe takes me right back to one specific, snowed-in afternoon when my niece and nephew were visiting. The forecast predicted a monster storm, and we were prepared with enough groceries to hibernate for a week. When the snow started falling, we did what any sensible person would do: we turned the kitchen into a winter wonderland workshop. We had sprinkles everywhere, melted chocolate in various bowls, and more laughter than I thought possible.
We were attempting a complicated gingerbread house that, let’s just say, had some structural integrity issues. Frustration was starting to creep in. Then, I remembered a version of these Oreo pops I’d seen. We scrapped the blueprint, grabbed the Oreos and some vegan chocolate we had, and started creating these silly, happy snowmen. It was an instant game-changer. There were no rules, just creativity. My nephew gave one snowman a big, frowny chocolate face “because he’s cold,” and my niece made one with a crooked hat. They weren’t perfect, and that was the whole point. They were ours. That’s the real magic of these pops—it’s less about precision and all about the joy of making something together. Every time I make them now, I smile thinking of that chaotic, perfect, snowy day.
Gathering Your Snow Squad: The Ingredients
Here’s the beautiful part: the ingredient list is short, sweet, and probably has a lot of items you can already find in your pantry. This recipe makes about 12 cheerful snowmen, perfect for a platter or a round of gifting!
- 4 packs of Oreo cookies: Regular or Double-Stuff both work great! I often grab the Double-Stuff because the extra cream filling makes the cookie a bit sturdier for inserting the stick and gives a delicious creamy center. And yes, standard Oreos are accidentally vegan—how cool is that?
- 500g dairy-free white chocolate melting wafers or bars: This is your snowman’s body! I highly recommend using melting wafers (like King David or CandyMelts brand vegan options) over chocolate bars. They’re specifically formulated to melt smoothly, set firmly, and hold their shape, which is key for dipping. If you use a bar, just add a teaspoon of coconut oil to help it melt smoothly.
- 40g dairy-free dark chocolate, melted: This is for drawing on those cute little faces and buttons. You can melt this and put it in a small piping bag or just use a toothpick for detailing.
- 12 pretzel sticks, broken in half: These become the adorable little arms. Any thin pretzel stick will do! Break them gently to get 24 little arm pieces.
- 12 vegan mini peanut butter cups (like Doisy & Dam or Justin’s): The perfect top hat for our frosty friend! If you can’t find vegan PB cups, a small chocolate-covered peppermint patty or even a melted chocolate button would work.
- Orange food gel or an orange sprinkle/candy: The classic carrot nose! A tiny dab of orange gel is easiest, but if you have an orange jellybean or a piece of candy, you can totally shape it into a tiny nose.
- 12 lollipop sticks or sturdy paper straws: The backbone of your pop! You can find lollipop sticks at any craft store or online. Paper straws add a really cute, rustic touch if you’re going for a certain vibe.
Let’s Build a Snowman! Step-by-Step Instructions
Alright, team! Let’s get our hands dirty (or, more accurately, delightfully chocolatey). Follow these steps, and you’ll have a squad of snowmen in no time.
Step 1: The Foundation. First, carefully insert a lollipop stick into the cream filling of an Oreo. Gently twist the stick back and forth as you push it in about halfway. Chef’s Hack: If you’re worried about the cookie cracking, you can microwave the Oreo for just 3-4 seconds to very slightly soften the cream. This makes it much more pliable and forgiving! Repeat this with all your cookies and lay them on a tray.
Step 2: Melt the “Snow”. Next, we melt our dairy-free white chocolate. This is a crucial step! The best method is a double boiler. Simply place a heatproof bowl over a pot of simmering water (make sure the bottom of the bowl isn’t touching the water) and stir the wafers until they’re smooth and creamy. No double boiler? No problem! You can use the microwave. Heat the chocolate in a microwave-safe bowl in 20-second bursts, stirring vigorously between each burst. Chef’s Warning: Do NOT overheat it! White chocolate is delicate and can seize up (become clumpy) if it gets too hot. We want it smooth and dippable.
Step 3: The Big Dip. Now for the fun part! Hold an Oreo pop by the stick and dunk it completely into the melted white chocolate. Use a spoon to help coat it evenly on all sides. Gently tap the stick on the side of the bowl to let any excess chocolate drip off. This prevents a big puddle of chocolate from forming around your snowman’s base (we call that a “skirt,” and while it’s tasty, it’s not the look we’re going for!). Place the dipped pop onto a baking sheet lined with parchment paper.
Step 4: Accessorize Before He Freezes! You have to work relatively quickly here before the chocolate sets. This is where you become an artist!
- Immediately place a mini peanut butter cup on the top of the pop for the hat. Gently press it down so it adheres.
- Press two pretzel stick halves into the sides for the arms.
- Using your melted dark chocolate (a toothpick or a piping bag with a tiny tip is perfect for this), carefully dot on two eyes, a sweet little smile, and a few buttons down the front.
- Finally, add a tiny dot of orange gel or your orange candy for the nose.
Step 5: The Chill Out. Once all your snowmen are dressed to impress, let them set completely. You can leave them at room temperature if your kitchen isn’t too warm, or you can pop the entire tray into the refrigerator for about 15-20 minutes to speed things up. The chocolate will become firm to the touch.
How to Serve Your Frosty Friends
Presentation is part of the fun! You can stick these pops upright in a vase filled with sugar or granulated white chocolate to look like snow, and they make an incredible centerpiece for your holiday table. For a party, simply lay them flat on a beautiful platter lined with parchment paper. If you’re feeling extra, sprinkle a little powdered sugar “snow” over the whole tray right before serving.
And they make the most thoughtful edible gifts! Once they’re completely set, you can wrap each pop individually in clear cellophane treat bags, tie them with a festive ribbon or baker’s twine, and voilà—you have a homemade gift that’s guaranteed to delight friends, neighbors, teachers, or your mail carrier!
Mix It Up! Recipe Variations
One of the best things about this recipe is how customizable it is. Don’t be afraid to get creative and make these snowmen your own!
- Peppermint Sparkle: Roll the edges of the white chocolate-dipped Oreo in finely crushed candy canes or peppermints before it sets. It adds a beautiful sparkle and a classic holiday flavor.
- Coconut Snow Drifts: For a textured, snowy look, roll the pops in shredded coconut immediately after dipping. It gives them a wonderfully fuzzy, frosty appearance.
- The Dapper Snowman: Give your snowman a scarf! Cut thin strips of vegan fruit leather (like a strawberry or apple fruit roll-up) and gently wrap it around the “neck” of the pop before the chocolate fully hardens.
- Gluten-Free Frosty: Use gluten-free Oreos (or another gluten-free sandwich cookie) and ensure your pretzels and other ingredients are certified gluten-free. Easy swap!
- Different Hats: Not a peanut butter fan? Use a vegan chocolate mint, a strawberry cream vegan candy, or even a small round cookie for a different style of hat.
Beau’s Chef Notes & Kitchen Stories
I’ve made these pops more times than I can count, and they’ve evolved a bit over the years. The first batch I ever made… well, let’s just say the snowmen looked like they’d been in a blizzard. The chocolate was too thick, the faces were lopsided, and one pop’s hat fell off right after I took a picture. But you know what? Everyone still devoured them and raved about how fun they were.
The moral of the story is: don’t strive for perfection. Embrace the quirks! A slightly crooked smile gives your snowman personality. If the arms break, he’s just waving. The goal is to have fun and create something delicious. The more you make them, the more you’ll develop your own little tricks and style. Now, I can assemble them with a podcast playing in the background—it’s my happy place.
FAQs & Troubleshooting
Q: My white chocolate is thick and clumpy! What did I do wrong?
A: Ah, the dreaded seized chocolate! This usually means it got a little too hot or a tiny drop of water got into it. To fix it, try adding a teaspoon of coconut oil or vegetable shortening and stir vigorously. If that doesn’t work, sadly, it’s best to start with a new bowl of chocolate. Remember: low and slow when melting!
Q: My Oreo keeps cracking when I put the stick in. Help!
A: No worries! This is common. Try the quick microwave trick—just 3-4 seconds to soften the cream filling makes a world of difference. You can also try using a skewer to poke a pilot hole first before inserting the wider lollipop stick.
Q: Can I make these ahead of time?
A: Absolutely! Once set, these pops store beautifully. Keep them in a single layer in an airtight container in the refrigerator for up to 5 days. They’re also great for freezing! Freeze them solid on the tray first, then transfer to a freezer bag for up to a month. Thaw in the fridge overnight.
Q: I can’t find vegan white chocolate wafers. What can I use?
A: A good bar of vegan white chocolate (like Pascha or Happi) mixed with a teaspoon of coconut oil will work in a pinch. The texture might be a bit softer, so be extra gentle when handling them.

No-Bake Snowman Oreo Pops (Vegan Edition)
Description
No-Bake Snowman Oreo Pops (Vegan Edition)
Adorable, chocolatey, and completely vegan—perfect for holiday gifts, parties, or a festive kitchen activity!
Ingredients
-
4 packs of Oreo cookies (regular or Double-Stuff; naturally vegan)
-
500 g dairy-free white chocolate melting wafers or bars (e.g., King David or CandyMelts)
-
40 g dairy-free dark chocolate, melted (for eyes, buttons, and smiles)
-
12 pretzel sticks, broken in half (for arms)
-
12 vegan mini peanut butter cups (or chocolate mint buttons, small cookies, etc. for hats)
-
Orange food gel or small orange candy (for the nose)
-
12 lollipop sticks or sturdy paper straws
Optional Variations:
-
Peppermint Sparkle: Roll edges in crushed candy canes before chocolate sets
-
Coconut Snow Drifts: Roll pops in shredded coconut for a frosty texture
-
Dapper Snowman: Add a scarf using thin strips of vegan fruit leather
-
Gluten-Free: Use gluten-free Oreos and certified gluten-free pretzels
-
Hat swaps: Chocolate mint, small cookie, or candy as an alternative to PB cups
Instructions
1. Prepare the Oreo Base
-
Carefully insert a lollipop stick halfway into the cream filling of each Oreo.
-
Tip: Microwave the Oreos 3–4 seconds to soften the cream if cracking occurs.
2. Melt the White Chocolate
-
Use a double boiler or microwave in 20-second bursts, stirring frequently.
-
Add 1 tsp coconut oil if using a bar to ensure smooth, dippable chocolate.
-
Avoid overheating; white chocolate seizes easily.
3. Dip the Oreos
-
Hold an Oreo by the stick and dip completely into melted white chocolate.
-
Use a spoon to coat evenly and tap off excess chocolate.
-
Place on a parchment-lined baking sheet.
4. Decorate Your Snowmen
-
Place a mini peanut butter cup on top for a hat.
-
Insert pretzel halves into sides for arms.
-
Use melted dark chocolate (toothpick or piping bag) to draw eyes, smile, and buttons.
-
Add a tiny dot of orange gel or candy for the carrot nose.
5. Set the Chocolate
-
Allow to set at room temperature or chill in the fridge 15–20 minutes until firm.
Notes
-
Thick or clumpy white chocolate: Add a tsp coconut oil and stir; melt slowly at low heat.
-
Oreo cracking when inserting stick: Use microwave trick or make a pilot hole with a skewer first.
-
Make ahead: Store in a single layer, airtight container, in fridge up to 5 days. Freeze on a tray, then transfer to freezer bag for up to 1 month. Thaw overnight in fridge.
-
No vegan white chocolate wafers: Use a vegan white chocolate bar with 1 tsp coconut oil. Handle gently as it may be softer.
Nutrition
- Calories: 200Cal
- Fat: 10 g
- Carbohydrates: 25 g
Quick Nutritional Info
While these are definitely a treat, it’s always good to know what you’re enjoying! The estimated nutritional information per pop (assuming one pop is one decorated Oreo) is approximately:
- Calories: ~200 kcal
- Fat: 10g
- Carbohydrates: 25g
- Protein: 2g
Allergy Info: This recipe is vegan. However, it contains gluten (from Oreos and pretzels) and may contain soy (in the chocolate) and nuts (depending on the peanut butter cups used). Always check your specific ingredient labels to accommodate allergies.
Final Thoughts
Well, friends, that’s it! Your guide to creating the most delightful, no-fuss, vegan holiday treat on the block. I hope this recipe brings as much laughter and joy to your kitchen as it has to mine. Remember, cooking—and especially holiday baking—isn’t about being perfect. It’s about the music playing, the stories shared, and the love stirred into every single bite.
I’d love to see your creations! If you make these snowman pops, tag me on Instagram @feastical or use the hashtag #FeasticalHoliday. Seeing your kitchen adventures absolutely makes my day.
From my kitchen to yours, happy holidays and happy eating!
Beau