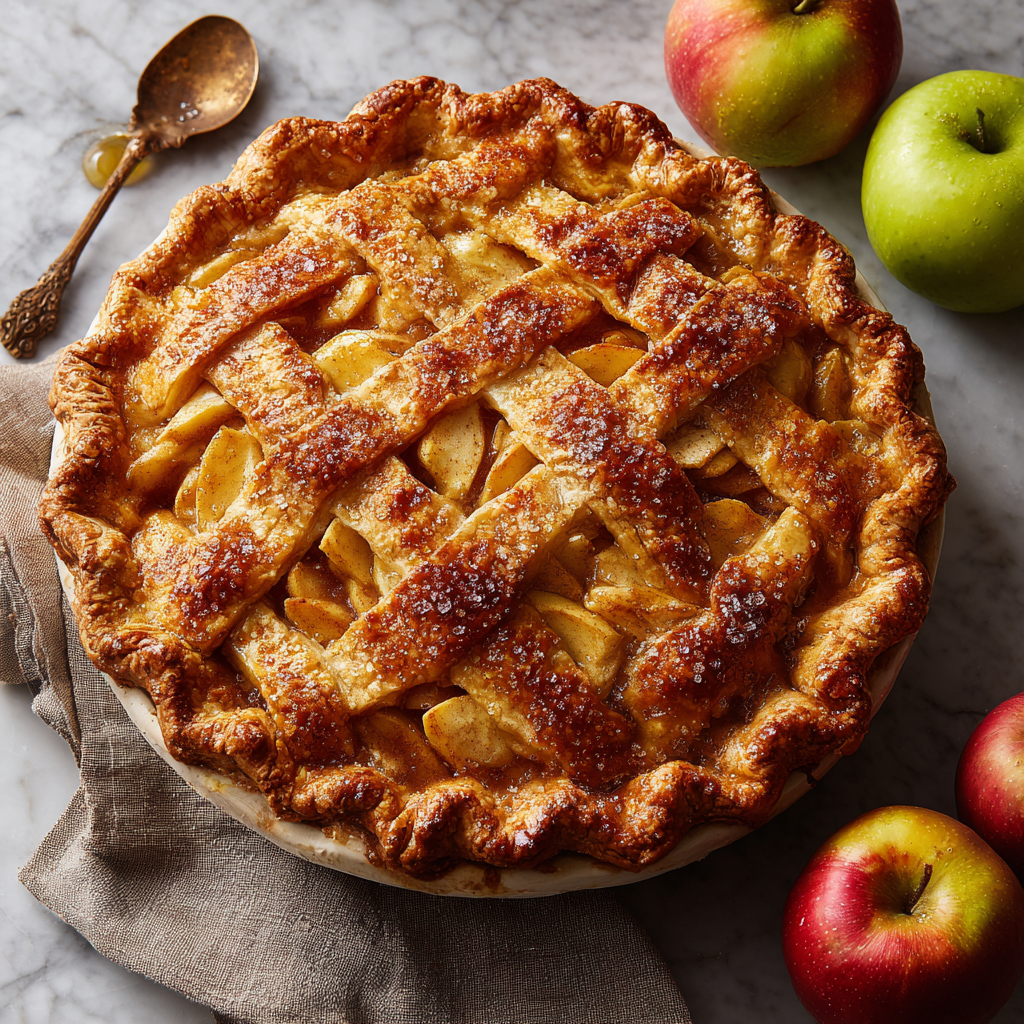
The Ultimate Cinnamon Apple Pie: A Double Dose of Comfort
Hey there, Feastical family! Beau here, coming to you from a kitchen that smells absolutely incredible. If you’ve ever wanted your home to smell like a cozy autumn hug, you’re in the right place. Today, we’re talking about the undisputed champion of comfort desserts: Cinnamon Apple Pie. But not just any pie. We’re going big. This is my legendary double-batch recipe that yields two stunning, golden-brown masterpieces. Why two? Because one is for you to proudly display and devour with your favorite people, and the other is for… well, also for you to devour, or to gift to a neighbor and instantly become the most popular person on your block. This isn’t just a recipe; it’s a feel-good mission. We’re using a symphony of warm spices, a zip of citrus, and the flakiest crust to create something that doesn’t just feed the stomach, but truly feeds the soul. So, tie on your apron, and let’s bake some memories together.
A Slice of Memory: Why This Pie Hits Different
This recipe is baked with a little extra secret ingredient: nostalgia. I can’t smell cinnamon and baking apples without being instantly transported to my grandma’s kitchen. It was a chaotic, flour-dusted haven, and her apple pie was the star of every family gathering. My job, as the eager (and messy) little helper, was to sneak apple slices while she wasn’t looking. She’d always pretend not to notice, but then she’d wink and say, “Beau, a chef’s gotta taste test!” She taught me that the best pies aren’t about perfection; they’re about the love you knead into the crust and the stories you share while waiting for them to bake. That’s the spirit I’ve tried to capture here. This double-crust beauty, with its hint of lemon zest and vanilla, is my homage to her. It’s a recipe built for making your own stories, for filling your home with that same unforgettable, welcoming aroma that says, “You are home, and you are loved.”
Gathering Your Pie-Making Posse: The Ingredients
Here’s the crew we’re working with. Using quality ingredients makes a world of difference, but I’ve also included my best hacks and swaps because I believe in keeping things real and accessible!
For the Pastry Crust:
- 4 (9-inch) pie shells (2 bottoms, 2 tops): Let’s be real, making homemade crust is a beautiful thing, but sometimes life happens. Using a good-quality store-bought crust is my not-so-guilty secret for getting pie on the table with a smile still on my face. If you’re a from-scratch hero, more power to you! Use your favorite butter-based recipe for two double-crust pies.
For the Cinnamon Apple Filling:
- 14 large Granny Smith apples: This might seem like a mountain of apples, but trust me, they cook down. Granny Smiths are my MVP because their tartness and firm structure hold up beautifully against the sugar and heat, preventing a mushy filling. Chef’s Swap: Feel free to mix it up! Try half Granny Smith and half Honeycrisp or Braeburn for a more complex sweetness.
- 1 cup white sugar + 1 cup lightly packed brown sugar: The dynamic duo! White sugar provides clean sweetness, while the brown sugar brings deep molasses notes and that gorgeous, gooey caramel quality to the filling. Light or dark brown sugar works great here.
- 4 tbsp all-purpose flour: This is our thickening agent, crucial for transforming those juicy apple juices into a luscious, sliceable sauce and not a soupy mess.
- 2 tsp ground cinnamon + ¼ tsp ground nutmeg: The heart and soul of the spice profile. Cinnamon is the warm, familiar star, and nutmeg is its best friend, adding a subtle, nutty depth. For next-level flavor, grate your own nutmeg!
- 2 tbsp lemon juice + Zest of 1 lemon: Don’t skip this! The acid in the lemon juice keeps the apples from browning while you prep, and the zest adds a tiny, bright sparkle that cuts through the sweetness and makes all the other flavors pop.
- 1 tsp vanilla extract: The warm, aromatic backbone that ties everything together. Use the real stuff—it matters!
- 2 tbsp cold salted butter, cut into small cubes: Dotting these little cubes over the filling before adding the top crust is a pro move. As it melts, it bastes the apples from within, adding an incredible richness and another layer of flavor.
For Assembly and Topping:
- 2 large eggs, beaten (for egg wash): This is what gives our crust that professional, glossy, deep golden-brown finish. It’s the pie’s equivalent of a perfect highlight!
- 4 tbsp sanding sugar (optional): The finishing touch! This coarse sugar doesn’t melt away completely, giving the top crust an irresistible crunch and a beautiful, sparkling appearance. Regular sugar works in a pinch, but sanding sugar is a game-changer.
Let’s Get Baking: The Step-by-Step Magic
Okay, team! It’s go time. Read through these steps once before you start—it’s like having a friendly chef right there with you, guiding you through every fold and crimp.
- Preheat and Prepare: Crank that oven to 400°F (200°C). Position your racks in the center of the oven to ensure even baking. This initial blast of high heat is crucial for setting the crust and getting that lift we call “oven spring.”
- The Flavor Foundation: In a bowl large enough to host a party for all those apples, toss your sliced apples with the white sugar, brown sugar, flour, cinnamon, nutmeg, lemon juice, lemon zest, and vanilla. Now, here’s the key: let it sit for 10-15 minutes. Don’t just mix and rush! This maceration time allows the sugar to pull juice from the apples, which then dissolves the flour and sugar, creating the base of your filling sauce. You’ll see it get syrupy—that’s exactly what you want!
- Fill ‘Er Up: Divide your amazing, fragrant apple mixture evenly between your two bottom pie crusts. Pile them high—they will shrink down as they bake. Now, take those little cubes of cold butter and dot them evenly over the apples. This is your secret weapon for richness!
- Top It Off: Carefully place your top crusts over the mounds of apples. You can go classic with a full crust (just don’t forget to cut a few decorative slits or a small hole in the center to let steam escape) or get fancy with a lattice weave. Crimp the edges together firmly using your fingers or a fork. A good seal prevents any precious filling from bubbling out during its oven adventure.
- The Glam Squad: Beat those eggs in a small bowl and gently brush a thin, even layer over the entire top crust. This is your adhesive for the next step. Now, generously sprinkle that gorgeous sanding sugar over the egg wash. This isn’t just for looks; it creates a delightful sugary crunch.
- The Bake: Place your pies on a baking sheet (this is a non-negotiable life-saver for catching any bubbling-over juices). Bake at 400°F for 20 minutes. This high heat gets the party started. Then, without opening the door, reduce the heat to 375°F and bake for another 35-40 minutes. The pie is done when the crust is a deep, golden brown and the filling is actively bubbling through the vents or lattice. If the edges of your crust are getting too dark too quickly, tent them loosely with strips of aluminum foil.
- The Ultimate Test of Patience: I know, I know. The smell is intoxicating, and you want to dive in immediately. But you MUST let the pies cool for at least 2 hours, preferably on a wire rack. This isn’t a suggestion—it’s a commandment. This cooling time allows the filling to set properly. If you cut into a hot pie, you’ll have a delicious but soupy mess. Trust me, the wait is absolutely worth it for that perfect, clean slice.
How to Serve Your Masterpiece
Presentation is part of the fun! Let that beautiful, sugar-sparkled crust be the star. Slide your pie onto a beautiful cake stand or a simple wooden board. For serving, use a sharp, thin knife dipped in hot water for the cleanest slices. Now, the age-old question: à la mode or not? For me, it’s always a resounding YES. A generous scoop of high-quality vanilla bean ice cream melting over the warm pie is a match made in heaven. A dollop of freshly whipped cream or even a sharp cheddar cheese slice on the side are also iconic pairings. Serve it with a smile—you’ve earned it!
Make It Your Own: Delicious Twists & Tweaks
Once you’ve mastered the classic, the pie world is your oyster! Here are a few of my favorite ways to play with this recipe:
- Bourbon Caramel Apple Pie: Stir 2-3 tablespoons of good bourbon into the apple filling mixture. Drizzle the bottom of each pie crust with 2 tablespoons of store-bought or homemade caramel sauce before adding the apples.
- Apple Cranberry Pie: Add 1 cup of fresh or frozen cranberries to the apple mixture for a gorgeous, tart burst of flavor and a stunning pop of red color.
- Oatmeal Crumble Top: Skip the top crust! Instead, mix 1 cup rolled oats, 1/2 cup flour, 1/2 cup brown sugar, 1 tsp cinnamon, and 1/2 cup melted butter for a single pie. Crumble this mixture over the filling for a delicious, crunchy alternative.
- Gluten-Free Friendly: Use a 1:1 gluten-free flour blend in place of the all-purpose flour in the filling and, of course, a certified GF pie crust. The result is just as fantastic!
- Spice It Up: Add a pinch of cardamom or a tiny pinch of black pepper to the spice mix for a wonderfully warm and complex undertone.
Beau’s Chef Notes & Kitchen Confessions
This recipe has evolved from many happy (and a few hilarious) kitchen experiments. I once, in a pre-coffee haze, used salt instead of sugar. Let’s just say it was a very… memorable pie. The lemon zest and vanilla are my personal additions to my grandma’s original—they just make the flavors sing a little louder. Don’t stress about a perfectly crimped edge or a magazine-worthy lattice. My best-tasting pies often look the most “rustic” (a fancy word for homemade and full of character). The real goal is the joy of making it and the people you get to share it with. Laugh off the flour on your nose, and remember: even if it’s a little lopsided, it’s made with love, and that’s what makes it perfect.
Your Pie Questions, Answered!
Q: My bottom crust is soggy! What did I do wrong?
A: This is the #1 pie complaint! A few tricks: First, make sure your filling isn’t too wet before it goes in (let it macerate!). Second, you can blind-bake your bottom crust for 10-15 minutes before adding the filling. Just prick it with a fork, line it with parchment paper and pie weights or dried beans, and bake until lightly golden. Third, baking on a preheated baking sheet helps cook the bottom crust faster.
Q: My filling is too runny. How can I thicken it up?
A: This usually means the pie needed more time to cool and set. If it’s still runny after cooling, you might need a bit more thickener next time. Try upping the flour to 5 tbsp for the double batch, or use a tablespoon of cornstarch or tapioca starch in addition to the flour for a super sturdy set.
Q: Can I make this ahead of time?
A: Absolutely! You can assemble the pies completely, then freeze them unbaked for up to 3 months. When you’re ready, bake straight from frozen—just add about 20 extra minutes to the baking time, keeping an eye on the crust. You can also bake them a day ahead; they reheat wonderfully in a 350°F oven for 15-20 minutes.
Q: Why did my filling shrink away from the crust?
A: This is natural! Apples release a lot of moisture and will shrink down as they cook. Piling them high in the crust to begin with accounts for this and helps prevent a giant gap.
Print
Cinnamon Apple Pie Recipe
- Total Time: 1 hr 40–45 mins
Description
Ultimate Cinnamon Apple Pie – Double Batch
Ingredients
For the Crust:
-
4 (9-inch) pie shells (2 bottoms, 2 tops – store-bought or homemade)
For the Cinnamon Apple Filling:
-
14 large Granny Smith apples, peeled, cored, and sliced
-
1 cup white sugar
-
1 cup brown sugar (lightly packed)
-
4 tbsp all-purpose flour (thickener)
-
2 tsp ground cinnamon
-
¼ tsp ground nutmeg
-
2 tbsp lemon juice + zest of 1 lemon
-
1 tsp vanilla extract
-
2 tbsp cold salted butter, cut into small cubes
For Assembly & Topping:
-
2 large eggs, beaten (egg wash)
-
4 tbsp sanding sugar (optional, for sparkle and crunch)
Optional Twists:
-
Bourbon Caramel: 2–3 tbsp bourbon + 2 tbsp caramel under apples
-
Apple Cranberry: Add 1 cup cranberries to filling
-
Oatmeal Crumble Top: Skip top crust; use oat-butter-sugar crumble
-
Gluten-Free: 1:1 GF flour blend in filling + GF pie crust
-
Extra Spice: Pinch of cardamom or black pepper
Instructions
1. Preheat Oven:
-
400°F (200°C), racks in center.
2. Prepare Filling:
-
Toss apple slices with sugars, flour, cinnamon, nutmeg, lemon juice/zest, and vanilla.
-
Let sit 10–15 mins to macerate and draw out juices.
3. Fill Pies:
-
Divide filling between two bottom crusts.
-
Dot with cold butter cubes.
4. Top Crust:
-
Place top crust (full or lattice). Crimp edges firmly.
-
Cut slits for steam escape.
5. Egg Wash & Sugar:
-
Brush tops with beaten egg.
-
Sprinkle sanding sugar generously.
6. Bake:
-
Place pies on a baking sheet.
-
Bake at 400°F for 20 mins.
-
Reduce heat to 375°F, bake 35–40 mins until golden brown and filling bubbles.
-
Tent edges with foil if browning too quickly.
7. Cool:
-
Let pies cool at least 2 hours on wire racks for filling to set.
Notes
-
Soggy bottom crust? Blind-bake or bake on preheated sheet.
-
Runny filling? Ensure proper maceration, cool fully, or add extra flour/cornstarch.
-
Filling shrinkage is normal; pile apples high.
-
Assemble ahead: freeze unbaked for up to 3 months or bake a day before.
- Prep Time: 45 mins
- Cook Time: 55–60 min
Nutrition
- Calories: 390 Calories (approx. per slice)
- Sugar: 36g
- Fat: 16g
- Carbohydrates: 65g
Nutritional Information (Per Slice, 1 of 16 Slices)
Calories: ~390 | Carbohydrates: 65g | Fat: 16g | Sugar: 36g | Fiber: 4g
Please note: This is an estimate based on the ingredients used. Values can vary depending on specific brands and ingredient choices.
Final Thoughts
The Ultimate Cinnamon Apple Pie is so much more than a list of ingredients and a set of instructions. It is a project of love, a lesson in patience, and a gateway to creating lasting memories. It connects us to the past—to grandmas and traditions—while allowing us to put our own spin on a classic, making it uniquely ours. It teaches us the science of pastry and the art of balance, rewarding our effort with a result that is both visually stunning and deeply satisfying to the soul.
Remember that perfection is not the goal. A lopsided crimp, a slightly dark edge, or an apple slice that refused to stay hidden adds character and tells the story of a real person in a real kitchen. Embrace the flour on your nose and the joy of the process. Share it generously, because the true magic of this pie is not just in its consumption, but in its power to connect, comfort, and bring people together. So preheat your oven, gather your apples, and get ready to bake not just a pie, but a whole lot of happiness. Happy baking