
Street Corn Pasta Salad
Street Corn Pasta Salad: A Flavorful Journey Through Taste and Tradition
Introduction
Hey there, fellow food enthusiasts! I’m Beau Collier, and today we’re diving into something absolutely delightful—a dish that will make your taste buds do a little happy dance. Welcome to the world of Street Corn Pasta Salad! This isn’t just any pasta salad; it’s a celebration of flavors and textures that’ll have everyone asking for seconds (and maybe thirds).
Now, let’s set the scene. Imagine this: summer evenings filled with laughter, the smell of grilled corn wafting through the air, and friends gathered around, sharing stories and creating memories. While traditional street corn, or "elote," is a staple found on street corners in Mexico, why not give it a little twist and bring it into the pasta salad family? That’s exactly what we’re doing today! This dish combines the comforting familiarity of pasta with the bold, zesty flavors of street corn, and trust me, your dinner guests will thank you!
I’ve made this salad countless times, and each version has a little piece of nostalgia embedded in it. Each spoonful sparks memories of road trips through vibrant towns and bustling markets, where the spirit of togetherness and community is celebrated through food. So, grab your apron, and let’s create something that’s not just good, but utterly unforgettable!
Personal Story
Back when I was a wee lad, my family and I would frequent the local summer fairs, and one of my fondest memories was devouring ears of corn slathered in butter and sprinkled with cheese and chili powder. I can still hear the rhythmic sound of the corn being grilled, the engaging chatter of vendors, and that wonderful moment when I took that first bite—sweet, smoky, and just the right amount of kick!
Years later, I found myself in a bustling California market, and the idea struck me: why not merge that nostalgic street corn experience with pasta, a dish we all adore? And just like that, my street corn pasta salad was born! This salad carries the essence of summer and celebration, but it’s also a dish anyone can whip up at a moment’s notice. It’s a blend of memories and flavors that warms the heart, just like food should.
Ingredients
Alright, let’s gather our ingredients for this fabulous Street Corn Pasta Salad:
-
400g of Pasta (your choice)
Tip: I love using rotini for its ability to hold onto all that creamy goodness, but you can use whatever pasta shape you fancy! -
2 Roasted Corn Cobs
Pro Tip: You can grill them for that smoky flavor or roast them in the oven. Either way, the sweet taste of corn is a must! -
3 Green Onions
These add a fresh crunch and a mild onion flavor. Feel free to swap them out for red onions if you prefer a bit more color and a bolder flavor. -
1 Shallot
Shallots introduce a subtle sweetness. If you don’t have shallots, a small yellow onion works in a pinch! -
2 Jalapenos
For heat! You can leave the seeds in for extra spice, or remove them for a milder kick. Alternatively, use sweet bell peppers for a non-spicy version. -
1/2 cup Cilantro
Cilantro brings brightness to the salad. If you’re not a fan, parsley makes a great substitute! -
1 cup Cotija Cheese
This crumbly Mexican cheese ties all the flavors together. Quest fresco or feta are fantastic alternatives if you can’t find cotija. -
1 cup Sour Cream
A creamy base that makes everything come together beautifully. Greek yogurt can also work here if you’re looking for a healthier option. -
1/2 cup Mayo
Mayonnaise adds richness. You can substitute it with vegan mayo for a lighter version. -
3 Cloves Garlic
Garlic infuses everything with an aromatic punch. Don’t skimp on this! If raw garlic is too strong for you, roasted garlic offers a sweeter, mellower flavor. -
Juice and Zest of 1 Lime
Brings a zesty brightness to the mix. Extra lemon or orange juice can be a delightful twist if you’re feeling adventurous! -
1 tsp Smoked Paprika
Gives a lovely smoky flavor reminiscent of summer BBQs. Regular paprika works, but you’ll lose that smoky touch! -
1 tsp Chili Powder
A subtle heat and depth is essential. Feel free to adjust this according to your spice tolerance! -
Salt & Pepper to Taste
Basic, yes, but essential! Always taste as you go to perfect the seasoning.
Gathering these ingredients might seem like a list out of a grocery store catalog, but I promise, together they create magic!
Step-by-Step Instructions
Now, let’s dive into the nitty-gritty and whip up this Street Corn Pasta Salad. I’ll walk you through each step, sharing my little insights along the way:
-
Cook the Pasta:
Start by bringing a large pot of salted water to a boil. Add your 400g of pasta and cook according to package instructions until al dente. Stir occasionally to prevent it from sticking together. Chef’s tip: Add a drizzle of olive oil to the water for added flavor and to keep the pasta from sticking once drained! -
Roast the Corn:
While the pasta is cooking, you can roast (or grill) your corn. If you’re roasting, wrap the cobs in foil and place them in a 400°F oven for about 30 minutes, turning halfway if possible. Tip: If you’re in a hurry, canned corn (drained) can work, but the fresh roasted corn adds that delightful smoky flavor! -
Prep the Veggies:
While the corn is roasting, finely chop the green onions, shallot, and jalapenos (seeds removed if you prefer milder heat). Chef hack: Let your green onions float in ice water for a bit before chopping. The cold water can make the greens crisper! -
Mix the Dressing:
In a big mixing bowl, combine 1 cup sour cream, 1/2 cup mayo, lime juice, zest, smoked paprika, chili powder, salt, and pepper. Pro Tip: Use a whisk to thoroughly blend everything—it keeps your dressing from clumping! -
Combine it All:
Once your pasta is cooked and drained (be sure to rinse it under cold water to stop the cooking), add it to the bowl with your dressing. Stir in the chopped veggies, roasted corn (cut the kernels off the cob), cilantro, and cotija cheese. Tip: If the salad seems too thick, add a splash of cold water or extra lime juice until you reach your desired creamy consistency! -
Chill & Serve:
Cover the bowl with plastic wrap or a lid and let it chill in the fridge for at least 30 minutes. This allows the flavors to mingle beautifully. Chef’s secret: It tastes even better the next day as all the flavors deepen and meld together!
Serving Suggestions
When it’s time to dig in, plate your Street Corn Pasta Salad in a large bowl, and sprinkle some extra cotija on top for good measure. I love serving this dish family-style—I simply plop it on the table and let everyone scoop their portions. You can garnish with a few extra sprigs of cilantro and serve with lime wedges on the side for those who want a little extra zing.
Pair it with grilled meats or even serve it as a refreshing side at your next barbecue. This vibrant salad is the perfect addition to any summer spread, and it’s sure to be a hit with everyone around the table!
Recipe Variations
Feel free to get creative with your Street Corn Pasta Salad! Here are some fun twists to consider:
-
Spicy Avocado Twist:
Add diced avocado for creaminess and a different flavor profile. This also makes the salad more filling! -
Black Bean Boost:
Toss in a can of drained black beans for added protein and fiber, making this salad a full meal. -
Herbed Up:
Experiment with different herbs! Dill or mint can bring a refreshing twist to the dish. -
Vegan Delight:
Make this salad vegan by substituting mayo with a vegan version and using cashew cheese instead of cotija. -
Fruit Fusion:
Toss in diced mango or pineapple for a sweet burst that complements the heat of jalapenos beautifully.
Chef’s Notes
Over time, I’ve played around with this recipe quite a bit. From tossing in shredded chicken on particularly hungry days (hey, it still works!) to adding in pickled onions for tang, this dish is versatile! One of my funniest kitchen blunders happened when I confused smoked paprika with cayenne—it turned out to be a fiery challenge for my taste buds but ended up being a big hit for my spice-loving friends!
FAQs and Troubleshooting
1. What if my pasta salad seems too dry?
If your dressing is too thick, simply add a splash of water or more lime juice until you reach the desired creamy consistency.
2. How do I make this dish ahead of time?
This salad is perfect for prepping ahead! You can make it a day in advance—just hold off on adding the avocado (if using) until right before serving to keep it fresh.
3. Can I freeze this pasta salad?
While technically you could freeze it, the texture of the pasta and veggies may change once thawed. It’s best enjoyed fresh!
4. What should I serve with this salad?
It pairs beautifully with grilled chicken, steak, or even fish. It’s also perfect as a standalone dish on a hot summer day!
Nutritional Info
While I generally believe in enjoying food as it is and not obsessing over the details, here’s a rough breakdown of what you’re getting with this Street Corn Pasta Salad (per serving):
- Calories: Approximately 320
- Protein: 10g
- Carbohydrates: 43g
- Fat: 14g
- Dietary Fiber: 3g
- Sugars: 3g
Feel free to adjust ingredients to suit your dietary needs!
Final Thoughts
Creating meals that not only satiate but also bring joy, connection, and a sprinkling of nostalgia is the heart of what I do. This Street Corn Pasta Salad encapsulates all that and more. It’s more than just a dish; it’s a reminder to slow down, gather around the table with loved ones, and savor each flavorful bite.
So the next time you’re in a cooking rut, remember this vibrant salad! It’s sure to brighten up your meal and bring back those warm summer vibes. Don’t forget to share your culinary triumphs with me and fellow foodies here at Feastical. Let’s keep the flavor love alive until we meet again! Happy cooking!
Print
Street Corn Pasta Salad
- Total Time: 45 minutes
- Yield: 4 servings 1x
- Diet: Vegetarian
Description
A vibrant pasta salad that combines the comforting familiarity of pasta with the bold, zesty flavors of traditional street corn.
Ingredients
- 400g Pasta (your choice, preferably rotini)
- 2 Roasted Corn Cobs
- 3 Green Onions
- 1 Shallot
- 2 Jalapenos
- 1/2 cup Cilantro
- 1 cup Cotija Cheese
- 1 cup Sour Cream
- 1/2 cup Mayo
- 3 Cloves Garlic
- Juice and Zest of 1 Lime
- 1 tsp Smoked Paprika
- 1 tsp Chili Powder
- Salt & Pepper to Taste
Instructions
- Cook the Pasta: Bring a large pot of salted water to a boil. Add pasta and cook according to package instructions until al dente.
- Roast the Corn: Roast the corn in foil at 400°F for 30 minutes, turning halfway. Grilled corn adds a smoky flavor.
- Prep the Veggies: Finely chop green onions, shallot, and jalapenos.
- Mix the Dressing: Combine sour cream, mayo, lime juice, zest, smoked paprika, chili powder, salt, and pepper in a mixing bowl.
- Combine it All: Add cooked pasta to the dressing, then stir in veggies, roasted corn, cilantro, and cotija cheese.
- Chill & Serve: Let it chill in the fridge for at least 30 minutes before serving.
Notes
Serve with extra cotija cheese and lime wedges. This salad tastes even better the next day!
- Prep Time: 15 minutes
- Cook Time: 30 minutes
- Category: Salad
- Method: Roasting
- Cuisine: Mexican
Nutrition
- Serving Size: 1 serving
- Calories: 320
- Sugar: 3g
- Sodium: 300mg
- Fat: 14g
- Saturated Fat: 4g
- Unsaturated Fat: 8g
- Trans Fat: 0g
- Carbohydrates: 43g
- Fiber: 3g
- Protein: 10g
- Cholesterol: 20mg
Keywords: pasta salad, street corn, summer salad, vegetarian recipes

Cucumber Pasta Salad
Cucumber Pasta Salad: A Refreshing Twist for Every Occasion
Hey there, foodie friends! It’s Beau Collier here, and today we’re diving into a delightfully refreshing dish that’s perfect for any gathering, picnic, or just a cozy night in. Let’s talk about Cucumber Pasta Salad—a dish that is as vibrant as it is versatile. Picture this: a medley of colorful ingredients tossed together in a light dressing, each bite bursting with flavor and crunch. Whether it’s a sunny barbecue or just a quick lunch, this salad is a total crowd-pleaser. And trust me, you’re going to want it in your recipe arsenal!
A Taste of Nostalgia
Let me take you back in time for a moment. I remember the summer picnics at my grandma’s house, where her backyard transformed into a culinary wonderland. The warm sun kissed our cheeks as we gathered around the picnic table, filled with an array of homemade dishes. Among them was her famous cucumber salad, which inspired my own version of Cucumber Pasta Salad.
Grandma used to say, “When in doubt, add cucumbers!” And boy, she was right. The cool crunch of cucumbers was always refreshing on a hot summer day, and the addition of pasta just took it to a whole new level. This salad combines nostalgia with a modern twist, making it the perfect dish for today’s feasts. So, let’s channel that summer spirit and whip up a batch of this delicious Cucumber Pasta Salad together!
Ingredients
Here’s what you’ll need to make this vibrant Cucumber Pasta Salad:
-
8 ounces pasta (e.g., bowtie or rotini)
Pasta is our base! Choose a shape that you love. Bowtie adds a playful touch, while rotini captures the dressing beautifully. Feel free to swap for whole wheat or gluten-free pasta if you prefer an alternative. -
1 large cucumber, diced
Crunchy and refreshing, cucumbers are the stars in this dish! English cucumbers without seeds work wonderfully, but any variety will do. If you’re feeling adventurous, try marinated or pickled cucumbers for a zingy twist. -
1 cup cherry tomatoes, halved
Juicy and full of flavor, cherry tomatoes make this salad burst with color. Substitute with grape tomatoes or even some diced heirlooms for variety. -
1/2 red onion, finely chopped
Red onions bring a bit of sharpness and sweetness. If they’re too strong for your taste, soak them in cold water for 10 minutes to mellow the flavor. -
1/4 cup fresh parsley, chopped
Parsley adds a bright, fresh touch! Swap it out for dill or basil if you prefer those flavors instead—both will elevate this dish beautifully. -
1/4 cup olive oil
A rich, flavorful olive oil ties this dish together, adding depth. You can replace it with avocado oil or even a flavored oil, like garlic-infused. -
2 tablespoons vinegar (e.g., red wine or apple cider)
The acid in vinegar balances out the ingredients and adds brightness. Play with flavored vinegars for an extra kick—like balsamic or white wine vinegar. -
Salt and pepper to taste
Seasoning is key! Remember, you can always add more, but it’s tough to take it out once it’s in. Start small and adjust as needed.
Step-by-Step Instructions
Alright, friends, let’s get cooking! Follow these simple steps and you’ll have a scrumptious Cucumber Pasta Salad ready before you know it.
-
Cook the Pasta
Bring a large pot of salted water to a boil. Add in your chosen pasta and cook according to package instructions until al dente. Remember, we want a little bite to our pasta for the perfect texture. Once cooked, drain and rinse under cold water to stop the cooking process. Chef’s tip: Adding a drizzle of olive oil while the pasta cools will prevent sticking! -
Prepare the Veggies
While the pasta cools, grab your cutting board and prep the veggies. Dice the cucumber into bite-sized cubes, halve the cherry tomatoes, and finely chop the red onion and parsley. The sharper your knife, the easier this is—plus, you’ll feel like a pro in the kitchen! -
Mix the Dressing
In a small bowl, whisk together the olive oil and vinegar along with salt and pepper to taste. This vinaigrette is what this salad dreams of! Pro tip: Experiment with adding a touch of honey or mustard for a flavor kick. -
Combine Ingredients
In a large mixing bowl, combine the cooled pasta, diced cucumber, halved cherry tomatoes, chopped red onion, and parsley. Drizzle the dressing over the top. Now comes the fun part! Toss gently until everything is well combined. You want to ensure each piece is coated in that delicious dressing without breaking the pasta. -
Chill and Serve
For best results, let the salad chill in the refrigerator for at least 30 minutes, allowing the flavors to meld together beautifully. When you’re ready to serve, give it another quick toss, adjust any seasoning as needed, and offer it up in a large beautiful serving bowl. Tip: Garnishing with extra parsley or a sprinkle of feta cheese (for a salty touch) adds a lovely presentation!
Serving Suggestions
This vibrant Cucumber Pasta Salad is not just a dish; it’s a centerpiece! Here are some ideas on how to serve it beautifully:
-
Picnic Perfection: Scoop the salad into individual mason jars for a fun, portable serving option! Layer the ingredients for a visual treat and easy grab-and-go treats.
-
Plate it up: Serve family style in a large, colorful serving bowl at your next gathering. Add a few sprigs of parsley on top for that added freshness.
-
On the Side: Complement grilled chicken, shrimp, or steak with a generous serving of this salad; it balances rich flavors perfectly!
Recipe Variations
Ready to put a spin on this Cucumber Pasta Salad? Here are a few creative twists you can try:
-
Mediterranean Style: Add olives, feta cheese, and a sprinkle of oregano for a taste of the Mediterranean.
-
Creamy Dreamy: Swap out the vinaigrette for a creamy dressing like Greek yogurt ranch or tzatziki for a refreshing, cool twist!
-
Asian Fusion: Use sesame oil and rice vinegar in place of olive oil and red wine vinegar. Toss in chopped bell peppers and shredded carrots for additional crunch.
-
Protein Boost: Add chickpeas or diced grilled chicken for a heartier salad, making it perfect for a main dish!
-
Zesty Lime: Substitute the vinegar with lime juice and add diced avocado and cilantro for a fresh twist reminiscent of summer!
Chef’s Notes
As with any recipe, I’ve had my fair share of ups and downs while creating this Cucumber Pasta Salad over the years. I remember once using store-bought dressing in a pinch, and let’s just say it wasn’t the same experience! This recipe has evolved, and each time I make it, I discover new possibilities. The best part is that every family has its distinct flavor preferences, so don’t hesitate to make this salad truly yours!
Over time, I’ve learned that it’s all about balance—find the right ratio of pasta to veggies, and the dressing that suits your taste buds. The beauty of this dish is in its flexibility and ability to showcase the fresh ingredients at their best.
FAQs and Troubleshooting
1. What can I do if my pasta turns sticky?
If you didn’t drizzle olive oil over the pasta while it cooled, it might clump together. Simply rinse it again under cool water before tossing it into the salad.
2. Can I make this salad ahead of time?
Absolutely! In fact, the flavors get better as they marinate. Just hold off adding fresh herbs until right before serving to keep them vibrant.
3. What if I don’t have vinegar?
No worries! You can substitute it with fresh lemon juice or any citrus juice you have on hand. It’ll add a lovely bright flavor!
4. How can I serve this for a crowd?
Double the recipe and serve it in a large bowl with tongs. It’s an easy dish for guests to help themselves and enjoy!
Nutritional Info
This Cucumber Pasta Salad is not only delicious but also offers great nutritional benefits! Here’s a quick breakdown per serving (based on roughly 6 servings):
- Calories: ~200
- Protein: 6g
- Carbohydrates: 30g
- Fiber: 3g
- Sugars: 2g
- Fat: 8g
Packed with fiber, vitamins, and healthy fats, this salad can be part of a balanced meal. Plus, the fresh veggies offer extra nutrients to keep your body happy!
Final Thoughts
So there you have it, my lovely food enthusiasts! Cucumber Pasta Salad is not just a dish; it’s a celebration of flavors, memories, and creativity in the kitchen. Whether you’re sharing it at a cookout or enjoying it on your own, every bite is a joyful connection to the delicious world of food.
I encourage you to embrace the flexibility of this recipe and make it your own. Add your favorite ingredients, experiment with seasonings, and make it a tradition in your home. Cooking is all about love, and every meal is a chance to express that love. So the next time you need a crowd-pleaser or just want something comforting and fresh, remember: your Cucumber Pasta Salad is just a whisk away!
Grab your fork, share a plate, and let the good times roll! Happy cooking, and I can’t wait to hear all about your delightful creations!
Print
Cucumber Pasta Salad
- Total Time: 45 minutes
- Yield: 6 servings 1x
- Diet: Vegetarian
Description
A refreshing and vibrant Cucumber Pasta Salad, perfect for gatherings or a cozy night in, with a delightful blend of crunchy cucumbers and pasta.
Ingredients
- 8 ounces pasta (e.g., bowtie or rotini)
- 1 large cucumber, diced
- 1 cup cherry tomatoes, halved
- 1/2 red onion, finely chopped
- 1/4 cup fresh parsley, chopped
- 1/4 cup olive oil
- 2 tablespoons vinegar (e.g., red wine or apple cider)
- Salt and pepper to taste
Instructions
- Cook the Pasta: Bring a large pot of salted water to a boil. Add in your chosen pasta and cook according to package instructions until al dente. Once cooked, drain and rinse under cold water to stop the cooking process.
- Prepare the Veggies: While the pasta cools, dice the cucumber into bite-sized cubes, halve the cherry tomatoes, and finely chop the red onion and parsley.
- Mix the Dressing: In a small bowl, whisk together the olive oil and vinegar along with salt and pepper to taste.
- Combine Ingredients: In a large mixing bowl, combine the cooled pasta, diced cucumber, halved cherry tomatoes, chopped red onion, and parsley. Drizzle the dressing over the top, and toss gently until well combined.
- Chill and Serve: Let the salad chill in the refrigerator for at least 30 minutes before serving. Adjust any seasoning as needed and serve in a large bowl.
Notes
Garnishing with extra parsley or a sprinkle of feta cheese adds a lovely presentation. This salad is versatile, allowing your creativity with different ingredients.
- Prep Time: 15 minutes
- Cook Time: 10 minutes
- Category: Side Dish
- Method: Mixing
- Cuisine: Mediterranean
Nutrition
- Serving Size: 1 serving
- Calories: 200
- Sugar: 2g
- Sodium: 200mg
- Fat: 8g
- Saturated Fat: 1g
- Unsaturated Fat: 7g
- Trans Fat: 0g
- Carbohydrates: 30g
- Fiber: 3g
- Protein: 6g
- Cholesterol: 0mg
Keywords: Cucumber Pasta Salad, refreshing salad, summer salad, picnic recipe

Bibimbap
The Ultimate Bibimbap: A Comfort Food Journey from My Kitchen to Yours
Hey there fellow food lovers! It’s Beau Collier here, and let me tell you, I am bubbling over with excitement to share one of my absolute favorite dishes with you today: Bibimbap! If you haven’t had the pleasure of indulging in a bowl of this spectacular Korean delight yet, you’re in for a treat.
Bibimbap, pronounced “bee-beem-bop,” translates to “mixed rice,” and it’s an explosion of color, flavor, and comfort all in one bowl. Imagine fluffy rice topped with marinated beef, a rainbow of sautéed vegetables, and a beautifully fried egg, all drizzled with spicy gochujang sauce and fragrant sesame oil. It’s as much a feast for the eyes as it is for the stomach.
But Bibimbap is not just about feeding your hunger; it’s about feeding your soul. Anytime I prepare this dish, it takes me back to my childhood memories of cooking with my family. The vibrant colors of the vegetables remind me of my mom’s garden, the sizzling sound of the beef cooks me up like a warm hug, and the spicy gochujang brings a little kick of fun that dances on your taste buds.
In this joyful journey, I’ll guide you through every step of preparing a traditional Bibimbap while sprinkling in my personal stories, useful tips, and plenty of chef hacks along the way. Whether you’re new to cooking or a seasoned pro, this recipe is guaranteed to bring warmth and connection to your kitchen. So tie on your apron, and let’s cook up some happiness!
Personal Story
As I reminisce about my childhood, one unforgettable memory comes to mind. Picture this: me, a scrappy little chef in training, standing on a stool beside my mom, who was each morning whipping up her famous Bibimbap for our family. The way she meticulously arranged the vegetables like an artist painting on a canvas always fascinated me. Each ingredient represented a vibrant part of her love for us; the tenderness of the marinated beef, the earthy crunch of fresh vegetables, and of course, that glorious golden egg on top.
One vivid Saturday morning stands out. My mom decided to let me take the lead, insisting I could make the Bibimbap on my own. I’ll never forget the gleaming wok sizzling away as I excitedly tossed the vegetables and danced around the kitchen humming to my favorite tunes. When we finally sat down to eat, our family of five was gathered around the dinner table, sharing laughs and stories while devouring my creation. The joy of serving my family a meal filled with love and laughter ignited a flame in me that still burns today.
That meal was not just food; it was connection. Bibimbap has since become my go-to dish for gatherings, impromptu dinners, or simply to indulge in myself when I need a little pick-me-up. Now, let’s create this beloved dish together in your kitchen, so you can experience that same warmth and happiness!
Ingredients
Before we begin, let’s gather everything we need to make a soul-satisfying bowl of Bibimbap:
-
2 cups cooked rice
- Tip: Use short-grain rice for the best texture. Brown rice is a healthier alternative, though it takes longer to cook.
-
1 cup marinated beef (bulgogi)
- Substitute: For a quick swap, use marinated tofu or tempeh for a plant-based version that packs a punch!
-
1 cup assorted seasoned vegetables
- Suggestions: Think spinach, carrots, bean sprouts, zucchini, or any colorful veggies you have on hand. Be creative and use what you love!
-
2 fried eggs
- Insight: A runny yolk adds creaminess to the dish, but you can scramble the eggs if you prefer.
-
2 tablespoons gochujang (Korean chili paste)
- Substitute: If you can’t find gochujang, mix together miso paste with sriracha for a spicy and savory alternative.
-
1 tablespoon sesame oil
- Tip: Toasted sesame oil has a deeper flavor, so try using it for an extra punch.
-
Sesame seeds for garnish
- Cooking Hack: Lightly toasting the sesame seeds enhances their nutty flavor!
-
Green onions for garnish
- Substitution: Chopped chives work as a great alternative if green onions aren’t available.
Step-by-Step Instructions
Alright, my culinary comrades, let’s roll up our sleeves and get cooking! Follow these steps and let the kitchen magic unfold.
-
Cooking the Rice:
- Begin by cooking your rice. If using a rice cooker, simply add the rinsed rice and water according to the instructions. If stovetop is your thing, combine 1 cup of rice with 1.5 cups of water. Bring it to a boil, lower the heat, cover, and let it simmer for 18-20 minutes. Once done, fluff it with a fork and set aside.
-
Marinade the Beef:
- If you’re using bulgogi, the marinating part should already be done! If not, toss your sliced beef in a mixture of soy sauce, sugar, sesame oil, and minced garlic and let it absorb those yummy flavors for at least 30 minutes.
-
Sauté the Vegetables:
- In a large skillet or wok, heat some vegetable oil over medium-high heat. Start with the sturdier veggies like carrots and zucchini, sauté them for about 3-4 minutes until they start softening.
- Next, toss in the spinach and bean sprouts, cooking just until they’re tender and vibrant. Add a pinch of salt to taste, and don’t forget to stir those beauties!
-
Cook the Beef:
- Push the veggies to the side and add the marinated beef to the skillet. Sizzle until it’s browned and cooked through, about 5-6 minutes. This step is crucial because the beef will blend its flavor into the vegetables.
-
Fry the Eggs:
- In a separate non-stick pan, heat a bit of oil and crack in your eggs. Cook them sunny-side up or to your preference, ensuring the yolks remain runny for that creamy element in the bowl.
-
Assemble the Bibimbap:
- In individual bowls, start with a generous serving of rice. Artfully arrange the sautéed vegetables and marinated beef on top. Crown each bowl with a fried egg, and drizzle over your gochujang and sesame oil. Finish off with a sprinkle of sesame seeds and chopped green onions.
-
Mix it Up:
- At the table, dig in and stir everything to combine the colors, flavors, and textures into a delightful masterpiece. This is where the magic happens—every bite is a celebration!
Serving Suggestions
Bibimbap is as beautiful as it is delicious, so take some time to plate it nicely. Layer your rice at the bottom, then make an attractive pattern with the veggies and beef on top. Top it off with the egg, then garnish with a sprinkle of sesame seeds and green onions. The vibrant colors will make your dish pop, inviting everyone to come and share in the experience!
Serve your Bibimbap with small bowls of extra gochujang on the side so everyone can tailor the spice level to their liking. It’s a meal that encourages sharing, mixing, and mingling—just like good food should!
Recipe Variations
Getting a little creative is the best part of cooking! Here are some variations to consider for your Bibimbap:
-
Vegetarian Delight: Swap out the beef for marinated tofu. The soy and sesame flavors complement everything beautifully.
-
Seafood Twist: Try adding shrimp or even octopus for a delightful ocean-inspired twist on the classic.
-
Kimchi Kick: Love that fermented tang? Add some chopped kimchi alongside your veggies for an extra layer of flavor and spice!
-
Noodle Base: For a carb twist, use noodles instead of rice. It gives an entire new dimension and texture to the dish!
-
Spicy Gochujang Alternative: If you’re not a fan of spicy, take down the gochujang by using a milder chili paste or even miso.
Chef’s Notes
As my Bibimbap journey continued over the years, its beauty transformed. From elaborate family gatherings, it has now morphed into something I whip up on a quiet Wednesday night—often with whatever veggies I have left in the fridge! What started as a recipe passed down through generations has become a canvas for creativity and love in my kitchen.
I’ve even had a few cooking fails along the way—missing sesame a few times or accidentally setting the stove to high and realizing I was creating a crispy rice disaster! But you know what? Those moments are just as precious as those glorious successes.
FAQs and Troubleshooting
Q: My rice turned out mushy, how can I fix this?
A: Be sure to measure your water correctly next time! Mushy rice often comes from too much water or overcooking. Try using slightly less water than usual and watch the cooking time.
Q: How can I make my beef more flavorful?
A: Allow the beef to marinate longer! Overnight is ideal, but a minimum of one hour can do wonders for flavor absorption.
Q: What if I don’t have gochujang?
A: No worries! You can make a quick fix with chili powder, sugar, and soy sauce, or substitute it with sriracha for some heat.
Q: Can I use frozen vegetables?
A: Absolutely! Just be sure to thaw and drain any excess water before sautéing. Fresh is great, but frozen will save you time too!
Nutritional Info
As a hearty dish packed with good-for-you ingredients, Bibimbap can fit well into various diets. At a glance, here’s what a serving generally offers:
- Calories: 500 – 700 (depending on beef and rice choice)
- Protein: Approximately 28g from the beef and egg
- Fat: Healthy fats from sesame oil and egg
- Carbohydrates: 60g from rice and veggies, which provide fiber and necessary nutrients
- Vitamins & Minerals: A colorful array of veggies will ensure you get vitamins A, C, and iron.
(Nutritional values will vary based on ingredients and portion sizes.)
Final Thoughts
There you have it, my cozy and colorful guide to making Bibimbap! From the nostalgic childhood memories to the creative spins you can put on this bright bowl of goodness, my hope is that you find joy in cooking and sharing this meal with friends and family.
This dish is truly a canvas for your culinary artistry—mix, match, and have fun! Whether you’re taking a step back into your own kitchen memories or creating new ones, Bibimbap has the magical ability to bring people together, celebrate cultures, and warm hearts.
So, grab your ingredients, gather your loved ones, and get ready to dive into a bowl of bliss. Happy cooking, and remember—food is all about love, laughter, and those beautiful moments we create around the table.
Now, let’s feast! 🍽️
Print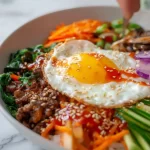
The Ultimate Bibimbap
- Total Time: 50 minutes
- Yield: 4 servings 1x
- Diet: Vegetarian (if using tofu)
Description
A vibrant and comforting Korean dish featuring fluffy rice topped with marinated beef, assorted vegetables, and a fried egg, all drizzled with gochujang sauce.
Ingredients
- 2 cups cooked rice
- 1 cup marinated beef (bulgogi) or marinated tofu
- 1 cup assorted seasoned vegetables (spinach, carrots, bean sprouts, zucchini)
- 2 fried eggs
- 2 tablespoons gochujang
- 1 tablespoon sesame oil
- Sesame seeds for garnish
- Green onions for garnish
Instructions
- Begin by cooking your rice. If using a rice cooker, simply add the rinsed rice and water according to the instructions. If stovetop is your thing, combine 1 cup of rice with 1.5 cups of water, bring it to a boil, lower the heat, cover, and let it simmer for 18-20 minutes. Once done, fluff it with a fork and set aside.
- If you’re using bulgogi, the marinating part should already be done! If not, toss your sliced beef in a mixture of soy sauce, sugar, sesame oil, and minced garlic and let it absorb those yummy flavors for at least 30 minutes.
- In a large skillet or wok, heat some vegetable oil over medium-high heat. Start with the sturdier veggies like carrots and zucchini, sauté for about 3-4 minutes until they start softening. Next, toss in the spinach and bean sprouts, cooking just until they’re tender and vibrant. Add a pinch of salt to taste.
- Push the veggies to the side and add the marinated beef to the skillet. Sizzle until it’s browned and cooked through, about 5-6 minutes.
- In a separate non-stick pan, heat a bit of oil and crack in your eggs. Cook them sunny-side up or to your preference.
- In individual bowls, start with a generous serving of rice. Artfully arrange the sautéed vegetables and marinated beef on top. Crown each bowl with a fried egg, drizzle over your gochujang and sesame oil, and finish with sesame seeds and green onions.
- At the table, dig in and stir everything to combine into a delightful masterpiece.
Notes
Use short-grain rice for the best texture. Feel free to customize with your favorite vegetables or proteins.
- Prep Time: 30 minutes
- Cook Time: 20 minutes
- Category: Main Course
- Method: Stovetop
- Cuisine: Korean
Nutrition
- Serving Size: 1 bowl
- Calories: 600
- Sugar: 5g
- Sodium: 900mg
- Fat: 25g
- Saturated Fat: 4g
- Unsaturated Fat: 21g
- Trans Fat: 0g
- Carbohydrates: 75g
- Fiber: 4g
- Protein: 30g
- Cholesterol: 185mg
Keywords: bibimbap, korean dish, comfort food, easy recipe, mixed rice