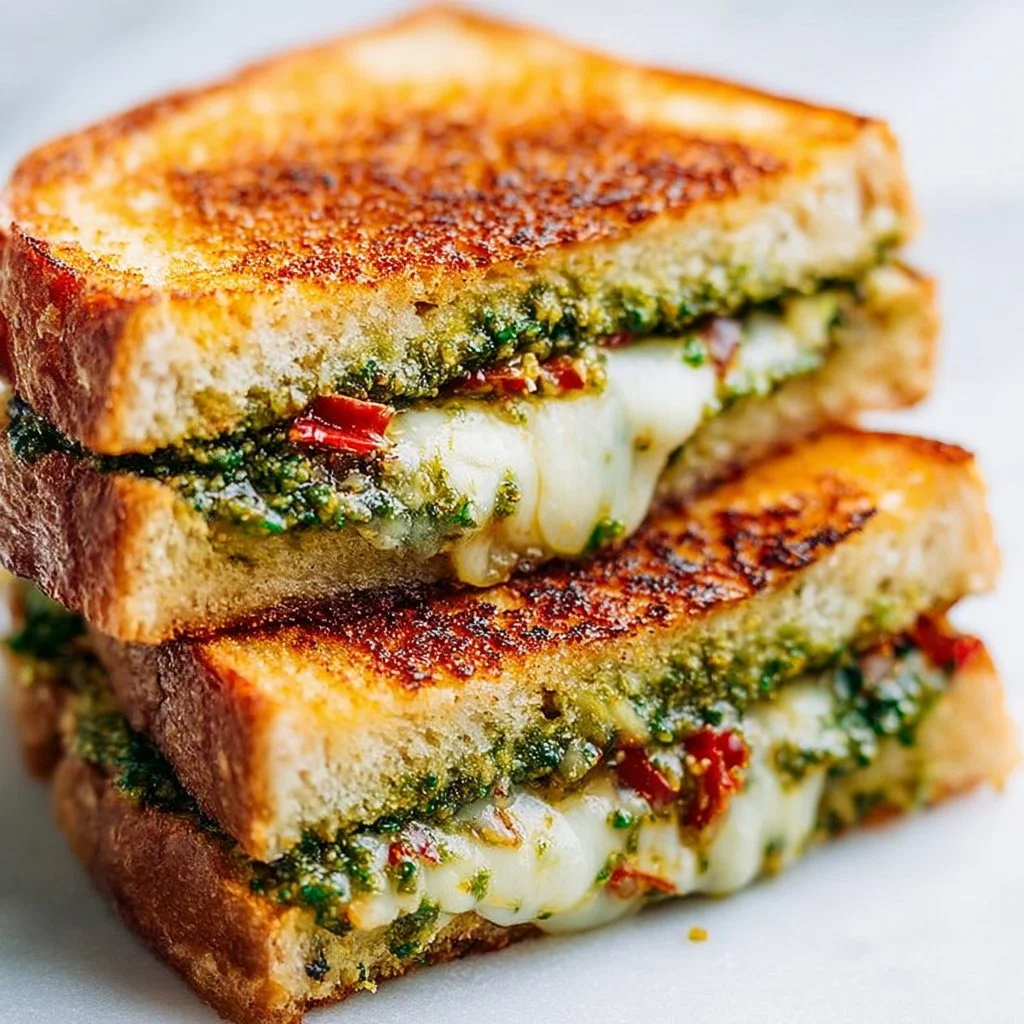
Pesto Grilled Cheese
Pesto Grilled Cheese: A Delectable Delight
Hey there, food lovers! If there’s one thing we can all agree on, it’s that comfort food comes in all shapes, sizes, and flavors. Today, we’re leveling up a classic favorite: grilled cheese. But wait—this isn’t just any grilled cheese. Say hello to Pesto Grilled Cheese, where the classic simplicity of melted cheese and crispy bread meets the delightful, herbaceous punch of homemade (or store-bought) pesto.
Imagine biting into that crispy golden-brown exterior, only to unveil the melty, cheesy goodness inside, infused with the rich flavors of basil, garlic, and parmesan. This dish is like a hug from an old friend and, trust me, it’s the perfect way to satisfy your cravings without fussing over complicated steps or ingredients. Whether you’re making it for a fancy brunch, an easy lunch, or a quick dinner, Pesto Grilled Cheese never fails to impress.
Now, why did I choose to share this particular recipe today? Well, my love for grilled cheese runs deep— it’s the ultimate nostalgic comfort food that never goes out of style. I remember those rainy afternoons spent huddled in front of the TV, dipping my cheesy creation into a warm bowl of tomato soup. I knew I had to capture that same magic but with a twist. So, grab your favorite mug, because we’re about to embark on a culinary adventure that will make your taste buds dance.
So, let’s roll up our sleeves and dive into the delicious world of Pesto Grilled Cheese!
Personal Story
Back in college, my go-to “fancy” dish was grilled cheese. In those wonderfully chaotic days, I didn’t always have the budget for lavish dinners, but somehow, I still craved flavor and comfort. One rainy afternoon, I found myself daydreaming about my mom’s homemade basil pesto, which was the highlight of every summer meal. I rummaged through my fridge and stumbled upon a jar of store-bought pesto, some cheese, and bread that was about to go stale. The gears in my head started turning: "What if I spread some pesto on the bread instead of just butter?"
I toasted that sandwich to perfection, and the moment I took that first blissful bite, I was transported to my mom’s kitchen, surrounded by the scents of summer and sunshine. It was magic in the making, and from that day on, Pesto Grilled Cheese became my version of fast food. I introduced it to friends, added it to brunch menus, and turned it into a beloved crowd-pleaser at potlucks.
That simple culinary experiment showed me that you don’t need a lot to make something delicious—you just need some creativity and the willingness to experiment. And what better way to honor my culinary journey than by sharing this delightful Pesto Grilled Cheese recipe with you?
Ingredients
Here’s a straightforward list of what you’ll need to craft this splendid Pesto Grilled Cheese, along with some chef insights to help you along the way:
-
2 slices of bread
You can use practically any type of bread—sourdough, whole grain, or even gluten-free! Just make sure it’s sturdy enough to hold all that goodness. For a crunchy exterior, try a thick cut! -
2 tablespoons pesto
This can be homemade or store-bought. If you’re feeling adventurous, why not whip up a quick homemade version? Just blend fresh basil, garlic, pine nuts, parmesan, and olive oil until smooth! Feeling nut-free? Use sunflower seeds or omit them altogether. -
2 slices of cheese (mozzarella or cheddar work beautifully)
Cheddar adds a nice sharpness, while mozzarella gives that gooey, stretchy effect. You can also mix and match cheeses—throw in some pepper jack for heat or gouda for richness! -
1 tablespoon butter
Use unsalted butter for better control over saltiness, or swap it with olive oil or vegan butter for a plant-based twist. Just remember to brown it slightly for extra flavor.
Now that you’ve gathered all your ingredients, let’s get cooking!
Step-by-Step Instructions
-
Prep Your Ingredients
Gather all your delicious goodies beforehand. This ensures everything’s within reach and makes assembling your sandwich a breeze! Lay out your bread slices, butter, and pesto so you’re all set to go. -
Butter Those Slices
Generously spread the butter on one side of each slice of bread. This will give your grilled cheese that beautiful golden crust we all know and love. If you’re feeling fancy, consider adding a sprinkle of garlic powder or Italian seasoning to the butter for extra flavor. -
Spread the Pesto
Flip the bread slices over (buttered side down) and spread about 2 tablespoons of pesto on one of the slices. Don’t skimp on it; this is where the magic happens! If you’ve made a homemade pesto, you might want to taste it to see if it needs a pinch of salt or a squeeze of lemon. -
Add the Cheese
Layer your cheese slices right on top of the pesto. Remember, the more cheese, the merrier! If you’re mixing cheeses, now is the time to get creative. I usually go for mozzarella for its meltiness and a slice of sharp cheddar for that extra oomph! -
Top It Off
Place the second slice of bread on top, making sure the buttered side is facing out. Gently press down to help the sandwich stick together. -
Heat the Pan
Get a skillet or griddle on medium heat. If you want to make sure it’s the perfect temperature, you can sprinkle a drop of water onto the pan; if it sizzles, you’re good to go! -
Grill to Perfection
Carefully place your sandwich in the skillet. Cook for about 3-4 minutes, or until the bottom is perfectly golden brown. Flip it over and let the other side grill for another 3-4 minutes. If you notice it’s browning too quickly, simply reduce the heat a little. Be patient, and let that cheese melt! -
Check the Cheese
After about 7-8 minutes total cooking time, your sandwich should be gloriously golden brown, and the cheese should be beautifully melted. Use a spatula to gently press down on the sandwich to encourage more melting if needed. -
Slice and Serve
Once out of the skillet, let the sandwich rest for a minute before slicing it in half. This helps prevent the cheese from oozing out all over the place. If you can resist, let it cool for just a moment—it’s worth it!
Serving Suggestions
When it comes to serving your Pesto Grilled Cheese, the world is your oyster! You could pair it with a bowl of classic tomato soup for that nostalgic touch. Simply bite, dip, and enjoy as the flavors mingle beautifully. To elevate your presentation, try cutting the sandwich diagonally and serve it on a rustic wooden board with a side of soup in a cute little cup.
You might also consider topping it with some fresh arugula or a sprinkle of grated parmesan for a gourmet touch. A drizzle of balsamic glaze can add a delightful tang that complements the pesto’s herbaceousness nicely. And let’s not forget about some crunchy pickle spears on the side for that classic deli vibe!
Recipe Variations
The beauty of Pesto Grilled Cheese is that it’s incredibly versatile! Here are a few creative twists to keep your taste buds excited:
-
Caprese Style: Add fresh slices of tomato and basil leaves between the cheese layers for a fresh Caprese-inspired twist.
-
Spicy Kick: Mix in jalapeño slices or a smear of sriracha into the pesto for a fiery hit. Perfect for those who crave heat!
-
Mediterranean Delight: Swap the pesto for a sun-dried tomato spread, and include some feta cheese and olives for a Mediterranean vibe.
-
Vegan Version: Use vegan cheese and butter, or even cashew cheese, along with a homemade vegan pesto for a plant-based option that’s just as satisfying.
-
Breakfast Brunch: Add a fried egg on top of the sandwich during cooking for a breakfast twist that makes this dish not just for lunch anymore!
Chef’s Notes
Now, let me tell you a little secret: this recipe has evolved over time. Initially, I wasn’t a huge pesto fan (don’t judge me!). I never used to think much of it until I created my version tailored to my taste—less oil, more freshness. I started experimenting with various nuts and herbs and even used arugula instead of basil on a whim! It amazed me how a simple cheese sandwich could spark so much creativity in my kitchen.
Funny story—one time I was prepping pesto and got a little too enthusiastic with the garlic. Let me tell you, my friends loved the grilled cheese, but I might have single-handedly scared off the vampires that night! Always be mindful of just how powerful garlic can be; a little goes a long way!
FAQs and Troubleshooting
Q1: Why is my sandwich not browning evenly?
This often happens if the heat is too high. Make sure to keep it on medium heat and give it enough time to develop that golden crust.
Q2: My cheese isn’t melting properly. What should I do?
Using a combination of cheeses can help with melting. If you’re using low-fat cheese, they often take longer to melt. Just give it a bit more time on the heat, and make sure to press down gently while cooking!
Q3: Can I freeze Pesto Grilled Cheese?
Yes, you can! Just assemble the sandwiches, wrap them tightly in plastic wrap, and freeze. When ready to enjoy, thaw and then grill to your heart’s content. Just keep in mind that the bread might get a little soggier upon reheating.
Q4: Can I use other spreads instead of pesto?
Absolutely! Try olive tapenade, roasted red pepper spread, or even hummus for a totally different flavor profile that can add diversity to your grilled cheese game.
Nutritional Info
If you’re keeping track, here’s a general nutritional breakdown for one serving of Pesto Grilled Cheese using mozzarella cheese, white bread, and butter:
- Calories: Approximately 400-450 calories
- Protein: 18-20 grams
- Fat: 25-30 grams
- Carb: 35-40 grams
- Fiber: 2-3 grams
Keep in mind, variations in ingredients will affect these values, so feel free to make adjustments based on your dietary needs!
Final Thoughts
There you have it, folks! A step-by-step guide to crafting the ultimate Pesto Grilled Cheese. I hope this recipe helps you rediscover the joy of cooking in your own kitchen and brings a sprinkle of happiness to your day. Whether you whip it up for lunch, dinner, or a decadent snack, this sandwich serves up comfort and nostalgia.
Remember, cooking should be as much about the fun and stories shared as it is about the food itself. Don’t be afraid to experiment, and most importantly, share it with someone you love. So grab your spatula, put on your favorite tunes, and get ready to dig into a sandwich that’s not just a meal but a celebration of flavor.
Until next time, keep cooking with love and passion! 🍽️
Print
Pesto Grilled Cheese
- Total Time: 18 minutes
- Yield: 1 serving 1x
- Diet: Vegetarian
Description
A delightful twist on the classic grilled cheese, infused with the rich flavors of basil pesto and melty cheese.
Ingredients
- 2 slices of bread (sourdough, whole grain, or gluten-free)
- 2 tablespoons pesto
- 2 slices of cheese (mozzarella or cheddar)
- 1 tablespoon butter
Instructions
- Prep your ingredients by gathering all the items.
- Butter one side of each slice of bread.
- Spread the pesto on the unbuttered side of one slice.
- Add the cheese slices on top of the pesto.
- Top with the second slice of bread, buttered side out.
- Heat a skillet on medium heat.
- Grill the sandwich for 3-4 minutes until golden brown.
- Check the cheese after 7-8 minutes, ensuring it’s melted.
- Slice and serve the sandwich with your favorite sides.
Notes
Pair with tomato soup for a nostalgic touch, or enjoy with arugula and balsamic glaze for a gourmet touch.
- Prep Time: 10 minutes
- Cook Time: 8 minutes
- Category: Snack
- Method: Grilling
- Cuisine: American
Nutrition
- Serving Size: 1 sandwich
- Calories: 400
- Sugar: 3g
- Sodium: 700mg
- Fat: 25g
- Saturated Fat: 12g
- Unsaturated Fat: 10g
- Trans Fat: 0g
- Carbohydrates: 35g
- Fiber: 2g
- Protein: 20g
- Cholesterol: 30mg
Keywords: grilled cheese, pesto, comfort food, sandwich, easy recipe
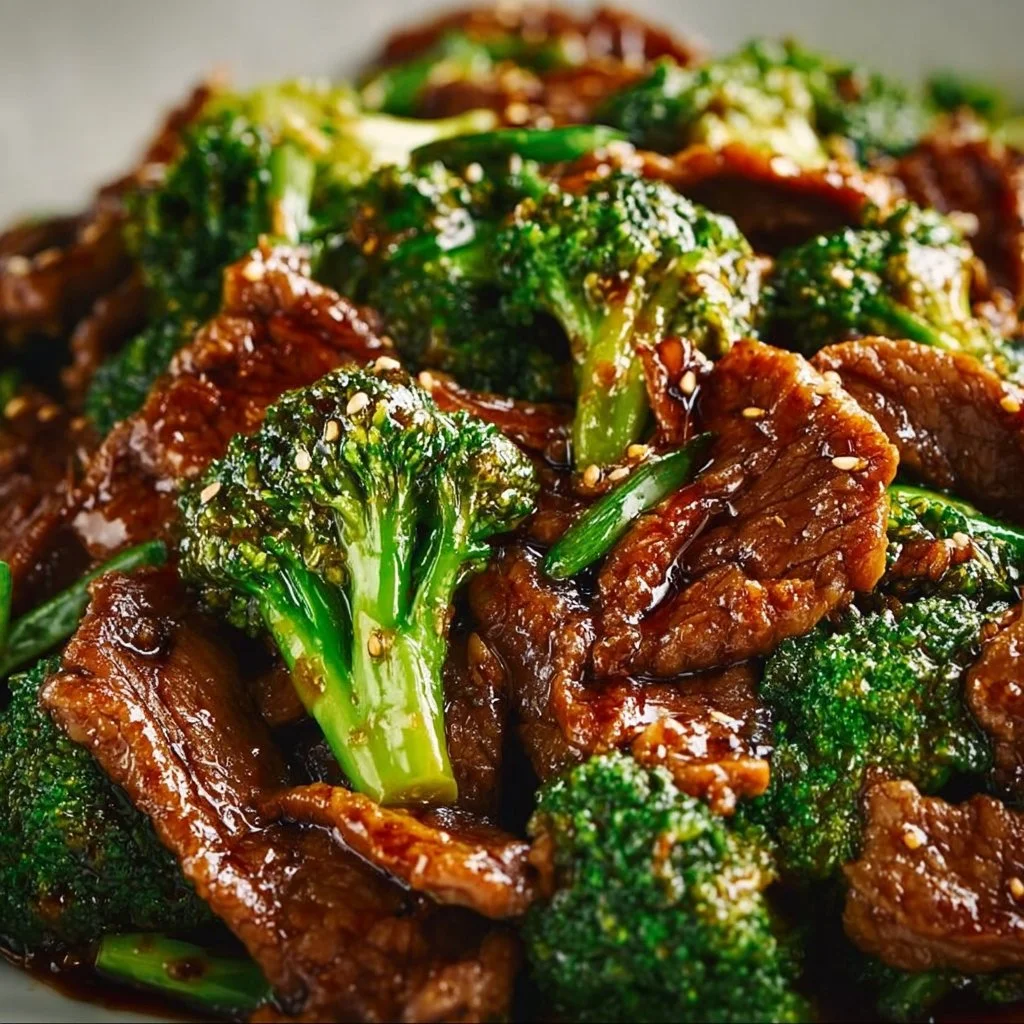
Chinese Beef and Broccoli
Chinese Beef and Broccoli: A Feel-Good Recipe That Brings Us All Together
Hey food lovers! Today, we’re diving into a classic dish that has been a staple both in restaurants and family kitchens alike: Chinese Beef and Broccoli. You know, that vibrant plate of deliciousness, where tender slices of beef are swirled lovingly with crisp broccoli florets and enveloped in a savory sauce that will make your taste buds dance. If you’re like me, this dish isn’t just a meal; it’s an invitation to gather around the table with friends and family, sharing stories and laughter, all while savoring the flavors of life.
Growing up, I had my fair share of meals at local Chinese restaurants, but it was my mom’s home-cooked version of Beef and Broccoli that truly stole the spotlight. Every time she made it, the aroma would waft through our house, drawing us all into the kitchen like moths to a flame. There was something about those fresh ingredients and that glorious sauce that made it feel like a hug from the inside out. Plus, it was one of those recipes that seemed fancy enough for special occasions but was easy enough that I could sneak in and help out in the kitchen, or even whip it up myself once I got the hang of it.
So, if you’re ready to create some kitchen magic, lend me your spatula, and let’s get cooking! You’ll be amazed at how simple and satisfying this Beef and Broccoli dish can be. Just like a warm hug, let’s make this a comforting meal for everyone to enjoy. Ready? Let’s dive right in!
Personal Story
I fondly recall one particular evening—a chilly Sunday night when my mom decided to make her famous Beef and Broccoli. We had recently returned from visiting my grandparents, where discussions about food (and lots of it) filled the air, and I was eager to bring home some of those culinary insights. My mom gave me the reins to chop up those vibrant broccoli florets. As I skillfully (or at least I thought so!) sliced away, we chatted about flavors, textures, and why certain ingredients worked so beautifully together.
We reminisced about our favorite dishes while she expertly stir-fried the beef, standing over the stove like a culinary maestro. The clinking of the wok and sizzling of the meat filled our cozy kitchen. It was more than just cooking; it was bonding over food, laughter, and the joy of creating something we all loved. When dinner was finally served, the three of us took our places at the table. With each bite, I could taste not just the dish, but all the warmth, experiences, and memories woven into it. And in that moment, I realized food truly has the power to connect us in ways we often overlook.
Ingredients
Let’s take a closer look at the ingredients for our mouthwatering Chinese Beef and Broccoli. Here’s what you’ll need:
-
1 lb flank steak (or skirt steak)
A great cut of meat that packs flavor! If you can’t find flank, sirloin is a good substitute, but remember, it cooks quickly—keep an eye on it! -
1 tablespoon soy sauce
This adds a savory depth to the dish. Use low-sodium if you’re watching your salt intake, and feel free to try tamari for a gluten-free option! -
1 tablespoon peanut oil (or vegetable oil)
Peanut oil is fantastic for stir-frying due to its high smoke point. If you have allergies or prefer another option, canola or sunflower oil works well too. -
1 tablespoon cornstarch
A little thickening magic! This helps create a beautifully silky sauce. For a low-carb alternative, you might try arrowroot powder. -
1/2 teaspoon baking soda (optional)
When marinating the beef, this helps tenderize it. A great tip if you’re using a tougher cut! -
1/2 cup chicken stock (or beef stock)
This is where the flavor really starts to build. Homemade stock is always the best, but store-bought works fine in a pinch! -
2 tablespoons Shaoxing wine (or dry sherry)
This rice wine adds depth and complexity. If you can’t find it, a splash of white wine or even cooking sherry can be used! -
2 tablespoons soy sauce
A second addition of soy sauce boosts the umami factor. Again, low-sodium or tamari can work here too. -
1 teaspoon dark soy sauce
This isn’t just about flavor; it delivers a rich color to your sauce. If needed, you can substitute with a bit of molasses for a similar effect. -
2 teaspoons brown sugar (or white sugar)
A touch of sweetness balances the salty components. It helps round out the flavors. -
1 tablespoon cornstarch (for the sauce)
This allows us to achieve a glossy finish to our delicious sauce. -
1 head broccoli (cut into bite-sized florets)
Fresh broccoli is essential for that crunchy bite! You can substitute with snow peas or bok choy for a twist. -
1 tablespoon peanut oil (or vegetable oil)
Remember to keep some oil for sautéing your veggies. -
3 garlic cloves (minced)
Garlic is a flavor powerhouse. If you love it, feel free to add more; there’s no such thing as too much garlic in my book! -
2 teaspoons ginger (minced)
Fresh ginger brightens this dish with a hint of spice. Don’t have fresh? Ground ginger can work in a pinch, but adjust the quantity since it’s more concentrated!
Step-by-Step Instructions
Alright, it’s showtime! Follow these steps to whip up a sensational Beef and Broccoli dish that will have everyone asking for seconds.
Step 1: Prep Your Ingredients
The first thing we want to do is prep all our ingredients. Trust me on this, having everything ready makes cooking so much smoother. Slice the flank steak against the grain into thin strips; about 1/4 inch works best. If your meat is slightly frozen, it will be easier to slice!
Step 2: Marinate That Beef
In a bowl, combine the steak strips with 1 tablespoon of soy sauce, 1 tablespoon of peanut oil, and 1 tablespoon of cornstarch. If you’re using baking soda, sprinkle that in too. Give it a good mix until the beef is well-coated—this marinade will help tenderize your meat and infuse it with flavor. Let it sit for about 20 minutes at room temperature while we prep the rest.
Step 3: Get Your Broccoli Ready
While your beef is soaking up those flavors, let’s turn our focus to the broccoli. Cut up your broccoloce tiniest florets—this way, they’ll cook evenly and quickly. Then, in a separate pot, bring some water to a boil. Blanch the broccoli for about 30 seconds until bright green, and then immediately transfer it to an ice bath to halt the cooking process. This keeps it crisp and vibrant!
Step 4: Stir-Fry Time
In a large skillet or wok, heat 1 tablespoon of peanut oil over medium-high heat. Once hot, add the marinated beef in a single layer (don’t overcrowd the pan) and let it sear. After about 1-2 minutes, stir-fry the beef until it’s just browned but not fully cooked. Remove the beef from the skillet and set aside.
Step 5: Add Aromatics
In the same skillet, throw in your minced garlic and ginger. Let those fragrant ingredients sauté for about 30 seconds until they start to release their lovely aroma. This is where the magic begins!
Step 6: Bring It All Together
Now, in the same skillet, add the blanched broccoli back in along with the beef. Stir to combine.
Meanwhile, we’ll whip up our sauce! In a small bowl, mix together the chicken stock, Shaoxing wine, 2 tablespoons of soy sauce, 1 teaspoon of dark soy sauce, brown sugar, and the remaining 1 tablespoon of cornstarch until smooth. Pour this over the beef and broccoli mixture, and give it a good stir. The sauce will start to thicken and coat everything beautifully. Let it simmer for a couple of minutes until the beef is cooked through and all ingredients are heated.
Step 7: Final Touches
Taste your glorious creation and adjust seasoning. You might want a pinch more sugar or soy sauce; do it according to your palate!
Serving Suggestions
Now that you’ve created this beautiful dish (pat yourself on the back!), it’s time to plate it up. I love serving my Beef and Broccoli over a steaming bowl of fluffy jasmine rice—there’s something about that combination that just feels right.
Scoop a generous portion of beef and broccoli onto your bed of rice, letting that luscious sauce spill over the grains. For an extra touch, garnish with sesame seeds or sliced green onions. And there you have it—a restaurant-quality dish that’s way better than takeout!
Recipe Variations
Feeling adventurous? Here are some creative twists and dietary swaps you can try with this recipe:
-
Add More Veggies: Throw in some sliced bell peppers, carrots, or snap peas for additional colors and nutrients.
-
Spicy Kick: If you like it with a kick, add some red pepper flakes or sriracha to the sauce.
-
Cauliflower Swap: For a low-carb version, substitute the broccoli with cauliflower florets.
-
Protein Alternatives: This recipe isn’t just for beef! Try it with chicken, tofu, or even shrimp. Just make sure to adjust cooking times to accommodate different proteins.
-
Add Noodles: Toss in some cooked regular or rice noodles at the end for a heartier meal.
Chef’s Notes
Food is a wonderful journey; every recipe has a story! My version of Beef and Broccoli has evolved over the years, shaped by family gatherings, travel, and of course, countless taste tests from friends. I remember the first time I decided to add brown sugar—it was a total game-changer!
And let’s talk about the time my friend tried to make it for a date night but accidentally used the entire bottle of dark soy sauce. Let’s just say it was a super salty experience that didn’t go as planned—priceless food memory, if you ask me!
FAQs and Troubleshooting
1. What can I substitute for flank steak?
You can use skirt steak, sirloin, or even chicken for a lighter option. Just remember to adjust cooking times slightly depending on the meat.
2. My sauce turned out too thick; what can I do?
No worries! Just whisk in a little extra broth or water to thin it out until it reaches your desired consistency.
3. The broccoli is mushy; how do I avoid this next time?
Make sure to blanch the broccoli only for about 30 seconds, and immediately transfer it to an ice bath. This keeps it crunchy and vibrant!
4. Can I prep this dish ahead of time?
Absolutely! You can marinate the beef and chop the veggies ahead of time. Just store them in the fridge until you’re ready to cook.
Nutritional Info
(Since every recipe can vary based on serving sizes and ingredient choices, be sure to adjust according to your ratios!)
- Serving Size: 1 cup
- Calories: 340
- Protein: 28g
- Fat: 14g
- Carbohydrates: 22g
- Fiber: 3g
- Sugar: 5g
This dish delivers a great balance of protein and nutrients while being lower in carbs if you choose to serve it on its own or with veggies.
Final Thoughts
And there you have it, my friends! This Chinese Beef and Broccoli recipe is more than just a meal; it’s a pathway to cozy kitchen moments, laughter, and lasting memories. Whether you’re cooking solo, trying to impress a loved one, or simply reviving old traditions, this dish brings everyone together in the best ways possible.
So roll up those sleeves, gather your ingredients, and let’s make some culinary magic happen. At the end of the day, Good food is all about connection, and I can’t wait to hear how your kitchen adventure turns out! Give it a try, and let the flavors and stories unfold. Happy cooking! 🍽️
Print
Chinese Beef and Broccoli
- Total Time: 30 minutes
- Yield: 4 servings 1x
- Diet: None
Description
A classic dish featuring tender beef and crisp broccoli in a savory sauce, perfect for family gatherings.
Ingredients
- 1 lb flank steak
- 1 tablespoon soy sauce
- 1 tablespoon peanut oil
- 1 tablespoon cornstarch
- 1/2 teaspoon baking soda (optional)
- 1/2 cup chicken stock
- 2 tablespoons Shaoxing wine
- 2 tablespoons soy sauce
- 1 teaspoon dark soy sauce
- 2 teaspoons brown sugar
- 1 tablespoon cornstarch (for the sauce)
- 1 head broccoli (cut into bite-sized florets)
- 1 tablespoon peanut oil
- 3 garlic cloves (minced)
- 2 teaspoons ginger (minced)
Instructions
- Prep your ingredients.
- Marinate the beef.
- Get your broccoli ready.
- Stir-Fry the beef.
- Add aromatics.
- Bring it all together.
- Final touches.
Notes
Serve with fluffy jasmine rice and garnish with sesame seeds or green onions.
- Prep Time: 15 minutes
- Cook Time: 15 minutes
- Category: Main Course
- Method: Stir-frying
- Cuisine: Chinese
Nutrition
- Serving Size: 1 cup
- Calories: 340
- Sugar: 5g
- Sodium: 800mg
- Fat: 14g
- Saturated Fat: 2g
- Unsaturated Fat: 7g
- Trans Fat: 0g
- Carbohydrates: 22g
- Fiber: 3g
- Protein: 28g
- Cholesterol: 60mg
Keywords: Beef and Broccoli, Chinese recipe, stir-fry, comfort food
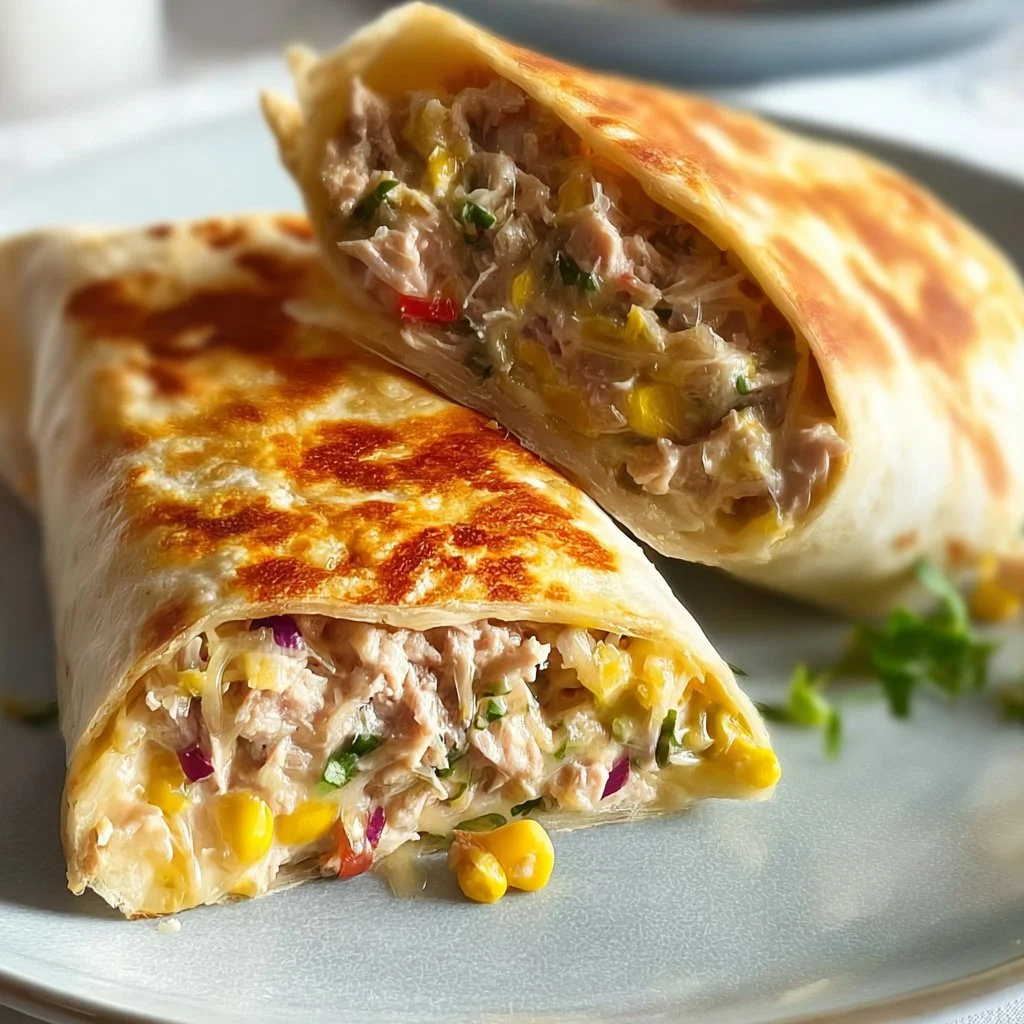
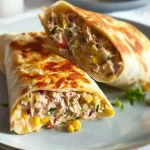
Tuna Melt Wrap
# The Ultimate Tuna Melt Wrap: A Solo Chef’s Favorite

## Introduction

Hey food lovers! I’m Beau Collier, and today we’re diving into one of my favorite comfy classics – the Tuna Melt Wrap. Yes, you heard it right! Imagine your traditional tuna melt but wrapped up nice and cozy, ready to fuel your day with just the right kind of flavor. Whether you’re looking for something simple to whip up on a busy weeknight or a fun dish to impress your friends, this wrap has your back!

Tuna melts have been around forever, and there’s something about that creamy, cheesy goodness stuffed into a warm wrap that just hits the spot. Plus, it’s a fantastic way to use pantry staples. Did someone say convenience? And guess what? You don’t have to slay over the stove for hours to make this happen. With just a few ingredients and about 20 minutes to spare, you’ll have a satisfying meal that tastes like you spent the entire day in the kitchen. Sounds good, right?

But before we roll up our sleeves and get cooking, let me take you on a tasty little journey down memory lane. Cooking has always been about connection for me—whether it’s shared meals with family, rekindling friendships over food, or the simple joy of creating something from scratch. This tuna melt wrap combines all those elements, delivering both nostalgia and deliciousness in every bite. So grab a fork (or your favorite mug), and let’s dig in!

---

## Personal Story: A Culinary Flashback

I vividly remember a Saturday afternoon when I was around twelve years old—my mom and I were in the kitchen, and the sun filtered through the window, bathing us in that warm golden light. My mom was rummaging through the pantry while I was busy daydreaming about the delicious feast we were going to create. Suddenly, she pulled out a can of tuna, and I can still hear her say, “How about tuna melts today?” I thought tuna was only for sandwiches, but boy, was I wrong!

She mixed tuna, mayo, and herbs, but the best part was when she added that layer of melted cheese on top. As it broiled in the oven, I couldn’t help but sneak a taste of the tuna mixture. I’ll never forget how simple ingredients came together to create something truly special. It was in that moment, watching the cheese bubble and golden, that my love for cooking began. While we’ve jazzed it up over the years, this wrap pays homage to those days. With this recipe, you’ll be channeling some serious retro vibes while crafting your own culinary masterpiece!

---

## Ingredients

Now that we’ve set the mood, let’s gather our ingredients. Here’s what you’ll need for making these mouthwatering Tuna Melt Wraps:

- **1 can of tuna, drained**
  *Look for tuna packed in water for a healthier option, or go for oil-packed if you prefer a richer flavor. Canned salmon or chicken can be great substitutes too!*

- **2 tablespoons mayonnaise**
  *Feel free to swap in Greek yogurt for a lighter version or even avocado for a creamy twist!*

- **1 tablespoon Dijon mustard**
  *This adds a tangy kick. If you’re not a fan, regular mustard or even some spicy sriracha can spice things up nicely!*

- **1/4 cup diced celery**
  *Celery gives that perfect crunch. If you don't have any, chopped bell peppers or pickles work well too!*

- **1/4 cup diced pickles**
  *Adding a bit of zesty flavor. Try using sweet or bread-and-butter pickles for extra sweetness, or omit if you prefer!*

- **Salt and pepper to taste**
  *Don’t be shy! A little seasoning will help bring all the flavors together.*

- **Whole wheat wraps**
  *These are my go-to for a healthier option. Feel free to use tortillas—flour or corn—just keep an eye on the size if you’re packing ‘em!*

- **1/2 cup shredded cheese (cheddar or your choice)**
  *Cheddar is classic, but try pepper jack for a little spice or mozzarella for that gooey stretchy goodness!*

- **Lettuce or spinach**
  *A handful of greens adds freshness. You can use any leafy greens, or even arugula for that peppery kick!*

---

## Step-by-Step Instructions

Alright, culinary adventurers! Let’s get cooking. Here’s how we bring this Tuna Melt Wrap to life in just a few simple steps.

### Step 1: Prepare the Tuna Salad Mixture
1. **In a mixing bowl**, combine your drained tuna, mayonnaise, and Dijon mustard.
   - *Tip: Use a fork to break up the tuna nicely—it helps mix everything uniformly!*

2. **Add in your diced celery and pickles**.
   - *Pro tip: You can chop the celery finely for more texture or leave it chunky for a hearty feel!*

3. **Season generously with salt and pepper**.
   - *Remember, taste as you go! A little sprinkle goes a long way... You want that flavor to sing!*

### Step 2: Prepare Your Wrap
1. **Lay your whole wheat wrap flat** on a clean surface or cutting board.
   - *Chef Insight: Warm your wrap slightly in a dry pan for a few seconds on each side before filling. It makes rolling easier and adds a nice touch!*

2. **Spoon a generous portion of the tuna mixture** onto the center of the wrap.
   - *Don’t be stingy—this is the star of the show!*

3. **Sprinkle on that shredded cheese.**
   - *Here’s where it gets cheesy—literally! Lay it on thick for melty goodness!*

### Step 3: Roll It Up
1. **Fold in the sides of the wrap**, then roll it up tightly from the bottom.
   - *A handy technique is to hold the sides while rolling with one hand and tucking in as you go. The key is to keep it snug without overstuffing!*

2. **Place the seam side down** on a preheated skillet (medium heat).
   - *Chef hack: If you have a panini press, use that for an even better crunch outside!*

### Step 4: Toast to Perfection
1. **Cook until golden brown** on one side (about 3-4 minutes), then carefully flip and cook the other side.
   - *Always keep an eye on it, as the cheese can melt quickly!*

2. **Once both sides are crispy and the cheese is melted**, remove it from the skillet and let it rest for a minute.
   - *Don’t skip this step! Cutting too soon can cause oozy cheese spills.*

### Step 5: Slice and Serve
1. **Cut the wrap in half**, and you’ll see that glorious melty cheese and tuna salad peeking out!
   - *For an extra touch, a diagonal cut showcases those layers beautifully!*

---

## Serving Suggestions

Now that you’ve got that irresistible Tuna Melt Wrap, presentation is key! Serve it up with a side of your favorite chips or a fresh salad for a colorful plate. Add a handful of baby greens or a dollop of sour cream for that gourmet vibe.

Feeling adventurous? Try a rainbow of sides: crispy carrot sticks, cucumber slices, or even a small bowl of homemade coleslaw! You can never go wrong with a side of freshness to balance the richness of the wrap.

---

## Recipe Variations

No two foodies are the same, and neither should their recipes be! Here are some delicious variations to try when you want to switch it up:

1. **Spicy Tuna Fling**: Add a tablespoon of sriracha or your favorite hot sauce to the tuna mixture for a spicy kick.
2. **Mediterranean Twist**: Swap mayo for tzatziki sauce and add chopped olives or sun-dried tomatoes for a zesty vibe.
3. **Herb Lovers’ Dream**: Mix in fresh herbs like dill, cilantro, or parsley to lift the tuna flavor to new heights.
4. **Vegan Marvel**: Replace tuna with chickpeas or canned jackfruit, and use vegan mayo for a plant-based alternative.
5. **Green Goddess**: Add mashed avocado for creaminess along with chopped spinach for a burst of nutrients.

---

## Chef’s Notes

As I’ve mastered this Tuna Melt Wrap over the years, I’ve learned one thing: simplicity is key! Elegant flavors often emerge from straightforward ingredients, and using whatever you have on hand can lead to delicious discoveries. This recipe has traveled with me through many culinary seasons, and seeing how the wrap has evolved keeps it fresh and exciting.

Oh, and let me share a little kitchen humor: the first time I made these wraps, I forgot the cheese. You better believe they still tasted good, but when I bit into the warm wrap and found that cheesy goodness on my next try—let’s just say it was the most satisfying ‘aha’ moment ever!

---

## FAQs and Troubleshooting

**Q: What can I do if the wrap falls apart while rolling?**
- *A: Try not to overfill! If it’s too stuffed, your wrap will become rebellious. Also, make sure your wrap is pliable; if it feels stiff, warming it helps!*

**Q: Can I make this ahead of time?**
- *A: Absolutely! Prepare the tuna salad mixture and wrap it tightly in cling film. Assemble on the day you plan to serve for the best freshness!*

**Q: How do I know when the cheese is melted?**
- *A: Just keep an eye on it; about 3–4 minutes per side usually does the trick. A little peek after flipping helps too!*

**Q: What if I'm not a big tuna fan?**
- *A: No worries! Soldier on with shredded chicken, shrimp, or even a hearty vegetable medley instead, the world is your oyster... or wrap!*

---

## Nutritional Info

Let’s talk nutrition! This Tuna Melt Wrap, if made with whole-wheat wraps and loaded with veggies, packs a punch:

- **Calories**: Approximately 400-500 per wrap (depending on cheese and condiments)
- **Protein**: Tuna alone brings about 20 grams!
- **Fiber**: Whole wheat wraps offer about 5 grams.
- **Vitamins and Minerals**: With the addition of greens and pickles, you’ll get a good dose of vitamins A, C, and K, not to mention great hydration!

**Nutritional Tip**: Amping up your greens and substituting whole ingredients can even turn this wrap into a powerhouse meal, full of the nutrients your body craves!

---

## Final Thoughts

And there you have it—the mouthwatering Tuna Melt Wrap, made with love and a sprinkle of creativity! It’s a fun dish that’s not only tasty but also tailors to your personal tastes and dietary needs. Whether you’re grabbing a quick lunch, hosting a casual dinner party, or just craving some comfort food, this wrap has got your back.

I hope you give this recipe a try, and don’t hesitate to share your twists and experiences down in the comments. Happy wrapping, and until next time, keep spreading that culinary joy in your kitchen! 🥙

Grab your loved ones, create those memories, and enjoy the delicious chaos that is cooking! Now, who’s hungry?
The Ultimate Tuna Melt Wrap
- Total Time: 20 minutes
- Yield: 1 serving 1x
- Diet: Pescatarian
Description
A cozy and satisfying twist on the classic tuna melt, wrapped up and ready to enjoy!
Ingredients
- 1 can of tuna, drained
- 2 tablespoons mayonnaise
- 1 tablespoon Dijon mustard
- 1/4 cup diced celery
- 1/4 cup diced pickles
- Salt and pepper to taste
- Whole wheat wraps
- 1/2 cup shredded cheese (cheddar or your choice)
- Lettuce or spinach
Instructions
- In a mixing bowl, combine your drained tuna, mayonnaise, and Dijon mustard.
- Add in your diced celery and pickles.
- Season generously with salt and pepper.
- Lay your whole wheat wrap flat on a clean surface or cutting board.
- Spoon a generous portion of the tuna mixture onto the center of the wrap.
- Sprinkle on that shredded cheese.
- Fold in the sides of the wrap, then roll it up tightly from the bottom.
- Place the seam side down on a preheated skillet (medium heat).
- Cook until golden brown on one side (about 3-4 minutes), then carefully flip and cook the other side.
- Once both sides are crispy and the cheese is melted, remove it from the skillet and let it rest for a minute.
- Cut the wrap in half, and you’ll see that glorious melty cheese and tuna salad peeking out!
Notes
Serve it with your favorite chips or a fresh salad. Feel free to modify the recipe with different ingredients or flavors.
- Prep Time: 10 minutes
- Cook Time: 10 minutes
- Category: Main Course
- Method: Grilling
- Cuisine: American
Nutrition
- Serving Size: 1 wrap
- Calories: 450
- Sugar: 4g
- Sodium: 600mg
- Fat: 25g
- Saturated Fat: 8g
- Unsaturated Fat: 12g
- Trans Fat: 0g
- Carbohydrates: 35g
- Fiber: 5g
- Protein: 25g
- Cholesterol: 40mg
Keywords: tuna melt, wrap, easy lunch, comfort food
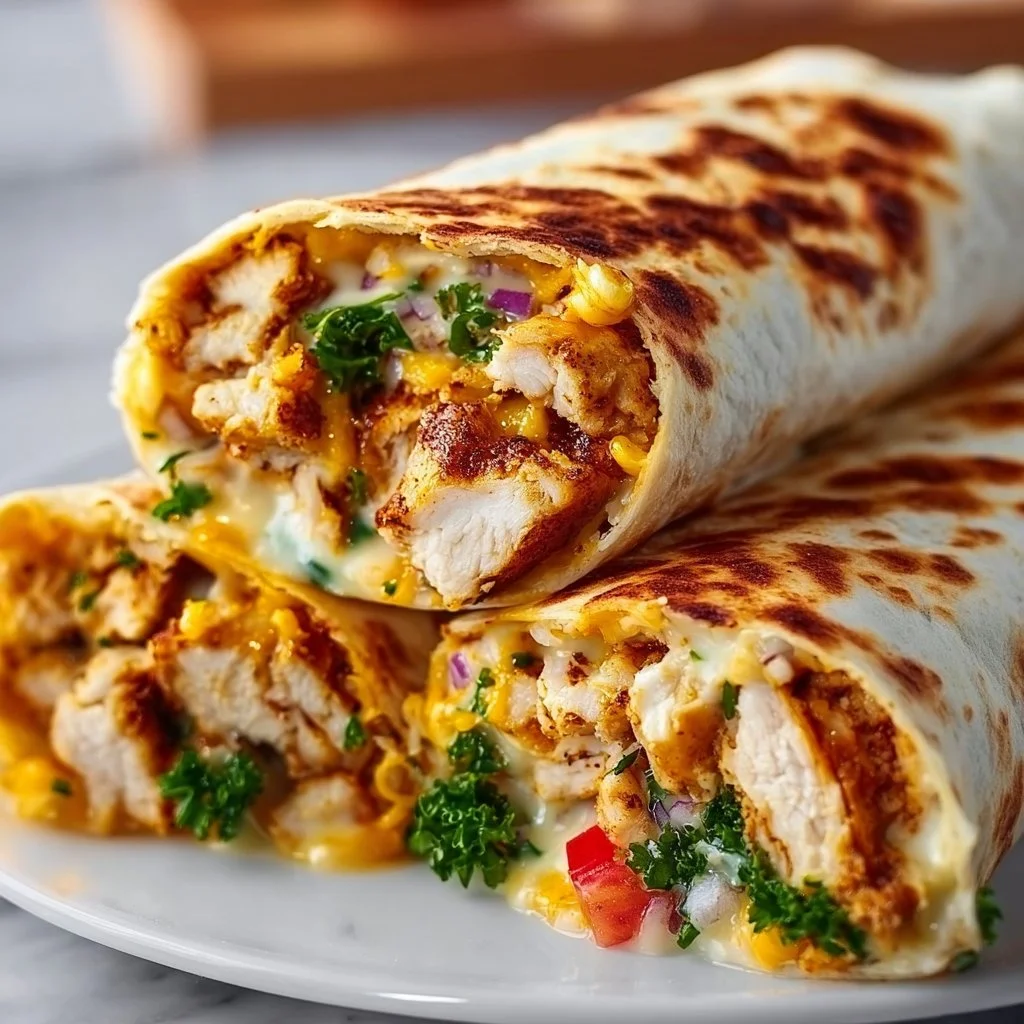
Cheesy Garlic Chicken Wraps
# Cheesy Garlic Chicken Wraps: A Flavorful Hug in Every Bite

Hey there, food lovers! Welcome back to Feastical, your home for all things delicious and oh-so-comforting. Today, we're diving into a recipe that’s not just a meal—it’s a warm hug wrapped in a tortilla! I’m talking about Cheesy Garlic Chicken Wraps. With tender chicken, melty cheese, and a garlicky zing, these wraps are perfect for any occasion, whether you’re having a laid-back dinner at home or hosting a gathering with friends.

Picture this: it’s a cozy evening, you're winding down after a long day, and the last thing you want is to spend hours in the kitchen. You want something quick, satisfying, and flavorful that the whole family will love. Enter these Cheesy Garlic Chicken Wraps. Trust me; this recipe is the answer to your dinner dilemmas! It’s simple, quick to prepare, and full of flavors that will have everyone asking for seconds—maybe even thirds!

So, grab your apron, let’s get cooking, and make some memorable moments in the kitchen. Ready? Let's go!

---

## A Little Story about My Kitchen Adventures

Ah, the kitchen—the heart of the home! It’s where I’ve spent countless hours whipping up dishes that tell stories of love, laughter, and sometimes a little chaos. I remember the time I decided to impress some friends with an elaborate meal and ended up starting a fire… It involved a bit more heat than necessary for my caramelized onions! Thankfully, we just laughed it off and ended up ordering pizza instead.

However, amidst all those kitchen mishaps, I discovered one of my favorite recipes: Cheesy Garlic Chicken Wraps. It was born on a lazy Sunday afternoon when I opened the fridge to find a few chicken breasts, some leftover tortillas, and, of course, garlic. After just a few minutes of work, the tantalizing aroma filled the kitchen, and by the end, we were all digging in. It's moments like these that remind me food isn’t just about eating. It's about gathering around the table, sharing stories, and creating memories.

So, let’s talk about what goes into these wraps. You might already have most of these ingredients in your pantry!

---

## Ingredients

For these Cheesy Garlic Chicken Wraps, you will need:

- **4 chicken breasts**
  *Why?* They're lean, versatile, and absorb flavors like a sponge!
  *Substitution Tip:* If you're short on chicken, feel free to use shredded rotisserie chicken or even tofu for a vegetarian version.

- **1 cup shredded cheese (cheddar or mozzarella)**
  *Why?* Because cheese makes everything better! It adds gooeyness and richness.
  *Chef Insight:* Use a mix of cheeses for added flavor! A blend of sharp cheddar and creamy mozzarella is divine.

- **4 large flour tortillas**
  *Why?* They’re soft and pliable, making wrapping up all that cheesy goodness a breeze.
  *Substitution Tip:* Try whole wheat or gluten-free tortillas if you need dietary alternatives.

- **4 cloves garlic, minced**
  *Why?* Garlic is the flavor powerhouse; it gives these wraps that lively zing!
  *Substitution Tip:* A teaspoon of garlic powder can work in a pinch, but fresh is always best!

- **1 tablespoon olive oil**
  *Why?* It keeps the chicken juicy while adding a hint of richness.
  *Chef Insight:* You can swap olive oil for avocado oil or melted butter for added flavor!

- **1 teaspoon paprika**
  *Why?* It adds a smoky, sweet flavor that complements the garlic and chicken beautifully.
  *Substitution Tip:* Smoked paprika can give an extra depth if you’re feeling adventurous!

- **Salt and pepper to taste**
  *Why?* Essential seasoning to bring out all the flavors.
  *Quick Tip:* Always season your chicken well; it makes a huge taste difference!

- **Fresh parsley for garnish**
  *Why?* A pop of color and freshness to brighten the dish.
  *Substitution Tip:* Chives or green onions are great alternatives!

---

## Step-by-Step Instructions

Alright, let’s roll up our sleeves and get cooking! Here’s how to whip up these delightful wraps in just a few simple steps.

### Step 1: Prep Your Chicken
Start by seasoning the chicken breasts with salt, pepper, and paprika. This is where the flavor journey begins! Don’t be shy—make sure to get both sides coated evenly. Let the chicken rest for about 15 minutes to absorb those flavors.

### Step 2: Sauté Your Garlic
While waiting, heat the olive oil in a large skillet over medium heat. Once it’s nice and hot, toss in the minced garlic. Stir it around for about 30 seconds until it’s fragrant but be careful not to let it burn; burnt garlic is a no-go!

### Step 3: Cook the Chicken
Add the seasoned chicken breasts to the skillet. Cook for about 6-7 minutes per side, or until they're golden brown and cooked through. You can tell they’re ready when the internal temperature hits 165°F (75°C). Here’s a little tip: if your chicken breasts are thick, consider butterflying them to ensure even cooking!

### Step 4: Add the Cheese
Once the chicken is cooked, sprinkle the shredded cheese generously on top. Cover the skillet with a lid for a couple of minutes, allowing the cheese to melt beautifully. This is the moment where your kitchen will smell like heaven!

### Step 5: Assemble the Wraps
Now it’s assembly time! Grab a tortilla, lay down a cheesy piece of chicken, and wrap it up snugly. Don't worry if it gets a bit messy—that’s all part of the fun. If you want to take it up a notch, you can add some fresh veggies inside, like spinach or bell peppers.

### Step 6: Grill or Toast the Wraps
Optional but recommended! If you have a grill pan or skillet, toss the wrapped tortillas on for 2-3 minutes on each side to get that golden, crispy finish. It really elevates the wraps and gives them that satisfying crunch when you bite into each one.

### Step 7: Garnish and Serve
Slice the wraps in half, plate them up, and sprinkle with fresh parsley for that pop of color. Serve them with your favorite dipping sauce or a side of tangy salsa for an extra kick!

---

## Serving Suggestions

These Cheesy Garlic Chicken Wraps are incredibly versatile. Serve them with a side of coleslaw or a fresh garden salad for a balanced meal. Feel free to cut them into smaller pieces if you're serving them as appetizers at your next gathering—trust me, they will disappear in minutes!

For those lazy nights, pair them with some crispy sweet potato fries or a warm bowl of tomato soup for a cozy combo. Want to elevate the experience? Serve with a zesty dipping sauce (ranch, anyone?) for added flavor with each bite!

---

## Recipe Variations

1. **Spicy Kick:** Add some sliced jalapeños or hot sauce for a spicy version that will make your taste buds dance!

2. **Veggie Delight:** Use grilled veggies like zucchini, bell peppers, and mushrooms instead of chicken for a fantastic vegetarian option.

3. **Buffalo Style:** Swap the cheese for buffalo sauce and ranch dressing for a zesty buffalo chicken wrap!

4. **Mediterranean Twist:** Add feta cheese, spinach, and sun-dried tomatoes for a Mediterranean flair—super fresh and delightful!

5. **Breakfast Wraps:** Make these a breakfast treat by adding scrambled eggs along with the chicken and cheese. Who doesn’t love breakfast for dinner?

---

## Chef’s Notes

These Cheesy Garlic Chicken Wraps have been a staple in my home for years. They are like a blank canvas! I’ve seen them evolve from a quick weeknight meal to a fun party food, with each family gathering sparking new ideas. One time, I even served them at a potluck, and they were an instant hit! There’s something about cheesy goodness wrapped in a tortilla that brings everyone together.

And let’s talk about the kids—they absolutely love these! I often catch them sneaking back to the kitchen for leftovers, which always warms my heart. Food truly has a magical way of creating those unforgettable moments.

---

## FAQs and Troubleshooting

**1. What if my chicken is dry?**
If your chicken turns out dry, don’t worry! Next time, marinate it in olive oil, lemon juice, and garlic beforehand or cook it on lower heat to keep it juicy.

**2. Can I make these ahead of time?**
Yes! You can prep the chicken and store it in the fridge. Assemble the wraps just before cooking for the best results.

**3. What if I don't have a skillet?**
No skillet? No problem! You can bake the chicken in the oven at 375°F (190°C) for about 25-30 minutes. Add your cheese in the last few minutes of baking.

**4. Can I freeze these wraps?**
Absolutely! Wrap them individually in foil or plastic wrap and freeze. When you’re craving a wrap, simply thaw and reheat in the oven or on a skillet until warmed through.

---

## Nutritional Info

Curious about the nutrition? Here’s a general breakdown for one wrap (without additional toppings or sides):

- **Calories:** ~350-400
- **Protein:** ~28g
- **Fat:** ~15g
- **Carbohydrates:** ~35g
- **Fiber:** ~2g

This can vary depending on the specific ingredients and sizes you use. They’re not just delicious; they also deliver a good protein punch to keep you satisfied and energized!

---

## Final Thoughts

There you have it—Cheesy Garlic Chicken Wraps that are sure to become a favorite in your home! With their simplicity, mouthwatering flavors, and countless variations, this dish is perfect for any night of the week or any gathering you have in mind. Remember, cooking is all about having fun, experimenting, and most importantly, enjoying the process and the company around you.

So, the next time you find yourself in need of a quick, delicious meal, remember these wraps! They truly embody the spirit of comfort food—easy to make, full of flavor, and perfect for sharing with loved ones.

Happy cooking, and as always, keep spreading the love through good food! Until next time, keep it cheesy and cozy! 🧀✨

Cheesy Garlic Chicken Wraps
- Total Time: 45 minutes
- Yield: 4 servings 1x
- Diet: Non-Vegetarian
Description
Delicious and comforting Cheesy Garlic Chicken Wraps filled with tender chicken, melty cheese, and a garlicky zing.
Ingredients
- 4 chicken breasts
- 1 cup shredded cheese (cheddar or mozzarella)
- 4 large flour tortillas
- 4 cloves garlic, minced
- 1 tablespoon olive oil
- 1 teaspoon paprika
- Salt and pepper to taste
- Fresh parsley for garnish
Instructions
- Prep your chicken by seasoning with salt, pepper, and paprika. Let it rest for about 15 minutes.
- Sauté the garlic in olive oil over medium heat for about 30 seconds.
- Cook the chicken breasts in the skillet for 6-7 minutes per side until golden brown.
- Add the shredded cheese on top of the chicken, cover, and let melt for a couple of minutes.
- Assemble the wraps by placing a cheesy piece of chicken in a tortilla and wrapping snugly.
- Grill or toast the wraps for 2-3 minutes on each side if desired.
- Garnish with fresh parsley and serve with your favorite dipping sauce.
Notes
Serve with coleslaw or a garden salad, and feel free to customize with additional veggies or dipping sauces.
- Prep Time: 15 minutes
- Cook Time: 30 minutes
- Category: Main Course
- Method: Grilling
- Cuisine: American
Nutrition
- Serving Size: 1 wrap
- Calories: 400
- Sugar: 1g
- Sodium: 600mg
- Fat: 15g
- Saturated Fat: 7g
- Unsaturated Fat: 6g
- Trans Fat: 0g
- Carbohydrates: 35g
- Fiber: 2g
- Protein: 28g
- Cholesterol: 70mg
Keywords: cheesy chicken wraps, garlic chicken, easy dinner recipes
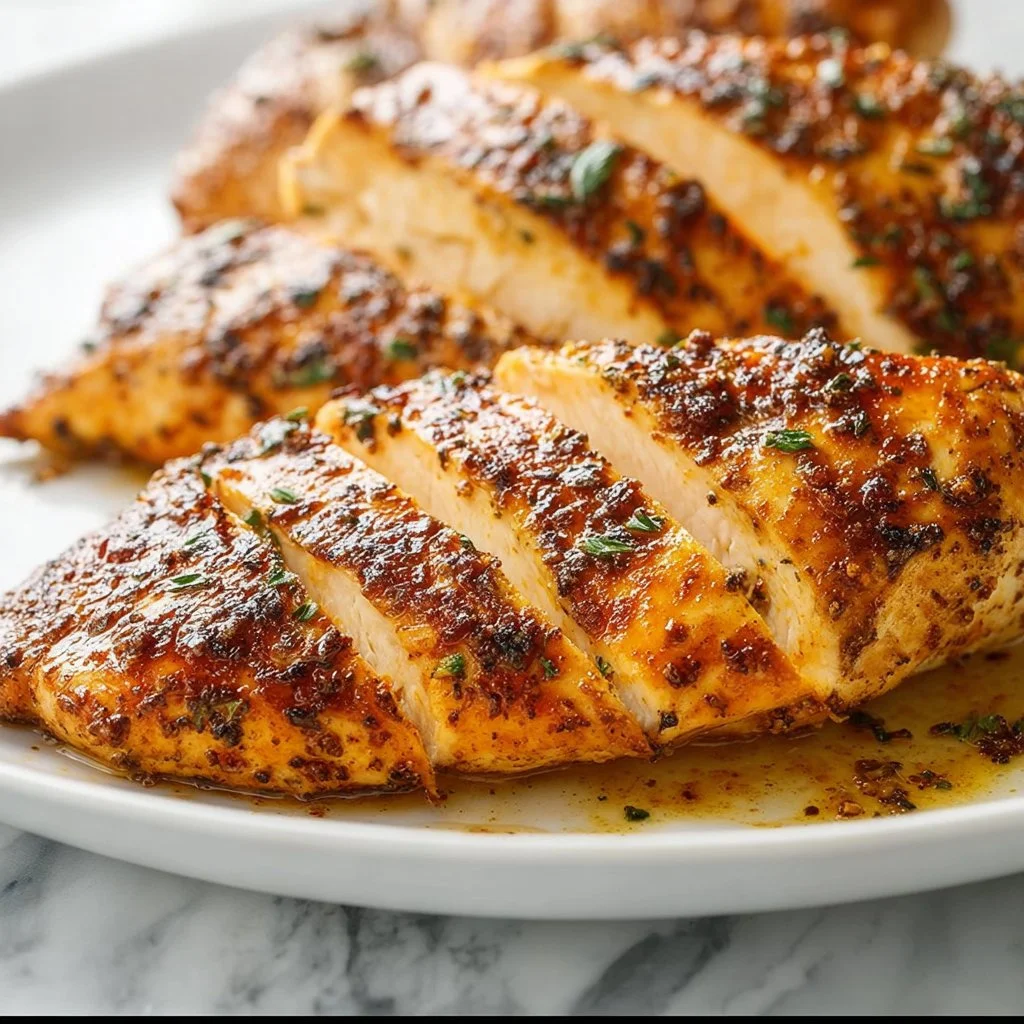
Juicy 30-Minute Baked Chicken Breast
Juicy 30-Minute Baked Chicken Breast: Your New Weekend Go-To!
Hey there, food lovers! I’m Beau Collier, and I’m so glad you’ve stopped by today. If you’re looking for a quick and simple way to whip up a juicy, delicious chicken breast in just 30 minutes, you’ve landed in the right place. Now, I know what you might be thinking: “Can chicken really be juicy and flavorful in such little time?” The answer is a resounding yes!
Today, we’re diving into the delightful world of juicy baked chicken breasts. Honestly, this is one of those recipes that both impresses and satisfies—the kind that can star in a busy weeknight dinner but also shine at special occasions. Imagine pulling a succulent piece of chicken out of the oven, its surface beautifully golden and aromatic, with the savory spices mingling in the air. That’s what I call a feast for the senses!
Personal Story: A Chicken Love Affair
When I think of baked chicken, I can’t help but be transported back to my childhood kitchen, where the air was always filled with the warm, inviting aroma of my mom’s cooking. Every Sunday, she’d roast a whole chicken for the family. It was a labor of love, one that took hours and left us salivating in anticipation as we crammed around the table, sharing stories and laughter.
As I stood on a stool to get a closer look, I admired how she seasoned that bird with a symphony of spices, effortlessly humming along to the kitchen tunes. Fast-forward to today, and I’ve made those memories my own by simplifying her traditional methods. Although I cannot replicate her mastery, I now bring you my 30-minute baked chicken breast—a quick yet scrumptious approach that’ll give you fond memories of your own in no time!
Ingredients
Let’s gather our superstar lineup for this dish, shall we? Here’s what you need to create your juicy baked chicken:
-
4 medium-sized chicken breasts (about 2 pounds total, or two large breasts cut in half horizontally)
- Choose fresh, high-quality chicken for maximum flavor. You can also use bone-in breasts for juicier meat, but you’ll need to adjust the cooking time.
-
1 teaspoon garlic powder
- A pantry staple! For a fresh twist, you could use minced garlic instead.
-
1 teaspoon onion powder
- Perfect for added depth. If you’re feeling adventurous, try using finely chopped fresh onions and sauté them before applying them to the chicken.
-
1 teaspoon paprika
- Paprika adds a subtle smokiness. For a more intense flavor, use smoked paprika.
-
1 teaspoon dried parsley
- A pinch of brightness! You can swap it out for fresh parsley if that’s what you have on hand—just remember to double the amount.
-
1/2 teaspoon dried mustard
- This adds a fantastic zing. If you don’t have it, a teaspoon of Dijon mustard will work in a pinch!
-
1/2 teaspoon chili powder (optional)
- For those who like a little heat! You can use cayenne for a spicier kick.
-
1 1/2 teaspoons kosher salt (or to taste)
- Kosher salt has larger grains, which help to season better. Sea salt works too, but be cautious as it can be saltier.
-
1/4 teaspoon black pepper
- Freshly cracked is best! Don’t be shy—crank it up a notch if you love that peppery taste.
-
2 tablespoons olive oil or avocado oil
- Choose oils with high smoke points for the best results. Olive oil will give a lovely flavor, while avocado oil is neutral and allows the spices to shine.
Step-by-Step Instructions
Alright, it’s time to roll up those sleeves and get cooking! Here’s how you’ll bring this juicy masterpiece to life:
-
Preheat Your Oven:
Preheat your oven to 425°F (220°C). Hot ovens make crispy skin—nobody wants a soggy chicken! -
Prepare Your Chicken:
While that oven heats up, grab your chicken breasts and pat them dry with paper towels. This helps with browning. If you’re using large breasts, slice them in half horizontally for quicker cooking time. -
Seasoning Time:
In a small bowl, mix together the garlic powder, onion powder, paprika, dried parsley, mustard powder, chili powder (if using), salt, and black pepper. Add the olive oil to the spice mix and stir until it forms a thick paste. -
Coat the Chicken:
Rub your spice mixture all over the chicken breasts. Make sure it’s evenly coated—you want every bite to be bursting with flavor! Don’t be shy; you can even gently lift the skin (if it’s skin-on) and apply some of that goodness right underneath. -
Arrange for Cooking:
Place the seasoned chicken in a single layer on a baking sheet lined with parchment paper or foil for easy cleanup. Give them a little space—this will help them cook evenly. -
Bake:
Pop the baking sheet in the oven and bake for 20-25 minutes. Chicken is done when it reaches an internal temperature of 165°F (75°C). If you’re using thin breasts, keep an eye on them—judgment is key! -
Rest Before Serving:
Once your chicken is out of the oven, let it rest for about 5 minutes. This helps the juices redistribute. Trust me; you don’t want to cut into it too soon!
Serving Suggestions
As you transition from oven time to mealtime, the way you plate your dish can elevate the experience! Slice the chicken into thick pieces and arrange them on a vibrant plate. Consider serving it alongside a colorful salad or fluffy garlic mashed potatoes. Perhaps a drizzle of citrusy vinaigrette or a few sprigs of fresh herbs could finish it off beautifully. This dish pairs wonderfully with roasted veggies or creamy coleslaw for that perfect comfort-food mashup!
Recipe Variations
Now for the fun part—mixing things up! Here are a few creative twists to keep this recipe fresh and exciting every time:
-
Herb-Infused: Swap out the dried parsley for your favorite herbs, like thyme, rosemary, or Italian seasoning for a fragrant twist.
-
Citrus Zing: Add a tablespoon of lemon or lime juice to your spice mixture for a bright, zesty contrast.
-
Asian-inspired: Replace the garlic and onion powder with ginger and sesame oil for a delightful Asian flair. Serve it with rice and steamed bok choy!
-
Barbecue Flavor: Brush the chicken with your favorite barbecue sauce in the last few minutes of baking for a sweet and smoky finish.
-
Cheesy Delight: Top your chicken with mozzarella or cheddar cheese in the last 5 minutes of baking and let it melt—hello, cheesy chicken heaven!
Chef’s Notes
As I’ve developed this recipe over the years, I’ve learned that chicken doesn’t have to be boring. It can evolve! My family loves when I switch things up with different spices or marinades. One time, I even experimented with a beer marinade, and I couldn’t believe how juicy the chicken turned out. It’s amazing how a simple recipe can bring together flavors that remind us of home, holidays, and gatherings with friends. So, don’t be afraid to inject your personality into this dish!
FAQs and Troubleshooting
1. Why is my chicken dry?
Overcooking is usually the culprit. Invest in a meat thermometer—chicken is perfect at 165°F (75°C).
2. Can I make this recipe in advance?
Absolutely! Marinate your chicken overnight for deeper flavor. Just be sure to store it in the fridge.
3. What should I serve with baked chicken?
This chicken pairs wonderfully with starches like rice, couscous, or potatoes, as well as steamed or sautéed vegetables. Get creative!
4. What if I only have frozen chicken?
You can use frozen chicken, but you’ll need to thaw it first! Ideally, place it in the fridge overnight. If time is short, submerge it in cold water for an hour or so.
Nutritional Info
Now, I know these days, we tend to pay more attention to nutritional facts. A serving of this juicy baked chicken breast (about 6 ounces) approximately contains:
- Calories: 330
- Protein: 52g
- Fat: 14g (depending on your choice of oil)
- Carbohydrates: 1g
- Sodium: 720mg (if using kosher salt; adjust according to your preference)
It’s a protein-rich choice that fits well in a balanced diet!
Final Thoughts
Thanks for hanging out with me in the kitchen today! I hope you’re feeling excited to give this juicy 30-minute baked chicken breast a try. Remember, cooking should always be an adventure—an opportunity to express yourself and create something wonderful for yourself and your loved ones. This recipe is your canvas. Add your flair, make it memorable, and enjoy every bite!
So grab your apron, put on your favorite tunes, and let’s make some chicken magic happen! If you give it a go, I’d love to see your creations—don’t forget to share with the Feastical family. Happy cooking, friends!
Print
Juicy 30-Minute Baked Chicken Breast
- Total Time: 35 minutes
- Yield: 4 servings 1x
- Diet: Paleo
Description
A quick and simple recipe for juicy, delicious chicken breasts baked to perfection in just 30 minutes.
Ingredients
- 4 medium-sized chicken breasts (about 2 pounds total)
- 1 teaspoon garlic powder
- 1 teaspoon onion powder
- 1 teaspoon paprika
- 1 teaspoon dried parsley
- 1/2 teaspoon dried mustard
- 1/2 teaspoon chili powder (optional)
- 1 1/2 teaspoons kosher salt (or to taste)
- 1/4 teaspoon black pepper
- 2 tablespoons olive oil or avocado oil
Instructions
- Preheat your oven to 425°F (220°C).
- Prepare your chicken breasts by patting them dry with paper towels.
- Mix together the garlic powder, onion powder, paprika, dried parsley, mustard powder, chili powder (if using), salt, and black pepper in a small bowl.
- Add the olive oil to the spice mix and stir until it forms a thick paste.
- Rub the spice mixture all over the chicken breasts, ensuring they are evenly coated.
- Place the seasoned chicken in a single layer on a baking sheet lined with parchment paper.
- Bake for 20-25 minutes until the chicken reaches an internal temperature of 165°F (75°C).
- Let the chicken rest for about 5 minutes before slicing.
Notes
This recipe is versatile. You can experiment with different spices or marinades for a unique flavor each time.
- Prep Time: 10 minutes
- Cook Time: 25 minutes
- Category: Main Course
- Method: Baking
- Cuisine: American
Nutrition
- Serving Size: 1 serving
- Calories: 350
- Sugar: 0g
- Sodium: 720mg
- Fat: 14g
- Saturated Fat: 2g
- Unsaturated Fat: 8g
- Trans Fat: 0g
- Carbohydrates: 1g
- Fiber: 0g
- Protein: 52g
- Cholesterol: 120mg
Keywords: baked chicken, quick dinner, healthy recipe, easy chicken recipes, weeknight meals