Minute No-Bake Granola Bars for Busy Weekday Meal-Prep
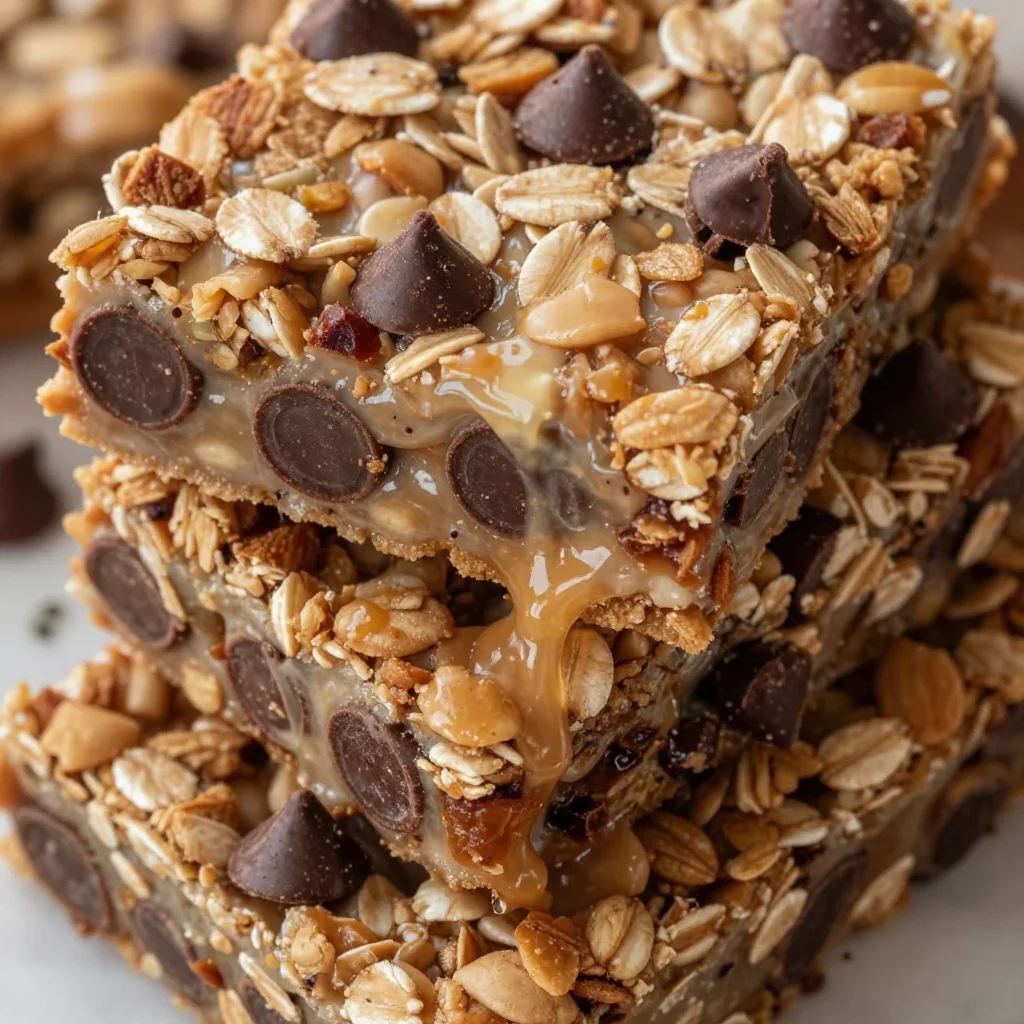
No-Bake Granola Bars: Your New Go-To Snack!
Hey there, fellow food lover! I’m Beau Collier, and today we’re diving into a kitchen adventure that’s as easy as pie—well, no-bake pie, that is. If you’re on the lookout for a delicious snack that not only satisfies but also gives you a warm, cozy feeling of home, then you’re in for a treat. We’re whipping up some Homemade No-Bake Granola Bars! These delightful munchies are perfect for when you need a quick pick-me-up, a healthy lunchbox addition, or a grab-and-go breakfast.
Now, let’s be real—life can get busy, and sometimes, who has the time to bake an entire batch of cookies or muffins? Not to mention, the cleanup can turn the kitchen into a battlefield! But that’s why no-bake recipes are my jam. They’re quick, easy, and oh-so-satisfying. Plus, kids and adults alike will enjoy these chewy, nutty, and utterly delicious granola bars.
As we walk through this recipe, I’ll sprinkle in some handy tips, little anecdotes, and personal touches that make this dish come alive. I invite you to put on your apron, grab your favorite mug, and let’s get cooking—no baking required!
A Granola Bar Trip Down Memory Lane
You know how certain smells and tastes can transport you back in time? That’s what homemade granola bars do for me. I remember sitting at the kitchen counter as a kid while my mom experimented with all sorts of snacks to fill our lunchboxes. She would blend oats, honey, and whatever nuts or fruits we had on hand, all while I eagerly awaited the final product. There was something so magical about watching her create perfection with just a few simple ingredients.
One of my favorite memories is when she made her first-ever batch of no-bake granola bars. As the mixture came together, we laughed about how messy the kitchen was getting—there was peanut butter everywhere, and I had Froot Loops in my hair from breakfast! But when we finally sunk our teeth into those chewy bars, it was like instant happiness. The satisfaction of knowing we’d helped make our own snacks amplified the fun, and from that day on, granola bars became a staple in our household.
Fast forward a few years, and I find myself in my own kitchen, trying to recreate that same sense of joy and nostalgia. And guess what? I think I’ve found the perfect no-bake granola bar recipe that captures all of those cherished memories. Best part? You can customize it just the way you like!
Ingredients
Let’s check out the lineup of ingredients you’ll need to craft these no-bake granola bars. Each one plays a key role in the texture and flavor, and I’ve got some great tips for you along the way!
-
2 cups oats
Rolled oats are the backbone of this recipe, providing texture and fiber. For a gluten-free option, just grab certified gluten-free oats! -
1 cup nut butter (peanut butter or almond butter)
This acts as the glue that holds everything together. Prefer a nut-free version? No problem! Sunflower seed butter or soy nut butter work wonderfully too. -
1/2 cup honey or maple syrup
Both sweeteners give this recipe a delightful sweetness and help bind the oats together. If you want a vegan alternative, maple syrup is your best bet! -
1/2 cup chocolate chips (optional)
Who can say no to a little chocolate? Dark, semi-sweet, or even dairy-free versions all work. To keep it healthy, consider swapping them for cacao nibs. -
1/2 cup dried fruits (optional)
Raisins, cranberries, or even chopped apricots add a lovely chewiness. Fresh fruits won’t work here since they can add too much moisture, but feel free to get creative with dried options! -
1/4 cup seeds (optional)
Think sunflower seeds, chia seeds, or pumpkin seeds. They add extra nutrition and a delightful crunch! You can skip these if you’re nut-free and want to lighten things up.
Step-by-Step Instructions
Now that we have our ingredients ready, let’s jump into some straightforward, fun, no-fuss steps to bring your granola bars to life. Each step will include tips and tricks that’ll make you feel like a pro chef in no time!
-
Gather Your Gear
Grab a large mixing bowl and a spatula for stirring. We’ll also need an 8×8 inch baking dish lined with parchment paper to make removal easy. -
Mix the Dry Ingredients
Start by pouring the oats into the mixing bowl. If you want a bit more flavor, give them a quick toast in a dry skillet over low heat for 5 minutes until lightly golden. It’ll enhance the nuttiness and aroma! Once ready, add any seeds and dried fruits you’re using. -
Heat the Nut Butter and Sweetener
In a small saucepan, combine the nut butter and honey (or maple syrup) over low heat, stirring continuously until smooth and warm. This is where the magic happens! The warmth makes it easier to blend with the oats. Just don’t let it come to a boil; we want to keep that creamy texture. -
Combine Everything Together
Pour the warm nut butter mixture over the dry ingredients. Now, grab that spatula and mix like your life depends on it! Make sure all the oats are coated evenly. If you’re adding chocolate chips, wait until the mixture has cooled slightly before folding them in to avoid melting them completely. -
Press It Down
Transfer the mixture into your lined baking dish. Use a second piece of parchment paper or your hands (which will likely get a bit sticky) to press it firmly and evenly into the dish. This step is crucial! The more compact it is, the better it will hold together once cut. -
Chill and Set
Place the dish in the refrigerator for at least 1-2 hours to set. This gives the mixture time to firm up, making it easier to slice into bars. If you’re in a rush, popping them in the freezer for 30 minutes does the trick too! -
Slice and Serve
Once set, remove the parchment paper and slice into your desired bar sizes. I usually aim for about 10-12 bars, but you do you! Store them in an airtight container in the fridge for up to a week (if they last that long).
Serving Suggestions
When it comes to serving these no-bake granola bars, there’s no wrong way! However, if you want to impress your friends or family, try bundling them up in wax paper and tying them with a cute kitchen twine for that homemade touch.
Pair them with a cup of coffee or a smoothie for breakfast on-the-go. Need a snack? These bars are just perfect for a quick energy boost between meals. Kids can take them to school, or you can enjoy them during your next hike. You might even crumble them over yogurt for a delicious parfait!
Recipe Variations
Now, let’s get creative! The beauty of no-bake granola bars is that they are truly customizable. Here are some flavorful variations to spice things up:
-
Tropical Twist: Swap out the dried fruits for shredded coconut and diced dried pineapple for a tropical vibe.
-
Chocolate Peanut Butter: Add cocoa powder to the nut butter mixture and increase the chocolate chips for an indulgent treat.
-
Protein Power-Up: Stir in a scoop of your favorite protein powder to the dry mix for a post-workout boost!
-
Trail Mix Style: Add your favorite nuts and seeds—think cashews, walnuts, or flaxseeds—for that crunchy trail mix feeling.
-
Pumpkin Spice Delight: For a seasonal treat, add pumpkin puree, pumpkin spice, and a few chocolate chips to turn these bars into a fall favorite!
Chef’s Notes
Over the years, I’ve tinkered with this recipe quite a bit. Initially, it was a straightforward combination of oats and peanut butter, but I discovered adding a mix of textures and flavors made all the difference. Funny enough, my first attempt at adding chia seeds turned into a gooey mess because I forgot they expand in moisture! Lesson learned, right?
This recipe has evolved to embrace various flavors and dietary preferences, ensuring everyone can enjoy a tasty snack. Plus, every twist adds a delightful surprise, making these bars a family favorite.
FAQs and Troubleshooting
-
Why are my granola bars falling apart?
This could be due to not pressing the mixture firmly enough or having too many add-ins. Ensure it’s compact in the dish before chilling! -
How do I store them?
These bars can be stored in an airtight container in the fridge for up to a week. If you need to extend their life, you can freeze them for up to three months. -
Can I use quick oats instead of rolled oats?
Absolutely! Quick oats will work, but keep in mind that the texture might be a bit different—less chewy and more crumbly. -
What if I want to make these chocolate-free?
No problem! Just skip over the chocolate chips. You could add extra dried fruit or nuts in place of them for added flavor and texture.
Nutritional Info
While homemade no-bake granola bars can vary in nutrition based on ingredients, here’s a rough estimate per bar (assuming you make 12 from the recipe):
- Calories: 150–180
- Protein: 5g
- Carbs: 22g
- Fats: 7g
- Fiber: 3g
These bars provide a great balance of healthy fats, fiber, and protein, making them a wholesome choice for a snack. Plus, you know exactly what’s in them—no preservatives or mystery ingredients!
Final Thoughts
There you have it—your new favorite go-to recipe for Homemade No-Bake Granola Bars! Not only are they delicious and easy to make, but they also carry a little bit of nostalgia that’ll warm your heart. I hope you enjoy making these as much as I do and that they bring a smile to your face with every bite.
Remember, the kitchen is a place for creativity, so don’t hesitate to play around with this recipe. Share your creations, or even your kitchen mishaps with me—I would love to hear your stories! Now grab your apron, get busy in the kitchen, and let’s get snacking. Happy cooking!
Print
No-Bake Granola Bars
- Total Time: 120 minutes
- Yield: 12 servings 1x
- Diet: Vegetarian
Description
Delicious and chewy no-bake granola bars that are easy to make and perfect for snacks, lunchboxes, or breakfast.
Ingredients
- 2 cups rolled oats
- 1 cup nut butter (peanut butter or almond butter)
- 1/2 cup honey or maple syrup
- 1/2 cup chocolate chips (optional)
- 1/2 cup dried fruits (optional)
- 1/4 cup seeds (optional)
Instructions
- Gather your gear: a large mixing bowl, a spatula, and an 8×8 inch baking dish lined with parchment paper.
- Mix the dry ingredients by pouring the oats into the bowl and adding any seeds and dried fruits.
- Heat the nut butter and sweetener in a saucepan over low heat until smooth and warm.
- Combine everything together by pouring the warm mixture over the dry ingredients and mixing thoroughly.
- Press the mixture into the lined baking dish using parchment paper or your hands.
- Chill in the refrigerator for at least 1-2 hours to set.
- Slice into bars and enjoy!
Notes
These bars can be customized with various add-ins like coconut, protein powder or pumpkin spice for seasonal flavors.
- Prep Time: 15 minutes
- Cook Time: 0 minutes
- Category: Snack
- Method: No-Bake
- Cuisine: American
Nutrition
- Serving Size: 1 bar
- Calories: 165
- Sugar: 8g
- Sodium: 50mg
- Fat: 7g
- Saturated Fat: 1g
- Unsaturated Fat: 6g
- Trans Fat: 0g
- Carbohydrates: 22g
- Fiber: 3g
- Protein: 5g
- Cholesterol: 0mg
Keywords: granola bars, no-bake, healthy snacks, easy recipes, homemade snacks