
Cheesy Beef Taco Potato Bowls
Cheesy Beef Taco Potato Bowls: A Comfort Food Fiesta
Hey there, foodie friend! If you’re here, it’s because you’re ready to dive into a delicious dish that brings all those cozy, feel-good vibes right to your kitchen. Let me introduce you to the Cheesy Beef Taco Potato Bowls—the kind of meal that gives a warm hug to your taste buds and is perfect for any day of the week. Imagine crispy potatoes, savory beef, melty cheese, and all the toppings you could dream of—all in one delightful bowl!
These taco potato bowls are not just a meal; they’re a full-blown experience. As someone who believes in the magic of food, I know that sometimes we need more than just fuel; we need something that comforts us, connects us, and fills our hearts and bellies. This dish isn’t just about flavor; it’s about creating memories around the table with family and friends, sharing laughter and stories that last long after the last bite is gone.
You might be thinking, “What makes these potato bowls so special?” Well, they’re a vibrant, colorful creation that lets you play with flavors and textures, and I’ll guide you through every step of the way! So whether you’re planning a family dinner, hosting game night, or simply craving something hearty after a long day, grab that apron, and let’s cook up some cheesy joy!
Personal Story
I still remember the first time I stumbled upon taco bowls. It was at a friend’s potluck, and I was instantly drawn to the colorful array of toppings and the homey smell wafting from the kitchen. My friend Jamie, with her loving and quirky style, had concocted the ultimate feast: spiced beef atop fluffy potatoes, ridiculously gooey cheese melting over everything, and a rainbow of toppings to crown it.
I remember sneaking back for a second helping, then a third—each bite took me back to simpler times: warm gatherings, laughter, and the comforting sound of family and friends all cracking jokes around the table. Inspired by that memorable evening, I began replicating Jamie’s taco bowls, adding my own twist with potatoes because, well, who doesn’t love a cheesy potato?!
Those memories of gathering around a table with loved ones have since stuck with me, fostering my passion for cooking. And now, I want to share that same joy with you through these Cheesy Beef Taco Potato Bowls—a dish that’s easy to whip up and guaranteed to spark joy in every bite!
Ingredients
Here’s what you’ll need to make these delightful Cheesy Beef Taco Potato Bowls. Don’t worry; I’ll give you some pro tips along the way!
-
1 lb ground beef
This is the star protein of our dish! Feel free to swap this with ground turkey or a plant-based alternative for a lighter option. -
4 medium potatoes, diced
I recommend using russet potatoes for their fluffy texture. You can also use sweet potatoes for a twist of sweetness! -
1 cup shredded cheese
Cheddar is my go-to, but a mix of Monterey Jack and Pepper Jack adds an incredible kick. Choose a dairy-free alternative if preferred. -
1 packet taco seasoning
Store-bought is super convenient, but if you want to flex your flavor muscles, a blend of cumin, paprika, garlic powder, and chili powder works just as well! -
1 cup diced tomatoes
Fresh tomatoes or canned; both work perfectly! Also consider adding diced bell peppers for extra crunch and flavor. -
1 cup black beans, drained
Rich in protein and fiber! If you like a different bean, kidney or pinto beans are excellent substitutes. -
1 cup corn
Frozen, fresh, or canned corn will do the trick. This adds a sweet crunch that brightens the dish. -
1 avocado, sliced
For that creamy goodness! If avocados aren’t your jam, consider topping with a dollop of Greek yogurt instead. -
Salt and pepper to taste
Essential! A pinch of each will elevate all those wonderful flavors. -
Fresh cilantro for garnish
Adds a burst of freshness! If cilantro isn’t your thing, fresh green onions or parsley are great alternatives.
Step-by-Step Instructions
Time to get our hands busy! Let’s bring this delicious Cheesy Beef Taco Potato Bowl to life, step by step.
-
Prep the Potatoes:
Start by washing and dicing your potatoes into bite-sized chunks—aim for uniform pieces for even cooking. After that, toss them with a splash of olive oil, salt, and pepper, then spread them on a baking sheet. Bake at 425°F (220°C) for about 30-35 minutes until they’re golden and crispy. Pro tip: Flip them halfway through for even crispiness! -
Cook the Beef:
In a large skillet over medium heat, brown your ground beef. Cook it for about 5-7 minutes until it’s no longer pink, breaking it apart with a spatula as you go. The aroma of sizzling beef is pure magic! Season it with the taco seasoning—oh yes, now it’s taco time! Stir in a splash of water if it seems too dry, and let it simmer for about 5 more minutes. -
Add In the Goodies:
Once the beef is nicely seasoned, toss in the diced tomatoes, black beans, and corn. Stir everything together and let the mixture cook for an additional 3-4 minutes until everything is warm and cozy. This is where the magic happens; the flavors melt together like the best friends they are! -
Cheese It Up:
Now, it’s time for the cheesy goodness! Reduce the heat to low, sprinkle the shredded cheese over the beef mixture, and let it melt into a gooey blanket of deliciousness. Seriously, don’t be shy with the cheese! -
Assemble the Bowls:
Once the potatoes are done baking, it’s time to build your masterpiece! Start with a generous scoop of crispy potatoes in the bottom of the bowl, then top it with a hearty scoop of the cheesy beef mixture. Add some avocado slices and a sprinkle of fresh cilantro to give it that beautiful finishing touch.
Little Chef Hacks:
- If you’re feeling extra fancy, add a dollop of sour cream or Greek yogurt for creaminess.
- For a spicy kick, drizzle some hot sauce on top before serving!
Serving Suggestions
When it comes to serving these Cheesy Beef Taco Potato Bowls, presentation matters! Use vibrant, colorfully patterned bowls to make your dish pop. Stack those crispy potato chunks high, and don’t hold back on the cheese—that melty goodness is the icing on this delicious cake!
Garnish your bowl with fresh cilantro and a sprinkle of feta or cotija cheese for added flair, and serve with lime wedges on the side for a zesty squeeze. Allow your guests to personalize their bowls with additional toppings like salsa or jalapeños.
Pro Tip:
Make it a taco bar! Set up an assembly area where everyone can build their own bowl, choosing their hearts’ delight. Trust me; it’s bound to be a hit!
Recipe Variations
Want to switch things up? Here are some tasty variations to keep your Cheesy Beef Taco Potato Bowls interesting!
-
Chicken Taco Bowls: Use shredded rotisserie chicken in place of beef for a lighter taco bowl option.
-
Veggie Delight: Swap the beef for sautéed mushrooms, zucchini, and bell peppers for a wholesome vegetarian meal.
-
Spicy Twist: Add chopped jalapeños to your beef for a spicy kick, or use spicy chorizo instead of ground beef.
-
Southwestern Style: Mix in diced peppers and use chipotle-lime seasoning for a smoky flavor.
-
Breakfast Burrito Bowl: Top with scrambled eggs and a dollop of salsa for a delicious breakfast or brunch option!
Chef’s Notes
As someone who’s played around with flavors and ingredients for years, these Cheesy Beef Taco Potato Bowls have become a staple in my kitchen. And while I’ve experimented wildly over the years, my love for crispy potatoes stayed strong!
Originally inspired by taco night and fond memories, I started adjusting the ingredients based on what I had on hand. The basic premise has remained—simple, satisfying, and filled with flavor. Who doesn’t love a meal that can be personalized and enjoyed with just one bowl?
And believe me, no kitchen disaster here! Just some happy messes, laughs, and the occasional “oops” that turned into something absolutely delightful!
FAQs and Troubleshooting
Q: Can I make these ahead of time?
Absolutely! You can prepare the beef and potato components in advance. Just reheat before serving, and top with cheese when you’re ready!
Q: What if my potatoes aren’t crispy?
Make sure to toss them in enough oil and spread them out on a baking sheet without crowding them. If they’re too soft or mushy, they may need a little more roasting time!
Q: How can I store leftovers?
Leftovers can be kept in an airtight container in the fridge for up to 3 days. Reheat in the microwave or a skillet for best results!
Q: Can I make this dish in advance for a party?
Definitely! Just prepare everything in advance and keep each component separate until you’re ready to serve; then quickly assemble for easy enjoyment!
Nutritional Info
Though the exact nutritional values can vary depending on specific ingredients used, here’s a rough estimate of nutritional information per serving (using ground beef with cheese and standard potato):
- Calories: 550
- Protein: 40g
- Fat: 25g
- Carbohydrates: 50g
- Fiber: 8g
- Sugar: 3g
This meal packs a punch of flavor and nutrition in every bite! Plus, you have the flexibility to make substitutions that fit your dietary needs.
Final Thoughts
There you have it! A delightful, heartwarming recipe that’s perfect for feeding a crowd or enjoying a cozy night in. These Cheesy Beef Taco Potato Bowls are so much more than just a recipe; they’re about bringing people together and celebrating flavors that nourish the soul.
Next time you’re looking to create a meal that’s not just filling but also fulfilling, don’t forget this dazzling dish. Trust me, with each bite, you’ll be transported to a place of comfort and bliss!
So, unleash your inner chef and get creative—there are no rules in love and cooking! I can’t wait to hear about your own taco bowl adventures. Cheers to food that warms us from the inside out—let’s dig in!
Print
Cheesy Beef Taco Potato Bowls
- Total Time: 50 minutes
- Yield: 4 servings 1x
- Diet: None
Description
A comforting dish that combines crispy potatoes, savory beef, and melty cheese topped with fresh ingredients.
Ingredients
- 1 lb ground beef
- 4 medium potatoes, diced
- 1 cup shredded cheese
- 1 packet taco seasoning
- 1 cup diced tomatoes
- 1 cup black beans, drained
- 1 cup corn
- 1 avocado, sliced
- Salt and pepper to taste
- Fresh cilantro for garnish
Instructions
- Prep the potatoes by washing and dicing them into bite-sized chunks. Toss with olive oil, salt, and pepper, then bake at 425°F (220°C) for 30-35 minutes until golden and crispy.
- Cook the beef in a large skillet over medium heat, browning it for 5-7 minutes. Add taco seasoning and simmer for 5 more minutes.
- Add diced tomatoes, black beans, and corn to the beef mixture. Cook for an additional 3-4 minutes until warm.
- Cheese the mixture by reducing heat and sprinkling shredded cheese over it. Let it melt.
- Assemble the bowls by placing crispy potatoes at the bottom, topping with the cheesy beef mixture, avocado slices, and fresh cilantro.
Notes
For extra flavor, consider topped with sour cream or Greek yogurt, and add hot sauce for a kick.
- Prep Time: 15 minutes
- Cook Time: 35 minutes
- Category: Main Course
- Method: Baking
- Cuisine: Mexican
Nutrition
- Serving Size: 1 bowl
- Calories: 550
- Sugar: 3g
- Sodium: 500mg
- Fat: 25g
- Saturated Fat: 10g
- Unsaturated Fat: 12g
- Trans Fat: 0g
- Carbohydrates: 50g
- Fiber: 8g
- Protein: 40g
- Cholesterol: 80mg
Keywords: taco bowls, cheesy, comfort food, beef, potatoes
Sticky Chicken Bowls Recipe
Sticky Chicken Bowls Recipe
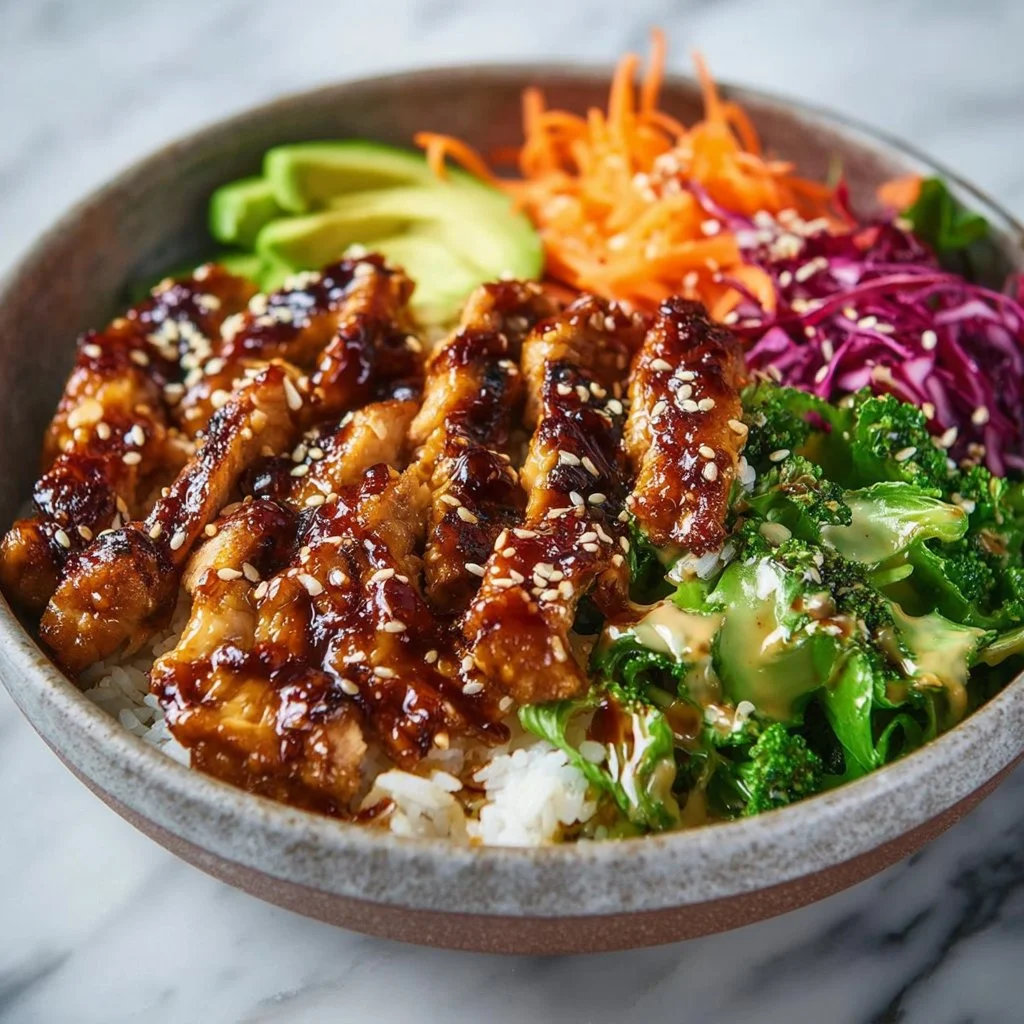
Hey there, food lovers! If you’re anything like me, you know that sometimes comfort food comes in a bowl—especially on those hectic weeknights when you’re craving something hearty but also crave a bit of fun in your kitchen life. That’s where my Sticky Chicken Bowls come into play! This dish is all about juicy, tender chicken coated in a tangy, sweet, and slightly spicy sauce served atop a bed of fluffy rice with vibrant broccoli. It’s not just a meal; it’s an experience that brings flavors and friends together, like a hug in a bowl!
I first stumbled upon this dish while rummaging through my grandmom’s old recipe box. I was looking for something special to make for a cozy dinner with friends. I remember finding her scribbled notes, filled with love and her classic twist on traditional Asian-inspired recipes. I decided to take that classic and put my own spin on it, making it easier and more flavorful for today’s busy kitchen warriors. Little did I know, it would become a staple that always garners oohs and aahs from my loved ones around the dinner table.
Whip out your spatula and get ready to embrace the magic that happens when juicy chicken meets a sticky sauce and delightful veggies. Don’t be surprised if you find yourself making this dish again and again—it’s simply that good!
Personal Story
Once upon a time, I had the best dinner party after I invited a group of friends over without much thought about what to serve. I went to my pantry, surveyed my fridge, and thought, "Alright, Beau, let’s make something out of nothing!" The neighbors’ aroma wafting through the air made me nostalgic for my grandmom’s kitchen—where every dish was loaded with flavor and warmth.
I decided to cook my version of a sticky chicken bowl based on the ingredients I had at hand, and let me tell you, it was a hit! My friends were eagerly waiting in the kitchen, licking their forks, and asking for the recipe before they even took a bite. That night, we showed each other our favorite music and devoured those sticky chicken bowls as if our souls depended on it—and in some ways, they did. Food is that powerful! The laughter, the flavors, and the memories made that night brought us all closer together. It was one of those “I could do this every week” kind of moments. So, if you’re looking to create your own beautiful memories, let’s get to cooking!
Ingredients
Here’s what you’re going to need to whip up these fantastic sticky chicken bowls:
-
2 cups uncooked rice
A fluffy base that soaks up all those tasty flavors! You can use jasmine rice for an aromatic touch or brown rice for a nuttier flavor and added nutrition. -
2 small heads broccoli, chopped
Fresh broccoli not only adds a beautiful pop of color but also a delightful crunch! If you don’t have broccoli handy, you can substitute it with steamed snap peas or bok choy for a different texture. -
3 large chicken breasts
The star of the dish! Choose boneless, skinless chicken for tenderness. For a twist, consider using tofu or seitan if you’re going plant-based. -
2 tbsp olive oil
For sautéing! You can substitute it with sesame oil for an extra layer of flavor, which is particularly tasty in this dish. -
1 tsp salt
Essential for enhancing flavors. Feel free to adjust based on your preference or dietary restrictions. -
1/2 tsp pepper
A staple spice! Don’t skip this to keep your dish from tasting flat. -
1 tsp chili powder
Adds a mild kick! If you’re extra spicy, switch it out for cayenne pepper. -
1 tsp smoked paprika
For that rich, smoky flavor and beautiful color. Sweet paprika works too, but you won’t get that smoky depth. -
1 tsp onion powder
A flavor powerhouse! If you have fresh onions, you could use 1 small onion instead—just sauté it until golden. -
1 tsp oregano
Gives a touch of herbaceousness. Dried thyme can make a fine substitute! -
1/2 cup soy sauce
The saltiness and umami boost hold the dish together. Use tamari sauce for a gluten-free option or coconut aminos for a sweeter profile. -
1/2 cup honey
The secret to the sticky vibe! Maple syrup or agave can be great swaps if you’re vegan. -
1/4 cup rice vinegar
Adds brightness! Apple cider vinegar is a good alternative if you don’t have rice vinegar on hand. -
3 cloves garlic, minced
Freshly minced garlic brings unforgettable aroma and flavor! Garlic powder will work too for an easier option. -
2 tbsp sriracha
To spice things up! You can reduce the quantity for a milder flavor or keep it spicy! -
2 tsp sesame oil
Drizzle this for that delicious nutty taste! Consider using a different high-heat oil if you can’t find it. -
1 tsp ground ginger
Fresh ginger would be stellar here; just grate it up finely! -
2 tsp arrowroot powder mixed with 2 tbsp water to make a slurry
This is our thickening agent! You can also use cornstarch with the same method if needed. -
1/2 cup mayo
For that creamy sauce! Swap out for Greek yogurt if you’re looking for a lighter option. -
1 tbsp sriracha
Extra kick for your mayonnaise sauce! Adjust based on your level of spice tolerance. -
2-3 tbsp water
To achieve the desired sauce consistency. -
Sesame seeds for topping
For a crunchy finish! You can roast them for an added depth of flavor.
Now that you’ve got your ingredients laid out, let’s dive into the cooking process!
Step-by-Step Instructions
Step 1: Cook the Rice
Start by rinsing your uncooked rice under cool water to remove excess starch. Toss it into a pot or rice cooker and add those magical proportions of water. The golden rule is usually a 1:1.5 rice-to-water ratio. Bring it to a gentle boil, then reduce to simmer until it’s fluffy and tender. If you’re using brown rice, it’ll take a tad longer, about 40-45 minutes. While that’s cooking, we can multitask!
Chef Tip: Give your rice an occasional stir to keep it from sticking, and fluff it with a fork at the end for that perfect loose texture.
Step 2: Prep the Chicken
While the rice is doing its magic, let’s get started on that chicken! Cut the chicken breasts into bite-sized pieces. This helps them to cook evenly and soak up the sticky sauce beautifully. Season the chicken with salt, pepper, chili powder, smoked paprika, onion powder, and oregano for that flavor-packed impact.
Step 3: Sauté the Chicken
In a sizable skillet, heat the olive oil over medium-high heat. Add your seasoned chicken and sauté, stirring occasionally, until it’s nice and golden brown (about 5-7 minutes). You want it cooked through but equally crispy on the outside. This is the moment where your kitchen will start to smell heavenly!
Chef Hack: Avoid overcrowding the skillet so that the chicken can brown properly. Cook in batches if necessary!
Step 4: Make the Sauce
In a separate bowl, whisk together the soy sauce, honey, rice vinegar, minced garlic, sriracha, sesame oil, and ground ginger. Pour this flavorful sauce over your sautéed chicken in the skillet. Let it simmer for about 5 minutes to allow those delicious flavors to meld together and thicken slightly.
Step 5: Thicken it Up
It’s time for the arrowroot slurry! Mix it in quickly to thicken up that sticky sauce, stirring for another 1-2 minutes until it coats the chicken beautifully.
Pro Tip: If you’re in a hurry, you can skip the thickening step — it’ll still be deliciously sticky sans the extra gooeyness!
Step 6: Steam the Broccoli
In the last few minutes of cooking, throw those beautiful, chopped broccoli heads into the same skillet, allowing them to steam in the leftover sauce for just a couple of minutes. They’ll become vibrantly bright green and perfectly tender-crisp!
Step 7: Assemble and Serve
It’s the moment of truth! Scoop that fluffy rice into bowls and top it generously with your sticky chicken and broccoli combo. Drizzle extra sauce over the top and finish with a sprinkle of sesame seeds for that satisfying crunch.
Serving Suggestions
For a visually appealing presentation, consider layering your sticky chicken and broccoli atop the rice in a generous mound. Play around with color; a side of pickled carrots or cucumber salad can add a refreshing touch. If you’re feeling extra, place the bowls on a rustic wooden board with colorful chopsticks and fresh herbs around for that Instagrammable moment!
Recipe Variations
- Spicy Pineapple Twist: Add chunks of fresh pineapple to the chicken during the last 5 minutes of cooking for a Hawaiian-inspired flavor.
- Mango Salsa Delight: Top your sticky chicken with a fresh mango salsa—combine diced mango, red onion, cilantro, lime juice, and a pinch of salt.
- Whole Grain Goodness: Swap out the white rice for quinoa or farro! Both options pack in extra nutrients and add a lovely chewy texture.
- Cauliflower Rice Option: For a low-carb option, try cauliflower rice instead of regular rice. Just sauté it lightly for a few minutes before serving.
- Sweet Potato Addition: Roasting some diced sweet potatoes alongside your broccoli adds a delightful sweetness that pairs well with the savory chicken.
Chef’s Notes
Food is always evolving, and this recipe is no exception. I remember the first few times I made this dish; I didn’t know a thing about balancing flavors. It took trial and error (and a few too many overly-salty mistakes!) to perfect my sauce. I’ve learned that simplicity often yields the best results. Today, I love keeping things practical, focusing on easy preparations that still make a lasting impression.
Oh, and here’s a fun kitchen story: Once, I was so busy chatting with friends while cooking, I mistook cayenne pepper for paprika (yikes!). Let’s just say that bowl of sticky chicken turned out to be a fire surprise! But hey, we all love a little unexpected twist, right?
FAQs and Troubleshooting
1. What if my sauce isn’t thickening?
If your sauce isn’t thickening as you want, ensure you’re using the correct proportions for the arrowroot slurry. Also, make sure to give it time to cook down properly; a little simmering will do wonders!
2. How do I store leftovers?
Store any leftovers in an airtight container, separated for up to 3 days in the fridge. Reheat in the microwave or in a skillet with a splash of water to keep everything moist.
3. How can I make this dish gluten-free?
Simply swap out the soy sauce for gluten-free tamari and choose rice vinegar as your acidic component. Most of the other ingredients on this list are naturally gluten-free.
4. What other veggies can I add?
You can get creative here! Bell peppers, snap peas, or even carrots would be lovely additions. Just be sure to cook them until they’re bright and tender but not mushy!
Nutritional Info
Here’s a breakdown of the nutrition you’ll get from one serving of these delicious sticky chicken bowls:
- Calories: Approximately 500 kcal
- Protein: Approximately 35 grams (thanks to the chicken!)
- Fat: 12 grams
- Carbohydrates: About 70 grams
- Fiber: 3 grams
Packed with protein and vibrant veggies, these bowls are both satisfying and nutritious!
Final Thoughts
There you have it, my friends! A delightful Sticky Chicken Bowl recipe that’s sure to have your taste buds singing and your friends craving seconds. Food is more than just nourishment; it brings joy, comfort, and connection. So next time you gather with loved ones, consider whipping up this dish and watch as smiles light up, stories flow, and laughter fills the air.
I encourage you not just to follow this recipe to the letter but to let it inspire your kitchen creativity. Who knows? Maybe you’ll create your own special twist that brings the same warm memories and happiness to your dinner table! Happy cooking, and as always, let’s dig in! 🍽️
Print
Sticky Chicken Bowls
- Total Time: 40 minutes
- Yield: 4 servings 1x
- Diet: Gluten-Free
Description
A comforting bowl of juicy chicken coated in a tangy, sweet, and slightly spicy sauce served atop rice with vibrant broccoli.
Ingredients
- 2 cups uncooked rice
- 2 small heads broccoli, chopped
- 3 large chicken breasts, cut into bite-sized pieces
- 2 tbsp olive oil
- 1 tsp salt
- 1/2 tsp pepper
- 1 tsp chili powder
- 1 tsp smoked paprika
- 1 tsp onion powder
- 1 tsp oregano
- 1/2 cup soy sauce
- 1/2 cup honey
- 1/4 cup rice vinegar
- 3 cloves garlic, minced
- 2 tbsp sriracha
- 2 tsp sesame oil
- 1 tsp ground ginger
- 2 tsp arrowroot powder mixed with 2 tbsp water to make a slurry
- 1/2 cup mayo
- 1 tbsp sriracha
- 2–3 tbsp water
- Sesame seeds for topping
Instructions
- Cook the rice by rinsing under cool water, then cook with a 1:1.5 ratio of water until fluffy.
- Prep the chicken by cutting it into bite-sized pieces and seasoning with the spices.
- Sauté the chicken in olive oil over medium-high heat until golden brown.
- Make the sauce by whisking together soy sauce, honey, rice vinegar, garlic, sriracha, sesame oil, and ginger.
- Thicken the sauce with the arrowroot slurry, stirring until it coats the chicken.
- Steam the broccoli in the skillet with the chicken for 2 minutes.
- Assemble the bowls with rice, chicken, broccoli, and drizzle with sauce, then top with sesame seeds.
Notes
For added flavor, consider different veggies or sauces based on preferences. Make sure to store leftovers properly.
- Prep Time: 10 minutes
- Cook Time: 30 minutes
- Category: Main Course
- Method: Sautéing
- Cuisine: Asian
Nutrition
- Serving Size: 1 serving
- Calories: 500
- Sugar: 30g
- Sodium: 800mg
- Fat: 12g
- Saturated Fat: 2g
- Unsaturated Fat: 7g
- Trans Fat: 0g
- Carbohydrates: 70g
- Fiber: 3g
- Protein: 35g
- Cholesterol: 90mg
Keywords: sticky chicken bowls, comfort food, weeknight dinner, Asian-inspired

High Protein Honey BBQ Chicken Mac & Cheese Meal Prep
High Protein Honey BBQ Chicken Mac & Cheese Meal Prep: A Deliciously Cozy Dish
Hey there, food lovers! It’s your favorite kitchen companion, Beau Collier, and today we’re diving into a comfort food classic with a healthy twist—High Protein Honey BBQ Chicken Mac & Cheese! Now, if you’re like me, the thought of gooey cheese enveloping perfectly cooked pasta sparks joy like nothing else. Add in some savory chicken and a hint of sweetness from honey BBQ sauce, and you’ve got yourself a dish that not only ticks all the boxes for comfort and flavor but is also packed with protein to fuel your day.
As life gets busier and we find ourselves juggling work, family, and everything in between, meal prep has become our culinary secret weapon. This dish is not just a mouthwatering meal; it’s a smart and deliberate way to ensure that you’re eating right while making your life just a tad easier. With this recipe, you can whip up a week’s worth of lunches or dinners in one appliance—your trusty oven, stovetop, or slow cooker. So, grab your spatula and let’s get cooking!
And I promise you, this isn’t just any mac and cheese. This is a love letter to the classic family favorite, elevated with the goodness of chicken and delightful honey BBQ flavors. Whether you’re meal prepping for the week or just treating yourself after a long day, this dish is all about that warm hug you get from good food. Let’s dig in!
Personal Story
I’ll never forget the first time I made mac and cheese for my family. I was just a wide-eyed kid standing on a stool to reach the stove, decked out in my superhero apron. My mission? To recreate the cheesy magic my mom always had up her sleeve. I grabbed elbow macaroni, a couple of blocks of cheese, and way too much milk. You can guess how well that went!
Fast forward to my teenage years, and I started getting creative in the kitchen. One experimental week, I decided to add BBQ chicken, thinking, “Why not?” and it was a hit! My family devoured it, and I couldn’t believe how something as simple as mac and cheese could be so versatile. That day sparked a love for combining flavors that drove me to create the delightful, health-conscious version I’m sharing with you today. Fast forward to now, and here I am, ready to share this powerhouse dish that packs the nostalgia of childhood with the nutrition we crave as adults.
Ingredients
Here’s what you’ll need for this High Protein Honey BBQ Chicken Mac & Cheese:
-
2 cups macaroni
- Chef Insight: Macaroni is the classic choice, but feel free to swap it for whole grain or gluten-free pasta for a health boost or dietary needs.
-
1 pound chicken breast, cooked and shredded
- Substitution Tips: If you’re short on time, rotisserie chicken or canned chicken will work perfectly. Just make sure to shred it for that perfect blend with the macaroni.
-
1 cup low-fat cheese
- Quick Note: Cheddar cheese is my go-to for that classic flavor, but you can also mix it up with mozzarella or gouda for a unique twist!
-
1/2 cup BBQ sauce
- Chef’s Insight: I love a tangy sauce! If you’re looking for a different flavor profile, experiment with honey mustard or hot sauce for a kick!
-
1 tablespoon honey
- Substitution Tips: If you’re feeling adventurous, try maple syrup or agave for a different sweetness!
-
1 cup milk
- Quick Note: Almond milk or any milk alternative can replace dairy milk while maintaining creaminess.
-
Salt and pepper to taste
- Chef Insight: Always season your pasta water; it makes a world of difference in flavor!
-
Optional toppings:
- Green onions: For a fresh crunch and color.
- Extra cheese: Because who doesn’t love more cheese?
Step-by-Step Instructions
Step 1: Cook the Macaroni
Bring a large pot of salted water to a boil. Add your macaroni and cook until al dente, about 8 minutes. Chef Tip: Reserve a cup of pasta water before draining! This liquid will help create a beautiful sauce later on.
Step 2: Prepare the Chicken
While your pasta is cooking, shred your cooked chicken breast. You can do this easily with two forks or in a stand mixer—just make sure it’s all nicely shredded to mix well with the mac and cheese later. If you’re using a store-bought option, simply measure out your portion.
Step 3: Create the Sauce
In a medium saucepan over medium heat, combine the BBQ sauce, honey, and milk. Stir gently until everything is well combined and heated through. Little Chef Hack: If you want to thicken your sauce a bit, add a small cornstarch slurry (mix a tablespoon of cornstarch with a tablespoon of water) and stir until it thickens.
Step 4: Combine Everything
In a large mixing bowl, combine the drained macaroni, shredded chicken, and the luscious BBQ sauce mixture. Add in your cheese and mix everything until well coated. If your mixture seems a bit dry, don’t hesitate to add a splash of the reserved pasta water to achieve your desired creaminess.
Step 5: Bake (Optional)
Transfer your mixture to a baking dish, top with extra cheese, and bake at 350°F (175°C) for about 20 minutes, or until bubbly and golden brown. If you like a little crust, broil it for the last minute or two. Just keep an eye on it so it doesn’t burn!
Step 6: Serve and Enjoy!
Once your mac and cheese is out of the oven, let it sit for about 5 minutes. This will help the flavors meld together and make serving a breeze. Top with optional green onions or extra cheese for a delightful finishing touch before diving in!
Serving Suggestions
There are a million ways to enjoy this High Protein Honey BBQ Chicken Mac & Cheese! Serve it in a cozy bowl, garnished with green onions for a pop of color. Pair it with a fresh green salad to balance the richness, or why not throw in some steamed veggies on the side? For casual dinners, serving it in a deep dish with some crusty bread on the side makes for the perfect family feast.
If you’re meal prepping, portion it out in airtight containers for easy grab-and-go meals throughout the week. Just reheat in the microwave for a delightful lunch that makes your coworkers envious!
Recipe Variations
-
Buffalo Chicken Mac: Swap in buffalo sauce for the BBQ sauce for a spicy kick. Add a dollop of blue cheese dressing on top!
-
Vegetarian Delight: Replace chicken with roasted vegetables or protein-rich chickpeas for a vegetarian option without losing flavor.
-
Cheesy Broccoli Mac: Stir in steamed broccoli florets for an extra serving of greens, plus they add a nice crunch.
-
Tex-Mex Twist: Incorporate black beans, corn, and a sprinkle of taco seasoning for a southwest flair.
-
Pesto Bliss: Instead of BBQ sauce, mix in your favorite pesto for an Italian-inspired comfort dish.
Chef’s Notes
As with all my recipes, this one has evolved over time. I originally created it without any thought of the high protein aspect, focusing solely on comfort food. But as I started meal prepping for an active lifestyle, the need to include solid proteins became evident. It’s been a joy finding ways to enjoy classic favorites while staying true to nutritional goals. I still remember that first bite, sharing it with my family, and knowing we all found joy in the flavors. Cooking has a funny way of taking you back, doesn’t it?
FAQs and Troubleshooting
1. My mac and cheese turned out too dry. What happened?
If your dish is dry, it may be due to not enough liquid in your sauce mixture. Try adding a bit more milk or reserved pasta water next time.
2. Can I freeze leftovers?
Absolutely! This dish freezes well. Just store it in an airtight container and reheat thoroughly when you’re ready to enjoy it again.
3. How can I make it spicier?
For an added kick, toss in some diced jalapeños or a spicy BBQ sauce.
4. What if I don’t have BBQ sauce?
You can use any sauce of your choice, like teriyaki for a sweet Asian twist or even just plain tomato sauce in a pinch!
Nutritional Info
While I’m not a nutritionist, I like to think about how the ingredients come together for a wholesome meal. This High Protein Honey BBQ Chicken Mac & Cheese is loaded with lean chicken breast and a decent amount of cheese, giving you about 25g of protein per serving. Coupled with the fiber from macaroni and any veggies you throw in, this meal offers a satisfying blend of macronutrients to keep you full and energized.
Each serving generally contains:
- Calories: 450-500
- Protein: ~25g
- Carbohydrates: ~50g
- Fat: ~15-20g
Of course, numbers can vary based on ingredients and measurements, but isn’t the focus on balance rather than perfection?
Final Thoughts
Cooking is an adventure, and I hope this High Protein Honey BBQ Chicken Mac & Cheese becomes one of your go-to recipes! With its rich flavors and comforting nature, this dish embodies everything I love about food—family, togetherness, and that magical ability to make us feel at home, no matter where we are. I can’t wait for you to try it out and hear how it turns out! Whether you’re savoring it on a busy weekday, indulging in it during a cozy movie night, or prepping it for your week ahead, remember: good food should always bring a smile. So let’s keep cooking, experimenting, and sharing the love of food with one another. Happy eating!
Print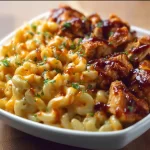
High Protein Honey BBQ Chicken Mac & Cheese
- Total Time: 45 minutes
- Yield: 4 servings 1x
- Diet: High Protein
Description
A comfort food classic elevated with protein-packed chicken and delicious honey BBQ flavors, perfect for meal prep.
Ingredients
- 2 cups macaroni
- 1 pound chicken breast, cooked and shredded
- 1 cup low-fat cheese
- 1/2 cup BBQ sauce
- 1 tablespoon honey
- 1 cup milk
- Salt and pepper to taste
- Optional toppings: Green onions, Extra cheese
Instructions
- Cook the macaroni by bringing a large pot of salted water to a boil, adding macaroni, and cooking until al dente, about 8 minutes.
- Prepare the chicken by shredding the cooked chicken breast with two forks or in a stand mixer.
- Create the sauce by combining the BBQ sauce, honey, and milk in a medium saucepan over medium heat, stirring until heated through.
- Combine everything by mixing the drained macaroni, shredded chicken, BBQ sauce mixture, and cheese in a large bowl until well coated.
- Transfer the mixture to a baking dish, top with extra cheese, and bake at 350°F (175°C) for about 20 minutes until bubbly.
- Serve and enjoy! Let it sit for about 5 minutes, then top with green onions or extra cheese if desired.
Notes
Feel free to swap the macaroni for whole grain or gluten-free pasta. For a spicy kick, substitute BBQ sauce with buffalo sauce.
- Prep Time: 15 minutes
- Cook Time: 30 minutes
- Category: Main Course
- Method: Baking
- Cuisine: American
Nutrition
- Serving Size: 1 serving
- Calories: 450
- Sugar: 10g
- Sodium: 600mg
- Fat: 18g
- Saturated Fat: 8g
- Unsaturated Fat: 8g
- Trans Fat: 0g
- Carbohydrates: 52g
- Fiber: 2g
- Protein: 25g
- Cholesterol: 60mg
Keywords: mac and cheese, meal prep, chicken, BBQ, comfort food
Creamy Garlic Chicken
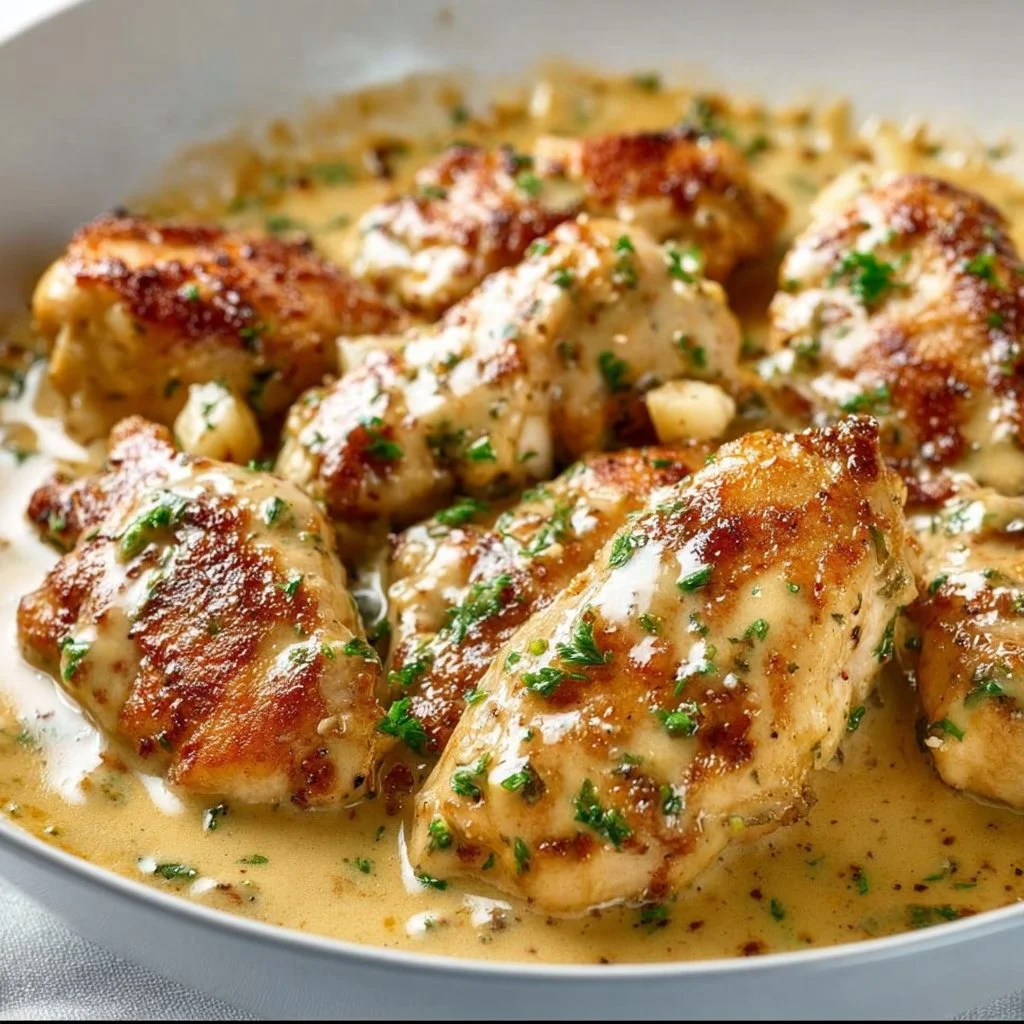
Creamy Garlic Chicken: A Soul-Warming Dish for Every Occasion
Hey there, food family! 🍽️ Welcome back to Feastical, where we whip up feel-good recipes that stir your soul and warm your heart. Today, I’m excited to share one of my all-time favorites: Creamy Garlic Chicken. This dish has all the right flavors—creamy, garlicky goodness with a touch of indulgence that’ll have everyone at the table saying, "Mmm, what’s that?"
Picture this: It’s a chilly evening, and you’ve had a long day. You don your apron and fire up the stove, and as you chop fresh garlic and sizzle chicken in olive oil, the kitchen begins to fill with the most divine aroma. It’s more than just a meal; it’s a warm hug after a long day. Easy to make and even easier to enjoy, this creamy garlic chicken is perfect for a cozy night in or impressing guests at your next dinner party.
Now, I know what you might be thinking: “Is this going to take me hours in the kitchen?” Relax, my friend! This recipe is straightforward and can be whipped up in about 30 minutes. Just grab your favorite music playlist and let’s dance our way through the culinary creation. Are you ready? Let’s get cookin’!
Personal Story
I remember the first time I made creamy garlic chicken. I was living in my first apartment, a cozy little space with a mismatched collection of kitchen tools. My friends were coming over for a casual dinner, and I was determined to impress them with something hearty yet simple. I stumbled onto this recipe while browsing through a cookbook gifted to me by my grandma, whose cooking always filled our family gatherings with love and laughter.
With a few ingredients and a healthy dose of enthusiasm, I set the scene—my apartment filled with laughter, clinking glasses, and just a hint of competitiveness over who could guess my secret ingredient. The dish was a hit, and it became a staple for our gatherings! The creamy garlic chicken not only satisfied our bellies but also became a centerpiece of many unforgettable memories, bonding us together over shared plates and stories.
Ingredients
Here’s what you’ll need to make this delightful dish:
-
4 Chicken Breasts
Tender and juicy, boneless chicken breasts are perfect for soaking up all that creamy goodness. If you’re a fan of dark meat, feel free to swap in chicken thighs for a richer flavor! -
4 Cloves Garlic, Minced
Garlic is the star of this recipe! Don’t be shy; use fresh minced garlic for that amazing aroma. If you’re in a pinch, pre-minced garlic in a jar works too, but fresh is always better. -
1 Cup Heavy Cream
This is where the magic happens! Heavy cream adds a silky texture to the sauce. For a lighter version, you can substitute with half-and-half or a rich coconut milk, although the flavor will slightly vary. -
1 Cup Grated Parmesan Cheese
Parmesan adds that wonderful salty, nutty flavor. Feel free to swap in Pecorino Romano for a sharper taste or nutritional yeast for a dairy-free alternative. -
2 Tablespoons Olive Oil
This is essential for searing your chicken and adding flavor. You can use other oils like avocado or canola, but olive oil’s flavor profile adds a nice touch. -
Salt and Pepper to Taste
These two are your best friends in the kitchen, elevating every dish. Always taste as you go—you might want more seasoning than you think! -
Chopped Parsley for Garnish
A sprinkle of fresh parsley adds a pop of color and freshness. Fresh chives or basil also make an inviting alternative!
Making sure you have these ingredients ready will ensure a smooth cooking process. Are you excited yet? Let’s dive into the cooking!
Step-by-Step Instructions
-
Prep Your Ingredients
Start by gathering all your ingredients and placing them within reach. Mince your garlic, chop the parsley, and if you haven’t, pat your chicken breasts dry with a paper towel. This will help with that lovely golden crust when you sear them. -
Season the Chicken
Sprinkle salt and pepper generously over both sides of the chicken breasts. Imagine you’re in your favorite restaurant, and you want each bite to pack a punch! Allow your seasoned chicken to sit while you heat your skillet. -
Sear the Chicken
Heat the olive oil in a large skillet over medium-high heat. Once it’s shimmering (but not smoking), add the chicken breasts. Sear each side for about 5-7 minutes until they turn a gorgeous golden brown. Resist the urge to move them too much—let that crust form! -
Add the Garlic
Once your chicken is beautifully seared and cooked through, remove it from the skillet and set it aside on a plate. In the same skillet, lower the heat to medium and toss in the minced garlic. Sauté for about 30 seconds until fragrant—be careful not to let it burn since burnt garlic can be bitter. -
Pour in the Cream
Now it’s time to bring that creamy goodness to life! Pour the heavy cream into the skillet, stirring to combine with the garlic-infused oil. Bring it to a gentle simmer, and watch as it transforms into a luscious sauce. -
Add the Parmesan
Gradually whisk in the grated parmesan cheese, continuing to stir until it melts and blends seamlessly into the cream. This will take about 2-3 minutes. If your sauce is too thick, a splash of chicken broth or water can help adjust the consistency. -
Return the Chicken
Nestle the chicken breasts back into the skillet, spooning the creamy sauce over them. Let everything simmer together for about 2-3 more minutes to heat through and allow the chicken to absorb that heavenly garlic flavor. -
Finish with Parsley
Remove from heat and stir in about half of the parsley. Reserve the rest for garnish. -
Taste and Adjust
Give your creamy garlic chicken a taste! Adjust the seasoning with more salt and pepper if necessary.
That’s it! So simple, yet so satisfying. Your kitchen should smell heavenly by now!
Serving Suggestions
To plate this scrumptious creamy garlic chicken, start with a generous scoop of the creamy sauce on the bottom of each plate. Lay the chicken breasts on top, allowing that luscious sauce to cascade around them. For a pop of color, sprinkle some chopped parsley on top, creating a vibrant contrast against the creamy backdrop.
Pair your masterpiece with some perfectly sautéed veggies or a bed of fluffy mashed potatoes to soak up the sauce. If you’re feeling adventurous, garlic bread on the side is a must for those gill-and-sop rituals! A crisp green salad dressed in a light vinaigrette complements the richness of the dish beautifully.
Recipe Variations
Get ready to shake things up with some fun variations!
-
Spicy Garlic Chicken: Add a sprinkle of red pepper flakes while sautéing the garlic for a bit of heat, or drizzle in some sriracha to give your dish a kick.
-
Mushroom Chicken: Sauté sliced mushrooms with the garlic for added earthiness and texture. They soak up that delicious sauce like little sponges!
-
Lemon Herb Twist: For a brighter flavor, add a squeeze of fresh lemon juice and zest to the cream just before serving. Fresh basil would also work wonders for a refreshing herbal twist.
-
Vegetable Medley: Incorporate seasonal veggies like spinach, peas, or sun-dried tomatoes into the sauce for added nutrition and color.
-
Easy Gluten-Free Option: Swap in a gluten-free pasta if you want a creamy garlic chicken over a nest of noodles—perfect for a comforting, hearty meal!
Chef’s Notes
As a chef, nothing makes me smile quite like the transformative power of cooking. This creamy garlic chicken has traveled with me through many kitchens and evolved into my own hearty masterpiece. Over the years, I’ve played with flavors, adjusting garlic levels and swapping different cheeses based on what’s in the fridge. But one thing remains constant—the love I pour into every dish.
Just last week, I made this exact recipe for a gathering, and my friend’s kid declared it “the best chicken ever!” That’s the ultimate compliment, isn’t it? Cooking should always be about joy, whether you’re trying something new or creating a family tradition.
FAQs and Troubleshooting
-
What if my sauce is too thick?
If your sauce turns out thicker than you’d like, simply whisk in a splash of chicken broth or water until you reach the desired consistency. -
Can I use chicken tenders instead of breasts?
Absolutely! Chicken tenders will cook quicker, so adjust your cooking time accordingly, searing for about 3-4 minutes on each side. -
What if I don’t have parmesan?
No worries! You can use any hard cheese, or even cream cheese for a different taste. Nutritional yeast is a great substitute if you’re looking for a dairy-free option. -
How do I store leftovers?
This chicken holds up wonderfully! Let it cool completely, then transfer to an airtight container in the fridge for up to 3-4 days. Reheat gently on the stove with a splash of cream to bring back that creamy texture.
Nutritional Info
Serving Size: 1 Chicken Breast with Sauce
Calories: Approximately 450
Fat: 32g
Carbohydrates: 4g
Protein: 38g
Fiber: 0g
This is a hearty meal that offers a nice balance of proteins and fats; you can indulge while also feeling satisfied!
Final Thoughts
And there you have it, folks! Creamy Garlic Chicken is more than just a recipe; it’s a cozy creation filled with flavors and memories that bring people together. Whether you’re gathering friends for a feast or just whipping up dinner for yourself, this dish is sure to make your heart happy and your belly full.
I hope you’ve enjoyed cooking along with me today! Don’t forget to share your own experiences and tweaks—cooking is all about making it your own. I absolutely love seeing how you put your spin on my recipes! Until next time, keep your kitchen filled with laughter, love, and of course, lots of delicious food. Happy cooking, friends! 🥄✨
Print
Creamy Garlic Chicken
- Total Time: 40 minutes
- Yield: 4 servings 1x
- Diet: None
Description
A soul-warming dish with creamy, garlicky goodness that’s perfect for any occasion.
Ingredients
- 4 Chicken Breasts
- 4 Cloves Garlic, Minced
- 1 Cup Heavy Cream
- 1 Cup Grated Parmesan Cheese
- 2 Tablespoons Olive Oil
- Salt and Pepper to Taste
- Chopped Parsley for Garnish
Instructions
- Prep Your Ingredients: Start by gathering all your ingredients and placing them within reach. Mince your garlic, chop the parsley, and pat your chicken breasts dry with a paper towel.
- Season the Chicken: Sprinkle salt and pepper generously over both sides of the chicken breasts. Allow to sit while heating the skillet.
- Sear the Chicken: Heat olive oil in a large skillet over medium-high heat. Sear each side of the chicken for about 5-7 minutes until golden brown.
- Add the Garlic: Remove chicken and sauté minced garlic in the skillet for about 30 seconds until fragrant.
- Pour in the Cream: Add heavy cream to the skillet, stirring to combine with garlic-infused oil and bring to a gentle simmer.
- Add the Parmesan: Gradually whisk in grated parmesan cheese, stirring until melted and blended. Adjust consistency if needed.
- Return the Chicken: Nestle chicken breasts back into the skillet, spooning the sauce over them and letting them simmer together for 2-3 minutes.
- Finish with Parsley: Remove from heat and stir in half of the parsley, reserving the rest for garnish.
- Taste and Adjust: Give your creamy garlic chicken a taste and adjust seasoning if necessary.
Notes
Serve with sautéed veggies or mashed potatoes to soak up the sauce. Garlic bread on the side is a must!
- Prep Time: 10 minutes
- Cook Time: 30 minutes
- Category: Main Course
- Method: Searing
- Cuisine: American
Nutrition
- Serving Size: 1 chicken breast with sauce
- Calories: 450
- Sugar: 1g
- Sodium: 700mg
- Fat: 32g
- Saturated Fat: 16g
- Unsaturated Fat: 12g
- Trans Fat: 0g
- Carbohydrates: 4g
- Fiber: 0g
- Protein: 38g
- Cholesterol: 100mg
Keywords: chicken, creamy, garlic, comfort food, easy recipe
Slow Cooker Lasagna
Slow Cooker Lasagna: A Comfort Food Classic
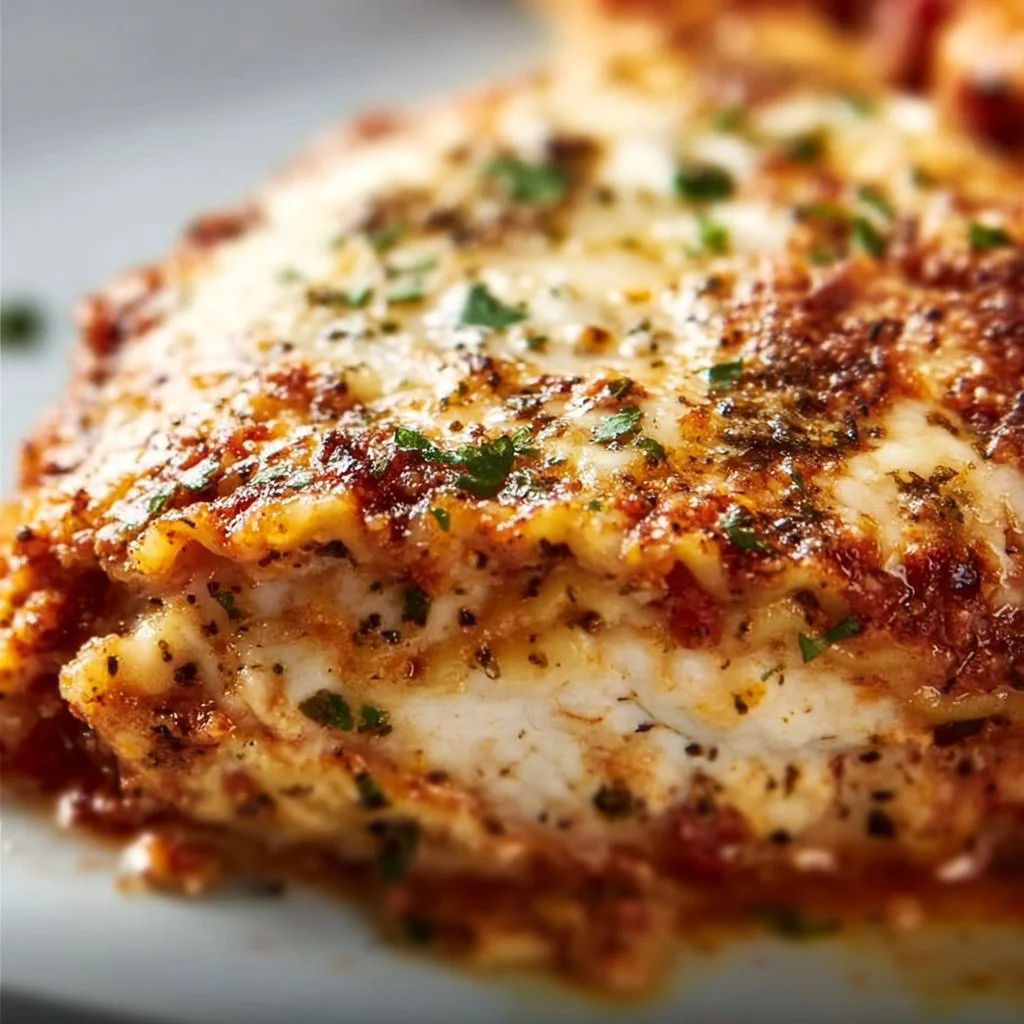
Hey there, food lover! Today, we’re diving into a warm, comforting world of rich flavors and gooey cheesiness with my Slow Cooker Lasagna recipe. If you’ve ever dreamt of the perfect lasagna—where layers of tender noodles, a savory meat sauce, and three types of cheeses meld together in one harmonious dish—then you’ve come to the right place!
Imagine coming home after a long day to the fragrant aroma of homemade lasagna wafting through your kitchen—that’s the magic of the slow cooker, my friends! It does all the hard work while you go about your day, making it practically effortless to serve up a dinner that feels like a big, warm hug.
Now, why not settle in for a bit? Grab a cup of your favorite beverage and let’s reminisce, shall we?
Personal Story: A Lasagna to Remember
I’ll never forget the first time I made lasagna for my family. I was in high school, eager to impress my parents with my burgeoning culinary skills. Armed with a dog-eared cookbook that I’d “borrowed” from the kitchen shelf, I decided that this was the moment I would show off. I can still picture myself in a flour-dusted apron, nervously layering those lasagna noodles, ricotta, and marinara sauce, all while my younger sibling excitedly asked if I would burn it.
Spoiler alert: I didn’t burn it! Instead, I created a slightly messy but utterly delicious masterpiece. The whole family gathered around the table, laughter spilled forth as my dad proclaimed it the best dinner ever (he was definitely being kind!). From that day on, lasagna became a staple at our family gatherings, often featuring in birthday celebrations and holiday dinners. It’s not just a meal; it’s part of our family history, warming our bellies and hearts alike. Who knew that one dish could carry such love?
Ingredients
Here are the star players of this scrumptious Slow Cooker Lasagna, presented with some insight straight from the chef’s mouth:
-
Lasagna Noodles
Opt for no-boil noodles for a fuss-free experience! These will soak up all the luscious sauce while cooking. -
Ricotta Cheese
Creamy and dreamy! You can swap it for cottage cheese if you want to lighten it up slightly. Just be prepared for a different texture! -
Mozzarella Cheese
The gooier, the better! Feel free to use low-fat mozzarella if you want to cut down on calories. -
Parmesan Cheese
Freshly grated is best for flavor, but pre-grated will do in a pinch. It adds that irresistible umami. -
Marinara Sauce
Go for store-bought for convenience or whip up a batch of homemade if you’re feeling adventurous! -
Ground Beef (or Sausage)
Use lean ground beef for a healthier option or Italian sausage for a flavor punch. If you’re vegetarian, try crumbled tempeh or lentils instead! -
Italian Seasoning
This blend is essential for that signature taste. You can make your own with basil, oregano, thyme, and rosemary if you have them on hand. -
Garlic
Fresh is always best! You can use garlic powder in a pinch, but nothing beats the aroma of freshly minced garlic. -
Onion
Yellow onion is the classic choice, but feel free to mix it up with a sweet onion for a milder flavor. -
Salt and Pepper
Essential for bringing all the flavors together. Always taste and adjust to your liking!
With these ingredients in hand, you’re all set to create a lasagna that will wow your family and friends!
Step-by-Step Instructions
Alright, it’s time to roll up those sleeves and get cooking! Follow along with these handy steps:
-
Prep the Sauce:
In a skillet over medium heat, add a little olive oil and sauté the diced onion until it’s translucent (about 3-4 minutes). Then, throw in the minced garlic and sauté until fragrant (around 30 seconds).Chef’s Tip: Don’t forget to stir while you sauté. Garlic can go from perfect to burnt in a heartbeat!
-
Brown Your Meat:
Add the ground beef or sausage to the skillet and cook until browned, breaking it apart with a wooden spoon as it cooks. Season it with Italian seasoning, salt, and pepper as it browns. Once it’s cooked through, drain any excess fat.Kitchen Hack: If you’re using sausage, remove it from the casings to create crumbles!
-
Layer the Marinara:
Stir in your marinara sauce with the meat mixture and let it simmer for a few minutes to meld those delicious flavors.Tip: Letting the sauce simmer enhances the taste so much. Just a little patience goes a long way!
-
Begin Layering:
Now, grab your slow cooker! Spread a thin layer of the meat sauce at the bottom, then place your lasagna noodles on top.Pro Tip: You can break noodles to fit if needed. There’s no right or wrong way to layer, so don’t stress!
-
Cheese Time:
Next, dollop ricotta cheese over the noodles, spreading it as evenly as possible, then sprinkle mozzarella and Parmesan cheese over it all. Repeat these layers until you’ve used everything—don’t forget to finish with a hearty layer of meat sauce and a showering of mozzarella on top! -
Cook Low and Slow:
Cover your slow cooker with its lid and cook on low for 4-6 hours or high for 2-3 hours. The longer, the better, as it allows the flavors to blend beautifully!Best Tip Ever: The last 30 minutes, uncover the slow cooker for that ooey-gooey cheese to melt to perfection!
-
Serving Time:
When it’s ready, let it cool for about 10-15 minutes. This allows the lasagna to set up a bit for cleaner slices.Chef’s Magic Touch: Garnishing with fresh basil or parsley before serving elevates the dish and adds a pop of color!
Serving Suggestions
Now that your Slow Cooker Lasagna is ready, let’s think about presentation! For the ultimate lasagna experience, serve it alongside a crisp garden salad drizzled with a tangy vinaigrette. It balances out the richness of the dish perfectly!
For a little something extra, offer up some warm garlic bread on the side—because let’s be honest, you can never have too much delicious bread! Slice up rich, crusty French bread, brush it with garlic-infused butter, and pop it in the oven for a few minutes until golden.
Don’t forget to sprinkle some extra Parmesan on top of your slice before serving, along with that fresh basil! It’s all about those beautiful, inviting layers that make your dish look restaurant-worthy.
Recipe Variations
Get ready to think outside the box with these fun twists on traditional lasagna:
-
Vegetable Lasagna:
Swap out meat for your favorite roasted veggies like zucchini, mushrooms, and bell peppers. Layer accordingly for a light, vibrant version! -
Spicy Chipotle Lasagna:
Add chipotle powder to your meat sauce for a smoky kick or layer in some sliced jalapeños for those who like it hot! -
White Lasagna:
Replace marinara with Alfredo sauce and layer in spinach and artichokes for a creamy, dreamy dish sure to impress! -
Pesto Lasagna:
Swap some marinara for pesto; it gives your lasagna a fresh flavor twist that pairs beautifully with chicken or veggies. -
Gluten-Free Lasagna:
Use gluten-free noodles made from rice or chickpeas, and be sure to choose a gluten-free sauce.
The beauty of lasagna is that it is adoptable, so feel free to get creative and make it your own!
Chef’s Notes
This recipe truly shines in its versatility and depth of flavor. It’s easy to customize based on what you have in your pantry or what you’re craving!
There was a time I experimented with adding spinach to my meat mixture (Hello, sneaky veggies!). Surprisingly, my kids didn’t even notice—and it became a staple in our household. It’s funny how we often view classic recipes as set in stone, yet they can evolve so beautifully over time, just like our own cooking stories.
FAQs and Troubleshooting
Q: My lasagna turned out watery. What went wrong?
A: This often happens when too much sauce or moisture-rich ingredients like veggies are added. To avoid this, always drain excess liquid and allow your cooked meat mixture to cool slightly before layering.
Q: How do I know when my lasagna is done?
A: You want that cheesy top to be bubbly and golden—use a digital thermometer if you have it. It should reach at least 160°F in the center.
Q: Can I prepare this ahead of time?
A: Absolutely! You can assemble the lasagna a day ahead and store it in the fridge. Just adjust cooking times slightly as it will start out cold.
Q: What can I do if my cheese didn’t melt properly?
A: If you uncover the slow cooker during the last 30 minutes of cooking, it allows the cheese to melt beautifully. A quick broil in your oven for a minute can also help melt and brown the cheese if needed!
Nutritional Info (per serving)
- Calories: 420
- Protein: 28g
- Carbohydrates: 30g
- Fat: 22g
- Fiber: 2g
- Sugar: 6g
These numbers can vary based on specific ingredients, but it gives you a ballpark figure for understanding this hearty dish!
Final Thoughts
There you have it, my friends—a Slow Cooker Lasagna that not only fills the belly but warms the heart. It’s perfect for busy weeknights, cozy family gatherings, or simply indulging because you deserve it! Remember, cooking is about enjoying the process and creating joyful memories along the way.
So, what are you waiting for? Fire up that slow cooker, gather your ingredients, and treat yourself to a delicious dish that brings people together. Happy cooking, and don’t forget to share your lasagna stories with me! Let’s keep this delicious journey alive! 🍽️❤️
Print
Slow Cooker Lasagna
- Total Time: 255 minutes
- Yield: 8 servings
- Diet: Meat
Description
A comforting slow cooker recipe featuring layers of noodles, meat sauce, and three types of cheese for a perfect family meal.
Ingredients
- No-boil Lasagna Noodles
- Ricotta Cheese
- Mozzarella Cheese
- Parmesan Cheese
- Marinara Sauce
- Ground Beef (or Sausage)
- Italian Seasoning
- Garlic
- Onion
- Salt
- Pepper
Instructions
- Prep the Sauce: In a skillet, sauté the diced onion until translucent, then add minced garlic until fragrant.
- Brown Your Meat: Add ground beef or sausage and cook until browned; drain excess fat.
- Layer the Marinara: Stir in marinara sauce with the meat mixture and let simmer.
- Begin Layering: Spread meat sauce in the slow cooker and place lasagna noodles on top.
- Cheese Time: Dollop ricotta over noodles, sprinkle with mozzarella and parmesan; repeat layers.
- Cook Low and Slow: Cover and cook on low for 4-6 hours or high for 2-3 hours.
- Serving Time: Let cool for 10-15 minutes before slicing and serve with fresh herbs.
Notes
Feel free to customize with different vegetables or sauces as desired.
- Prep Time: 15 minutes
- Cook Time: 240 minutes
- Category: Main Course
- Method: Slow Cooking
- Cuisine: Italian
Nutrition
- Serving Size: 1 serving
- Calories: 420
- Sugar: 6g
- Sodium: 600mg
- Fat: 22g
- Saturated Fat: 10g
- Unsaturated Fat: 6g
- Trans Fat: 0g
- Carbohydrates: 30g
- Fiber: 2g
- Protein: 28g
- Cholesterol: 70mg
Keywords: lasagna, slow cooker, pasta, cheesy, comfort food
Pesto Grilled Cheese
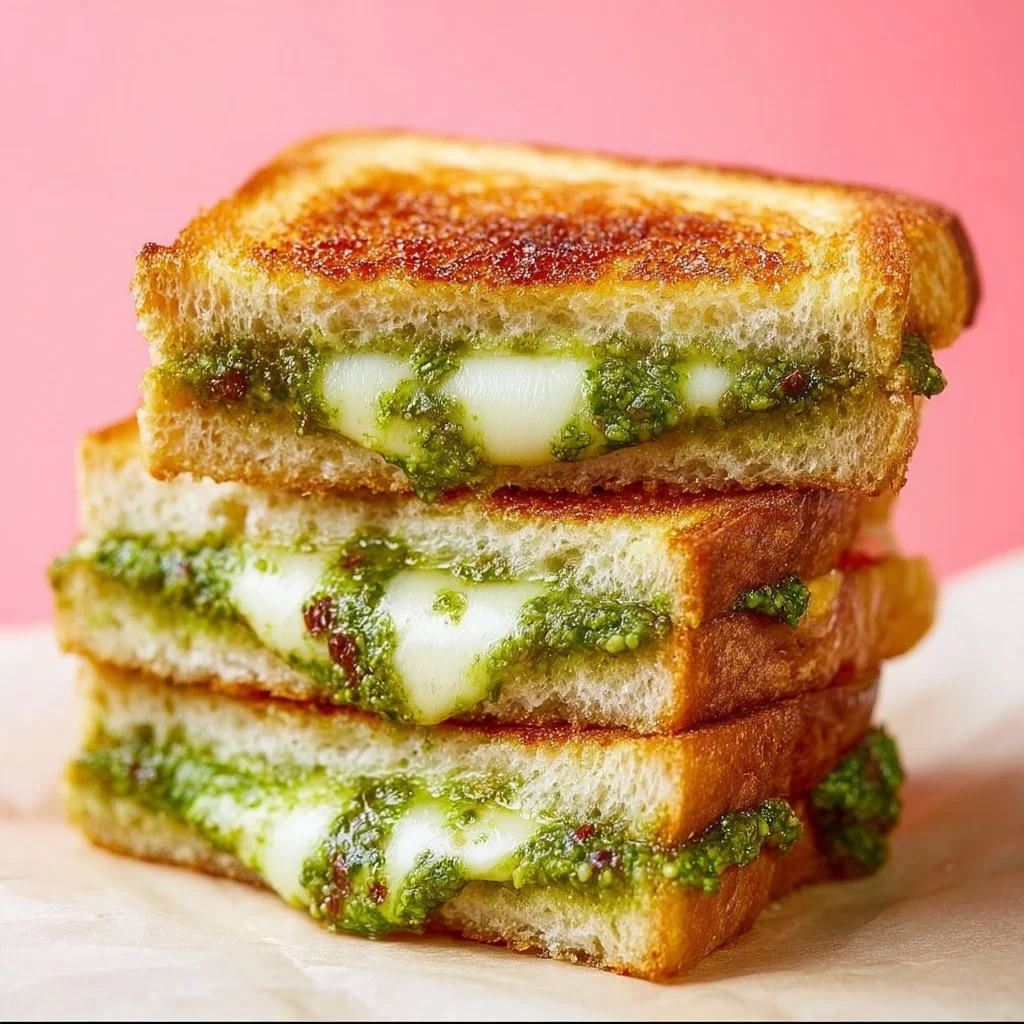
Pesto Grilled Cheese: A Flavor-packed Twist on a Classic Comfort Food
Hey food lovers, welcome back to Feastical! Today, I’m excited to whisk you away on a delicious adventure with one of my favorite comfort foods—Pesto Grilled Cheese. Picture this: two golden slices of perfectly toasted bread, melty cheese that oozes with every bite, and a vibrant pesto that adds a burst of freshness. That’s right; we’re taking the classic grilled cheese to a whole new level!
I’ve always had a soft spot for grilled cheese. Growing up, it was one of those “go-to” meals that my mom would whip up on rainy days alongside a bowl of tomato soup. There was something magical about the way the buttery bread transformed into crispy perfection, and how the cheese would stretch gloriously as I bit into it. Fast forward to now, and while I still savor the original grilled cheese, I’ve become obsessed with elevating it with all the flavors I adore—in this case, pesto.
I’ll never forget the first time I made this delightful twist. I had just returned home from a summer trip to Italy, where I fell in love with their fresh basil pesto sauce. With lingering memories of warm honeyed bread and rustic kitchens, I figured, why not combine these two culinary loves? I grabbed some ingredients and got to work. The result was a masterpiece that not only brought nostalgia to my taste buds but also transformed a simple meal into a gourmet experience. So, are you ready to dive into this cheesy, pesto-filled dream? Grab your spatula, and let’s get cooking!
Personal Story
The inception of my Pesto Grilled Cheese spills from a cherished memory of sunny afternoons spent in my Italian grandmother’s kitchen. I can still recall the delightful aroma of fresh basil wafting through the air, as she chopped herbs effortlessly while chatting about her secret family recipes. That kitchen was the heart of our family—a place for laughter, bonding, and, most importantly, amazing food.
One summer, I was tasked with helping her whip up a batch of basil pesto straight from her garden. As I lovingly crushed the basil and garlic with a mortar and pestle, she regaled me with stories of her childhood in Italy. That pesto made its way to sandwiches, tossed with pasta, and of course, drizzled generously over grilled cheeses. Fast forward to later years, when I found myself craving those flavors while in the comfort of my own kitchen. Inspired by my nonna’s wisdom, I decided to fuse her classic pesto with an all-time favorite. It was a joyful, delicious connection across time, and that’s how my Pesto Grilled Cheese was born!
Ingredients
Let’s gather the stars of the show for our Pesto Grilled Cheese! Here’s what you’ll need:
-
2 slices of bread
Choose your favorite! A hearty sourdough or a classic white works wonderfully, but feel free to experiment. Gluten-free options are also available if needed! -
2 slices of cheese
I love a good sharp cheddar for its rich flavor, but mozzarella adds a lovely stretch. Mix and match! Other great options include gouda or provolone. A dairy-free cheese can work too! -
2 tablespoons pesto
Homemade is amazing, but store-bought works in a pinch. You can also substitute with sun-dried tomato paste or spinach pesto if you’re feeling adventurous! -
Butter (for grilling)
Butter gives that iconic crispy golden crust, but if you’re looking for an alternative, try olive oil or vegan butter for a healthier option. Just remember, the key is to get that sizzle!
Step-by-Step Instructions
Alright, let’s get into the nitty-gritty of how to bring this cheesy delight to life!
-
Prep Work:
Gather all your ingredients and your trusted griddle or skillet. It’s worth cleaning your workspace beforehand to avoid any kitchen chaos. -
Bread it Up:
Take two slices of your chosen bread and place them on a clean surface. Don’t rush this part—be sure you’re selecting the right ones for your dream sandwich! -
Spread the Magic:
Slather a generous tablespoon of pesto on one side of each slice of bread. Ensure it’s evenly spread; this will add intense flavor to every bite. Want extra kick? Add a sprinkle of red pepper flakes for a little heat! -
Add the Cheese:
Place one slice of cheese on top of the pesto side of one of the bread slices. If you’re daring (and I think you should be), stack on another layer of cheese for maximum meltiness. Then, top with the other slice of bread, pesto side down. -
Butter Up:
Now, put that generous, warm pat of butter in the skillet over medium heat. Let it melt until golden and bubbly. You want that beautiful sizzle when you place the sandwich down! -
Get Grilling:
Carefully add your sandwich to the skillet. Cook for about 4 minutes on one side until it turns a toasty brown. Keep an eye out so it doesn’t burn! -
Flip Time:
When that side is golden, carefully flip your sandwich over using a spatula. If you want, add a little more butter around the edges for extra crunch and flavor. -
Perfect Melt:
Cook for another 3-4 minutes or until the cheese is beautifully ooey-gooey and the other side is radiantly golden. Use a lid to cover it during cooking to help the cheese melt faster. -
Serve It Up:
Once it’s just how you like it, remove it from the heat and let it cool momentarily. Slice it in half to reveal that glorious cheesy inside—totally Instagram-worthy!
Serving Suggestions
Presentation matters, right? For serving up your Pesto Grilled Cheese, keep it simple! Plate it on a rustic wooden board for that homey feel. I always love pairing it with a bowl of tomato soup or a light salad—something fresh to balance the richness.
You can add a sprinkle of fresh basil on top for color and flavor, or even a drizzle of balsamic glaze for a surprising tangy touch. And if you’re feeling playful? Try out an open-faced version by topping the grilled cheese with sliced fresh tomatoes or avocado right before serving.
Recipe Variations
The beauty of the Pesto Grilled Cheese is its flexibility! Here are some twists you can try to keep things exciting:
-
Caprese Style: Add slices of ripe tomatoes and fresh mozzarella along with the pesto for a refreshing Caprese touch.
-
Meat Lovers: Layer in some cooked bacon or prosciutto for a savory kick.
-
Veggie Delight: Sauté some spinach or mushrooms ahead of time, then add them in for a nutrient boost.
-
Nutty Flavor: Swap out the traditional cheese for goat cheese for a tangy twist, or even mix in a bit of sliced avocado for creaminess.
-
Spicy Pesto: Create a spicy version of your pesto by mixing in jalapeños or chipotle peppers for a heat-filled delight!
Chef’s Notes
As I revisit this recipe over the years, I’ve enjoyed exploring different flavor profiles and textures. One of the most memorable moments was when I served this dish at a family gathering, and my cousin, who hated vegetables, found himself heading back for seconds. That’s the magic of adding pesto; it transforms everything!
I also love the idea of transforming this dish into a breakfast delight. Think pesto grilled cheese with scrambled eggs and a sprinkle of chili flakes on top—perfect for brunch!
FAQs and Troubleshooting
1. My grilled cheese burnt before the cheese melted, what went wrong?
Ensure you’re using medium heat and keep a close eye on the sandwich. If it’s browning too quickly, lower the heat. Patience is key for that cheesy goodness!
2. What if I don’t have pesto?
No worries! Substitute with a mix of olive oil, garlic, and chopped fresh herbs, or even try any flavorful sauce you have on hand—sun-dried tomato paste works wonders!
3. Can I make this ahead of time?
While grilled cheese is best fresh, you can prepare the ingredients in advance and grill them right before serving.
4. My cheese didn’t melt! What did I do wrong?
Try using cheese that’s known for melting well, like mozzarella or Fontina. A little extra cover while cooking could speed up the melting process, too!
Nutritional Info (per serving)
- Calories: Approximately 400-500 (varies by bread and cheese choice)
- Protein: 18g
- Carbohydrates: 38g
- Fat: 25g
- Fiber: 2g
Remember, feel free to swap ingredients for lower-calorie alternatives, and always load on those veggies to up the nutritional value!
Final Thoughts
And there you have it, my wonderful friends—a gourmet take on the classic grilled cheese that’s sure to warm your soul! Whether you’re enjoying this solo with a good book or serving it up for friends, the Pesto Grilled Cheese will undoubtedly make you smile.
Cooking is about sharing, connecting, and creating memories, and I hope this recipe becomes a new favorite in your kitchen. Keep it simple, keep it delicious, and let that creativity flow! Stay tuned for more fun recipes and kitchen antics right here on Feastical. Until next time, happy cooking! 🧀✨
Print
Pesto Grilled Cheese
- Total Time: 18 minutes
- Yield: 1 serving 1x
- Diet: Vegetarian
Description
A flavor-packed twist on the classic comfort food, featuring melty cheese and vibrant pesto.
Ingredients
- 2 slices of bread
- 2 slices of cheese
- 2 tablespoons pesto
- Butter (for grilling)
Instructions
- Gather all your ingredients and your trusted griddle or skillet.
- Take two slices of your chosen bread and place them on a clean surface.
- Slather a generous tablespoon of pesto on one side of each slice of bread.
- Place one slice of cheese on top of the pesto side of one of the bread slices.
- Put that generous, warm pat of butter in the skillet over medium heat.
- Carefully add your sandwich to the skillet.
- When that side is golden, carefully flip your sandwich over using a spatula.
- Cook for another 3-4 minutes or until the cheese is beautifully ooey-gooey.
- Once it’s just how you like it, remove it from the heat and let it cool momentarily.
- Slice it in half to reveal the glorious cheesy inside.
Notes
Pair with tomato soup or a light salad for a complete meal. Add fresh basil or balsamic glaze for extra flavor.
- Prep Time: 10 minutes
- Cook Time: 8 minutes
- Category: Snack
- Method: Grilling
- Cuisine: Italian
Nutrition
- Serving Size: 1 sandwich
- Calories: 450
- Sugar: 2g
- Sodium: 600mg
- Fat: 25g
- Saturated Fat: 10g
- Unsaturated Fat: 10g
- Trans Fat: 0g
- Carbohydrates: 38g
- Fiber: 2g
- Protein: 18g
- Cholesterol: 30mg
Keywords: grilled cheese, pesto, vegetarian comfort food
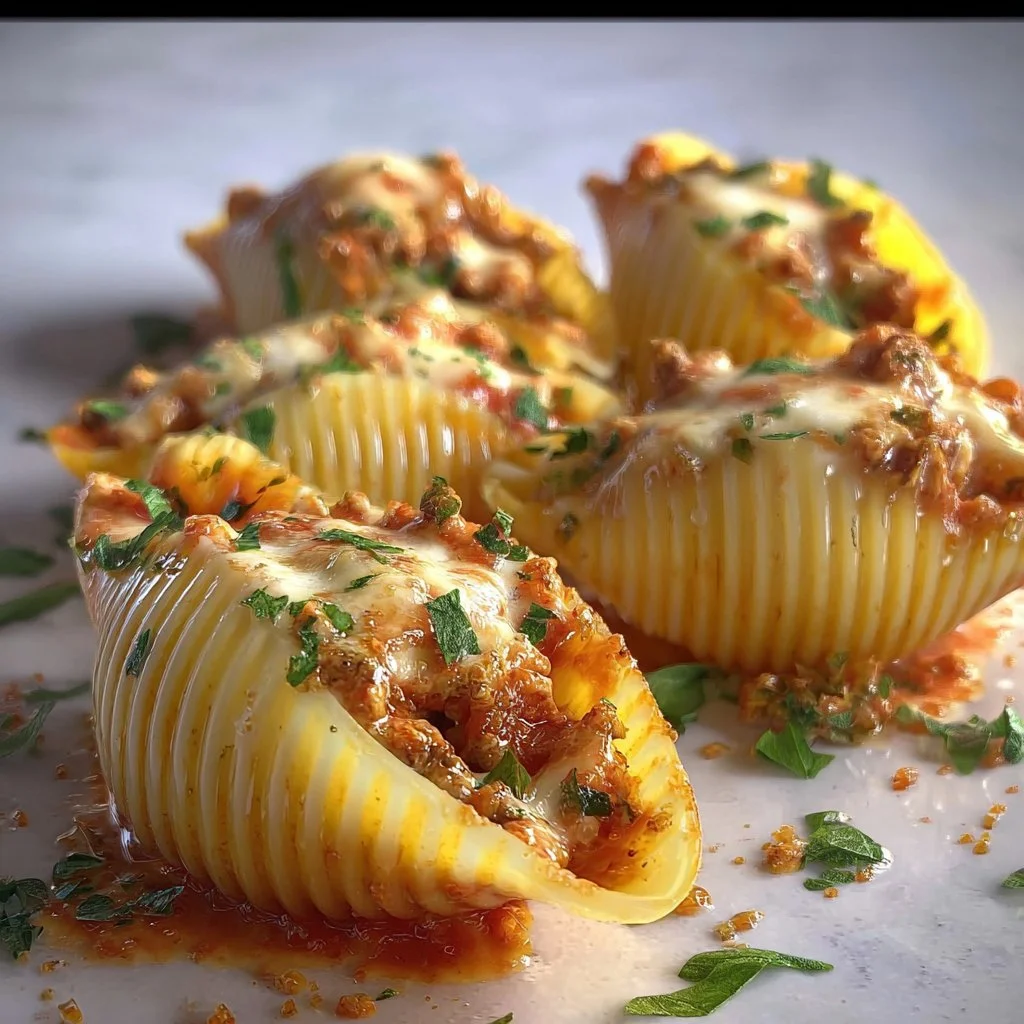
Stuffed Pasta Shells
# Dive into Deliciousness: Stuffed Pasta Shells Recipe

## Introduction

Hey there, fellow food lovers! It’s Beau Collier here, and today we’re diving into the heart of comfort food with my all-time favorite: **Stuffed Pasta Shells**. This dish isn’t just a staple in my kitchen; it’s a heartwarming meal that brings people together. Picture this: you’ve had a long day, and all you want is to whip up something cozy that smells divine in your home. Well, these stuffed shells are just the ticket!

What I love most about stuffed pasta shells is their versatility. You can customize them to your liking, and they still come out tasting fantastic. Think of them as an edible hug, filled to the brim with savory goodness! You can impress family, friends, or even yourself with this dish—you might find your kitchen smelling like an Italian trattoria in no time!

Now, you might be wondering why I’m so passionate about these shells. Let me take you back for a moment. Growing up, my family would have “pasta night” every Sunday. It was our time to reconnect, share stories, and indulge in heaping plates of deliciousness. My mom had a knack for stuffing those pasta shells to perfection, and I can still hear her laughter mingling with the bubbling sauce as we gathered around the table.

Whether you’re a culinary whiz or a kitchen newbie, you’ll find this recipe easy to follow and, most importantly, utterly satisfying. So grab your apron, roll up those sleeves, and let’s make some comforting, cheesy, and delicious stuffed pasta shells together!

---

## Personal Story

One of my fondest memories in the kitchen revolves around making stuffed pasta shells with my grandma. I remember bustling around her kitchen, which always smelled like a combination of garlic and warm bread. We would open up a can of rich, zesty marinara sauce and gaze into the pot, mesmerized as it bubbled away.

The highlight, of course, was the stuffing process. We made a mess, flour everywhere, ricotta smeared across the countertop. Grandma would chuckle and say, “A little mess means a lot of love!” She taught me the importance of enjoying the process and making meals that bring people together. Those pasta shells became our love letters to family, and every bite was filled with a blend of flavors and laughter.

Fast forward a few years, and I find myself recreating those magical moments in my kitchen, sharing the same recipe with friends and family. Each time I pull together those ingredients, it feels like a time capsule, taking me back to those Sunday evenings filled with joy and connection.

---

## Ingredients

Let's talk about the stars of our show! Here’s how to make your stuffed pasta shells sing with flavor:

- **12 Jumbo Pasta Shells**
  Try to find the largest you can! If you can't get jumbo shells, conchiglie (shell pasta) work too but will change the overall feel a bit.

- **1 Pound Ground Beef**
  You can substitute ground turkey, chicken, or even plant-based meat if you prefer a lighter or vegetarian option.

- **1 Cup Ricotta Cheese**
  A creamy filling that’s essential for that classic texture. For a twist, try blending in cottage cheese or even goat cheese!

- **1 Cup Shredded Mozzarella Cheese**
  Melty and bubbly goodness! You could swap this for provolone or fontina for a different flavor profile.

- **2 Cups Marinara Sauce**
  Store-bought or homemade – no one’s judging! If you want to play with flavors, opt for arrabbiata for a spicy kick.

- **1/2 Cup Grated Parmesan Cheese**
  Adds a salty depth. If you prefer dairy-free, there are excellent vegan Parmesan options out there.

- **1 Egg**
  Helps hold the filling together. If you’re going vegan, a flax egg works great!

- **1 Teaspoon Italian Seasoning**
  A robust blend of herbs that compliments the dish beautifully. If you’ve got the individual spices on hand, a mix of oregano and thyme will suffice.

- **Salt and Pepper to Taste**
  Essential in every kitchen. Always adjust to your palate!

- **Fresh Basil for Garnish (optional)**
  This adds a lovely touch of freshness. Feel free to skip it, but it really brightens up the meal!

---

## Step-by-Step Instructions

Alright, let’s get cooking! Follow these steps to create a plate of joyous stuffed pasta shells:

### Step 1: Preheat the Oven
Start by preheating your oven to 375°F (190°C). This ensures it’s nice and toasty by the time your delicious shells are ready to bake.

### Step 2: Cook the Pasta Shells
Bring a large pot of salted water to boil. Once it’s bubbling away, add the jumbo pasta shells. Cook until they are al dente—about 8-10 minutes. We want them to be firm since they’ll continue cooking in the oven. Once done, drain them and rinse with cold water to stop the cooking process. Set aside, and admire your handiwork!

### Tip:
Add a drizzle of olive oil to keep them from sticking together while they cool.

### Step 3: Prepare the Filling
In a large mixing bowl, combine your ground beef (or your chosen protein), ricotta cheese, half of the mozzarella cheese, egg, Italian seasoning, salt, and pepper. Mix until everything is well incorporated.

### Tip:
Taste a tiny spoonful of the mixture before adding salt to ensure you get the seasoning just right.

### Step 4: Fill the Shells
Grab a spoon (or a sturdy piping bag if you’re feeling fancy) and begin stuffing each pasta shell with the filling mixture. You want them generously filled but not burst at the seams. Place each filled shell in a baking dish.

### Step 5: Assemble the Dish
Once all your shells are filled, pour the marinara sauce evenly over the top, making sure each shell has a little sauce love. Sprinkle the remaining mozzarella cheese and the Parmesan over the top so that it’s all bubbly and golden when baked.

### Step 6: Bake Your Creation
Cover the baking dish with aluminum foil and pop it in the oven for 25 minutes. This helps steam the shells and meld those luscious flavors. After 25 minutes, remove the foil and let it bake for another 10 minutes, or until the cheese is melted and slightly browned.

### Step 7: Garnish and Serve
Take it out, let it cool for a minute (if you can!), and sprinkle with fresh basil. Now it’s time to dig in!

---

## Serving Suggestions

When it comes to plating, let’s keep it rustic yet elegant. Serve these stuffed pasta shells on a large platter, drizzled with a bit more marinara for that vibrant color. Pair with a side of garlic bread to soak up every bit of that saucy goodness.

For a touch of freshness, add a simple salad—think arugula with a squeeze of lemon and some cherry tomatoes. Perfect to balance out those cheesy, hearty shells!

---

## Recipe Variations

Now, let’s talk about getting creative! Here are a few fun twists you can try with your stuffed pasta shells:

1. **Spinach and Ricotta:** Mix in some sautéed spinach with your ricotta for a pop of color and added nutrients.

2. **Mexican Twist:** Use taco seasoning instead of Italian seasoning and fill with a mix of seasoned ground beef, black beans, and corn. Top with salsa and cheese!

3. **Sweet Potato Swirl:** Swap half of the ricotta for mashed sweet potatoes for a slight sweetness and creamy consistency.

4. **Seafood Delight:** Try stuffing your shells with a mix of shrimp and crabmeat for a coastal vibe. Use a white sauce instead of marinara to complement the seafood flavors.

5. **Vegan Option:** Use lentils or chickpeas with Italian herbs as stuffing. Replace cheeses with cashew cheese or nutritional yeast for a cheesy taste.

---

## Chef’s Notes

This recipe has come a long way since my grandma made it. I’ve found that the key to perfect stuffed shells lies in how you balance the flavors in the filling. My initial attempts often resulted in a lack of seasoning, but now I encourage experimentation! Each time I make this dish, I think back to the laughter in my grandma’s kitchen and realize that the love you put into cooking is what makes the difference.

So don’t stress perfection—embrace the chaos and enjoy the kitchen dance!

---

## FAQs and Troubleshooting

**1. Can I freeze the stuffed shells?**
Absolutely! Just prepare up until the baking step, then cover tightly and freeze. When you’re ready to eat, just thaw overnight in the fridge and bake without needing to adjust the cooking time too much.

**2. My filling is too runny!**
If your filling seems too wet, consider draining the ricotta or adding more cheese. Sometimes moisture from the meat can affect it, too. A tablespoon of breadcrumbs can help absorb excess moisture as well!

**3. What if my pasta shells break?**
This can happen! Just layer them in the dish with a bit more sauce—broken shells still taste divine!

**4. How long do leftovers last?**
They’ll keep in the fridge for about 3-4 days. Just reheat gently in the oven or microwave.

---

## Nutritional Info

Each serving of these stuffed pasta shells is not just hearty and comforting, but they also pack a nutritional punch:

- **Calories:** ~350 (depends on filling and sauce variety)
- **Protein:** 24g (from beef and cheese)
- **Carbohydrates:** 33g (wonderfully filling!)
- **Fat:** 18g (thanks to the cheeses)
- **Fiber:** 2g (from pasta and added veggies)

Stuffed shells are a delightful way to enjoy a meal that covers the bases of taste, comfort, and nutrition.

---

## Final Thoughts

There you have it, my dear food friends—a mouthwatering journey into the world of stuffed pasta shells! This dish embodies the essence of comforting cooking, bringing with it a flurry of flavors and memories that tantalize the senses.

So the next time you're in need of a warm hug from your kitchen, remember this recipe. It’s not just about filling pasta; it’s about sharing joy and experiences, just like my grandma did all those years ago. Don’t hesitate to put your spin on it and explore endless possibilities—cooking should be fun, after all!

Happy cooking, and I can’t wait to hear about your adventures in making these stuffed shells!
Stuffed Pasta Shells
- Total Time: 55 minutes
- Yield: 4 servings 1x
- Diet: Omnivore
Description
A heartwarming dish featuring jumbo pasta shells stuffed with a savory filling of ground beef, ricotta, and mozzarella, baked in marinara sauce.
Ingredients
- 12 Jumbo Pasta Shells
- 1 Pound Ground Beef
- 1 Cup Ricotta Cheese
- 1 Cup Shredded Mozzarella Cheese
- 2 Cups Marinara Sauce
- 1/2 Cup Grated Parmesan Cheese
- 1 Egg
- 1 Teaspoon Italian Seasoning
- Salt and Pepper to Taste
- Fresh Basil for Garnish (optional)
Instructions
- Preheat the oven to 375°F (190°C).
- Cook the pasta shells in boiling salted water until al dente, about 8-10 minutes, then drain and rinse.
- Prepare the filling by mixing ground beef, ricotta, half of the mozzarella, egg, Italian seasoning, salt, and pepper in a bowl.
- Fill each shell generously with the mixture and place them in a baking dish.
- Assemble the dish by pouring marinara sauce over the shells and sprinkling the remaining mozzarella and Parmesan on top.
- Bake covered with foil for 25 minutes, then uncovered for an additional 10 minutes until cheese is bubbly.
- Garnish with fresh basil before serving.
Notes
Customize the filling with different proteins or add vegetables for variety. Freezes well before baking.
- Prep Time: 15 minutes
- Cook Time: 40 minutes
- Category: Main Course
- Method: Baking
- Cuisine: Italian
Nutrition
- Serving Size: 1 serving
- Calories: 350
- Sugar: 5g
- Sodium: 400mg
- Fat: 18g
- Saturated Fat: 10g
- Unsaturated Fat: 6g
- Trans Fat: 0g
- Carbohydrates: 33g
- Fiber: 2g
- Protein: 24g
- Cholesterol: 70mg
Keywords: stuffed pasta shells, Italian recipe, comfort food
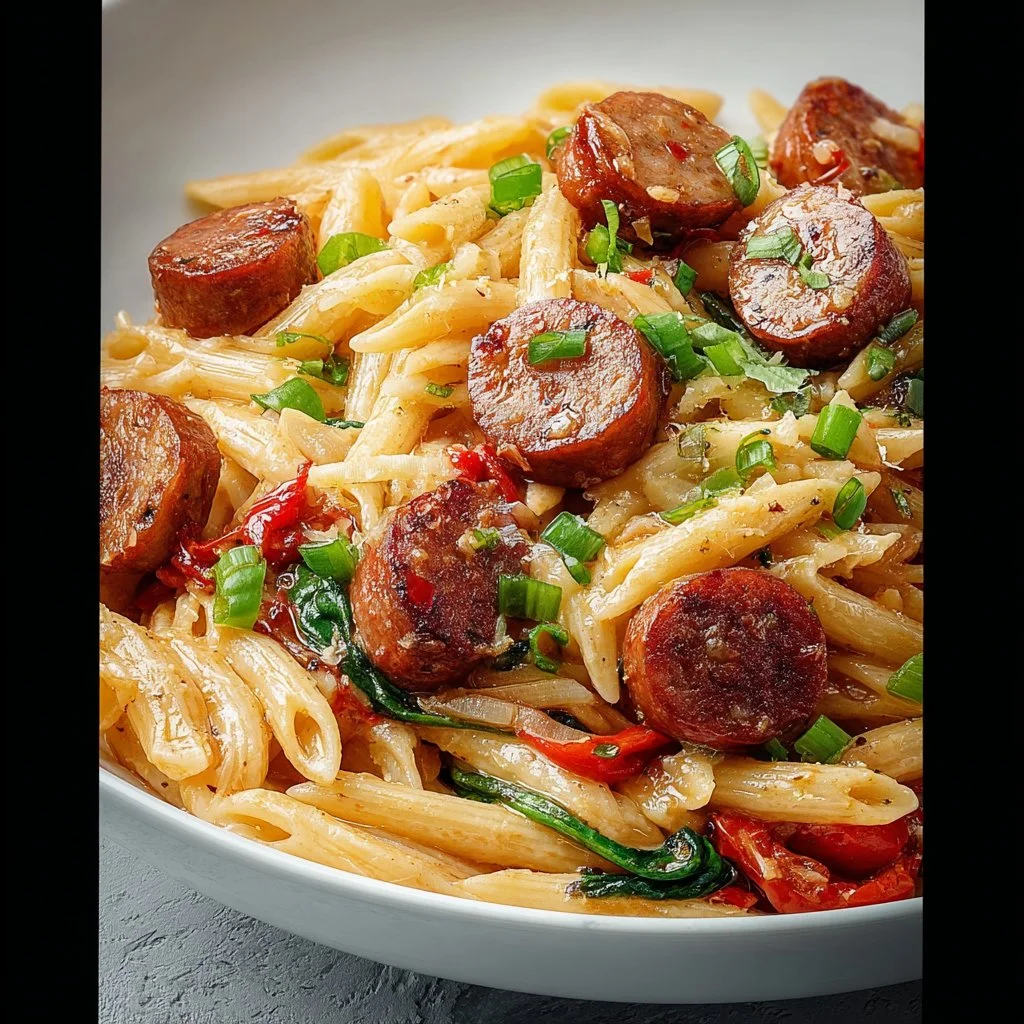
Cajun Sausage Pasta
Cajun Sausage Pasta: A Flavorful Adventure in Every Bite!
Hey there, fellow foodies! Welcome to the warm and savory world of Cajun Sausage Pasta—a dish that dances on your palate and wraps you in a cozy embrace of flavors. If you’re looking for a dinner recipe that’s easy enough to whip up on a busy weeknight yet impressive enough for a weekend gathering, you’ve just struck gold!
Now, let me take you back in time, to that wondrous moment when I first discovered the vibrant, bold flavors of Cajun cuisine— a delicious blend of spices that just sings in your mouth! I remember the first time I encountered it at a local food festival; the aroma wafted through the air, pulling me towards the lively stall with an enticing menu. I was handed a heaping plate of pasta, bursting with smoky sausage, fresh peppers, and creamy goodness. It wasn’t just a meal—it was an experience!
That day sparked a creative journey in my kitchen. I started experimenting, riffing off classic recipes and adding my personal touch, which eventually led me to develop this Cajun Sausage Pasta masterpiece. So, whether you’re sitting at your cozy kitchen table, ready to dive into a bowl of heartwarming pasta, or just browsing for your next culinary adventure, you’re going to absolutely love what’s coming up next!
Join me as we dive into this flavorful recipe that combines the silky smoothness of heavy cream with the spicy kick of Cajun seasoning. Let’s get started, shall we?
Personal Story
Ah, the memories of my first culinary experiment with Cajun flavors still make me smile! It was a rainy Saturday afternoon, and I was flipping through cookbooks looking for inspiration. My eyes landed on a classic pasta dish, and suddenly, I was craving something so flavorful it could practically dance off the plate!
I rummaged through my pantry, pulling out ingredients that sang that Cajun tune. As I sliced the sausage and seared it in the pan, the aroma filled the air, transporting me to a bustling New Orleans kitchen, where laughter mingle d with the sizzle of expertly crafted dishes. I dashed to the fridge for bell peppers and garlic and threw everything together with a splash of cream—and oh boy, did it come together beautifully!
That day, I not only made a delicious meal, but I also created a tradition that I still cherish; this dish became a staple for gatherings with family and friends. Piling bowls high, sharing stories, and relishing the burst of flavors created a symphony of joy. It’s those heartfelt moments that make cooking so special—an interconnectedness through culinary love. And I can’t wait for you to create your own memories with this dish!
Ingredients
Alright, my culinary friends, let’s gather our star players for this Cajun Sausage Pasta. Here’s what you’ll need:
- 8 oz pasta (penne or fettuccine): Choose whichever you fancy! Penne scoops up all that creamy goodness perfectly, while fettuccine gives you those lovely ribbons of flavor.
- 12 oz smoked sausage (sliced): This is where the magic happens! The smokiness adds depth—feel free to substitute with chorizo or turkey sausage if you need a lighter option.
- 1 onion (chopped): A classic flavor base. Sweet or yellow onions work well; red onions can offer a unique twist with extra sweetness!
- 1 bell pepper (chopped): Choose your favorite—red, green, or yellow. Each brings its own flavor palette, and it makes the dish pop with color!
- 3 cloves garlic (minced): A must-have! Garlic brings an aromatic punch to the dish. Fresh is always best—if you’re in a pinch, garlic powder works too.
- 1 can (14.5 oz) diced tomatoes (with juices): They add acidity and brightness; the juices also help create the sauce. Look for fire-roasted tomatoes for an extra touch of flavor!
- 1 cup heavy cream: This adds a luxurious richness. You can swap it for half-and-half for a lighter version, but hey, we’re living a little here, right?
- 1 cup shredded cheese (cheddar or mozzarella): Cheese makes everything better! Cheddar adds a bit of sharpness, while mozzarella offers a gooey texture.
- 2 tsp Cajun seasoning: The star of the show! Feel free to use store-bought or whip up your own with paprika, cayenne, thyme, and oregano.
- Salt and pepper to taste: Always season to make those flavors shine!
- Olive oil for cooking: A drizzle of quality extra virgin is all you need to get started.
- Fresh parsley (for garnish): Not just for looks, it adds a pop of freshness that balances the richness.
Now that we’ve got our ingredient lineup, let’s get cooking and create this culinary masterpiece!
Step-by-Step Instructions
Step 1: Boil Your Pasta
First things first, bring a large pot of salted water to a boil. Add your chosen pasta and cook according to package instructions until al dente. Give it a good stir to prevent sticking, and don’t forget to reserve about a cup of pasta water before draining! The starchy water can help thicken our sauce later if needed.
Step 2: Sauté the Sausage
In a large skillet or pot, heat a drizzle of olive oil over medium heat. Add the sliced smoked sausage and sauté for about 5 minutes, or until golden brown and fragrant. This step is crucial—it caramelizes the sausage, giving an outstanding depth to the final dish. Once nicely browned, remove the sausage from the skillet and set it aside.
Step 3: Cook the Veggies
In the same skillet, add the chopped onion and bell pepper. Sauté these beauties until they’re soft and translucent—about 4-5 minutes. The fond (those little brown bits left from the sausage) will add extra flavor to the vegetables as they cook. Toss in the minced garlic and sauté for another minute until it’s aromatic—oh, that smell is simply heavenly!
Step 4: Add Tomatoes and Cream
Pour in the can of diced tomatoes along with their juices. Stir it all together, scraping any leftover bits from the bottom of the pan. Let this simmer for about 3 minutes. Then, reduce the heat and add the heavy cream, continuously stirring to combine. If that sauce looks too thick, here’s where we can add just a bit of reserved pasta water to achieve the consistency you crave.
Step 5: Season and Combine
Now it’s time to bring in the flavors! Add the Cajun seasoning, salt, and pepper to taste. Stir in the sautéed sausage; let it cook together for another 3-4 minutes on low heat, allowing all those flavors to marry beautifully. Don’t be afraid to taste as you go—you want this dish to sing in harmony!
Step 6: Mix in Pasta & Cheese
Finally, add the drained pasta to the skillet. Toss everything together until the pasta is well coated in that creamy, spicy sauce. Then, stir in the shredded cheese until melted—this is the moment where you’ll start drooling! If needed, you can add a splash more of pasta water to get everything just right.
Step 7: Garnish and Serve
Plate your Cajun sausage pasta, garnishing generously with fresh parsley and maybe an extra sprinkle of cheese on top. Feel free to serve it hot alongside a crisp green salad or some crusty garlic bread for a complete meal.
Serving Suggestions
When it comes to serving Cajun Sausage Pasta, presentation can elevate your dish into a whole new realm of deliciousness! Here are some serving tips to make your dish pop:
- Use Wide Bowls: Serving pasta in wide, shallow bowls allows the vibrant colors and textures to shine through while keeping the dish casual.
- Add a Crusty Side: Pair it with some garlic bread or warm baguette slices to mop up every last bite of that delicious sauce.
- Fresh Herbs for Flair: Besides parsley, consider topping it with fresh basil or striking green onions for added flavor and color.
- Grated Parmesan: A sprinkle of freshly grated Parmesan or Pecorino Romano adds a briny touch that beautifully complements the creamy sauce.
With every perfect bite, your dinner table will surely sing with joy!
Recipe Variations
The beauty of Cajun Sausage Pasta lies in its versatility—don’t hesitate to get creative! Here are some variations to consider:
-
Vegetable Twist: Add in your favorite veggies such as spinach, zucchini, or mushrooms. Simply sauté them with the onion and bell pepper for added nutrition!
-
Heat it Up: For a spicier kick, toss in chopped jalapeños or an extra dash of cayenne to elevate that Cajun heat!
-
Protein Swap: Try chicken, shrimp, or even a plant-based sausage alternative to match your dietary preferences.
-
Creamy Options: Substitute heavy cream with a dairy-free option such as coconut cream, or make it lighter using Greek yogurt for a tangy twist.
-
Herb Boost: Fresh thyme or oregano can elevate the dish further with delightful aromatic notes that pair wonderfully with Cajun seasoning.
The possibilities are endless; let your creativity run wild!
Chef’s Notes
I have to confess—this recipe has evolved over time. Initially, I stuck strictly to the classic ingredients, but as I experimented and played around, I found that diverse flavors truly enrich this dish. Sometimes I throw in leftovers, be it chicken or veggies, and it always turns into a flavorful feast.
One fun story—once while preparing this dish, I accidentally spilled an entire jar of Cajun seasoning while trying to shake it into the pot. Instead of panicking, I embraced it and added a bit more cream to balance it out, creating a spicier version that became an instant favorite among friends! Those kitchen mishaps that turn into delicious surprises are what cooking is all about!
FAQs and Troubleshooting
1. My sauce is too thick; what should I do?
Don’t worry! A splash of reserved pasta water or a bit more cream can help loosen up that sauce and bring it back to a creamy consistency.
2. How do I store leftovers?
Store any leftover Cajun Sausage Pasta in an airtight container in the fridge for up to 3 days. Reheat on the stove or in a microwave, adding a splash of cream or broth to bring it back to life!
3. Can I freeze this dish?
Absolutely! To freeze, place cooled pasta in an airtight container or freezer bag, where it can stay fresh for up to 3 months. Just remember, the texture may slightly change upon thawing.
4. What if I don’t have Cajun seasoning?
No worries! You can create your own mix using paprika, cayenne pepper, oregano, and thyme—adjusting to your preferred spice level.
Nutritional Info
While Cajun Sausage Pasta is undeniably delicious, it’s also important to consider the nutritional aspects. Here’s a general breakdown per serving (based on typical ingredients):
- Calories: Approx. 550
- Protein: 25g
- Carbohydrates: 40g
- Fat: 30g (mostly from cream and cheese)
- Fiber: 3g
Keep in mind that variations and substitutions will alter the nutritional values, so feel free to customize it according to your dietary needs!
Final Thoughts
There you have it—a delightful and comforting bowl of Cajun Sausage Pasta that you can whip up with ease and finesse! Cooking shouldn’t be a chore; it’s a joyful adventure, a chance to combine flavors, share experiences, and create lasting memories around the dinner table.
So next time you’re yearning for something delicious that packs a flavorful punch, give this recipe a try! I can guarantee it will bring smiles, laughter, and perhaps a little dancing in the kitchen. Remember, the best part of any meal is the love you share with those around you. Now, grab your apron, put on some tunes, and let’s get cooking together! Happy feasting!
Print
Cajun Sausage Pasta
- Total Time: 35 minutes
- Yield: 4 servings 1x
- Diet: None
Description
A delightful and savory Cajun sausage pasta dish that combines bold flavors with creamy goodness. Perfect for a weeknight dinner or a weekend gathering!
Ingredients
- 8 oz pasta (penne or fettuccine)
- 12 oz smoked sausage (sliced)
- 1 onion (chopped)
- 1 bell pepper (chopped)
- 3 cloves garlic (minced)
- 1 can (14.5 oz) diced tomatoes (with juices)
- 1 cup heavy cream
- 1 cup shredded cheese (cheddar or mozzarella)
- 2 tsp Cajun seasoning
- Salt and pepper to taste
- Olive oil for cooking
- Fresh parsley (for garnish)
Instructions
- Bring a large pot of salted water to a boil. Add your chosen pasta and cook according to package instructions until al dente. Reserve about a cup of pasta water before draining.
- Heat olive oil in a large skillet over medium heat. Add the sliced smoked sausage and sauté for about 5 minutes, or until golden brown.
- In the same skillet, add the chopped onion and bell pepper. Sauté until soft and translucent—about 4-5 minutes. Add minced garlic and sauté for another minute.
- Pour in the diced tomatoes along with their juices. Let this simmer for about 3 minutes. Reduce heat and add the heavy cream, stirring continuously.
- Add Cajun seasoning, salt, and pepper to taste. Stir in the sautéed sausage and let it cook for another 3-4 minutes.
- Mix in the drained pasta, tossing everything together until well coated in the creamy sauce. Stir in the shredded cheese until melted.
- Plate your pasta, garnishing with fresh parsley and an extra sprinkle of cheese. Serve hot with your favorite sides.
Notes
Feel free to add your favorite vegetables or adjust the spice level to your liking. This dish is versatile and can easily be customized!
- Prep Time: 10 minutes
- Cook Time: 25 minutes
- Category: Main Course
- Method: Stovetop
- Cuisine: Cajun
Nutrition
- Serving Size: 1 serving
- Calories: 550
- Sugar: 5g
- Sodium: 800mg
- Fat: 30g
- Saturated Fat: 15g
- Unsaturated Fat: 10g
- Trans Fat: 0g
- Carbohydrates: 40g
- Fiber: 3g
- Protein: 25g
- Cholesterol: 100mg
Keywords: Cajun, pasta, sausage, comfort food, quick dinner

Grilled Cheese Burrito
Grilled Cheese Burrito: Comfort Food with a Twist
Hey there, fellow food lovers! Welcome back to Feastical, where we whip up delicious dishes that are as comforting as a hug on a rainy day. Today, I’m extra excited because we’re diving into a delightful concoction that blends the best of two worlds: the classic grilled cheese sandwich and the beloved burrito. Yep, you heard me right! We’re making a Grilled Cheese Burrito.
Picture this: crispy, golden tortillas wrapped around a melty, gooey cheese filling, with the added option of savory extras to elevate the flavor profile. This dish is perfect for any occasion—whether it’s a busy weeknight, a lazy Sunday brunch, or a fun gathering with friends. You can even customize it to your heart’s content, so everyone at the table is satisfied.
Now, if you’re anything like me, you have a special connection to food—each dish tells a story, evokes a memory, or gets you feeling all warm and fuzzy inside. So grab a seat, a fork, and maybe a napkin (because things might get a little cheesy), and let’s embark on this culinary adventure together!
Personal Story
Ah, grilled cheese—the ultimate comfort food! If you ask me, the heart behind a great meal often lies in the memories it evokes. My fondest recollection of grilled cheese takes me back to childhood summers spent at my grandparents’ house. I can still hear the sizzle of butter in the skillet as my grandmother expertly flipped those golden slices of bread. Like magic, she’d craft a sandwich that never failed to warm my heart and satisfy my never-ending appetite.
During one sunny afternoon, we decided to spice things up and made a version with our favorite ingredients—think sharp cheddar, juicy tomatoes, and crispy bacon. My grandpa, ever the grill master, transformed those sandwiches into burritos, wrapping them in soft tortillas instead of bread. You can imagine my delight as he called it a “Cheesy Burrito Surprise.” That day marked the birth of my love for grilled cheese burritos, elevating an already beloved dish into something extraordinary! The excitement of discovering a new twist on an old favorite is something I want to replicate for you.
Now that you know the origin of this delightful dish, let’s get into what you’ll need to whip up this cheesy goodness in your own kitchen!
Ingredients
To create your Grilled Cheese Burrito, gather the following ingredients:
-
4 large tortillas: Flour tortillas are typically used, but you can use whole wheat or corn tortillas for a twist. They’re your blank canvas, so choose what fits your style!
-
2 cups shredded cheese: Cheddar, mozzarella, or a mix of both works wonders here. Feel free to experiment with other cheeses like pepper jack for a little zing or gouda for a smoky flavor!
-
1 tablespoon butter: This is the secret to achieving that crispy, golden crust. You can swap it out for olive oil or even a vegan butter substitute if you’d prefer a lighter alternative.
-
Optional: Cooked meats: Chicken, bacon, or even your leftover pulled pork can take this burrito over the top. Use what you have on hand or try a plant-based protein option for a vegetarian take.
-
Optional: Vegetables: Bell peppers, onions, or even spinach are great additions for a burst of color and flavor. Sauté them up beforehand to enhance their sweetness and make them extra tasty.
With these ingredients handy, you’re well on your way to creating a culinary masterpiece that will impress everyone at the dinner table!
Step-by-Step Instructions
Alright, my fellow culinary adventurers, let’s roll up our sleeves and get cooking! Here’s how to make the perfect Grilled Cheese Burrito:
-
Prep Your Ingredients:
Start by shredding your cheese and chopping any vegetables or cooked meats you’d like to incorporate. Having everything ready to go makes the cooking process smooth sailing. Plus, it’s like having your own little mise en place! -
Heat the Skillet:
Grab a large skillet and place it over medium heat. Add about a tablespoon of butter and let it melt completely, swirling it to cover the surface of the pan. -
Assemble Your Burrito:
Lay one tortilla flat on a plate. Layer it generously with cheese (about half a cup), placing any optional ingredients you desire on top. Think of it as building a layered cheesy wonderland! -
Roll It Up:
Here’s where it gets fun! Fold in the sides of the tortilla, then roll it up from the bottom to the top, ensuring all that cheesy goodness is tucked neatly within. Don’t be afraid to roll it tightly; you want it to keep your filling inside and stay intact! -
Place It in the Skillet:
Once your burrito is securely rolled, place it seam-side down in the skillet. Let it cook for about 3-4 minutes or until the bottom is golden brown. Pro tip: Press it down gently with a spatula to really achieve that crispy, crunchy crust. -
Flip It:
When the first side is beautifully browned, it’s time to flip! Carefully turn the burrito over, adding a bit more butter to the pan if it’s looking dry. You’ll want to cook this side for another 3-4 minutes until it’s just as deliciously golden as the first. -
Let’s Cheese It Up:
At this point, you can take a peek inside. If you love that ooey-gooey cheese texture, you might want to let it cook for an extra minute or two—just until everything is melted and comforting. -
Slice and Serve:
When you’re satisfied with the color and texture, carefully transfer the burrito to a cutting board. Let it sit for a minute (this helps the cheese set a bit), then cut it in half for your Instagram-worthy presentation.
And just like that, you’re ready to enjoy your divine creation. The aroma is already enough to make your mouth water. You can almost hear your foodie friends cheering you on from the sidelines!
Serving Suggestions
Now that you have your Grilled Cheese Burrito crowned with that lovely golden crust, it’s time to think about presentation.
I love to serve mine straight from the skillet onto a rustic wooden board for that homey feel. Pair it with a fresh side salad bursting with greens, or some crispy tortilla chips and salsa for dipping. A scoop of flavorful guacamole or sour cream on the side also brings a zesty twist that complements the cheesy interior beautifully.
Feel free to sprinkle some freshly chopped cilantro or a few slices of jalapeño on top for extra flavor and a pop of color! Your guests will swoon, and you’ll feel like the kitchen champion you truly are!
Recipe Variations
The Grilled Cheese Burrito is already a knockout, but if you’re feeling adventurous, here are some variations to consider:
-
BBQ Chicken Burrito: Swap in cooked, shredded BBQ chicken for a tangy take that’ll have your taste buds dancing. Add some coleslaw inside for an added crunch.
-
Vegetarian Delight: Load up on sautéed mushrooms, zucchini, and spinach for a hearty meatless option. The depth of flavors will surely wow both vegetarians and meat-lovers alike!
-
Mexican Fiesta: Add black beans, corn, and taco seasoning to your cheese for a flavorful twist. Serve with a side of pico de gallo to amp up those Mexican flavors!
-
Spicy Jalapeño: For those who crave a kick, toss in some pickled jalapeños or a drizzle of hot sauce before rolling. The spice elevates the entire experience!
-
Breakfast Burrito: Transform this dish into a breakfast sensation. Incorporate scrambled eggs, sausage, and avocado for a delightful morning treat.
No matter how you choose to jazz it up, these variations ensure you’ll never get bored of this incredible dish!
Chef’s Notes
Here’s an exciting tidbit: this recipe has evolved for me over the years! Initially, it started as an attempt to combine my two favorite quick meals—grilled cheese and burritos—during those busy weeknights when I wanted something comforting without spending hours in the kitchen.
I began sharing it with my friends, and I quickly learned that there are endless possibilities when it comes to fillings. From using leftover pizza toppings to even experimenting with different cheeses, it became a creative outlet for everyone involved. My favorite kitchen stories always revolve around mishaps—like the time I added way too much cheese and had a molten lava situation in the skillet. But hey, that’s what makes cooking fun and keeps us on our toes!
FAQs and Troubleshooting
-
Q: What should I do if my burrito is falling apart?
A: If your burrito isn’t holding together, ensure that you’re rolling it tightly and tucking in the sides while you roll. You can also wrap it in foil for a few minutes to help it set. -
Q: How do I know when my cheese is fully melted?
A: The best way to check is to peek inside once you’ve flipped the burrito. If you see gooey cheese pulling apart when you cut it, you’re golden! If not, let it cook for an extra minute or two. -
Q: Can I make this burrito ahead of time?
A: Absolutely! You can prep the fillings and even roll the burritos ahead of time. Just store them tightly wrapped in plastic wrap in the fridge. When you’re ready to enjoy, simply pop them in the skillet or even a microwave to heat through. -
Q: What’s the best way to reheat leftovers?
A: I suggest reheating on a skillet at a low temperature to prevent sogginess and to keep that crispy texture. You can flip it halfway through to make sure it’s evenly warmed.
Nutritional Info
If you’re wondering about the nutrition aspects of the Grilled Cheese Burrito, here’s a little breakdown. This dish is packed with protein, thanks to the cheese and any added meats. If you go easy on the butter and load up on veggies, you can keep it relatively balanced.
On average, each burrito can be around 400-600 calories, depending on the filling and cheese you choose. Consider using whole grain tortillas and plenty of veggies to enhance the fiber content. And of course, feel free to customize it to fit your dietary goals!
Final Thoughts
There you have it, my friend! The Grilled Cheese Burrito: a scrumptious combination of two classic comfort foods brought to life in your kitchen. No matter how you personalize this dish or enjoy it, I hope it brings as much joy to your table as it has to mine.
I invite you to share your own versions of this recipe! Whether it’s a fun twist, a secret ingredient, or a delicious memory that comes rushing back when you bite into your burrito, I want to hear it! Cooking is all about connection, joy, and creativity, so don’t forget to have fun in the process! Until next time, happy cooking, and may your kitchen always be filled with love and laughter.
Let’s dig in and make delicious memories together. Cheers!
Print
Grilled Cheese Burrito
- Total Time: 23 minutes
- Yield: 4 servings 1x
- Diet: Vegetarian
Description
A delightful fusion of a classic grilled cheese sandwich and a burrito, featuring crispy tortillas wrapped around a gooey cheese filling with customizable options.
Ingredients
- 4 large tortillas (flour, whole wheat, or corn)
- 2 cups shredded cheese (cheddar, mozzarella, or a mix)
- 1 tablespoon butter
- Optional: cooked meats (chicken, bacon, or pulled pork)
- Optional: vegetables (bell peppers, onions, or spinach)
Instructions
- Prep your ingredients by shredding cheese and chopping vegetables or meats.
- Heat a large skillet over medium heat and melt the butter.
- Assemble your burrito by layering cheese and optional ingredients on a tortilla.
- Roll it up tightly, tucking in the sides.
- Place the burrito seam-side down in the skillet and cook until golden brown.
- Flip the burrito and cook the other side until golden.
- Check for gooey cheese and cook longer if necessary.
- Slice and serve with desired sides.
Notes
Feel free to customize with your favorite proteins and veggies, and try different cheese combinations for varied flavors.
- Prep Time: 15 minutes
- Cook Time: 8 minutes
- Category: Main Course
- Method: Pan-frying
- Cuisine: Mexican
Nutrition
- Serving Size: 1 burrito
- Calories: 500
- Sugar: 2g
- Sodium: 550mg
- Fat: 25g
- Saturated Fat: 10g
- Unsaturated Fat: 10g
- Trans Fat: 0g
- Carbohydrates: 50g
- Fiber: 4g
- Protein: 20g
- Cholesterol: 50mg
Keywords: grilled cheese, burrito, comfort food, cheesy, easy recipe
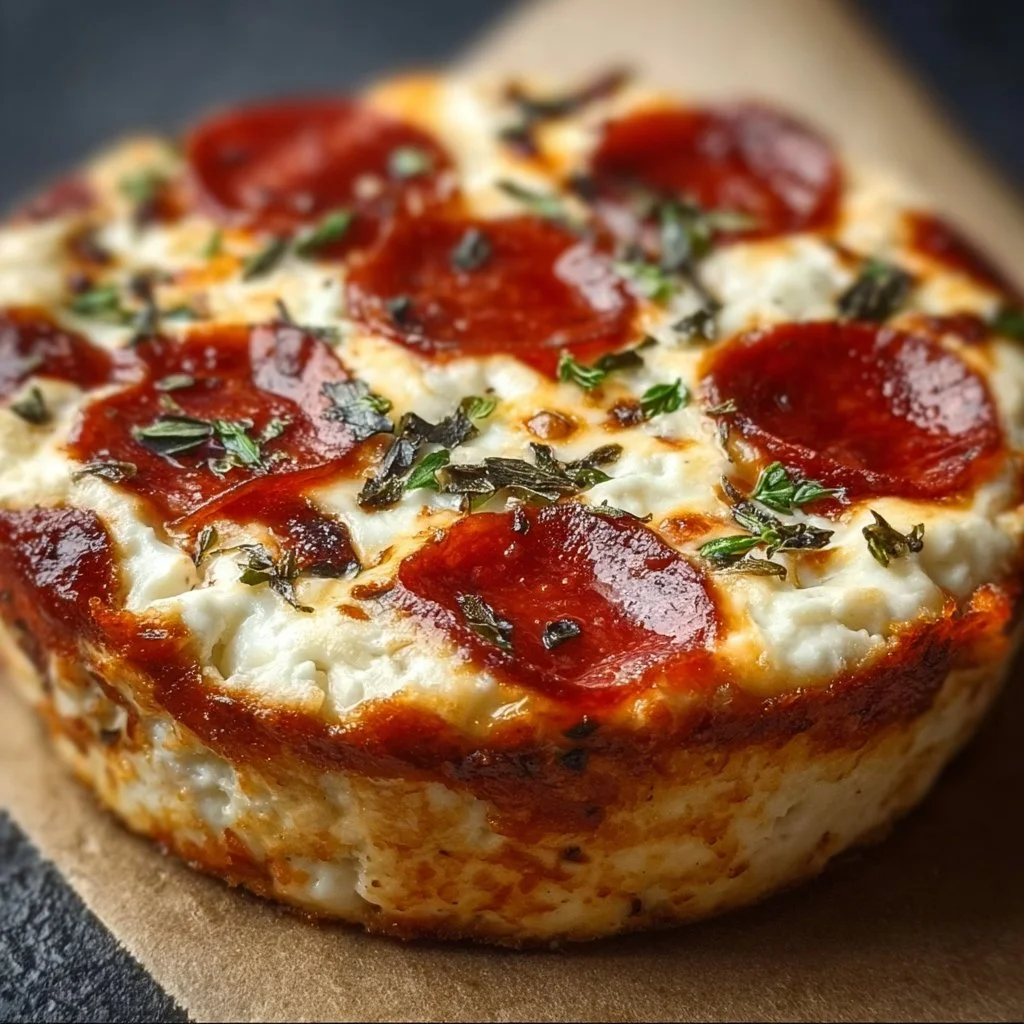
Cottage Cheese Pizza Bowl: A Healthy Comfort Food Delight
Cottage Cheese Pizza Bowl: A Healthy Comfort Food Delight
Introduction: Embracing the Comfort of Food
Hey there, fellow food lovers! I’m Beau Collier, and I’m thrilled to have you with me at Feastical. Today, we’re diving into a deliciously creative dish that redefines comfort food – the Cottage Cheese Pizza Bowl! Picture this: creamy cottage cheese blended with the rich flavors of marinara, an abundance of colorful veggies, and topped off with ooey-gooey mozzarella. It’s like your favorite pizza, but in a bowl – and yes, it’s healthy too!
Now, I know what you might be thinking: “Cottage cheese? On pizza?” But let me tell you, this dish is a game-changer! Not only does it pack a protein punch, but the combination of ingredients creates a harmony of textures and flavors that will leave you feeling satisfied without the post-pizza guilt. It’s ideal for anyone looking to enjoy the essence of pizza without going down the traditional route.
Let me take you back in time when I discovered something magical about combining simple ingredients to create comfort food that nourishes the soul. Growing up, my kitchen was always bustling with activity. My family prioritized mealtime, where moments were shared over hearty dishes, laughter echoed, and food became more than just sustenance; it was a celebration of love and tradition.
In those days, we were quite the pizza-loving family. Friday nights meant gathering around the table, where the aroma of freshly baked pizza wafted through the air as we took turns deciding toppings. It was during one of those memorable evenings, while rifling through the fridge for toppings, that I stumbled upon a tub of cottage cheese, and inspiration struck! What if I could take the essence of pizza and create a lighter, healthier version? And just like that, the Cottage Cheese Pizza Bowl was born.
Gather your ingredients, roll up your sleeves, and let’s turn your kitchen into a cozy haven of creativity and flavor. Whether you’re making this for a hearty lunch, a snack, or even dinner, this dish is versatile, and I’m here to guide you every step of the way!
Personal Story: A Kitchen Adventure
When I think back to those cozy kitchen memories, one incident always pops up in my mind. It was a rainy Thursday evening when I was determined to whip up something special for my little sister, who was feeling under the weather. After perusing the pantry, I saw a tub of cottage cheese, a bottle of marinara sauce, and a mix of veggies. It felt like an ordinary selection, but with a little imagination, I turned my kitchen into a mini pizza factory.
As I layered the ingredients into my favorite mixing bowl, my sister sat on the counter, her wide eyes watching the magic unfold. I remember her excitement as I topped our concoction with cheese, popping it into the oven. What emerged 25 minutes later was a bubbling, cheesy masterpiece that brought an enormous grin to her face. That was the moment I realized food isn’t just about what’s on the plate; it’s about the stories behind it, the memories made, and the people you share it with.
So, whether you’re looking for a nostalgic comfort meal or a simple weeknight dish, the Cottage Cheese Pizza Bowl is here to transport you back to those joyful moments spent with loved ones, one bite at a time!
Ingredients
Let’s gather our ingredients to embark on this delicious journey! Here’s what you’ll need for your Cottage Cheese Pizza Bowl:
Ingredients List
-
1 cup Cottage Cheese: The heart of this dish, delivering a creamy texture and a protein boost. Look for low-fat versions if you want a lighter option or even a flavored one to add a twist!
-
1 cup Marinara Sauce: Offers a rich, zesty flavor that ties everything together. You can use store-bought for convenience or make a quick homemade version with tomatoes, garlic, and herbs.
-
1 cup Bell Peppers: Add a crunchy sweetness to your bowl. Feel free to mix and match colors for that vibrant look – red, yellow, and green all work beautifully!
-
1 cup Mushrooms: They provide an earthy flavor and a meaty texture when sliced. If you’re not a fan of mushrooms, consider using zucchini or eggplant for a similar effect.
-
1 cup Spinach or Kale: Infuse your bowl with essential nutrients. Kale can add a hearty texture, while spinach wilts down nicely.
-
1 cup Shredded Mozzarella Cheese: The melty goodness that ties all flavors together. If you’re feeling adventurous, try mixing in some parmesan or a spicy pepper jack!
-
1 tablespoon Olive Oil: A drizzle enhances richness and aids in browning. Don’t have olive oil? Avocado or coconut oil can work just as well.
-
Salt & Pepper to taste: Essential seasonings to elevate flavor; always season to your preference.
-
1/4 cup Sliced Olives: For a briny punch that can elevate the overall flavor profile. If olives aren’t your thing, you could use artichoke hearts instead.
-
1/4 cup Diced Onions: Adds a sharpness that balances the creaminess. Red onions will give a milder flavor, while yellow onions are more robust.
-
Fresh Basil to taste: Brightens up the bowl and reflects traditional pizza vibes. If you can’t find fresh basil, a pinch of dried basil will do the trick!
Step-by-Step Instructions
This recipe is simple and straightforward. Are you ready? Let’s get cooking!
-
Preheat your oven: Kick things off by preheating your oven to 375°F (190°C). This ensures your bowl will be warm and bubbly by the time you finish prepping.
-
Prepare the baking dish: Grab a sturdy oven-safe bowl or small casserole dish. You’ll be layering all your ingredients in here, so have something that can hold up to the heat!
-
Layer the base: Start by spreading the cottage cheese evenly as the base of your bowl. This creamy layer will not only add texture but also a delightful protein boost!
-
Add the marinara sauce: Carefully spoon the marinara sauce over the cottage cheese. Make sure to spread it evenly so every bite is packed with flavor. You can mix a bit of the cottage cheese with the sauce if you like a creamier consistency.
-
Chop and add veggies: Dice your bell peppers and slice your mushrooms. Toss these veggies along with the spinach (or kale) on top of the sauce. Don’t worry too much about how it looks; it’s all getting mixed and melted together anyway!
-
Sprinkle with cheese: Take that gorgeous shredded mozzarella cheese and sprinkle it over the top of your veggie layer. This is where the real magic happens – that ooey-gooey cheesiness will transform your dish!
-
Season your creation: Season with salt and pepper to your taste. If you like a bit of heat, consider adding crushed red pepper flakes here too!
-
Olives and onions: Scatter your sliced olives and diced onions atop. These will add savory notes that contrast beautifully with the cottage cheese and marinara.
-
Drizzle with olive oil: A light drizzle of olive oil over the top will contribute to the browning process and infuse some extra richness.
-
Bake: Pop your Cottage Cheese Pizza Bowl into the preheated oven and let it bake for about 25-30 minutes, or until the cheese is bubbly and golden.
-
Garnish and serve: Once it’s out of the oven, sprinkle fresh basil over the top. Serve hot, and enjoy that comforting aroma filling your kitchen!
Cooking tip: If you want to get a nice brown top, consider broiling it for the last couple of minutes, just keep a close watch to avoid burning!
Serving Suggestions
The beauty of the Cottage Cheese Pizza Bowl is its versatility. Serve it straight from the oven into your favorite bowl or ramekins for a personal touch. Pair it with a fresh side salad topped with a zesty vinaigrette to brighten up the meal, or freshly baked garlic bread for an indulgent twist.
For an extra pop of freshness, consider drizzling some balsamic glaze over your bowl just before serving. And if you want to make it a complete meal, don’t hesitate to add a side of roasted veggies or a crisp green salad – what’s better than a colorful spread?
Recipe Variations
Now that you’ve mastered the basic Cottage Cheese Pizza Bowl, let’s explore some delicious twists you can make to personalize it even further!
-
Veggie Swap: Have leftover veggies? Toss in whatever you’ve got on hand—zucchini, broccoli, or even shredded carrots would work beautifully.
-
Meat Lovers’ Delight: Want a heartier option? Layer in cooked ground turkey, chicken sausage, or pepperoni for a meat-lovers twist!
-
Spicy Spin: Kick up the heat by mixing in jalapeños or chili flakes. For a gourmet touch, use a spiced cheese blend.
-
Cheesy Garlic Bread Bowl: Use a hollowed-out loaf of artisan bread as your bowl. Fill it with the ingredients and let the bread soak up all that delicious gooeyness while baking!
-
Creamy Alfredo Base: Replace marinara with alfredo sauce for a creamy take. It’s a comforting Italian twist that’s sure to impress!
Chef’s Notes
I must admit, the Cottage Cheese Pizza Bowl has evolved over the years. Originally, it was a last-minute solution to clear out leftovers, but then I realized the potential for something extraordinary! I’ve experimented with different cheeses and toppings so much that I’ve lost count. Some of my fondest culinary memories stem from this dish, especially when experimenting with friends and family, all eager for a taste test!
One time, I was so caught up in adding toppings that I forgot to check how much cheese I put on! The result? A glorious, cheesy avalanche! And you know what? It just made everything even better. Embracing those ‘oops’ moments is what cooking is all about, right? It’s all experimentation, creativity, and fun in the kitchen!
FAQs and Troubleshooting
1. Can I make this ahead of time?
Absolutely! You can prep all the ingredients in advance and store them separately. When you’re ready, layer them in the bowl and bake when needed.
2. My cheese didn’t brown properly, what happened?
It may be that your oven wasn’t hot enough, or the top wasn’t exposed for adequate heat circulation. If you want a golden top, try switching to broil for a minute or two, but keep an eye out to avoid burning!
3. Can I freeze leftovers?
Certainly! Just ensure you store them in an airtight container. When reheating, add a splash of water or sauce to maintain moisture.
4. What if I don’t like cottage cheese?
No worries! You can swap cottage cheese with ricotta or even cream cheese, depending on your preference for texture and flavor.
Nutritional Info
The Cottage Cheese Pizza Bowl is a fantastic option for health-conscious foodies! Here’s some nutritional info (per serving):
- Calories: Approximately 350–400 calories
- Protein: 30g (thanks to cottage cheese!)
- Fat: 15g
- Carbohydrates: 25g
- Fiber: 4g
- Sodium: 600mg (can be reduced with low-sodium options)
This bowl provides a well-rounded meal packed with protein, healthy fats, and colorful veggies, making it perfect for a nurturing lunch or cozy dinner!
Final Thoughts
Whether you’re cooking for yourself, your family, or entertaining friends, let the Cottage Cheese Pizza Bowl become a delightful staple in your meal rotation. With its wonderful adaptability, the recipe welcomes creativity and experimentation; so don’t hesitate to make it your own!
Food is meant to be an experience—an adventure that encompasses flavors, memories, and shared moments around the table. So grab that fork, dig deep into the medley of deliciousness, and relish in the comforts of serendipity within your kitchen!
Thanks for joining me today! I hope you find joy and comfort in making the Cottage Cheese Pizza Bowl. As always, I’d love to hear how yours turned out. Feel free to drop your thoughts in the comments or share your own unique spin on this delicious dish! Happy cooking, everyone!
Print
Cottage Cheese Pizza Bowl
- Total Time: 45 minutes
- Yield: 4 servings 1x
- Diet: Vegetarian
Description
A healthy twist on comfort food, this Cottage Cheese Pizza Bowl combines creamy cottage cheese with marinara, colorful veggies, and melted mozzarella for a nourishing meal.
Ingredients
- 1 cup Cottage Cheese
- 1 cup Marinara Sauce
- 1 cup Bell Peppers
- 1 cup Mushrooms
- 1 cup Spinach or Kale
- 1 cup Shredded Mozzarella Cheese
- 1 tablespoon Olive Oil
- Salt & Pepper to taste
- 1/4 cup Sliced Olives
- 1/4 cup Diced Onions
- Fresh Basil to taste
Instructions
- Preheat your oven to 375°F (190°C).
- Prepare a sturdy oven-safe bowl or small casserole dish.
- Layer the cottage cheese as the base of your bowl.
- Add the marinara sauce over the cottage cheese.
- Chop and add the diced bell peppers and sliced mushrooms along with the spinach (or kale).
- Sprinkle with shredded mozzarella cheese on top.
- Season with salt and pepper to taste.
- Scatter sliced olives and diced onions atop the mix.
- Drizzle with olive oil.
- Bake in the preheated oven for about 25-30 minutes, until the cheese is bubbly and golden.
- Garnish with fresh basil before serving.
Notes
For a nice brown top, consider broiling for the last couple of minutes while keeping a close watch.
- Prep Time: 15 minutes
- Cook Time: 30 minutes
- Category: Main Course
- Method: Baking
- Cuisine: Italian
Nutrition
- Serving Size: 1 serving
- Calories: 375
- Sugar: 6g
- Sodium: 600mg
- Fat: 15g
- Saturated Fat: 7g
- Unsaturated Fat: 6g
- Trans Fat: 0g
- Carbohydrates: 25g
- Fiber: 4g
- Protein: 30g
- Cholesterol: 30mg
Keywords: cottage cheese, pizza bowl, healthy recipe, comfort food, vegetarian, Italian