
One-Pan Pumpkin Pecan Cobbler (30-Minute Fall Comfort)
Pumpkin Pecan Cobbler: A Cozy Autumn Delight
Hey there, food enthusiasts! I’m Beau Collier, and today we’re diving into a recipe that captures the essence of fall: Pumpkin Pecan Cobbler. It’s the kind of dish that makes you feel all warm and fuzzy inside, like wrapping up in your favorite sweater on a crisp autumn evening. Picture this: golden leaves falling, a gentle breeze rustling through the trees, and the sweet aroma of pumpkin wafting through your kitchen. It’s not just dessert; it’s a celebration of flavors that brings friends and family together!
I began my love affair with pumpkin desserts at a young age. My grandmother was a baking wizard, always experimenting with seasonal ingredients. One of my favorite memories is standing on a stool next to her as she whipped up her famous pumpkin pie. I remember the way she’d sprinkle cinnamon and nutmeg with a flourish, and the laughter we shared while tasting the pumpkin filling straight from the bowl. Those sweet moments inspired me to play with flavors and create my own recipes that keep those cherished memories alive.
At Feastical.com, we believe that cooking should be a joyful experience, and this Pumpkin Pecan Cobbler embodies that spirit. With its comforting combination of pumpkin, warm spices, and crunchy pecans, this dish is sure to become a go-to in your kitchen. So, let’s gather our ingredients and get started!
Ingredients
Here’s what you’ll need to make this delightful Pumpkin Pecan Cobbler:
-
1 cup + 3 tablespoons all-purpose flour
This forms the base of your cobbler. You can substitute with gluten-free flour if you want a gluten-free option, just ensure it’s a 1:1 blend! -
2 teaspoons baking powder
This little magic dust helps your cobbler rise and creates that beautiful, fluffy texture. -
1/2 teaspoon salt
Salt enhances the flavors beautifully; don’t skip this step! -
3/4 cup granulated sugar
The sweetener that balances the warm spices and pumpkin’s earthiness. You could also use coconut sugar for a lower glycemic option. -
1 teaspoon cinnamon
The quintessential fall spice! If you want to spice things up, try using a pumpkin pie spice blend for added warmth. -
1/2 teaspoon nutmeg
Nutmeg adds a lovely aromatic flavor that pairs perfectly with pumpkin. -
1/2 teaspoon cloves
Just a hint! Cloves can be powerful, so a little goes a long way in this cobbler. -
1/2 cup pumpkin puree
The heart of our dish! You can use homemade pumpkin puree, but make sure it’s pure without any added sugars or spices. -
1/4 cup milk
This adds moisture; feel free to swap with almond milk or oat milk for a dairy-free option. -
1/4 cup melted butter or vegetable oil
Butter adds richness, while vegetable oil maintains moisture. Choose what suits your taste! -
1 1/2 teaspoons vanilla extract
Add a splash of warmth and sweetness; it’s like a hug for your taste buds! -
1/2 cup granulated sugar (for the topping)
This gets caramelized on top to create that perfect crust. -
1/2 cup brown sugar
Brown sugar adds richness and depth; you can substitute with light or dark depending on your preference. -
1/4 cup chopped pecans
These add a crunchy texture. You can swap with walnuts or omit completely if nuts aren’t your thing. -
1 1/2 cups very hot water
This step is crucial; it helps create that gooey bottom layer that you’ll just love.
Step-by-Step Instructions
Alright, let’s roll up our sleeves and get into the nitty-gritty of making this glorious Pumpkin Pecan Cobbler!
-
Preheat your oven
Start by preheating your oven to 350°F (175°C). This is essential for ensuring your cobbler bakes evenly and comes out golden brown. -
Prepare the baking dish
Grab a medium-sized baking dish (a 9×9 square works perfectly). You can grease it lightly with butter or cooking spray to prevent sticking. -
Mix the dry ingredients
In a large bowl, combine the flour, baking powder, salt, granulated sugar, cinnamon, nutmeg, and cloves. Whisk them together until well blended. This mixes the dry ingredients evenly, ensuring that every bite has that delicious spice. -
Combine wet ingredients
In another bowl, mix together the pumpkin puree, milk, melted butter (or oil), and vanilla extract. Give it a good stir until it’s smooth and creamy. This combo brings richness to your cobbler. -
Combine wet and dry mixtures
Gradually add the wet ingredients into the dry mixture, stirring until just combined. Over-mixing can lead to a dense cobbler, so stop as soon as no dry flour is visible! -
Pour the batter into the baking dish
Spread the batter evenly in your prepared baking dish. It doesn’t have to be perfect; a few lumps are totally fine. -
Sprinkle the toppings
In a separate bowl, mix the granulated sugar, brown sugar, and chopped pecans. Sprinkle this mixture generously over the batter. This is where the magic happens, forming that crunchy topping! -
Add hot water
Slowly pour the very hot water over the top of the batter. It may look a little strange, but trust me – this will create that wonderful gooey bottom layer that balances the crunchy topping. -
Bake
Now, pop it in the oven and let it bake for about 40–45 minutes. You’ll know it’s done when the top is golden and the cobbler is bubbling at the edges. Your kitchen will smell like a glorious autumn festival! -
Cool and serve
Let your cobbler cool for about 10-15 minutes before serving. This allows the flavors to settle and makes it easier to scoop!
Serving Suggestions
When it comes to serving this Pumpkin Pecan Cobbler, there are endless possibilities to make it even more delightful. You can serve it warm right from the oven in generous scoops. I love adding a dollop of whipped cream or a scoop of vanilla ice cream on top, allowing it to melt into the warm cobbler. If you want to get a bit fancy, drizzle some caramel sauce over the top or sprinkle with additional chopped pecans for crunch.
Place it on a rustic wooden board or in a warm dish to preserve its cozy vibe. Trust me, your friends and family will be raving about it even before they take a bite!
Recipe Variations
I’m a firm believer that recipes are meant to be played with, so here are a few variations you can try with this Pumpkin Pecan Cobbler:
-
Pumpkin Spice Swap: Replace the spices with your favorite pumpkin spice blend for a quick shortcut. It’s all about convenience!
-
Add Chocolate: For a flavor explosion, add a handful of chocolate chips to the batter before pouring it into the baking dish. Chocolate and pumpkin are a match made in heaven!
-
Dairy-Free Delight: Substitute almond milk for regular milk and use coconut oil instead of butter to make this cobbler dairy-free. You won’t miss the creaminess one bit!
-
Apple-Pecan Twist: Mix in some diced apples with the pumpkin for an extra layer of texture and flavor. This gives it a fun twist and makes it a bit more festive.
-
Pumpkin Cheesecake Cobbler: Swirl in some cream cheese or mascarpone into the pumpkin mixture before pouring it into the dish. This ups the creaminess game and creates a rich flavor profile!
Chef’s Notes
As I’ve played with this recipe over the years, it has evolved beautifully, gathering inspiration from all my culinary adventures. Once upon a time, I accidentally forgot the pecans! It turned out so deliciously soft and custardy that I just had to embrace the accident. Now, I often create a nut-free version for friends with allergies. Funny enough, that day in the kitchen led to an “accidental favorite”!
And there’s truly nothing like sharing this cobbler with loved ones. Whether it’s holiday gatherings, potlucks, or just a cozy night in, it feels like a hug in a dish.
FAQs and Troubleshooting
Let’s tackle some common questions and potential pitfalls when making your Pumpkin Pecan Cobbler:
-
Why did my cobbler turn out too dense?
This could be due to over-mixing the batter. Make sure to mix until just combined to keep it light and fluffy! -
Can I use fresh pumpkin puree?
Absolutely! Just make sure to cook and puree your pumpkin until smooth. Avoid any added sugars or spices unless you want to adjust the recipe accordingly. -
How do I know when the cobbler is done?
Look for a golden-brown top and bubbling edges. You can also test with a toothpick; it should come out clean if poked in the center. -
What if the topping is too crunchy?
If your cobbler topping feels overly crunchy, it could be due to too much sugar or long baking time. Keep an eye on it towards the end of baking, and reduce the sugar if needed.
Nutritional Info
You may be wondering about the nutritional content of this delicious Pumpkin Pecan Cobbler. While it might not be the lightest dessert, moderation is key! Here’s a rough estimation per serving (based on an 8-serving dish):
- Calories: Approximately 300–350
- Total Fat: 12–15g
- Sugars: 20–25g
- Fiber: 2g
- Protein: 3g
Feel free to adjust the sugar content or swap ingredients depending on your dietary needs. Remember that this cobbler is best enjoyed with a sprinkle of mindfulness and a generous helping of love!
Final Thoughts
There you have it, friends! This Pumpkin Pecan Cobbler is a delightful concoction that embodies all that is cozy and comforting about fall. It’s not just about filling your belly; it’s about making memories, sharing laughs, and celebrating the flavors of the season.
So, grab your ingredients, crank up your favorite tunes, and have fun with it! I can’t wait to hear all about your cobbler-making adventures, the tweaks you made, and the laughter shared around the table. Remember, at Feastical, we’re all about the joy of cooking and connecting through food. Happy baking!
Print
Pumpkin Pecan Cobbler
- Total Time: 60 minutes
- Yield: 8 servings 1x
- Diet: Vegetarian
Description
A cozy autumn dessert that combines pumpkin, warm spices, and crunchy pecans for a delightful treat.
Ingredients
- 1 cup + 3 tablespoons all-purpose flour
- 2 teaspoons baking powder
- 1/2 teaspoon salt
- 3/4 cup granulated sugar
- 1 teaspoon cinnamon
- 1/2 teaspoon nutmeg
- 1/2 teaspoon cloves
- 1/2 cup pumpkin puree
- 1/4 cup milk
- 1/4 cup melted butter or vegetable oil
- 1 1/2 teaspoons vanilla extract
- 1/2 cup granulated sugar (for topping)
- 1/2 cup brown sugar
- 1/4 cup chopped pecans
- 1 1/2 cups very hot water
Instructions
- Preheat your oven to 350°F (175°C).
- Prepare a medium-sized baking dish by greasing it lightly with butter or cooking spray.
- Mix the dry ingredients in a large bowl: flour, baking powder, salt, granulated sugar, cinnamon, nutmeg, and cloves.
- Combine the wet ingredients in another bowl: pumpkin puree, milk, melted butter (or oil), and vanilla extract.
- Combine the wet and dry mixtures, stirring until just combined.
- Pour the batter into the prepared baking dish.
- Sprinkle the topping mixture of granulated sugar, brown sugar, and chopped pecans over the batter.
- Add the very hot water over the top of the batter.
- Bake for 40–45 minutes or until golden and bubbling.
- Cool for about 10-15 minutes before serving.
Notes
For a twist, try adding chocolate chips or swapping in a pumpkin spice blend.
- Prep Time: 15 minutes
- Cook Time: 45 minutes
- Category: Dessert
- Method: Baking
- Cuisine: American
Nutrition
- Serving Size: 1 serving
- Calories: 325
- Sugar: 22g
- Sodium: 360mg
- Fat: 14g
- Saturated Fat: 7g
- Unsaturated Fat: 5g
- Trans Fat: 0g
- Carbohydrates: 45g
- Fiber: 3g
- Protein: 4g
- Cholesterol: 30mg
Keywords: pumpkin dessert, fall dessert, cobbler, pecan cobbler, cozy recipe

One-Pot 30-Minute Greek Lemon Chicken Soup for Weeknights
Deliciously Comforting Greek Lemon Chicken Soup Recipe
Hey there, fellow food enthusiast! If you’re looking for a dish that’s as warm and inviting as a hug on a chilly day, then you’ve landed on the right recipe. Today, let’s dive into the vibrant world of Greek cuisine with a classic dish that combines rich flavors and comforting ingredients—Greek Lemon Chicken Soup. This delightful soup, known as “Avgolemono,” is a staple in many Greek households, and once you taste it, you’ll understand why. Trust me; this recipe is like a sunbeam on a cloudy day!
A Whiff of Nostalgia
I’ll never forget the first time my grandmother made this soup for me in her tiny kitchen filled with the fragrant aroma of simmering chicken and fresh herbs. I was around eight years old, a restless kid constantly exploring the nooks and crannies of her home, but as soon as I caught a whiff of that lemony goodness, I was glued to the kitchen floor like a moth to a flame.
With the warmth of her smile, she taught me the art of creating this soup. She’d always say, “Cooking is like life, my dear; it’s all about the balance of flavors.” The way she whisked those egg yolks with lemon juice until they were as smooth as silk is forever etched in my memory. And her secret? A sprinkle of fresh dill from her garden! Every spoonful was a comforting reminder of family, love, and tradition. That’s why I’m so excited to share this recipe with you—because it’s more than just food; it’s a journey back to those cherished moments.
So, gather your ingredients, roll up those sleeves, and let’s whip up this heartwarming Greek Lemon Chicken Soup together!
Ingredients
Here’s what you’ll need to create this delightful soup:
-
1 tablespoon olive oil (good quality extra virgin)
A drizzle of good olive oil adds depth to the dish. You can use sunflower oil in a pinch, but high-quality olive oil brings the authentic flavor. -
1 medium onion (diced)
Onions bring sweetness and a savory base to the soup. If you’re not an onion fan, try leeks for a milder flavor! -
1 medium carrot (diced)
Carrots add a touch of sweetness and color. Baby carrots work just as well—just chop them up! -
2-3 stalks celery (diced)
Celery offers a wonderful crunch and depth. If you can’t find celery, feel free to use fennel for a unique flavor twist. -
2-3 cloves garlic (finely chopped)
Garlic is essential for that aromatic fragrance. You can use garlic powder in a pinch—just go easy! -
2 bay leaves
These leaves infuse a subtle earthiness. Don’t forget to remove them before serving! -
2 chicken breasts (about 12 oz / 350 g total)
Opt for boneless, skinless chicken breasts for ease. You could also use thighs for more richness. -
6 cups chicken stock (1.5 liters, good quality, flavorful)
Quality stock makes all the difference! Go for homemade if you can, but store-bought is fine too. -
3/4 cup orzo (175 g)
Orzo is cute little pasta that adds heartiness! If you’re gluten-free, use brown rice or quinoa. -
1 lemon (juice of, fresh)
Fresh lemon juice is pivotal for that zing! Bottled juice just doesn’t cut it. -
2 egg yolks
Yolks help create that silky texture. For a lighter version, you can skip the eggs—you’ll still have a delicious soup. -
A handful fresh dill
Fresh dill adds a kick of flavor! If you can’t find it, parsley or thyme will do the trick. -
Salt and freshly ground black pepper (to taste)
Season to your liking. Remember, you can always add more, but you can’t take it out!
Step-by-Step Instructions
-
Heat the Olive Oil
In a large pot or Dutch oven, heat the tablespoon of olive oil over medium heat. The pot should be nice and warm but not smoking. This is where the magic begins! -
Sauté the Vegetables
Toss in the diced onion, carrot, and celery. Sauté these for about 5-7 minutes, or until the onion is translucent and the veggies are tender. Don’t rush this step—let those flavors mingle! -
Add Garlic and Seasonings
Stir in the finely chopped garlic and bay leaves, letting them cook for an additional 2-3 minutes until fragrant. The kitchen should smell like pure heaven at this point! -
Introduce the Chicken
Time to add the chicken breasts to the pot. Pour in the chicken stock, making sure the chicken is fully submerged, then bring the mixture to a gentle boil. Cover the pot, reduce the heat to a simmer, and cook for about 20-25 minutes until the chicken is cooked through. Check for doneness using a meat thermometer (it should read 165°F or 74°C). -
Prepare the Orzo
While the chicken is simmering, cook the orzo separately according to the package instructions in a pot of salted boiling water. Drain and set aside. This helps prevent the pasta from becoming mushy if left in the soup. -
Shred the Chicken
Once the chicken is cooked, remove it from the pot and set it on a cutting board. Let it cool for a few minutes before shredding it into bite-sized pieces. You can also chop it if you prefer larger chunks. -
Combine it All
Return the shredded chicken to the soup pot and stir in the cooked orzo. Allow the soup to simmer for another 5 minutes, letting those flavors meld together beautifully. -
Whisk Up the Lemon and Egg Mixture
In a separate bowl, whisk together the egg yolks and fresh lemon juice until creamy. To temper the mixture and avoid cooking the eggs, slowly ladle a cup of the hot soup into the egg mixture while whisking continuously. This will warm the eggs without scrambling them. -
Finish the Soup
Slowly pour the tempered egg mixture back into the pot while stirring the soup. This will give the soup a rich and creamy texture. Add in the fresh dill and season with salt and pepper to taste. Enjoy the delightful transformation! -
Serve and Bask in the Flavor
Ladle the soup into bowls and garnish with extra dill or a lemon wedge if you’d like.
Serving Suggestions
Serving your Greek Lemon Chicken Soup can be just as fun as making it! A simple bowl will do, but why not dress it up a bit? You can sprinkle some freshly chopped dill on top and add a thin slice of lemon for a splash of brightness. Serve with warm, crusty bread or a fresh Greek salad on the side for the ultimate comforting meal. This soup is perfect for lunch or as a starter for dinner and is sure to impress your guests.
Recipe Variations
-
Mediterranean Twist: Toss in some baby spinach or kale for a pop of green and extra nutrition. The added greens will wilt beautifully into the soup!
-
Spicy Kick: Love a bit of heat? Try adding a pinch of red pepper flakes or a diced jalapeño to the sautéing veggies for a spicy version.
-
Savory Swap: Experiment with using turkey in place of chicken—great for those Thanksgiving leftovers!
-
Herby Delight: Mix it up with different herbs! Try tarragon or parsley for a fresh aroma that brings a unique flair.
-
Creamy Comfort: For those who love an extra creamy soup, add in a splash of heavy cream right before serving. It elevates the dish to new heights!
Chef’s Notes
You know, every time I make this soup, I’m reminded of my grandmother’s little kitchen and her endless wisdom. I’ve adjusted the recipe over the years, adding a little more lemon here and a touch of dill there, but the essence remains the same. Every family has its twist on Avgolemono, and that’s what makes it such a cherished dish! Try it out and feel free to make it your own. Food is all about love and connection, after all!
FAQs and Troubleshooting
1. My soup is too thick! What do I do?
No worries! Add a splash of chicken stock or water to thin it out until you reach the desired consistency.
2. What if my soup curdled when adding the egg mixture?
It can be tricky! Make sure to temper the egg yolks with hot soup first before adding them back in. If it curdles, the flavor is still there; just blend it for a smoother consistency.
3. I’m vegetarian; can I still enjoy this soup?
Absolutely! Substitute chicken with tofu or chickpeas and use vegetable stock. You’ll still get the heartwarming flavors!
4. How do I store leftovers?
Store any leftovers in an airtight container in the fridge for up to 3 days. You can also freeze it, but the orzo may become mushy when reheated, so consider adding it fresh each time.
Nutritional Info
While the exact nutritional information can vary based on your specific ingredients and serving sizes, here’s a rough estimate per serving (considering 6 servings for this recipe):
- Calories: 320
- Protein: 20g
- Carbohydrates: 25g
- Fat: 10g
- Fiber: 2g
This soup is a well-balanced dish providing hearty protein from the chicken, carbs from the orzo, and an abundance of vitamins from the veggies.
Final Thoughts
And there you have it! A heartwarming bowl of Greek Lemon Chicken Soup that’ll fill your home with love and joy. Whether you’re cozying up on the couch, hosting a gathering, or simply nourishing your body with good food, this recipe has got you covered. So grab that spoon, dig in, and share it with the ones you love. After all, the best meals are the ones that bring people together! Enjoy, my dear friend! 🍋🍲
Print
Deliciously Comforting Greek Lemon Chicken Soup
- Total Time: 45 minutes
- Yield: 6 servings 1x
- Diet: Non-Vegetarian
Description
A heartwarming Greek lemon chicken soup, known as Avgolemono, that combines rich flavors and comforting ingredients.
Ingredients
- 1 tablespoon olive oil
- 1 medium onion (diced)
- 1 medium carrot (diced)
- 2–3 stalks celery (diced)
- 2–3 cloves garlic (finely chopped)
- 2 bay leaves
- 2 chicken breasts (about 12 oz / 350 g total)
- 6 cups chicken stock (1.5 liters)
- 3/4 cup orzo (175 g)
- 1 lemon (juice of, fresh)
- 2 egg yolks
- A handful fresh dill
- Salt and freshly ground black pepper (to taste)
Instructions
- Heat the olive oil in a large pot or Dutch oven over medium heat.
- Sauté the diced onion, carrot, and celery for about 5-7 minutes.
- Add the finely chopped garlic and bay leaves, and cook for 2-3 minutes.
- Introduce the chicken breasts and pour in the chicken stock, bringing it to a gentle boil.
- Prepare the orzo according to package instructions in a pot of salted boiling water.
- Shred the chicken into bite-sized pieces.
- Combine the shredded chicken and cooked orzo into the soup pot.
- Whisk together the egg yolks and fresh lemon juice until creamy.
- Finish the soup by adding the tempered egg mixture back in.
- Serve the soup garnished with dill or a lemon wedge.
Notes
Serve with warm crusty bread or a fresh Greek salad. Can add greens or spices for variations.
- Prep Time: 15 minutes
- Cook Time: 30 minutes
- Category: Soup
- Method: Stovetop
- Cuisine: Greek
Nutrition
- Serving Size: 1 serving
- Calories: 320
- Sugar: 3g
- Sodium: 800mg
- Fat: 10g
- Saturated Fat: 1.5g
- Unsaturated Fat: 5g
- Trans Fat: 0g
- Carbohydrates: 25g
- Fiber: 2g
- Protein: 20g
- Cholesterol: 100mg
Keywords: Greek lemon chicken soup, Avgolemono, comfort food, chicken soup
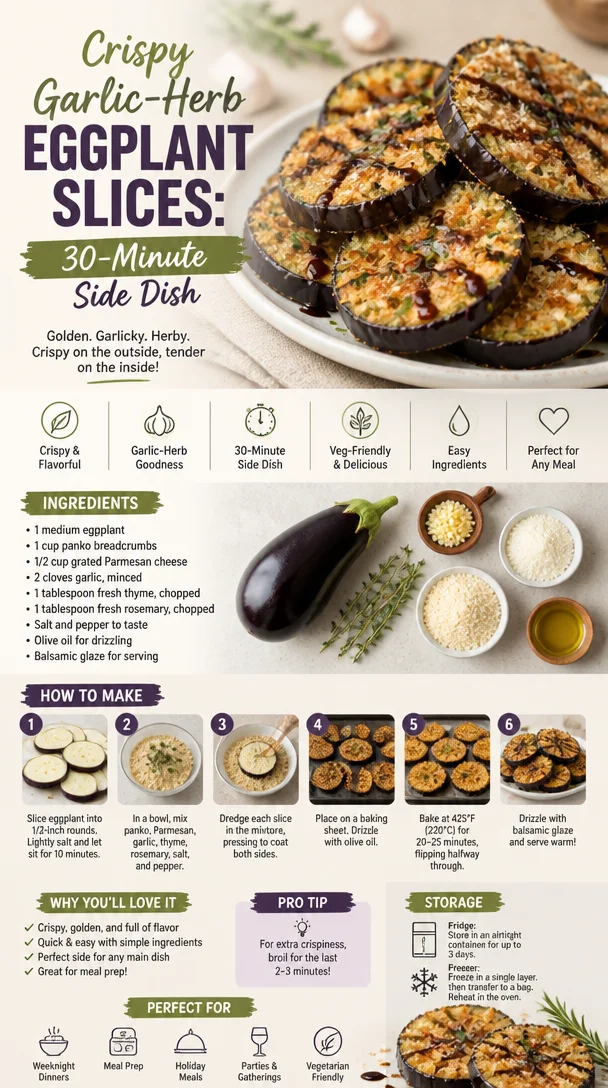
Crispy Garlic-Herb Eggplant Slices: 30-Minute Side Dish
Garlic Herb Crusted Eggplant Slices: A Comforting Culinary Adventure
Hey there, food lovers! If you’ve ever been on the hunt for a comfort food dish that delights your taste buds while feeling light and wholesome, you’ve hit the jackpot today. Meet my Garlic Herb Crusted Eggplant Slices! This flavorful gem is the perfect way to elevate your veggie game while also indulging in a crispy, savory embrace of garlic and herbs.
Now, let’s set the stage. Picture this: It’s a warm summer evening, and the scent of herbs fills the air as you step into your kitchen. There’s something about cooking with seasonal vegetables, right? Eggplants are one of those underrated beauties that not only bring a pop of color to your plate but also pack a hearty punch in terms of taste and nutrition. Let’s face it, they can easily go unnoticed, sitting quietly in the produce aisle, yet they’ve got so much to offer.
I still remember the first time I roasted a big batch of eggplant. It was a weekend afternoon, and I was experimenting with flavors alone in my kitchen. The eggplant was like a sponge, soaking up all the delicious garlic and herbs. As I pulled that dish out of the oven, the aroma wrapped around me as if it was a warm hug. The crispy outside and soft, creamy inside made me realize—I had struck culinary gold!
So, grab your favorite apron, and let’s dive into the beautiful world of Garlic Herb Crusted Eggplant Slices. This recipe will become an instant classic in your kitchen, perfect for a cozy family dinner or a stunning dish to impress friends on game night. Let’s get cooking!
Personal Story
The first time I cooked eggplant was during a family gathering at my grandmother’s house. She was known for her incredible Italian cuisine, and I was determined to impress her. I remember her towering over me in her floral apron, a grin plastered across her face as I tiptoed around the bustling kitchen.
“Just cut it into thick slices, Beau! Don’t be shy with the garlic and herbs!” she chuckled, playfully nudging me with her elbow. Her confidence in me reignited my passion for cooking. We roasted our eggplant slices side by side, infusing the air with garlic and ground pepper. That day, I learned that cooking is not just about following a recipe but also about infusing your essence into the food—creating memories and shared moments over plates filled with love.
So here I am, years later, still channeling that joy and freshness through these Garlic Herb Crusted Eggplant Slices. It’s become a symbolic dish for me, representing both nostalgia and innovation in the kitchen. Trust me, you’re gonna want to make this yourself!
Ingredients
Let’s gather our delicious lineup of ingredients that will turn this eggplant into a feast for the senses:
-
1 medium eggplant: This vibrant beauty will be the star of the show. Look for one that feels firm and has smooth, shiny skin. If you’re not keen on eggplant, zucchini or portobello mushrooms are great alternatives!
-
1 cup panko breadcrumbs: These Japanese-style breadcrumbs add a fluffy, light crunch that’s irresistible. If you’re gluten-free, you can find gluten-free panko or use crushed cornflakes for a similar texture.
-
1/2 cup grated Parmesan cheese: This cheese brings the umami! Feel free to swap in nutritional yeast for a vegan alternative without compromising on flavor.
-
2 cloves garlic, minced: Garlic is where the flavor explosion begins! If you’re a garlic lover like me, consider adding an extra clove or two to really amp up the fragrance.
-
1 tablespoon fresh thyme, chopped: Thyme is aromatic and earthy, perfect for complementing the eggplant. If fresh isn’t available, dried thyme will work, but use only half as much since dried herbs can be more potent.
-
1 tablespoon fresh rosemary, chopped: Rosemary goes hand-in-hand with hearty dishes. It adds a distinctive aroma. Dried rosemary can also be used—just rub it between your fingers before adding to release its oils.
-
Salt and pepper to taste: These essential flavors bring it all together. Always taste before serving; seasoning is key!
-
Olive oil for drizzling: This will help create a stunning golden crust. You can substitute with avocado oil or any oil of your choice.
-
Balsamic glaze for serving: This sweet and tangy drizzle enhances the dish further. You can make your own by simmering balsamic vinegar until reduced, or use store-bought to save time.
Let’s round up our ingredients and set ourselves up for a delightful cooking experience!
Step-by-Step Instructions
Now, let’s do this! Follow my lead for making these Garlic Herb Crusted Eggplant Slices step-by-step.
Step 1: Preheat Your Oven
Start by preheating your oven to 400°F (200°C). A hot oven is crucial for getting that lovely crispy texture on the outside of your eggplant.
Step 2: Prepare the Eggplant
Slice the medium eggplant into 1/2-inch thick rounds. This size is essential since it allows the eggplant to cook evenly and absorb all those amazing flavors without becoming mushy. If you’ve got a vegetable peeler, consider peeling alternating strips for a bit of aesthetic flair!
Step 3: Salt the Eggplant
Sprinkle salt generously on both sides of the eggplant slices. This not only seasons the eggplant but also helps draw out excess moisture, preventing the slices from becoming soggy. Let them sit for about 10 minutes, then rinse and pat dry. This will help achieve that crispy crust we’re aiming for!
Step 4: Make the Coating Mixture
In one bowl, combine your panko breadcrumbs, grated Parmesan cheese, minced garlic, thyme, rosemary, salt, and pepper. Give it a good mix! This blend of ingredients will make your crust delightful.
Step 5: Coat the Eggplant
In another bowl, prepare to assemble your flavor masterpiece! Lightly drizzle a bit of olive oil onto a baking sheet. Now, dip each eggplant slice into the breadcrumb mixture, ensuring it gets fully coated on both sides. The oil will help the breadcrumbs stick, giving you that gorgeous crust on each piece.
Step 6: Bake the Eggplant
Place the coated eggplant slices on the prepared baking sheet, making sure they’re not overlapping—this promotes even cooking. Drizzle a little olive oil over the top (just a teaspoon of love goes a long way), then pop the baking sheet into your preheated oven.
Bake for about 25-30 minutes, flipping the slices halfway through. You want them to be beautifully golden brown and crisp. The smell is going to be out of this world—trust me, your neighbors will be dancing to the aroma wafting from your kitchen!
Step 7: Add the Finishing Touch
Once they’re done, take them out of the oven and let them cool for a minute. A light drizzle of balsamic glaze on top is the cherry on top; this adds a sweet, tangy finish that complements the earthiness of the eggplant beautifully.
There you have it—hot, crispy Garlic Herb Crusted Eggplant Slices ready to wow your taste buds!
Serving Suggestions
Alright, let’s get to the fun part—serving! These Garlic Herb Crusted Eggplant Slices are versatile, making them great for various occasions.
-
As a Main Course: Serve them alongside a fresh salad drizzled with lemon vinaigrette for a light yet satisfying meal. Add some quinoa or couscous for extra heartiness.
-
As an Appetizer: Slice them into bite-sized pieces for a stunning platter with a side of marinara or homemade tzatziki for dipping. Guests will devour them!
-
Garnish: A sprinkle of freshly chopped herbs like parsley or a dash of chili flakes will create a showstopping presentation and add flavor.
No matter how you serve them, these slices are a great way to share comfort and joy around your dining table.
Recipe Variations
Let’s get creative, shall we? Here are some fun variations to put your own spin on these Garlic Herb Crusted Eggplant Slices:
-
Spicy Kick: Add some red pepper flakes or cayenne pepper to the breadcrumb mixture for those who crave a little heat.
-
Cheesy Goodness: Mix in some crumbled feta or mozzarella cheese into the breadcrumb mixture for an added cheesy surprise.
-
Mediterranean Twist: Instead of thyme and rosemary, try oregano and a hint of lemon zest to bring a taste of the Mediterranean right to your kitchen!
-
Smoky Flavor: For a BBQ flair, add a sprinkle of smoked paprika to the breadcrumb mixture for a depth of flavor that will transport you to summer cookouts.
-
Herbed Yogurt Dip: Blend some Greek yogurt with herbs and a touch of lemon juice as a refreshing dip to pair with the slices, enhancing the flavor profile beautifully.
Experimenting with these variations can help you discover your favorite version or create a personalized dish that resonates with your culinary style!
Chef’s Notes
Over the years, I’ve whipped up these Garlic Herb Crusted Eggplant Slices countless times, and they never cease to amaze both me and anyone lucky enough to taste them. It’s fascinating how a simple dish can change and evolve based on the flavor profiles you experiment with.
One funny memory that still makes me smile happened during a dinner party. I mistakenly grabbed the cayenne pepper instead of regular black pepper and ended up serving my guests spicy eggplant slices. To my surprise, they went crazy for the unexpected heat! That experience taught me that sometimes, the best dishes emerge from happy accidents in the kitchen.
FAQs and Troubleshooting
1. Why is my eggplant soggy?
Sometimes undercooked or overly moist eggplant can be an issue. Ensure you salt the slices and let them sit to draw out excess moisture before cooking.
2. How can I make this vegan?
You can easily swap out the Parmesan for nutritional yeast, and use vegan mayonnaise instead of olive oil for a luscious coating.
3. Can I prep this dish ahead of time?
Absolutely! You can coat the eggplant slices a few hours before baking. Store them in the refrigerator, then pop them in the oven right before serving.
4. How do I store leftovers?
Keep any leftovers in an airtight container in the fridge for up to 3 days. Reheat in the oven to regain that crispy texture before enjoying!
Nutritional Info
Each serving of Garlic Herb Crusted Eggplant Slices not only bursts with flavor but also packs a nutritious punch. Eggplant is rich in antioxidants and vitamins, particularly vitamins C and K.
When you add in the health benefits of garlic as an anti-inflammatory element, along with the fresh herbs contributing essential vitamins, this dish checks off several boxes on the nutritional list! Each slice is hearty yet light, making it perfect for those looking to balance indulgence with nutrition.
This recipe overall is a wonderful way to incorporate more vegetables into your meals without sacrificing taste. And let’s be honest—who wouldn’t want more delicious comfort food in their life?
Final Thoughts
So there you have it—my beloved recipe for Garlic Herb Crusted Eggplant Slices! Not only is it simple and satisfying, but it’s also a canvas for all your culinary creativity. Whether you make it as is, or experiment with the variations I’ve suggested, this dish is bound to be a hit in your kitchen.
Gather your friends and family, fire up that oven, and get ready to create some mouthwatering memories. Food is all about experience, and I can guarantee these slices will bring joy to your table and be the talk of the night.
As always, I’m excited to hear how your journey with these garlic herb delights goes! Let’s keep spreading that food love, one delicious dish at a time. Happy cooking!
PrintGarlic Herb Crusted Eggplant Slices
- Total Time: 45 minutes
- Yield: 4 servings 1x
- Diet: Vegetarian
Description
Elevate your veggie game with these crispy, savory Garlic Herb Crusted Eggplant Slices, perfect for any occasion.
Ingredients
- 1 medium eggplant
- 1 cup panko breadcrumbs
- 1/2 cup grated Parmesan cheese
- 2 cloves garlic, minced
- 1 tablespoon fresh thyme, chopped
- 1 tablespoon fresh rosemary, chopped
- Salt and pepper to taste
- Olive oil for drizzling
- Balsamic glaze for serving
Instructions
- Preheat your oven to 400°F (200°C).
- Slice the eggplant into 1/2-inch thick rounds.
- Sprinkle salt on both sides of the eggplant slices and let sit for 10 minutes.
- Combine panko breadcrumbs, Parmesan cheese, minced garlic, thyme, rosemary, salt, and pepper in a bowl.
- Lightly drizzle olive oil on a baking sheet.
- Dip each eggplant slice into the breadcrumb mixture.
- Place the coated eggplant slices on the baking sheet and drizzle with olive oil.
- Bake for 25-30 minutes, flipping halfway through.
- Drizzle with balsamic glaze before serving.
Notes
Feel free to experiment with different herbs and spices to create your own variations!
- Prep Time: 15 minutes
- Cook Time: 30 minutes
- Category: Main Course
- Method: Baking
- Cuisine: Italian
Nutrition
- Serving Size: 1 serving
- Calories: 350
- Sugar: 5g
- Sodium: 400mg
- Fat: 12g
- Saturated Fat: 4g
- Unsaturated Fat: 6g
- Trans Fat: 0g
- Carbohydrates: 45g
- Fiber: 3g
- Protein: 15g
- Cholesterol: 30mg
Keywords: eggplant, vegetarian, crispy, baked, comfort food
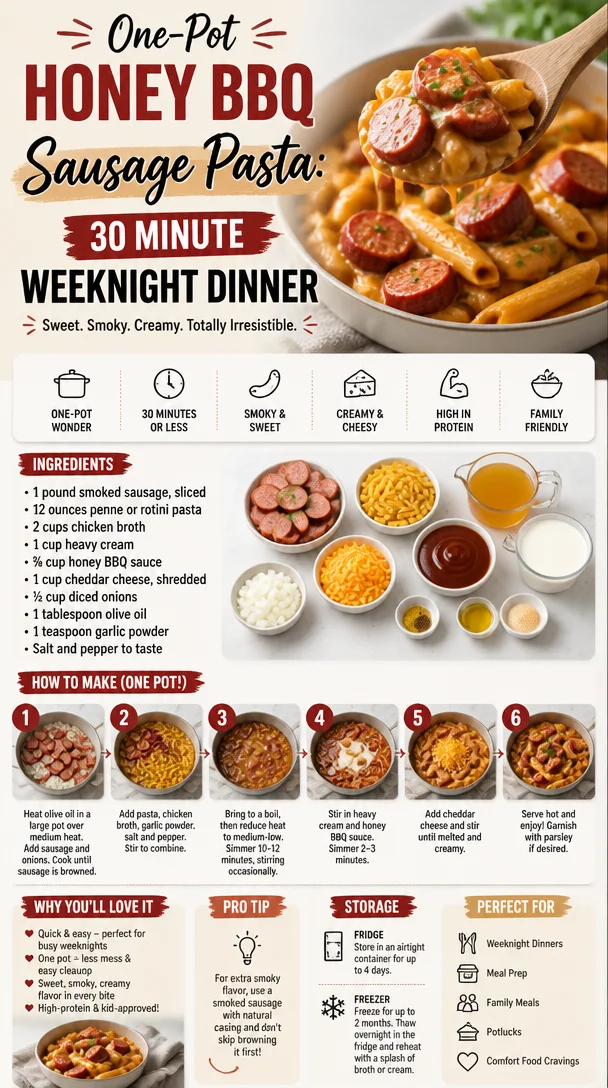
One-Pot Honey BBQ Sausage Pasta: 30 Minute Weeknight Dinner
One-Pot Bold Honey BBQ Sausage Pasta: Comfort Food Done Right
Hey there, friends! Welcome back to Feastical, where the heart of the home is the kitchen, and the flavors are always on point. Today, I’m thrilled to dive into a dish that has become a comfort staple in my kitchen: One-Pot Bold Honey BBQ Sausage Pasta. This dish is not only a breeze to make but also bursts with flavor that’ll have you and your taste buds dancing. Buckle up, because we’re about to whip up something special!
Introduction: Let’s Get Cooking!
If there’s one thing I love more than sharing recipes, it’s the stories and memories that accompany those meals. Growing up, weekends in my family were all about gathering around the kitchen table, enjoying hearty meals that not only filled our stomachs but also fueled our hearts. One of those meals was a simple, yet oh-so-delicious sausage pasta that my grandma used to whip up on busy weeknights. Fast forward to today, and I’ve given that dish a bold, modern twist with a honey BBQ flair that’ll have you asking for seconds!
Picture this: the aroma of sautéed sausage filling the air, mingling with the sweet smokiness of BBQ sauce and the creamy richness of pasta. It’s a dish that brings people together, whether it’s a casual family dinner or a get-together with friends. And the best part? It all comes together in just one pot! Talk about a win-win. So, grab your favorite apron and let’s dive into the exciting world of One-Pot Bold Honey BBQ Sausage Pasta!
Personal Story: A Nostalgic Twist
Let me take you back to a warm summer evening when I was just a little kitchen helper. I remember standing on a stool, peering over the counter as my grandma orchestrated our family meal. She had this incredible knack for making simple ingredients sing, and her homemade BBQ sauce was legendary. One Saturday, we decided to experiment, tossing in some smoked sausage and penne pasta while she hummed her favorite tunes. The vibrant flavors danced together in perfect harmony, and I could hardly wait to dig in.
That meal stuck with me, and as I grew up, I often found myself revisiting that moment in my own cooking adventures. Fast forward a few years—after culinary school and countless dinner parties later—and here I am, ready to share this updated version. It’s not just a recipe; it’s a tribute to the joy of cooking and the memories we create around the table. Are you ready to create your own flavorful memories? Let’s get started!
Ingredients: What You’ll Need
Got your apron on? Great! Here’s what you’ll need to recreate this deliciousness:
-
1 pound smoked sausage, sliced
This adds a wonderful depth of flavor to your dish. Feel free to substitute with turkey sausage or even vegetarian sausage for a lighter alternative! -
12 ounces penne or rotini pasta
These pasta shapes hold onto the sauce beautifully. If you’re gluten-free, go for a gluten-free pasta like chickpea or quinoa pasta. -
2 cups chicken broth
Homemade is always best, but store-bought works too! Use vegetable broth if you’re looking for a vegetarian option. -
1 cup heavy cream
This creates the creamy base of the sauce. You can swap it for half-and-half or coconut cream for a dairy-free version. -
¾ cup honey BBQ sauce
This is the star of the dish! I recommend a quality sauce that balances sweetness and smokiness. -
1 cup cheddar cheese, shredded
Cheddar adds a creamy texture and sharpness. Try pepper jack cheese for an extra kick! -
½ cup diced onions
A classic base for flavor. Green onions or shallots can be a nice alternative if you want something milder. -
1 tablespoon olive oil
This helps sauté the onions and sausage. Feel free to use avocado oil for a healthier twist. -
1 teaspoon garlic powder
A simple way to add flavor without the hassle of minced garlic. Fresh garlic can be substituted as well. -
Salt and pepper to taste
Essential for seasoning! A dash of smoked paprika can also add an extra layer of flavor.
Step-by-Step Instructions: Cooking Up a Storm
Alright, let’s roll up our sleeves and break this down step by step! Cooking should never feel intimidating; it should be fun and fulfilling. Here’s how we do it:
-
Sauté the Sausage and Onions
Heat a large pot over medium heat and drizzle in that olive oil. Toss in the sliced smoked sausage and diced onions. Sauté them for about 5-7 minutes until the onions become translucent and the sausage begins to brown. Don’t be afraid to let the sausage get a little crispy on the edges—those caramelized bits add incredible flavor! -
Add the Pasta
Once the sausage and onions are looking delicious, pour in the penne or rotini pasta. Give it a good stir to coat everything in that savory goodness. Trust me, you’ll want to get all those flavors mingling right from the start. -
Pour in the Broth and Cream
Now it’s time to bring all of that together! Pour in the chicken broth and heavy cream. Stir gently to combine and raise the heat just a touch until it’s bubbling away. This is the moment where the magic starts to happen, and your kitchen will start to smell heavenly. -
Add the Honey BBQ Sauce
Here comes the fun part! Add in that luscious honey BBQ sauce and stir until everything is well combined. The sauce will start to thicken and coat the pasta beautifully. Give it a taste—this is your chance to fine-tune the flavors! If you like it sweeter, add a bit more BBQ sauce. -
Mix in the Cheese
Once the pasta is al dente, reduce the heat and stir in the shredded cheddar cheese. Watch as it melts into the creamy sauce, creating a comforting, cheesy hug for your pasta. At this point, taste again and add salt and pepper as needed. -
Serve It Up
Turn off the heat and let it sit for a minute or two. This allows everything to settle, making it easier to serve. Plus, it gives you just enough time to take a quick taste test (as if you needed an excuse).
Serving Suggestions: Plating Perfection
Ah, the final touch! Plate your One-Pot Bold Honey BBQ Sausage Pasta in vibrant, shallow bowls. You can also use a big serving dish to keep it family-style. Finish it off with a sprinkle of chopped green onions or fresh parsley for that burst of color.
For an extra twist, consider serving it with a light side salad or some crusty garlic bread to soak up all that creamy goodness. And if you’re feeling adventurous, a drizzle of extra honey BBQ sauce on top can elevate the dish even further!
Recipe Variations: Get Creative
Now that you’ve mastered the basics, let’s talk variations! Here are a few creative twists to consider:
-
Vegetable Explosion
Toss in your favorite veggies—like bell peppers, zucchini, or spinach—when sautéing the onions. Not only do they add nutrients, but they’ll also bring a lovely pop of color. -
Spicy Sausage Kick
Use a spicy Italian sausage or add a pinch of cayenne pepper to the mix if you’re looking to ignite your taste buds. -
Cheesy Mozzarella Surprise
Replace the cheddar with fresh mozzarella for a gooey, cheesy delight. Just stir it in at the very end until it melts slightly. -
Pesto Infusion
Swap out the honey BBQ sauce for basil pesto to give it an herbaceous spin. Pair it with toasted pine nuts for added crunch! -
Plant-Based Swap
Use plant-based sausage and swap the heavy cream for cashew cream to make this dish entirely plant-based without sacrificing taste.
Chef’s Notes: A Bit of Kitchen Wisdom
Here’s a little kitchen tidbit from my own experience: this recipe is incredibly forgiving. Whether you are missing an ingredient or want to add something to the mix, don’t stress! Cooking is all about creativity and finding what flavors you love. I’ve had nights where I completely forgot to add the cheese, and it still turned out delicious! Remember, your unique touch is what makes each meal special.
FAQs and Troubleshooting: Your Prep Companion
-
What if my pasta is too mushy?
Make sure to keep an eye on your pasta. It should be al dente, meaning it should have a slight bite to it. It will continue cooking a bit even after you’ve turned off the heat. -
Can I make this in advance?
Absolutely! Feel free to prep it ahead and store it in the fridge. Just reheat it with a splash of extra broth or cream to keep it creamy. -
What if it’s too thick?
If your pasta dish becomes too thick during cooking or reheating, just add a splash of chicken broth or milk until you reach your desired consistency. -
Can I freeze leftovers?
Yes, you can freeze the remaining pasta. Just let it cool completely, then store in an airtight container for up to three months. Reheat it gently, adding a little extra cream if needed.
Nutritional Info: A Quick Breakdown
Per serving (based on eight servings), you’re looking at approximately:
- Calories: 550 kcal
- Protein: 20g
- Carbohydrates: 50g
- Fat: 30g
Keep in mind that these numbers may vary based on your ingredient choices. It’s all about balance; enjoy a delicious meal and savor every bite!
Final Thoughts: A Bow to You, the Home Cook
There you have it, friend—a comforting bowl of One-Pot Bold Honey BBQ Sausage Pasta that’s sure to become a favorite in your household. With every bite, you’ll taste the love and effort you put into making this dish, and the memories that come with it. So whether you’re dining solo, feeding the family, or hosting friends, know that this delicious pasta will bring smiles and warm hearts around the table.
Remember, cooking is a journey, and every recipe you explore is an opportunity to learn and grow. Embrace those moments, share your meals, and create connections through food. I can’t wait to hear about your adventures in the kitchen, so drop me a comment below and let me know how your pasta turns out!
Until next time, keep those pots stirring and those plates filled with love. Happy cooking!
Print
One-Pot Bold Honey BBQ Sausage Pasta
- Total Time: 30 minutes
- Yield: 4 servings 1x
- Diet: Non-Vegetarian
Description
A comforting one-pot pasta dish featuring smoked sausage and a sweet honey BBQ sauce, perfect for family dinners or gatherings.
Ingredients
- 1 pound smoked sausage, sliced
- 12 ounces penne or rotini pasta
- 2 cups chicken broth
- 1 cup heavy cream
- ¾ cup honey BBQ sauce
- 1 cup cheddar cheese, shredded
- ½ cup diced onions
- 1 tablespoon olive oil
- 1 teaspoon garlic powder
- Salt and pepper to taste
Instructions
- Sauté the sausage and onions: Heat a large pot over medium heat and drizzle in olive oil. Toss in sliced sausage and diced onions. Sautéfor about 5-7 minutes until onions become translucent and sausage begins to brown.
- Add the pasta: Pour in the penne or rotini pasta and stir to coat everything in the savory goodness.
- Pour in the broth and cream: Add chicken broth and heavy cream, and stir gently. Raise the heat until it starts bubbling.
- Add the honey BBQ sauce: Stir in the honey BBQ sauce until everything is well combined.
- Mix in the cheese: Once the pasta is al dente, reduce the heat and stir in shredded cheddar cheese until melted.
- Serve it up: Let it sit for a minute before serving. Plate and finish it off with chopped green onions or fresh parsley.
Notes
This recipe is flexible; feel free to add vegetables or substitute proteins as needed. You can also make it ahead of time and reheat with a splash of broth.
- Prep Time: 10 minutes
- Cook Time: 20 minutes
- Category: Main Course
- Method: Stovetop
- Cuisine: American
Nutrition
- Serving Size: 1 serving
- Calories: 550 kcal
- Sugar: 12g
- Sodium: 900mg
- Fat: 30g
- Saturated Fat: 12g
- Unsaturated Fat: 14g
- Trans Fat: 0g
- Carbohydrates: 50g
- Fiber: 2g
- Protein: 20g
- Cholesterol: 75mg
Keywords: one-pot pasta, honey BBQ, sausage pasta, comfort food, easy dinner

Tomato Pie Recipe for Busy Weeknights (30-Minute Prep)
The Ultimate Tomato Pie Recipe: A Slice of Comfort from My Kitchen to Yours
Hey there, food lovers! Today, we’re diving into a dish that’s not just a meal but a heartwarming slice of nostalgia: Tomato Pie. If you’re like me, there’s something about this savory delight that brings back memories of summer days spent in a sun-soaked garden, with juicy, red tomatoes dripping with flavor. So, roll up your sleeves and grab your apron; we’re going to whip up a dish that’s just as comforting as an old sweater and perfect for sharing with friends and family!
A Slice of Nostalgia
Let me take you back to a sweltering August afternoon in my grandmother’s kitchen. The air was thick with the scent of fresh tomatoes picked from her sprawling garden. I remember standing on a little stool, just tall enough to peek over the counter, while my grandma effortlessly transformed those ruby-red beauties into the most delicious Tomato Pie. We would laugh as she tossed in her secret ingredients, reminiscing about summers gone by and creating new memories in the process.
It was more than just cooking; it was a way of bonding—fingers sticky with tomato juice and flour as we crimped the edges of her flaky pie crust. The anticipation of that pie baking in the oven, its golden crust browning perfectly, was almost unbearable. Each time we dug in, it felt like we were diving into a treasure chest of flavors, with each slice unfolding layers of love and warmth.
And that’s exactly what I aim to recreate with my Tomato Pie recipe. It’s simple, delicious, and brings people together—just like Grandma’s did. Let’s get started on building our own delicious memories today!
Ingredients
We’re keeping it simple with a handful of fresh ingredients that you might already have in your pantry. Here’s what you’ll need:
-
1 Pie Crust
Whether you go for homemade or store-bought, this is the foundation of your Tomato Pie. If you’re short on time, a pre-made crust works wonders! Feeling adventurous? You can even use a savory biscuit crust for a fun twist. -
4 Beefsteak Tomatoes (peeled and sliced thin)
These large, juicy tomatoes are perfect for our pie. Not a fan of beefsteak? You can substitute with any ripe tomatoes or even heirloom varieties for a splash of color and flavor. -
Salt and Pepper (to taste)
These are your basic flavor enhancers! A dash of salt will help draw out the moisture in the tomatoes, making sure your pie isn’t soggy. -
1 tbsp Fresh Basil (or 1 tsp dried basil)
Fresh herbs elevate any dish! Basil pairs wonderfully with tomatoes but feel free to experiment with other herbs like oregano or thyme. -
2 tbsp Chopped Chives
Chives add a mild onion flavor that complements the tomatoes perfectly. If you don’t have chives, green onions or even parsley can work in a pinch. -
1 cup Heavy Mayonnaise (preferably Duke’s)
Mayonnaise might seem unusual, but it adds creaminess and depth to your pie. If you want a lighter version, Greek yogurt is a good substitute, although it’ll alter the flavor a bit. -
1 cup Grated Cheddar Cheese
Cheddar lends a rich, savory flavor to the pie. Experiment with other cheeses like mozzarella, goat cheese, or even a spicy pepper jack for something fun!
Step-by-Step Instructions
Now that we have our ingredients laid out, it’s time to bring it all together! Follow these steps for a Tomato Pie that will have your taste buds dancing.
-
Preheat your oven.
We want it nice and hot, so set your oven to 350°F (175°C). This ensures crispy edges for your pie. -
Prepare the pie crust.
If you’re using a store-bought crust, follow the package instructions. If homemade, roll it out and fit it into a 9-inch pie plate. Press it down gently to avoid any air pockets, then prick it with a fork to allow steam to escape. -
Layer the tomatoes.
Now, for the star of the show! Arrange the thinly sliced, peeled tomatoes in a single layer over the crust. Don’t worry if they overlap; this just makes for a more rustic, homey feel. Sprinkle salt and pepper over the top to enhance the flavor. -
Mix the delightful filling.
In a bowl, combine the mayonnaise, herbs, and half the cheese (saving the other half for later). Stir it all together until it’s creamy and well mixed. This is where the magic happens! -
Spread the filling over the tomatoes.
Carefully spoon the mayo mixture over the tomatoes, making sure to cover them nicely. This creamy layer adds richness and texture that’s simply irresistible. -
Top with cheese.
Sprinkle the remaining grated cheddar cheese over the top—you can never have too much cheese, am I right? It’s going to melt beautifully as the pie bakes. -
Bake to perfection.
Place your pie in the oven and bake for about 30-35 minutes or until the pie is bubbling and the cheese turns a golden brown. Your kitchen will smell like heaven, trust me! -
Cool and serve.
Once baked, let the pie cool for about 10 minutes before slicing. This will help the filling set up a bit, making your slices cleaner. The wait is agonizing, but it’s worth it!
Serving Suggestions
Serving your Tomato Pie can be just as creative as making it! Here are a few ideas to elevate your presentation:
-
Garnish with Fresh Herbs: Sprinkle fresh chives or basil on top for a pop of color and fresh flavor.
-
Perfect Pairings: Serve it with a simple green salad drizzled with balsamic vinaigrette or a light soup to round out the meal. This dish is fabulous alongside some crusty bread for soaking up any leftover juices.
-
Slice it Right: For a rustic touch, use a serrated knife to cut it into wedges. Each slice should reveal that gorgeous layering of tomatoes and creamy goodness.
-
Warm or Cold: This pie is delightful either warm or at room temperature, making it versatile for any occasion. It’s great as a main dish or even at a brunch buffet!
Recipe Variations
This Tomato Pie recipe is a fantastic canvas for creativity! Here are a few ideas to switch things up:
-
Add Proteins: Toss in cooked bacon bits or crumbled sausage for a heartier version. Who wouldn’t love the addition of some smoky flavor?
-
Spicy Kick: If you like a little heat, add red pepper flakes or diced jalapeños to the mayo mixture for an unexpected zing.
-
Cheesy Goodness: Swap out the cheddar for mozzarella and add in some parmesan for an Italian-inspired twist. You could even layer in some sautéed spinach!
-
Veggie Loaded: Mix in some sautéed bell peppers or mushrooms with the tomatoes for an earthy flavor explosion.
-
Gluten-Free Option: Use a gluten-free pie crust or even a cauliflower crust if you want to keep it lighter but still delicious!
Chef’s Notes
Over the years, my Tomato Pie recipe has gone through many transformations—kind of like me in the kitchen! There was that one time I accidentally grabbed expired mayo… let’s just say it didn’t turn out so well. But each failure taught me a valuable lesson: cooking is about experimenting and having fun. And the best part? Even mishaps often lead to surprisingly tasty outcomes!
So don’t be afraid to tweak this recipe and make it your own. It’s not just about following directions; it’s about letting your personality shine through your cooking. Who knows? You might just cook up your own family classic to be passed down for generations!
FAQs and Troubleshooting
Here are a few common questions and potential pitfalls to look out for:
-
Why is my Tomato Pie watery?
If your pie ends up soggier than expected, it might be due to the moisture content in the tomatoes. To avoid this, sprinkle some salt on the tomato slices before assembling, letting them sit for a bit to draw out excess liquid. -
Can I use other types of cheese?
Absolutely! Feel free to mix and match with your favorite cheeses. Just keep in mind that the flavor will change, so choose according to your taste preference. -
What can I do if I have leftovers?
Leftover Tomato Pie is a delicious treat the next day! Just store it in the fridge, and when you’re ready, reheat it in the oven for that freshly baked taste. It makes for a fantastic lunch or even a quick snack. -
How can I make this recipe vegetarian?
It’s already vegetarian-friendly! You can easily keep it meat-free by sticking to the original ingredients or swapping out cheese for a plant-based option if desired.
Nutritional Info
While I believe in enjoying every bite of our delicious Tomato Pie, it’s always good to be mindful of nutritional values. Here’s a quick breakdown of the calories and key nutrients per slice (assuming 8 slices):
- Calories: ~280
- Fat: 22g
- Carbohydrates: 16g
- Protein: 6g
- Fiber: 1g
This dish is packed with flavor and comfort, but like all good things, moderation is key!
Final Thoughts
So there you have it—the ultimate Tomato Pie recipe, brimming with love, nostalgia, and sunshine flavors. This pie isn’t just a meal; it’s a celebration of summer, simple ingredients, and the joy of cooking with family and friends. Remember, cooking is as much about the journey as it is about the destination; don’t rush it, and savor each slice.
I can’t wait for you to try out this recipe. I know it’ll become a cherished dish in your home just like it is in mine. So gather your favorite folks, dish out those slices, and create new memories around the dinner table. Happy cooking!
Print
The Ultimate Tomato Pie
- Total Time: 50 minutes
- Yield: 8 servings 1x
- Diet: Vegetarian
Description
A heartwarming Tomato Pie recipe that evokes memories of summer with fresh, juicy tomatoes and a creamy filling.
Ingredients
- 1 Pie Crust
- 4 Beefsteak Tomatoes (peeled and sliced thin)
- Salt and Pepper (to taste)
- 1 tbsp Fresh Basil (or 1 tsp dried basil)
- 2 tbsp Chopped Chives
- 1 cup Heavy Mayonnaise (preferably Duke’s)
- 1 cup Grated Cheddar Cheese
Instructions
- Preheat your oven to 350°F (175°C).
- Prepare the pie crust according to package instructions or roll it out and fit it into a 9-inch pie plate.
- Layer the thinly sliced, peeled tomatoes in a single layer over the crust, then sprinkle with salt and pepper.
- Mix the mayonnaise, herbs, and half the cheese in a bowl until creamy.
- Spread the mayo mixture over the tomatoes.
- Top with the remaining grated cheddar cheese.
- Bake for about 30-35 minutes until bubbling and golden brown.
- Cool for 10 minutes before slicing and serving.
Notes
This dish is delicious warm or at room temperature. It can also be served alongside a salad or soup.
- Prep Time: 15 minutes
- Cook Time: 35 minutes
- Category: Main Course
- Method: Baking
- Cuisine: American
Nutrition
- Serving Size: 1 slice
- Calories: 280
- Sugar: 4g
- Sodium: 550mg
- Fat: 22g
- Saturated Fat: 5g
- Unsaturated Fat: 15g
- Trans Fat: 0g
- Carbohydrates: 16g
- Fiber: 1g
- Protein: 6g
- Cholesterol: 30mg
Keywords: Tomato Pie, Comfort Food, Summer Recipe, Vegetarian Recipe, Heirloom Tomato
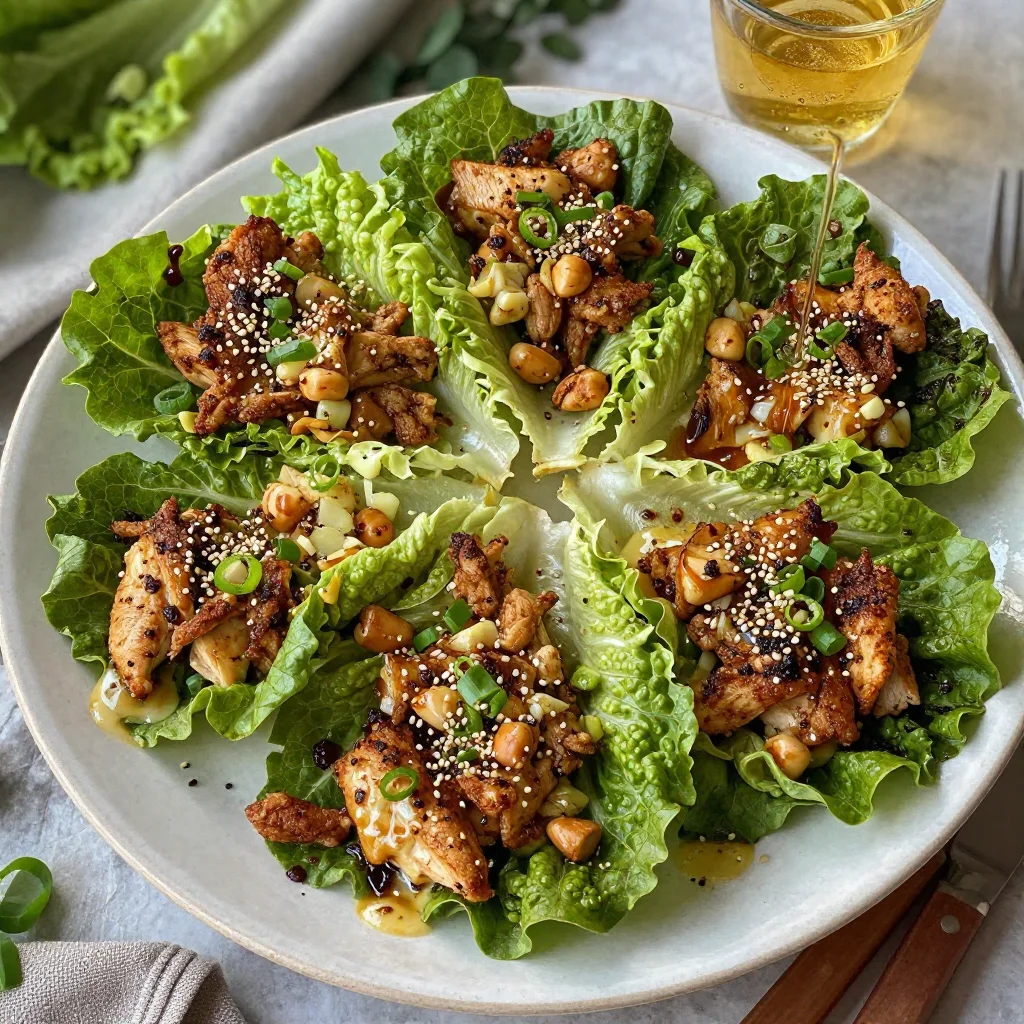
P.F. Chang’s Chicken Lettuce Wraps: 20-Minute One-Pan Copycat
The Joy of PF Chang’s Chicken Lettuce Wraps: A Delectable Delight
Hey there, fellow food lovers! Let me just say—if you’re a fan of feel-good food that’s not only delicious but also easy to whip up at home, then you’re in for a treat today. One of my all-time favorite dishes is the iconic Chicken Lettuce Wraps, just like the ones you’d find at PF Chang’s. You know the ones I’m talking about: savory, juicy, and wrapped in crisp lettuce—each bite is an experience in itself!
Now, if you’re thinking that recreating this restaurant classic in your own kitchen sounds like a daunting task, worry not! These wraps are ideal for those of us who may be just a bit intimidated by complicated recipes. Not only do these savory bites let you get creative, but they also double as a low-carb option that’s perfect for any gathering. So, roll up your sleeves and let’s dive into the wonderful world of Chicken Lettuce Wraps!
When I first discovered this dish, it was love at first bite! It takes me back to those fun evenings out with friends, where laughter and good food were the main ingredients of the night. The flavors are so bold and comforting, reminding me of the times I’d share them with my best pals during our weekly dinner nights. I loved the communal aspect of digging into a platter of lettuce wraps, rolling and folding with everyone as we filled our wraps to the brim with that delicious mixture. It’s such a simple yet remarkable dish that spells out "togetherness."
So, are you ready to recreate that same happiness in your kitchen? Grab your favorite apron, and let’s get started!
Personal Story
Like many foodies, I have a memory tied to the first time I tried these Chicken Lettuce Wraps. It was a misty Friday evening, and I was out with my close friends after a hectic week at work. As we settled into a cozy booth at PF Chang’s, we browsed through the menu, and my eyes landed on a glowing description of Chicken Lettuce Wraps.
When they arrived, my world was forever changed. The aroma filled the air, the vibrant colors were a feast for the eyes, and the first bite was a burst of flavors—savory chicken mingling with crunchiness from the water chestnuts and the crispness of the lettuce. It was a blend of comfort and adventure. That night, we ordered several plates, and as we created our own little wraps, the laughter flowed just as freely as our conversation. That experience etched itself in my memory, sparking not just a love for Chicken Lettuce Wraps but also a passion for bringing people together through cooking.
So, fast forward to today: when I’m making these wraps, I always think back to that night—friends, tasty food, and the joy it brings. Now, let me guide you through making your very own delicious Chicken Lettuce Wraps!
Ingredients
Here’s what you’ll need to create this flavor-packed dish:
- 1 pound ground chicken: The star of our dish! Ground chicken is flavorful, juicy, and can easily be substituted with ground turkey or even tofu for a vegetarian option.
- 1 head butter lettuce: The perfect vehicle for our filling! Butter lettuce is soft and pliable, but you can also use iceberg lettuce for crispness or romaine for extra crunch.
- 1 small onion, finely diced: Adds sweetness to the filling. You can swap with shallots or skip them altogether if you’re not an onion fan.
- 3 cloves garlic, minced: What’s cooking without a hint of garlic? If fresh isn’t available, a teaspoon of garlic powder works in a pinch.
- 1 tablespoon fresh ginger, grated: This adds a warm and spicy kick! If you’re in a bind, ground ginger can be used, but use less as it’s more concentrated.
- 1 cup water chestnuts, finely chopped: For that delightful crunch factor. If you can’t find these, finely chopped mushrooms could add a similar texture.
- 3 tablespoons soy sauce: Provides depth and umami. Look for low-sodium versions if you’re watching your salt intake.
- 3 tablespoons hoisin sauce: Adds a sweet and tangy flavor. You can easily make a quick homemade version with soy sauce, sugar, and peanut butter.
- 1 tablespoon rice vinegar: Brightens the dish. Apple cider vinegar can work if you don’t have rice vinegar.
- 1 teaspoon sesame oil: Just a drizzle of this aromatic oil enhances the overall taste. You can substitute with olive oil, but the flavor will differ.
- 2 green onions, sliced: For garnish and that fresh, oniony crunch! Feel free to sprinkle as much or as little as you like.
- 1 tablespoon sesame seeds: Adds a little nuttiness when served on top. Keep an eye out for toasted sesame seeds if you want more flavor.
- 1/2 teaspoon black pepper: A touch of heat without overpowering the dish. Use white pepper for a milder flavor.
- 1 tablespoon olive oil: Used for cooking the filling. If you prefer, you can use vegetable oil or any neutral oil.
Taking the time to gather fresh and quality ingredients will elevate your dish to an entirely new level. Now let’s make some culinary magic!
Step-by-Step Instructions
Step 1: Prepare Your Ingredients
Before we cook, let’s get organized! Chop your garlic, onion, ginger, and water chestnuts so everything is ready to go. This makes the cooking process smoother and way more enjoyable. Chef tip: Use a food processor to finely chop the water chestnuts quickly!
Step 2: Heat the Oil
In a large skillet over medium heat, add your olive oil. Once it’s nice and hot, throw in those finely diced onions. Sauté them for about 3-4 minutes until they’re soft and translucent. You’ll smell those sweet notes filling your kitchen already!
Step 3: Add Garlic and Ginger
Time to bring in the aromatics! Add your minced garlic, ginger, and black pepper to the pan. Sauté for another minute, stirring continuously to avoid burning the garlic.
Step 4: Brown the Chicken
Now it’s time for the star of our dish! Add in the ground chicken and break it apart with your spatula. Cook this for about 5-7 minutes until it’s no longer pink and begins to brown. Chef hack: If you want to add extra flavor, sprinkle a pinch of salt over the chicken while it cooks. This helps enhance its natural flavors.
Step 5: Stir in the Water Chestnuts
Once the chicken is perfectly cooked, add in those finely chopped water chestnuts and mix well. Let them sauté with the chicken for another 2-3 minutes. This is when you can really appreciate that delightful crunch they bring to the dish.
Step 6: Add Sauces
It’s time to introduce the savory elements! Pour in your soy sauce, hoisin sauce, rice vinegar, and drizzle in the sesame oil. Stir everything together until well combined. Simmer this mixture for an additional 2-3 minutes to let the flavors meld beautifully together.
Step 7: Finish Up
Finally, toss in the sliced green onions and mix again. You should have a beautifully aromatic filling that’s not too runny but moist enough to hold together in your lettuce wrap.
Step 8: Serve
Spoon the mixture into your separated butter lettuce leaves, sprinkle with sesame seeds, and serve immediately to enjoy the best texture.
Your Chicken Lettuce Wraps are ready to be devoured—warm and crisp, just like a hug from the inside out!
Serving Suggestions
When it comes to serving your Chicken Lettuce Wraps, simplicity is key! Arrange the filled lettuce wraps on a platter, and let your guests enjoy assembling their own wraps. For an added touch, provide a small bowl of soy or extra hoisin sauce for dipping on the side.
You can also serve these wraps with a side of rice for a heartier meal. If you want to enhance the presentation, garnish the platter with thinly sliced cucumbers or radishes for a pop of color and crunch!
Recipe Variations
-
Spicy Sesame Chicken Lettuce Wraps: Add a teaspoon of chili paste to your chicken mixture for a spicy kick.
-
Vegetarian Version: Swap out the ground chicken for crumbled tofu or mushrooms for a delightful vegetarian alternative.
-
Curried Chicken Wraps: Stir in a tablespoon of curry powder while cooking the chicken for a flavorful twist.
-
Savory Beef Version: Use ground beef instead of ground chicken, and add a bit of Worcestershire sauce for extra depth.
-
Quinoa Lettuce Wraps: Make a healthy twist by replacing the chicken with cooked quinoa for a wholesome vegan option.
Chef’s Notes
Over the years, I have played around with this recipe, making it my own. One funny reality is that during my first attempt at hosting a dinner party, I completely forgot to buy the lettuce! We ended up using tortilla chips instead, scooping up the filling like a dip. To my surprise, everyone loved it and now I always keep this as a fun variation whenever I want to spice things up!
FAQs and Troubleshooting
1. What if my mixture is too watery?
If your filling ends up looking too wet, you can let it simmer on low heat for a few extra minutes to evaporate the excess moisture. Alternatively, a cornstarch slurry (1 tablespoon cornstarch mixed with 2 tablespoons water) can help thicken it up.
2. Can I make these in advance?
Absolutely! You can prep the filling a few hours ahead and store it in the fridge. Just assemble your wraps when you’re ready to serve.
3. What other sauces can I use?
Feel free to experiment with different sauces! Teriyaki sauce or sweet chili sauce can provide a lovely twist.
4. How do I store leftovers?
If you have any filling left (which I doubt you will!), store it in an airtight container in your fridge for up to 3 days. Reheat it on medium heat before serving.
Nutritional Info
Each serving of these delightful Chicken Lettuce Wraps can range around 250 calories, depending on the amount of sauce and toppings you add. They pack in a good amount of protein from the chicken and are low in carbohydrates if you’re avoiding grains. Plus, you get a delightful serving of vegetables from the lettuce and toppings, making them a well-rounded option for any meal.
Nutritional Breakdown (per serving):
- Calories: ~250
- Protein: 20g
- Fat: 12g
- Carbohydrates: 10g
- Fiber: 2g
- Sugar: 2g
Final Thoughts
So there you have it—PF Chang’s Chicken Lettuce Wraps made right in your own kitchen! It’s time to gather your family or close friends, as these wraps are perfect for sharing and bonding over delicious food. Remember, cooking is all about enjoying the process and creating memories that last a lifetime.
Next time you’re looking for something fun, flavorful, and easy to prepare, just think back to these delicious Chicken Lettuce Wraps! I hope this recipe inspires you, just as it did for me. Happy cooking, and may your kitchen always be filled with laughter and warmth!
Now, what are you waiting for? Go ahead and make your own scrumptious wraps, and don’t forget to catch me up on your culinary adventures later!
Print
PF Chang’s Chicken Lettuce Wraps
- Total Time: 45 minutes
- Yield: 4 servings 1x
- Diet: Low-Carb
Description
Delicious and easy-to-make Chicken Lettuce Wraps inspired by PF Chang’s, perfect for any gathering.
Ingredients
- 1 pound ground chicken
- 1 head butter lettuce
- 1 small onion, finely diced
- 3 cloves garlic, minced
- 1 tablespoon fresh ginger, grated
- 1 cup water chestnuts, finely chopped
- 3 tablespoons soy sauce
- 3 tablespoons hoisin sauce
- 1 tablespoon rice vinegar
- 1 teaspoon sesame oil
- 2 green onions, sliced
- 1 tablespoon sesame seeds
- 1/2 teaspoon black pepper
- 1 tablespoon olive oil
Instructions
- Prepare Your Ingredients
- Heat the Oil
- Add Garlic and Ginger
- Brown the Chicken
- Stir in the Water Chestnuts
- Add Sauces
- Finish Up
- Serve
Notes
Let your guests assemble their own wraps, and provide extra sauce for dipping.
- Prep Time: 15 minutes
- Cook Time: 30 minutes
- Category: Appetizer
- Method: Sautéing
- Cuisine: Asian
Nutrition
- Serving Size: 1 wrap
- Calories: 250
- Sugar: 2g
- Sodium: 900mg
- Fat: 12g
- Saturated Fat: 2g
- Unsaturated Fat: 8g
- Trans Fat: 0g
- Carbohydrates: 10g
- Fiber: 2g
- Protein: 20g
- Cholesterol: 80mg
Keywords: chicken, lettuce wraps, PF Chang's, Asian appetizer, low-carb recipe

One-Pot Cajun Chicken & Sausage Gumbo in 30 Minutes
A Taste of Louisiana: Cajun Chicken and Sausage Gumbo
Hey there, food lovers! Welcome back to Feastical, where the aroma of home-cooked meals fills the air and every dish tells a story. Today, I’m jazzing things up with a recipe that’s a warm hug on a plate: Cajun Chicken and Sausage Gumbo. If you’ve never had the pleasure of slurping a steaming bowl of gumbo, get ready for a delicious adventure. Whether you’re cozying up in the kitchen or entertaining friends, this dish is bound to become a favorite in your culinary repertoire.
Introduction
What is it about gumbo that feels like a comforting old friend? It’s hearty, it’s full of flavor, and it’s the kind of dish that brings people together. Originating from the vibrant state of Louisiana, gumbo is a staple that showcases the unique blend of cultures—African, French, Spanish, and Native American—within the region. This rich stew is typically made in a single pot, making it a delightful way to feed a crowd or simply enjoy a hearty meal at home.
In my own kitchen, I’ve stirred up countless pots of gumbo, each time putting my twist on the classic dish. There’s something magical about caramelizing the roux and watching the ingredients mingle to create an explosion of flavor. The beauty of gumbo is its adaptability; you can make it your own by adjusting the spices, adding seasonal vegetables, or even switching up proteins.
So, strap on your apron and let’s dive deep into the colorful world of Cajun cooking! Trust me, once you master this dish, you’ll realize that cooking gumbo is not just about the food—it’s an experience that brings back memories of laughter, warmth, and gatherings around the dinner table. Ready to get cookin’?
Personal Story
Speaking of gatherings, I remember my first gumbo experience like it was yesterday. I was invited to a friend’s housewarming party in New Orleans, where the scent of spicy sausage and peppery chicken wafted through the air, beckoning me closer. There, I met “Big Mama,” my friend’s grandmother, who was famous for her gumbo. With a big spoon in hand and the biggest smile on her face, she served up steaming bowls of her creation, laden with sausage, chicken, and a generous helping of okra.
Each bite was magical. The roux was perfectly dark, a deep cocoa brown, and the flavors danced on my palate. I couldn’t get enough. I spent the evening sipping sweet tea and swapping stories with friends as we filled our bellies with love and laughter. That night solidified my love for gumbo, and I knew I had to try making it myself.
Fast forward a few years, and here I am, sharing my own version of Cajun Chicken and Sausage Gumbo with you. It’s a dish that’s carried forward with not only the flavors of Louisiana but also the memories of friends, family, and the bonds we create over good food.
Ingredients
Here’s what you’ll need to whip up this Cajun delight:
-
1/2 cup vegetable oil
The base for your roux. You can substitute with canola or grapeseed oil if you prefer. -
1/2 cup all-purpose flour
The key to thickening the gumbo. For a gluten-free option, you can use a gluten-free flour blend. -
1 pound Andouille sausage, sliced
This spicy smoked sausage is a must for authentic flavor. Chicken or turkey sausage works well too! -
1 pound boneless chicken thighs, diced
Thighs are juicy and flavorful; however, you can use chicken breasts for a leaner option. -
1 cup okra, sliced (fresh or frozen)
This adds a unique taste and some thickness to the gumbo. If you’re not a fan, you can leave it out or substitute with sliced zucchini. -
1 green bell pepper, chopped
This enhances the gumbo’s flavor and color. Feel free to experiment with red or yellow bell peppers for a sweeter taste. -
1 onion, chopped
A flavor powerhouse! You can use shallots or even leeks if you’re feeling fancy. -
4 cloves garlic, minced
Because everything is better with garlic! You can amp it up with more if you love that garlicky punch. -
2 tablespoons Cajun seasoning (adjust to taste)
This is where you kick up the flavor. You can use store-bought or make your own! For a milder version, reduce the amount. -
6 cups low-sodium chicken broth
A rich base for your gumbo. You can substitute vegetable broth for a vegetarian option. -
2 cups cooked white rice (for serving)
Serve your gumbo over fluffy white rice—instant comfort food! Brown rice works, too, for a nuttier flavor. -
1/4 cup green onions, chopped (for garnish)
Bright and fresh! A lovely finishing touch. -
1/4 cup parsley, chopped (for garnish)
Adds a pop of color and freshness. Cilantro can also substitute for a change.
Step-by-Step Instructions
-
Make the Roux:
In a large pot or Dutch oven, heat the vegetable oil over medium heat. Once it’s shimmering, slowly whisk in the flour. You want to cook this mixture, stirring constantly, until it turns a rich brown color. This can take about 20-30 minutes, so be patient! If it starts to smell nutty and looks like chocolate, you’re on the right track. Pro tip: Keep the heat low to prevent burning. -
Add the Holy Trinity:
Once your roux is perfect, toss in the chopped onion, green bell pepper, and minced garlic. Stir well and cook until the vegetables are tender, about 5-7 minutes. The smell will be intoxicating at this point! -
Brown the Sausage and Chicken:
Add the sliced Andouille sausage to the pot and let it cook for about 5 minutes. Then, add the diced chicken thighs, stirring to coat with the roux and veggies. Cook until the chicken is browned on the outside, about 5 more minutes. -
Incorporate the Rest:
Pour in the low-sodium chicken broth, followed by the sliced okra and Cajun seasoning. Stir it all together, allowing the flavors to meld. If you want a little kick, you can add a pinch of cayenne pepper! Bring the mixture to a boil, then reduce the heat and let it simmer gently for at least 30 minutes. Letting it simmer allows those hearty flavors to truly shine through. -
Serve it Up:
To serve, ladle the gumbo into a bowl over a scoop of fluffy white rice. Garnish with chopped green onions and parsley for that fresh touch. And there you have it—gorgeous, savory Cajun Chicken and Sausage Gumbo!
Serving Suggestions
Gumbo is best served with a side of crusty French bread for dipping and some hot sauce for those who like to spice things up. You could also offer up a light salad as a starter to complement the rich flavors of the gumbo.
When plating, you can make it look extra appealing by placing a mound of the cooked rice right in the center of the bowl and carefully pouring the gumbo around it. A sprinkle of green onions and parsley on top will give it that restaurant-quality flair! Trust me, your friends and family will be impressed.
Recipe Variations
-
Seafood Gumbo: Swap the chicken and sausage for shrimp and crab. Toss the seafood in towards the end to avoid overcooking.
-
Vegetarian/Garden Gumbo: Leave out the meat altogether and load it with seasonal veggies like bell peppers, eggplant, and zucchini. Use vegetable broth for the base.
-
Spicy Kick: Add some diced jalapeños or a dash of Tabasco sauce if you crave that extra heat!
-
One-Pot Wonder: Mix in some lentils or beans for additional protein while keeping it vegetarian; just adjust the broth amount accordingly.
-
Coconut-Curry Gumbo: For an exciting flavor twist, replace part of the chicken broth with coconut milk and toss in some curry powder for a fusion twist!
Chef’s Notes
Over the years, I’ve played around with my version of gumbo, experimenting with the ingredients and techniques. One funny moment that stands out was when I mistakenly grabbed powdered sugar instead of salt during a dinner party prep. Imagine my guests’ faces when they tasted a hint of sweetness in my gumbo! While it wasn’t a total disaster, it certainly made for a memorable evening filled with laughter.
Yet, that’s the beauty of cooking. It’s all about exploration and connection—both with the ingredients and the people you share meals with. Gumbo is forgiving, and you can adjust it to suit your taste. So don’t be afraid to make it your own!
FAQs and Troubleshooting
-
Why did my roux burn?
Burning roux is often due to too high heat or not stirring enough. Keep the heat low and be patient. -
My gumbo is too thick. What should I do?
Simply add more broth or water to reach your desired consistency. Adjust the seasoning afterward! -
Can I make gumbo ahead of time?
Absolutely! It often tastes even better the next day! Just store it in the fridge, and reheat on the stove until hot. -
How do I store leftover gumbo?
Place it in an airtight container in the fridge for up to 3 days, or freeze it for longer storage (up to 3 months).
Nutritional Info
This hearty gumbo packed with protein and vegetables provides a well-rounded meal. A typical serving (one bowl with rice) contains approximately:
- Calories: 450
- Protein: 30g
- Fat: 24g
- Carbohydrates: 38g
- Fiber: 3g
- Sodium: 800mg
Adjustments in fat or ingredients can affect nutritional values, so feel free to customize based on your dietary preferences.
Final Thoughts
There you have it, my friends! Cajun Chicken and Sausage Gumbo is not just a recipe; it is a delightful homage to the flavors of Louisiana and the memories created around the table. Whether you’re a novice cook or a seasoned chef, I hope this recipe inspires you to gather your loved ones and serve up a hearty bowl of comfort.
So, roll up your sleeves, put on some jazzy tunes, and let’s get cookin’! Remember, at the end of the day, it’s all about enjoying the process, embracing the flavors, and creating moments that linger long after the last spoonful. Happy cooking!
Print
Cajun Chicken and Sausage Gumbo
- Total Time: 75 minutes
- Yield: 6 servings 1x
- Diet: Paleo
Description
A hearty and flavorful Cajun Chicken and Sausage Gumbo that brings together the vibrant flavors of Louisiana in a warm bowl of comfort.
Ingredients
- 1/2 cup vegetable oil
- 1/2 cup all-purpose flour
- 1 pound Andouille sausage, sliced
- 1 pound boneless chicken thighs, diced
- 1 cup okra, sliced (fresh or frozen)
- 1 green bell pepper, chopped
- 1 onion, chopped
- 4 cloves garlic, minced
- 2 tablespoons Cajun seasoning (adjust to taste)
- 6 cups low-sodium chicken broth
- 2 cups cooked white rice (for serving)
- 1/4 cup green onions, chopped (for garnish)
- 1/4 cup parsley, chopped (for garnish)
Instructions
- Make the roux: In a large pot or Dutch oven, heat the vegetable oil over medium heat. Whisk in the flour until it turns a rich brown color, about 20-30 minutes.
- Add the Holy Trinity: Toss in the chopped onion, green bell pepper, and minced garlic. Cook until tender, about 5-7 minutes.
- Brown the sausage and chicken: Add the sliced Andouille sausage and cook for 5 minutes. Add the diced chicken thighs and cook until browned, about 5 more minutes.
- Incorporate the rest: Pour in the chicken broth, add the okra and Cajun seasoning. Bring to a boil, then reduce the heat and let it simmer for at least 30 minutes.
- Serve it up: Ladle the gumbo into bowls over a scoop of white rice. Garnish with green onions and parsley.
Notes
Gumbo can be made ahead of time and often tastes even better the next day. Store it in an airtight container in the fridge for up to 3 days.
- Prep Time: 15 minutes
- Cook Time: 60 minutes
- Category: Main Course
- Method: Stovetop
- Cuisine: Cajun
Nutrition
- Serving Size: 1 serving
- Calories: 450
- Sugar: 3g
- Sodium: 800mg
- Fat: 24g
- Saturated Fat: 8g
- Unsaturated Fat: 12g
- Trans Fat: 0g
- Carbohydrates: 38g
- Fiber: 3g
- Protein: 30g
- Cholesterol: 80mg
Keywords: gumbo, cajun, chicken, sausage, comfort food, Louisiana
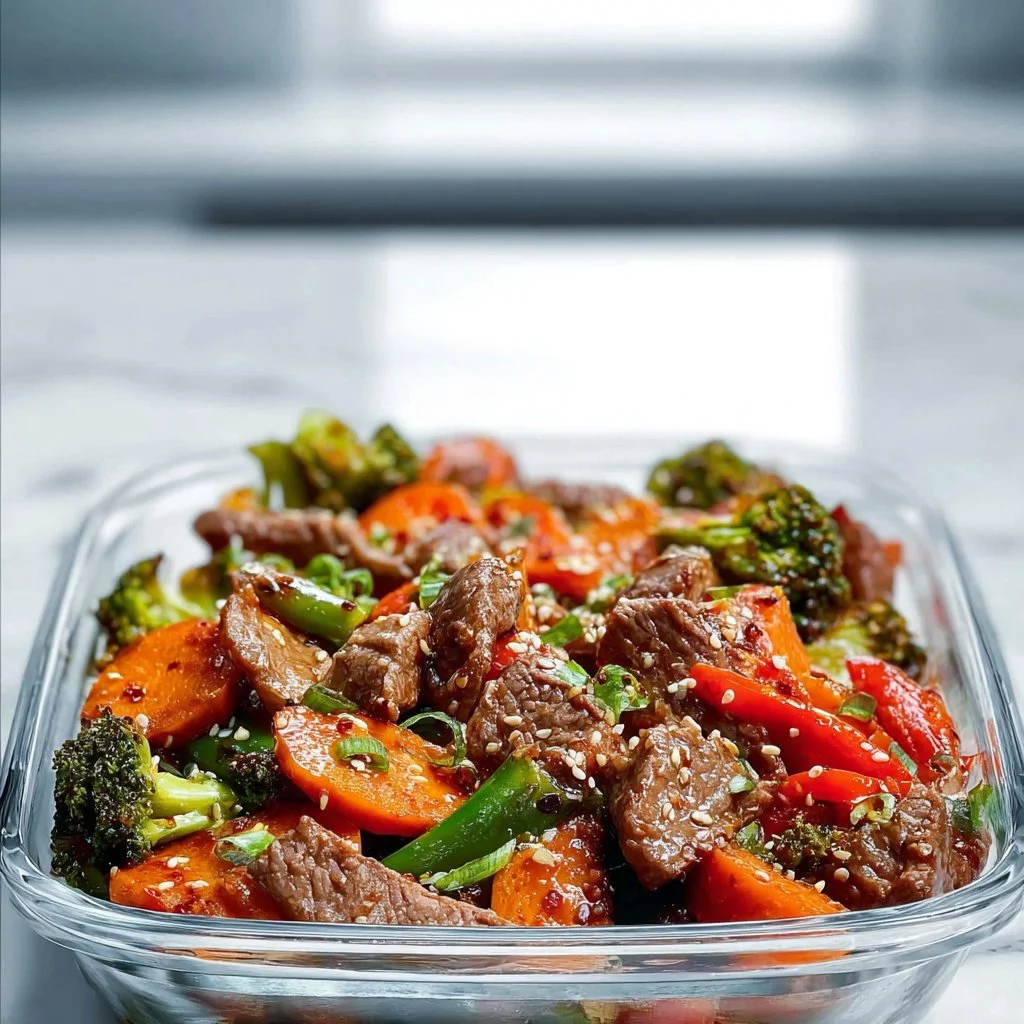
Super Easy Beef Stir Fry
Super Easy Beef Stir Fry: Your New Weeknight Wonder
Hey there, fellow food enthusiasts! It’s Beau Collier here, and I can’t wait to share a gem of a recipe that’s going to jazz up your weeknight dinners: Super Easy Beef Stir Fry. If you’re busy and looking for a dish that’s quick, delicious, and satisfies the soul, then this is it! There’s something about a sizzling stir fry that brings a burst of flavor and a sense of excitement to the dinner table, right? Let’s dive into this culinary adventure that’s not just easy on the eyes but also on your schedule.
Introduction: Sizzle and Pop in 30 Minutes or Less
Picture this: it’s a Wednesday night, and the clock is ticking. You’ve had a long day, and the last thing you want is to be in the kitchen for hours. Enter the stir fry—a magical way to transform a few fresh ingredients into a hearty meal in less than 30 minutes!
Stir frying is not only one of the quickest methods to whip up dinner, but it also allows you to play with flavors and textures to keep things interesting. That vivid, colorful plate can brighten even the gloomiest of days. Plus, with a couple of nifty tricks, anyone can master this technique—even if you think your cooking skills end at boiling water.
This recipe features tender beef sirloin paired with a medley of vibrant veggies, all coated in a savory sauce that will have your taste buds doing a happy dance. Yet, what I love most about stir fry is that it embodies comfort food without the guilt of hours spent slaving away in the kitchen. You can enjoy it from a bowl or plate, alone or with friends and family. Ready to get those chopping skills honed? Let’s do it!
Personal Story: The Family Kitchen Connection
Growing up, nothing screamed “family bonding” quite like our Sunday dinners. My mom had a magic touch with her wok, and her stir fry was legendary in our household. I remember standing on a stool beside her, eagerly watching as she tossed slices of marinated beef into that hot, sizzling pan. The aroma filled the kitchen, turning everything into a sensory playground.
We were a big family, so my mom always made a feast. The best part? Sibling rivalries over who could grab the most greens (because who doesn’t want to be a “veg champion,” right?) and the laughter that echoed as we caught up over each plate of colorful goodness. In hindsight, those meals taught me so much—about food, love, and how a simple dish could bring everyone together. It wasn’t just about eating; it was about enjoying that time together, and I hope this Super Easy Beef Stir Fry does the same for you and yours!
Ingredients: What You’ll Need and a Few Chef Tips
Here’s a sneak peek into my pantry for this stellar dish. Let’s chat through the ingredients so you know exactly what you need and some quick tips to keep in your back pocket:
-
1 lb beef sirloin, thinly sliced
Sirloin is lean and packs a great beefy flavor. If you’re looking for a budget-friendly option, flank steak or even chicken breast could be delicious substitutes. -
2 cups mixed vegetables (bell peppers, broccoli, carrots)
Mix it up! While bell peppers and broccoli are staples, feel free to add snap peas, zucchini, or bok choy for a pop of color and diversity. The more the merrier! -
2 tablespoons soy sauce
Soy sauce is your flavor king here, bringing that umami punch! Low-sodium soy sauce works great if you’re watching your salt intake; just keep an eye on the overall seasoning as you cook. -
1 tablespoon olive oil
This helps us get that sizzle going! You can always swap in sesame oil for an extra flavor kick, especially if you love that delightful nutty essence. -
1 clove garlic, minced
Garlic is the aromatic hero of many dishes. Fresh is best, but pre-minced garlic works in a pinch—just don’t tell my mom! -
1 teaspoon ginger, minced
Ginger adds a lovely zing! If you’re not a fan, you can skip it or use ginger paste as a time-saver. It’s packed with flavor and brings that refreshing warmth. -
Salt and pepper to taste
Keep it simple! You can tweak this duo to your liking, but I’d suggest starting light. You can always add more, but it’s hard to dial it back once it’s in there!
Step-by-Step Instructions: Let’s Get Cooking!
Alright, grab your favorite wok or large, sturdy skillet and let’s do this!
-
Prep Your Ingredients:
Start by slicing your beef into thin strips, about 1/4 inch thick. This will help it cook quickly and evenly. Chef tip: If your beef is slightly frozen, it will be easier to slice thinly. Just a quick 20 minutes in the freezer should do the trick! -
Heat the Wok:
Hit that burner to medium-high heat and let your wok or skillet become hot—this is key for a good stir fry. Add the olive oil, swirling it around to coat the pan. -
Cook the Beef:
Once the oil is shimmering, add the sliced beef in a single layer, and let it sear without stirring for about 1-2 minutes. This allows it to caramelize. After that, stir it every so often until it’s browned and cooked through, about 5 minutes. Chef hack: Doing this in batches can give your beef an even better texture, so if you have a lot, consider cooking it in two rounds. -
Add Aroma:
Toss in the minced garlic and ginger, stirring for about 30 seconds until fragrant (your kitchen will smell incredible!). This is the moment the dish really starts to come alive. -
Veggie Time:
Now it’s vegetable time! Add the mixed veggies to the pan, and stir them in. We want them to retain some crunch, so keep stirring for about 3-5 minutes until they’re bright and tender. -
The Sauce:
Drizzle the soy sauce over the beef and veggies, and toss everything together so each piece is coated in that yummy goodness. Cook for another minute to let the sauce glaze the ingredients. -
Taste & Adjust:
Here’s your chance! Give it a taste and see if it needs a pinch of salt or pepper. Maybe a splash more soy sauce? You’re the chef, so make it yours! -
Final Toss & Plate:
Once everything is sizzling and the colors are popping, it’s time to serve. Carefully plate your stir fry while it’s hot—let those vibrant colors shine!
Serving Suggestions: How to Present Your Creation
Plating is everything, my friends! Here are some ideas to make your stir fry look as good as it tastes:
- Rice Base: Serve your stir fry over fluffy white rice, brown rice, or even quinoa for a nutritious twist.
- Bowl It Up: Use a deep bowl if you’ll be enjoying dinner with a spoon. Garnish with sesame seeds for an elegant touch.
- Wrap It Up: Looking for a unique way to serve? Try using large lettuce leaves to create wraps. Fill ’em up with stir fry for a fun, low-carb option!
- Garnish: A sprinkle of green onions or a handful of crushed peanuts on top can elevate the dish and add extra flavor and crunch.
Recipe Variations: Switch It Up!
The beauty of stir fry is its versatility! Here are some twists to make this dish your own:
- Saucy Variation: Add a tablespoon of oyster sauce for a richer flavor profile.
- Sweet and Spicy: Toss in a teaspoon of chili paste or sriracha for a kick of heat! Balance it with a splash of honey to even things out.
- Vegetarian Delight: Swap the beef for tofu and add extra veggies like mushrooms and bok choy.
- Curry Twist: Add a splash of coconut milk and a tablespoon of curry powder for a deliciously aromatic spin on this stir fry.
- Herb Infusion: Fresh herbs like basil or cilantro can elevate the flavor profile. Add them just before serving for a refreshing touch!
Chef’s Notes: A Dish of Growth
One of the things I love most about cooking is how it allows us to grow and learn. This Super Easy Beef Stir Fry has evolved from those family dinners to being my go-to dish whenever I have hungry guests or need a quick meal fix. The method is so forgiving, and I get to play with flavors every time I make it.
Isn’t it amazing how food is more than just sustenance? It’s a way to connect, celebrate, and make memories. I still hear my mom’s laughter and feel her love every time I whip up a stir fry. Cooking is a beautiful journey, and I’m so grateful to share it with you.
FAQs and Troubleshooting
Here are some common questions I get about stir fry and a few tips on avoiding potential pitfalls:
-
Why is my stir fry watery?
Ensure you’re cooking on high heat and not overcrowding the pan! If it’s too crowded, the ingredients steam instead of sear. Consider cooking in batches. -
Can I prep this ahead of time?
Absolutely! You can slice your veggies and beef the night before. Just store them separately in the fridge to keep them fresh. -
What if my beef is tough?
When slicing, always cut against the grain. This will help keep it tender. Also, marinating your beef in soy sauce and a bit of cornstarch for 15 minutes before cooking can really help. -
How can I store leftovers?
Place any leftovers in an airtight container and refrigerate for up to 3 days. Reheat on the stove for the best texture.
Nutritional Info
While comfort food often comes laden with calories, this Super Easy Beef Stir Fry packs in the nutrition without compromising on flavor:
- Calories: Approximately 350-400 per serving (based on 4 servings)
- Protein: 30g (thanks to the beef!)
- Carbohydrates: 30g
- Fiber: 6g (varies with the type and amount of veggies)
- Fat: 15g (mostly from olive oil)
Feel free to customize to your dietary needs by swapping out proteins or adjusting the oil content!
Final Thoughts
So there you have it—a delightful journey into the world of stir fry! I hope this Super Easy Beef Stir Fry finds a special place in your kitchen and becomes your trusty weeknight go-to. Remember, cooking is all about joy, creativity, and, of course, a dash of love. Don’t shy away from experimenting, tweaking, and making this dish uniquely yours.
Now, get chopping, stir-frying, and make some memorable meals with the ones you love. I can’t wait to hear about your own culinary adventures! Until next time, happy cooking, friends! 🍽️✨
Print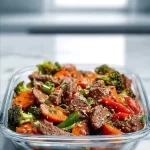
Super Easy Beef Stir Fry
- Total Time: 30 minutes
- Yield: 4 servings 1x
- Diet: Low-Carb
Description
A quick and delightful beef stir fry featuring tender beef sirloin and a medley of vibrant veggies, all coated in a savory sauce.
Ingredients
- 1 lb beef sirloin, thinly sliced
- 2 cups mixed vegetables (bell peppers, broccoli, carrots)
- 2 tablespoons soy sauce
- 1 tablespoon olive oil
- 1 clove garlic, minced
- 1 teaspoon ginger, minced
- Salt and pepper to taste
Instructions
- Prep your ingredients by slicing the beef into thin strips, about 1/4 inch thick.
- Heat the wok over medium-high heat and add the olive oil.
- Cook the sliced beef in a single layer for about 1-2 minutes, then stir until browned, about 5 minutes.
- Add the minced garlic and ginger, stirring for about 30 seconds until fragrant.
- Veggie time! Add mixed veggies and stir for about 3-5 minutes until bright and tender.
- Drizzle the soy sauce over the beef and veggies, toss to coat, and cook for another minute.
- Taste the stir fry and adjust seasoning if needed before serving.
- Plate the stir fry while hot and enjoy!
Notes
Cooking in batches can improve the texture of the beef. You can personalize the stir fry with different veggies or proteins.
- Prep Time: 10 minutes
- Cook Time: 20 minutes
- Category: Main Course
- Method: Stir Fry
- Cuisine: Asian
Nutrition
- Serving Size: 1 serving
- Calories: 375
- Sugar: 5g
- Sodium: 600mg
- Fat: 15g
- Saturated Fat: 2g
- Unsaturated Fat: 10g
- Trans Fat: 0g
- Carbohydrates: 30g
- Fiber: 6g
- Protein: 30g
- Cholesterol: 70mg
Keywords: beef, stir fry, weeknight dinner, quick recipe, Asian cuisine

Honey Garlic Chicken Bites | Ultimate 25-Min Dinner Delight
Honey Garlic Chicken Bites | Ultimate 25-Min Dinner Delight
Hey there, Feastical friends! Imagine this: it’s a weeknight, the clock is ticking, and you’re staring blankly at your pantry, wondering what to whip up for dinner. You could settle for takeout, but what if I told you there’s a mouthwatering dish you can make in just 25 minutes? That’s right—today, we’re diving into the delightful world of Honey Garlic Chicken Bites!
These little treasures are simply irresistible. Picture tender chicken pieces caramelized in a sweet and savory honey garlic sauce, with a hint of spice that will make your taste buds dance. Best of all, they’re super easy to whip up, so you can channel your inner chef without stressing out. Whether you’re cooking for yourself, a special someone, or the whole family, this dish is bound to impress without consuming your entire evening.
Why Honey Garlic Chicken Bites, you ask? Well, they’re quick, they’re versatile, and they’re a dreamy combination of flavors. This recipe is like a warm hug for your taste buds, and trust me, once you get hooked on this dish, it’ll become a staple in your weeknight rotation. I can’t wait for you to try it!
Ready to embark on this kitchen adventure? Grab your spatula, and let’s get cooking!
Personal Story
Let me take you back to a quieter, cozier time—a rainy Sunday afternoon at my grandparents’ home. The scent of garlic wafting through the air mixed with the warmth of honey brought all of us kids to the kitchen like moths to a flame. My grandmother would make her version of honey garlic chicken on special occasions, and it was always a family affair. We’d gather around the kitchen island, dipping pieces of chicken straight from the pan and giggling about memories while sneaking bites as she cooked.
It was more than just food; it was connection, laughter, and love—all wrapped up in a delicious meal. Every bite transported me to that moment in time, and it’s the reason I cherish this recipe so much. Each time I make Honey Garlic Chicken Bites, I’m reminded of those cozy Sundays and how food truly brings people together. That’s the magic of cooking, my friends—it’s about sharing love, joy, and a plate of something scrumptious with the people you care about!
Ingredients
Let’s gather our ingredients and gear up for cooking! Here’s what you’ll need:
-
1 lb (450g) boneless, skinless chicken breast, cut into 1-inch cubes
Why? Chicken breast is lean and cooks quickly. You can substitute with thighs for richer flavor; just adjust cooking time accordingly. -
2 teaspoons cornstarch (optional)
Why? This is our secret weapon for achieving an extra crispiness on the chicken when sautéing. You can skip it for a lighter dish! -
Kosher salt and freshly ground black pepper, to taste
Why? Salt and pepper elevate flavors; feel free to sprinkle more or less based on your preference. -
1 tablespoon olive oil
Why? Olive oil adds a nice richness; however, you can use avocado or vegetable oil if that’s what you have. -
1 tablespoon unsalted butter
Why? This gives the dish a creamy touch. If you prefer dairy-free cooking, opt for margarine or a plant-based butter alternative. -
4 cloves garlic, finely minced
Why? Garlic is the star of this dish, bringing that unmistakable flavor. If you’re short on fresh garlic, sub with 1 teaspoon of garlic powder. -
1/4 cup honey
Why? The natural sweetness of honey pairs perfectly with the garlic. For a vegan option, use maple syrup or agave nectar. -
3 tablespoons low-sodium chicken stock
Why? Chicken stock adds depth to the sauce; vegetable stock works just as well for veggie lovers! -
1–2 tablespoons lemon juice
Why? The acidity from lemon juice brightens all the flavors. You can also use lime if that’s what you have handy. -
1 teaspoon hot sauce (optional; Sriracha recommended)
Why? This adds a kick! Feel free to leave it out if spice isn’t your thing. -
1 teaspoon red chili pepper flakes (for garnish)
Why? A sprinkle adds color and heat. You can substitute with fresh chopped chilies for an added pop. -
1 tablespoon chopped fresh parsley (for garnish)
Why? Fresh herbs make everything better! Basil or cilantro would make lovely substitutes as well.
Step-by-Step Instructions
Let’s get our cooking hats on! Follow these steps to make your dish come to life:
-
Prep the Chicken:
Start by cutting your boneless, skinless chicken breasts into bite-sized cubes (about 1 inch). This allows them to cook quickly and evenly. Sprinkle a bit of kosher salt, pepper, and the cornstarch (if using) over the chicken, tossing to coat. This not only flavors the bites but helps create a lovely crust when they hit the pan. -
Heat the Oil and Butter:
In a large skillet, heat the olive oil and butter over medium-high heat until the butter is melted and starts to bubble. You want it hot enough to sear the chicken but not so hot that it burns. A little tip: if you see the butter sizzling, you’re ready to go! -
Sear the Chicken:
Add the chicken to the pan in a single layer, ensuring not to overcrowd the skillet. Let the pieces cook for about 3-4 minutes without moving them. This will help achieve that golden, crispy exterior. After that, flip the bites over, allowing them to cook for another 3-4 minutes until they are golden brown and fully cooked through. Pro Tip: Use a meat thermometer—round 165°F (74°C) for perfectly cooked chicken every time! -
Add the Garlic:
Once the chicken is cooked, add in the finely minced garlic to the pan. Sauté for about 30 seconds, just until fragrant. Be careful not to let it burn because burnt garlic is not a flavor we want in our lives. -
Make the Sauce:
Now, it’s time for our star ingredient: the honey! Pour the honey over the chicken and mix it well, followed by the low-sodium chicken stock and lemon juice. Stir to combine everything, letting the mixture bubble for about 2-3 minutes. This way, the sauce thickens just enough to coat those delicious chicken bites! -
Spice It Up:
If you’re going for that spicy kick, now’s the time to drizzle in the hot sauce! Give it a good stir to incorporate all those flavors. And if you’re feeling adventurous, add a pinch of red chili flakes as well. -
Plate and Garnish:
Once everything is well-coated and the sauce has thickened slightly, it’s time to serve! Transfer the honey garlic chicken bites to a serving dish or individual plates, and sprinkle with a pinch of red chili flakes and fresh parsley for a pop of color. -
Serve Warm:
These bites are best enjoyed warm, so dive in right away! You can also reserve some extra sauce from the pan to drizzle over the top before serving.
Serving Suggestions
Now that your Honey Garlic Chicken Bites are ready, let’s talk about how to serve them! These bites would pair wonderfully with a variety of sides. Here are a few scrumptious ideas:
-
Over Rice or Quinoa: Spoon the chicken atop a bed of fluffy jasmine rice or protein-packed quinoa for a hearty meal. The grains soak up the delicious sauce beautifully!
-
With Vegetables: Serve alongside steamed broccoli, roasted asparagus, or even a fresh cucumber salad for a balanced dish.
-
As Sliders: For a fun twist, place the chicken bites in mini slider buns with some crunchy slaw and a drizzle of sauce to create delightful little sandwiches.
-
In Tacos: Soft taco tortillas filled with the chicken bites, avocados, and a sprinkle of lime create a fresh and exciting meal.
Get creative—this dish is super versatile, so don’t hesitate to experiment with your favorite sides!
Recipe Variations
And here’s where things get even more fun! Here are some creative twists on this Honey Garlic Chicken Bites recipe you might want to try:
-
Honey Ginger Chicken Bites: Swap out half of the honey for fresh ginger juice or add minced fresh ginger right along with the garlic for an extra flavor layer.
-
Sweet and Spicy Pineapple Chicken: Add chunks of fresh pineapple into the dish during the last few minutes of cooking for a fruity kick! This tenderizes the chicken and adds tropical vibes.
-
Sesame Chicken Bites: Incorporate 1-2 tablespoons of sesame oil in place of olive oil and garnish with toasted sesame seeds for a nutty flavor that pairs perfectly with honey!
-
Gluten-Free Option: Swap out the soy sauce for tamari or coconut aminos for a gluten-free variation that tastes equally delicious and still offers a rich, savory flavor!
-
Vegetarian Delight: Replace chicken with firm tofu or seitan and follow the same cooking process for a vegetarian option that’s just as satisfying.
Chef’s Notes
I’ll let you in on a little kitchen secret: this recipe has evolved over the years. I started off with just a basic honey garlic sauce, but as I fell in love with cooking, I began experimenting with spices and heat. Each time I shared this dish with friends or family, I noticed how it always sparked joy and conversation at the table. That’s why I love sharing this recipe with all of you—it’s not just about food, it’s about creating memories.
And here’s a funny kitchen mishap—one time, I accidentally mixed up the salt and sugar measurements because I was so engrossed in a podcast while cooking. Let’s just say that was one sweet chicken! (Lesson learned: always double-check those measurements!)
FAQs and Troubleshooting
I know you’re going to love making this dish, but just in case, here are a few common questions:
-
What should I do if my sauce is too thin?
Don’t fret! If your sauce isn’t thickening up, you can mix 1 teaspoon of cornstarch with 1 tablespoon of cold water, add that to the pan, and let it simmer for another minute. It’ll thicken right up! -
Can I use frozen chicken?
Sure! Just remember to thaw it before cooking, as frozen chicken can release extra water and throw off the sauce’s consistency. -
How do I store leftovers?
Place any leftover chicken bites in an airtight container in the fridge for up to 3 days. Reheat gently on the stovetop or in a microwave. -
Is this dish good for meal prep?
Absolutely! These chicken bites hold up well in the fridge and can be reheated for a quick meal throughout the week.
Nutritional Info
Let’s take a quick look at the nutrition breakdown (approximate values per serving, based on 4 servings):
- Calories: 280-300 kcal
- Protein: 25g
- Fat: 12g
- Carbohydrates: 20g
- Sugars: 10g
- Fiber: 0g
- Sodium: 400mg
This dish offers a great protein boost along with healthy fats and a kick of flavor! Perfect for anyone needing quick energy food without the fuss!
Final Thoughts
Cooking should be a joyful adventure, not a chore, and I hope this Honey Garlic Chicken Bites recipe helps you experience just that! It’s all about those essential ingredients and love infused into each dish. Whether you’re gathered around the dinner table with family or enjoying a quiet meal alone with your favorite show, these bites are bound to put a smile on your face!
So, what are you waiting for? Roll up your sleeves, get those ingredients, and make some memories in the kitchen. I can’t wait to hear your thoughts and tweaks on this recipe! Here’s to happy cooking—I’ll catch you next time with more delicious kitchen stories and culinary creations. Cheers! 🍯🍗✨
Print
Honey Garlic Chicken Bites
- Total Time: 25 minutes
- Yield: 4 servings 1x
- Diet: Gluten-Free
Description
Quick and easy honey garlic chicken bites cooked in just 25 minutes, perfect for busy weeknights.
Ingredients
- 1 lb (450g) boneless, skinless chicken breast, cut into 1-inch cubes
- 2 teaspoons cornstarch (optional)
- Kosher salt and freshly ground black pepper, to taste
- 1 tablespoon olive oil
- 1 tablespoon unsalted butter
- 4 cloves garlic, finely minced
- 1/4 cup honey
- 3 tablespoons low-sodium chicken stock
- 1–2 tablespoons lemon juice
- 1 teaspoon hot sauce (optional; Sriracha recommended)
- 1 teaspoon red chili pepper flakes (for garnish)
- 1 tablespoon chopped fresh parsley (for garnish)
Instructions
- Prep the Chicken: Cut chicken into bite-sized cubes, season with salt, pepper, and cornstarch (if using).
- Heat the Oil and Butter: In a large skillet, heat olive oil and butter until melted.
- Sear the Chicken: Add chicken to the pan, cooking for about 3-4 minutes on each side until golden brown.
- Add the Garlic: Sauté minced garlic for about 30 seconds until fragrant.
- Make the Sauce: Pour honey, chicken stock, and lemon juice over chicken and stir, letting it bubble for about 2-3 minutes.
- Spice It Up: Add hot sauce if desired and stir.
- Plate and Garnish: Transfer chicken to a serving dish and sprinkle with chili flakes and parsley.
- Serve Warm: Enjoy immediately or drizzle with extra sauce.
Notes
Perfect for serving over rice or as sliders. Experiment with sides like veggies or tortillas!
- Prep Time: 10 minutes
- Cook Time: 15 minutes
- Category: Main Course
- Method: Sautéing
- Cuisine: American
Nutrition
- Serving Size: 1 serving
- Calories: 300
- Sugar: 10g
- Sodium: 400mg
- Fat: 12g
- Saturated Fat: 4g
- Unsaturated Fat: 7g
- Trans Fat: 0g
- Carbohydrates: 20g
- Fiber: 0g
- Protein: 25g
- Cholesterol: 70mg
Keywords: chicken, honey garlic, quick dinner, weeknight meal, easy recipe