Pesto Grilled Cheese
Pesto Grilled Cheese: A Flavor-packed Twist on a Classic Comfort Food
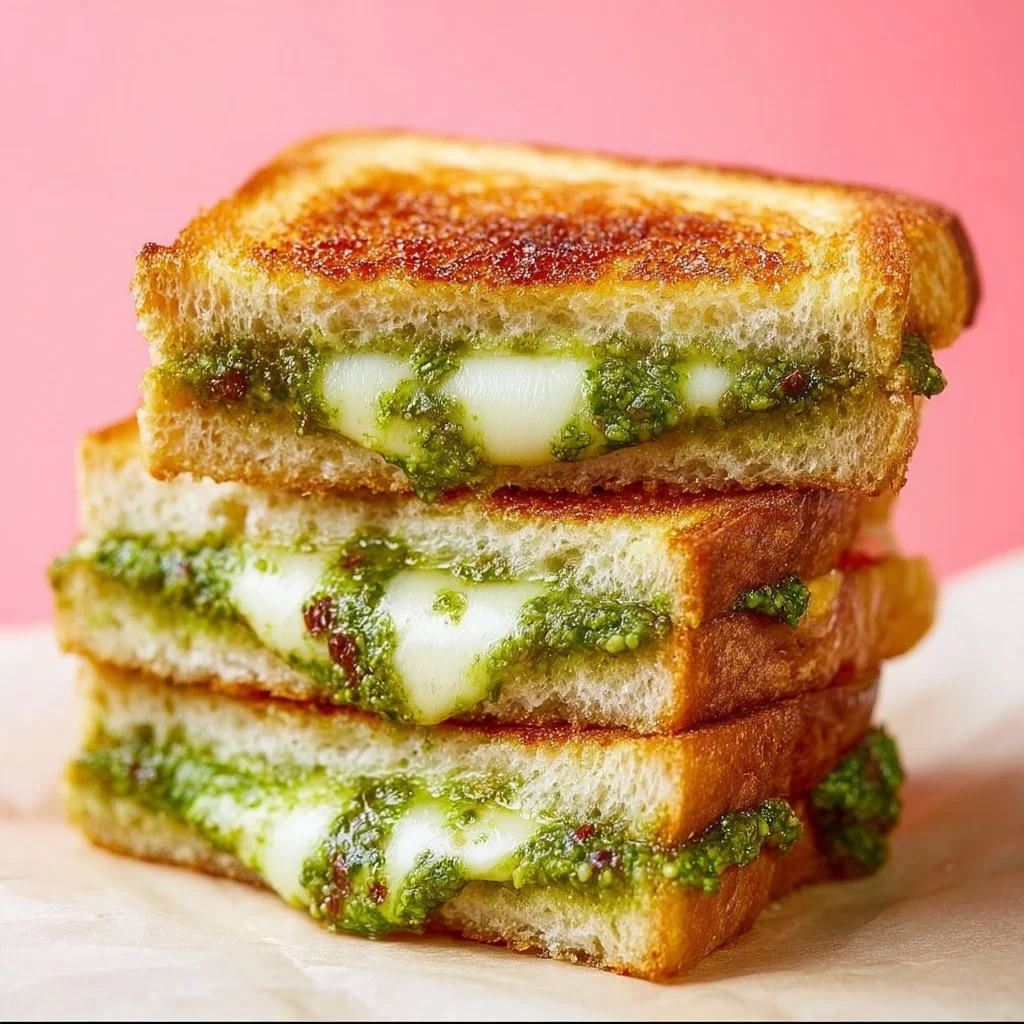
Hey food lovers, welcome back to Feastical! Today, I’m excited to whisk you away on a delicious adventure with one of my favorite comfort foods—Pesto Grilled Cheese. Picture this: two golden slices of perfectly toasted bread, melty cheese that oozes with every bite, and a vibrant pesto that adds a burst of freshness. That’s right; we’re taking the classic grilled cheese to a whole new level!
I’ve always had a soft spot for grilled cheese. Growing up, it was one of those “go-to” meals that my mom would whip up on rainy days alongside a bowl of tomato soup. There was something magical about the way the buttery bread transformed into crispy perfection, and how the cheese would stretch gloriously as I bit into it. Fast forward to now, and while I still savor the original grilled cheese, I’ve become obsessed with elevating it with all the flavors I adore—in this case, pesto.
I’ll never forget the first time I made this delightful twist. I had just returned home from a summer trip to Italy, where I fell in love with their fresh basil pesto sauce. With lingering memories of warm honeyed bread and rustic kitchens, I figured, why not combine these two culinary loves? I grabbed some ingredients and got to work. The result was a masterpiece that not only brought nostalgia to my taste buds but also transformed a simple meal into a gourmet experience. So, are you ready to dive into this cheesy, pesto-filled dream? Grab your spatula, and let’s get cooking!
Personal Story
The inception of my Pesto Grilled Cheese spills from a cherished memory of sunny afternoons spent in my Italian grandmother’s kitchen. I can still recall the delightful aroma of fresh basil wafting through the air, as she chopped herbs effortlessly while chatting about her secret family recipes. That kitchen was the heart of our family—a place for laughter, bonding, and, most importantly, amazing food.
One summer, I was tasked with helping her whip up a batch of basil pesto straight from her garden. As I lovingly crushed the basil and garlic with a mortar and pestle, she regaled me with stories of her childhood in Italy. That pesto made its way to sandwiches, tossed with pasta, and of course, drizzled generously over grilled cheeses. Fast forward to later years, when I found myself craving those flavors while in the comfort of my own kitchen. Inspired by my nonna’s wisdom, I decided to fuse her classic pesto with an all-time favorite. It was a joyful, delicious connection across time, and that’s how my Pesto Grilled Cheese was born!
Ingredients
Let’s gather the stars of the show for our Pesto Grilled Cheese! Here’s what you’ll need:
-
2 slices of bread
Choose your favorite! A hearty sourdough or a classic white works wonderfully, but feel free to experiment. Gluten-free options are also available if needed! -
2 slices of cheese
I love a good sharp cheddar for its rich flavor, but mozzarella adds a lovely stretch. Mix and match! Other great options include gouda or provolone. A dairy-free cheese can work too! -
2 tablespoons pesto
Homemade is amazing, but store-bought works in a pinch. You can also substitute with sun-dried tomato paste or spinach pesto if you’re feeling adventurous! -
Butter (for grilling)
Butter gives that iconic crispy golden crust, but if you’re looking for an alternative, try olive oil or vegan butter for a healthier option. Just remember, the key is to get that sizzle!
Step-by-Step Instructions
Alright, let’s get into the nitty-gritty of how to bring this cheesy delight to life!
-
Prep Work:
Gather all your ingredients and your trusted griddle or skillet. It’s worth cleaning your workspace beforehand to avoid any kitchen chaos. -
Bread it Up:
Take two slices of your chosen bread and place them on a clean surface. Don’t rush this part—be sure you’re selecting the right ones for your dream sandwich! -
Spread the Magic:
Slather a generous tablespoon of pesto on one side of each slice of bread. Ensure it’s evenly spread; this will add intense flavor to every bite. Want extra kick? Add a sprinkle of red pepper flakes for a little heat! -
Add the Cheese:
Place one slice of cheese on top of the pesto side of one of the bread slices. If you’re daring (and I think you should be), stack on another layer of cheese for maximum meltiness. Then, top with the other slice of bread, pesto side down. -
Butter Up:
Now, put that generous, warm pat of butter in the skillet over medium heat. Let it melt until golden and bubbly. You want that beautiful sizzle when you place the sandwich down! -
Get Grilling:
Carefully add your sandwich to the skillet. Cook for about 4 minutes on one side until it turns a toasty brown. Keep an eye out so it doesn’t burn! -
Flip Time:
When that side is golden, carefully flip your sandwich over using a spatula. If you want, add a little more butter around the edges for extra crunch and flavor. -
Perfect Melt:
Cook for another 3-4 minutes or until the cheese is beautifully ooey-gooey and the other side is radiantly golden. Use a lid to cover it during cooking to help the cheese melt faster. -
Serve It Up:
Once it’s just how you like it, remove it from the heat and let it cool momentarily. Slice it in half to reveal that glorious cheesy inside—totally Instagram-worthy!
Serving Suggestions
Presentation matters, right? For serving up your Pesto Grilled Cheese, keep it simple! Plate it on a rustic wooden board for that homey feel. I always love pairing it with a bowl of tomato soup or a light salad—something fresh to balance the richness.
You can add a sprinkle of fresh basil on top for color and flavor, or even a drizzle of balsamic glaze for a surprising tangy touch. And if you’re feeling playful? Try out an open-faced version by topping the grilled cheese with sliced fresh tomatoes or avocado right before serving.
Recipe Variations
The beauty of the Pesto Grilled Cheese is its flexibility! Here are some twists you can try to keep things exciting:
-
Caprese Style: Add slices of ripe tomatoes and fresh mozzarella along with the pesto for a refreshing Caprese touch.
-
Meat Lovers: Layer in some cooked bacon or prosciutto for a savory kick.
-
Veggie Delight: Sauté some spinach or mushrooms ahead of time, then add them in for a nutrient boost.
-
Nutty Flavor: Swap out the traditional cheese for goat cheese for a tangy twist, or even mix in a bit of sliced avocado for creaminess.
-
Spicy Pesto: Create a spicy version of your pesto by mixing in jalapeños or chipotle peppers for a heat-filled delight!
Chef’s Notes
As I revisit this recipe over the years, I’ve enjoyed exploring different flavor profiles and textures. One of the most memorable moments was when I served this dish at a family gathering, and my cousin, who hated vegetables, found himself heading back for seconds. That’s the magic of adding pesto; it transforms everything!
I also love the idea of transforming this dish into a breakfast delight. Think pesto grilled cheese with scrambled eggs and a sprinkle of chili flakes on top—perfect for brunch!
FAQs and Troubleshooting
1. My grilled cheese burnt before the cheese melted, what went wrong?
Ensure you’re using medium heat and keep a close eye on the sandwich. If it’s browning too quickly, lower the heat. Patience is key for that cheesy goodness!
2. What if I don’t have pesto?
No worries! Substitute with a mix of olive oil, garlic, and chopped fresh herbs, or even try any flavorful sauce you have on hand—sun-dried tomato paste works wonders!
3. Can I make this ahead of time?
While grilled cheese is best fresh, you can prepare the ingredients in advance and grill them right before serving.
4. My cheese didn’t melt! What did I do wrong?
Try using cheese that’s known for melting well, like mozzarella or Fontina. A little extra cover while cooking could speed up the melting process, too!
Nutritional Info (per serving)
- Calories: Approximately 400-500 (varies by bread and cheese choice)
- Protein: 18g
- Carbohydrates: 38g
- Fat: 25g
- Fiber: 2g
Remember, feel free to swap ingredients for lower-calorie alternatives, and always load on those veggies to up the nutritional value!
Final Thoughts
And there you have it, my wonderful friends—a gourmet take on the classic grilled cheese that’s sure to warm your soul! Whether you’re enjoying this solo with a good book or serving it up for friends, the Pesto Grilled Cheese will undoubtedly make you smile.
Cooking is about sharing, connecting, and creating memories, and I hope this recipe becomes a new favorite in your kitchen. Keep it simple, keep it delicious, and let that creativity flow! Stay tuned for more fun recipes and kitchen antics right here on Feastical. Until next time, happy cooking! 🧀✨
Print
Pesto Grilled Cheese
- Total Time: 18 minutes
- Yield: 1 serving 1x
- Diet: Vegetarian
Description
A flavor-packed twist on the classic comfort food, featuring melty cheese and vibrant pesto.
Ingredients
- 2 slices of bread
- 2 slices of cheese
- 2 tablespoons pesto
- Butter (for grilling)
Instructions
- Gather all your ingredients and your trusted griddle or skillet.
- Take two slices of your chosen bread and place them on a clean surface.
- Slather a generous tablespoon of pesto on one side of each slice of bread.
- Place one slice of cheese on top of the pesto side of one of the bread slices.
- Put that generous, warm pat of butter in the skillet over medium heat.
- Carefully add your sandwich to the skillet.
- When that side is golden, carefully flip your sandwich over using a spatula.
- Cook for another 3-4 minutes or until the cheese is beautifully ooey-gooey.
- Once it’s just how you like it, remove it from the heat and let it cool momentarily.
- Slice it in half to reveal the glorious cheesy inside.
Notes
Pair with tomato soup or a light salad for a complete meal. Add fresh basil or balsamic glaze for extra flavor.
- Prep Time: 10 minutes
- Cook Time: 8 minutes
- Category: Snack
- Method: Grilling
- Cuisine: Italian
Nutrition
- Serving Size: 1 sandwich
- Calories: 450
- Sugar: 2g
- Sodium: 600mg
- Fat: 25g
- Saturated Fat: 10g
- Unsaturated Fat: 10g
- Trans Fat: 0g
- Carbohydrates: 38g
- Fiber: 2g
- Protein: 18g
- Cholesterol: 30mg
Keywords: grilled cheese, pesto, vegetarian comfort food

Grilled Cheese Burrito
Grilled Cheese Burrito: Comfort Food with a Twist
Hey there, fellow food lovers! Welcome back to Feastical, where we whip up delicious dishes that are as comforting as a hug on a rainy day. Today, I’m extra excited because we’re diving into a delightful concoction that blends the best of two worlds: the classic grilled cheese sandwich and the beloved burrito. Yep, you heard me right! We’re making a Grilled Cheese Burrito.
Picture this: crispy, golden tortillas wrapped around a melty, gooey cheese filling, with the added option of savory extras to elevate the flavor profile. This dish is perfect for any occasion—whether it’s a busy weeknight, a lazy Sunday brunch, or a fun gathering with friends. You can even customize it to your heart’s content, so everyone at the table is satisfied.
Now, if you’re anything like me, you have a special connection to food—each dish tells a story, evokes a memory, or gets you feeling all warm and fuzzy inside. So grab a seat, a fork, and maybe a napkin (because things might get a little cheesy), and let’s embark on this culinary adventure together!
Personal Story
Ah, grilled cheese—the ultimate comfort food! If you ask me, the heart behind a great meal often lies in the memories it evokes. My fondest recollection of grilled cheese takes me back to childhood summers spent at my grandparents’ house. I can still hear the sizzle of butter in the skillet as my grandmother expertly flipped those golden slices of bread. Like magic, she’d craft a sandwich that never failed to warm my heart and satisfy my never-ending appetite.
During one sunny afternoon, we decided to spice things up and made a version with our favorite ingredients—think sharp cheddar, juicy tomatoes, and crispy bacon. My grandpa, ever the grill master, transformed those sandwiches into burritos, wrapping them in soft tortillas instead of bread. You can imagine my delight as he called it a “Cheesy Burrito Surprise.” That day marked the birth of my love for grilled cheese burritos, elevating an already beloved dish into something extraordinary! The excitement of discovering a new twist on an old favorite is something I want to replicate for you.
Now that you know the origin of this delightful dish, let’s get into what you’ll need to whip up this cheesy goodness in your own kitchen!
Ingredients
To create your Grilled Cheese Burrito, gather the following ingredients:
-
4 large tortillas: Flour tortillas are typically used, but you can use whole wheat or corn tortillas for a twist. They’re your blank canvas, so choose what fits your style!
-
2 cups shredded cheese: Cheddar, mozzarella, or a mix of both works wonders here. Feel free to experiment with other cheeses like pepper jack for a little zing or gouda for a smoky flavor!
-
1 tablespoon butter: This is the secret to achieving that crispy, golden crust. You can swap it out for olive oil or even a vegan butter substitute if you’d prefer a lighter alternative.
-
Optional: Cooked meats: Chicken, bacon, or even your leftover pulled pork can take this burrito over the top. Use what you have on hand or try a plant-based protein option for a vegetarian take.
-
Optional: Vegetables: Bell peppers, onions, or even spinach are great additions for a burst of color and flavor. Sauté them up beforehand to enhance their sweetness and make them extra tasty.
With these ingredients handy, you’re well on your way to creating a culinary masterpiece that will impress everyone at the dinner table!
Step-by-Step Instructions
Alright, my fellow culinary adventurers, let’s roll up our sleeves and get cooking! Here’s how to make the perfect Grilled Cheese Burrito:
-
Prep Your Ingredients:
Start by shredding your cheese and chopping any vegetables or cooked meats you’d like to incorporate. Having everything ready to go makes the cooking process smooth sailing. Plus, it’s like having your own little mise en place! -
Heat the Skillet:
Grab a large skillet and place it over medium heat. Add about a tablespoon of butter and let it melt completely, swirling it to cover the surface of the pan. -
Assemble Your Burrito:
Lay one tortilla flat on a plate. Layer it generously with cheese (about half a cup), placing any optional ingredients you desire on top. Think of it as building a layered cheesy wonderland! -
Roll It Up:
Here’s where it gets fun! Fold in the sides of the tortilla, then roll it up from the bottom to the top, ensuring all that cheesy goodness is tucked neatly within. Don’t be afraid to roll it tightly; you want it to keep your filling inside and stay intact! -
Place It in the Skillet:
Once your burrito is securely rolled, place it seam-side down in the skillet. Let it cook for about 3-4 minutes or until the bottom is golden brown. Pro tip: Press it down gently with a spatula to really achieve that crispy, crunchy crust. -
Flip It:
When the first side is beautifully browned, it’s time to flip! Carefully turn the burrito over, adding a bit more butter to the pan if it’s looking dry. You’ll want to cook this side for another 3-4 minutes until it’s just as deliciously golden as the first. -
Let’s Cheese It Up:
At this point, you can take a peek inside. If you love that ooey-gooey cheese texture, you might want to let it cook for an extra minute or two—just until everything is melted and comforting. -
Slice and Serve:
When you’re satisfied with the color and texture, carefully transfer the burrito to a cutting board. Let it sit for a minute (this helps the cheese set a bit), then cut it in half for your Instagram-worthy presentation.
And just like that, you’re ready to enjoy your divine creation. The aroma is already enough to make your mouth water. You can almost hear your foodie friends cheering you on from the sidelines!
Serving Suggestions
Now that you have your Grilled Cheese Burrito crowned with that lovely golden crust, it’s time to think about presentation.
I love to serve mine straight from the skillet onto a rustic wooden board for that homey feel. Pair it with a fresh side salad bursting with greens, or some crispy tortilla chips and salsa for dipping. A scoop of flavorful guacamole or sour cream on the side also brings a zesty twist that complements the cheesy interior beautifully.
Feel free to sprinkle some freshly chopped cilantro or a few slices of jalapeño on top for extra flavor and a pop of color! Your guests will swoon, and you’ll feel like the kitchen champion you truly are!
Recipe Variations
The Grilled Cheese Burrito is already a knockout, but if you’re feeling adventurous, here are some variations to consider:
-
BBQ Chicken Burrito: Swap in cooked, shredded BBQ chicken for a tangy take that’ll have your taste buds dancing. Add some coleslaw inside for an added crunch.
-
Vegetarian Delight: Load up on sautéed mushrooms, zucchini, and spinach for a hearty meatless option. The depth of flavors will surely wow both vegetarians and meat-lovers alike!
-
Mexican Fiesta: Add black beans, corn, and taco seasoning to your cheese for a flavorful twist. Serve with a side of pico de gallo to amp up those Mexican flavors!
-
Spicy Jalapeño: For those who crave a kick, toss in some pickled jalapeños or a drizzle of hot sauce before rolling. The spice elevates the entire experience!
-
Breakfast Burrito: Transform this dish into a breakfast sensation. Incorporate scrambled eggs, sausage, and avocado for a delightful morning treat.
No matter how you choose to jazz it up, these variations ensure you’ll never get bored of this incredible dish!
Chef’s Notes
Here’s an exciting tidbit: this recipe has evolved for me over the years! Initially, it started as an attempt to combine my two favorite quick meals—grilled cheese and burritos—during those busy weeknights when I wanted something comforting without spending hours in the kitchen.
I began sharing it with my friends, and I quickly learned that there are endless possibilities when it comes to fillings. From using leftover pizza toppings to even experimenting with different cheeses, it became a creative outlet for everyone involved. My favorite kitchen stories always revolve around mishaps—like the time I added way too much cheese and had a molten lava situation in the skillet. But hey, that’s what makes cooking fun and keeps us on our toes!
FAQs and Troubleshooting
-
Q: What should I do if my burrito is falling apart?
A: If your burrito isn’t holding together, ensure that you’re rolling it tightly and tucking in the sides while you roll. You can also wrap it in foil for a few minutes to help it set. -
Q: How do I know when my cheese is fully melted?
A: The best way to check is to peek inside once you’ve flipped the burrito. If you see gooey cheese pulling apart when you cut it, you’re golden! If not, let it cook for an extra minute or two. -
Q: Can I make this burrito ahead of time?
A: Absolutely! You can prep the fillings and even roll the burritos ahead of time. Just store them tightly wrapped in plastic wrap in the fridge. When you’re ready to enjoy, simply pop them in the skillet or even a microwave to heat through. -
Q: What’s the best way to reheat leftovers?
A: I suggest reheating on a skillet at a low temperature to prevent sogginess and to keep that crispy texture. You can flip it halfway through to make sure it’s evenly warmed.
Nutritional Info
If you’re wondering about the nutrition aspects of the Grilled Cheese Burrito, here’s a little breakdown. This dish is packed with protein, thanks to the cheese and any added meats. If you go easy on the butter and load up on veggies, you can keep it relatively balanced.
On average, each burrito can be around 400-600 calories, depending on the filling and cheese you choose. Consider using whole grain tortillas and plenty of veggies to enhance the fiber content. And of course, feel free to customize it to fit your dietary goals!
Final Thoughts
There you have it, my friend! The Grilled Cheese Burrito: a scrumptious combination of two classic comfort foods brought to life in your kitchen. No matter how you personalize this dish or enjoy it, I hope it brings as much joy to your table as it has to mine.
I invite you to share your own versions of this recipe! Whether it’s a fun twist, a secret ingredient, or a delicious memory that comes rushing back when you bite into your burrito, I want to hear it! Cooking is all about connection, joy, and creativity, so don’t forget to have fun in the process! Until next time, happy cooking, and may your kitchen always be filled with love and laughter.
Let’s dig in and make delicious memories together. Cheers!
Print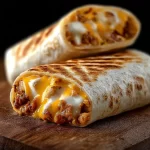
Grilled Cheese Burrito
- Total Time: 23 minutes
- Yield: 4 servings 1x
- Diet: Vegetarian
Description
A delightful fusion of a classic grilled cheese sandwich and a burrito, featuring crispy tortillas wrapped around a gooey cheese filling with customizable options.
Ingredients
- 4 large tortillas (flour, whole wheat, or corn)
- 2 cups shredded cheese (cheddar, mozzarella, or a mix)
- 1 tablespoon butter
- Optional: cooked meats (chicken, bacon, or pulled pork)
- Optional: vegetables (bell peppers, onions, or spinach)
Instructions
- Prep your ingredients by shredding cheese and chopping vegetables or meats.
- Heat a large skillet over medium heat and melt the butter.
- Assemble your burrito by layering cheese and optional ingredients on a tortilla.
- Roll it up tightly, tucking in the sides.
- Place the burrito seam-side down in the skillet and cook until golden brown.
- Flip the burrito and cook the other side until golden.
- Check for gooey cheese and cook longer if necessary.
- Slice and serve with desired sides.
Notes
Feel free to customize with your favorite proteins and veggies, and try different cheese combinations for varied flavors.
- Prep Time: 15 minutes
- Cook Time: 8 minutes
- Category: Main Course
- Method: Pan-frying
- Cuisine: Mexican
Nutrition
- Serving Size: 1 burrito
- Calories: 500
- Sugar: 2g
- Sodium: 550mg
- Fat: 25g
- Saturated Fat: 10g
- Unsaturated Fat: 10g
- Trans Fat: 0g
- Carbohydrates: 50g
- Fiber: 4g
- Protein: 20g
- Cholesterol: 50mg
Keywords: grilled cheese, burrito, comfort food, cheesy, easy recipe