
Pumpkin Cinnamon Apple Yogurt Parfait
Your New Autumn Obsession: Creamy, Crunchy & Oh-So-Cozy!
Hey friends, Beau here from Feastical! Can you smell it? That crisp, golden-hued magic in the air? Fall isn’t just a season; it’s a *feeling* – and nothing captures it better than cozy, layered goodness in a glass. Imagine this: cool, spiced pumpkin yogurt hugging tender cinnamon apples, all topped with a nutty, toasty crunch that sings autumn. That’s exactly what this Pumpkin Cinnamon Apple Yogurt Parfait delivers! It’s not just breakfast; it’s a portable hug for your taste buds, perfect for rushed mornings, elegant brunches, or even a guilt-free dessert. Seriously, this parfait is like wearing your favorite flannel shirt… but edible. Ready in just 10 minutes, it’s packed with protein, fiber, and fall flavors that’ll make your heart (and your Instagram feed) happy. Grab your favorite spoon – let’s build some deliciousness!
Apples, Autumn & Grandma’s Apron: A Flavor Memory
This recipe takes me straight back to my grandma’s sun-drenched kitchen in Vermont. Every October, we’d pile into her old station wagon, drive to the orchard, and fill bushels with crisp McIntosh apples. Back home, the scent of cinnamon and butter sizzling in her cast iron skillet was pure heaven. She’d let me sneak spoonfuls of the caramelized apples while she hummed old tunes. One chilly morning, I watched her layer those warm apples with leftover pumpkin pie filling and yogurt – a happy accident! She called it her “Autumn Sundae.” That messy, joyful creation sparked my love for playful flavor combos. This parfait? It’s my grown-up, slightly fancier homage to Grandma’s genius. Every bite tastes like falling leaves, crackling fires, and that irreplaceable feeling of being loved. Food memories? They’re the best kind.
Gather Your Fall Flavor Squad
Here’s your simple lineup for parfait perfection! Don’t sweat substitutions – cooking’s an adventure, not a test.
- 1/2 cup plain Greek yogurt (or coconut yogurt): Thick, tangy, protein-packed base! Insider Tip: Full-fat Greek yogurt gives ultimate creaminess. For dairy-free, coconut yogurt adds a lovely tropical hint that oddly works with pumpkin!
- 2 tbsp pumpkin puree: NOT pumpkin pie filling! Puree brings velvety texture and earthy sweetness. Chef’s Hack: Freeze leftover puree in ice cube trays for instant pumpkin power later!
- 1 tsp maple syrup (or keto sweetener): Pure maple syrup adds authentic fall vibes. Monk fruit or erythritol blend seamlessly for low-carb magic.
- 1/2 tsp cinnamon (divided): Our cozy spice hero! Half goes in the yogurt, half in the apples. Why? Layering spices = deeper flavor!
- 1/4 apple, diced: Honeycrisp or Fuji are my faves – sweet, firm, and hold their shape. Granny Smith works for tartness lovers!
- 1 tsp butter (or coconut oil): Butter = classic richness. Coconut oil = dairy-free + subtle sweetness. Win-win!
- Pinch of nutmeg: Cinnamon’s best friend! Just a whisper – it’s potent but magical with pumpkin.
For the Nutty Almond Crunch:
- 2 tbsp chopped almonds: Raw or toasted. Slivered almonds work too! Adds essential CRUNCH.
- 1 tsp almond flour: Secret weapon! It toasts into golden “crumbs” that cling to every layer.
- 1/2 tsp coconut oil: Helps everything crisp up beautifully. Butter works here too!
- Dash of cinnamon: Because more cinnamon is always a good idea.
- Sweetener to taste: A tiny sprinkle of maple syrup, coconut sugar, or keto sweetener caramelizes the nuts.
Let’s Build Your Edible Autumn Masterpiece!
Follow these steps for parfait perfection – I’ve packed them with my favorite kitchen hacks!
- Sizzle Those Apples: Heat a small skillet over medium. Add the butter or coconut oil. Once it melts and shimmers (listen for that happy sizzle!), toss in the diced apple, 1/4 tsp cinnamon, and the pinch of nutmeg. Chef’s Tip: Don’t stir constantly! Let the apples get a tiny bit caramelized on one side for extra flavor – about 3-4 minutes total. They should be tender but still have a slight bite. Transfer them to a bowl immediately to stop cooking. Why? Hot apples = runny parfait layers! Let them cool slightly while you prep the rest.
- Whip Up the Pumpkin Yogurt: In a small bowl, combine the Greek yogurt, pumpkin puree, 1/4 tsp cinnamon, and maple syrup (or keto sweetener). Whisk vigorously until smooth and dreamily orange. Insider Hack: Whisking incorporates air, making it extra light and fluffy! Taste it. Want more spice? Add a tiny pinch more cinnamon or nutmeg. Want it sweeter? Drizzle in another 1/2 tsp maple syrup. Set this pumpkin cloud aside.
- Create the Magic Crunch: Don’t wash that skillet! Wipe it out quickly. Return it to medium-low heat. Add the coconut oil (or butter). Once melted, add the chopped almonds, almond flour, dash of cinnamon, and your chosen sweetener (about 1/4 tsp maple syrup or a sprinkle of granulated sweetener). Chef’s Secret: Stir constantly for 1-2 minutes! The almond flour toasts FAST. It’s done when golden brown and smelling like toasted marzipan heaven. Immediately scrape it onto a plate to cool – it crisps up as it sits. Burning Alert: Almond flour goes from golden to burnt in seconds! Low heat + constant stirring is key.
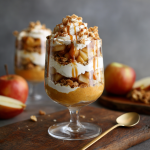
- Layer Like a Pro: Grab a clear glass or jar (showing off the layers is half the fun!). Start with a spoonful of pumpkin yogurt. Tap the glass gently on the counter to settle it. Next, add a layer of the slightly cooled cinnamon apples. Sprinkle a bit of the almond crunch over the apples. Repeat: yogurt, apples, crunch. Aim for 2-3 layers. Pro Presentation Tip: Use the back of a spoon to gently press down each apple layer – this keeps the sides clean and visible! Finish with a final dollop of yogurt.
- The Grand Finale: Pile the remaining almond crunch gloriously on top! Feeling fancy? A tiny extra drizzle of maple syrup or a single perfect apple slice makes it Insta-worthy. Beau’s Rule: Dig in immediately for the best contrast of warm apples, cool yogurt, and crunchy topping!
How to Serve & Savor Your Creation
This parfait shines brightest served immediately in a clear glass or mason jar – those beautiful layers deserve to be seen! For a brunch spread, pair it with a hot cup of spiced chai or dark roast coffee. Serving it as dessert? Elevate it with a tiny scoop of vanilla bean ice cream on the side or a drizzle of warm salted caramel sauce over the top. Pack it in a lidded jar for an envy-inducing portable breakfast (add the final crunch topping just before eating to keep it crisp!). It’s perfect solo, but also plays well with crispy bacon or a slice of whole-grain toast for a heartier start.
5 Delicious Twists to Make It Your Own!
This parfait is your blank canvas! Get creative:
- Pecan Praline Power: Swap almonds for chopped pecans in the crunch. Add 1/2 tsp vanilla extract to the yogurt!
- Berry-licious Fall Fusion: Layer in a handful of fresh cranberries or raspberries with the apples for a tart pop.
- Grain Goodness: Add a layer of cooked, cooled quinoa or oats between the yogurt and apples for extra staying power.
- Decadent Dessert Mode: Stir 1 tbsp chocolate chips into the warm apples as they cool, or sprinkle cacao nibs in the crunch.
- Savory-Sweet Edge: Add a tiny pinch of flaky sea salt to the top crunch layer – it makes the sweetness sing!
A Few More Crumbs from My Kitchen…
This recipe evolved from pure fridge-foraging desperation one hectic Thanksgiving morning! I had leftover pumpkin, yogurt needing using, and a lone apple. That messy first attempt was delicious but… structurally unsound (think pumpkin-apple soup with floaty nuts!). Over time, I learned the cooling trick for the apples and discovered almond flour’s crunch-multiplying magic. It’s become my go-to for impressing overnight guests without stress. One funny fail? I once used pumpkin pie spice *instead* of cinnamon in the apples – it worked, but my taste buds did a cha-cha! Lesson learned: start simple, then riff. The beauty is its flexibility. Make it sweeter, tarter, crunchier – own it! Just promise me you’ll use real pumpkin puree. That one time I grabbed pie filling by mistake? Let’s just say it was a VERY sweet surprise!
Your Parfait Questions, Answered!
Let’s tackle those common kitchen hiccups:
- Q: My parfait layers turned runny/mushy! Help!
A: The #1 culprit is HOT apples! Let them cool completely before layering. Also, ensure your yogurt is thick (drain regular yogurt in a fine mesh strainer for 10 mins if needed). Using watery pumpkin puree? Pat it dry with a paper towel first! - Q: Can I make this ahead of time?
A: Yes, but strategically! Prep components separately: cook & cool apples, make pumpkin yogurt, prepare crunch (store airtight). Assemble just before serving. Pre-assembled parfaits stored overnight will get soggy. - Q: My almond crunch burned! What happened?
A: Almond flour is sneaky fast! Use medium-low heat and stir constantly like your parfait depends on it (it does!). Remove it from the pan the *second* it turns golden – it keeps cooking from residual heat. Burnt? Sadly, start over. That bitter taste won’t disappear. - Q: Any protein boost ideas?
A: Absolutely! Stir a scoop of vanilla protein powder into the pumpkin yogurt (add a splash of milk if too thick). Or, sprinkle hemp seeds or chia seeds into the layers for extra protein and omega-3s.
Pumpkin Cinnamon Apple Yogurt Parfait
- Total Time: 10 minutes
Description
Think crisp apples, creamy pumpkin-spiced yogurt, and warm, nutty crunch—all layered into one irresistible glass. This parfait is fall’s version of comfort food meets Instagram breakfast. It’s speedy (ready in 10 minutes), nutritious, and makes mornings feel like golden hour in a flannel shirt. Whether you’re fueling up for work, hosting brunch, or craving dessert without the crash, this parfait is your delicious go-to.
Ingredients
Pumpkin Yogurt Layer:
-
½ cup plain Greek yogurt (or coconut yogurt)
-
2 tbsp pumpkin puree
-
1 tsp maple syrup (or keto sweetener)
-
¼ tsp cinnamon
Warm Apple Layer:
-
¼ apple, diced (Honeycrisp or Fuji)
-
1 tsp butter or coconut oil
-
¼ tsp cinnamon
-
Pinch nutmeg
Nutty Crunch Topping:
-
2 tbsp chopped almonds
-
1 tsp almond flour
-
½ tsp coconut oil
-
Dash of cinnamon
-
Sweetener to taste
Instructions
-
Sauté Apples: In a skillet, melt butter/oil. Add apples, cinnamon, and nutmeg. Cook 3–4 mins until tender and golden. Cool.
-
Mix Yogurt: Whisk yogurt, pumpkin, maple syrup, and cinnamon until fluffy and smooth.
-
Make Crunch: Wipe skillet clean. Add coconut oil, almonds, almond flour, cinnamon, and sweetener. Toast 1–2 mins on low, stirring constantly. Cool immediately on a plate.
-
Assemble: In a glass, layer yogurt, apples, and crunch. Repeat for 2–3 layers. Top with final crunch and optional drizzle of maple syrup.
Notes
-
Let apples cool completely to avoid runny layers.
-
Use full-fat yogurt for max creaminess.
-
Want extra protein? Stir in a scoop of vanilla protein powder!
- Prep Time: 10 minutes
Nutrition
- Calories: 220Cal Per Serving
- Fat: 14g
- Carbohydrates: 14g
- Fiber: 4g
- Protein: 10g
Nutritional Info (Per Serving)
Approximate values using full-fat Greek yogurt, butter, and maple syrup:
- Calories: 220
- Fat: 14g (Healthy fats from nuts & yogurt!)
- Carbohydrates: 14g
- Net Carbs: 10g (Total Carbs – Fiber)
- Fiber: 4g (Keeps you full!)
- Sugar: 7g (Mostly natural from maple & apple)
- Protein: 10g (Great start to your day!)
Using keto sweetener and coconut yogurt? Net carbs drop to ~6g!
Final Thoughts: More Than Just a Parfait
This Pumpkin Cinnamon Apple Yogurt Parfait isn’t just a recipe—it’s a celebration of fall. It’s the crunch of leaves underfoot, the smell of a crackling fire, and the joy of sharing food with loved ones, all packed into a single jar.
Whether you’re meal-prepping for the week, hosting a brunch, or treating yourself to a cozy dessert, this parfait delivers. It’s quick enough for hectic mornings but elegant enough to impress guests. Plus, with its balance of protein, fiber, and healthy fats, it’s a meal that loves you back.
So grab your spoon, layer up those flavors, and savor every bite. After all, fall is fleeting—but with this parfait in your repertoire, you can make every morning taste like the best parts of the season.
Happy cooking, and may your autumn be as delicious as this parfait!
Pumpkin Apple Sparkling Shrub
Fall in a Glass: Meet Your New Favorite Sipper
Hey friends, Beau here! There’s a crispness in the air that makes me wanna ditch the iced tea and wrap my hands around something that tastes like autumn’s golden hour. That’s where this Pumpkin Apple Sparkling Shrub waltzes in – your new go-to for when you crave the cozy feels of pumpkin spice but want something bright, bubbly, and buzz-free. Imagine tart apple cider vinegar doing a happy dance with real pumpkin puree, all sweetened with maple syrup and warmed up with pie spices. Then we lighten the whole party with fizzy water? *chef’s kiss* This isn’t just a mocktail; it’s a fermented flavor bomb that’s naturally gut-friendly (hello, probiotic perks!) and ridiculously refreshing. Whether you’re prepping a Friendsgiving spread, need a festive afternoon pick-me-up, or just want to sip something special while the leaves fall – this shrub’s got your back. Zero fuss, maximum autumn vibes. Ready to make your taste buds do a happy little shimmy?
That Time a “Kitchen Oops” Sparked Magic
Picture this: It’s October 2018, and I’m buried under a mountain of pie pumpkins after an overly ambitious farmers market haul. I’m roasting, pureeing, freezing… and honestly, getting a little bored. One rainy Tuesday, I’m experimenting with apple cider vinegar shrubs (my latest obsession) when my elbow knocks a bowl of leftover pumpkin puree right into my steeping jar. Cue the internal screaming! But instead of tossing it, curiosity won. “What if…?” I added maple and spices, shoved it in the fridge, and basically forgot it for two days. When I finally strained it and topped it with seltzer? Mind. Blown. It tasted like sparkling pumpkin pie filling – tangy, spiced, and utterly addictive. That happy accident became a Feastical fall staple, and every time I sip it, I laugh remembering my pumpkin-covered kitchen floor. Sometimes the best recipes start with a beautiful mess!
Gather Your Autumn Arsenal
Here’s the beauty squad – simple, real ingredients doing big things:
- Apple Cider Vinegar (1/4 cup): The star! Raw, unfiltered ACV (like Bragg’s) brings the tangy fermentable magic and gut-loving probiotics. Chef’s Tip: Cloudy with the “mother” is non-negotiable – that’s where the good stuff lives!
- Pumpkin Puree (2 tbsp): NOT pie filling! Pure, unsweetened puree gives earthy sweetness and body. Swap: Roasted butternut squash puree works in a pinch for a similar vibe.
- Maple Syrup (2 tbsp): Our natural sweetener that whispers “fall.” Keto/Dietary Swap: Equal amount of monk fruit syrup or erythritol blend works perfectly.
- Pumpkin Pie Spice (1/4 tsp): Warmth in a jar! Chef’s Insight: Make your own blend (cinnamon, ginger, nutmeg, cloves) for fresher flavor – I add a tiny pinch of black pepper for a subtle kick!
- Water (1/2 cup): Just plain filtered water for steeping. It carries all the flavors together.
- Sparkling Water (to serve): Plain or unflavored club soda/seltzer. Pro Move: Use ginger beer for extra zing!
- Garnishes (Optional but Fun): Thin apple slices, a cinnamon stick, or even a star anise pod. They make it *feel* fancy.
Let’s Brew Some Autumn Fizz!
Don’t sweat the “fermented” label – this is crazy simple. Here’s how we coax out those incredible flavors:
- The Gentle Warm-Up: Grab a small saucepan. Combine the water, pumpkin puree, maple syrup, and pumpkin pie spice. Warm this over medium-low heat, whisking constantly. **Crucial Tip:** We’re NOT boiling! Heat just until it’s steaming hot and everything looks like a smooth, spiced pumpkin latte (about 2-3 minutes). Boiling kills the ACV’s probiotic potential later. Think “cozy warm bath,” not rolling boil.
- Vinegar Time! Pull the saucepan off the heat. Now whisk in the apple cider vinegar. **Why off-heat?** High heat mellows ACV’s tang too much. We want that bright, assertive zing! You’ll smell that gorgeous apple-pumpkin aroma blooming.
- Jar & Chill: Carefully pour this warm mixture into a clean glass jar (a pint-sized Mason jar is perfect). Seal it tight with a lid. Let it cool on the counter for about 30 minutes, then pop it into the fridge. **Patience, Padawan:** This is where the magic happens! Let it infuse for at least 24 hours, but 48 hours is my sweet spot. The flavors deepen, mellow, and become incredibly complex. Give the jar a gentle shake once or twice during this time.
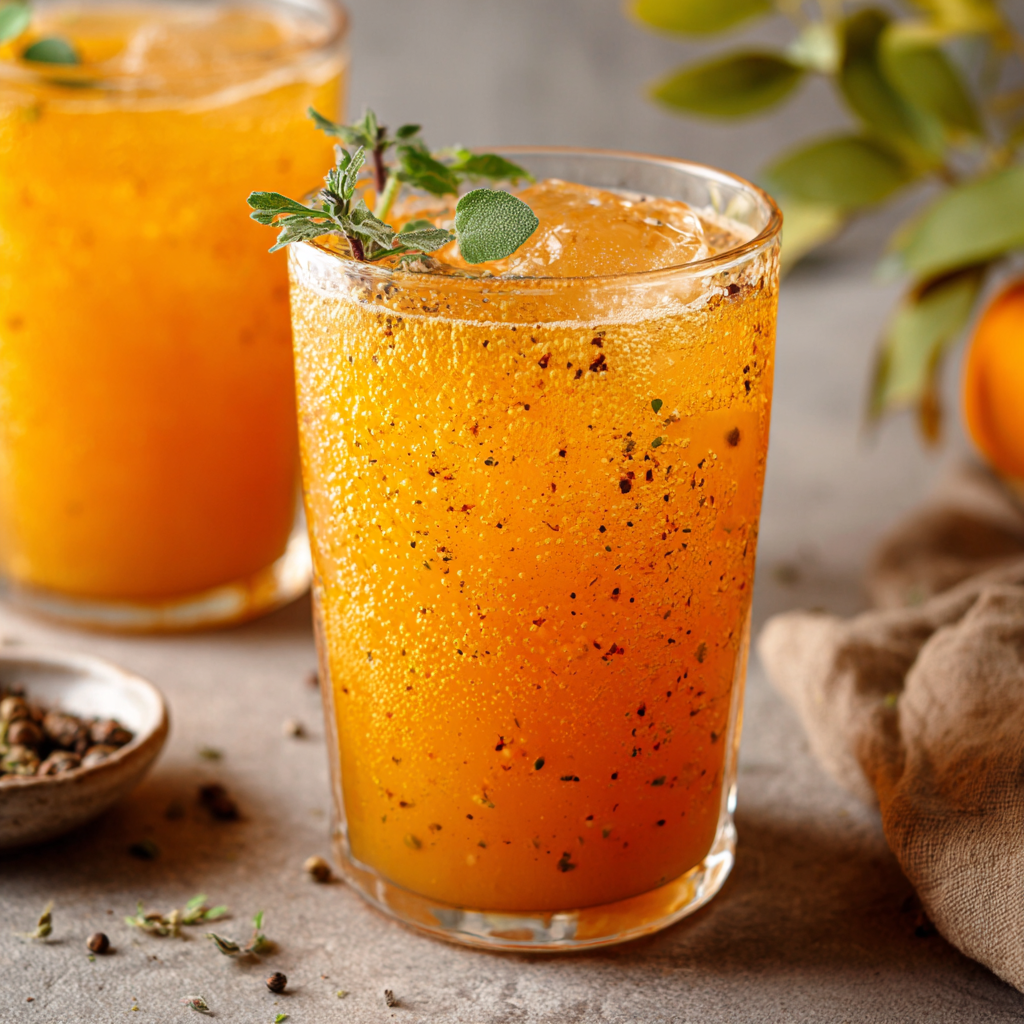
- Strain & Sparkle: After infusion, you have options! For a crystal-clear shrub, strain it through a fine-mesh sieve into a clean jar or bottle, pressing gently on the solids. **Lazy/Happy Chef Hack:** I often skip straining! The settled pumpkin adds a lovely texture (think light smoothie vibes). To serve, fill a glass with ice. Pour in **1 part shrub base** and top with **3 parts sparkling water**. Stir gently.
- The Grand Finale (Garnish!): Drop in a few thin apple slices or slide in a cinnamon stick. It’s not just pretty – the apple infuses more flavor as you sip! Take a moment… then enjoy that fizzy, tart, spiced hug in a glass.
How to Serve Your Sparkling Shrub Masterpiece
This shrub screams “celebrate the season!” Serve it ice-cold in a stemless wine glass, a vintage tumbler, or even a cute mason jar for rustic charm. For gatherings, set up a DIY shrub bar: put the infused base in a pretty pitcher, have sparkling water chilled nearby, and offer garnishes (apple slices, cinnamon sticks, maybe even a bowl of sugared cranberries!). It’s perfect alongside spicy appetizers, as a pre-dinner palate cleanser, or as your signature “I’m the host with the most” non-alcoholic toast. The bubbles and tang cut through rich fall foods beautifully!
Shake Up Your Shrub Vibe
This recipe is your playground! Try these fun twists:
- Ginger Zinger: Add 1 tsp finely grated fresh ginger to the warming mixture. Swap sparkling water for ginger beer! Fiery and fantastic.
- Berry Autumn: Steep 2 tbsp dried cranberries or cherries WITH the shrub base. Strain well – adds a tart-sweet berry note.
- Vanilla Dream: Stir 1/4 tsp pure vanilla extract into the base after removing from heat. Luxuriously smooth.
- Herbal Escape: Add 1-2 sprigs of fresh rosemary or thyme to the jar during infusion. Strain out before serving – earthy elegance!
- Extra Probiotic Boost: Extend the ferment! After 2 days, leave sealed at room temp for 12-24 hours before refrigerating. Gets tangier and fizzier!
Beau’s Backstory & Bonus Bits
This little shrub has come a LONG way from its accidental kitchen-floor origins! I used to fuss with straining meticulously, but honestly? Embracing the slight pumpkin texture felt more rustic and real – plus, less work! I also played with adding orange zest early on, but found it overpowered the delicate pumpkin. The biggest evolution was nailing the infusion time: 24 hours is good, 48 is *great*, but beyond that? It gets aggressively tangy (though some hardcore ACV lovers dig that!). One chaotic Thanksgiving, I subbed bourbon for half the sparkling water when serving adults – instant autumnal cocktail hit! But I love it most as a vibrant, alcohol-free option that doesn’t feel like a compromise. It tastes like fall decided to throw a sparkling party in your mouth.
Your Shrub Questions, Answered!
Let’s tackle those bubbling queries:
- Q: My shrub tastes too vinegary! Did I mess up?
A: Fear not! This usually means you either added the ACV while the mixture was too hot (mutes sweetness) or infused it too long. Fix: Next time, ensure the mix is just warm, not hot, before adding ACV, and stick to 24-48 hours max infusion. Salvage This Batch: Dilute it more when serving (try 1 part shrub to 4 or 5 parts sparkling water) or add an extra tiny drizzle of maple syrup directly to your glass. - Q: Can I use pumpkin pie filling instead of puree?
A: Oh, please don’t! Pie filling has added sugars, spices, and thickeners that’ll make your shrub weirdly sweet and gloopy. Stick to 100% pure pumpkin puree for clean flavor and texture. - Q: How long does the shrub base last in the fridge?
A: Thanks to the ACV’s natural preserving power, your strained or unstrained shrub base will stay vibrant and delicious for up to 3 weeks in a sealed glass jar in the fridge. The flavor might mellow further, but it’s safe! Always give it a sniff – if it smells off (not just tangy), toss it. - Q: Where’s the “sparkle” before I add the water? It looks flat!
A: Haha, totally normal! The shrub base itself isn’t carbonated. The fermentation here is flavor development, not carbonation (that’s slower). The magic fizz comes ONLY when you add the sparkling water right before serving. Think of the base as your flavor concentrate!

Pumpkin Apple Sparkling Shrub
- Total Time: 5 minutes
Description
Craving something cozy and refreshing? This bright, bubbly, and booze-free sip is fall in liquid form. Tangy apple cider vinegar meets creamy pumpkin puree, sweet maple syrup, and warm pie spices—all mellowed and sparkled with fizzy water. It’s a gut-friendly, low-sugar hug in a glass that pairs just as well with brunch as it does a chilly evening on the porch. It’s easy, elegant, and makes you feel like a fall cocktail artist (minus the booze). Let’s fizz up autumn, shall we?
Ingredients
-
¼ cup raw apple cider vinegar (with the “mother”)
-
2 tbsp pumpkin puree (not pie filling!)
-
2 tbsp maple syrup (or monk fruit syrup)
-
¼ tsp pumpkin pie spice
-
½ cup filtered water
-
Sparkling water, to serve
Optional Garnishes: apple slices, cinnamon stick, star anise
Instructions
-
Warm & Whisk: In a saucepan, gently heat water, pumpkin, syrup, and spices until just steaming (not boiling), whisking smooth.
-
Add Vinegar: Off the heat, stir in ACV. This preserves its zing and probiotic perks.
-
Steep & Chill: Pour into a jar, cool 30 mins, then refrigerate for 24–48 hours to develop flavor.
-
Strain or Not: Strain for clarity, or keep it rustic and leave it textured.
-
Serve Sparkling: In a glass with ice, mix 1 part shrub with 3 parts sparkling water. Stir and garnish.
Notes
-
Don’t overheat! Warm, not hot, preserves vinegar benefits.
-
Infuse for 48 hours for max flavor, but 24 works too.
-
No straining needed if you like a smoothie-like finish.
- Prep Time: 5 mins
Nutrition
- Calories: 25 Cal Per Serving
- Sugar: 4g
- Fat: 0g
- Carbohydrates: 6g
- Fiber: 1g
- Protein: 0g
Nutritional Nibble (Per Serving)
Approximate values when using maple syrup and strained shrub mixed with plain sparkling water:
- Calories: 25
- Fat: 0g
- Carbs: 6g (Net Carbs: 5g)
- Sugar: 4g (Naturally occurring from maple/pumpkin)
- Fiber: 1g
- Protein: 0g
Keto Note: Using a sugar-free sweetener brings net carbs down to ~2g per serving!
Final Thoughts: Why This Shrub Deserves a Spot in Your Fall Rituals
This Pumpkin Apple Sparkling Shrub isn’t just a drink—it’s a celebration of autumn’s best flavors, with a nod to tradition and a wink at modern wellness. Whether you’re toasting at Friendsgiving, sneaking a probiotic boost, or repurposing leftovers into creative dishes, it’s a versatile staple that bridges the gap between indulgence and nourishment.
So here’s to happy accidents (like Beau’s pumpkin spill!), to fermentation’s quiet magic, and to sipping slowly as the leaves turn. Because fall doesn’t just look golden—it can taste golden too. Cheers!
Cinnamon-Spiced Pumpkin Apple Trail Mix
Fall’s Coziest Adventure Buddy: Cinnamon-Spiced Pumpkin Apple Trail Mix
Hey friends, Beau here! You know that magical moment when crisp autumn air hits your face, and you suddenly crave something sweet, salty, and utterly snackable? Maybe you’re gearing up for a leaf-peeping hike, packing lunchboxes, or just need a crunchy companion for that new true-crime documentary. That’s when this Cinnamon-Spiced Pumpkin Apple Trail Mix swoops in like a superhero in a flannel shirt. Imagine: toasty almonds and pecans doing a happy dance with earthy pumpkin seeds, chewy apple rings whispering orchard secrets, and dried pumpkin cubes that taste like Halloween’s coziest memories—all showered in warm cinnamon and kissed with maple. It’s not just trail mix; it’s a portable hug for your taste buds. I created this recipe after a hilarious “snack emergency” during a rainy camping trip (more on that later!), and now it’s my go-to for fueling adventures—whether you’re climbing mountains or conquering the laundry pile. Ready to make your kitchen smell like a fall festival? Let’s get mixing!
The Campfire Snack Fiasco That Started It All
Picture this: It’s 2018, and I’m on my first fall camping trip with buddies in the Blue Ridge Mountains. We’re all set for s’mores—until a surprise downstorm soaks our firewood. There we are, huddled in a damp tent, stomachs growling like angry bears, when I remember the sad bag of store-bought trail mix in my backpack. One bite and… yikes! Stale peanuts, weirdly sour raisins, and enough salt to dehydrate a camel. My buddy Mark groaned, “Dude, your food blog’s called Feastical. Fix this!” Challenge accepted! Back home, I raided my pantry: leftover roasted pepitas from pumpkin carving, apple chips from a farmer’s market haul, and my mom’s trick of toasting nuts with maple and cinnamon. After three batches (and a minor coconut oil spill incident involving my dog’s tail), this magical mix was born. Now, it’s our annual tradition—I mail jars to the whole camping crew every October. Pro tip: Always pack extra. Mark still owes me for stealing the last handful in 2019!
Your Fall Flavor Toolkit: Ingredients & Why They Rock
Grab these pantry pals—each one brings personality to the party! (Pssst: All measurements are for a big batch. Double it for gifting!)
- 1/2 cup roasted almonds – The crunch captain! Buy pre-roasted to save time, but raw works too (we’ll toast ’em!). Chef’s swap: Try smoked almonds for campfire vibes.
- 1/2 cup roasted pecans – Buttery royalty. Their natural sweetness loves the cinnamon. Chef’s tip: Chop if yours are huge—better bite distribution!
- 1/4 cup pumpkin seeds (pepitas) – Tiny green powerhouses! Packed with magnesium. Chef’s insight: Use unsalted to control sodium.
- 1/4 cup sunflower seeds – The sunny cheerleaders. Hulled saves messy fingers later! Swap: Sub sesame seeds for nut-free friends.
- 1/3 cup chopped dried apple – Chewy, tart-sweet magic. I prefer rings chopped into confetti-sized bits. Pro move: Look for sulfite-free brands!
- 1/3 cup dried pumpkin – The autumnal MVP! Find dehydrated chunks online or at health stores. Hack: Roast butternut squash cubes as a fresh sub.
- 1 tbsp coconut oil (optional) – The crunch amplifier! Melt it for easy coating. Note: Skip for oil-free, but expect less shine.
- 1 tsp cinnamon – The warm hug spice. Ceylon cinnamon tastes brighter here!
- 1 tbsp maple syrup or keto sweetener – The sweet whisper. Pure syrup caramelizes nuts; keto syrups (like monk fruit) keep sugar low. Fun twist: Infuse syrup with a cardamom pod!
- Pinch of sea salt – The flavor spotlight. Flaky Maldon salt makes it gourmet.
Let’s Toast & Toss: Your Foolproof Trail Mix Blueprint
Step 1: Preheat & Prep (2 minutes)
Fire up your oven to 300°F (150°C). Why low and slow? We’re toasting nuts—not incinerating them! Line a baking sheet with parchment paper (trust me, cleanup’s a breeze). Chef’s hack: If nuts are raw, no sweat! We’ll roast everything together. If pre-roasted? Still toast ’em—it revives their crunch!
Step 2: The Flavor Shuffle (3 minutes)
In a big bowl, combine almonds, pecans, pumpkin seeds, and sunflower seeds. Add melted coconut oil (if using)—it should look like a light drizzle, not a swamp. Sprinkle cinnamon, maple syrup, and salt. Toss like you’re flipping pancakes! Watch for: Coating every nut evenly. No seed left behind! Time-saver: Use a silicone spatula—syrup won’t stick.
Step 3: Toast to Perfection (12–15 minutes)
Spread mixture evenly on your baking sheet. Single layer is key—overcrowding steams instead of toasts. Pop it in the oven. Set a timer for 8 minutes, then stir gently. Why? Edges brown faster! Bake another 4–7 minutes until golden and fragrant. Don’t walk away—nuts go from “perfect” to “burnt” in 60 seconds. They’ll crisp up as they cool!
Step 4: The Cool Down (10 minutes)
Slide the tray onto a cooling rack. Resist nibbling! Hot nuts are soft—they crisp as they cool. Break up any clumps while warm. Chef’s secret: Sprinkle extra cinnamon now if you’re a spice fiend!
Step 5: Mix in the Fun Stuff (2 minutes)
Once completely cool (patience, grasshopper!), add dried apples and pumpkin. Stir gently—you don’t want to crush the fruit. Storage pro-tip: Wait until cooled to add fruit; moisture from warm nuts makes apples soggy.
Serving: Where Snack Meets Adventure
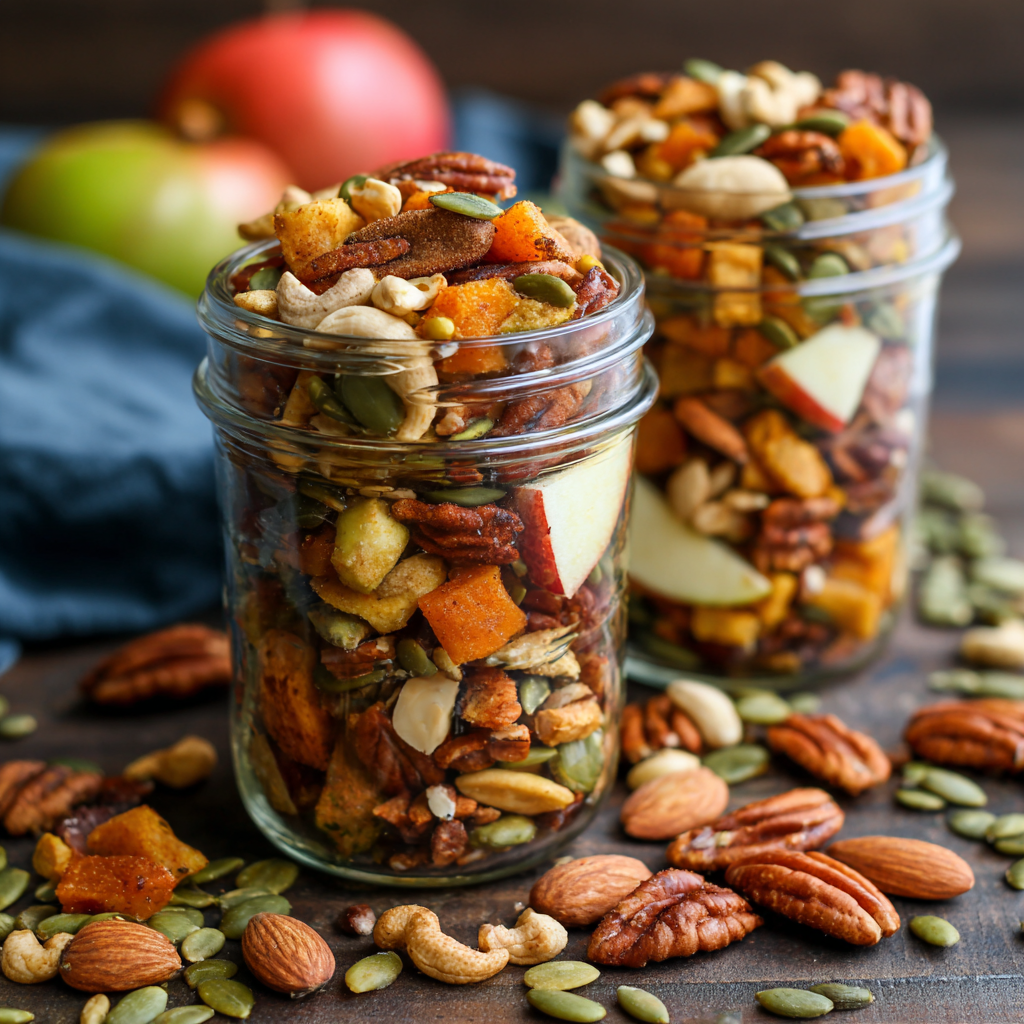
This isn’t just for trails! Pack it in mini Mason jars for lunchboxes (kids adore the “treasure hunt” vibe). For hikes, use reusable silicone bags—eco-friendly and crinkle-free. Movie night? Serve in vintage mugs with cider! Feeling fancy? Layer it in clear glasses with yogurt for parfaits. Gift it in brown paper bags tied with twig-and-twine bows—instant fall happiness. Stays fresh for 2 weeks in airtight containers (if it lasts that long!).
Mix It Up: 5 Delicious Twists
1. Chocolate Dapple Dream: Post-toast, add ¼ cup dark chocolate chips. They’ll melt slightly into pools of joy.
2. Savory Herb Edition: Swap cinnamon for ½ tsp rosemary + ¼ tsp garlic powder. Omit maple. Add Parmesan crisps!
3. Tropical Escape: Use dried mango instead of apple, add toasted coconut flakes, and a pinch of cayenne for heat.
4. Nut-Free Neighbor: Replace nuts with ½ cup roasted chickpeas + ½ cup banana chips. Seeds stay!
5. Pumpkin Spice Overdrive: Add ¼ tsp each ginger, nutmeg, and allspice to the cinnamon. Boom—fall in a jar!
Beau’s Backstory Bites
This recipe’s evolved more than my hair style (RIP, 2010 man-bun). Originally, I candied the nuts—delicious, but sticky for backpacks. The dried pumpkin was a game-changer; before that, I roasted fresh cubes, which added moisture. Big mistake! They turned the mix soggy overnight. Now, I source chewy dried pumpkin online (Nuts.com has great options). Funny fail: Once subbed cayenne for cinnamon. Let’s just say my hiking group needed emergency milkshakes! Now I label spice jars… religiously. Pro tip: Make a double batch. You’ll sneak handfuls straight from the jar while “checking flavor.”
Trail Mix as a Functional Snack—Beyond Just Taste
This isn’t just delicious—it’s a powerhouse of nutrients designed to fuel adventures (or Netflix marathons).
Energy That Lasts
-
Almonds & Pecans: Packed with healthy fats and protein for slow-burning energy.
-
Pumpkin Seeds: High in magnesium, which helps combat muscle cramps during hikes.
-
Maple Syrup: A natural source of quick glucose for an immediate boost.
Hiker’s Tip: The fiber in apples and seeds helps stabilize blood sugar, avoiding energy crashes.
Mindful Snacking for Stress Relief
The act of munching on something crunchy can reduce stress. A 2021 study found that rhythmic chewing (like on nuts) lowers cortisol levels. Plus, cinnamon has been linked to improved focus—great for work-from-home snack attacks.
Dietary Flexibility
-
Keto? Swap maple for monk fruit sweetener.
-
Nut-Free? Use roasted chickpeas or soy nuts.
-
Vegan? Already is! Just check your chocolate chips.
Trail Mix Therapy: Your Questions, Solved!
Q: My nuts burned! What did I do wrong?
A> Oven temps vary! Use an oven thermometer. If nuts are pre-roasted, reduce time to 8–10 minutes. Stir every 4 minutes—and sniff! If you smell “toasty,” check early.
Q: Can I use fresh pumpkin? How?
A> Absolutely! Dice small (½-inch), toss with 1 tsp oil and a pinch of cinnamon, roast at 375°F (190°C) for 25 mins until dry. Cool completely before adding to mix. But heads-up: It shortens shelf life to 5 days.
Q: Why’s my trail mix soggy after 2 days?
A> Two culprits: 1) Nuts weren’t fully cooled before adding fruit (traps steam). 2) Humidity! Store with a silica pack (those little “do not eat” packets in seaweed snacks) or in the fridge.
Q: Maple syrup alternatives for keto?
A> Swap for ½ tbsp sugar-free maple syrup (like ChocZero) or 1 tsp powdered erythritol + 1 tsp water. Keto pro-tip: Use macadamia nuts—they’re lower in carbs!

Cinnamon-Spiced Pumpkin Apple Trail Mix
- Total Time: 30 mins
Description
When crisp air rolls in and the leaves crunch beneath your boots, snack time deserves a seasonal glow-up. Enter this warm, crunchy, chewy, cinnamon-kissed trail mix—a festive, fuel-packed blend of roasted nuts, tart apple, earthy seeds, and pumpkin surprises that’s basically autumn in every bite. Whether you’re hiking, snuggling into a movie, or surviving Monday, this mix has your back. Let’s turn snack o’clock into a fall ritual.
Ingredients
-
½ cup roasted almonds
-
½ cup roasted pecans
-
¼ cup pumpkin seeds (pepitas)
-
¼ cup sunflower seeds
-
⅓ cup dried apple (chopped)
-
⅓ cup dried pumpkin cubes
-
1 tbsp melted coconut oil (optional)
-
1 tbsp maple syrup or keto sweetener
-
1 tsp ground cinnamon
-
Pinch of sea salt
Instructions
-
Preheat Oven to 300°F (150°C). Line a tray with parchment.
-
Mix the Base: In a large bowl, combine nuts and seeds. Toss with oil (if using), syrup, cinnamon, and salt until well coated.
-
Toast: Spread evenly on tray. Bake 8 mins, stir, then bake another 4–7 mins until golden. Cool completely.
-
Add Dried Fruit: Once cool, stir in dried apple and pumpkin.
-
Store in an airtight jar up to 2 weeks. (Longer if you hide it well!)
Notes
-
Let nuts cool fully before adding fruit to prevent sogginess.
-
Chop large nuts for even bites.
-
Use unsalted seeds to control flavor.
-
Add chocolate chips post-baking for a sweet twist.
- Prep Time: 5 mins
- Cook Time: 12–15 mins
Nutrition
- Calories: 210 Cal per ⅓ cup
- Fat: 17g
- Carbohydrates: 10g
- Fiber: 3g
- Protein: 5g
Nutritional Sunshine (Per ⅓ Cup Serving)
Calories: 210 | Fat: 17g (Good fats from nuts!) | Carbs: 10g (Net: 7g) | Fiber: 3g | Sugar: 5g (Mostly from fruit) | Protein: 5g
Note: Stats include maple syrup. Keto swaps reduce carbs to 4g net.
Final Thoughts: More Than Just a Snack
This Cinnamon-Spiced Pumpkin Apple Trail Mix isn’t just food—it’s a sensory experience. From the campfire mishap that inspired it to the science behind its crunch, every element has a purpose. It’s a love letter to fall, a nutrient-packed fuel source, and a testament to the magic of improvisation.
So whether you’re packing it for a mountain trek or nibbling it under a blanket fort, remember: The best recipes aren’t just made in kitchens. They’re born from adventure, perfected through fails, and shared with people who turn snacks into stories. Now go forth and mix boldly!

Pumpkin Apple Cinnamon Nut Butter
Your Jar of Autumn Sunshine: Pumpkin Apple Cinnamon Nut Butter
Hey friends, Beau here! Is there anything better than that first crisp, golden morning of fall? You know the one – leaves crunching underfoot, the scent of woodsmoke in the air, and that undeniable craving for something warm, spiced, and utterly comforting. Well, pull up a stool in my kitchen, because I’ve got the *perfect* jar of happiness to kick off sweater weather: my Creamy Pumpkin Apple Cinnamon Nut Butter! Imagine the coziest flavors of autumn – sweet roasted pumpkin, tart dried apples, and that soul-warming cinnamon hug – all whirled into a luxuriously smooth, spreadable dream. This isn’t just a nut butter; it’s a spoonful of seasonal joy. Whether you’re smearing it thickly on warm sourdough, swirling it into your morning oatmeal, or (confession time!) sneaking a finger-swipe straight from the jar, this recipe is pure feel-good fuel. It’s ridiculously easy to whip up (seriously, just 10 minutes!), packed with real ingredients, and tastes infinitely better than anything store-bought. So, grab your food processor, put on your comfiest flannel, and let’s make your kitchen smell like a fall festival!
This little wonder is my ultimate multitasker. Need a quick breakfast hero? Toast + this nut butter = done. Looking for a snack that actually satisfies? Apple slices dipped in this magic? Perfection. Want to impress guests at brunch? Drizzle it over pancakes or waffles – instant gourmet vibes. It’s creamy, slightly sweet, perfectly spiced, and has that delightful little chew from the dried apples. Plus, it’s naturally packed with good fats and fiber! Forget pumpkin spice lattes for a sec (blasphemy, I know!), this nut butter is the *real* taste of autumn you’ll want to keep stocked all season long. Let’s get blending!
A Campfire Spark & A Happy Accident
This recipe actually started with a slightly charred marshmallow and a happy kitchen accident! Picture this: a few autumns back, I was hosting a big family bonfire weekend at my place. We had all the classics – chili simmering, s’mores supplies overflowing, and a giant bowl of my homemade pecan butter for apple dipping. In the midst of marshmallow chaos, my niece, ever the budding chef (and slightly overzealous with the pumpkin pie spice!), accidentally knocked a hefty scoop of pumpkin puree destined for pancakes *right* into my nearly-empty bowl of pecan butter. We laughed, groaned about the “waste,” but then curiosity got the better of me. I grabbed a spoon, gave it a stir, tossed in a few chopped dried apples from the charcuterie board nearby, and took a taste. WHOA. It was like a campfire in a bowl – smoky pecans, sweet pumpkin, chewy apple, and that warm spice. Everyone crowded around, dipping apple slices and pretzels, demanding I “make that again, but *on purpose*!” That happy little collision became the spark for this recipe. I refined it (less charred marshmallow smoke, sadly!), swapped between almonds and pecans, perfected the spice balance, but kept the spirit of that cozy, communal, slightly messy moment. Every time I make it now, I think of chilly nights, crackling fires, and the simple joy of delicious accidents. Food memories are the best, aren’t they?
Gathering Your Autumn Harvest: What You’ll Need
Here’s the beautiful part: you only need a handful of simple, wholesome ingredients to create pure pumpkin-spiced bliss. This recipe is incredibly forgiving, so don’t sweat substitutions – I’ve got you covered!
- 1 1/2 cups Roasted Almonds or Pecans: The heart of the butter! Roasting is KEY – it deepens the flavor dramatically. Almonds give a classic, slightly sweet base, while pecans bring a richer, buttery, almost caramel-like autumnal vibe (my personal fave!). Chef’s Hack: Buy them pre-roasted & unsalted for speed, or roast raw nuts yourself at 350°F for 10-12 minutes until fragrant. Sub: Walnuts work great too! Need nut-free? Try roasted sunflower seeds or pepitas (pumpkin seeds) – the flavor profile changes but it’s still deliciously cozy.
- 1/4 cup Pumpkin Puree: The cozy orange hug! Make sure it’s 100% pure pumpkin puree, NOT pumpkin pie filling (which has added sugar and spices). Chef’s Insight: Squeeze out excess moisture by pressing it between paper towels! This prevents your nut butter from becoming too thin or seizing up weirdly. Sub: Butternut squash puree works in a pinch!
- 2 tbsp Chopped Dried Apple: The tart, chewy surprise! This adds incredible texture and bursts of apple flavor. I love unsulphured apples for a more natural taste. Chop them fairly small so they blend in smoothly. Sub: Dried pears offer a similar vibe. In a real pinch? A tiny bit of unsweetened applesauce can work, but you’ll lose the texture magic.
- 1 tsp Cinnamon: The warm, familiar embrace! Use good quality ground cinnamon – it makes a difference! Chef’s Tip: Start with 1 tsp, you can always add more after blending. Sub: Apple pie spice blend is fantastic here too!
- 1–2 tbsp Maple Syrup or Keto Sweetener (Optional): A touch of sweetness! This balances the pumpkin and tart apple. Pure maple syrup complements the fall flavors perfectly. For keto/low-sugar, monk fruit sweetener or allulose syrup blend seamlessly. Chef’s Advice: Start with 1 tbsp, blend, taste, then add more if needed. The natural nut sweetness might be enough for you!
- Pinch of Salt: The flavor booster! Don’t skip this! Even a tiny pinch enhances all the other flavors and cuts any bitterness. Use sea salt or Himalayan pink salt.
- Optional Boosters: Make it your own!
- 1/4 tsp Vanilla Extract: Adds a warm, comforting depth.
- Dash of Nutmeg or Ginger: Intensifies the warm spice notes – a little goes a long way!
- Tiny Pinch of Cloves (Careful!): Adds complexity, but cloves are potent – use sparingly!
Equipment Note: A sturdy food processor is essential! A high-speed blender *can* work but requires more scraping and patience.
Whirling Up Autumn Magic: Let’s Make It!
Okay, team, let’s transform these simple ingredients into liquid gold! This process is mostly hands-off, thanks to your trusty food processor. Get ready for the amazing transformation from crumbly nuts to creamy dreaminess!
- The Nut Butter Foundation: “Dump your roasted almonds or pecans into the bowl of your food processor. Secure the lid tightly! Pulse a few times to break the nuts down into coarse crumbs. Now, let ‘er rip! Process on high for 5-7 minutes. Here’s where the magic (and patience!) happens: It’ll go through stages – fine crumbs, a thick paste that clumps, a dry-looking ball, and FINALLY, a smooth, glossy river of nut butter! Chef’s Non-Negotiable Tip: STOP and scrape down the sides and bottom of the bowl with a silicone spatula EVERY 1-2 minutes during this stage. This ensures everything gets evenly processed and prevents frustrating lumps. Don’t rush this step – let the machine do its work until it’s truly liquid and drips easily. Your patience will be rewarded!”
- Autumn Flavor Infusion: “Once you have beautiful, smooth nut butter, it’s time for the seasonal stars! Add the pumpkin puree (remember, squeeze out that excess moisture!), chopped dried apple, cinnamon, your chosen sweetener (if using), the pinch of salt, and any optional extras (vanilla, nutmeg, etc.). Pop the lid back on securely. Process again for another 1-2 minutes, scraping down the sides halfway through. You want everything fully incorporated and creamy. Watch as the pumpkin turns it a gorgeous warm orange and those little apple flecks distribute throughout. Chef’s Hack: If the mixture seems too thick after adding the pumpkin, you can add a tiny drizzle (think 1/2 tsp at a time) of neutral oil (like avocado or light olive oil) to help it smooth out, but usually the natural oils are sufficient.”
- Taste & Tweak: “Stop the processor. Grab a clean spoon and TASTE! This is the fun part. Is it sweet enough? Add a touch more maple syrup or sweetener. Want more spice? Sprinkle in a bit more cinnamon or nutmeg. Need more apple flavor? Pulse in another tablespoon of chopped dried apple. Chef’s Advice: The flavors will meld and deepen slightly after chilling, so don’t go too overboard – adjust conservatively.”
- Jarring Up the Goodness: “Your masterpiece is ready! Carefully spoon the warm, fragrant Pumpkin Apple Cinnamon Nut Butter into a clean mason jar or airtight container. I love using a butter knife to swirl the top prettily. Chef’s Storage Tip: Let it cool slightly on the counter before popping the lid on and refrigerating. This helps prevent condensation inside the jar.”
Important Consistency Note: Your fresh nut butter will likely be quite runny and pourable straight from the processor – that’s the heat from the friction! It will thicken up SIGNIFICANTLY as it chills in the fridge. Don’t panic!
Serving Up Sunshine: How to Enjoy Your Nut Butter
Oh, the possibilities! This jar is your autumn culinary paintbrush. Spread it thick and luxurious on toasted sourdough, whole wheat, or a warm bagel – it’s an instant gourmet breakfast. Stir a generous spoonful into your morning oatmeal or overnight oats for pumpkin-spiced bliss. Dollop it onto pancakes, waffles, or French toast instead of syrup (heaven!). Slather it on rice cakes or apple slices for a satisfying snack. Get fancy: swirl it into Greek yogurt, use it as a dip for pretzels or graham crackers, or even thin it slightly with warm milk for a unique fall-inspired “hot chocolate” drizzle! My ultimate move? A spoonful straight from the jar when no one’s looking – pure, unadulterated autumn comfort. Enjoy it cold from the fridge for a thicker spread, or let it sit at room temp for 10 minutes for easier scooping.
Shake Things Up: Creative Twists!
Love the base recipe? Here’s how to play with your food (in the best way!):
- Maple Pecan Dream: Use pecans, add an extra 1/2 tsp maple extract with the vanilla, and sprinkle flaky sea salt on top after jarring. *Chef’s Kiss*
- Ginger Snap Kick: Swap the cinnamon for 1/2 tsp cinnamon + 1/2 tsp ground ginger. Add 1 tbsp finely chopped crystallized ginger with the dried apple for a spicy-sweet bite!
- Chocolate Pumpkin Swirl: After the main blend, pulse in 1-2 tbsp of mini dark chocolate chips or cacao nibs. Or, melt 2 tbsp dark chocolate and swirl it into the jarred nut butter with a knife.
- Savory-Sweet Seed Butter (Nut-Free!): Replace nuts with 1 1/2 cups roasted pumpkin seeds (pepitas). Reduce cinnamon to 1/2 tsp and add 1/4 tsp smoked paprika + a pinch of cayenne for an intriguing kick. Amazing on roasted sweet potato!
- Super Seed Boost: Add 1 tbsp each chia seeds, hemp seeds, and ground flaxseed with the pumpkin puree for an extra fiber and omega-3 punch!
Beau’s Backstory & Bits
This recipe has become a true Feastical fall staple, evolving from that bonfire mishap into something I make weekly once the leaves turn. The biggest lesson? Patience during the initial nut blending is non-negotiable. I’ve had more than one “Is it broken?!” moment early on when the nuts just clump into a dry ball. Trust the process, keep scraping, and suddenly – magic! It’s also taught me flexibility. Out of dried apples? Used pear once, even chopped dates in desperation – both worked! Prefer no sweetener? Skip it! The pumpkin and apples bring natural sweetness. One funny fail: I once added the pumpkin BEFORE the nuts were fully buttered. Big mistake! It seized up into a grainy, unspreadable mess. Lesson learned: smooth nut butter base first, always! Now, I love gifting little jars of this during fall gatherings – tied with twine and a cinnamon stick. Seeing people’s faces light up at that first taste? That’s the real recipe right there. It’s simple food that feels like a celebration of the season.
Your Nut Butter Questions, Answered!
Let’s tackle some common hiccups and curiosities:
- Q: Help! My nut butter is super runny after blending. Did I break it?
A: Relax, chef! This is totally normal. The friction of the food processor generates heat, which liquefies the natural oils. It will thicken significantly as it cools in the fridge (usually within 2-3 hours). If it’s *still* too runny after chilling, you might have added a bit too much pumpkin puree (did you squeeze it dry?) or your nuts weren’t processed long enough initially. Next time, blend the nuts until truly drippy before adding anything else.
- Q: Why is my nut butter gritty or grainy?
A: This usually means the nuts weren’t processed long enough *before* adding the wet ingredients, or you didn’t scrape the bowl down frequently. Unfortunately, it’s hard to fix once grainy. Power through and blend longer if you catch it early! Next time: patience and scraping! Using a weaker processor or old nuts can also contribute. Make sure your nuts are fresh and roasted!
- Q: Can I use fresh apple instead of dried?
A: I wouldn’t recommend it. Fresh apples add WAY too much moisture, which can make the nut butter spoil faster and cause texture/seizing issues. Dried apples concentrate the flavor and add that perfect chewy texture without the extra water.
- Q: How long does this really last? And why refrigerate?
Print
Pumpkin Apple Cinnamon Nut Butter
- Total Time: 10 minutes
Description
Craving that first golden whisper of fall in every bite? Meet your new obsession: a luscious, velvety nut butter bursting with roasted almonds or pecans, rich pumpkin puree, tart dried apple, and a swirl of warm cinnamon. This spread is autumn coziness in a jar – perfect for toast, oatmeal, apple slices, or straight-up spooning. Easy to make, endlessly customizable, and way better than anything you’ll find on a store shelf. Let’s bottle up the season, one spoonful at a time.
Ingredients
Scale-
1½ cups roasted almonds or pecans
-
¼ cup pumpkin puree (well-drained)
-
2 tbsp chopped dried apple
-
1 tsp cinnamon
-
1–2 tbsp maple syrup or keto sweetener (optional)
-
Pinch of salt
Optional boosters:
¼ tsp vanilla, dash of nutmeg/ginger, pinch of cloves
Instructions
-
Process Nuts: Blend roasted nuts in a food processor for 5–7 mins until glossy and smooth, scraping down every 1–2 mins.
-
Add Flavor: Add pumpkin, dried apple, cinnamon, sweetener, salt, and boosters. Blend 1–2 mins until fully mixed.
-
Taste & Adjust: Add more sweetener or spice if needed. Texture too thick? Add a small drizzle of neutral oil.
-
Jar It Up: Spoon into a clean jar. Let cool, then refrigerate. It thickens beautifully as it chills.
Notes
-
Dry pumpkin well before adding to avoid watery butter.
-
Don’t add pumpkin too early or it’ll seize.
-
Let the processor work—smooth takes time.
-
Dried apples only—fresh apples = too wet.
- Prep Time: 10 minutes
Nutrition
- Calories: 90 Cal Per 1 tbsp serving
- Fat: 8g
- Carbohydrates: 3g
- Fiber: 1g
- Protein: 2g
Final Thoughts
This Pumpkin Apple Cinnamon Nut Butter is a celebration of fall’s simplest pleasures: warmth, nostalgia, and the joy of sharing. From its happy-accident origins to its endless versatility, it embodies the spirit of the season. Whether you’re smearing it on toast, gifting it to a friend, or sneaking a spoonful at midnight, it’s a reminder that the best recipes are born from experimentation and heart. So embrace the mess, taste as you go, and let this jar become your autumn tradition. After all, as Beau says, “Food memories are the best, aren’t they?”
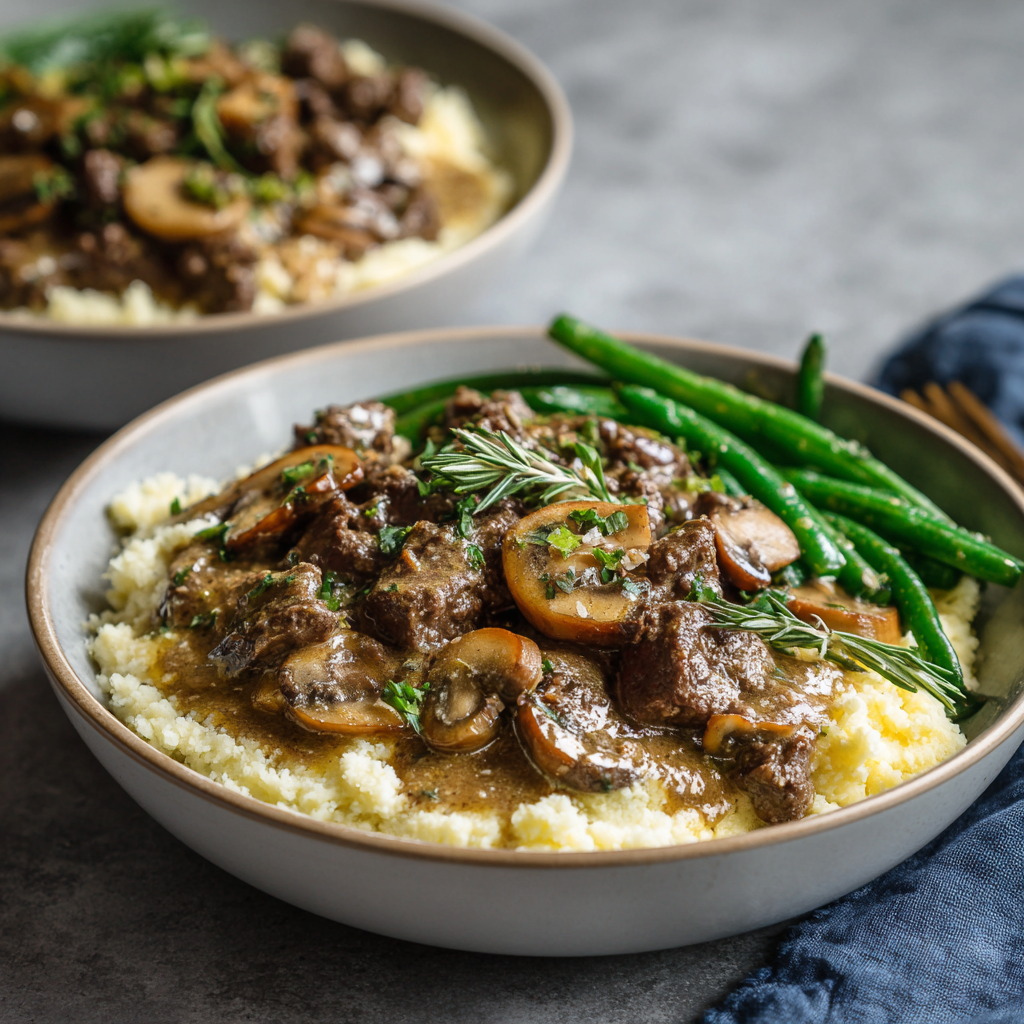
Beef Stroganoff Cauliflower Mash Bowls
Beef Stroganoff Cauliflower Mash Bowls: Low-Carb Comfort That Hugs Your Soul
Hey friends, Beau here from Feastical! Let’s talk about that cozy craving hitting you right now—the one whispering, “I want something rich and comforting… but maybe without the carb coma?” Oh, I hear you. That’s exactly why I’m obsessed with these Beef Stroganoff Cauliflower Mash Bowls. Picture this: tender beef and earthy mushrooms swimming in a creamy gravy that’s tangy, savory, and downright luxurious. But instead of noodles? We’re swapping in velvety garlic cauliflower mash that’s so smooth, you’ll swear it’s cheating. And because we eat with our eyes first, we’re adding crisp-tender green beans for that pop of color and freshness.
This isn’t just another “healthy” recipe that tastes like sacrifice. Nope. It’s my kitchen-tested, weeknight-warrior solution for when you need deep, soul-warming flavor and that light-on-your-feet energy. Whether you’re meal-prepping like a boss or serving up a family dinner that’ll have everyone scraping their bowls, this dish delivers. Ready to make comfort food feel good? Grab your favorite skillet—let’s get cozy.
Grandma’s Apron & My Stroganoff Epiphany
This recipe? It’s got roots. When I was eight, my Russian grandma would make classic beef stroganoff every Sunday. I’d perch on her counter, stealing mushroom slices while she pretended not to notice. Her secret was a splash of sherry and letting the beef simmer until it practically melted. But here’s the twist: Years later, during my “low-carb phase” (you know the one—where you miss mashed potatoes like a long-lost friend), I was staring at a head of cauliflower. Lightbulb moment! What if I swapped noodles for cauliflower mash? One experimental kitchen disaster later (R.I.P., that too-watery batch), I nailed it. That first bite—creamy mash catching every drop of gravy—felt like Grandma’s hug with a fresh, green-bean crunch. Now, it’s my go-to when life needs extra comfort without the slump.
Your Flavor Toolkit: What You’ll Need
- Ground beef or thinly sliced beef strips (1 lb): Go for 85% lean—fat = flavor! For a fancier twist, use sirloin strips. Vegetarian? Swap in lentils or chopped portobellos.
- Olive oil (1 tbsp): Our sauté superhero. Avocado oil works too if you’re searing hot!
- Onion + mushrooms (1 small onion, 2 cups sliced ‘shrooms): The savory backbone. Creminis add earthiness; white buttons keep it mild. No onions? Try shallots.
- Garlic (3 cloves total—2 for stroganoff, 1 for mash): Fresh is best! Jarred works in a pinch, but use 1.5x the amount.
- Flour or low-carb thickener (1 tbsp): All-purpose flour creates classic richness. For keto, use xanthan gum (¼ tsp) or almond flour.
- Beef broth (1 cup): Homestock? Gold star. Otherwise, low-sodium store-bought + a splash of Worcestershire sauce amps up depth.
- Sour cream (½ cup): Makes the gravy luxe. Greek yogurt works but add it OFF heat to prevent curdling.
- Dijon mustard (1 tsp): My “secret” for tangy brightness. Yellow mustard in emergencies!
- Cauliflower (1 medium head): Steam until fork-tender—crucial for silky mash! Frozen works; just thaw and squeeze out water.
- Butter (2 tbsp): For mash richness. Vegan? Olive oil or vegan butter.
- Milk/cream (a splash): Makes mash creamy. Any dairy or non-dairy milk fits!
- Green beans (2 cups): Fresh or frozen. Asparagus or broccoli florets rock too.
Chef’s Tip: Salt layers build flavor! Season beef when browning, then taste gravy before final seasoning.
Let’s Build Those Bowls: Step-by-Step Magic
Step 1: Sauté the Aromatics (5 mins)
Heat olive oil in a large skillet over medium-high. Toss in onions and mushrooms with a pinch of salt. Sizzle until onions turn golden and mushrooms release their juices (about 5 minutes). Why salt now? It draws out moisture for better browning! Add garlic—stir for 60 seconds until fragrant. Don’t let it burn!
Step 2: Brown the Beef (7 mins)
Crank heat to high. Add beef, breaking it up with your spatula. Sear until no pink remains (if using strips, sear 2 mins per side). Sprinkle flour over everything, stirring to coat. This little move? It’s our gravy game-changer—flour cooks out that raw taste and thickens beautifully.
Step 3: Create the Creamy Dream (10 mins)
Pour in beef broth, scraping up those crispy bits at the bottom of the pan (that’s FLAVOR!). Bring to a simmer, then reduce heat to low. Fold in sour cream and Dijon mustard. Key hack: Take the skillet off heat for 30 seconds before adding sour cream—this prevents curdling! Return to low heat, simmer gently until gravy hugs the back of a spoon (3-4 mins). Season with pepper and extra salt if needed.
Step 4: Whip Up the Cauliflower Mash (8 mins)
While gravy simmers, steam cauliflower florets until fork-tender (about 7 mins in a steamer basket). Drain WELL—watery cauliflower = sad mash. Toss into a food processor with butter, garlic, salt, pepper, and that splash of milk. Blitz until smooth as clouds. No processor? Mash by hand, then whip with a fork!
Step 5: Crisp Those Beans (4 mins)
Steam green beans until bright green with a slight crunch (3-4 mins). Toss with a drizzle of olive oil and flaky salt.
Step 6: Assemble Your Masterpiece (2 mins)
Scoop cauliflower mash into bowls. Ladle stroganoff over the top. Artfully arrange green beans alongside. Garnish with parsley if you’re feeling fancy!
Serving Up Comfort
Slide these bowls onto the table while the stroganoff is still bubbling! For meal prep, layer mash first in containers, top with stroganoff, and tuck green beans beside—reheats like a dream. Pair with a simple arugula salad with lemon vinaigrette to cut the richness. And hey—grab crusty bread for gravy-dipping rebels at the table. I won’t tell!
Shake It Up: 5 Delicious Twists
- Pork & Apple: Swap beef for ground pork, add ½ cup diced apples with onions. Finish with thyme.
- Mushroom Lover’s: Double the mushrooms, use ½ lb beef. Add 1 tsp soy sauce for umami punch.
- Dairy-Free: Coconut milk + nutritional yeast in the mash. Cashew cream instead of sour cream.
- Tex-Mex: Beef seasoned with taco spice. Mash with cilantro and lime. Top with avocado.
- Parmesan Cauliflower: Stir ¼ cup grated parmesan into mash. Heavenly.
Beau’s Backstory Bites
Funny confession: The first time I tested this, I got overzealous with the cauliflower and flooded the kitchen with steam. My dog, Biscuit, hid under the table! But here’s how it’s evolved: Originally, I used heavy cream in the gravy—too rich. Sour cream lightened it while keeping that tang. And the green beans? Total accident. I needed color one night, grabbed beans from the fridge, and loved the crunch contrast. Now, it’s non-negotiable. Pro tip: Make double the stroganoff—it freezes beautifully for emergency comfort nights!
Your Questions, My Answers
Q: My gravy curdled! What happened?
A: High heat is sour cream’s enemy. Always take the skillet off the burner before stirring it in, and keep the simmer low and gentle. If it curdles, blend with an immersion blender—it’ll come back together!
Q: Can I use frozen cauliflower?
A: Absolutely! Thaw completely, then squeeze out excess water in a kitchen towel (crucial step). Steam it for 2-3 mins to warm through before mashing.
Q: Why not add sour cream to the slow cooker?
A: Slow cookers get too hot, leading to separation. Stir it in during the last 10 mins if using that method. Stovetop gives you more control!
Q: How long does this keep in the fridge?
A: 4 days in airtight containers. Reheat gently—microwave at 50% power or on the stovetop with a splash of broth.
Beef Stroganoff Cauliflower Mash Bowls
- Total Time: 35 min
Description
Think rich, creamy beef stroganoff without the carb crash. These bowls deliver everything: savory beef, earthy mushrooms, and velvety garlic cauliflower mash, with crisp green beans adding freshness and snap. Whether you’re going low-carb, meal-prepping, or just need dinner to feel like a hug, this cozy, flavor-packed recipe is your new go-to. Comfort never felt so light on its feet.
Ingredients
• 1 lb ground beef or beef strips (85% lean)
• 1 tbsp olive oil
• 1 small onion, chopped
• 2 cups sliced mushrooms (cremini or button)
• 3 garlic cloves (divided: 2 for sauce, 1 for mash)
• 1 tbsp flour or ¼ tsp xanthan gum (low-carb option)
• 1 cup beef broth
• ½ cup sour cream
• 1 tsp Dijon mustard
• 1 head cauliflower, chopped into florets
• 2 tbsp butter
• Splash of milk/cream (any type)
• 2 cups green beans, trimmed
• Salt & pepper to taste
Instructions
-
Sauté Mushrooms & Onion: Heat oil in skillet. Cook onion & mushrooms with salt until golden, 5 mins. Add 2 garlic cloves, cook 1 min.
-
Brown Beef: Add beef, season with salt & pepper. Brown fully. Stir in flour and cook 1 min.
-
Make Gravy: Pour in broth, scrape pan. Lower heat. Stir in Dijon & sour cream off heat. Simmer on low until creamy (3–4 mins).
-
Mash Cauliflower: Steam cauliflower until tender (7 mins). Blend with butter, garlic, splash of milk, salt, and pepper until smooth.
-
Steam Beans: Cook green beans until bright and crisp (3–4 mins). Season with olive oil and salt.
-
Assemble: Layer mash, beef stroganoff, and green beans in bowls. Garnish with herbs if desired.
Notes
– Use frozen cauliflower if needed—just drain well!
– Add Dijon last to protect tangy flavor
– Freezes beautifully—store in portions for comfort on demand
- Prep Time: 15 min
- Cook Time: 20 min
Nutrition
- Calories: 440 Calo Per Serving
- Fat: 30g
- Carbohydrates: 10g
- Protein: 30g
Nutritional Per Serving (Approx)
Calories: 440 • Protein: 30g • Carbs: 15g (Net: 10g) • Fat: 30g • Saturated Fat: 10g • Sugars: 5g • Sodium: 620mg
Final Thoughts: Comfort Without Compromise
This dish proves that “healthy” doesn’t mean deprivation. By understanding the science (emulsifying sauces, Maillard reactions), technique (cauliflower prep, layering flavors), and psychology (texture, nostalgia), we transform simple ingredients into soul food. Whether you’re keto, gluten-free, or just craving coziness, these bowls adapt without apology. So grab that skillet—your taste buds (and your inner child) will thank you.
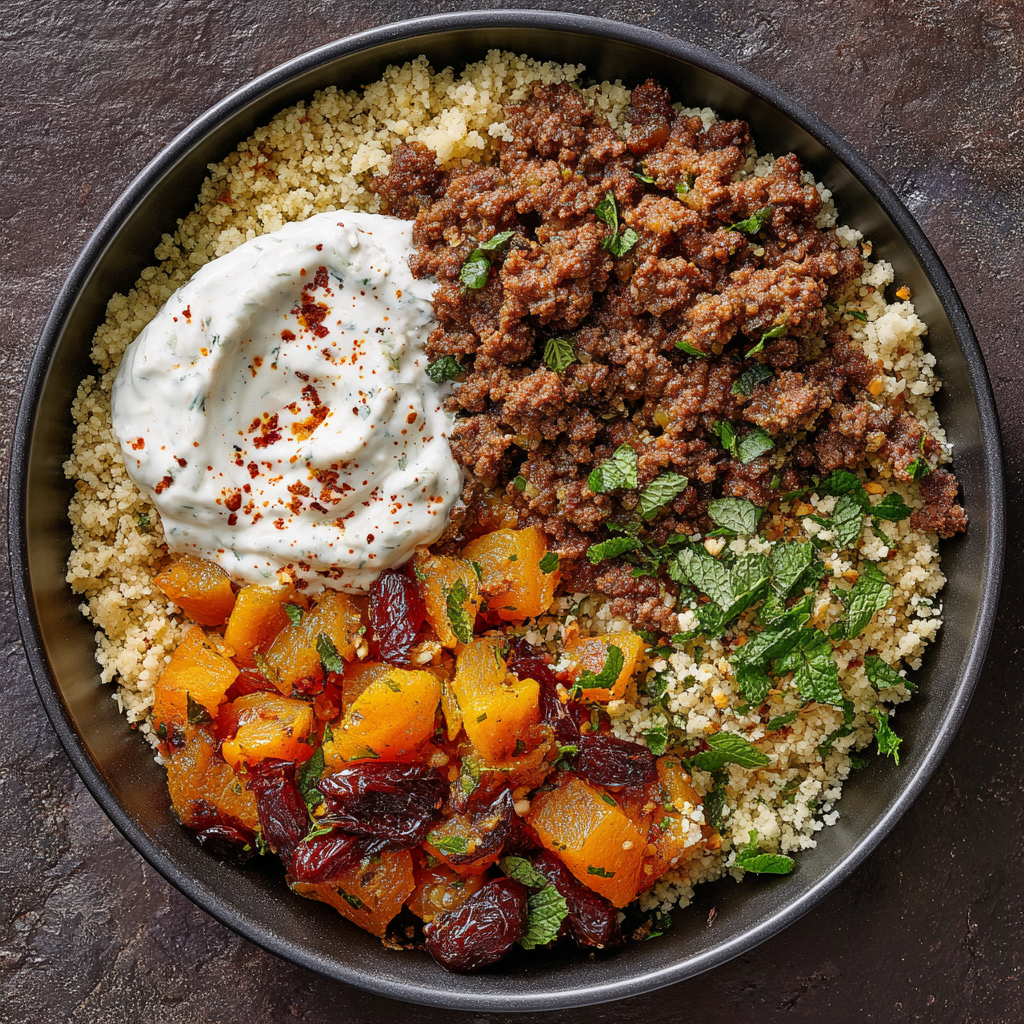
Moroccan Spiced Beef with Apricot Couscous and Mint Yogurt
Moroccan Spiced Beef with Apricot Couscous: Your Tastebuds’ Next Vacation
Hey foodie friend! Beau here from Feastical, and I’ve got a secret weapon for your meal prep that’ll make your coworkers stare at your lunch container with serious envy. Imagine this: fragrant cinnamon-kissed beef tumbling over fluffy couscous dotted with sunny apricots, all brightened up with a cool swipe of mint yogurt. It’s like Marrakech met your lunchbox in the best possible way.
Why’s this my go-to? Because life’s too short for boring lunches. This Moroccan Spiced Beef with Apricot Couscous and Mint Yogurt isn’t just fuel – it’s a 35-minute flavor escape that balances sweet and savory like a tightrope walker with great taste. That yogurt sauce? It’s the refreshing high-five your taste buds need after the warm hug of spiced beef. Perfect for meal prep Sundays or “I need dinner NOW” Tuesday nights. No fancy skills required – just a skillet, a bowl, and your appetite. Let’s turn your kitchen into a spice bazaar, shall we?
A Spicy Memory (and a Near-Kitchen Disaster!)
This recipe takes me straight back to my first attempt at a massive Moroccan feast for friends – think overflowing tagines and sweaty-brow ambition. I’d underestimated how *intensely* spices bloom in hot oil. When I added my cinnamon-cumin blend to the sizzling pot? POOF! A fragrant mushroom cloud hit the ceiling, sending everyone into coughing fits while I frantically waved a towel like a surrender flag. Our eyes watered, but we couldn’t stop laughing. The beef? Absolutely incredible – deep, complex, and totally worth the temporary spice fumigation. That chaotic moment taught me two things: 1) Ventilation is your friend, and 2) Magic happens when sweet apricots collide with warmly spiced meat. This simplified bowl version captures all that exotic coziness without the airborne chili emergency!
Your Flavor Toolkit: Ingredients & Smart Swaps
- Ground Beef (1 lb): The hearty base. Chef’s Tip: 85% lean keeps it juicy! Swap: Ground lamb or turkey (add 1 tsp extra cumin for turkey).
- Olive Oil (1 tbsp + 1 tbsp): For sautéing and fluffing. Insight: Extra virgin adds fruitiness! Swap: Avocado oil.
- Onion (1 small, finely chopped): Sweet foundation. Hack: Grate it if you hate chopping! It melts into the beef.
- Garlic (2 cloves, minced): Essential aroma. Tip: Smash cloves with your knife first – skins slip right off!
- Cinnamon, Cumin, Coriander (1 tsp each + ½ tsp): The Moroccan soul. Secret: Toast whole spices and grind them fresh if you can – game-changer!
- Couscous (1 cup): Quick-cooking fluff. Swap: Quinoa (cook per package).
- Hot Chicken Broth (1 cup): Flavor booster. Swap: Veggie broth or water + ½ tsp salt.
- Dried Apricots (⅓ cup, chopped): Sweet, chewy jewels. Swap: Dates or golden raisins.
- Greek Yogurt (½ cup): Creamy tang base. Swap: Dairy-free yogurt.
- Fresh Mint (1 tbsp chopped): Bright, cool finish. Must: Use fresh, not dried!
- Lemon Juice (½ lemon): Zesty lift. Swap: Lime juice in a pinch.
Let’s Build Your Flavor Oasis: Step-by-Step
1. Spice Bloom & Beef Bliss: Heat that olive oil in your skillet over medium. Toss in the onions and let them sweat until they’re soft and translucent (about 5 mins – don’t rush!). Add the garlic and spices. NOW – lean in close – this is the magic moment! Stir constantly for just 30 seconds. You’ll smell the spices waking up and getting intensely fragrant – that’s “blooming” and it builds insane depth. Immediately crumble in the beef! Break it up with your spoon and cook until beautifully browned (5-7 mins). Season with salt and pepper. Chef’s Hack: Drain just a little fat if it seems excessive, but leave some – it’s flavor gold!
2. Couscous Cloud: While the beef works, place couscous and apricots in a heatproof bowl. Bring broth to a simmer (or boil water). Pour the hot liquid over the couscous, cover the bowl tightly with a plate or foil, and walk away for 5 minutes. NO PEEKING! That steam is doing the work. Uncover, fluff gently with a fork – watch those grains separate! Stir in the second tbsp of olive oil and a pinch of salt. Pro Tip: Run a fork through it sideways to fluff, not smash.
3. Minty Fresh Whisk: In a small bowl, combine yogurt, chopped mint, lemon juice, and a tiny pinch of salt. Stir until smooth. Taste! Want more zing? Add another squeeze of lemon. Chef’s Secret: Chop the mint just before mixing for maximum vibrancy.
4. Bowl Beauty Assembly: Grab your prettiest bowls (or meal prep containers!). Spoon in a fluffy bed of apricot couscous. Pile high with that gorgeous spiced beef. Finish with a generous dollop (or swipe!) of mint yogurt. Garnish Game: Chopped pistachios, extra mint leaves, or a sprinkle of paprika add color and crunch!
Plating Perfection: Serving It Up Right
Presentation makes this feel extra special! For meals at home, use shallow bowls to show off those gorgeous layers. Swipe the mint yogurt across one side of the bowl first, then add the couscous, and top with beef. Scatter on some chopped fresh parsley, cilantro, or mint leaves, and a sprinkle of toasted pistachios or slivered almonds for crunch. It’s fantastic warm, but the flavors also mingle beautifully served at room temperature – making it IDEAL for packed lunches. Pair it simply with a crisp green salad dressed with lemon vinaigrette to keep the Moroccan vibes flowing.
Mix It Up! Flavorful Twists
This bowl is your culinary canvas! Try these easy swaps:
- Veggie Power: Replace beef with 1.5 cups cooked brown lentils or chickpeas. Add 1 tsp smoked paprika with the spices.
- Lamb Love: Swap beef for ground lamb – classic Moroccan richness!
- Nutty & Nice: Stir toasted pine nuts or slivered almonds into the couscous.
- Fruity Fun: Use chopped Medjool dates or golden raisins instead of apricots.
- Heat Seeker: Add ¼ tsp cayenne pepper or a minced fresh chili to the beef spices.
Beau’s Backstage Notes
This recipe is my streamlined love letter to those chaotic, spice-filled Moroccan feasts. Over the years, I’ve learned the beauty is in the balance: Don’t skip the yogurt! That cool creaminess is essential against the warm spices. One funny fail? I once used “hot” curry powder instead of cumin by accident during a sleepy morning prep. Let’s just say… it was unexpectedly Thai-Moroccan fusion! Stick to the warm spices listed – cinnamon, cumin, coriander – they’re the dream team. This dish gets BETTER the next day as flavors marry, so embrace the make-ahead magic! It’s evolved into my ultimate comfort food that feels fancy without the fuss.
Your Questions, Answered!
Q: Can I use fresh apricots instead of dried?
A: You can, but it changes the vibe! Fresh apricots (chopped) are lovely stirred in at the end for a juicy burst, but they won’t give the same concentrated sweetness as dried. If using fresh, add a tiny drizzle of honey to the couscous if you miss that sweet note.
Q: Help! My couscous is mushy/gummy!
A: Two likely culprits: 1) Too much liquid. Use exactly 1 cup hot liquid to 1 cup couscous. 2) Over-stirring after steaming. Fluff gently with a fork, don’t mash! If it’s clumpy, spread it on a baking sheet for 5 mins to dry slightly.
Q: How long does this keep for meal prep?
A: Like a champ! Store components separately in airtight containers: Beef & Couscous for 4 days, Mint Yogurt for 3-4 days. Assemble your bowl the morning you eat it, or keep yogurt on the side to add last minute.
Q: My spiced beef tastes a bit flat. What happened?
A: Spices need activation! Blooming them (cooking briefly in oil before adding meat) is crucial. Also, SALT. Season the beef well at the end. If it’s still bland, add a pinch more cumin or a squeeze of lemon juice just before serving.

Moroccan Spiced Beef with Apricot Couscous and Mint Yogurt
- Total Time: 35 min
Description
Skip the takeout and turn your kitchen into a spice bazaar! This Moroccan-inspired bowl is layered with cinnamon-scented beef, fluffy apricot couscous, and a cooling mint yogurt that ties it all together. Perfect for quick dinners or stylish meal prep, it’s bold, balanced, and absolutely unforgettable. One skillet, one bowl, and 35 minutes to a flavor-packed escape.
Ingredients
• 1 lb ground beef (85% lean)
• 1 small onion, finely chopped
• 2 garlic cloves, minced
• 1 tsp each: cinnamon, cumin, ground coriander
• Salt & pepper to taste
• 1 cup couscous
• 1 cup hot chicken broth
• ⅓ cup chopped dried apricots
• 2 tbsp olive oil (divided)
Mint Yogurt Sauce:
• ½ cup Greek yogurt
• 1 tbsp chopped fresh mint
• Juice of ½ lemon
• Pinch of salt
Instructions
-
Cook Beef: Sauté onion in 1 tbsp oil until soft. Add garlic and spices, stir 30 secs. Add beef, cook until browned. Season well.
-
Make Couscous: Place couscous and apricots in bowl. Pour hot broth over, cover 5 mins. Fluff with fork, stir in 1 tbsp oil + pinch of salt.
-
Mix Yogurt: Stir yogurt, mint, lemon juice, and salt in a bowl.
-
Assemble: Spoon couscous into bowls, top with beef, then a dollop of mint yogurt. Garnish with herbs or nuts if desired.
Notes
– Bloom spices in oil to unlock their depth
– Don’t skip the yogurt—it balances the warmth beautifully
– Great for leftovers: keeps 4 days in the fridge
- Prep Time: 10 min
- Cook Time: 25 min
Nutrition
- Calories: 470 Cal Per Serving
- Sugar: 7g
- Fat: 26g
- Carbohydrates: 35g
- Protein: 27g
Nutritional Info (Per Serving)
Calories: 470 | Protein: 27g | Carbs: 35g | Fat: 26g | Saturated Fat: 8g | Sugars: 7g | Sodium: 580mg
Note: Values are approximate and can vary based on specific ingredients used.
Final Thoughts: Why This Recipe Earns a Permanent Spot in Your Rotation
This Moroccan Spiced Beef bowl isn’t just a meal—it’s a flexible flavor adventure that respects your time and thrills your palate. It teaches foundational skills (blooming spices! textural balance!) while welcoming creativity. Whether you’re meal prepping for chaos or craving a 30-minute escape to Marrakech, it delivers. The best part? It’s forgiving. Burn the onions? Add a dash of honey to compensate. Overcooked the couscous? Toss in fresh herbs for vibrancy.
So grab that skillet and treat yourself to a lunchbox that’s anything but basic. Because good food shouldn’t be complicated—just unforgettable.
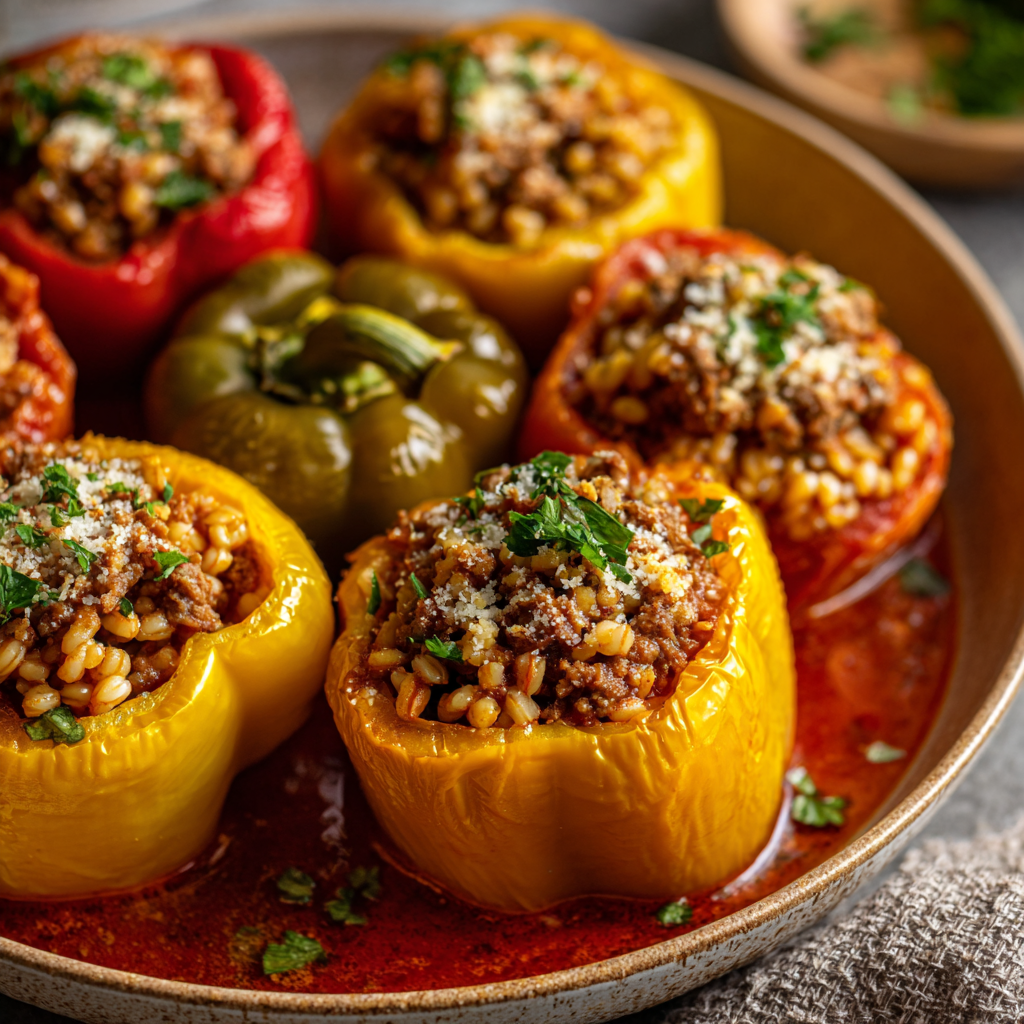
Beef & Barley Stuffed Peppers
Beef & Barley Stuffed Peppers: Your New Freezer Hero!
Hey friends, Beau here from Feastical! Let’s talk about that magical moment when you open your freezer after a chaotic day and find a ready-made dinner staring back at you like a culinary superhero. That’s exactly what these Beef & Barley Stuffed Peppers are—your edible safety net. Imagine sweet bell peppers stuffed to the brim with garlicky ground beef and chewy pearl barley, all snuggled in a smoky tomato bath that’ll make your kitchen smell like a rustic Italian trattoria. Whether you’re a meal-prep ninja or just craving cozy vibes, these peppers are your golden ticket. They’re freezer-friendly, slow-cooker adaptable, and oven-reliable. No fancy skills needed—just big flavors, zero stress, and that soul-warming comfort we all crave. Ready to turn humble ingredients into a standing ovation? Let’s roll up our sleeves!
Why barley? It’s the unsung hero here! Unlike rice, pearl barley holds its shape beautifully, adding a nutty bite and soaking up flavors like a dream. Plus, it’s packed with fiber and keeps you fuller longer. And those peppers? They transform from crisp vessels into tender, sweet pockets after slow cooking. Trust me, one bite of these, and you’ll be hooked. Perfect for busy weeknights, potlucks, or when you just want to hug someone with food. So grab your slow cooker or baking dish—we’re making magic today!
My First Stuffed Pepper Fiasco (And Why It Matters)
Picture this: It’s 2010, and I’m a baby chef hosting my first dinner party. I decided to impress my friends with “gourmet” stuffed peppers. Cue the drama! I used undercooked quinoa, forgot to season the beef, and accidentally set off the smoke alarm when the cheese topping ignited. My peppers emerged looking like sad, deflated balloons. But here’s the twist—my friends DEVOURED them. Why? Because even imperfect food made with heart brings people together. That night taught me two things: 1) Always par-cook grains before stuffing, and 2) Comfort food isn’t about perfection; it’s about joy. These beef and barley peppers are my redemption arc—foolproof, forgiving, and guaranteed to unite hungry souls. Every time I make them, I laugh remembering those charred little troopers. Your kitchen misadventures? They’re just future stories!
Gather Your Flavor All-Stars
- 6 bell peppers (any color) – Red, yellow, or orange add extra sweetness! Avoid giant ones—they take forever to cook. Chef’s hack: Pick peppers with flat bottoms so they stand upright.
- 1 lb ground beef (80/20) – Fat = flavor! Lean beef dries out. For a lighter twist, try ground turkey or lamb.
- 1 cup cooked pearl barley – Not instant! Pearl barley’s chew is key. Substitute: brown rice, farro, or quinoa. Cook it al dente—it’ll soften later.
- 1 small onion, finely diced – Yellow onions for sweetness, or red for zing. Frozen diced onions work in a pinch!
- 2 garlic cloves, minced – Double this if you’re a garlic fiend. Jarred minced garlic? No shame here.
- 1 tsp smoked paprika – The secret weapon! Adds campfire depth. Swap with regular paprika + a pinch of cumin.
- 1 tsp Italian seasoning – Oregano, basil, and thyme’s greatest hits. Fresh herbs? Use 1 tbsp chopped.
- Salt & pepper to taste – Season aggressively—peppers need love.
- 1½ cups tomato sauce – Use a robust marinara. Fire-roasted tomatoes blended smooth? *Chef’s kiss*.
- ½ cup beef broth – For simmering. Veggie broth keeps it lighter.
- Optional garnish: parsley, grated cheese – Parmesan, cheddar, or pepper jack for gooey goodness!
Pro insight: Barley absorbs liquid like a sponge. If your filling feels dry, stir in extra broth or sauce until it’s moist but not soggy.
Let’s Build Flavor Bombs Step-by-Step
Step 1: Brown That Beef
Heat a skillet over medium-high. Crumble in the ground beef with onions, garlic, smoked paprika, Italian seasoning, 1 tsp salt, and ½ tsp pepper. Cook until beef is browned (about 7 mins), breaking up chunks. Chef’s hack: Don’t drain all the fat—it’s flavor gold! Stir in cooked barley and ½ cup tomato sauce. Taste! Adjust salt if needed. Filling should be juicy but not runny.
Step 2: Pepper Prep Party
Slice tops off peppers and remove seeds/ribs. Save tops! Dice them and sauté with the beef if you hate waste. Stand peppers upright in slow cooker or baking dish. Tip: Rub insides with olive oil and a pinch of salt—this prevents sogginess.
Step 3: Stuff ‘Em Like a Pro
Pack filling into peppers firmly—don’t be shy! Leave ½-inch space at the top; they’ll expand. Top with cheese now if you’re baking. For slow cooker, add cheese in the last 10 minutes.
Step 4: Choose Your Adventure
Slow Cooker: Pour broth and remaining tomato sauce around peppers (not over!). Cook on LOW 5-6 hours. Peppers should be tender when pierced.
Oven: Preheat to 375°F (190°C). Pour broth/sauce around peppers. Cover tightly with foil. Bake 40-45 mins. Uncover, add cheese, bake 5 more mins.
Critical tip: Always keep peppers upright! Tilting = sauce spillage.
Step 5: Freezer Magic
Wrap uncooked stuffed peppers individually in plastic wrap, then in a labeled freezer bag. Freeze flat. Thaw overnight in fridge before cooking. They keep 3 months!
Serving: Where Comfort Meets Style
Slide peppers onto plates with a spoonful of that luscious tomato broth pooling underneath. Sprinkle with fresh parsley and a snowdrift of grated parmesan. For a hearty meal, pair with garlic bread to mop up the sauce or a crisp green apple salad. Feeling fancy? Drizzle with basil oil. These peppers are a full meal, but they love company—try them beside roasted carrots or a dollop of creamy polenta. And friends? Serve straight from the slow cooker at potlucks. Watch them disappear!
5 Delicious Twists to Shake It Up
- Mediterranean: Swap beef for lamb, add feta, olives, and oregano. Top with tzatziki!
- Tex-Mex: Use ground turkey, black beans, corn, chili powder, and top with pepper jack & avocado.
- Vegetarian Power: Replace beef with lentils + mushrooms. Use veggie broth and quinoa.
- Cheeseburger Style: Stir ¼ cup ketchup + 1 tbsp mustard into filling. Top with cheddar and pickles.
- Spicy Arrabbiata: Add red pepper flakes to filling and use spicy marinara sauce.
Beau’s Backstage Notes
This recipe evolved from my grandma’s “pepper surprise” (which was mostly leftover meatloaf). Over the years, I added barley for texture and smoked paprika for depth. The biggest game-changer? Freezing them raw—cooking from frozen makes peppers mushy. One hilarious fail: I once used giant poblano peppers thinking, “Bigger is better!” They collapsed like tired accordions. Stick to medium bell peppers, folks! Now, these are my go-to for new parents or sick friends. I drop off a batch saying, “Just bake or crockpot—dinner’s done.” Seeing their relief? Priceless. Remember: Food is love made edible.
Your Questions, Answered!
Q: Can I use quick-cook barley?
A: Avoid it! Quick barley turns mushy. Pearl barley’s sturdy texture is non-negotiable. No barley? Try farro or brown rice.
Q: Why did my peppers split/fall apart?
A: Two culprits: Overcooking or thin-walled peppers. Choose firm, fresh peppers and check for doneness at 5 hours (slow cooker) or 35 mins (oven). Propping them snugly in the dish helps too!
Q: Can I freeze cooked stuffed peppers?
A: Technically yes, but texture suffers. Freezing before cooking preserves the peppers’ integrity. Thaw overnight, then cook as directed.
Q: Help! My filling is dry.
A: Easy fix: Add 2-4 tbsp broth or tomato sauce to the filling mix. Also, ensure you’re adding the full ½ cup broth around peppers during cooking—it steams them perfectly.

Beef & Barley Stuffed Peppers
- Total Time: 1 hr 5 min
Description
These Beef & Barley Stuffed Peppers are the weeknight win your freezer’s been waiting for. Picture sweet bell peppers packed with savory beef, nutty barley, and bold seasonings, all simmering in a smoky tomato sauce. Whether baked or slow-cooked, they deliver cozy, soul-hugging flavor—no dinner drama. Bonus? They freeze like champs, making them perfect for hectic nights, new-parent meals, or a just-because hug in a bowl.
Ingredients
• 6 medium bell peppers (flat bottoms, any color)
• 1 lb ground beef (80/20)
• 1 cup cooked pearl barley (al dente)
• 1 small onion, finely diced
• 2 garlic cloves, minced
• 1 tsp smoked paprika
• 1 tsp Italian seasoning
• Salt & pepper to taste
• 1½ cups tomato sauce
• ½ cup beef broth
• Optional toppings: parsley, grated cheese (Parmesan, cheddar, pepper jack)
Instructions
-
Brown Beef: Sauté beef, onion, garlic, paprika, and seasoning until browned. Stir in barley and ½ cup tomato sauce.
-
Prep Peppers: Slice tops, remove seeds. Rub inside with oil and salt.
-
Stuff ‘Em: Firmly fill each pepper, leaving ½” at top.
-
Cook:
Slow Cooker: Add broth + remaining sauce around peppers. Cook LOW 5–6 hrs.
Oven: Bake at 375°F for 40–45 mins (covered). Uncover, top with cheese, bake 5 more mins. -
Freeze for Later: Wrap uncooked stuffed peppers individually and freeze up to 3 months. Thaw before cooking.
Notes
– Use pearl barley for the perfect chewy bite
– Add extra sauce if filling feels dry
– Keep peppers upright to avoid sauce spills
- Prep Time: 20 min
- Cook Time: 45 min
Nutrition
- Calories: 380 Cal
- Fat: 18g
- Carbohydrates: 28g
- Fiber: 5g
- Protein: 25g
Nutritional Breakdown (Per Pepper)
Calories: 380 • Protein: 25g • Carbs: 28g • Fiber: 5g • Fat: 18g (Saturated: 6g) • Sugars: 7g • Sodium: 590mg
Note: Values are estimates. Cheese garnish adds 30-50 calories.
Final Thoughts: More Than a Meal—A Kitchen Hug
These Beef & Barley Stuffed Peppers aren’t just dinner—they’re a strategy for chaos-proofing life. They teach us that:
-
Imperfections can be delicious (remember my 2010 pepper fail?).
-
Freezer meals are self-care (future-you will high-five present-you).
-
Global flavors are just a spice swap away.
So stash a batch in your freezer, and next time life throws a curveball, dinner’s already won. Now go forth, stuff peppers, and feed your people like the hero you are.

Banana Coconut Muffins
Warm Banana Coconut Hugs: Your New Favorite Muffin Moment
Hey friends, Beau here! Can we talk about those sad bananas turning spotty on your counter? You know the ones – begging to be something magical instead of compost-bound. Today, we’re transforming them into pure sunshine: Banana Coconut Muffins that taste like a beach vacation met your coziest kitchen blanket. Imagine tender crumb infused with caramel-sweet bananas, kissed with tropical coconut, and topped with a golden, crunchy-sweet lid. These aren’t just muffins; they’re edible joy bombs. Perfect for rushed mornings, afternoon slumps, or “I deserve something wonderful” moments. And the best part? They’re naturally sweetened, wholesome enough for breakfast (yes, really!), and come together faster than you can say “second cup of coffee.” So grab those speckled bananas – your taste buds are about to send you a thank-you note!
Sunshine & Spills: My Banana Coconut Awakening
Picture this: Me, age 10, “helping” my grandma in her tiny Florida kitchen. Humidity? 100%. My enthusiasm for cracking eggs? Also 100%. Accuracy? Well… let’s just say eggshell confetti happened. Grandma, bless her, just chuckled and handed me a fork to fish it out. She was mashing bananas with shredded coconut – a combo I found wildly exotic compared to plain ol’ banana bread. “Beau, honey,” she’d said, wiping flour off my nose, “Life’s too short for boring muffins. A little coconut makes everything an adventure.” That smell – caramelized bananas and toasty coconut filling her steamy kitchen – is pure nostalgia for me. Years later, after a disastrously dry batch in my first apartment (RIP, forgotten baking powder!), I finally nailed her spirit: moist, fragrant, unpretentious happiness. Now, every time I make these, I hear her laugh as I carefully crack those eggs. The adventure continues, Grandma. Minus the shell confetti… usually.
Gather Your Tropical Toolkit
Makes 12 glorious muffins
- ¾ cup whole wheat pastry flour (or white/regular whole wheat flour): Lighter texture than regular whole wheat! Makes muffins tender, not dense. Sub: All-purpose flour works, but they’ll be less nutty.
- ½ cup white whole wheat flour (or regular whole wheat flour): Extra fiber boost! White whole wheat is milder. Sub: Use all whole wheat pastry if that’s what you have.
- 1½ tsp baking powder: Our lift-off agent! Ensure it’s fresh for maximum puff.
- ¼ tsp fine sea salt: Balances sweetness. Chef Tip: Salt amplifies flavor magic!
- ½ tsp lemon zest (from ~½ lemon): The SECRET WEAPON! Brightens the banana & coconut. Don’t skip!
- 1 cup mashed ripe banana (from ~3 bananas): The spottier, the sweeter! Mash until mostly smooth, a few lumps are fine.
- ½ cup melted virgin coconut oil: Adds moisture & subtle tropical flair. Sub: Melted butter or neutral oil (avocado, grapeseed).
- ¼ cup honey: Natural sweetness & keeps muffins moist. Sub: Pure maple syrup.
- 1 large egg (room temperature preferred): Binds it all. Cold eggs can re-solidify coconut oil! Hack: Place egg in warm water for 5 mins.
- 1 tsp vanilla extract: Warmth & depth. Use the good stuff!
- ¾ cup unsweetened shredded coconut, divided: Texture & flavor bomb! Unsweetened lets the banana & honey shine. Chef Crunch Tip: We use half IN, half ON TOP!
- 1 tbsp turbinado (raw) sugar: That sparkling, crunchy crown! Sub: Regular sugar or omit.
Let’s Bake Some Sunshine: Step-by-Step
- Preheat & Prep: Crank that oven to 350°F (175°C). Line a muffin tin with paper liners or give it a light grease dance. Beau’s Pro Move: Use a pastry brush to lightly coat the *top* of the tin too – prevents any stray topping from welding itself on!
- Whisk the Dry Crew: In a large bowl, whisk together both flours, baking powder, salt, and that glorious lemon zest. Whisk like you mean it for 30 seconds – aerating the flour = fluffier muffins! Why lemon zest? It cuts through richness and makes the banana pop like a flavor firework.
- Wet Team Unite! In another bowl, combine the mashed bananas, melted coconut oil, honey, room-temp egg, and vanilla. Whisk until smooth and emulsified – you shouldn’t see streaks of oil. Texture Check: Bananas should be well-mashed, but a few tiny bits are totally fine (flavor pockets!).
- The Gentle Merge: Pour the wet ingredients into the dry ingredients. Grab a spatula (not the whisk!) and fold gently until *just* combined. Golden Rule: Lumps are your friends! Overmixing = tough, tunneled muffins. Stop when you see the last traces of flour disappear. Fold in ½ cup shredded coconut.
- Fill & Top for Glory: Divide the batter evenly among the 12 muffin cups – an ice cream scoop works wonders! Sprinkle the tops generously with the remaining ¼ cup coconut and a pinch of turbinado sugar on each. Beau’s Crunch Secret: Press the topping down *gently* with your finger – helps it adhere and caramelize beautifully.
- Bake to Golden Perfection: Slide into the oven. Bake for 20-25 minutes. Don’t Peek Too Early! Around 20 minutes, check. They’re done when a toothpick inserted near the center comes out clean or with just a *few* moist crumbs (not wet batter), and the tops are springy. That coconut topping should be deeply golden brown.
- Cooling is Crucial (Patience, Grasshopper!): Let muffins cool in the pan for 5 minutes. Then, transfer them to a wire rack. Why? This stops the steaming process, preventing soggy bottoms and letting the crumb set for maximum tenderness. Try to wait at least 15 minutes before diving in!
Serving Up the Good Vibes
These muffins shine brightest warm! Plop one on a funky plate, maybe alongside a steaming mug of dark roast coffee or a cold glass of almond milk. For breakfast decadence, slice one open and schmear it with a little coconut butter or almond butter. Feeling fancy? A tiny drizzle of extra honey and a fresh banana slice scream “brunch star.” They’re perfect grab-and-go fuel, but honestly? I love savoring mine at the kitchen counter, pretending I’m still in Grandma’s steamy Florida kitchen.
Mix It Up! Tropical Twists
- Chocolate Lover’s Dive: Fold in ½ cup dark chocolate chips with the coconut. Because banana + coconut + chocolate = bliss.
- Tropical Piña Colada: Fold in ⅓ cup finely chopped dried pineapple and replace 1 tbsp honey with 1 tbsp rum extract (or real rum!). Top with extra pineapple bits.
- Nutty Crunch: Add ⅓ cup chopped toasted macadamia nuts or pecans to the batter. Swap turbinado for chopped nuts on top.
- Gluten-Free Getaway: Use a 1:1 gluten-free baking flour blend (like Bob’s Red Mill) for both flours. Ensure baking powder is GF.
- Vegan Voyage: Swap the egg for a flax egg (1 tbsp ground flax + 2.5 tbsp water, mix & sit 5 mins). Use maple syrup instead of honey.
Beau’s Back-Porch Notes
This recipe is my kitchen evolution in a muffin tin! That first dry batch taught me the power of ripe bananas and not overmixing. Adding lemon zest? Total game-changer – stole that trick from a blueberry scone recipe! The coconut oil vs. butter debate rages in my house; coconut oil wins for pure tropical vibes, but butter brings a rich nostalgia. Pro Tip: Freeze spotty bananas peeled in chunks! Thaw them when muffin cravings strike – they mash beautifully and add extra moisture. These muffins also freeze like a dream; pop one in the microwave for 30 seconds, and instant sunshine. Funny story: I once tried adding lime zest instead of lemon. Let’s just say… stick with lemon. Trust me on this one!
Muffin SOS: Your Questions Answered
Q: My muffins turned out dense! What happened?
A: The usual suspects: Overmixing the batter (be gentle!), using cold ingredients (especially egg/coconut oil – they need to blend smoothly), or expired baking powder (test it by dropping 1/2 tsp in hot water – it should fizz!). Also, measure flour correctly: spoon it into the cup and level it off. Don’t scoop!
Q: Can I use sweetened coconut?
A: You can, but ease up on the honey! Reduce it to 3 tablespoons. Sweetened coconut adds extra sugar and moisture, so expect a slightly different texture and sweeter result. I prefer unsweetened for better flavor control.
Q: Why did my coconut topping burn?
A: Ovens vary! If yours runs hot, tent the muffins loosely with foil for the last 5-7 minutes of baking. Also, ensure your rack is in the center – too close to the top element = scorched coconut. Dark pans bake hotter too; reduce temp by 25°F if using one.
Q: Can I make this as a loaf?
A: Absolutely! Pour into a greased 8×4 inch loaf pan. Bake at 350°F for 50-60 minutes, tenting with foil if top browns too fast. Test with a toothpick for doneness. Cool completely in the pan before slicing – banana bread needs patience!
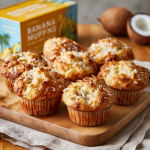
Banana Coconut Muffins
- Total Time: 35 min
Description
Don’t toss those overripe bananas—turn them into golden, tropical-scented muffin bliss! These Banana Coconut Muffins are soft, lightly sweet, and full of cozy island vibes. Think: caramelized banana, lemon-zest brightness, and crispy coconut tops that deliver a satisfying crunch with every bite. Whether you’re hustling through your morning or savoring a slow cup of coffee, these muffins bring comfort, ease, and that irresistible “just one more” energy. Bonus? They’re wholesome enough for breakfast and freeze like a dream.
Ingredients
• ¾ cup whole wheat pastry flour
• ½ cup white whole wheat flour
• 1½ tsp baking powder
• ¼ tsp sea salt
• ½ tsp lemon zest
• 1 cup mashed ripe banana (about 3)
• ½ cup melted virgin coconut oil
• ¼ cup honey (or maple syrup)
• 1 large egg, room temp
• 1 tsp vanilla extract
• ¾ cup unsweetened shredded coconut, divided
• 1 tbsp turbinado sugar (optional, for topping)
Instructions
-
Preheat oven to 350°F (175°C). Line a muffin tin or grease well.
-
In a large bowl, whisk flours, baking powder, salt, and lemon zest.
-
In another bowl, whisk mashed banana, oil, honey, egg, and vanilla until smooth.
-
Fold wet mix into dry ingredients just until combined. Gently stir in ½ cup coconut.
-
Divide batter into muffin cups. Top with remaining coconut and turbinado sugar.
-
Bake 20–25 mins, until tops are golden and springy. Cool 5 mins, then transfer to rack.
Notes
– Don’t overmix—gentle folding = tender crumb
– Press topping lightly into batter for max crunch
– Freeze muffins for up to 3 months and reheat for instant sunshine
- Prep Time: 10 min
- Cook Time: 25 min
Nutrition
- Calories: 190 Cal Per Muffin
- Fiber: 3g
- Protein: 3g
Nutritional Sunshine (Per Muffin)
- Calories: ~190
- Protein: ~3g
- Fiber: ~3g
- Total Sugar: ~8g (Primarily natural sugars from banana & honey)
- Prep: 10 mins | Cook: 25 mins | Total: 35 mins
Final Thoughts: More Than Just a Muffin
These Banana Coconut Muffins are a celebration of small joys—the transformation of sad bananas into something golden, the crunch of coconut against a tender crumb, and the warmth of sharing something homemade. Whether you’re baking for comfort, convenience, or nostalgia, this recipe is a reminder that the best foods are those made with love (and a little bit of science).

Cinnamon Toast Breakfast Quinoa
Rise, Shine, and Quinoa: Your New Breakfast BFF Is Here!
Mornings. Let’s be real – they can be chaotic. Between chasing socks, finding lost keys, and trying to remember if you fed the goldfish, breakfast often gets demoted to sad cereal or that granola bar lurking in your bag. But what if I told you your most joyful, nourishing morning ritual takes just 10 minutes? Meet your new kitchen superhero: Cinnamon Toast Breakfast Quinoa! This isn’t just fuel; it’s a warm, cozy hug in a bowl that tastes like your favorite childhood cinnamon toast got a glow-up. Imagine fluffy quinoa toasted with buttery pecans, wrapped in sweet maple-cinnamon spice, and topped with cheerful pops of dried fruit. It’s protein-packed, fiber-filled, and so satisfying, you’ll actually look forward to rolling out of bed. I created this for my own crazy mornings after one too many “breakfast fails” (we don’t talk about The Burnt Oatmeal Incident). Whether you’re a meal-prep maestro or a “where’s my coffee?” zombie, this recipe adapts to YOU. So grab your favorite mug (or bowl!), ditch the breakfast blues, and let’s make mornings magical again.
The Cinnamon-Scented Time Machine
This recipe? It’s pure nostalgia with a quinoa twist. Picture 7-year-old me, bare feet cold on the linoleum, racing into Grandma Ellie’s kitchen every Saturday. The air smelled like magic – buttery toast, cinnamon sugar, and love. She’d slide that golden, crackly cinnamon toast across the Formica counter with a glass of cold milk, and for a moment, the whole world felt safe and sweet. Fast-forward thirty years: I’m staring at leftover quinoa after a dinner party, craving that childhood comfort but wanting something healthier. “What if…?” I thought. I tossed it in a pan with cinnamon, toasted pecans (Grandma used walnuts, but I’m team pecan!), and maple syrup. That first bite? Time travel. It had the soul-warming spice and crunch I loved, but with powerhouse nutrition that kept me full till lunch. Now, it’s my go-to “I need a good day” breakfast. Every spoonful whispers: “You’ve got this.” And Grandma? She’d absolutely approve – especially since I kept the extra cinnamon sprinkle!
Gather Your Goodness
Here’s your simple, wholesome lineup (makes one generous bowl – double/triple as needed!):
- Heaping 2 tbsp chopped raw pecans – Our crunch heroes! Their buttery richness is *chef’s kiss*. Swap: Walnuts or almonds work great. Allergic? Try pumpkin seeds!
- 1½ tsp coconut oil – Adds subtle sweetness and helps toast everything beautifully. Chef Tip: Melt it first for easy coating! Swap: Butter or ghee for classic toast vibes.
- ½ tsp ground cinnamon (plus extra for topping) – The warm, cozy heart of the dish. Chef Secret: Use Ceylon cinnamon if you can – it’s sweeter and milder!
- Tiny pinch of salt – Don’t skip! It balances the sweetness and makes flavors pop.
- 1 cup pre-cooked quinoa (warm or chilled) – The protein-packed base. Pro Tip: Cook a big batch Sunday night! Swap: Pre-cooked brown rice or oats in a pinch.
- 1 tbsp maple syrup (more to taste) – Pure, unrefined sweetness. Swap: Honey or agave. Want lower sugar? Start with 1 tsp!
- Toppings (Optional but Awesome!): Chopped dried cherries/cranberries (tangy jewels!), hemp/chia/flax seeds (omega-3 boost!), milk/yogurt (creamy dreaminess). Get creative: Fresh apple slices? Banana? Go wild!
Let’s Make Breakfast Magic!
Ready? Grab a small skillet and let’s dance:
- Toast Those Nuts! Heat your skillet over medium heat. Add coconut oil and pecans. Stir constantly for 2-3 minutes until they smell like heaven (toasty and fragrant). Watch closely! Nuts burn faster than you think. Smell is your best guide – when it’s nutty and warm, you’re golden.
- Spice It Up! Reduce heat slightly. Stir in the ½ tsp cinnamon and that tiny pinch of salt. Let them mingle with the nuts for about 30 seconds – just until the spices bloom and your kitchen smells incredible. This “blooms” the cinnamon’s flavor – don’t rush it!
- Quinoa’s Grand Entrance! Add the pre-cooked quinoa and maple syrup. Stir everything together like you’re giving it a warm hug. Cook for 1-2 minutes, stirring gently, until the quinoa is heated through and every grain is glistening with spiced, maple goodness. Cold quinoa? No problem! Just cook an extra minute. Texture Tip: Want it crispier? Press it down gently and let it sit undisturbed for 30 seconds.
- Bowl Bliss! Spoon that gorgeous, fragrant quinoa mixture into your favorite bowl. Pro Move: Warm the bowl first for extra coziness!
- Top It Like It’s Hot! Now, the fun part! Sprinkle on dried fruit, seeds, and/or a splash of milk or dollop of yogurt. Finish with that extra pinch of cinnamon – because more cinnamon is always a good idea. Grandma’s Rule: The prettier the bowl, the happier the morning!
Serve with Sunshine (or at Least a Smile!)
This bowl is a canvas for joy! Serve it immediately while it’s warm and fragrant. I love it straight from the pan, maybe curled up on the couch with my dog, Beau Jr. (yes, he begs!). For extra comfort, pair it with a hot mug of coffee or chai. Packing it to go? Layer it in a jar: quinoa mix on the bottom, seeds/fruit next, yogurt on top – shake it up when you’re ready! The key? Make it yours. Use your grandma’s old bowl, a colorful mug, or that fancy dish you save for “someday.” Today is that day!
Mix It Up, Make It Yours!
This recipe loves a remix! Try these tasty twists:
- Tropical Escape: Swap pecans for macadamia nuts, add diced mango/pineapple, and a sprinkle of toasted coconut. Use coconut milk!
- Apple Pie Bliss: Stir in ¼ cup finely chopped apple with the quinoa. Top with a sprinkle of nutmeg and chopped walnuts.
- Chocolate Craver: Add 1 tsp cocoa powder with the cinnamon. Top with dark chocolate chips and raspberries.
- Savory Sunrise: Skip maple/cinnamon. Use olive oil, toasted almonds, garlic powder, black pepper, and top with a fried egg & avocado.
- Vegan/Veggie Boost: Stick with coconut oil & maple syrup. Use plant-based yogurt/milk. Add extra seeds for protein!
Beau’s Backstory & Bloopers
This little bowl has come a long way! My first attempt? Let’s just say I learned the hard way that quinoa *absorbs* cinnamon. Used a full tablespoon – it was like eating potpourri! Dialed it back fast. Then there was The Great Oil Splatter of 2022 (note: dry quinoa before adding to hot oil!). Now, it’s my zen morning ritual. I’ve made it camping (using pre-cooked quinoa in a thermos!), for hangry toddlers (extra maple syrup diplomacy), and even as a “breakfast-for-dinner” lifesaver. The beauty? It evolves. Some days I crave it simple; other days, I raid the pantry for toppings. It taught me that the best recipes aren’t fussy – they’re flexible friends that fit your life. And hey, if you burn the pecans? Welcome to the club. Toss ‘em and start again. Cooking’s an adventure, not a perfection contest!
Your Quinoa Questions, Answered!
Q: My quinoa turned out mushy/soggy! Help!
A: Likely culprit: overcooked quinoa or too much moisture. For pre-cooking quinoa, use a 1:1.5 ratio (quinoa:water) and fluff it with a fork immediately after cooking. If using leftover quinoa that’s wet, spread it on a plate for 5 mins to dry slightly before adding to the pan. Cooking it in the skillet briefly helps crisp it up!
Q: Can I make this ahead for meal prep?
A: Absolutely! Cook the quinoa base (toasted nuts, spices, quinoa, syrup) and let it cool. Store airtight in the fridge for 3-4 days. Reheat gently in a pan or microwave (add a splash of milk/water if dry). Add FRESH toppings (fruit, seeds, yogurt) just before serving for best texture.
Q: Is this really filling enough for breakfast?
A: Thanks to quinoa’s protein (about 8g) and fiber (~5g), yes! The healthy fats from nuts/oil add staying power. If you’re extra hungry, boost it: add an extra tbsp nuts/seeds, stir in a scoop of protein powder with the quinoa, or top with a spoonful of nut butter!
Q: My spices clumped together! What did I do wrong?
A: No worries! It happens if the spices hit cold oil or the pan’s too hot. Ensure your oil/nuts are hot (but not smoking) before adding spices. Stir constantly for those 30 seconds. If clumps form, just smash them gently with your spoon against the pan – they’ll blend in.
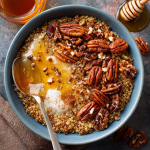
Cinnamon Toast Breakfast Quinoa
- Total Time: 10min
Description
Forget sad cereal—this warm, cinnamon-scented quinoa bowl is here to rescue your mornings! Packed with protein, fiber, and cozy nostalgia, it turns leftover quinoa into something magical. Toasted pecans, a swirl of maple syrup, and fragrant spices create a soul-hugging breakfast you’ll actually look forward to. Whether you’re rushing out the door or soaking up a slow sunrise, this bowl’s got your back.
Ingredients
• 2 heaping tbsp chopped pecans (or walnuts/pumpkin seeds)
• 1½ tsp coconut oil (or butter/ghee)
• ½ tsp cinnamon (plus extra for topping)
• Tiny pinch of salt
• 1 cup cooked quinoa (warm or cold)
• 1 tbsp maple syrup (adjust to taste)
• Optional toppings: dried cherries, chia/hemp seeds, milk, yogurt, sliced fruit
Instructions
-
Heat skillet over medium. Add oil and pecans. Toast for 2–3 mins, stirring, until fragrant.
-
Reduce heat. Stir in cinnamon and salt for 30 secs to bloom the flavor.
-
Add quinoa and maple syrup. Stir to coat and warm through (1–2 mins).
-
Spoon into a cozy bowl. Add toppings of choice and a final dusting of cinnamon.
Notes
– Want it crispy? Let quinoa sit undisturbed for 30 secs in the pan.
– Make ahead and reheat with a splash of milk.
– Great for breakfast-for-dinner or snack time with a twist.
- Prep Time: 2 min
- Cook Time: 8 min
Nutrition
- Calories: 300 Cal Per Serving:
- Sugar: 7g
- Fiber: 5g
- Protein: 8g
Nutritional Sunshine (Approx. per serving)
Calories: ~300 | Protein: ~8g | Fiber: ~5g | Sugar: ~7g (from maple syrup/fruit)
Note: Toppings (yogurt, extra fruit, seeds) will add more. This is a naturally gluten-free, nutrient-dense start to your day!
Final Thoughts: Breakfast as Self-Care
In a world of rushed mornings, Cinnamon Toast Breakfast Quinoa isn’t just a meal—it’s a mini act of self-love. Whether you’re:
-
A busy parent (double-batch it for kids!)
-
A work-from-home warrior (fuel for focus)
-
A midnight snacker (yes, it’s great as dessert!)
…this recipe meets you where you are. No perfection required—burned nuts, mushy quinoa, or forgotten toppings won’t ruin it. Because the real magic? Starting the day with intention, nourishment, and a little sweetness.
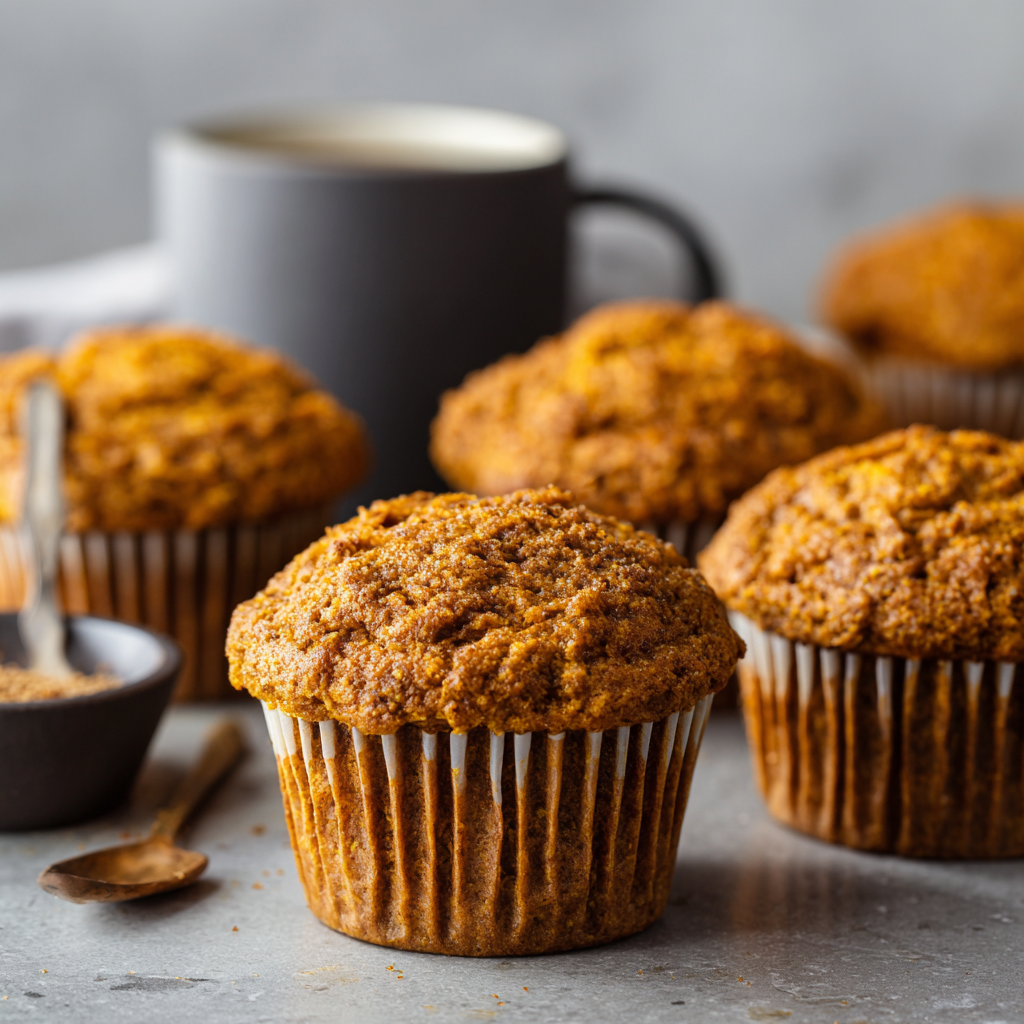
Healthy Pumpkin Muffins
Why These Healthy Pumpkin Muffins Are Your New Best Friend
Hey there, friend! Beau here from Feastical. Can we just take a moment to appreciate that magical moment when you open the oven and the scent of cinnamon-kissed pumpkin swirls through your kitchen like a cozy autumn hug? That’s exactly what these Healthy Pumpkin Muffins deliver—a feel-good, soul-warming experience that’ll make your taste buds dance without weighing you down. Picture this: tender crumb, warm spices, and just the right touch of sweetness, all packed into a grab-and-go breakfast or afternoon pick-me-up. I’ve tweaked this recipe over years to nail that perfect balance—moist but not dense, indulgent-tasting but actually nourishing. We’re talking whole wheat flour, naturally sweetened with maple syrup, and loaded with fiber-rich oats and pumpkin. And the best part? They freeze like a dream. Toss ’em in the freezer, and boom—you’ve got instant cozy vibes on busy mornings. No more sad, store-bought muffins! Whether you’re sipping coffee while the leaves fall or sneaking a midnight snack, these little guys are your ticket to happy taste buds and a happy heart. Ready to bake magic together? Let’s do this!
That Time I Burned the First Batch (and Why It Matters)
Okay, story time! Picture my tiny NYC apartment kitchen circa 2018. I was determined to impress my now-wife, Jess, with “healthy” pumpkin muffins for our first autumn together. Spoiler: I got distracted FaceTiming my mom about her dog’s Halloween costume (yes, a pumpkin-themed pug). Next thing I knew—*smoke alarm symphony*. Charred tops, sad centers. Jess walked in coughing, took one look, and burst out laughing. But then? She grabbed a spoon, scooped out the molten pumpkin goo from the middle, and declared it “the best muffin innards ever.” That disaster became our tradition! Now, every October, we intentionally underbake one muffin (“The Jess Special”) just for that gooey nostalgia. It’s a reminder that kitchen flops make the best memories—and that perfection is overrated. These muffins? They’re my redemption arc. And trust me, no smoke alarms required this time.
What You’ll Need (and Clever Swaps!)
- ⅓ cup melted coconut oil – Adds lush moisture! Chef hack: If you hate coconut flavor, use light olive oil. Both bring healthy fats.
- ½ cup maple syrup – Nature’s caramel! Swap: Honey works, but reduce milk by 1 tbsp—it’s thicker.
- 2 large eggs, room temp – Bind everything beautifully. Insight: Cold eggs? Plunge ’em in warm water for 5 mins. Game-changer!
- 1 cup pumpkin purée – NOT pie filling! Pro tip: Canned is easy, but roast a sugar pumpkin if you’re feeling fancy.
- ¼ cup milk (any kind!) – Dairy, almond, oat—all work. Fun twist: Use spiced chai tea for extra warmth.
- 2 tsp pumpkin spice blend – The soul of fall! DIY mix: 1 tsp cinnamon + ½ tsp ginger + ¼ tsp nutmeg + ¼ tsp allspice.
- 1 tsp baking soda – Lift master! Warning: Don’t sub baking powder—it’ll taste metallic.
- 1 tsp vanilla extract – Flavor enhancer. Splurge on pure vanilla if you can!
- ½ tsp salt – Balances sweetness. Sea salt or kosher—both rock.
- 1¾ cups whole wheat flour – Fiber boost! Gluten-free? Use 1:1 GF flour blend.
- ⅓ cup old-fashioned oats – Chewy texture heroes. Crunch hack: Sprinkle extra on top with turbinado sugar!
Let’s Bake! (No Distractions This Time, Promise)
- Preheat oven to 325°F (165°C). Line muffin tin with liners. Why low temp? Prevents domes from collapsing! Also, skip non-stick spray—liners prevent sticking.
- Whisk oil + maple syrup in a large bowl. Chef secret: Whisk aggressively for 1 minute. It emulsifies like mayo, making muffins ultra-tender.
- Beat in eggs. One at a time! Room temp eggs blend smoother. Scrape the bowl—no hidden pockets of oil.
- Stir in pumpkin, milk, spices, baking soda, vanilla, and salt. Watch: The mix will foam slightly—that’s the baking soda activating! Totally normal.
- Add flour + oats. Mix until JUST combined. CRUCIAL TIP: Overmixing = tough muffins. Stop when flour disappears—lumps are fine!
- Divide batter into 12 cups. Sprinkle with oats/turbinado. Portion hack: Use an ice cream scoop for even muffins. Top generously for that Instagram crunch.
- Bake 22-25 mins until toothpick comes out clean. Timing note: Ovens lie! Check at 20 mins. If tops spring back, they’re done.
- Cool 5 mins in pan, then transfer to rack. Why move ’em? Steam makes bottoms soggy. Let ’em breathe!
How to Serve ’Em Up (Beyond Just Your Hand!)
Warm muffins + cold butter = happiness. But let’s get creative! Slice ’em horizontally, toast lightly, and slather with almond butter or Greek yogurt for protein power. Hosting brunch? Stack ’em high on a wooden board with fresh figs and pecans. Kid-approved move: Dunk ’em in warm apple cider! For freezing, let muffins cool completely, then seal in a zip-top bag. They’ll stay perfect for 3 months. Reheat straight from frozen: 30 secs in the microwave or 10 mins in a 300°F oven. Crispy top restored!
5 Fun Twists to Shake Things Up
- Chocolate Craver’s Fix: Fold in ½ cup dark chocolate chips + orange zest. Sweet-salty magic!
- Protein Powerhouse: Replace ¼ cup flour with vanilla protein powder. Post-workout win.
- Nutty Crunch: Add ⅓ cup chopped pecans or walnuts to batter. Top with candied ginger.
- Vegan Vibes: Swap eggs for flax eggs (2 tbsp ground flax + 5 tbsp water). Use almond milk.
- Apple Pie Fusion: Stir in 1 cup grated apple + extra cinnamon. Top with oat streusel.
Beau’s Behind-the-Scenes Scoop
Confession: I’ve made these over 200 times. Seriously. The recipe started as a dense, whole-wheat brick (RIP 2016 batch). But through “research” (read: eating A LOT of muffins), I learned two game-changers: First, melting the oil with syrup creates an emulsion that traps moisture—bye-bye, dry muffins! Second, low-and-slow baking stops the dreaded sinkhole center. Jess still teases me about “The Great Pumpkin Smoke-Out,” but now I bake these for our neighborhood potlucks. Last fall, our mailman traded me a bag of his homegrown pecans for a batch. Real talk: Food connects us. Whether you’re baking these solo with a podcast or with kids smearing batter everywhere, it’s all about the joy. P.S. If you underbake one intentionally? You’re officially part of Team Jess.
Your Questions, Answered!
Q: Can I use fresh pumpkin instead of canned?
A: Absolutely! Roast a sugar pumpkin, scoop flesh, and blend until smooth. Just strain it overnight in a cheesecloth—fresh pumpkin holds more water. You’ll need about 1¼ cups cooked pumpkin for 1 cup purée.
Q: Why did my muffins turn out gummy?
A: Two culprits: Overmixing (develops gluten) or expired baking soda. Test your soda by dropping ½ tsp in vinegar—if it doesn’t bubble violently, replace it! Also, measure flour correctly: Spoon it into the cup, then level. No packing!
Q: Can I sub sugar for maple syrup?
A: Yep! Use ⅔ cup brown sugar + ¼ cup milk. But maple adds depth, so I’d reduce to ⅓ cup sugar + 3 tbsp milk to keep moisture.
Q: How do I prevent flat tops?
A: Oven too hot! Invest in an oven thermometer ($7!). Also, let batter rest 10 mins before baking—this hydrates the oats and flour for better rise.

Healthy Pumpkin Muffins
- Total Time: 35 min
Description
Say hello to your new cozy craving! These Healthy Pumpkin Muffins are tender, spiced just right, and naturally sweetened with maple syrup. They taste like your favorite autumn candle smells—but way more satisfying. Made with whole wheat flour, oats, and real pumpkin, they’re secretly nourishing, freezer-friendly, and kid-approved. Whether it’s breakfast on the go or an afternoon pick-me-up, these muffins bring homemade comfort with every bite. Burned batch or not, you’re in for muffin greatness.
Ingredients
• ⅓ cup melted coconut oil (or light olive oil)
• ½ cup maple syrup
• 2 large eggs, room temp
• 1 cup pumpkin purée (not pie filling)
• ¼ cup milk (any kind)
• 2 tsp pumpkin spice blend
• 1 tsp baking soda
• 1 tsp vanilla extract
• ½ tsp salt
• 1¾ cups whole wheat flour
• ⅓ cup old-fashioned oats (+ more for topping)
• Optional: turbinado sugar for crunchy tops
Instructions
-
Preheat oven to 325°F (165°C). Line a muffin tin with paper liners.
-
In a large bowl, whisk oil and maple syrup vigorously. Add eggs and beat well.
-
Stir in pumpkin, milk, spices, baking soda, vanilla, and salt.
-
Fold in flour and oats until just combined—don’t overmix!
-
Divide batter into 12 cups. Sprinkle tops with oats and turbinado sugar.
-
Bake 22–25 mins until a toothpick comes out clean. Cool 5 mins in pan, then transfer to a rack.
Notes
– Want a gooey center? Underbake one on purpose—”The Jess Special”!
– Freeze fully cooled muffins in a zip bag up to 3 months. Reheat from frozen.
– For a protein boost, sub ¼ cup flour with protein powder.
- Prep Time: 10 min
- Cook Time: 25 min
Nutrition
- Calories: 180 Cal Per Muffin
- Sugar: 8g
- Fiber: 3g
- Protein: 4g
Nutritional Perks (Because Knowledge Is Yummy)
Serving: 1 muffin (makes 12) | Calories: ~180 | Protein: ~4g | Fiber: ~3g | Sugar: ~8g
Pumpkin delivers vitamin A (hello, glowing skin!), oats bring soluble fiber for happy digestion, and whole wheat flour keeps blood sugar steady. Compared to bakery muffins (often 400+ calories!), these are a win!
Final Thoughts: More Than Just a Muffin
These pumpkin muffins are a triple threat: nourishing, nostalgic, and endlessly adaptable. They’re breakfast saviors, lunchbox heroes, and midnight snack champions. But beyond that, they’re a reminder that food is more than fuel—it’s connection. Whether it’s the laugh over a smoke alarm, the joy of gifting a batch to a neighbor, or the quiet moment with coffee and a crumb-strewn plate, these muffins are little vessels of happiness.
So bake them. Share them. Maybe even intentionally underbake one in honor of life’s sweet imperfections. And when someone asks why your kitchen smells like a fall dream? Just wink and say, “That’s the soundtrack of my best mistakes.”