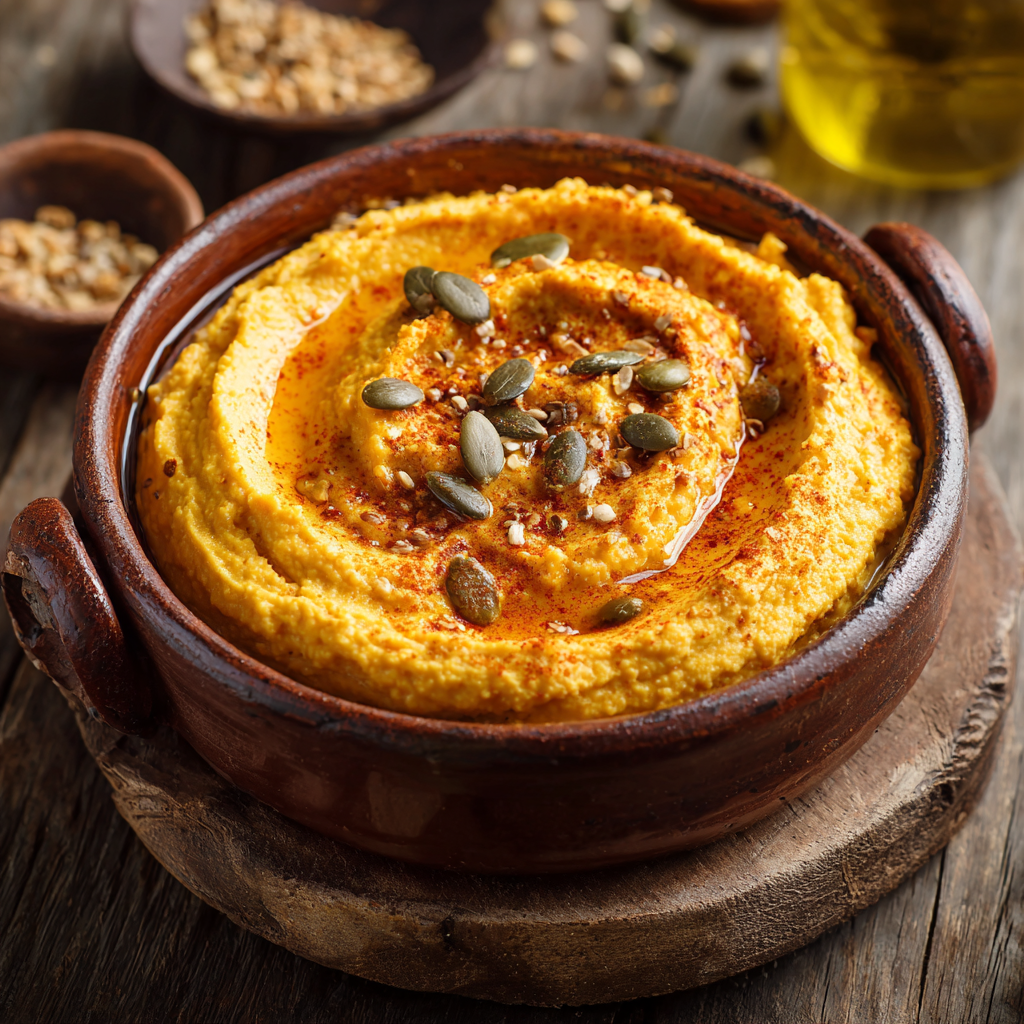
Pumpkin Hummus
Fall’s Coziest Appetizer: Your New Favorite Pumpkin Hummus
Hey friends, Beau here from Feastical! Let’s talk about the best part of fall. No, not the questionable sweater choices (though I’m a fan of a good flannel), but the incredible, soul-warming food. It’s the season of spice, everything nice, and dipping things into other, even more delicious things. And that, my friends, is exactly where today’s star player comes in: Pumpkin Hummus.
Now, I know what you might be thinking. “Pumpkin? In my hummus? Isn’t that for pies and lattes?” Trust me on this one. This isn’t a dessert dip masquerading as savory. This is a smooth, creamy, dreamy fusion of earthy chickpeas and sweet, roasted pumpkin, all hugged tight by the warm spices we know and love—cumin, a touch of cinnamon, and that magical smoked paprika. It’s a flavor experience that feels both familiar and excitingly new. It’s the perfect centerpiece for your game day spread, the talk of your holiday party, or just a ridiculously good snack to make your Tuesday afternoon feel a little more special. So, grab your food processor (or your trusty blender), and let’s whip up a batch of this autumnal magic together.
A Happy Little Kitchen Accident
I’ll let you in on a little secret: this now-famous recipe started as a beautiful kitchen mishap. A few years back, I was hosting a big Friendsgiving potluck. My mission was to make a massive batch of my classic hummus. I had the music going, the chickpeas drained, the tahini measured… and then I saw it. A lonely container of leftover roasted pumpkin from a pie test-run, sitting right next to my bowl of lemon juice. In a moment of pure, “why not?” energy, I just scooped a big spoonful into the food processor with everything else.
The result was a silent, then roaring, standing ovation from my friends. The pumpkin added this incredible velvety texture and a subtle sweetness that balanced the garlic and lemon perfectly. It was gone in minutes, and the requests for the “recipe” started flooding in. It taught me one of my favorite kitchen lessons: some of the best creations come from a place of playful experimentation, not rigidly following the rules. That happy accident is now a Feastical fall tradition, and I’m so pumped to share it with you.
Gathering Your A-Team: The Ingredients
This recipe is all about simple, wholesome ingredients that work together in perfect harmony. Here’s your shopping list, complete with my chef-y notes to set you up for success.
- 1 can (15 oz) chickpeas, drained and rinsed – The hearty, protein-packed base of any great hummus. Pro tip: For the absolute smoothest texture, take 30 seconds to pop the skins off each chickpea. It’s a little extra work, but oh man, does it make a difference. If you’re short on time, no sweat—it’ll still be delicious!
- 1 cup roasted pumpkin (or canned pumpkin purée) – The autumnal star! Using canned purée is the ultimate no-fuss, totally delicious option—just make sure it’s 100% pure pumpkin, not pumpkin pie filling. For a deeper, caramelized flavor, roasting your own sugar pumpkin (or pie pumpkin) is a game-changer.
- 2 tbsp tahini – This sesame seed paste adds essential richness and that authentic hummus flavor. Give the jar a really good stir before you measure, as the oil loves to separate. If you’re in a pinch, a natural, runny peanut butter or almond butter can work, but the flavor will shift.
- 2 tbsp olive oil – Plus more for drizzling! Use a good extra-virgin olive oil here—its fruity, peppery notes will shine through in the final dip.
- 2 tbsp lemon juice – The bright, zesty kick that cuts through the richness and brings all the flavors to life. Freshly squeezed is always best!
- 1 clove garlic, minced – For that essential savory punch. If raw garlic is a bit too intense for you, try roasting the clove first for a sweeter, mellower flavor.
- 1 tsp cumin – Earthy, warm, and absolutely non-negotiable. It’s the soul of the spice blend.
- ½ tsp smoked paprika – This is my secret weapon. It adds a subtle smokiness that makes the dip taste like it’s been slow-cooking for hours.
- ½ tsp cinnamon – This is the surprise guest that ties the pumpkin and chickpeas together beautifully. It whispers “fall” without shouting “dessert.”
- Salt and black pepper, to taste – Seasoning is key! Don’t be shy.
- 2–3 tbsp water (to thin if needed) – Your tool for achieving that perfect, dippable consistency.
Let’s Get Blending: Your Foolproof Steps
This is where the magic happens, and it’s incredibly easy. I’ll walk you through each step to ensure hummus perfection.
- Prep Your Pumpkin (If Roasting). If you’re going the fresh route, preheat your oven to 400°F (200°C). Cut a small sugar pumpkin in half, scoop out the seeds (save them for roasting later!), and place the halves cut-side down on a baking sheet lined with parchment. Roast for about 45 minutes, or until the flesh is super tender. Let it cool, then scoop out one cup of flesh. Chef Hack: You can do this a day or two ahead and keep it in the fridge!
- Combine the Core Ingredients. In the bowl of your food processor, add the drained chickpeas, your one cup of pumpkin, tahini, olive oil, lemon juice, minced garlic, cumin, smoked paprika, cinnamon, a good pinch of salt, and a crack of black pepper. Chef Hack: If you’re sensitive to raw garlic’s bite, add just half the clove to start. You can always add more after tasting.
- Blend Until Smooth. Secure the lid on your processor and let it rip! Blend for a good minute, then stop and scrape down the sides with a spatula. This ensures everything gets incorporated evenly. Blend again for another minute or two. You’re looking for a thick, mostly smooth paste.
- Adjust the Consistency. With the processor running, slowly stream in the water, one tablespoon at a time, through the feed tube. Watch the magic happen as it transforms from a thick paste into a luxuriously smooth and creamy dip. Stop when it reaches your perfect dippable consistency.
- Taste and Tweak. This is the most important step! Grab a spoon and taste your creation. Does it need more salt? A extra squeeze of lemon for brightness? Another pinch of smoked paprika? Adjust the seasonings to make it your own. Blend one last time for 10 seconds to incorporate any changes.
- The Rest (Optional but Recommended). For the absolute best flavor, transfer your hummus to a bowl, cover it, and let it hang out in the fridge for at least 30 minutes. This allows the flavors to get to know each other and mingle beautifully.
How to Serve This Autumnal Masterpiece
Okay, it’s creamy, it’s spiced, it’s perfect. Now what? Let’s make it look as good as it tastes.
Transfer your hummus to a wide, shallow bowl. Use the back of a spoon to create beautiful swoops and swirls on the surface—these little grooves are perfect for catching all the delicious garnishes. Speaking of which, give it a generous drizzle of your best extra-virgin olive oil. Then, sprinkle on some toasted pumpkin seeds (pepitas) for a delightful crunch, and a final dusting of smoked paprika or a tiny pinch of cinnamon for a gorgeous color contrast.
Now, surround that beautiful bowl with an array of dippers! I love a mix of:
- Warm pita chips or torn pieces of flatbread
- Fresh, crunchy veggie sticks: carrot, cucumber, bell pepper, and radish are all fantastic.
- Apple slices for a sweet and savory combo that’s unexpectedly amazing.
- Pretzels or crackers for a classic move.
It also makes an incredible spread for a turkey or veggie sandwich instead of mayo. Get creative!
Make It Your Own: Delicious Variations
Once you’ve mastered the base recipe, the fun really begins. Here are a few of my favorite ways to mix it up.
- Spicy Kick: Add ¼ tsp of cayenne pepper or a tablespoon of chopped chipotle pepper in adobo sauce to the food processor. It adds a wonderful smoky heat.
- Herbaceous Twist: Blend in a handful of fresh herbs like rosemary, thyme, or sage for a deeply aromatic, savory flavor that screams holiday gathering.
- Sweet & Savory Maple Walnut: Drizzle the finished hummus with a little real maple syrup and sprinkle with crushed, toasted walnuts. Trust me, it works!
- Ultra-Creamy Vegan: For an even richer texture, swap the olive oil for 2-3 tablespoons of creamy, unsweetened coconut milk.
- Butternut Squash Swap: No pumpkin? No problem! Roasted butternut squash purée works beautifully as a 1:1 substitute.
Beau’s Chef Notes & Kitchen Stories
This recipe has been on quite a journey since that first fateful Friendsgiving. I’ve learned that the type of pumpkin matters. While canned is great, finding a sugar pumpkin (the small, sweet ones meant for eating, not carving) will elevate your dip to restaurant-quality status. I also once, in a frantic pre-party rush, accidentally used pumpkin pie spice instead of cinnamon. The result was… interestingly sweet, but my nieces absolutely devoured it! So remember, even a “mistake” can lead to a new favorite. Don’t be afraid to play with your food. That’s where the joy is.
Your Questions, Answered!
Q: My hummus is too thick/grainy. What did I do wrong?
A: Don’t worry, this is the most common hummus hurdle! Graininess usually means it needs more liquid and more blending time. Make sure you’re adding that water, one tbsp at a time, while the processor is running. Let it blend for a solid 3-4 minutes to get it super smooth. And remember, peeling those chickpea skins is the ultimate secret weapon for silkiness.
Q: Can I make this ahead of time?
A: Absolutely! In fact, I recommend it. Making it a day ahead allows the flavors to deepen and marry perfectly. Just store it in an airtight container in the fridge. Give it a good stir and let it sit at room temperature for 15-20 minutes before serving for the best texture and flavor.
Q: How long will pumpkin hummus last in the fridge?
A: It will stay fresh and delicious for up to 5 days. Just keep it covered. You might see a little liquid separate on top—that’s totally normal. Just give it a quick stir and it’s good to go.
Q: Is there a substitute for tahini? I have a sesame allergy.
A> For sure! Sunflower seed butter is your best bet—it has a similar nutty, rich flavor and creamy texture. Just make sure it’s the unsweetened, natural kind.
Pumpkin Hummus
Description
Fall is all about cozy flavors and soul-warming dishes, and this Pumpkin Hummus is the perfect example. Creamy, smooth, and lightly spiced, it’s a fun twist on classic hummus with a subtle sweetness from pumpkin and a touch of warm spices like cumin, cinnamon, and smoked paprika. Perfect as a snack, party dip, or sandwich spread!
Ingredients
-
1 can (15 oz) chickpeas, drained and rinsed
-
1 cup roasted pumpkin or canned pumpkin purée (100% pure)
-
2 tbsp tahini
-
2 tbsp olive oil (plus extra for drizzling)
-
2 tbsp fresh lemon juice
-
1 clove garlic, minced
-
1 tsp ground cumin
-
½ tsp smoked paprika
-
½ tsp cinnamon
-
Salt and black pepper, to taste
-
2–3 tbsp water (to thin, if needed)
-
Optional garnish: toasted pumpkin seeds, extra olive oil, sprinkle of smoked paprika
Instructions
-
Prep Pumpkin (if using fresh):
Preheat oven to 400°F (200°C). Halve a small sugar pumpkin, scoop out seeds, place cut-side down on a parchment-lined baking sheet, and roast 45 minutes or until tender. Scoop 1 cup flesh and cool. -
Combine Ingredients:
In a food processor, add chickpeas, pumpkin, tahini, olive oil, lemon juice, garlic, cumin, smoked paprika, cinnamon, salt, and pepper. -
Blend Until Smooth:
Process for 1–2 minutes, stopping to scrape sides as needed. -
Adjust Consistency:
With the processor running, add water 1 tbsp at a time until creamy and dippable. -
Taste & Adjust:
Add more salt, lemon, or spices to taste. Blend briefly to combine. -
Chill (Optional but Recommended):
Refrigerate for at least 30 minutes for flavors to meld. -
Serve:
Spoon into a bowl, swirl the top with a spoon, drizzle with olive oil, and sprinkle with pumpkin seeds and paprika. Serve with pita chips, fresh veggies, crackers, or apple slices.
Notes
-
Silky Smooth: For ultra-smooth hummus, peel chickpeas before blending.
-
Spicy Kick: Add ¼ tsp cayenne or 1 tbsp chopped chipotle in adobo.
-
Herbaceous Twist: Blend in fresh herbs like rosemary, sage, or thyme.
-
Sweet & Savory: Drizzle with maple syrup and sprinkle toasted walnuts.
-
Substitute: Butternut squash purée works 1:1 if pumpkin isn’t available.
-
Tahini-Free: Use sunflower seed butter if allergic to sesame.
Nutrition
- Calories: 120Cal per ¼ cup serving
- Fat: 6g
- Carbohydrates: 12g
- Fiber: 3g
Nutritional Info (Because We Care!)
While we’re all about flavor first at Feastical, it’s always nice to know you’re eating something that’s good for you, too! This pumpkin hummus is packed with nutrients. Chickpeas are a fantastic source of plant-based protein and fiber, which helps keep you full and satisfied. Pumpkin is loaded with Vitamin A (great for eye health) and antioxidants. The olive oil provides those wonderful heart-healthy fats.
Per serving (approx. ¼ cup):
Calories: ~120 | Fat: 6g | Carbs: 12g | Fiber: 3g | Sugar: 2g | Protein: 4g
Remember, these are estimates and can vary based on your specific ingredients and portions. But overall, it’s a wholesome, nutrient-dense snack you can feel great about enjoying.
Final Thoughts
Well, there you have it, friends—my go-to recipe for the creamiest, most flavorful Pumpkin Hummus that’s sure to become a new fall tradition in your home. It’s more than just a dip; it’s a conversation starter, a crowd-pleaser, and a testament to the fact that the best food often comes from a place of fun and a little bit of fearless experimenting in the kitchen.
I hope you love making it (and eating it!) as much as I do. If you give it a try, be sure to tag me @Feastical on social media—I love seeing your creations! Now, go forth, spread the pumpkin love, and remember: always make time for a good snack.
Cranberry & Brie Tartlets
Let’s Make Some Magic: Cranberry & Brie Tartlets
Hey friends, Beau here! Can you smell it? That crisp, festive air is starting to swirl, and you know what that means—it’s officially party season. And whether you’re hosting the big family feast, heading to a friend’s potluck, or just treating yourself to a fancy little snack, every celebration needs a show-stopping appetizer. The kind that makes folks’ eyes light up the second the platter hits the table. The kind that looks like you fussed for hours but secretly comes together in a beautiful, flaky, cheesy flash. That, my friends, is where these Cranberry & Brie Tartlets come in.
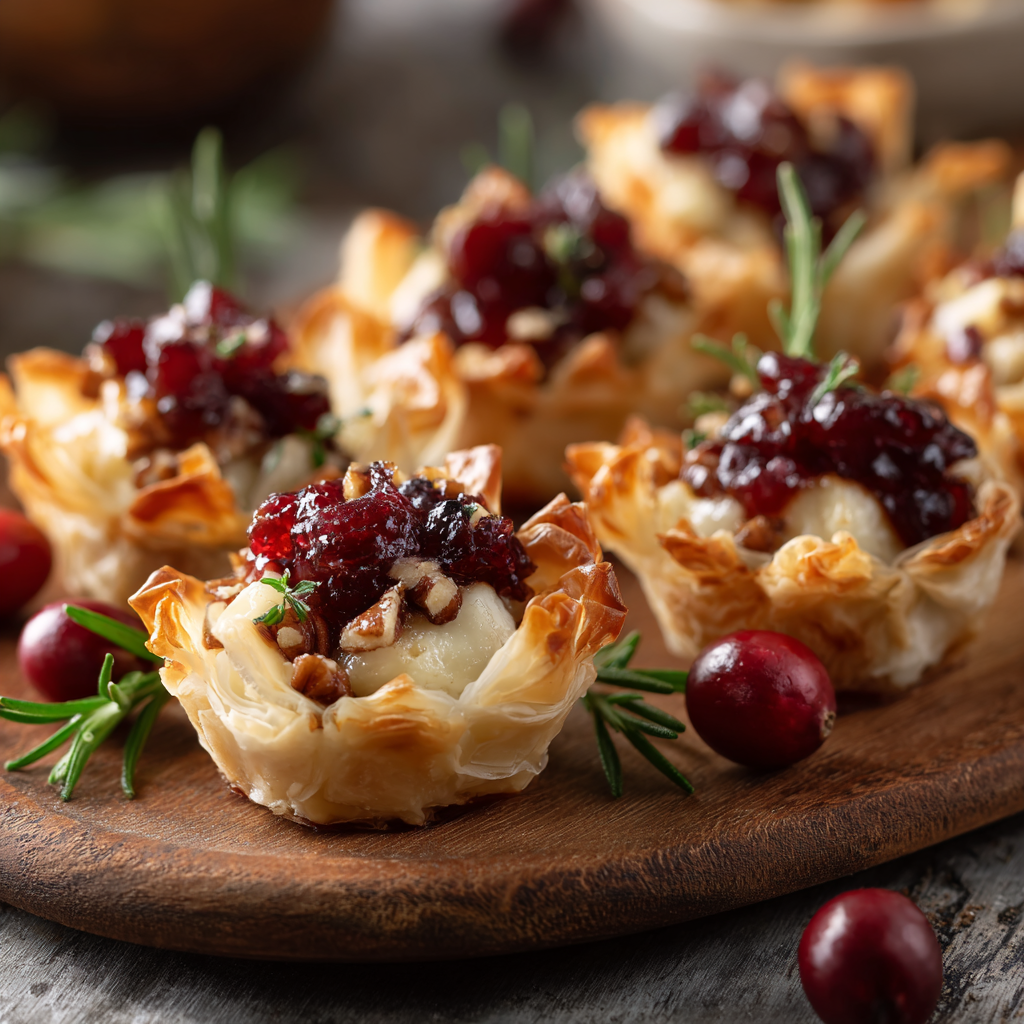
Imagine this: a delicate, buttery phyllo cup, cradling a pocket of luxuriously melted, creamy brie. On top, a dollop of sweet-and-tart cranberry sauce that just *pops* with flavor, and maybe a little crunch from some toasted pecans. You pick one up, still warm from the oven, and in one perfect bite, you get that incredible combo of crispy, creamy, sweet, and savory. It’s a flavor and texture party, and everyone’s invited. These little bites are my absolute go-to for the holidays because they are foolproof, endlessly customizable, and disappear from the plate faster than you can say “Happy Holidays!” So, preheat that oven, grab your favorite baking sheet, and let’s create some bite-sized magic together.
A Tartlet Tradition is Born
I’ll never forget the first time I threw these together. It was years ago, right before a last-minute Friendsgiving potluck. You know the drill—you’re scrambling through the pantry, hoping inspiration strikes. I found a lonely box of phyllo cups, a wedge of brie that was begging to be used, and a jar of cranberry sauce left over from a test recipe. In a moment of “what’s the worst that could happen?” genius, I assembled them and popped them in the oven.
The result was nothing short of legendary. They were the first platter to be completely emptied, and I spent the rest of the night giving out the “recipe.” What started as a kitchen Hail Mary has now become a non-negotiable tradition. For me, the smell of these tartlets baking—that warm, cheesy, berry-scented aroma—is the official smell of the holidays. It’s a little reminder that the best creations often come from a place of fun, experimentation, and a desire to bring people together over seriously good food.
Gathering Your Tartlet Toolkit
Here’s the beautiful part: you only need a handful of simple, high-quality ingredients to make these tartlets sing. Let’s break them down.
- 1 package (15-count) phyllo shells: These are the little edible vessels for our delicious cargo! You’ll find them in the freezer section near the desserts. They’re pre-formed and ready to go, which is the ultimate kitchen hack. Chef’s Insight: Keep them frozen until you’re ready to use them to ensure they stay crisp and don’t get soggy.
- 6 oz brie cheese, rind removed, cut into small cubes: The star of the show! Brie melts into this incredible, creamy pool of goodness. Substitution Tip: If you’re not a brie fan, camembert works beautifully. And about the rind—it’s totally edible, but for a smoother melt in these small bites, I prefer to remove it.
- ½ cup cranberry sauce (homemade or store-bought): This is where the tangy magic happens. Chef’s Insight: If using store-bought, I often jazz it up with a squeeze of fresh orange juice or a pinch of orange zest to brighten it up. Whole-berry sauce gives a great texture, but jellied works just fine too!
- 2 tbsp chopped pecans or walnuts (optional): A little sprinkle adds a wonderful toasty, crunchy contrast. Substitution Tip: Not a nut family? Totally fine to leave them out. For a different crunch, try a sprinkle of crispy fried onions or even a few pomegranate arils for a juicy burst.
- Fresh rosemary or thyme sprigs for garnish: Don’t skip this! A tiny herb leaf not only makes them look professionally gorgeous but also adds a whisper of earthy, fresh flavor that cuts through the richness perfectly.
Let’s Build These Bites: A Step-by-Step Guide
Alright, team, let’s get our hands (gently) dirty. This process is so simple it’s almost magical. Here’s exactly how to nail it.
Step 1: Preheat & Prep. First things first, get that oven heating to a cozy 350°F (175°C). This is the perfect temperature to gently melt the brie and warm the phyllo without burning those delicate shells. While it’s warming up, line a baking sheet with your phyllo cups. Give them a little space—they don’t need much, but they appreciate the breathing room. Chef’s Hack: If your shells feel a bit soft straight from the box, you can pop the empty shells in the oven for 2-3 minutes to crisp up before filling. This creates a extra-sturdy barrier against sogginess!
Step 2: The Cheese Please. Take your cubes of rind-free brie and place one neatly inside each phyllo cup. You want a nice, hearty cube that will melt into a generous cheesy pool. Don’t be shy! Chef’s Tip: If the brie is too soft to cube neatly, pop it in the freezer for about 15 minutes. It will firm up beautifully and make slicing a breeze.
Step 3: Crown It With Cranberry. Now, take your cranberry sauce and give it a good stir if it’s separated. Using a small spoon (a ¼ teaspoon measuring spoon is perfect for this!), carefully place a dollop of the saucy goodness right on top of the brie cube. You don’t want to overfill it and risk a sticky, leaky mess in the oven. Just a cute little red hat for your cheese.
Step 4: The Nutty Finale (Optional). If you’re going the nut route, now’s the time! Sprinkle a few pieces of your chopped pecans or walnuts over the cranberry layer. This adds that final textural element and a lovely toasty flavor.
Step 5: Bake to Bubbly Perfection. Slide that baking sheet into your preheated oven and let the magic happen. This should take about 8 to 10 minutes. You’re looking for the cheese to be completely melted and gloriously bubbly, and the edges of the phyllo to turn a beautiful golden brown. Chef’s Hack: Keep a close eye after the 8-minute mark! Ovens can vary, and phyllo goes from perfectly golden to burnt in a flash.
Step 6: Garnish & Serve Immediately. The most important step! As soon as they’re out of the oven, immediately garnish with those tiny fresh herb leaves. The residual heat will release their amazing aroma. Serve these beauties warm. They are best enjoyed fresh from the oven when the cheese is still gooey and the shell is crisp.
How to Serve Your Masterpieces
Presentation is part of the fun! You’ve created these gorgeous, jewel-like appetizers, so let’s show them off. I love to arrange them on a simple white platter or a beautiful piece of slate—something that really lets their red-and-gold colors pop. Place a few extra sprigs of rosemary around the platter for a festive touch.
Because the cheese sets up as they cool, these are truly a “serve immediately” situation. I like to have my guests gathered ’round the kitchen island so I can transfer them straight from the baking sheet to the platter and into their waiting hands. The sound of happy murmurs after that first bite is the best review a chef can get! Pair them with a glass of sparkling prosecco, a crisp white wine, or even a festive cocktail. They’re rich, so a bubbly or acidic drink helps cleanse the palate perfectly.
Get Creative: Tartlet Twist Ideas
The basic formula is a masterpiece, but feel free to play with it! Here are a few of my favorite ways to mix things up.
- Thanksgiving Leftover Style: Chop up a little bit of leftover turkey and add a tiny piece under the brie before baking. Finish with a tiny drizzle of gravy after baking. Seriously!
- Fig & Goat Cheese: Swap the brie for a small piece of creamy goat cheese and replace the cranberry sauce with a spoonful of fig jam. Garnish with a tiny piece of prosciutto for a salty kick.
- Apple Pie Twist: Use a small cube of sharp cheddar cheese and top with a dollop of spiced apple butter or finely diced sautéed apples. A sprinkle of cinnamon on top is divine.
- Savory Herb: Skip the sweet and go savory. Fill with herbed goat cheese and top with a sliver of sun-dried tomato and a fresh basil leaf after baking.
- Spicy Kick: Add a thin slice of jalapeño on top of the brie before the cranberry for a sweet-and-spicy combination that will wake up your taste buds.
From My Kitchen to Yours: Chef’s Notes
Over the years, I’ve made approximately a zillion of these tartlets (slight exaggeration, but you get it). I’ve learned a few things. First, always buy an extra box of phyllo cups. They are notoriously fragile, and you’ll always have a few casualties in the box. Plus, it’s better to have too many than not enough—the filling is easy to scale up! Second, embrace the mess. Sometimes the cheese bubbles over, sometimes the cranberry drips. It’s okay! It just shows they’re made with love (and it all tastes the same). This recipe has evolved from a last-minute fix into a beloved staple, and I hope it becomes one for you, too. The best part is how it gets everyone gathered in the kitchen, waiting for the next batch. That’s the real magic.
Your Questions, Answered!
Q: Can I make these ahead of time?
A: You can *assemble* them ahead of time! Up to a few hours before your party, fill the shells and keep them covered in the fridge. Hold off on baking until your guests arrive. This prevents the phyllo from getting soggy. Do not freeze assembled tartlets.
Q: My phyllo shells got soggy. What happened?
A: Sogginess is usually caused by two things: 1) The filling was too wet, or 2) They weren’t eaten immediately. Using thicker cranberry sauce (not runny) and that pre-baking trick for the empty shells can help create a barrier. But remember, they are best right out of the oven!
Q: Can I use a different cheese?
A: Absolutely! Brie is classic, but other soft, melty cheeses work wonderfully. Camembert is a direct substitute. For a stronger flavor, try a soft goat cheese. For a more stretchy, savory vibe, a small cube of mozzarella could be fun!
Q: How do I keep them warm for a party?
A: Bake them in batches! Since they only take 10 minutes, I’ll often do one tray to put out right away and have a second tray assembled and ready to pop in the oven 15 minutes later. You can also keep them warm on a warming tray or in a low oven (200°F) for a very short period, but they are so quick to bake fresh it’s usually easier to just do multiple rounds.

Cranberry & Brie Tartlets
Description
Crispy, golden phyllo cups filled with creamy brie, topped with tangy cranberry sauce and a sprinkle of toasted pecans—these tartlets are the holiday appetizer everyone will rave about. They’re festive, elegant, and shockingly easy to make in just minutes. Perfect for parties, potlucks, or cozy nights with a glass of bubbly, they’re guaranteed to vanish as soon as they hit the table.
Ingredients
-
1 package (15-count) frozen phyllo shells
-
6 oz brie cheese, rind removed, cut into cubes
-
½ cup cranberry sauce (whole-berry or jellied)
-
2 tbsp chopped pecans or walnuts (optional)
-
Fresh rosemary or thyme leaves, for garnish
Instructions
-
Prep: Preheat oven to 350°F (175°C). Arrange phyllo shells on a baking sheet.
-
Fill: Place a cube of brie in each shell. Top with ½–1 tsp cranberry sauce.
-
Add Crunch: Sprinkle with pecans or walnuts, if using.
-
Bake: 8–10 minutes, until brie is melted and shells are golden.
-
Finish: Garnish with fresh rosemary or thyme. Serve immediately while warm and gooey.
Nutrition
- Calories: 70 Cal per tartlet
- Sugar: 3g
- Fat: 4g
- Carbohydrates: 6g
Nutritional Information (Approximate, Per Tartlet)
Let’s be real—these are a treat, and that’s okay! It’s all about balance. Here’s a rough breakdown of what’s in each delicious bite. Remember, these values can vary based on the specific brands of ingredients you use, especially the cranberry sauce (jellied vs. whole berry, sugar content) and the type of nuts.
- Calories: ~70
- Total Fat: 4g
- Carbohydrates: 6g
- Protein: 2g
- Sugar: 3g
To lighten them up slightly, you could use a light brie cheese (if you can find it) and opt for a reduced-sugar cranberry sauce. The pecans add healthy fats and a bit of protein, but you can omit them to save a few calories. But hey, it’s the holidays. Enjoy a few without guilt!
Final Thoughts
Well, that’s it, folks! Your complete guide to creating the easiest, most impressive appetizer of the season. I hope this recipe brings as much joy to your table as it has to mine. Remember, cooking isn’t about being perfect; it’s about creating moments and memories. These little tartlets are a perfect way to do just that. They’re a conversation starter, a crowd-pleaser, and a testament to the fact that the best food is often the simplest.
So from my kitchen at Feastical to yours, I wish you a season filled with delicious food, great company, and plenty of warm, cheesy, cranberry-filled hugs. Now, go preheat that oven and get your party started! And if you make them, I’d love to see your creations. Tag me @feastical on social media so I can share in the fun. Happy cooking!
Southern Maple Sweet Potato Casserole (Double Batch + Soulful Twists)
Your New Holiday Showstopper: Southern Maple Sweet Potato Casserole
Hey there, friends! Beau here from Feastical, and let me tell you, I can practically smell the holidays already. It’s that magical time of year where ovens are working overtime, kitchens are filled with laughter (and maybe a little bit of flour dust), and the table is packed with dishes that feel like a warm, edible hug. And right at the center of it all? A dish that’s so much more than a side—it’s a conversation piece, a memory-maker, and quite possibly the first thing to disappear from the buffet line.
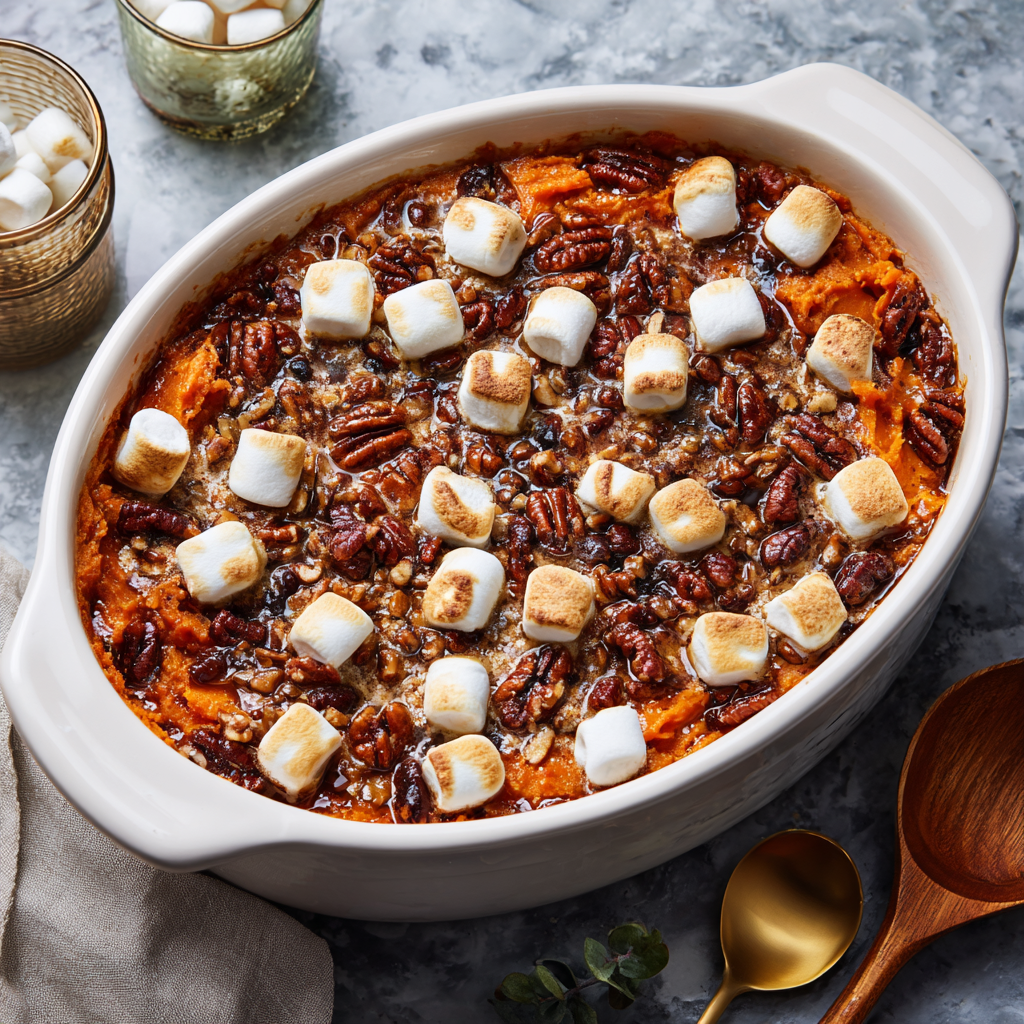
I’m talking about my Southern Maple Sweet Potato Casserole. This isn’t your average, run-of-the-mill recipe. We’re taking creamy, dreamy sweet potatoes and giving them a serious upgrade with rich maple syrup, cozy spices, plump raisins, and a crown of toasted marshmallows and crunchy, maple-glazed pecans. It’s a symphony of textures and flavors in every single bite. I’ve crafted this as a double batch because, trust me, you’ll want leftovers. This casserole is the star of the holiday table, the perfect potluck contribution, and honestly, it’s decadent enough to eat as dessert. So, preheat those ovens and grab your favorite mixing bowl—we’re about to create something truly special together.
The Story Behind The Sweetness
This recipe takes me right back to my grandma’s bustling kitchen. Every Thanksgiving, she’d have what seemed like a dozen dishes going at once, but her sweet potato casserole was her pride and joy. She’d let me be her official “taste-tester,” and I’d stand there, spoon in hand, waiting for her to nod approvingly after a final sprinkle of cinnamon. Her version was classic and simple, but it had so much heart. One year, I decided to put my own spin on it. I swapped the canned syrup for the real, pure maple stuff I’d discovered on a trip to Vermont, added a handful of raisins I’d soaked in orange juice for a burst of tangy sweetness, and went a little overboard with the pecans. When I brought it to the table, my grandma took one bite, her eyes lit up, and she said, “Well, Beau, you’ve outdone yourself.” That moment, that approval from the queen of the kitchen herself, is baked right into this recipe. It’s a beautiful blend of tradition and a little bit of my own culinary mischief.
Gathering Your Casserole Crew: The Ingredients
Here’s the dream team that makes this casserole so unforgettable. Don’t be intimidated by the list—it’s mostly pantry staples, and I’ve got plenty of tips and swaps for you!
- 8 large sweet potatoes, peeled and cubed: The star of the show! Look for firm potatoes with smooth skin. Pro Chef Tip: Cubing them before roasting ensures they cook evenly and quickly, giving them a deeper, caramelized flavor compared to boiling.
- 4–5 tbsp extra virgin olive oil: For roasting. It helps the spices stick and creates those delicious, crispy edges.
- 2 tsp ground cinnamon + 1 tsp ground nutmeg (for roasting): We’re building layers of flavor right from the start. Toasting these spices with the potatoes wakes up their essential oils and makes them incredibly fragrant.
- 1 cup almond milk (or dairy of choice): This adds creaminess. I love the slight nutty flavor of almond milk here, but whole milk, oat milk, or even canned coconut milk for a tropical twist work beautifully.
- 4 tsp vanilla extract: A non-negotiable for depth of flavor. Use the real stuff, not imitation!
- 8 tbsp (1 stick) unsalted butter, cubed: For rich, velvety texture and that classic, comforting buttery taste. Salted butter works too; just maybe ease up on any added salt later.
- ⅔ cup organic brown sugar: Adds a deep, molasses-like sweetness that pairs perfectly with maple.
- ½ cup pure maple syrup: The co-star! Please, for the love of all things holy, use real maple syrup. The fake pancake stuff just won’t give you the same complex, autumnal flavor.
- 2 tsp ground cinnamon + ¼ tsp ground nutmeg + Pinch of ground allspice (for filling): The spice brigade, part two! This is where the warm, soulful flavor profile really comes to life.
- 2 cups organic raisins, soaked and drained: I highly recommend soaking them in warm water or orange juice for 10-15 minutes before using. It plumps them up, making them juicy little flavor bombs instead of dry, chewy bits.
- 4 cups mini marshmallows: For that iconic, gooey, toasted topping. They’re fun and nostalgic!
- 3 cups raw pecans: For the crunchy, nutty topping. You can use walnuts if you prefer, but pecans are the classic Southern choice.
- ½ cup pure maple syrup (for topping): To glaze the pecans and make them irresistibly sticky and sweet.
- Optional: ½ tsp flaky sea salt / zest of 1 orange / splash of bourbon: My “pro” twists! The sea salt creates an amazing sweet-salty contrast, the orange zest adds a bright, citrusy note that cuts through the richness, and a splash of good bourbon adds a wonderful, warm depth.
Let’s Get Cooking: Building Your Casserole Masterpiece
Okay, team, let’s do this! Follow these steps, and you’ll have a flawless casserole. I’m walking you through every bit of it.
- Preheat & Prep: Fire up your oven to 400°F (205°C). While it’s heating, peel and cube those sweet potatoes into roughly 1-inch chunks. The more consistent the size, the more evenly they’ll roast. Toss them in a large bowl with the olive oil, cinnamon, and nutmeg. Chef Hack: Lining your baking sheet with parchment paper makes cleanup an absolute breeze.
- Roast to Perfection: Spread the spiced potatoes in a single layer on your prepared baking sheet. Roast for 25-30 minutes, or until they are fork-tender and have some beautiful caramelized spots. Roasting instead of boiling is our secret weapon—it concentrates their natural sweetness!
- Mash and Mix: Reduce your oven temp to 350°F (175°C). Transfer the tender, fragrant sweet potatoes to a very large mixing bowl. Mash them until smooth with a potato masher or a hand mixer. Now, add in the milk, cubed butter, brown sugar, ½ cup maple syrup, the second round of spices, and vanilla. Mix everything until it’s gloriously smooth and well-combined. Fold in those plumped-up, drained raisins. Chef Commentary: Don’t be shy here—mix with love! This is the heart of your casserole.
- Assemble with Flair: Grease a 9×13 inch baking dish (or a larger one if you have it—this is a double batch!). Spread the sweet potato filling evenly into the dish. Now, create a beautiful, even layer of mini marshmallows over the entire surface.
- Create the Topping: In a medium bowl, toss the raw pecans with the remaining ½ cup of maple syrup until they’re all nicely coated. Sprinkle this sticky, nutty goodness all over the marshmallow layer. If you’re using it, now’s the time for a light sprinkle of flaky sea salt over the top.
- The Final Bake: Pop the uncovered dish into your 350°F oven for 25-30 minutes. You’re waiting for a spectacular transformation: the marshmallows should be golden brown and puffy, the pecans should be fragrant and toasted, and the edges should be bubbly. Pro Tip: Keep a close eye on it for the last 10 minutes! Marshmallows can go from perfectly golden to sadly scorched in a flash.
How to Serve This Beauty
Patience is a virtue, but I know it’s hard! Let the casserole rest for about 10 minutes after pulling it from the oven. This allows it to set just enough so you can get a clean scoop. Use a large spoon to serve up generous portions, making sure everyone gets a bit of that gooey marshmallow top, those crunchy pecans, and the creamy filling. This casserole is a powerhouse side dish that pairs perfectly with all your holiday classics: roasted turkey, honey-glazed ham, or even a hearty vegetarian wellington. For a next-level experience, serve it with a dollop of freshly whipped cream or a scoop of vanilla bean ice cream on the side—trust me on this one.
Make It Your Own: Delicious Twists & Swaps
This recipe is incredibly versatile. Feel free to play around and make it suit your taste!
- Bourbon-Spiked: For a grown-up twist, add 2-3 tablespoons of good bourbon to the filling when you mix in the wet ingredients. It adds a wonderful warmth and complexity.
- Tropical Escape: Swap the raisins for dried pineapple or mango chunks. Use coconut milk instead of almond milk and add a handful of toasted coconut flakes to the pecan topping.
- Nut-Free & Still Crunchy: Have an allergy? No problem! Replace the pecans with a crunchy oat streusel topping. Mix 1 cup rolled oats, ½ cup brown sugar, ¼ cup flour, and ½ cup melted butter. Sprinkle it over the marshmallows before baking.
- Less Sweet, More Savory: Cut the brown sugar down to ⅓ cup and omit the marshmallows. Top with the maple pecans for a sophisticated side that’s still full of flavor but less dessert-like.
- Apple Pie Vibe: Fold in a cup of finely diced, peeled apples (like Granny Smith) into the filling for little pockets of tartness and texture.
Beau’s Chef Notes & Kitchen Tales
This recipe has seen a few… experiments over the years. One memorable Thanksgiving, I was chatting away and completely forgot I had the pecans toasting on the stove. Let’s just say I created “Cajun-Style” charcoal pecans and had to frantically send my cousin to the store for more! Another time, I tried to be fancy and make my own marshmallows. They melted into a single, sticky lake on top. Delicious, but not exactly the look I was going for. Stick with the mini ones—they’re foolproof! The beauty of this dish is its forgiving nature. It’s hard to mess up, and even my “mistakes” have usually been happily eaten. It’s evolved from my grandma’s simple version to this loaded, flavor-packed masterpiece, and I hope it becomes a tradition in your home, too.
Your Questions, Answered!
Q: Can I make this casserole ahead of time?
A: Absolutely! You can roast the potatoes and mix the filling (without the marshmallow and pecan topping) up to 2 days in advance. Keep it covered in the fridge. When you’re ready to bake, let it sit at room temp for 30 minutes, add your toppings, and bake. You might need to add 5-10 minutes to the baking time since it’s starting from cold.
Q: My casserole is too watery! What happened?
A: This usually happens if the sweet potatoes are boiled instead of roasted (they absorb water) or if you used a milk alternative that is very thin. The fix? You can mix a tablespoon of cornstarch with a tablespoon of cold milk and stir it into your filling before assembling to help thicken it up.
Q: How do I prevent the marshmallows from burning?
A: The key is positioning your oven rack in the center, not too close to the top heating element. If you see the top browning too quickly, you can loosely tent the dish with aluminum foil for the remainder of the baking time.
Q: Can I freeze leftovers?
A: The texture of the marshmallows and potatoes can change a bit after freezing and thawing, becoming a bit softer. It will still taste great, but for the best experience, I recommend enjoying it fresh!

Southern Maple Sweet Potato Casserole (Double Batch + Soulful Twists)
- Total Time: 55 minutes
Description
Creamy roasted sweet potatoes, kissed with maple syrup and warm spices, topped with gooey marshmallows and maple-glazed pecans—this casserole is a holiday masterpiece. It’s indulgent, nostalgic, and absolutely irresistible. Whether it’s Thanksgiving, Christmas, or a cozy Sunday feast, this dish will steal the show and probably be the first thing gone from the table.
Ingredients
Sweet Potato Filling
-
8 large sweet potatoes, peeled & cubed
-
4–5 tbsp olive oil
-
2 tsp cinnamon + 1 tsp nutmeg (for roasting)
-
1 cup almond milk (or milk of choice)
-
8 tbsp unsalted butter, cubed
-
⅔ cup brown sugar
-
½ cup pure maple syrup
-
2 tsp cinnamon + ¼ tsp nutmeg + pinch allspice
-
4 tsp vanilla extract
-
2 cups raisins, soaked & drained
Topping
-
4 cups mini marshmallows
-
3 cups pecans
-
½ cup pure maple syrup
-
Optional: flaky sea salt, orange zest, or splash of bourbon
Instructions
-
Roast Potatoes: Preheat oven to 400°F. Toss sweet potatoes with oil, cinnamon & nutmeg. Roast 25–30 min until caramelized & tender.
-
Mash & Mix: Reduce oven to 350°F. Mash potatoes until smooth. Mix in milk, butter, brown sugar, maple syrup, spices & vanilla. Fold in raisins.
-
Assemble: Spread filling in a greased 9×13 dish. Top with marshmallows.
-
Pecan Glaze: Toss pecans with ½ cup maple syrup. Sprinkle over marshmallows.
-
Bake: 25–30 min until marshmallows are golden and pecans are toasted. Rest 10 min before serving.
Notes
For a grown-up twist, stir 2 tbsp bourbon into the filling before baking—it adds incredible depth and warmth.
- Prep Time: 25 min
- Cook Time: 30 min
Nutritional Information*
Okay, let’s be real—this is a holiday treat, meant to be savored and enjoyed! But for those who like to know, here’s a rough breakdown per serving (based on 16 servings).
- Calories: ~360 kcal
- Carbohydrates: 45g
- Fat: 18g
- Sugar: 28g
- Fiber: 4g
- Protein: 3g
*This is an estimate generated using a nutrition calculator. Values can vary based on specific ingredients and portion sizes. The raisins and sweet potatoes provide a good dose of fiber and vitamins like Vitamin A, while the pecans add healthy fats.
Final Thoughts from My Kitchen to Yours
Well, friends, there you have it—my heart and soul in a casserole dish. This recipe is more than just a list of ingredients; it’s an invitation to create joy, to gather around the table, and to make delicious memories with the people you love. Don’t stress about making it perfect. Embrace the little messes, laugh if you burn the first batch of pecans (like someone I know…), and most importantly, enjoy the process. Cooking is an act of love, and this casserole is full of it. I’d love to hear how it turns out for you! Tag me @Feastical on social media so I can see your beautiful creations. Now, go forth and bake!
With love and a full belly,
Beau

Pecan Pie Brownies
Pecan Pie Brownies: The Ultimate Dessert Mashup You NEED to Make
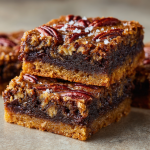
Hey friends, Beau here from Feastical! Let’s get real for a second. You’re staring into your pantry, and you’ve got a serious craving. But it’s a complicated one. Part of you is dreaming of that deep, dark, fudgy chew of a perfect brownie. The other part? It’s whispering sweet nothings about the gooey, buttery, nutty goodness of a classic pecan pie. What if I told you that you don’t have to choose? What if the universe, in its infinite dessert wisdom, designed a treat that combines both of these iconic favorites into one mind-blowing, show-stopping bite?
Well, friends, that day is today. These Pecan Pie Brownies are my absolute go-to when I need to bring a dessert that will genuinely make people’s eyes light up. We’re talking a rich, chocolatey brownie base, topped with a luxurious, sweet, and crunchy pecan pie layer. It’s the best of both worlds, and I’ve designed this recipe as a double batch in a big ol’ sheet pan because, trust me, you’re going to want plenty to share (or, you know, not share… I don’t judge). This is feel-good food at its finest—simple to make but sophisticated in flavor. So, grab your favorite mixing bowl, and let’s create some magic together!
The Thanksgiving That Started It All
This recipe holds a special place in my heart, and it all started with a little kitchen panic a few years back. I was hosting my first big Friendsgiving, and I’d promised both a classic pecan pie and a tray of fudge brownies. But as the day went on, oven space became hotter than a contested parking spot on Black Friday. I had the turkey, the casseroles, the rolls—you name it, it needed to bake. I looked at the pie shell and the brownie mix on the counter and had a true “Aha!” moment. What if I just… combined them?
I quickly whipped up the brownie base, par-baked it, and slathered on my grandma’s pecan pie filling. The result? Pure, unadulterated dessert harmony. The brownie provided a sturdy, fudgy foundation that held up to the gooey topping perfectly. It was an instant hit. The tray was demolished before the coffee was even brewed. That day, I learned that the best recipes often come from a little bit of chaos and a whole lot of heart. Now, it’s not a proper gathering at my place without a pan of these bars.
Gathering Your Ingredients (Let’s Talk Shop!)
Here’s everything you’ll need to create this masterpiece. Remember, baking is part science, part art—so I’ve included my best chef insights and swaps to make it your own.
For the Brownie Base:
- 2 boxes brownie mix (the kind that makes a 13×9 pan each) – Insight: I’m a from-scratch guy 90% of the time, but for a double batch this size, a good quality mix is a fantastic timesaver and delivers consistent results. Look for one labeled “fudgy” or “chocolatey.”
- Eggs, Oil, and Water – As directed on both packages. Pro Tip: Use the amount listed for a “fudgy” texture if the box gives you the option!
For the Pecan Pie Topping:
- 2 cups granulated sugar – This sweetens the deal and helps create that classic pecan pie texture.
- 3 cups light corn syrup – This is the key to that signature gooey, glossy filling. For a deeper flavor, you can substitute 1 ½ cups of it with dark corn syrup or even pure maple syrup.
- 8 large eggs – They bind the whole topping together and give it structure. Make sure they’re at room temperature for a smoother blend!
- ½ cup unsalted butter, melted – Unsalted lets you control the salt level. That rich, buttery flavor is non-negotiable for authenticity.
- 1 tbsp vanilla extract – Don’t be shy! This adds a beautiful warmth that complements the nuts and chocolate.
- 4 cups pecans, roughly chopped – I like a mix of chopped and a few whole halves for texture. Toasting them beforehand (350°F for 5-7 minutes) will unlock an incredible, nutty depth of flavor.
Optional Flavor Twists (Get Creative!):
- 1 tbsp bourbon – My personal favorite add-in. It adds a warm, complex note that cuts the sweetness perfectly.
- ½ tsp cinnamon – A cozy, warming spice that makes it taste like the holidays.
- ½ cup mini chocolate chips – Because more chocolate is always a good idea. Stir these into the pecan mixture.
- Flaky sea salt – A sprinkle on top before baking creates an unforgettable sweet-and-salty contrast.
Let’s Bake: Building Your Dessert Masterpiece
Okay, team! Let’s fire up the oven and get to it. Follow these steps, and you’ll be a hero in no time.
- Preheat and Prep: Crank your oven to 350°F (175°C). This is the sweet spot for baking both layers evenly. Now, take your 13×18-inch sheet pan and line it with parchment paper, leaving some overhang on the sides. This is your secret weapon for easy cleanup and even easier removal of the whole slab of brownies later. Give the parchment a very light spritz with cooking spray—just to be safe.
- Whip Up the Brownie Base: In a large bowl, prepare both boxes of brownie mix according to their package directions. Usually, this means whisking together the mix, eggs, oil, and water until just combined. Chef’s Hack: Do not overmix! A few lumps are totally fine. Overmixing = tough brownies, and we want them fudgy and tender. Pour the beautiful, chocolatey batter into your prepared pan and spread it into an even layer.
- First Bake: Pop the pan into your preheated oven and bake for 20-22 minutes. You’re not looking for a fully baked brownie here. It should just be set on top—meaning if you jiggle the pan, it jiggles just a little, but it’s not liquid anymore. This par-baking is crucial! It gives the brownie a head start so it doesn’t turn into a soupy mess when we add the wet pecan topping.
- Create the Gooey Topping: While the brownie is baking, let’s make the magic. In another large bowl, whisk together the sugar, corn syrup, 8 eggs, melted butter, and vanilla. Whisk until it’s smooth and beautifully golden. If you’re using any of the optional twists like bourbon or cinnamon, whisk them in now. Finally, gently fold in the pecans until they’re all gloriously coated.
- The Big Merge: Once the brownie base is out of the oven (it will be hot!), carefully and slowly pour the pecan mixture over it. Use a spatula to spread it into a perfectly even layer, making sure to get into all the corners. If you’re going for the sea salt sprinkle, now’s the time!
- Final Bake to Perfection: Gently return the loaded pan to the oven. Now, bake for another 30-35 minutes. You’ll know it’s done when the top is a rich golden brown and the center is just set. It might still have a very slight jiggle—that’s okay! It will firm up as it cools. If the pecans look like they’re browning too quickly, you can tent the pan loosely with aluminum foil.
- The hardest part: COOL COMPLETELY. I know, the aroma is killing you. But patience is key here. You must let these brownies cool completely in the pan on a wire rack. This allows the pecan pie layer to set up properly. If you cut into them warm, they’ll be delicious but messy. For clean, beautiful bars, let them cool. I sometimes even pop the whole pan in the fridge for an hour to speed things up!
- Slice and Serve: Once completely cool, use the parchment paper overhang to lift the entire block out of the pan. Place it on a cutting board and use a sharp knife to slice it into bars. For super clean cuts, wipe your knife clean between slices.
How to Serve These Show-Stopping Bars
Presentation is part of the fun! You can keep it simple and let the bars speak for themselves, or you can dress them up for a real “wow” factor.
For a homey, comforting vibe, just stack them on a rustic wooden board or a simple plate. They are plenty rich and beautiful on their own. If you’re feeling fancy, plate them individually. Place a bar on a dessert plate, add a dollop of freshly whipped cream or a scoop of high-quality vanilla bean ice cream. The contrast of the cold cream with the rich, room-temperature bar is divine. For a final flourish, drizzle a little caramel sauce or even a chocolate ganache over the top. A few extra pecan halves and a tiny sprinkle of sea salt make it look like it came from a professional bakery. Perfect for your holiday table, a potluck, or just a Tuesday night treat!
Mix It Up! Delicious Variations to Try
The basic recipe is a total winner, but part of the joy of cooking is making it your own. Here are a few of my favorite twists:
- The Salted Caramel Swirl: Before adding the pecan topping, drizzle ½ cup of warm caramel sauce over the par-baked brownie base. Use a knife to swirl it gently into the brownie, then proceed with the recipe. The caramel ribbons take it to another level.
- The Chocolate Lover’s Dream: Stir ½ cup of mini chocolate chips into the pecan pie filling itself. You get little pockets of melted chocolate in every bite. You could also use white chocolate chips for a fun contrast.
- The Bourbon Pecan: This is my personal favorite. Add that tablespoon of good bourbon to the pecan filling. It adds a wonderful depth and warmth that makes the flavor so much more complex.
- The “Healthier” Swap: For a slightly less sweet version, you can replace one cup of the corn syrup with pure maple syrup. The flavor will be deeper and more nuanced.
- The Nut-Free Version: Not a fan of pecans? Swap them out for a different nut! Walnuts are a classic substitute and work beautifully here.
Beau’s Chef Notes & Kitchen Stories
This recipe has evolved so much since that first frantic Friendsgiving. I’ve learned that toasting the pecans is an absolute game-changer—it adds a nuttiness that raw pecans just can’t match. I also started using the parchment paper sling after one… unfortunate… incident where I tried to cut them in the pan and scratched my brand new sheet pan to oblivion. Learn from my mistakes!
The beauty of this dessert is its forgiving nature. Even if your layers mix a little at the edges, it still tastes incredible. It’s a hug in dessert form—a little messy, not always perfect, but always, always filled with love. Don’t stress about making it flawless. Just enjoy the process and the incredible results.
FAQs & Troubleshooting: Your Questions, Answered
Q: My pecan pie layer is super runny even after cooling. What happened?
A: The most common culprit is underbaking. Make sure you bake it until the center is just set with only a slight jiggle. Also, it MUST cool completely to room temperature to set properly. If you’re in a humid environment, chilling them in the fridge will help firm them up beautifully.
Q: Can I make these ahead of time?
A: Absolutely! In fact, I think they taste even better the next day. Once completely cool, store them in an airtight container at room temperature for up to 2 days, or in the fridge for up to 5 days. They also freeze wonderfully for up to 3 months. Just thaw at room temperature.
Q: Can I use a homemade brownie recipe instead of a mix?
A: You sure can! You’ll need a homemade recipe designed for a 13×18-inch half-sheet pan (which is a lot of batter!). Make sure it’s a fudgy, dense brownie recipe, not a cakey one, so it can support the heavy topping.
Q: The top is browning too fast! Help!
A: Ovens can vary. If the pecans are getting too dark before the center is set, simply tent the entire pan loosely with a piece of aluminum foil. This will shield the top and allow the center to continue cooking without burning.
Pecan Pie Brownies
- Total Time: 1 hour 15 minutes
Description
Why choose between gooey pecan pie and fudgy brownies when you can have both? These bars are the perfect marriage of rich chocolate and nutty, buttery caramel goodness. Born out of a Thanksgiving kitchen crunch, this recipe has become a show-stopper at gatherings—easy to make, impossible to resist, and guaranteed to disappear fast.
Ingredients
Brownie Base
-
2 boxes brownie mix (13x9 each, “fudgy” style)
-
Eggs, oil & water (per package directions)
Pecan Pie Topping
-
2 cups granulated sugar
-
3 cups light corn syrup (or swap half with dark corn syrup or maple syrup)
-
8 large eggs, room temperature
-
½ cup unsalted butter, melted
-
1 tbsp vanilla extract
-
4 cups pecans, roughly chopped (toast for deeper flavor)
Optional Twists
-
1 tbsp bourbon
-
½ tsp cinnamon
-
½ cup mini chocolate chips
-
Flaky sea salt for topping
Instructions
-
Prep Pan & Oven: Heat oven to 350°F. Line a 13×18 sheet pan with parchment, leaving overhang. Lightly grease.
-
Mix Brownies: Prepare batter as directed. Spread evenly in pan.
-
Par-Bake: Bake 20–22 min, until just set on top but still soft inside.
-
Make Pecan Mix: Whisk sugar, corn syrup, eggs, butter, and vanilla until smooth. Stir in pecans (plus any optional twists).
-
Layer: Pour pecan mix evenly over hot brownie base.
-
Final Bake: Bake 30–35 min until golden and just set in center. Tent with foil if browning too quickly.
-
Cool Completely: Let set at room temp (or chill) before slicing for clean cuts.
-
Serve: Cut into bars. Top with whipped cream, ice cream, or caramel drizzle if you’re feeling fancy.
Notes
For bakery-style flair, sprinkle flaky sea salt before baking or swirl in caramel for ribbons of extra indulgence.
- Prep Time: 20 min
- Cook Time: 55 min
Nutrition
- Calories: ~380 kcal per bar
- Sugar: 40g
- Fat: 18g
Nutritional Information (Because Knowledge is Power!)
Okay, let’s be real—this is a decadent dessert, meant to be enjoyed as a treat! Here’s a rough breakdown per bar (assuming you get 24 generous bars from the pan). Remember, these are estimates and can vary based on the specific ingredients and brands you use.
- Calories: ~380 kcal
- Carbohydrates: 50g
- Fat: 18g
- Sugar: 40g
- Protein: 4g
To make them a tad lighter, you can use the maple syrup swap mentioned above and reduce the sugar by ¼ cup. But sometimes, you just gotta live a little!
Final Thoughts from My Kitchen to Yours
Well, there you have it, my foodie friends—my all-time favorite dessert mashup that never fails to bring joy. These Pecan Pie Brownies are more than just a recipe; they’re a conversation starter, a memory maker, and the ultimate comfort food. They prove that the best things in life often come from combining simple, beloved flavors into something new and extraordinary.
I hope you’ll give this recipe a try for your next gathering (or, hey, just for yourself!). If you do, I’d love to hear about it. Tag me @Feastical on social media so I can see your beautiful creations. Now, go preheat that oven, and let’s get baking! Until next time, keep your kitchen messy and your heart full.
With love and a full belly,

Caramel Apple Dip (3-Layer Fall Favorite)
Your New Go-To Fall Party Trick: 3-Layer Caramel Apple Dip
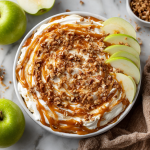
Hey friends, Beau here from Feastical! Can you feel it? That crisp, cool air sneaking in, the leaves starting to put on their fiery show, and that undeniable urge to cozy up with something sweet, spiced, and utterly delicious. If your soul is craving the taste of a caramel apple straight from the county fair but your schedule is shouting “make it quick!”, I have the absolute perfect recipe for you. Welcome to my legendary 3-Layer Caramel Apple Dip.
This isn’t just any dip; it’s a textural masterpiece and a total crowd-pleaser. Imagine this: a velvety, slightly tangy cream cheese base, a river of rich, gooey caramel, all crowned with a crunchy, buttery toffee blanket. You scoop it up with a crisp, tart apple slice and… boom. Taste bud heaven. It’s the flavor of autumn in a dish, and it comes together in about 10 minutes flat. Seriously, it’s almost too easy to be this good. Whether you’re hosting game day, heading to a potluck, or just treating yourself to a fabulous fall snack, this dip is your secret weapon. So, let’s grab our bowls and make some magic happen!
The County Fair & A Dip That Steals the Show
This recipe always takes me right back to my childhood, standing in a crowded field at the fall fair, the smell of fried dough and popcorn hanging in the air. My mission back then was singular: find the vendor with the biggest, shiniest caramel apples. You know the ones—coated in a thick, crackly shell of caramel, sometimes rolled in nuts, always threatening to pull a loose tooth out with the first glorious bite. It was a messy, sticky, and completely perfect ritual.
Years later, I wanted to capture that same magic for a friendsgiving party I was hosting. I needed something effortless but impressive, a dish that said “I slaved over this” while secretly knowing I absolutely did not. That’s when the idea for this layered dip was born. It had all the iconic flavors—the sweet caramel, the crisp apple, the crunchy nut topping—but in a shareable, dippable, no-muss-no-fuss format. The moment I set it down on the table, it was gone. I mean, gone. It wasn’t just a hit; it became my most-requested fall recipe. It’s that taste of nostalgic joy, made easy enough to enjoy any day of the week.
Gathering Your Dip Dream Team
Part of what makes this recipe so brilliant is its simplicity. You only need a handful of ingredients to create something truly spectacular. Here’s what you’ll need and my little chef insights on each one.
- 8 oz Cream Cheese, softened: This is the foundation, the creamy canvas for our masterpiece. Full-fat is key here for that luxuriously rich and smooth texture. Let it sit on the counter for a good 30-45 minutes before you start. If it’s too cold, you’ll end up with a lumpy base, and we’re going for cloud-like fluffiness! For a lighter version, Neufchâtel cheese works beautifully.
- ¼ cup Powdered Sugar: Unlike granulated sugar, powdered sugar dissolves instantly and helps sweeten and stabilize our cream cheese layer without any grittiness. It’s the perfect sweetener for no-bake recipes like this.
- ½ tsp Vanilla Extract: Don’t skip this! A good quality vanilla adds a warm, complex depth that makes the cream cheese layer taste like cheesecake filling. It’s the secret flavor booster.
- 1 cup Caramel Sauce or Dip: This is the star of the show! You can use a high-quality store-bought jar (I won’t tell!), or if you’re feeling fancy, my easy homemade caramel sauce is incredible here. Look for a thicker sauce or dip, not a thin ice cream topping, for the best layered effect.
- ½ – ¾ cup Toffee Bits (like Heath): My #1 choice for the topping. They provide an incredible buttery crunch and a flavor that marries perfectly with the caramel. If you can’t find them, see my variations below for other fantastic crunchy options!
- 4-5 Crisp Apples, for serving: You need a firm, tart apple to cut through all that sweetness. Granny Smith is the classic for a reason, but Honeycrisp or Pink Lady are also fantastic choices. Slice them just before serving to keep them from browning.
Building Your 3-Layer Masterpiece
Alright, team, let’s get mixing! This is where the fun begins. I’ll walk you through each step with my best tips to ensure dip perfection.
- Whip It Good: In a medium mixing bowl, combine your softened cream cheese, powdered sugar, and vanilla extract. Now, grab your hand mixer (or a sturdy whisk and some elbow grease) and beat it on medium-high speed for a good 2-3 minutes. We’re not just mixing; we’re incorporating air to make it light, fluffy, and perfectly smooth. Scrape down the sides of the bowl halfway through to make sure everything is evenly combined. You’ll know it’s ready when it looks like a spreadable cloud.
- Create the Base: Grab your serving dish! A pie plate, a shallow baking dish, or even a nice wide bowl works great. Using a spatula, spread the cream cheese mixture into an even layer across the bottom. I like to make the layer a little thicker around the edges to act as a “dam” for the caramel. Pro tip: A quick swipe of your spatula can create pretty little swirls on the surface.
- The Caramel Cascade: Now for the good stuff! Give your caramel sauce a quick stir if it has separated. If it’s very thick, you can warm it for 10-15 seconds in the microwave to make it more pourable. Slowly pour the caramel over the cream cheese layer. Here’s the key: start in the center and pour in a circular motion, letting it flow outwards naturally. Then, use the back of a spoon to gently guide it to the edges. Be gentle—you don’t want to mix the two layers together.
- The Grand Finale (The Crunch): Take your toffee bits (or nuts) and sprinkle them generously and evenly over the entire caramel surface. Don’t be shy! This layer provides the crucial textural contrast that makes this dip so addictive.
- The Chill Factor: Pop the whole dish into the refrigerator for at least 15-30 minutes. This is a non-negotiable step, my friends! This short chill allows the layers to set slightly, making it much easier to scoop without everything sliding around. It also gives the flavors a chance to mingle and get to know each other. It’s worth the wait, I promise.
How to Serve This Fall Celebrity
Presentation is part of the fun! You’ve made something gorgeous, so let’s show it off.
I love to place the chilled dip right in the center of a large platter or a beautiful wooden board. Arrange your freshly sliced apple fans around it in a sunburst pattern. For an extra professional touch, you can squeeze a little lemon juice over the apple slices to keep them from browning, but honestly, this dip disappears so fast it’s rarely an issue!
But don’t stop at apples! This caramel dip is a fantastic companion for:
- Sturdy cookies like graham crackers, shortbread, or biscoff
- Salty pretzel rods or pretzel chips
- Fresh pear slices
- Even just a spoon (no judgment here)
Make It Your Own: Delicious Twists & Swaps
The beauty of this recipe is its versatility. Feel free to play around and create your own signature version!
- The Peanut Butter Lover: Beat 2-3 tablespoons of creamy peanut butter into the cream cheese layer. Top with chopped salted peanuts instead of toffee for a salty-sweet sensation that’s out of this world.
- The Salted Caramel Guru: Finish the dip with a light sprinkle of flaky sea salt (like Maldon) over the toffee bits right before serving. It amplifies the caramel flavor and balances the sweetness perfectly.
- The Spiced Autumn Dream: Add ½ a teaspoon of ground cinnamon or a pinch of pumpkin pie spice to the cream cheese mixture. It adds that warm, cozy flavor we all crave this time of year.
- The Nutty Professor: Not a toffee person? No problem! Swap it for chopped pecans, walnuts, or almonds. Toasting the nuts first in a dry pan will unlock their deepest, richest flavor.
- The Bourbon Bliss (For the Adults): Stir a tablespoon of good bourbon into your caramel sauce before pouring it over the cream cheese. It adds a wonderful, sophisticated depth.
Beau’s Kitchen Confidential
Over the years, this recipe has seen it all. I once accidentally used salted caramel and whipped cream cheese (the tub kind) for a last-minute gathering. It was a little softer than usual but still a massive hit! The lesson? This dip is incredibly forgiving.
My favorite evolution was the discovery of the peanut butter twist. It was a happy accident born from a near-empty peanut butter jar I was trying to scrape clean. Now, it’s a requested variation in its own right. I also highly recommend making a double batch if you’re headed to a party. Trust me, you’ll be glad you did. It has a funny way of making you very popular very quickly.
Your Caramel Apple Dip Questions, Answered!
Q: My cream cheese layer is lumpy. What did I do wrong?
A: The number one culprit is cream cheese that wasn’t soft enough! Make sure you give it plenty of time to come to room temperature. If you’re in a pinch, you can microwave it on a plate for 10-15 seconds, but be very careful—you don’t want it to melt, just soften.
Q: Can I make this dip ahead of time?
A: You can! Prepare the dip completely, cover it tightly with plastic wrap, and store it in the fridge for up to 24 hours. I’d wait to add the crunchy toffee topping until just before serving to keep it from getting soft. Slice your apples right before serving, too.
Q: The caramel is too hard to pour. Help!
A: Easy fix! Pop the jar (without the lid) in the microwave for 15-20 seconds, or place the jar in a bowl of warm water for a few minutes. Give it a good stir and it should be perfectly pourable.
Q: Is there a way to make this lighter?
A> Absolutely. You can use reduced-fat cream cheese (Neufchâtel) and a light caramel sauce. The texture might be a touch less rich, but the flavor will still be fantastic!
Caramel Apple Dip (3-Layer Fall Favorite)
- Total Time: 25–40 min
Description
Think caramel apple on a stick—but party-ready, mess-free, and layered into pure indulgence. With a fluffy cream cheese base, a rich caramel middle, and a crunchy toffee crown, this dip is the ultimate fall crowd-pleaser. It comes together in 10 minutes flat and will disappear even faster. Perfect for game days, potlucks, or cozy nights in with a bowl of crisp apple slices.
Ingredients
-
8 oz cream cheese, softened
-
¼ cup powdered sugar
-
½ tsp vanilla extract
-
1 cup caramel sauce or dip (thicker style preferred)
-
½–¾ cup toffee bits (like Heath)
-
4–5 crisp apples, sliced (Granny Smith, Honeycrisp, or Pink Lady)
Instructions
-
Whip Base: Beat softened cream cheese, powdered sugar, and vanilla until light, smooth, and fluffy.
-
Layer: Spread cream cheese mix evenly in a pie plate or shallow dish.
-
Caramel Layer: Pour caramel sauce over cream cheese, spreading gently to edges.
-
Topping: Sprinkle generously with toffee bits.
-
Chill: Refrigerate 15–30 min so layers set.
-
Serve: Arrange sliced apples (or pretzels, cookies, pears) around dip and dig in!
Notes
For a gourmet twist, finish with a pinch of flaky sea salt or a swirl of bourbon-spiked caramel.
- Prep Time: 10 min
Nutrition
- Calories: 180 Cal per serving
- Fat: 9g
- Carbohydrates: 20g
Nutritional Information*
*This is an estimated nutritional breakdown for one serving (about 2 tablespoons of dip, not including apple slices), based on the specific ingredients listed. Your exact values may vary depending on brands and substitutions.
Per Serving: ~180 kcal | Carbohydrates: 20g | Fat: 9g | Saturated Fat: 5g | Protein: 2g | Sugar: 18g | Sodium: 120mg
Remember, friends, this is a treat! It’s all about balance. Enjoy this indulgent dip as part of your fall celebrations, alongside those crisp, vitamin-packed apple slices.
Dig In & Enjoy the Season
And there you have it! My no-fail, always-impressive, 3-Layer Caramel Apple Dip. It’s more than just a recipe; it’s a ticket to those cozy, joyful, shared moments that make this season so special. It’s the taste of laughter with friends, of family gathered around the table, and of simple, feel-good food that truly brings people together.
I hope this recipe becomes a cherished part of your fall traditions, just like it is for me and my crew. If you make it (and I really think you should!), tag me on social @feastical with #FeasticalEats. I love seeing your creations! Now, go forth and dip.
With a full heart and an even fuller plate,

Slow Cooker Baby Carrots with Honey and Brown Sugar
Your New Favorite Side Dish: Slow Cooker Honey Brown Sugar Carrots
Hey friends, Beau from Feastical here! Let’s talk about one of the unsung heroes of the dinner table: the humble side dish. We’ve all been there. The main course is sizzling, the drinks are poured, but the veggie situation is looking a little… sad. Maybe it’s a last-minute steamed bag from the freezer or a rushed salad. I’m here to tell you that it doesn’t have to be that way. What if I told you that you could create a side dish so delicious, so melt-in-your-mouth tender, and so effortlessly beautiful that it might just steal the show from the main event? And what if you could do it with about five minutes of hands-on time?
Enter these incredible Slow Cooker Baby Carrots with Honey and Brown Sugar. This isn’t just a recipe; it’s your ticket to a stress-free, flavor-packed side that feels like a warm, gourmet hug. We’re taking simple, sweet baby carrots and letting them slowly bathe in a luxurious glaze of butter, rich brown sugar, and floral honey. The slow cooker does all the heavy lifting, transforming them into something truly magical. They’re perfect for a bustling weeknight where you need a win, but they’re also elegant and crowd-pleasing enough for your biggest holiday feast. So, let’s ditch the stress and embrace the ease. Grab your slow cooker, and let’s make something feastical together!
A Spoonful of Sweet Memories
This recipe always takes me right back to my grandma’s kitchen during the holidays. Her house was the epicenter of our family gatherings, a place filled with noise, laughter, and the most incredible aromas. She was a wizard with a roasting pan, but her side dishes were where her true magic lived. I remember one particularly chaotic Thanksgiving. The turkey was fighting back, the potatoes were lumpy, and us kids were underfoot. In the midst of the chaos, Grandma quietly pulled out her old, mustard-yellow Crock-Pot, dumped in a bag of carrots, and a few glugs of this and that. She gave me a wink and said, “Beau, honey, sometimes the simplest things bring the most peace.”
Hours later, as we all sat down, exhausted but happy, that humble pot of carrots was the first dish to be completely emptied. They were sweet, buttery, and so tender they practically dissolved on your tongue. They brought a moment of calm, sweet perfection to the chaotic feast. That’s the spirit I want to bring to you with this recipe. It’s not about fancy techniques or hard-to-find ingredients. It’s about creating a little moment of peace and a whole lot of flavor, just like Grandma did.
Gathering Your Glorious Ingredients
Part of the beauty of this dish is its simplicity. You probably have most of this in your pantry right now! Here’s what you’ll need to feed a hungry crowd (about 10-12 people).
- 4 lbs baby carrots, rinsed – No peeling required! The “baby” carrot here is key—they’re naturally sweeter and more tender than large carrots, and their uniform size means they cook evenly. A quick rinse is all they need. If you only have full-sized carrots, just peel and chop them into 2-inch pieces.
- ½ cup water – This is our essential steam starter. It creates the environment for the carrots to become tender without burning the glaze. Don’t skip it!
- ½ cup unsalted butter, cut into pieces – I insist on unsalted so you control the final salt level. Cutting it into pats helps it melt and distribute evenly over the carrots. For a dairy-free version, a high-quality plant-based butter works wonderfully.
- ½ cup brown sugar, packed – Pack that cup firmly! The molasses in the brown sugar gives us a deep, caramel-like sweetness that white sugar just can’t match. It’s the soul of the glaze.
- 6 tbsp honey – This is the other half of our sweet, glossy glaze. Honey adds a beautiful floral note that balances the deep brown sugar. Feel free to use local honey for an extra flavor boost!
- ½ tsp salt – Crucial! Salt is not the enemy of sweetness; it’s its best friend. It heightens all the other flavors and keeps the dish from being one-dimensionally sugary.
- Optional: ½ tsp cinnamon or ¼ tsp ground ginger – A little warm spice can make this dish feel extra cozy and holiday-ready. The ginger adds a lovely, subtle kick.
- Optional: 1 tbsp orange zest or 1 tbsp balsamic vinegar – My pro-chef hack for cutting through the sweetness and adding a layer of complexity. The citrus zest is bright and fresh, while the balsamic adds a sophisticated tangy depth.
- Garnish: fresh chopped dill or parsley (optional) – Don’t underestimate the power of a fresh green garnish! It adds a pop of color and a fresh flavor that makes the whole dish look and taste restaurant-quality.
Let’s Get Cooking: Effortless Steps to Carrot Heaven
Okay, here’s where the magic happens. I promise, it could not be easier. Let’s walk through it together.
Step 1: The Foundation. Take your trusty slow cooker and pour in that ½ cup of water. This is our secret weapon against any scorching. Now, gently add your rinsed baby carrots. You don’t need to stir them here; just create an even layer. See? We’re two minutes in and already winning.
Step 2: The Flavor Bomb. Now, scatter the pieces of butter evenly over the carrots. Follow that with the packed brown sugar, drizzling the honey over everything, and then sprinkling the salt. If you’re using one of the optional spices (hello, cinnamon!), add it now. Here’s my little chef hack: don’t stir yet! Let the ingredients sit on top. As everything heats up, the butter and sugars will slowly melt and drip down through the carrots, basting them in goodness from top to bottom. This prevents a sticky, clumpy mess at the beginning.
Step 3: The Patience Part. Pop the lid on tight. Now, choose your adventure: the “low and slow” method for deeper flavor (4-5 hours on LOW) or the “I need this now!” method (2-3 hours on HIGH). I’m a big fan of LOW for this one—it gives the flavors more time to mingle and get to know each other. Your house is going to smell absolutely incredible.
Step 4: The Grand Finale. Once the time is up, carefully remove the lid (watch out for the steam!) and give everything a very gentle stir. You’ll see the carrots have softened beautifully and are now coated in a shiny, luxurious glaze. If the liquid seems a bit thin, don’t worry! Let it sit with the lid off for 15-20 minutes; it will thicken up perfectly. Taste one (chef’s privilege!) and adjust with another pinch of salt if needed.
Step 5: The Chef’s Touch. Right before serving, this is where you can get creative. Stir in that orange zest or a splash of balsamic vinegar for a bright finish. Transfer to your favorite serving bowl and give it a flourish with a sprinkle of fresh, chopped dill or parsley. This isn’t just cooking; it’s plating with personality!
How to Serve These Shining Stars
These glazed carrots are the ultimate team player on the plate. Their sweet and savory profile pairs with just about everything!
For a holiday feast, they are a non-negotiable classic. Picture them next to a golden roasted turkey, a pile of creamy mashed potatoes, and a scoop of savory herb stuffing. The vibrant orange color adds such a beautiful pop to the table. Serve them straight from the slow cooker set on “warm” to keep them perfect throughout the meal.
For a weeknight win, they are the perfect way to elevate a simple rotisserie chicken or a juicy pork chop. They make a can of soup or a sandwich feel like a real, home-cooked meal. I love to toss any leftovers (if you have them!) with some hot cooked pasta and a little extra butter for a shockingly delicious and easy lunch the next day.
Mix It Up! Fun Flavor Twists
Once you’ve mastered the base recipe, the world is your carrot-filled oyster! Here are a few of my favorite ways to play with the flavors.
- Maple Bacon Bliss: Swap the honey for pure maple syrup. Before adding the carrots, cook 6 slices of chopped bacon in a skillet until crispy. Use the bacon grease instead of (or in addition to) the butter for an insane depth of flavor. Garnish with the crispy bacon bits. Trust me on this one.
- Herb Garden Delight: For a more savory profile, omit the cinnamon/ginger. Instead, add a few sprigs of fresh thyme and rosemary to the slow cooker with the carrots. Remove the woody stems before serving and garnish with a little fresh chopped chive.
- Citrus Sunshine: Add the zest of one entire orange and about 2 tbsp of fresh orange juice along with the other liquids. The bright, sunny citrus flavor cuts the richness beautifully. A little sprinkle of poppy seeds at the end looks fantastic, too.
- Spicy Kick: Like a little heat? Add a pinch of red pepper flakes or a few dashes of your favorite hot sauce to the glaze mixture. The sweet and spicy combo is addictive.
- Vegan-Friendly Version: This is a super easy swap! Use a high-quality vegan butter (Miyoko’s or Earth Balance are great) and ensure your sugar is certified vegan (most are, but some are processed with bone char). Agave nectar can be used in place of honey. It works like a charm!
Beau’s Kitchen Notes & Stories
This recipe has been a living, evolving thing in my kitchen for years. The first time I made it, I made the classic rookie mistake: I stirred it all together at the beginning. The sugar immediately sunk to the bottom and, while still tasty, it caramelized and stuck a bit. Lesson learned! The “layering, not stirring” technique was a total game-changer.
I also once, in a fit of experimentation, tried adding a tablespoon of bourbon along with the water. The result? Absolutely fantastic. The alcohol cooks off, leaving behind a wonderful, warm oaky note that pairs incredibly well with the brown sugar. Just saying, if you’re feeling adventurous…
The best part about this dish is its forgiving nature. A little more butter? Great. A little less honey? Fine. It’s a recipe that encourages you to make it your own. That’s what Feastical is all about—finding joy and confidence in your kitchen, one simple, delicious recipe at a time.
Your Questions, Answered!
Q: My glaze is really thin/watery after cooking. What happened? How can I fix it?
A: No worries! This usually happens if your slow cooker runs a little cool or if the lid was left ajar, letting too much steam escape. The fix is easy. You have two options: 1) Remove the carrots with a slotted spoon, set them aside, and pour the liquid into a saucepan. Simmer it on the stovetop over medium heat for 5-10 minutes until it reduces and thickens into a syrupy glaze. Pour it back over the carrots. 2) Make a quick slurry with 1 tsp of cornstarch and 1 tbsp of cold water. Stir it into the liquid in the slow cooker, turn it to HIGH, and let it cook for another 15-20 minutes, uncovered, until thickened.
Q: Can I use frozen carrots or large carrots instead of fresh baby carrots?
A: You can, but the texture will be slightly different. For frozen baby carrots, there’s no need to thaw; just add them straight in. They may release more water, so your glaze might be thinner (see fix above!). For large carrots, peeling and chopping them into uniform 2-inch pieces is essential so they cook at the same rate as the smaller ones.
Q: Can I make this ahead of time?
A: Absolutely! This is a fantastic make-ahead dish. Cook them as directed, let them cool, and store them in an airtight container in the fridge for up to 3 days. To reheat, simply warm them in a saucepan over medium-low heat, or pop them back in the slow cooker on LOW for about an hour until heated through.
Q: The bottom of my slow cooker is a little scorched. Did I do something wrong?
A: This can happen if your slow cooker runs hot or if the sugar makes direct contact with the pot. Ensuring you have that ½ cup of water at the very bottom creates a protective barrier and should prevent this. The layering technique (carrots on top of water, then butter/sugar on top of carrots) also helps immensely!
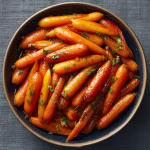
Slow Cooker Baby Carrots with Honey and Brown Sugar
- Total Time: 1 minute
Description
Tender, glossy, and kissed with buttery sweetness—these carrots are the side dish that turns heads at any table. With just 5 minutes of prep and the slow cooker doing all the work, you’ll have a dish that’s equal parts cozy and elegant. Perfect for holiday feasts, weeknight dinners, or anytime you want veggies that taste like candy (but better).
Ingredients
-
4 lbs baby carrots, rinsed
-
½ cup water
-
½ cup unsalted butter, cut into pats
-
½ cup packed brown sugar
-
6 tbsp honey
-
½ tsp salt
-
Optional: ½ tsp cinnamon or ¼ tsp ground ginger
-
Optional Finishes: 1 tbsp orange zest or balsamic vinegar
-
Garnish: fresh parsley or dill
Instructions
-
Layer: Add water to slow cooker, then carrots. Top with butter, brown sugar, honey, salt, and optional spices.
-
Cook: Cover and cook 4–5 hrs on LOW or 2–3 hrs on HIGH until carrots are tender.
-
Glaze: Stir gently. If glaze seems thin, leave lid off for 15–20 min or reduce liquid on stovetop.
-
Finish: Just before serving, stir in orange zest or balsamic vinegar for brightness. Garnish with herbs.
Notes
Try swapping honey for maple syrup and topping with crispy bacon bits for a smoky-sweet twist.
- Prep Time: 5 min
- Cook Time: 4–5 hrs (LOW) or 2–3 hrs (HIGH)
Nutritional Information (A Quick Note!)
Hey folks, I’m a chef, not a dietitian, but I believe in being transparent about what we’re eating! This info is a general estimate per serving (assuming 12 servings).
These carrots are a fantastic source of Beta-Carotene (which your body converts to Vitamin A), fiber, and antioxidants. The sweetness comes from natural carrot sugars, honey, and brown sugar. Using unsalted butter helps manage sodium, and the small amount of fat helps your body absorb all those fantastic fat-soluble vitamins from the carrots!
Approximate Nutrition Per Serving: Calories: ~130 kcal | Carbohydrates: 20g | Sugar: 14g | Fat: 5g | Saturated Fat: 3g | Fiber: 3g | Protein: 1g
Final Thoughts from My Kitchen to Yours
Well, there you have it, my friends. My go-to, never-fail, always-impressive slow cooker carrot recipe. This dish embodies everything I love about cooking: it’s simple, soulful, and designed to bring people together around the table without stressing the cook out. It’s a reminder that the most memorable dishes aren’t always the most complicated ones.
I hope this recipe finds its way into your regular rotation and becomes a part of your own family’s story. Maybe it’ll be the dish your kids remember you making on busy nights, or the glazed carrots that become a demanded tradition at your holiday table. However you serve it, I know it’ll bring a little bit of that Feastical feeling—warm, satisfied, and happily full.
If you make it (and I really hope you do!), tag me on social @feastical or leave a comment over on the blog. I love seeing your creations and hearing your kitchen stories. Now, go forth and cook with confidence! Until next time, happy eating.

Classic Butter Herb Stuffing
Your New Favorite Tradition: The Ultimate Classic Butter Herb Stuffing
Hey friends, Beau here from Feastical! Can you smell it? That incredible, soul-warming aroma of onions and celery sizzling in a lake of melted butter, mixed with the earthy scent of fresh sage and thyme. It’s the smell of home, of celebration, of pure, unadulterated comfort. If there’s one dish that truly deserves a standing ovation at any dinner table, it’s a classic, golden, savory butter herb stuffing.
I’m not talking about the stuff from a box (we’ve all been there, no judgment!). I’m talking about the real deal. The kind of stuffing that forms a beautifully crispy, buttery crust on top while staying impossibly moist and tender underneath. Every single forkful is a perfect harmony of soft and crunchy, savory and herbal. It’s the side dish that everyone secretly wants to take seconds of, the one that somehow makes the turkey jealous, and the absolute star of leftover sandwiches the next day.
Today, I’m pulling back the curtain on my go-to, never-fail, crowd-ready recipe. This isn’t just a list of ingredients and steps; it’s a blueprint for creating memories. We’re going to walk through this together, and I’ll share all my favorite chef hacks and stories along the way. So, tie on your favorite apron, grab your most trusted skillet, and let’s make a stuffing that’s going to have everyone asking for your recipe.
The Stuffing That Started It All
This recipe has roots, my friends. Deep, delicious roots in my Grandma Eleanor’s kitchen. I remember being maybe ten years old, perched on a step-stool she kept just for me, tasked with the “very important job” of tearing what felt like a mountain of stale bread into little pieces. My arms would get tired, and I’d inevitably start making a mess, but she never minded. She’d be at the stove, her glasses slightly fogged from the steam, working her magic with the butter, onions, and celery—what she called the “holy trinity of flavor.”
The best part was the taste test. She’d dip a spoon into the broth and herb mixture, blow on it carefully, and let me have the first sip. My eyes would widen at the burst of savory goodness. “That’s the love, Beau,” she’d say with a wink. “You can’t buy that in a jar.” She was right. That lesson stuck with me more than any cookbook ever could: the best ingredient is always the one you can’t measure—the joy and care you pour into making food for the people you love. This recipe is my homage to her, and every time I make it, I’m right back on that step-stool, surrounded by love and the promise of a fantastic meal.
Gathering Your Cast of Characters
Great stuffing starts with great ingredients. Here’s everything you’ll need to bring this masterpiece to life. Don’t stress about having every single thing—cooking is an adventure, and substitutions are part of the fun!
- 1 loaf (14–16 oz) day-old bread, cubed: This is the foundation! I love a good French bread or sourdough for their sturdy texture and slight tang. Chef’s Insight: “Day-old” is key! Fresh bread turns to mush. If your bread is too fresh, cube it and toast it in a 300°F oven for 15-20 minutes to dry it out.
- 1 cup unsalted butter: Unsalted is our friend here. It lets us control the salt level perfectly. This generous amount is what creates that rich, decadent flavor and incredible golden top.
- 1 large yellow onion, finely chopped: Yellow onions are sweet and mellow when cooked, forming the savory base of our flavor profile.
- 3–4 celery stalks, finely chopped: Celery adds a crucial earthy, slightly bitter note and a wonderful bit of texture. Don’t skip it!
- 2 tsp garlic, minced: Because… garlic. It adds a deep, aromatic punch. Feel free to add an extra clove if you’re a garlic fiend like me.
- 2 tbsp fresh parsley, chopped: Adds a pop of fresh, green color and a mild, clean flavor.
- 1 tbsp fresh sage, chopped (or 1 tsp dried): Sage is the quintessential stuffing herb. It’s earthy, slightly peppery, and smells like the holidays. Sub Tip: If using dried, use one-third the amount of fresh, as dried herbs are more potent.
- 1 tbsp fresh thyme leaves (or 1 tsp dried): Thyme brings a subtle, lemony warmth that complements the sage beautifully.
- 1½ tsp salt & ½ tsp black pepper: Seasoning superstars! We start with this, but always taste and adjust at the end.
- 2½–3 cups chicken or vegetable broth: The hydrator! Using a good-quality broth makes a world of difference. Low-sodium is best if you’re watching salt.
- 2 large eggs, lightly beaten: Our binding agent. The eggs help hold everything together, giving the stuffing a perfect, sliceable texture.
Let’s Get Cooking: Building Your Masterpiece
Okay, team! It’s go time. Follow these steps, and you’ll have a flawless stuffing. I’ve packed this section with all my best tips to ensure your success.
Step 1: Preheat and Prep
Fire up your oven to 350°F (175°C). Take a moment to grease your favorite 9×13 inch baking dish (or a similar-sized casserole dish) with a little butter or non-stick spray. This little step guarantees a beautiful release and those coveted crispy edges.
Step 2: Toast Those Cubes!
Spread your cubed bread in a single layer on a large sheet pan. Pop it into the oven for 10-15 minutes. You’re not looking for crouton-level hardness here, just a light toasting to dry them out and give them a pale gold color. Chef’s Hack: This is the #1 secret to avoiding mushy stuffing! It gives the bread the structural integrity to soak up all that glorious broth and butter without collapsing.
Step 3: The Aromatic Dance
While the bread toasts, let’s work on the good stuff. In a large skillet or Dutch oven, melt that entire cup of butter over medium heat. Once it’s foaming slightly, add your chopped onion and celery. Sauté this for 6-8 minutes, stirring occasionally, until the vegetables have softened and become translucent. They should smell incredible. Now, add the garlic and cook for just one more minute—until fragrant. Garlic burns easily, so we’re just waking it up! Now, stir in all those beautiful fresh herbs, the salt, and the pepper. Give it one good stir, take a deep breath, and admire your work. Turn off the heat.
Step 4: The Big Combine
In a very large mixing bowl—I’m talking the biggest one you own—combine the toasted bread cubes and the entire contents of your buttery, herby skillet. Toss it gently with a large spoon or, better yet, with your hands (just let it cool a bit first!). You want every single piece of bread to get glistened with that butter. In a separate bowl or measuring cup, whisk your eggs into the 2½ cups of broth. Now, slowly pour this liquid over the bread mixture. Toss, toss, toss! You want everything to be evenly moistened. Here’s the test: grab a handful and squeeze it gently. It should hold its shape briefly without dripping liquid. If it seems dry, add the remaining ½ cup of broth, a little at a time.
Step 5: Bake to Perfection
Transfer this glorious mixture into your prepared baking dish and press it down gently into an even layer. Cover it tightly with aluminum foil. This first 30-minute bake is a steam session—it cooks the eggs and rehydrates the bread fully, making it tender. Then, remove the foil (this is the moment of truth!) and bake for another 15-20 minutes. You’re waiting for that top to turn a deep, irresistible golden brown and the edges to get crispy. Your whole house will smell like a dream.
How to Serve This Show-Stopper
Presentation matters, even for family-style comfort food! Here’s how to make your stuffing look as good as it tastes.
Let the stuffing rest for about 10 minutes after pulling it out of the oven. This allows it to set up, making it much easier to scoop out clean portions. Use a large serving spoon to dish out hearty squares. I love garnishing the top with a little extra fresh chopped parsley and a few whole thyme sprigs for a touch of green. It screams “fresh and homemade!”
This is the ultimate team player on the plate. It belongs right next to your roasted turkey, a pool of rich gravy, some tangy cranberry sauce, and a helping of creamy mashed potatoes. It soaks up gravy like a champion and provides the perfect savory counterpoint to sweeter sides. For a cozy Sunday dinner, it’s incredible alongside a simple roast chicken. And remember, the corner pieces—with the most crispy edges—are a hot commodity. You might want to call dibs early!
Make It Your Own: Delicious Twists & Tweaks
Once you’ve mastered the classic, the world of stuffing is your oyster! Here are a few of my favorite ways to mix things up.
- The Sweet & Savory: Stir in ½ cup of dried cranberries or chopped tart apples (like Granny Smith) when you add the broth. The little bursts of sweetness are a fantastic contrast to the savory herbs.
- The Meat Lover’s: Brown ½ lb of your favorite sausage (mild Italian or sage breakfast sausage are perfect) in the skillet before adding the butter. Remove the sausage, then proceed with melting the butter and cooking the veggies. Add the cooked sausage back in with the bread. This adds incredible heartiness and flavor.
- The Cheesy Finish: For the last 10 minutes of baking, uncover the stuffing and sprinkle ½ cup of grated Parmesan or sharp cheddar cheese over the top. Let it melt and form a gorgeous, cheesy crust.
- The Nutty Crunch: Add ½ cup of toasted pecans or walnuts for a wonderful textural contrast and rich, toasty flavor. Just stir them in during the final combine.
- Gluten-Free & Vegan Friendly: Use your favorite gluten-free bread cubes and vegan butter. Swap the chicken broth for vegetable broth. For the egg binder, a “flax egg” (1 tbsp ground flaxseed mixed with 3 tbsp water per egg, let sit 5 mins) works great as a binder.
Beau’s Kitchen Notes & Stories
This recipe has evolved over years of Thanksgiving trials and happy accidents. One year, I accidentally used a whole stick *more* butter than called for. Disaster? Nope. It was declared the “best stuffing ever” by my family and is now the mandatory amount. Go figure!
The beauty of stuffing is its flexibility. Don’t have thyme? Use rosemary. No celery? Add some chopped fennel for a similar crunch with a licorice twist. This recipe is a template for your own creativity. The most important thing is to taste as you go. After you combine everything, taste a little bit of the mix (it’s uncooked, but it’s safe to taste). Does it need more salt? More pepper? Another pat of butter? You’re the chef of your kitchen—trust your palate!
Stuffing SOS: Your Questions, Answered
Q: My stuffing turned out too dry! What did I do wrong?
A: The most common culprit is not enough broth or over-toasting the bread. Next time, be sure to do the “squeeze test” and add broth until the mixture holds together. Also, remember that stuffing continues to soak up liquid as it sits. If you’ve already baked it and it’s dry, don’t panic! Drizzle a little warm broth over the top and gently toss it before serving.
Q: Can I make this stuffing ahead of time?
A: Absolutely! You can prepare the entire recipe up to the point of baking. Combine everything in the baking dish, cover tightly with plastic wrap and then foil, and refrigerate for up to 24 hours. When you’re ready, bake it straight from the fridge, but add an extra 10-15 minutes to the covered baking time since it’s starting cold.
Q: Why is my stuffing mushy or gummy?
A: This usually happens if the bread wasn’t dry enough to start. Fresh, soft bread will disintegrate. Always use day-old or pre-toasted bread! Also, be careful not to over-mix once you add the broth, as this can break down the bread cubes.
Q: Can I cook this inside the turkey?
A: You can, but I don’t recommend it for food safety reasons. To get the stuffing to a safe temperature (165°F), the turkey breast often ends up overcooked and dry. Baking it in a dish separately is a foolproof method for a moist bird and perfectly cooked, crispy stuffing.
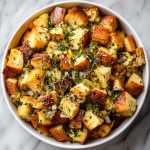
Classic Butter Herb Stuffing
Description
Golden on top, tender in the middle, and bursting with buttery, herby goodness—this stuffing is the side dish that steals the spotlight. It’s comfort, tradition, and celebration baked into one irresistible pan. Whether it’s Thanksgiving, Christmas, or just a cozy Sunday roast, this recipe will have everyone reaching for seconds (and fighting over the crispy corners!).
Ingredients
-
1 loaf (14–16 oz) day-old French bread or sourdough, cubed
-
1 cup unsalted butter
-
1 large yellow onion, finely chopped
-
3–4 celery stalks, finely chopped
-
2 tsp garlic, minced
-
2 tbsp fresh parsley, chopped
-
1 tbsp fresh sage (or 1 tsp dried)
-
1 tbsp fresh thyme (or 1 tsp dried)
-
1½ tsp salt & ½ tsp black pepper
-
2½–3 cups chicken or vegetable broth (low-sodium best)
-
2 large eggs, lightly beaten
Instructions
-
Prep Bread: Preheat oven to 350°F. Spread cubed bread on a sheet pan and toast 10–15 min until lightly dried and golden.
-
Sauté Veggies: In a large skillet, melt butter. Cook onion & celery 6–8 min until soft. Stir in garlic, herbs, salt, and pepper. Remove from heat.
-
Mix: In a big bowl, toss toasted bread with buttery veggie mix. Whisk eggs into 2½ cups broth and pour over. Toss until evenly moistened (add extra broth if needed—bread should hold together when squeezed but not drip).
-
Bake: Transfer to greased 9×13 dish. Cover with foil; bake 30 min. Remove foil; bake 15–20 min more until golden and crisp on top.
-
Rest: Let sit 10 min before serving. Garnish with fresh parsley for a festive finish.
Notes
: Add sausage for heartiness, dried cranberries or apples for a sweet contrast, or top with cheese in the last 10 min for a melty finish.
Nutritional Information (For the Curious Cook!)
Okay, let’s be real: this is a celebratory comfort food dish, meant to be enjoyed as part of a special meal. But it’s always good to know what’s on your plate! This info is per serving (assuming 10 servings from the recipe).
Calories: ~320 kcal
Carbohydrates: 28g | Fat: 18g | Protein: 6g | Fiber: 3g
The carbs come primarily from the bread and vegetables. The fat content is from the butter and eggs, which provide richness and flavor. You can lighten it up slightly by using a whole-grain bread, reducing the butter by a few tablespoons (though I wouldn’t!), and using a low-sodium broth. But my philosophy? Enjoy the real deal on feast days—it’s all about balance!
Final Thoughts from My Kitchen to Yours
Well, there you have it, my friends. My heart and soul on a baking dish—the Classic Butter Herb Stuffing that has warmed countless hearts at my table. I hope this recipe brings as much joy and connection to your kitchen as it has to mine.
Remember, cooking isn’t about perfection. It’s about the laughter that happens while you’re chopping celery, the stories shared over the simmering pot, and the collective “mmm” that happens when everyone takes their first bite. This stuffing is more than a recipe; it’s a vehicle for togetherness.
I’d love to hear how it turns out for you! Tag me @Feastical on social media with your creations. Now, go forth and stuff… I mean, bake! Until next time, happy cooking!

No-Bake Apple Pie Cheesecake
Your New Favorite Dessert: No-Bake Apple Pie Cheesecake
Hey friends, Beau here from Feastical! Let’s talk about something magical. You know that feeling when you’re craving something decadent, something that tastes like you fussed over it for hours, but the mere thought of turning on your oven makes you want to take a nap on the cool kitchen tiles? Yeah, I’ve been there more times than I can count. That’s exactly why I’m so crazy about this recipe. This No-Bake Apple Pie Cheesecake is the hero we all need—a show-stopping dessert that comes together with zero baking required.
Imagine this: a thick, buttery graham cracker crust that crumbles just right. A cloud-like, impossibly creamy cinnamon-spiced cheesecake filling that’s light yet indulgent. And on top, a glorious, warm-spiced apple pie topping that’s basically autumn in a spoon. Each layer is a star, and together? They create a symphony of texture and flavor that will have everyone at your table asking for seconds (and the recipe!). It’s the perfect centerpiece for your holiday table, a brilliant potluck contribution, or just a Wednesday night treat because you deserve it. So, let’s ditch the oven, grab a mixing bowl, and create some no-bake magic together.
A Slice of Nostalgia: Why This Recipe Hits Home
This dessert is more than just a combination of ingredients for me; it’s a delicious mashup of my two favorite childhood memories. My grandma’s house always smelled like baked apples and cinnamon in the fall. She’d make these incredible deep-dish apple pies, and I’d sit at her counter, sneaking pinches of the leftover crust. Meanwhile, my mom was the queen of no-bake cheesecakes. Her simple, creamy version was a staple at every family BBQ and birthday party. It was cool, refreshing, and always hit the spot.
One particularly hectic holiday season, I was trying to figure out what to bring to a friendsgiving potluck. I desperately wanted to capture the cozy, comforting essence of my grandma’s apple pie but didn’t have the time or energy to make pastry from scratch. I glanced at my mom’s old no-bake cheesecake recipe scribbled on a notecard, and a lightbulb went off. What if I combined them? The result was this glorious creation. It’s my little culinary homage to both of these incredible women—all the heartwarming flavor of a classic apple pie, with the effortless ease of a no-bake cheesecake. It’s a story in every bite, and I’m so excited to share it with you.
Gathering Your No-Bake Toolkit: The Ingredients
Here’s everything you’ll need to bring this masterpiece to life. The beauty of this recipe is in its simplicity, but a few chef’s notes on the ingredients can make all the difference!
For the Graham Cracker Crust:
- 4 cups graham cracker crumbs: You can buy pre-crushed crumbs or pulse whole sheets in a food processor. For a deeper flavor, try using ginger snaps or biscoff cookies! (Gluten-free grahams work perfectly here too).
- 1 cup (2 sticks) unsalted butter, melted: Unsalted lets you control the salt level. If you only have salted, just skip the pinch of salt you might normally add. This butter is the glue that holds our crunchy crust together.
- 4 tbsp granulated sugar: This sweetens the crust and helps it caramelize slightly for that perfect hold.
- 2 tsp ground cinnamon: We’re building that warm, spiced flavor from the ground up! Don’t be shy with it.
For the Cinnamon Cheesecake Filling:
- 4 (8 oz) packages cream cheese, softened: This is non-negotiable – FULL FAT cream cheese, and it MUST be softened to room temperature. This is the secret to a silky-smooth filling with no lumps. I can’t stress this enough!
- 6 cups Cool Whip, thawed: Lite or regular both work great. Thaw it in the fridge overnight for best results. This is what gives our filling that incredible, airy lightness.
- 2 ⅔ cups granulated sugar: It seems like a lot, but it balances the tang of the cream cheese. You can adjust slightly to your taste.
- 1 tsp ground cinnamon: Infusing the filling with spice makes every layer cohesive and delicious.
- Optional twist: 1 tsp vanilla extract or 1 tbsp real maple syrup: I almost always add the vanilla for a flavor backbone. The maple syrup is a fantastic fall-inspired twist that pairs beautifully with the apples.
For the Warm Apple Pie Topping:
- ½ cup (1 stick) unsalted butter: Because everything is better with butter. This forms the rich base for sautéing our apples.
- 8 Gala apples, peeled, cored, and chopped: Gala apples are my go-to because they hold their shape well and have a lovely sweetness. Feel free to use a mix of Granny Smith (for tartness) and Honeycrisp (for sweetness)!
- 1 cup water: This helps create the sauce.
- 4 tsp cornstarch: Our thickening agent! Always mix it with a bit of cold water first to create a “slurry” before adding it to the hot apples to avoid lumps.
- 1 cup light brown sugar, packed: Brown sugar brings molasses notes and a deeper caramel flavor that white sugar just can’t match.
- 4 tsp ground cinnamon: Hello, classic apple pie flavor!
- 1 tsp vanilla extract: Added at the very end to preserve its beautiful aroma.
- Optional twist: A pinch of nutmeg or a splash of bourbon: Nutmeg is apple’s best friend. A tablespoon of bourbon adds a wonderful grown-up depth of flavor.
Building Your Masterpiece: Step-by-Step Instructions
Alright, team! Let’s get mixing. Follow these steps, and you’ll be a no-bake champion in no time.
Step 1: The Foundation (The Crust)
In a medium bowl, combine your graham cracker crumbs, sugar, and cinnamon. Pour the melted butter over the top and mix it with a fork until it resembles wet sand and holds together when you pinch it. Transfer this mixture to your 9×13 pan (or two pie dishes) and press it down firmly and evenly. I like to use the bottom of a measuring cup to really pack it in—this prevents a crumbly crust later. Pop it in the fridge to set for at least 20 minutes while you make the filling. Chef’s Hack: For a next-level crust, toast your graham cracker crumbs in a dry skillet for 2-3 minutes before mixing with the butter. It amplifies the flavor exponentially!
Step 2: The Cloud (The Cheesecake Filling)
In a large bowl, use an electric hand mixer (or stand mixer with the paddle attachment) to beat your softened cream cheese on medium speed until it’s completely smooth and lump-free. This should take about 2-3 minutes. Scrape down the sides of the bowl. Add the granulated sugar and cinnamon (and vanilla or maple syrup if using) and beat again until everything is fully incorporated and creamy. Now, here’s the key: gently fold in the thawed Cool Whip. Use a spatula and a light hand, folding from the bottom of the bowl up until no white streaks remain. You want to keep all that airiness! Chef’s Hack: If your cream cheese was still a bit cold and you see tiny lumps, don’t panic! Press the filling through a fine-mesh sieve. It’s a extra step but guarantees a perfectly silky texture.
Step 3: The Star (The Apple Pie Topping)
Melt the butter in a large skillet over medium heat. Add your chopped apples, brown sugar, and cinnamon. Stir to coat everything beautifully and cook for about 5 minutes, until the apples just start to soften. In a small separate bowl, whisk the cornstarch into the 1 cup of COLD water until it’s completely dissolved. Pour this slurry into the skillet with the apples and stir continuously. Bring the mixture to a gentle simmer. It will start to thicken noticeably within a few minutes. Cook for another 5-7 minutes, until the apples are tender but not mushy and the sauce is glossy and thick. Remove from heat and stir in the vanilla (and nutmeg or bourbon). Let this cool completely to room temperature before adding it to the cheesecake. Chef’s Hack: Spreading the apple topping on a baking sheet will help it cool down much faster so you’re not waiting around!
Step 4: The Grand Finale (Assembly & Chill)
Pull your chilled crust from the fridge. Spread the cinnamon cheesecake filling evenly over the top. Now, carefully spoon the completely cooled apple pie topping over the cheesecake layer. Grab some plastic wrap and cover the pan tightly. This is the hardest part: walk away. Let the cheesecake chill in the refrigerator for at least 4 hours, but honestly, overnight is best. This patience allows the flavors to marry and the filling to set up perfectly for clean slices.
How to Serve This Show-Stopper
When it’s finally time to serve, you’ve got options! For a 9×13 pan, you can simply cut it into squares. If you used a springform pan, run a thin knife under hot water, dry it, and then carefully slide it around the edge of the pan for a clean release.
I love serving this slightly chilled. The contrast between the cool, creamy filling and the spiced apple topping is everything. For a truly decadent experience, drizzle each slice with warm homemade caramel sauce and add a scoop of high-quality vanilla ice cream. The warm-cold combo is absolute perfection. A little dollop of whipped cream and a light dusting of cinnamon on top makes it look like it came from a fancy bakery. Serve it on a pretty plate, and get ready for the compliments to roll in!
Make It Your Own: Delicious Recipe Variations
The fun doesn’t stop here! This recipe is a fantastic base for all sorts of creativity.
- Gluten-Free & Vegan Friendly: Use gluten-free graham crackers for the crust. For a fully vegan version, use vegan butter, plant-based cream cheese, coconut whipped topping, and a vegan caramel sauce. It works like a dream!
- Different Fruit Twist: Not an apple person? Swap the apple topping for a homemade cherry pie filling, salted caramel, or a simple mixed berry compote. The possibilities are endless.
- Nuttier Crust: Replace 1 cup of the graham cracker crumbs with finely ground toasted pecans or walnuts for a richer, nuttier crust flavor.
- Boozy Upgrade: Add that splash of bourbon to the apple topping as mentioned, or add a tablespoon of bourbon or spiced rum directly to the cheesecake filling for a grown-up kick.
- Individual Servings: Layer the components in small mason jars or dessert cups for adorable, pre-portioned treats perfect for parties.
Beau’s Chef Notes & Kitchen Stories
This recipe has evolved so much since that first friendsgiving experiment. The first time I made it, I was in such a rush that I didn’t let the apple topping cool. I poured it right on top of the cheesecake layer, and let’s just say… it turned my beautiful white filling into a pink, runny mess. A delicious mess, but a mess nonetheless! I learned the importance of patience the hard way.
I’ve also found that using a high-quality vanilla extract really makes a difference in the filling. It’s one of those ingredients where you can truly taste the quality. Don’t be afraid to really pack that brown sugar for the topping, either—it’s the key to a deep, rich sauce. This dessert has become my most-requested recipe, and I love hearing how you all make it your own!
Your Questions, Answered: FAQs & Troubleshooting
Q: My cream cheese was lumpy! How do I avoid that?
A: The number one rule is SOFTENING. Take the blocks of cream cheese out of the fridge at least 2-3 hours before you start. If you’re short on time, you can microwave them on 50% power for 15-second bursts, but be very careful not to melt them. If you end up with lumps, try pressing the mixed filling through a sieve—it’s a lifesaver!
Q: Why does my crust seem crumbly and not holding together?
A: You probably need a bit more butter. The mixture should hold its shape when you squeeze it in your hand. If it’s too dry, add another tablespoon of melted butter and mix it in. Also, make sure you are pressing it into the pan firmly enough.
Q: Can I make this ahead of time?
A: Absolutely! This is the perfect make-ahead dessert. It needs that long chill time anyway. You can assemble it completely up to 2 days in advance. Just keep it covered tightly in the fridge.
Q: Can I use real whipped cream instead of Cool Whip?
A: You can, but the texture will be different. Cool Whip is stabilized, so it helps the filling set firmly. If you use freshly whipped cream, your cheesecake will be lighter and softer. I’d recommend adding a tablespoon of instant pudding powder (vanilla or cheesecake flavor) to your whipped cream to help stabilize it.
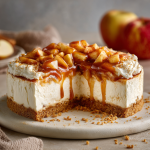
No-Bake Apple Pie Cheesecake
Description
Dreamy, creamy, and bursting with cozy autumn flavor—this No-Bake Apple Pie Cheesecake is the dessert you’ll crave all year long. With a buttery graham cracker crust, a cinnamon-kissed cheesecake filling, and a glossy apple pie topping, it’s a showstopper that requires zero oven time. Perfect for holiday tables, potlucks, or just when you want a little indulgence without the fuss.
Ingredients
Crust
-
4 cups graham cracker crumbs (or gingersnaps for extra spice)
-
1 cup unsalted butter, melted
-
4 tbsp granulated sugar
-
2 tsp ground cinnamon
Cheesecake Filling
-
4 (8 oz) packages full-fat cream cheese, softened
-
6 cups Cool Whip, thawed
-
2 ⅔ cups granulated sugar
-
1 tsp ground cinnamon
-
1 tsp vanilla extract or 1 tbsp maple syrup (optional)
Apple Pie Topping
-
½ cup unsalted butter
-
8 Gala apples, peeled, cored, chopped
-
1 cup water + 4 tsp cornstarch (slurry)
-
1 cup light brown sugar, packed
-
4 tsp ground cinnamon
-
1 tsp vanilla extract
-
Optional: pinch of nutmeg or splash of bourbon
Instructions
-
Crust: Mix crumbs, sugar, and cinnamon. Stir in melted butter until sandy. Press firmly into a 9×13 pan or 2 pie dishes. Chill 20 minutes.
-
Filling: Beat softened cream cheese until smooth. Add sugar, cinnamon, and vanilla/maple. Fold in Cool Whip gently until airy and uniform. Spread over crust.
-
Topping: Sauté apples with butter, brown sugar, and cinnamon for 5 minutes. Stir in cornstarch slurry, simmer until glossy and thick (7–10 min). Remove from heat, stir in vanilla (and nutmeg/bourbon if using). Cool completely.
-
Assemble: Spoon cooled apple topping over cheesecake filling. Cover and chill at least 4 hours, ideally overnight. Slice, serve, and enjoy!
Notes
For bakery-style flair, serve with warm caramel drizzle, a scoop of vanilla ice cream, and a sprinkle of cinnamon.
Nutritional Information*
*Please note: This is an estimated nutritional breakdown for informational purposes. Values can vary based on specific ingredients used and portion size.
Per Serving (1/16th of recipe, without optional caramel or ice cream):
- Calories: ~450 kcal
- Total Carbohydrates: 52g
- Dietary Fiber: 2g
- Sugars: 38g
- Total Fat: 25g
- Saturated Fat: 15g
- Protein: 4g
This is certainly a treat-yo-self kind of dessert. The richness comes from the cream cheese, butter, and sugars. To lighten it up slightly, you can use reduced-fat cream cheese, lite Cool Whip, and reduce the sugar in the filling by 1/4 cup. Remember, it’s all about balance!
Final Thoughts from My Kitchen to Yours
Well, friends, there you have it. My ultimate no-bake dessert love letter to fall, to family, and to taking it easy in the kitchen without sacrificing an ounce of flavor. This No-Bake Apple Pie Cheesecake is proof that the most impressive dishes often come from the simplest, most heartfelt ideas.
I hope this recipe finds its way into your recipe box and becomes a new tradition for your own family and friends. It’s a reminder that cooking is about connection—to our past, to each
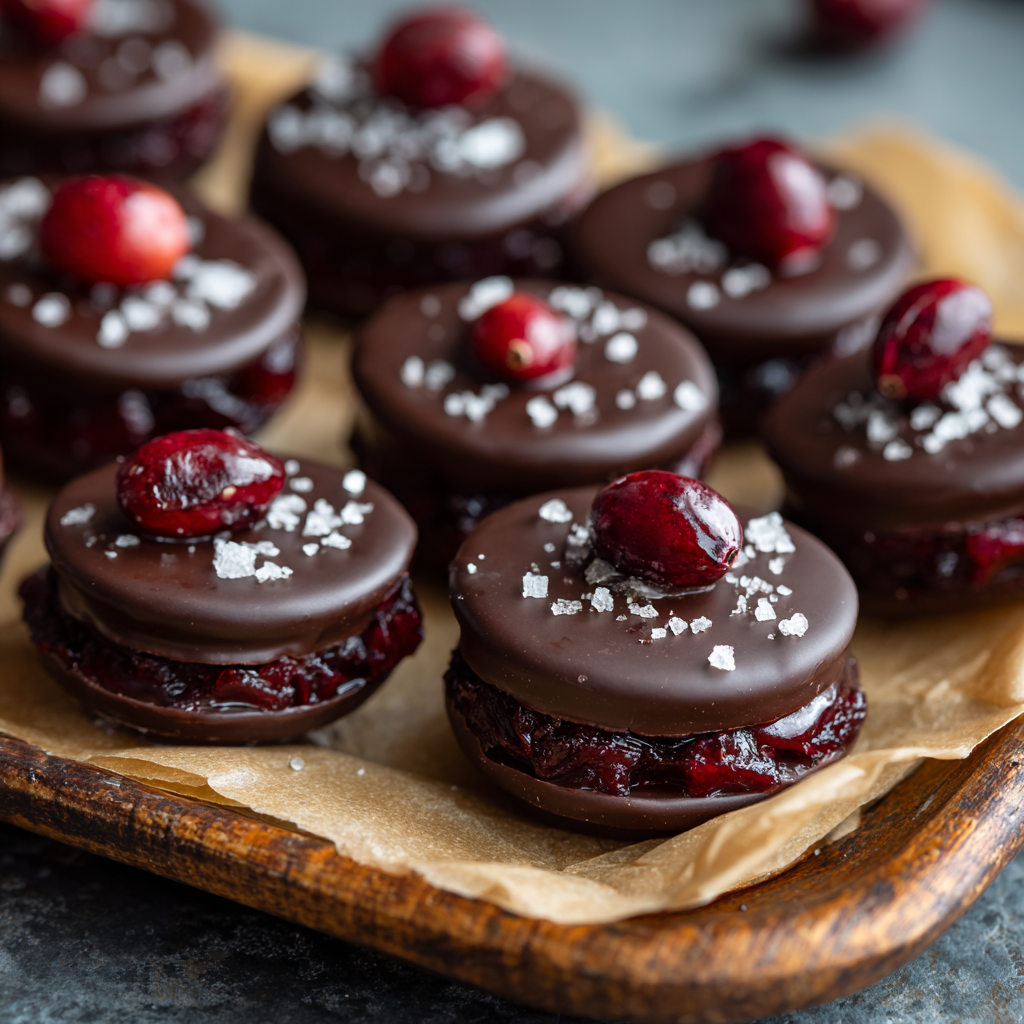
Dark Chocolate Covered Cranberry Sauce Bites
Your New Favorite Holiday Obsession: Dark Chocolate Cranberry Sauce Bites
Hey friends, Beau here! Can we talk about the elephant in the room for a second? You know, the one wearing a Santa hat and holding a half-eaten turkey leg? I’m talking about the post-holiday fridge. It’s a beautiful, chaotic mess of leftovers, and right there in the door, nestled between the pickles and the mustard, is that can of jellied cranberry sauce. You used a few slices for the big meal, but now it’s just… sitting there. Staring at you. Do you just… eat it with a spoon? (No judgment if you do!). Do you try to reinvent it into a sandwich for a week? Or does it sadly get pushed to the back, only to be discovered sometime in January with a new, interesting fuzz on top?
Well, my foodie friends, I’m here to tell you that this year, that little can of tart, jiggly joy is your secret weapon. We’re transforming those humble leftovers into the most elegant, addictive, and downright impressive little treat you’ll make all season: Dark Chocolate Covered Cranberry Sauce Bites. Imagine this: sweet-tart cranberry, firm and cool, enrobed in a crackling shell of rich, dark chocolate. It’s a flavor and texture explosion that’s part dessert, part candy, and 100% genius. They’re incredibly simple to make, perfect for gifting, and they’re the ultimate “wow” factor to finish a festive meal. So, let’s rescue that cranberry sauce and turn it into something truly magical. Grab your favorite apron, and let’s get cooking!
A Can of Memories
This recipe actually has its roots in a bit of kitchen desperation, and it involves my Nana Collier. Nana was a phenomenal cook, but she was also the Queen of “Waste Not, Want Not.” One year, after Thanksgiving, she caught my cousin Jamie and me giggling at the can-shaped ridges on the cranberry sauce slice on her plate. Instead of scolding us, she just smiled, winked, and said, “You just wait until tomorrow. I’ll make you forget all about those silly lines.”
The next day, she summoned us to the kitchen. There, on a plate, were what looked like tiny, glistening jewels. She had sliced the leftover sauce, dipped the pieces in melted chocolate from a leftover baking project, and frozen them. We were skeptical. But one bite and we were absolute converts. The contrast of the smooth, bitter chocolate and the bright, sweet-tart cranberry was a revelation. It felt so fancy, so special. To this day, the sight of a can of jellied cranberry sauce doesn’t make me think of Thanksgiving lines; it makes me think of my clever Nana and the magical, delicious surprises you can create with a little love and zero waste. It’s a tradition I’m proud to carry on, and I’m so excited to share it with you.
Gathering Your Magical Ingredients
One of the best parts of this recipe is its beautiful simplicity. You only need a couple of core ingredients to create something extraordinary. Here’s what you’ll need to make about 48 delicious bites:
- 2 (14 oz) cans jellied cranberry sauce: This is our star! The jellied variety works best because it holds its shape when sliced. That classic, can-shaped slice is part of the charm, but don’t worry, we’re transforming it completely. Chef’s Insight: If you have homemade whole-berry sauce, you can still use it! Just spread it in a parchment-lined pan about ½-inch thick and freeze it solid before cutting.
- 32 oz dark chocolate chips or chopped high-quality bars: This is where you can really make these bites your own. I prefer a 60-70% dark chocolate for a perfect balance—rich enough to cut the sweetness of the cranberry but not too bitter. Substitution Tip: Feel free to use semi-sweet or milk chocolate if that’s more your family’s style! For a dairy-free option, ensure your chocolate chips are labeled as such.
- 2 tbsp coconut oil (optional): This little trick is a game-changer. Adding a touch of fat to your melting chocolate makes it smoother, easier to dip with, and gives the finished chocolate shell a gorgeous, professional-looking snap. Chef’s Hack: If you don’t have coconut oil, you can use a tiny bit of refined avocado oil or even vegetable shortening. Butter is not recommended as it can cause the chocolate to seize.
Let’s Make Some Magic: Step-by-Step
Alright, team! Let’s turn these simple ingredients into a masterpiece. Follow these steps, and you’ll be a chocolate-dipping pro in no time.
Step 1: Slice and Dice
First, pop open those cans of cranberry sauce. You’ll notice it slides right out, maintaining its iconic cylindrical shape. Don’t you dare try to slice it yet! Place the whole cylinder on a cutting board. Using a sharp knife, slice it into ½-inch thick rounds. Now, take each round and cut it into bite-sized squares. I usually get 6-8 squares per slice. Chef’s Hack: For a truly fun presentation, use tiny cookie cutters! Stars, trees, or circles make these extra special for holiday platters.
Step 2: The Big Freeze (This is CRUCIAL!)
Line a baking sheet with parchment paper and carefully place your cranberry squares on it. They’re a bit jiggly and fragile now, but that’s about to change. Pop the entire baking sheet into the freezer for at least 30-60 minutes. You want these guys to be completely firm and frozen solid. This step is non-negotiable! A frozen center is what prevents the cranberry from melting into a puddle when it hits the warm chocolate, and it makes them so much easier to handle.
Step 3: Melt Your Chocolate Like a Pro
While the cranberry bites are getting chilly, it’s chocolate time! You can melt your chocolate two ways. The double boiler method is the classic chef’s way: place a heatproof bowl over a pot of simmering water (make sure the bottom of the bowl doesn’t touch the water), add your chocolate and coconut oil, and stir gently until it’s silky smooth. The microwave method is faster: pour your chocolate and coconut oil into a microwave-safe bowl and heat in 30-second bursts, stirring vigorously between each burst, until melted. Pro Tip: However you melt it, keep your equipment completely dry. Even a single drop of water can cause chocolate to “seize,” turning it into a grainy, clumpy mess.
Step 4: The Dip!
Take your frozen cranberry bites out of the freezer. Work quickly now! Using a fork or a dipping tool, spear a frozen square and fully submerge it into the melted chocolate. Swirl it around to ensure it’s completely coated. Lift it out, let the excess chocolate drip off for a second, and then gently place it back onto the parchment-lined baking sheet. Chef’s Hack: For a gorgeous two-tone look, just dip each piece halfway. It’s easier, less messy, and shows off that beautiful crimson color inside.
Step 5: The Finishing Touches
If you’re adding any optional toppings like a pinch of flaky sea salt, a sprinkle of orange zest, or a dusting of cinnamon, now is the time! Do it immediately after placing the bite on the sheet, before the chocolate starts to set.
Step 6: Set It and Forget It
Once all your bites are beautifully coated, place the entire baking sheet back into the refrigerator for at least 15-20 minutes, or until the chocolate is completely firm and hard to the touch. And voilà! You’ve just created edible magic.
How to Serve These Shiny Gems
Presentation is part of the fun! These bites are so beautiful they deserve a special stage. For a casual family treat, pile them high in a rustic ceramic bowl. For a more elegant dessert platter, arrange them in a single layer on a beautiful slate board or a white porcelain plate—the dark chocolate and red cranberry will pop against a neutral background.
They are the perfect petit four to serve with after-dinner coffee or tea. I also love setting out a plate of them next to a cheese board; the sweet-tart-chocolatey flavor is an incredible pairing with a sharp aged cheddar or a creamy brie. And let’s talk gifting! Place a dozen in a clear cellophane bag, tie it with a pretty ribbon, and you have a heartfelt, handmade gift that’s infinitely better than anything from a box. Teachers, neighbors, and friends will be absolutely thrilled.
Make It Your Own: Delicious Variations
The basic recipe is a knockout, but if you’re feeling creative, here are some of my favorite ways to mix it up!
- The Citrus Zing: Add the zest of one whole orange directly into the cranberry sauce before you slice and freeze it. The bright, aromatic citrus notes cut through the richness and add a whole new layer of flavor.
- The Salty-Sweet Dream: Right after dipping, finish each bite with a tiny sprinkle of flaky sea salt (like Maldon). It enhances the chocolate and cranberry flavors incredibly.
- The Warm Spice: Feeling cozy? Add a dash of warm spice to the melted chocolate. A ¼ teaspoon of cinnamon, cardamom, or even a tiny pinch of cayenne pepper will give these bites a warm, intriguing depth.
- The Nutty Crunch: After dipping in chocolate, immediately roll the bite in finely chopped pistachios, pecans, or toasted almonds. You get an amazing crunch in every bite.
- The White Chocolate Swirl: Melt a small amount of white chocolate and drizzle it over the top of the fully set dark chocolate bites for a beautiful and tasty contrast.
Beau’s Chef Notes
This recipe has come a long way since Nana’s first experiment! I’ve made these bites more times than I can count, and every time I learn something new. One year, in a hurry, I tried to dip the cranberry squares before they were fully frozen. It was a delicious, but hilariously messy, chocolatey puddle. Lesson learned: patience is key! I’ve also found that using a slightly higher quality chocolate bar instead of chips really does elevate the final product—the flavor is just cleaner and richer. But honestly, even with the simplest ingredients, these always turn out amazing. They’re a testament to the idea that the best recipes often come from a place of resourcefulness and a desire to make something special out of the ordinary.
Your Questions, Answered!
Q: My chocolate became thick and clumpy when I melted it. What happened?
A: Ah, you’ve experienced the dreaded “seized” chocolate! This happens when even a tiny bit of moisture or steam gets into the melting chocolate. Unfortunately, you can’t really fix it for dipping. Your best bet is to start over with a completely dry bowl and new chocolate. To prevent it, always ensure all your tools are bone-dry and avoid using a lid over your melting pot, as condensation can drip in.
Q: Can I use whole-berry cranberry sauce?
A: Absolutely! The method is just slightly different. Line a small baking pan (like an 8×8) with parchment paper and spread your whole-berry sauce into an even layer, about ½-inch thick. Freeze it until it’s completely solid, then use the parchment to lift it out and cut it into squares. The berries might make it a bit more fragile, but the flavor is fantastic!
Q: How far in advance can I make these?
A: They are fantastic make-ahead treats! Store them in a single layer in an airtight container in the refrigerator for up to a week. You can also freeze them for up to 2 months! Just let them thaw in the fridge for an hour or so before serving.
Q: The cranberry is oozing out when I dip it. Help!
A: This means it wasn’t frozen enough. Pop everything back into the freezer for another 20-30 minutes. The centers need to be rock-solid to withstand the heat of the chocolate.
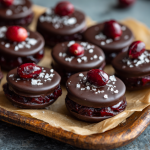
Dark Chocolate Covered Cranberry Sauce Bites
Description
Move over boring leftovers—this is the holiday treat that will steal the show! Sweet-tart cranberry sauce squares, frozen solid and dipped in rich dark chocolate, become shiny little jewels of flavor. They’re elegant enough for a dessert platter, fun enough for gifting, and ridiculously simple to make. One bite and you’ll never look at that can of cranberry sauce the same way again.
Ingredients
-
2 (14 oz) cans jellied cranberry sauce (or homemade, frozen solid in a pan)
-
32 oz dark chocolate chips or bars (60–70% is perfect)
-
2 tbsp coconut oil (optional, for smoother dipping)
Optional toppings: flaky sea salt, orange zest, chopped nuts, warm spices, or a drizzle of white chocolate.
Instructions
-
Slice cranberry sauce into ½-inch rounds, then cut into bite-sized squares (or use mini cookie cutters for fun shapes).
-
Freeze squares on a parchment-lined sheet for 30–60 minutes until rock solid.
-
Melt chocolate with coconut oil using a double boiler or in the microwave in short bursts, stirring until smooth.
-
Dip frozen squares into chocolate with a fork, let excess drip, and place back on parchment.
-
Top immediately with salt, zest, or nuts if desired.
-
Chill in fridge for 15–20 minutes until chocolate sets.
Notes
Make ahead and store in an airtight container for up to a week, or freeze up to 2 months. For a two-tone look, dip only halfway and let that gorgeous cranberry color shine!
A Quick Note on Nutrition
While these are definitely a treat, it’s nice to know what you’re enjoying! The following is a rough estimate per bite (assuming 48 bites and using semi-sweet chocolate chips).
Calories: ~80 kcal
Carbohydrates: 10g | Fat: 4.5g | Sugar: 8g | Fiber: 1g
The dark chocolate provides antioxidants (flavanols), and cranberries are a great source of vitamin C and other phytonutrients. So, while it’s a dessert, it’s one with some hidden benefits! As always, enjoy in moderation as part of a balanced diet.
Final Thoughts from My Kitchen to Yours
Well, there you have it, my friends! Your guide to turning a humble leftover into the talk of the town. I hope this recipe brings as much joy to your kitchen as it has to mine. It’s more than just a dessert; it’s a little project, a moment of creativity, and a delicious way to make sure nothing goes to waste. Food, at its best, is about connection—connecting to memories like my Nana’s, connecting with family and friends over a shared plate, and connecting to the simple, satisfying pleasure of creating something with your own two hands.
I’d love to hear how your chocolate-dipping adventures go! Tag me on social @feastical with your creations. Now, go forth, raid that fridge, and get dipping! Until next time, keep your kitchen messy and your heart full.
With love and a full plate,

Pumpkin & Feta Grain Bowl Salad
Your New Favorite Autumn Meal is Here, Friend!
Hey there, Feastical family! Beau here, coming to you from my kitchen where the air is finally starting to smell like crisp leaves and cozy sweaters. Is there anything better than that first truly cool autumn day? It makes me want to cook something that matches that perfect feeling—something hearty enough to warm you up but fresh enough to keep you feeling vibrant and energized.
That’s exactly why I’m so crazy about this Pumpkin & Feta Grain Bowl Salad. We’re not talking about some sad, wilted side salad here. Oh no. This is a main-event, fork-in-one-hand, grateful-sigh-in-the-other kind of meal. It’s a beautiful, textural masterpiece of sweet roasted pumpkin, salty feta, crunchy spiced chickpeas, and those little jewel-like bursts of pomegranate, all sitting on a bed of wholesome grains and massaged kale. And the creamy, dreamy lemon-tahini dressing? It ties the whole party together in the most glorious way.
This bowl is the culinary equivalent of your favorite flannel shirt. It’s comfortable, reliable, makes you look good, and just feels right for the season. It’s a meal that celebrates everything I love about fall cooking: nourishing ingredients, vibrant colors, and flavors that hug you from the inside out. So, grab your favorite cutting board and let’s build something beautiful together.
The Cozy Porch & The Perfect Bowl
This recipe always takes me back to a specific, golden-hour afternoon a few years ago. My wife and I had just finished a long, satisfying hike through the Vermont woods. The kind where the air is so fresh it almost tastes sweet, and your cheeks are flushed from the cold. We got back to our friend’s cabin, absolutely starving, and raided the fridge to see what we could throw together.
We found a leftover wedge of pumpkin from a previous night’s soup, a block of feta, some grains, and a pomegranate that was just begging to be cracked open. In about 30 minutes, we had thrown together the very first, rough-draft version of this grain bowl. We took our heaping bowls out onto the creaky wooden porch, wrapped ourselves in blankets, and dug in while watching the sun set over the orange and red hills. It was one of those perfectly simple, profoundly happy moments where the food just tasted right. It was nourishing, it was delicious, and it was shared. I’ve tweaked and perfected the recipe since, but every time I make it, I’m right back on that porch, feeling that same sense of cozy contentment.
Gathering Your Autumn Treasure Trove
Here’s your shopping list for this flavor adventure! Don’t stress if you need to make a swap—cooking is all about making it work for you. I’ve included my best chef insights and substitutions right here.
- 1½ cups cooked mixed grains (farro, brown rice, or quinoa): This is your hearty base. I’m a farro guy—it’s chewy, nutty, and holds up like a champ. Quinoa is a fantastic gluten-free option that adds complete protein. Pro-tip: Cook your grains in vegetable broth instead of water for a massive flavor upgrade!
- 2 cups chopped kale: Don’t you dare skip the massaging step! A little olive oil and lemon juice rubbed into those leaves breaks down their tough structure, making them tender, sweet, and utterly delicious. No more chewing on leathery greens!
- 2 cups roasted pumpkin cubes: You can use sugar pumpkin, kabocha, or even butternut squash here. The goal is that sweet, caramelized roast. Chef’s insight: Toss them in a tiny pinch of cinnamon or nutmeg with the oil and salt. It’s a game-changer.
- ½ cup crumbled feta: That salty, tangy punch is crucial. For a vegan twist, a good creamy tofu feta or even some salty capers will do the trick!
- ½ cup pomegranate seeds: These are my little bursts of joy. They add a pop of color and a sweet-tart crunch. No pomegranate? Dried cranberries or cherries work in a pinch.
- ¾ cup roasted chickpeas: Our crunch factor! I season mine with smoked paprika and a pinch of cumin. Canned chickpeas, rinsed, dried, and tossed with oil and spices, then roasted until crispy. So easy, so good.
For the Lemon-Tahini Dressing:
- 3 tbsp tahini: This sesame seed paste is the creamy, rich heart of the dressing. If it’s separated in the jar, just give it a really good stir!
- 2 tbsp lemon juice: Freshly squeezed is always best. It brightens up the entire bowl.
- 1 tbsp olive oil: For extra richness and to help emulsify everything.
- 1 tsp maple syrup or honey: Just a touch to balance the lemon’s acidity and the tahini’s slight bitterness.
- 1–2 tbsp water: This is your secret weapon for getting the perfect drizzling consistency. Add slowly until it’s just right.
- Salt & pepper to taste: Season with love, people. Taste as you go!
Let’s Build Some Bowl Magic: Step-by-Step
Alright, team. Aprons on, music playing—let’s get cooking! This isn’t complicated, but a little order of operations makes everything flow smoothly.
- Get Your Pumpkin Roasting. Heat that oven to 400°F (200°C). Chop your pumpkin into 1-inch cubes—keep them roughly the same size so they cook evenly. Toss them in a bowl with a good glug of olive oil, salt, and pepper. Spread them out on a baking sheet in a single layer. Chef Hack: Give them space! If they’re crowded, they’ll steam instead of roast. We want those caramelized, crispy edges. Pop them in the oven for 25-30 minutes, giving the pan a shake halfway through.
- Crispy Chickpea Time. While the pumpkin is in, tackle the chickpeas. Rinse and drain a can of chickpeas, then pat them really dry with a clean kitchen towel or paper towels. This is the key to crispiness! Toss them with a bit of olive oil, smoked paprika, cumin, and salt. Spread them on another baking sheet. They can go right into the oven with the pumpkin for the last 15-20 minutes. They’ll be golden and perfect by the time the pumpkin is done.
- Massage That Kale. While your oven is working its magic, take your chopped kale and put it in a large bowl. Drizzle with just a teaspoon of olive oil and a squeeze of lemon juice. Now, get your hands in there! Literally massage the kale for 1-2 minutes. You’ll feel it start to soften and turn a brighter green. This transforms it from tough and bitter to tender and sweet. Set it aside.
- Whisk the Wonder Dressing. In a small bowl or jar, combine the tahini, lemon juice, olive oil, and maple syrup. It might look a bit seized up and thick at first—don’t panic! Start whisking. Slowly add water, one tablespoon at a time, until it smooths out into a beautiful, creamy, pourable consistency. Season with salt and pepper. Give it a taste and adjust—maybe it needs more lemon? More maple? Make it yours!
- The Grand Assembly. Now for the fun part! In your serving bowls, start with a base of your cooked grains. Top with a generous handful of your massaged kale. Artfully (or just enthusiastically) arrange your roasted pumpkin, crispy chickpeas, crumbled feta, and pomegranate seeds over the top. The colors are going to look incredible.
- The Finale. Drizzle that gorgeous lemon-tahini dressing over everything right before serving. This keeps everything crisp and avoids sogginess.
How to Serve This Autumn Masterpiece
Presentation is part of the joy of a meal like this! I love using wide, shallow bowls so you can see all the beautiful layers. This dish is fantastic served immediately while the pumpkin and chickpeas are still warm, creating a wonderful contrast with the cool, crisp kale and tangy feta.
It’s a complete meal on its own, but if you’re serving it for a dinner party or want to make it even more substantial, it pairs beautifully with a simple roast chicken or some grilled pork chops. For a cozy weeknight, just the bowl itself, maybe with a slice of crusty sourdough bread for wiping up every last drop of dressing, is absolute perfection.
This recipe is also a fantastic make-ahead lunch. Just keep the components separate in containers. Pack the dressing in a little jar, and assemble it all at work right before you eat. You’ll be the envy of the lunchroom, I promise.
Make It Your Own: Delicious Twists & Swaps
The beauty of a grain bowl is its flexibility. Here are a few ways to riff on this recipe based on what you have or what you’re craving:
- The Protein Power-Up: Add some grilled shrimp, shredded rotisserie chicken, or pan-seared halloumi cheese for an extra protein boost.
- Go Fully Plant-Based: It’s easily vegan! Just skip the feta or use a vegan feta alternative, and make sure your grains are cooked in veggie broth. The dressing is already vegan if you use maple syrup.
- Nutty for Nuts: Not a chickpea fan? Toasted pepitas (pumpkin seeds), walnuts, or pecans would add a fantastic crunch and nutty flavor that works so well with pumpkin.
- Apple of My Eye: Thinly sliced crisp apples (like Honeycrisp or Fuji) would be a amazing sweet-crunchy substitute for the pomegranate, leaning into those classic fall flavors.
- Herb It Up: Fresh herbs can take this to another level. A handful of fresh mint, parsley, or even a little chopped rosemary sprinkled over the top right before serving adds a wonderful freshness.
Beau’s Kitchen Notes & Stories
This recipe has evolved so much from that first cabin creation. I’ve learned that the massaged kale step is non-negotiable—I once served it to my nephew without doing it, and he looked at me like I’d betrayed him with a bowl of tree leaves. Lesson learned!
Another funny kitchen fail: I once tried to shortcut the chickpeas by frying them. Let’s just say I learned why you need to pat them completely dry first. I ended up with chickpeas popping like popcorn and oil splatters all over the stove. The baking sheet method is infinitely easier and less dangerous!
Don’t be afraid to play with the spice blends. A little garam masala on the pumpkin? Amazing. Some chili powder on the chickpeas for heat? Do it! This bowl is your canvas.
Your Questions, Answered!
Q: My tahini dressing is too thick/grainy! What did I do wrong?
A: This is the most common issue, and it’s an easy fix! Tahini can seize up when it first hits acid (the lemon juice). Just keep whisking and slowly add more water. It will suddenly smooth out into a creamy dream. If it’s still too thick, you’ve just made a great dip—thin it out with more water or lemon juice for dressing.
Q: Can I meal prep this?
A: Absolutely! This is a meal-prep superstar. Store each component separately in airtight containers in the fridge. The roasted pumpkin, chickpeas, and grains will keep for 4 days. The dressed kale and dressing will keep for about 3 days. Assemble the morning you plan to eat it or right before.
Q: My chickpeas aren’t getting crispy. Help!
A: The enemy of crispiness is moisture. You must pat those chickpeas thoroughly dry after rinsing. Also, make sure they’re in a single layer on the baking sheet with a little room to breathe. Overcrowding steams them. Finally, give them enough time! They need a full 15-20 minutes.
Q: What’s the best way to cut a pumpkin?
A: It can be tough! First, pierce it a few times and microwave it for 2-3 minutes to slightly soften the skin. Then, use a sharp, heavy chef’s knife to slice it in half. Scoop out the seeds, then lay the flat side down on the board to safely cut it into slices, then cubes.
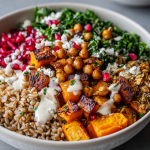
Pumpkin & Feta Grain Bowl Salad
- Total Time: 40 min
Description
Your new favorite autumn meal is here! This bowl is cozy, colorful, and crave-worthy—packed with roasted pumpkin, tangy feta, crunchy chickpeas, jeweled pomegranate seeds, hearty grains, and a dreamy lemon-tahini drizzle. It’s comfort food that also happens to nourish your body, perfect for chilly evenings or make-ahead lunches. Think of it as a big, warm hug in a bowl.
Ingredients
For the bowl
-
1½ cups cooked grains (farro, brown rice, or quinoa)
-
2 cups chopped kale, massaged with olive oil + lemon
-
2 cups roasted pumpkin (or butternut squash) cubes
-
¾ cup roasted chickpeas (seasoned with smoked paprika & cumin)
-
½ cup crumbled feta (or vegan feta)
-
½ cup pomegranate seeds (or dried cranberries)
For the lemon-tahini dressing
-
3 tbsp tahini
-
2 tbsp fresh lemon juice
-
1 tbsp olive oil
-
1 tsp maple syrup (or honey)
-
1–2 tbsp water (for consistency)
-
Salt & black pepper to taste
Instructions
-
Roast pumpkin: Toss cubes with olive oil, salt, pepper, and a pinch of cinnamon. Roast at 400°F (200°C) for 25–30 min until caramelized.
-
Crisp chickpeas: Pat dry, season with oil + spices, roast for 15–20 min until golden.
-
Massage kale: Rub chopped kale with a little oil + lemon for 1–2 min until tender.
-
Whisk dressing: Stir tahini, lemon, oil, and maple until smooth, adding water slowly. Season to taste.
-
Assemble: Layer grains + kale, then top with pumpkin, chickpeas, feta, and pomegranate.
-
Finish: Drizzle with dressing and enjoy warm or chilled.
- Prep Time: 15 min
- Cook Time: 25 min
Nutrition
- Calories: 360 Cal per serving
Nourishment That Feels as Good as It Tastes
This isn’t just empty calories, friends. This is a bowl packed with nutrients that will keep you fueled and satisfied. Here’s a rough breakdown of the goodness you’re getting per serving:
Per Serving (approximate):
Calories: 360 | Fat: 17g (mostly healthy fats from olive oil, tahini, and nuts) | Carbs: 38g (complex, fiber-rich carbs from grains and veggies) | Protein: 12g | Fiber: 7g | Sodium: 410mg
You’re getting a powerhouse of vitamins from the kale and pumpkin (hello, Vitamin A and C!), a great dose of fiber for digestive health, and a balanced mix of complex carbs, healthy fats, and plant-based protein. It’s a meal that truly fuels your body and your soul.
Final Thoughts from My Kitchen to Yours
Well, there you have it. My go-to, never-fail, always-impresses autumn grain bowl. It’s more than just a recipe to me; it’s a reminder of that perfect fall day and the joy of creating something delicious from simple, whole ingredients.
I hope this recipe finds its way into your regular rotation and creates its own little moments of joy in your kitchen. Maybe it’ll be a quick weeknight dinner that saves the day, or the star of your next Friendsgiving spread. However you serve it, make it with a little love and a lot of crunch.
If you make it (and I really hope you do!), tag me @Feastical on social media so I can see your beautiful creations. Nothing makes me happier than seeing you guys enjoy these recipes. Now go forth and roast some pumpkin! Talk soon.
Beau