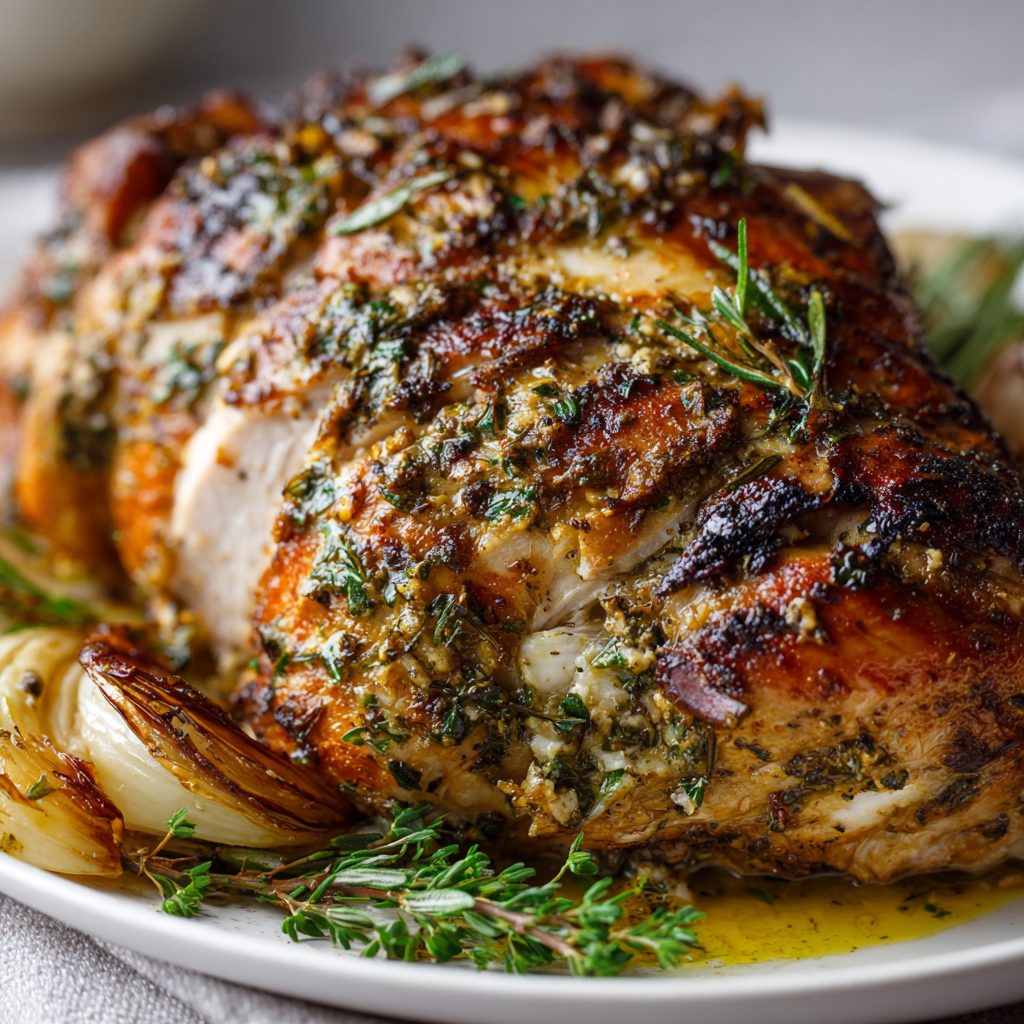
Garlic Herb Butter Slow Cooker Turkey Breast
Your New Holiday Hero: The Easiest, Most Flavor-Packed Turkey Breast Ever
Hey friends, Beau here from Feastical! Let’s have a real talk for a second. Does the thought of roasting a whole turkey make your palms sweat a little? The brine, the basting, the constant oven-peeking, the very real fear of serving a beautiful, golden… yet tragically dry… bird to your hungry family? I get it. I’ve been there. That’s why I’m practically bursting to share this recipe with you today. This Garlic Herb Butter Slow Cooker Turkey Breast is about to change your comfort-food game forever.
Imagine this: unbelievably juicy, tender turkey meat that practically melts in your mouth, infused through and through with the rich, savory magic of garlic and fresh herbs. And the skin? We’re not sacrificing crispiness here, my friend. We get it perfectly golden and crackling with a quick finish under the broiler. The best part? Your trusty slow cooker does 95% of the work for you. That’s right—no oven hogging, no frantic thermometer checks, just set-it-and-forget-it ease that leaves your kitchen cool, calm, and smelling absolutely incredible. This isn’t just for holidays; it’s your new secret weapon for a spectacular Sunday dinner that feels like a warm hug. So, grab your slow cooker and let’s make some magic happen.
That One Time I Almost Burned Down the Kitchen (And Found a Better Way)
This recipe was born from a near-disaster, as the best kitchen stories often are. It was my third Thanksgiving hosting duty, and I was determined to prove my culinary chops. I had a massive 20-pound turkey, a complicated brining recipe, and an ego the size of the bird itself. Long story short, between managing pies, casseroles, and a dozen hungry relatives, I got distracted. The smoke alarm became my dinner bell, announcing a beautifully bronzed turkey… with a blackened, charcoal-like bottom where the drippings had caught fire.
As I frantically waved a towel at the shrieking alarm, my sweet grandmother simply patted my arm and said, “Beau, honey, why make it so hard? The best meals come from love, not stress.” She was right. That moment sent me on a mission to create a turkey centerpiece that delivered on massive flavor without the massive anxiety. After countless tests (and a much cleaner oven), this slow cooker method emerged as the undisputed champion. It’s foolproof, it’s forgiving, and it guarantees a juicy result every single time. Now, it’s the only way I make turkey for my family, and I’m so excited to share that peace of mind with you.
Gathering Your Flavor Arsenal
Here’s everything you’ll need to create this masterpiece. Don’t be shy with the herbs—that’s where the soul of this dish lives!
- 1.5–2 kg (3–4 lb) bone-in, skin-on turkey breast: This is our star! The bone-in cut adds incredible depth of flavor and helps keep the meat insanely moist during the long, slow cook. The skin is non-negotiable—it’s our barrier for the butter and our ticket to crispy goodness later. Chef’s Insight: If you can only find boneless, that’s okay! Just reduce the cooking time by about an hour and keep a close eye on the internal temperature.
- 4 tbsp unsalted butter, softened: This is our flavor vehicle. Softened butter is key because it whips into a beautiful, spreadable herb paste. Substitution Tip: Feel free to use a good olive oil or even ghee if you’re dairy-free. The fat is essential for moisture and richness.
- 4 garlic cloves, minced: Because is it even a comfort food without garlic? Mince it finely so it distributes evenly in the butter rub. Chef’s Hack: If you’re in a pinch, 1 teaspoon of high-quality garlic powder can work, but fresh is always best here.
- 1 tbsp each fresh rosemary, thyme, and parsley, chopped: The holy trinity of herbs for poultry! Fresh is absolutely paramount—they provide a bright, aromatic flavor that dried herbs just can’t match. Substitution Tip: No fresh herbs? Use 1 teaspoon of each dried herb, but try to find the fresh parsley at least for a garnish at the end.
- 1 tsp paprika: This little addition isn’t for heat, but for a subtle sweetness and that gorgeous golden color it imparts to the butter and the skin.
- 1 tsp salt & ½ tsp black pepper: The essential seasonings. Don’t be afraid of salt—it’s a big piece of meat and needs seasoning to shine!
- 1 onion, quartered: This isn’t just for flavor. The onion pieces create a little “rack” at the bottom of the slow cooker, lifting the turkey out of the direct liquid and allowing hot air to circulate for more even cooking.
- 1 cup chicken or turkey broth: This creates the steam that keeps the cooking environment humid and prevents drying out. It also forms the base of your incredible, ready-made pan juices for serving. Chef’s Insight: A good low-sodium broth is best so you can control the salt level yourself.
Let’s Get Cooking: Your Foolproof Roadmap to Juicy Turkey
Follow these steps, and you are guaranteed a winner. I’m talking standing ovation from your family levels of good.
Step 1: Prep the Bird. Take your turkey breast out of the fridge and pat it completely dry with paper towels. This is our first secret weapon! Dry skin = crispy skin later. Let it sit on the counter for 20-30 minutes to take the chill off—this helps it cook more evenly.
Step 2: Create the Magic Butter. In a small bowl, mix the softened butter, minced garlic, all your chopped herbs, paprika, salt, and pepper. Mash it all together with a fork until it’s one beautifully green-flecked, fragrant compound butter. Give it a taste—this is where you can adjust the seasoning to your liking.
Step 3: Get Under Its Skin (Literally). This is the most important step for flavor infusion! Gently slide your fingers under the skin of the turkey breast, loosening it from the meat. Be careful not to tear it. Now, take about half of your herb butter and spread it directly onto the meat under the skin. Massage it gently to spread it out evenly. This gets the flavor right to the heart of the dish. Take the remaining butter and rub it all over the outside of the skin. Don’t miss a spot!
Step 4: Slow Cooker Assembly. Scatter the quartered onion pieces evenly over the bottom of your slow cooker. This is our natural roasting rack. Carefully place the butter-slathered turkey breast on top of the onions, skin side UP. This is crucial—we want the skin to stay out of the liquid. Now, pour the broth around the sides of the turkey, being careful not to pour it over the top and wash off that beautiful herb butter.
Step 5: The Long, Slow, Magical Cook. Pop the lid on, set your slow cooker to LOW, and walk away for 5-6 hours. No peeking! Every time you lift that lid, you let out precious heat and steam, adding to the cooking time. The turkey is done when an instant-read thermometer inserted into the thickest part of the breast (without touching the bone) reads 75°C / 165°F.
Step 6: The Crispy Finish. Here’s the hack that makes this recipe next-level. Preheat your oven’s broiler to high. Carefully remove the turkey from the slow cooker (it will be fall-apart tender, so use two large spatulas or tools!) and place it on a baking sheet. Slide it under the broiler for just 3-5 minutes, WATCHING IT CONSTANTLY, until the skin is golden brown and crackling crisp.
Step 7: The Patient Wait. Transfer the turkey to a cutting board, tent it loosely with foil, and let it rest for a full 10 minutes. This allows the juices to redistribute throughout the meat, ensuring every single slice is moist. While it rests, you can strain the incredible cooking juices from the slow cooker into a gravy boat or jug to serve alongside.
Feasting Time: How to Serve Your Masterpiece
You’ve done the hard work, now let’s make it look as good as it tastes! I like to place the whole rested turkey breast on a large wooden cutting board or a beautiful platter. Slice it into thick, even slices, showing off that juicy interior. Arrange the slices slightly fanned out.
Don’t you dare forget those amazing juices from the slow cooker! Strain them into a small pitcher or gravy boat and serve it right alongside the turkey. This liquid gold is packed with flavor and is incredible poured over the sliced meat and, let’s be real, your mashed potatoes too. Garnish the platter with a few fresh sprigs of rosemary and thyme and maybe some lemon wedges for a pop of color. This isn’t just dinner; it’s a centerpiece.
Make It Your Own: Delicious Twists & Swaps
This recipe is a fantastic canvas. Play around with these ideas to keep it exciting!
- Lemon Zest & Herb: Add the zest of one whole lemon to your herb butter mixture. The bright, citrusy notes cut through the richness beautifully.
- Spicy Cajun Kick: Swap the paprika for 2 teaspoons of your favorite Cajun or Creole seasoning blend for a turkey with a bit of a punch.
- Maple Butter Bliss: Perfect for fall! Add 2 tablespoons of pure maple syrup to the butter mixture and use sage instead of thyme. The subtle sweetness with the savory herbs is out of this world.
- Bone-In Chicken Breast Swap: Don’t want turkey? This method works identically for a large bone-in, skin-on chicken breast! Just reduce the cooking time to 3-4 hours on Low.
- Veggie-Packed: Add more flavor to the pot and create a side dish! Throw in some chunked carrots, celery, and whole garlic cloves with the onions. They’ll cook in the broth and turkey drippings and taste amazing.
Beau’s Kitchen Notes & Stories
This recipe has become my ultimate comfort food for a crowd. It’s evolved from that first nervous attempt into my most-requested dish. I remember one time I was so confident, I didn’t check the temperature until the 6-hour mark. The thermometer read 180°F! I panicked, sure I had ruined it. But you know what? Because of the gentle, moist heat of the slow cooker, it was still incredibly juicy. It’s just that forgiving. The broth and butter create a steamy sanctuary that protects the meat. These days, I love making this on a lazy weekend. The smell that fills the house as it cooks is pure happiness. It’s the smell of relaxation, of good times coming, and of a meal made with love (not stress).
Your Questions, Answered!
Q: Can I cook this on HIGH instead of LOW?
A: I don’t recommend it. The magic of this recipe is the low, slow, gentle heat that breaks down the connective tissues without squeezing out the juices. Cooking on high will likely result in a tougher, drier texture. Plan for the slow and low—it’s worth the wait!
Q: My skin isn’t getting crispy in the broiler. What did I do wrong?
A: The number one culprit is not drying the skin thoroughly in Step 1. Any moisture on the skin will steam instead of crisp. Also, make sure your broiler is fully preheated and you’re placing the turkey close enough to the heating element. Watch it like a hawk—it can go from perfect to burnt in seconds!
Q: Can I make gravy from the juices in the slow cooker?
A: Absolutely! It makes a fantastic, light gravy. After removing the turkey, strain the juices into a measuring cup and let the fat rise to the top. Skim off most of the fat, then pour the defatted juices into a saucepan. Bring to a simmer. For each cup of juice, mix 1 tablespoon of cornstarch with 2 tablespoons of cold water to make a slurry. Whisk the slurry into the simmering juices and cook for 1-2 minutes until thickened. Season to taste.
Q: How long do I have leftovers?
A: Stored in an airtight container in the fridge, your leftover turkey will be perfect for 3-4 days. It’s amazing in sandwiches, salads, soups, and pot pies!

Garlic Herb Butter Slow Cooker Turkey Breast
Description
Forget the stress of roasting a whole turkey! This slow-cooker turkey breast comes out unbelievably juicy, tender, and packed with garlic-herb flavor. Finish it under the broiler for perfectly crisp, golden skin. Minimal effort, maximum comfort—perfect for holidays or any cozy Sunday dinner.
Ingredients
-
1.5–2 kg (3–4 lb) bone-in, skin-on turkey breast
-
4 tbsp unsalted butter, softened
-
4 garlic cloves, minced
-
1 tbsp each fresh rosemary, thyme, and parsley, chopped
-
1 tsp paprika
-
1 tsp salt
-
½ tsp black pepper
-
1 onion, quartered
-
1 cup chicken or turkey broth
Instructions
-
Prep the Turkey: Pat turkey dry and let it sit at room temperature for 20–30 minutes.
-
Make Herb Butter: Mix softened butter, garlic, chopped herbs, paprika, salt, and pepper until well combined.
-
Butter the Bird: Gently loosen the skin and spread half the herb butter under it. Rub the remaining butter over the skin.
-
Assemble in Slow Cooker: Scatter onion quarters on the bottom. Place turkey breast skin-side up. Pour broth around the sides, avoiding the skin.
-
Cook Slowly: Cover and cook on LOW for 5–6 hours until an instant-read thermometer reads 75°C / 165°F in the thickest part.
-
Broil for Crispy Skin: Preheat broiler. Transfer turkey to a baking sheet and broil 3–5 minutes until skin is golden and crisp. Watch carefully.
-
Rest and Serve: Tent turkey loosely with foil for 10 minutes. Slice and serve with the cooking juices or a quick pan gravy.
Notes
-
High Heat Shortcut: Not recommended; low and slow keeps meat juicy.
-
Extra Flavor: Add lemon zest, maple syrup, or Cajun seasoning to the butter.
-
Veggie Boost: Toss in carrots, celery, or garlic cloves with onions.
-
Chicken Option: Works with a large bone-in, skin-on chicken breast (3–4 hours on LOW).
Nutrition
- Calories: 310Ca per serving
- Fat: 16g
- Protein: 38g
Nutritional Information*
Here’s a rough breakdown of what you’re getting in each delicious serving. This is for estimates based on the ingredients listed and assumes the recipe serves 6. Remember, the actual broth and butter fat are largely left in the slow cooker and not全部 consumed, making this a leaner option than you might think!
Per Serving:
Calories: 310 | Protein: 38g | Fat: 16g | Saturated Fat: 8g | Carbohydrates: 2g | Fiber: 0g | Sugar: 1g | Cholesterol: 125mg | Sodium: 520mg
*Please note: Nutritional information is an estimate only and can vary widely based on the specific brands of products used, the size of your turkey breast, and how much of the cooking juices are consumed. For precise dietary needs, it’s always best to calculate using your exact ingredients with a dedicated nutrition calculator.
You’ve Got This!
And there you have it, my friend. Your path to a stress-free, show-stopping turkey dinner that’s packed with more flavor than a whole bird twice its size. This Garlic Herb Butter Slow Cooker Turkey Breast is more than just a recipe; it’s a promise of a good meal and a good time, without the cleanup or the kitchen drama. It’s the kind of dish that gives you confidence in the kitchen and makes everyone at your table feel special.
I truly hope this recipe becomes a staple in your home, creating its own stories and traditions. If you make it (and you absolutely should!), I’d love to hear about it. Tag me on social @feastical or drop a comment on the blog. Nothing makes me happier than seeing you guys create and enjoy these recipes. Now go forth, cook with joy, and dig in!
With love and a full belly,
Beau
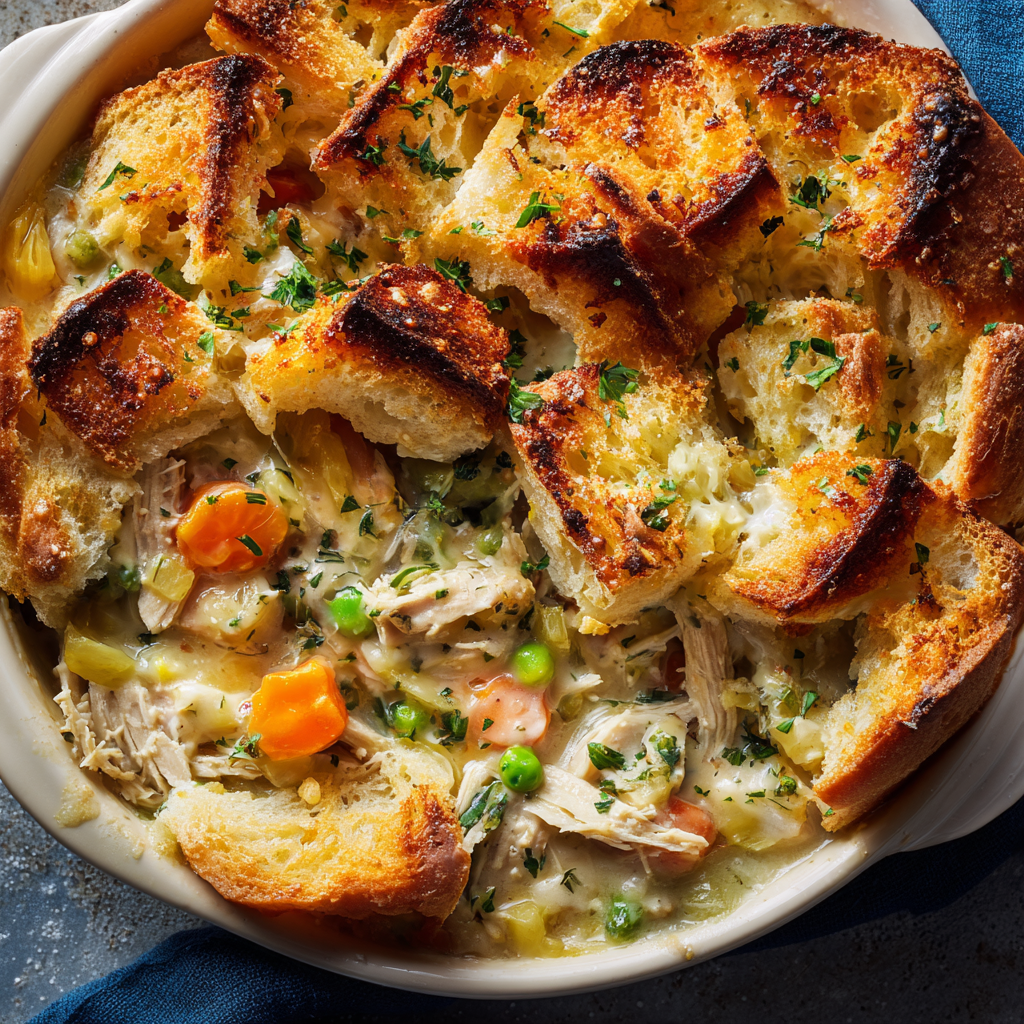
Garlic Bread Leftover Turkey Pot Pie
Garlic Bread Leftover Turkey Pot Pie: Your New Favorite Comfort Food
Hey there, Feastical family! Beau here, coming at you from my kitchen, which currently smells like a cozy, garlicky dream. You know that post-holiday moment? The one where you’ve had your fill of feasts, the relatives have all gone home, and you’re left staring into a fridge that’s basically a monument to your culinary success? There’s a mountain of turkey, a few rogue vegetables, and maybe, just maybe, the last half of a loaf of bread. I used to see a chore. Now, I see pure, unadulterated potential. I see the makings of the most epic, comforting, and downright delicious Leftover Turkey Pot Pie you’ve ever had—with a serious garlic bread twist.
Forget the fuss of making a pastry crust. We’re keeping it real, simple, and incredibly flavorful. We’re taking that leftover turkey, those veggies, and transforming them with a creamy, dreamy sauce. Then, we’re crowning it all with crispy, buttery, garlic-infused slices of bread that bake into a golden, crunchy crust. Every single bite is a perfect harmony of savory filling and crispy topping. It’s the kind of meal that feels like a warm hug, the ultimate solution to your leftover dilemma, and a guaranteed crowd-pleaser. So, let’s roll up our sleeves, grab that leftover turkey, and turn it into something truly magical.
A Tale of Two Leftovers: My First Kitchen “Aha!” Moment
This recipe was born out of a little bit of desperation and a whole lot of ingenuity. I’ll never forget my first Thanksgiving hosting gig. I was so proud of the bird I’d brined and roasted, the mountains of sides… and then completely overwhelmed by the aftermath. For days, it was turkey sandwiches. And then more turkey sandwiches. I hit a wall. My best friend came over, took one look at my sad-face and the sadder-looking loaf of French bread on the counter, and said, “Dude. We’re not making sandwiches. We’re making a pot pie. But better.”
We threw everything we had into a skillet, whipped up a quick sauce, and instead of wrestling with pastry dough, we just sliced that bread, slathered it in garlic butter, and laid it right on top. Twenty minutes later, the kitchen smelled insane, and we dug into this bubbling, cheesy, garlicky masterpiece. It was a revelation! It wasn’t just about using up leftovers anymore; it was about elevating them into something new and exciting. That’s the spirit of Feastical—taking what you have and making it feel special, without any of the stress. This Garlic Bread Turkey Pot Pie is a tribute to that first kitchen “aha!” moment.
Gather Your Ingredients: Building Blocks of Flavor
This is the fun part! Let’s break down what you’ll need. Remember, this is a leftover recipe, so flexibility is your best friend.
- ▢ 2 cups cooked turkey, shredded or chopped – This is your star! Use white meat, dark meat, or a mix. Chef’s Insight: Shredding it with two forks helps it soak up all that glorious sauce. If you’re short on turkey, cooked chicken works perfectly.
- ▢ 2 tbsp butter – The foundation of our rich sauce. Unsalted is best so you can control the seasoning.
- ▢ 1 small onion, diced – Sweetness and aroma. Yellow or white onion is perfect here.
- ▢ 2 cloves garlic, minced – Because more garlic is always the answer. Fresh is key for that punchy flavor!
- ▢ 2 tbsp all-purpose flour – This is our thickening agent, creating the roux for the sauce. For a gluten-free version, a 1:1 GF flour blend works great.
- ▢ 1 1/2 cups turkey or chicken broth – The liquid gold. Use homemade if you have it, or a good quality low-sodium store-bought broth. Pro Tip: If you have leftover gravy, swap out ½ cup of broth for it for an even richer, deeper flavor.
- ▢ 1/2 cup cream or whole milk – For creaminess and body. Half-and-half also works. For a lighter version, whole milk is fine, but the cream adds a lovely decadence.
- ▢ 2 cups mixed vegetables (frozen or leftover) – The supporting cast! Classic peas and carrots are a win. But use what you have: green beans, corn, even diced roasted potatoes! Frozen mixed veggies are a lifesaver—no need to thaw.
- ▢ Salt & pepper, to taste – Season as you go! Taste your filling before it goes into the dish.
- ▢ 6–8 slices of crusty bread (French or sourdough) – This is our game-changing “crust.” You want something sturdy that can hold up to the garlic butter and soak up the saucy goodness without getting soggy. A day-old loaf is actually ideal!
- ▢ 3 tbsp melted butter – For that gorgeous, crispy, golden top.
- ▢ 1/2 tsp garlic powder – Combined with fresh garlic, this gives a rounded, pervasive garlic flavor that’s just *chef’s kiss*.
- ▢ 2 tbsp chopped parsley – A pop of fresh color and flavor. If you only have dried, use about 2 teaspoons.
- ▢ 1/2 cup shredded mozzarella or cheddar (optional) – I say “optional,” but highly recommended. It creates a cheesy, bubbly, glorious layer between the bread and the filling.
Let’s Get Cooking: Building Your Masterpiece, Step-by-Step
Ready to create some magic? Follow these steps, and you’ll have a show-stopping dinner on the table in no time. I’ve packed this section with all my favorite chef hacks to make it foolproof.
Step 1: Preheat and Prep
Preheat your oven to 200°C (400°F). This is crucial for getting that bread nice and crispy right out of the gate. While it’s heating, grab a 9-inch pie dish or an 8×8 baking dish—anything of a similar size will work. Lightly grease it. Now, get all your ingredients prepped (this is called your *mise en place*—makes you feel fancy, right?). Dice the onion, mince the garlic, chop the turkey, and measure everything out. Trust me, this makes the process smooth and relaxing.
Step 2: Build the Flavor Base (The Aromatics)
In a large skillet or Dutch oven, melt the 2 tablespoons of butter over medium heat. Add the diced onion and sauté for 3-4 minutes, until it becomes soft and translucent. You’re not looking for color here, just sweetness. Now, add the fresh minced garlic and cook for just one more minute until it’s incredibly fragrant. Chef’s Hack: Don’t let the garlic brown! Burnt garlic turns bitter, and we want all that good, pungent flavor.
Step 3: Create the Luxurious Sauce (The Roux)
Sprinkle the 2 tablespoons of flour over the onions and garlic. Stir constantly and cook for about 1-2 minutes. You’re cooking out the raw flour taste, and this mixture (called a roux) is what will thicken our sauce. It should look pasty. Now, here’s the key: gradually whisk in the turkey or chicken broth. Add a little at a time, whisking vigorously after each addition to avoid lumps. Once the broth is incorporated, whisk in the cream or milk. Bring the mixture to a gentle simmer, and let it cook for 2-3 minutes, stirring occasionally. You’ll feel it thicken beautifully. Season generously with salt and pepper.
Step 4: Bring It All Together (The Filling)
Turn the heat down to low. Add your shredded turkey and all your mixed vegetables to the skillet. Stir everything until it’s completely coated in that creamy, luxurious sauce. Give it a taste! This is your last chance to adjust the seasoning. Does it need more pepper? A pinch more salt? Maybe a sprinkle of thyme? Make it yours. Once it’s perfect, pour the entire mixture into your prepared baking dish and spread it out evenly.
Step 5: Craft the Garlic Bread Crown
In a small bowl, mix together the 3 tablespoons of melted butter, ½ teaspoon of garlic powder, and the chopped parsley. Lay your slices of crusty bread on a cutting board. Using a pastry brush (or the back of a spoon), generously brush one side of each bread slice with the garlic butter mixture. This is what’s going to give us that incredible flavor and crunch.
Step 6: Assemble and Bake to Perfection
Now, artfully arrange your garlic-buttered bread slices on top of the filling, buttered side up, like you’re shingling a roof. Overlap them slightly to cover most of the filling. If you’re using the optional cheese, now’s the time to sprinkle it right over the top of the bread. It’ll melt and get all bubbly and fantastic. Pop the dish into your preheated oven and bake for 20-25 minutes, until the filling is bubbling around the edges and the bread is golden brown and crisp. Your kitchen will smell absolutely incredible.
How to Serve This Comfort Food Classic
This pot pie is a complete meal in a dish, but a little flair never hurt anybody! I like to take it straight from the oven and let it rest for about 5 minutes. This allows the filling to set just a tad, making it easier to serve. Use a big spoon to scoop down through that crispy bread top and into the saucy filling underneath.
For a true “feast-ical” presentation, serve it right in the baking dish at the table—it’s rustic, inviting, and gets everyone excited. A simple, bright side salad with a tangy vinaigrette is the perfect partner to cut through the richness of the pie. A handful of fresh arugula with a lemon squeeze would be my go-to. And honestly, a cold beer or a glass of crisp white wine like a Sauvignon Blanc is a match made in heaven with all those savory, garlicky flavors. Dig in and enjoy the fruits of your (minimal) labor!
Make It Your Own: Delicious Recipe Variations
The beauty of this recipe is its versatility. Don’t be afraid to play around and adapt it to what you love or what’s in your pantry!
- The “Everything But The Kitchen Sink” Version: Got leftover ham, roasted Brussels sprouts, or even some mashed potatoes? Toss them in! This recipe is the ultimate clean-out-the-fridge hero.
- Cozy Herb Garden Twist: Add a teaspoon of fresh chopped thyme or rosemary to the filling when you add the turkey. It gives it that classic, comforting holiday herb flavor.
- A Little Kick: Love a bit of heat? Add a pinch of red pepper flakes to the garlic butter mixture or a dash of hot sauce to the filling. It’ll add a wonderful warmth.
- Ultra-Creamy Version: Stir in 2 tablespoons of cream cheese into the sauce when you add the cream. It makes it extra indulgent and velvety.
- Gluten-Free & Dairy-Free Friendly: Use a gluten-free 1:1 flour blend for the roux and your favorite GF bread for the top. For dairy-free, use olive oil or a plant-based butter and swap the cream for unsweetened almond or oat milk. Skip the cheese or use a vegan shred.
Beau’s Chef Notes & Kitchen Stories
This recipe has evolved so much since that first haphazard attempt with my buddy. I’ve learned that a thicker, sturdier bread is non-negotiable—no flimsy sandwich bread here, unless you want mush (which, hey, some people might!). I’ve also started adding a tiny pinch of smoked paprika to the filling for a subtle, smoky depth that plays so well with the turkey.
One funny story: I once tried to get fancy and make intricate garlic bread “weaves” on top. It looked Instagram-worthy for about five minutes before it collapsed into a delicious, but homely, pile. Lesson learned: sometimes simple and rustic is not only easier, it’s better. The goal is flavor and comfort, not perfection. This dish is forgiving and wants to be loved, not stressed over!
Your Questions, Answered: FAQs & Troubleshooting
Q: Can I make this ahead of time?
A: Absolutely! You can prepare the filling up to 2 days in advance. Let it cool completely, store it covered in the fridge, and when you’re ready, pour it into the dish, add the bread topping, and bake. You might need to add a few extra minutes to the baking time since it’s starting from cold.
Q: My filling seems too runny. How can I fix it?
A: No worries! If it’s runny before baking, mix a teaspoon of cornstarch with a tablespoon of cold water to create a slurry. Stir this into the simmering filling and let it cook for another minute—it should tighten right up. If it’s runny after baking, it likely just needed a few more minutes in the oven to allow the sauce to reduce and thicken further.
Q: The bottom of my bread is a bit soggy. What happened?
A: This usually means your filling was very liquidy before you added the bread. Next time, make sure your sauce has thickened nicely on the stovetop. Also, using a sturdy, day-old bread helps immensely, as it’s less prone to soaking up moisture too quickly.
Q: Can I freeze this pot pie?
A: I recommend freezing just the filling. The creamy sauce and bread topping can separate and get a weird texture when frozen and thawed. Make and cool the filling, freeze it in an airtight container for up to 3 months. Thaw in the fridge overnight, then assemble and bake as directed.

Garlic Bread Leftover Turkey Pot Pie
Description
Turn your holiday leftovers into a comforting, garlicky masterpiece with this easy pot pie. Shredded turkey, mixed veggies, and a creamy sauce are baked under a crispy garlic bread topping. Minimal prep, maximum flavor—perfect for a cozy dinner or a creative way to use up leftovers.
Ingredients
For the Filling:
-
2 cups cooked turkey, shredded or chopped
-
2 tbsp butter
-
1 small onion, diced
-
2 cloves garlic, minced
-
2 tbsp all-purpose flour (or GF flour for gluten-free)
-
1 1/2 cups turkey or chicken broth
-
1/2 cup cream or whole milk
-
2 cups mixed vegetables (frozen or leftover)
-
Salt and pepper, to taste
For the Garlic Bread Topping:
-
6–8 slices crusty bread (French or sourdough)
-
3 tbsp melted butter
-
1/2 tsp garlic powder
-
2 tbsp chopped parsley
-
1/2 cup shredded mozzarella or cheddar (optional)
Instructions
-
Preheat Oven: Preheat oven to 200°C (400°F). Grease a 9-inch pie dish or similar baking dish.
-
Cook Aromatics: In a large skillet, melt butter over medium heat. Add diced onion and sauté until soft, 3–4 minutes. Add garlic and cook 1 more minute, being careful not to burn it.
-
Make the Sauce: Sprinkle flour over the onions and garlic, stir constantly for 1–2 minutes. Gradually whisk in broth, then cream or milk, until smooth. Simmer 2–3 minutes to thicken. Season with salt and pepper.
-
Add Turkey & Veggies: Stir in shredded turkey and mixed vegetables until fully coated. Taste and adjust seasoning. Pour mixture into prepared baking dish.
-
Prepare Garlic Bread: Mix melted butter, garlic powder, and parsley. Brush mixture onto one side of each bread slice.
-
Assemble & Bake: Arrange bread slices buttered-side up over filling, overlapping slightly. Sprinkle cheese on top if using. Bake 20–25 minutes until filling bubbles and bread is golden and crisp.
-
Serve: Let rest 5 minutes. Scoop through bread into filling and serve warm.
Notes
-
Make Ahead: Prepare filling 1–2 days in advance. Add bread topping before baking.
-
Thicker Sauce: If filling is too runny, stir in 1 tsp cornstarch mixed with 1 tbsp water and simmer until thick.
-
Extra Flavor: Add fresh thyme, rosemary, or smoked paprika to the filling.
-
Leftover Mix-Ins: Ham, roasted Brussels sprouts, or mashed potatoes can all be added.
-
Gluten-Free / Dairy-Free: Use GF flour and bread, and swap cream with plant-based milk and butter.
Nutrition
- Calories: 390 Cal per serving
- Fat: 21g
- Carbohydrates: 28g
- Protein: 23g
Nutritional Information (A General Guide)
Alright, friends, let’s talk nutrition. Remember, I’m a chef, not a dietitian, so these are estimates based on the ingredients listed and can vary widely based on your specific choices (like using milk vs. cream, or adding cheese). This info is for one serving, assuming the recipe serves 6.
Per serving:
Calories: approx 390 | Carbohydrates: 28g | Protein: 23g | Fat: 21g | Saturated Fat: 12g | Cholesterol: 85mg | Sodium: 450mg | Fiber: 3g | Sugar: 4g
This dish is a fantastic source of protein, thanks to the turkey, and provides a good amount of energy. Using mixed veggies boosts the fiber and vitamin content. To lighten it up, opt for low-fat milk, go easy on the butter in the topping, and skip the cheese. But remember, part of the Feastical philosophy is enjoying wholesome, satisfying food that nourishes the soul, too!
Final Thoughts: Leftovers, Elevated
And there you have it! Your guide to transforming those humble holiday leftovers into a meal that’s anything but ordinary. This Garlic Bread Turkey Pot Pie is more than just a recipe; it’s a mindset. It’s about looking at what you have with creativity and joy, and turning it into something that

Festive Christmas Cranberry Roll-Ups
Your New Favorite Holiday Party Trick: Festive Cranberry Roll-Ups
Hey friends, Beau here from Feastical! Can you smell that? It’s officially in the air—the scent of pine needles, cinnamon sticks, and… sheer, unadulterated holiday panic. Am I right? If your to-do list is longer than a child’s letter to Santa and the thought of making another complicated appetizer makes you want to hide in the pantry with the last of the good chocolate, I’ve got you. Today, we’re throwing culinary stress out the frosty window and making something incredibly delicious, stunningly festive, and so easy you’ll be doing a little happy dance right there by the fridge.
I’m talking about my legendary Festive Christmas Cranberry Roll-Ups. These little pinwheels of joy are the ultimate crowd-pleaser. Imagine: a creamy, tangy, slightly crunchy filling rolled up in a soft tortilla and sliced into beautiful, bite-sized spirals. They’re a burst of red and green holiday cheer on a platter, and I promise they will be the first thing to disappear at your potluck or party. The best part? You can make them ahead of time, which means less fussing in the kitchen and more time for you to actually enjoy the party (and maybe snag one or three of these for yourself before the guests descend). So, let’s put on some classic holiday tunes, grab that softened cream cheese, and create some magic together.
The Happy Kitchen Accident That Started It All
I have to be honest with you all; this recipe was born from a beautiful, chaotic kitchen accident. It was my third holiday season hosting my extended family, and I was determined to be the host with the most. I had a menu planned down to the last sprig of rosemary. But, as life loves to do, it threw me a curveball. A last-minute text: “Aunt Carol is bringing her new boyfriend who’s vegan and gluten-free!” Cue the internal scream.
I was scrambling, staring into the abyss of my fridge, when I saw it: a half-used block of cream cheese, a nearly empty bag of dried cranberries from another recipe, and a lone green onion looking a little lonely. In a moment of “what’s the worst that could happen?” inspiration, I mashed it all together, slathered it on a tortilla, rolled it up, and took a bite. Friends, it was a revelation. The creamy, the tart, the savory—it just worked! I sliced it up, arranged it on a plate, and it was an instant hit. It wasn’t on my fancy menu, but it became the star of the show. It just goes to show that sometimes the best recipes aren’t meticulously planned; they’re discovered in the beautiful, messy, real-life moments of feeding the people we love.
Gathering Your Cast of Characters
One of the things I love most about this recipe is its flexibility. It’s more of a method than a rigid set of rules. Here’s what you’ll need to get started, along with my chef-y insights to make it your own.
- 2 large flour tortillas (10-inch): The canvas for our masterpiece! The larger size gives you more room to roll. I like the “burrito-size” ones for their flexibility. Chef’s Tip: For a gluten-free version, your favorite GF tortilla works perfectly. Just warm it for a few seconds in the microwave to make it more pliable and less likely to crack.
- 8 oz (225g) cream cheese, softened: This is non-negotiable—it MUST be softened to room temperature. Trying to mix cold cream cheese is an arm workout nobody signed up for and will leave you with a lumpy filling. Take it out about an hour before you start.
- 1/2 cup dried cranberries, chopped: These little ruby jewels provide the perfect pop of sweet-tart flavor and that iconic festive color. I give them a rough chop so they distribute evenly and are easier to bite into. Craisins work great here!
- 1/2 cup chopped green onions or chives: This is our savory, fresh counterpoint to the sweet cranberries. I use the green parts for color and a milder flavor. If you’re an onion lover, feel free to add a tiny bit of the white part for more punch.
- 1/2 cup chopped pecans or walnuts (optional but highly recommended): This is where we add that wonderful crunch and toasty, nutty flavor. It truly elevates the texture. If you have nut allergies, just leave them out! Sunflower seeds or even a sprinkle of everything bagel seasoning could be a fun swap.
- 1/2 tsp garlic powder: We’re using powder instead of fresh garlic here for a smoother, more subtle flavor that won’t overpower the other ingredients or have a sharp, raw bite.
- Salt and pepper, to taste: Don’t you dare skip this! Seasoning is what makes flavors sing. A good pinch of salt and a few cracks of black pepper will balance the sweetness and bring the whole filling together.
Rolling Up the Goodness: A Step-by-Step Guide
Alright, team, let’s get our hands dirty (figuratively speaking—we’re keeping them clean for rolling!). Follow these steps, and you’ll be a pinwheel pro in no time.
Step 1: The Perfect Mix
In a medium-sized bowl, combine your beautifully softened cream cheese, the chopped cranberries, green onions, nuts, garlic powder, salt, and pepper. Now, grab a spatula and mix until everything is beautifully combined and smooth. Chef’s Hack: If you’re making a double or triple batch (which you should!), a hand mixer on low speed can make this process lightning fast. Just be careful not to overmix and whip too much air into it.
Step 2: The Art of the Spread
Lay your tortillas flat on a clean cutting board. Using that same spatula or a butter knife, spread the cream cheese mixture evenly over the entire surface of each tortilla, all the way to the edges. Pro Tip: Leave about a half-inch border on the side farthest from you. This will give the filling somewhere to go when you start rolling, preventing it from squishing out the end!
Step 3: The Tight Roll
This is the only slightly technical part, but you’ve got this. Starting from the side closest to you, begin rolling the tortilla away from you. Keep it as tight as you can without squeezing the filling out. Think firm but gentle pressure. You want a nice, compact log.
Step 4: The Crucial Chill
Once you have your two beautiful logs, wrap each one tightly in plastic wrap. This is the most important step for getting those perfect, clean slices! Pop them in the refrigerator for at least one hour. This chills the cream cheese, firms everything up, and allows the flavors to get to know each other and become best friends. You can absolutely do this the night before—they get even better!
Step 5: The Big Slice
Unwrap your chilled logs. Grab a sharp serrated knife—this is key! A dull knife will squish your beautiful roll. Using a gentle sawing motion, slice each log into 1-inch pinwheels. Wipe your knife clean between slices for the prettiest presentation.
Plating Your Holiday Masterpiece
Now for the fun part: making it look as good as it tastes! I love using a simple white or rustic wooden platter to really make the red and green colors pop. Arrange the pinwheels in a circular sunburst pattern or line them up in rows. For that little extra “chef’s kiss” of holiday flair, garnish the platter with a few extra whole cranberries, a sprinkle of chopped green onions or fresh parsley, and maybe a few whole pecans. It tells your guests, “Yes, I am a culinary genius who thought of everything,” even though we know it took 10 minutes of active work. If you’re serving these on a buffet, I like to place a small bowl of extra cranberry sauce or a spicy pepper jelly in the center for dipping. Trust me on this one!
Make It Your Own: Delicious Twists & Swaps
The beauty of this recipe is its versatility. Play around and find your family’s favorite combination!
- The “Everything Bagel” Roll-Up: Swap the cranberries for everything bagel seasoning and add a little extra chopped chive. It’s a savory, brunch-ready dream.
- Turkey & Stuffing Roll-Up: Add a layer of thinly sliced leftover turkey and a drizzle of cranberry sauce before you add the cream cheese mixture. It’s a Thanksgiving leftovers party in every bite!
- Spicy Pepper Jack & Jalapeño: For a kick, use pepper jack cheese instead of cream cheese and add a few tablespoons of finely diced pickled jalapeños to the mix.
- Sweet & Salty Dessert Roll-Up: Transform it into a dessert! Use a cinnamon-sugar tortilla (just brush with butter and sprinkle with cinnamon sugar), mix a little powdered sugar into the cream cheese, and use mini chocolate chips instead of cranberries and nuts. Roll in sprinkles after slicing!
- Dairy-Free Delight: Easily make this vegan by using your favorite plant-based cream cheese and tortillas. It works like a charm!
Beau’s Chef Notes & Kitchen Confessions
Over the years, this recipe has become a Feastical holiday staple, and it’s evolved in the best ways. I once, in a pre-coffee haze, accidentally used onion powder instead of garlic powder. It was a happy accident—it was delicious! So don’t be afraid to experiment. My biggest kitchen confession? I have been known to “test” the ends of the log after I slice it. You know, the parts that aren’t as pretty? Someone’s gotta do it, right? It’s the chef’s treat. This recipe is forgiving, fun, and always a hit. It’s proof that the best dishes are often the simplest ones, made with a pinch of love and a whole lot of flavor.
Your Questions, Answered!
Q: My tortilla is cracking when I try to roll it. What did I do wrong?
A: This usually means your tortilla is too cold or old. Tortillas dry out in the fridge. The simple fix is to warm them for about 15-20 seconds in the microwave before spreading the filling. This makes them soft and pliable!
Q: Can I make these further in advance?
A: Absolutely! You can assemble the rolls, wrap them tightly in plastic wrap, and keep them in the fridge for up to 24 hours before slicing and serving. I wouldn’t go much longer than that, as the tortilla might start to get soggy.
Q: My filling is oozing out when I slice them. Help!
A: This means they needed more chill time! Pop the whole unsliced log back in the freezer for 15-20 minutes to firm up significantly. Also, ensure you’re using a sharp serrated knife and a gentle sawing motion.
Q: Are there any other nuts I can use?
A: Of course! Toasted almonds or pistachios would be fantastic. Pistachios would especially add a gorgeous green color for the holidays!
Nutritional Information*
Okay, let’s talk real talk. This is a holiday appetizer, meant to be enjoyed in all its creamy, festive glory! But here’s a rough breakdown per pinwheel (assuming 20 slices total and including pecans).
Calories: ~90 | Carbohydrates: 7g | Protein: 2g | Fat: 6g | Saturated Fat: 3g | Cholesterol: 15mg | Sodium: 80mg | Sugar: 3g
*Please note: This is an estimate based on the specific ingredients I used. Values can vary greatly depending on the brands you choose and any substitutions you make. If you have specific dietary concerns, always calculate using your exact ingredients.
Print
Festive Christmas Cranberry Roll-Ups
Description
Bring a pop of holiday cheer to your table with these easy and stunning Cranberry Roll-Ups! Soft tortillas are spread with a creamy, tangy filling of cream cheese, cranberries, green onions, and nuts, then sliced into bite-sized pinwheels. Make them ahead of time for stress-free entertaining—they’re always the first to disappear at any party!
Ingredients
-
2 large flour tortillas (10-inch)
-
8 oz (225g) cream cheese, softened
-
1/2 cup dried cranberries, chopped
-
1/2 cup chopped green onions or chives
-
1/2 cup chopped pecans or walnuts (optional)
-
1/2 tsp garlic powder
-
Salt and pepper, to taste
Instructions
-
Mix the Filling:
In a medium bowl, combine softened cream cheese, cranberries, green onions, nuts, garlic powder, salt, and pepper. Mix until smooth and well combined. -
Spread on Tortillas:
Lay tortillas flat and spread filling evenly over each, leaving a 1/2-inch border on one side. -
Roll the Tortillas:
Starting from the side closest to you, roll each tortilla tightly into a log. -
Chill:
Wrap each log in plastic wrap and refrigerate for at least 1 hour (or overnight) to firm up. -
Slice and Serve:
Unwrap chilled logs and slice into 1-inch pinwheels using a sharp serrated knife. Arrange on a platter. Optionally garnish with extra cranberries, nuts, or parsley. Serve with cranberry sauce or a favorite dip.
Notes
-
Soft Tortillas: Warm tortillas for 15–20 seconds in the microwave if they crack while rolling.
-
Firm Slices: Chill the logs well to prevent filling from oozing.
-
Nut Alternatives: Toasted almonds or pistachios work beautifully if you want a twist.
-
Make Ahead: Assemble and wrap the rolls in advance for up to 24 hours.
Final Thoughts from My Kitchen to Yours
Well, there you have it, my friends. My go-to, never-fail, always-impresses recipe for Festive Christmas Cranberry Roll-Ups. I hope this recipe finds its way onto your holiday table and becomes a part of your own family’s traditions. Remember, cooking isn’t about perfection; it’s about connection. It’s about the laughter that happens while you’re mixing, the stories shared over the platter, and the joy of creating something delicious for the people you love.
I’d love to hear how your roll-ups turn out! Tag me @Feastical on social media so I can see your beautiful creations. From my kitchen to yours, have a deliciously joyful holiday season. Now go forth and roll!
Beau

Cheesy Pull-Apart Christmas Bread
Your New Favorite Holiday Tradition: Cheesy Pull-Apart Christmas Bread
Hey there, friends! Beau here from Feastical, and can you just *smell* that? The scent of garlic butter toasting in the oven, the unmistakable melody of holiday tunes playing in the background, and the warm, excited buzz of family and friends gathering in the next room. If there’s one thing I love more than a good, hearty meal, it’s a meal that brings everyone together, hands reaching in, laughing, and sharing one incredible, gooey, delicious bite at a time. That’s the magic of food, and it’s exactly why I’m so pumped to share this recipe with you today.
We’re talking about a show-stopping, conversation-starting, impossibly fun Cheesy Pull-Apart Christmas Bread. Imagine this: soft, pillowy dough balls, each one stuffed with a secret pocket of molten mozzarella, all baked together in the shape of a beautiful Christmas tree. You brush the whole thing with a generous coat of garlic-herb butter until it’s golden and glistening, then finish it with a snowy dusting of parmesan. You don’t slice it—you tear it. You pull it apart with your fingers, dunk it in marinara, and watch as those glorious cheese strands stretch for what feels like miles. It’s the ultimate festive appetizer, a spectacular side dish, and honestly, it might just become the main event. It’s simple enough for a weeknight treat but special enough to earn a permanent spot on your holiday table. So, tie on your favorite apron, and let’s make some kitchen magic together!
The Christmas Eve That Started It All
This recipe always takes me right back to my grandma’s kitchen on a particularly chaotic (and wonderful) Christmas Eve. I was about ten, and my job was to “supervise” the bread-making—which mostly meant sneaking pieces of raw dough when no one was looking. Grandma was a wizard with yeast and flour, but that year, time got away from us. The main event was almost ready, but our traditional loaf was still proofing! In a minor panic, she looked at the bowl of dough, then at me, and said, “Beau, honey, we’re changing tactics. We’re making this quick.”
She grabbed a pair of kitchen shears, snipped the dough into a dozen pieces, stuffed them with bits of cheese from the antipasto platter, and threw them in a pan. Twenty minutes later, we had this glorious, cheesy, pull-apart monstrosity. It was lopsided and cheesy and absolutely perfect. There was no beautiful braid, no fancy scoring—just pure, unadulterated, shareable joy. That’s the spirit I’ve tried to capture here. This Christmas Tree Bread is that same fast, fun, communal energy, just dressed up in its holiday best. It’s a reminder that sometimes, the best traditions start by accident.
Gathering Your Cheesy Treasure
One of the best things about this recipe is its beautiful simplicity. You likely have most of this in your pantry right now! Here’s what you’ll need to create this festive masterpiece.
- 1 batch pizza dough (homemade or store-bought): This is your blank canvas! I love using my super simple homemade dough for that extra love, but a high-quality store-bought dough is a fantastic, time-saving cheat code. No shame in that game! If you’re using frozen, just make sure it’s fully thawed.
- 2 cups shredded mozzarella cheese: The star of the show! I highly recommend shredding your own from a block of low-moisture, part-skim mozzarella. The pre-shredded stuff is coated with anti-caking agents that can prevent it from melting into those epic, gooey strands we’re after.
- 3 tbsp unsalted butter, melted: This is going to give our bread that gorgeous, golden-brown, crispy exterior. Using unsalted lets you control the seasoning perfectly. Vegan butter works great here too for a dairy-free version!
- 2 garlic cloves, minced: Fresh is best! That punchy, aromatic flavor is irreplaceable. In a pinch, ½ teaspoon of garlic powder mixed into the melted butter will do the trick.
- 1 tbsp chopped fresh parsley: This adds a lovely pop of color and a fresh, herbal note that cuts through the richness. Don’t have fresh? A teaspoon of dried parsley or even Italian seasoning will work wonderfully.
- 2 tbsp grated parmesan: The salty, umami-packed finishing touch. Use the good stuff from the refrigerated section, not the shelf-stable canister, for the best flavor.
- Marinara or pesto sauce, for dipping: The supporting cast! A warm, herby marinara is a classic pairing, but a vibrant pesto offers a gorgeous color contrast and a deliciously different flavor profile. Ranch dressing is also a shockingly delicious (and kid-approved) option!
Building Your Edible Christmas Tree: Step-by-Step
Alright, team! Let’s get our hands dirty and build this beautiful, cheesy tree. It’s easier than you think, and I’ll be with you every step of the way with my best chef hacks.
Step 1: Preheat and Prep. Fire up your oven to 180°C (350°F). This is the perfect temperature to get a golden exterior without burning the garlic butter before the inside is cooked. Line a large baking sheet with parchment paper—this is non-negotiable for easy cleanup and preventing any cheesy leaks from sticking. Trust me on this one.
Step 2: Shape the Dough Balls. On a lightly floured surface, roll your dough out into a rough rectangle, about ½-inch thick. Using a pizza cutter or a sharp knife, cut it into roughly 30 equal squares. Don’t stress about perfection! Rustic is charming. Now, take one square, flatten it slightly in the palm of your hand, place a good pinch (about a teaspoon) of shredded mozzarella in the center, and then bring the edges of the dough up and over the cheese, pinching them tightly to seal. Roll it gently in your hands to form a smooth ball. Repeat with all the pieces. Chef’s Hack: Keep a small bowl of water nearby—dampening your fingertips slightly can help seal any stubborn dough seams.
Step 3: Assemble the Tree. This is the fun, creative part! Start by placing one dough ball at the top of your prepared baking sheet—this is your tree topper. Directly underneath, place two balls side-by-side. Below that, three balls. Continue this pattern, increasing each row by one ball, until you have a triangle shape. I usually go down to a row of six or seven. For the trunk, place one or two balls vertically at the bottom. You want the balls to be touching each other so they bake together into one glorious pull-apart loaf.
Step 4: The Garlic Butter Glaze. While the oven is heating, mix your melted butter, minced garlic, and chopped parsley in a small bowl. Let it sit for a minute so the garlic infuses that butter with all its goodness. Now, using a pastry brush, generously brush this liquid gold over every single dough ball. Get in all the nooks and crannies! This butter is what’s going to create that incredible flavor and stunning color.
Step 5: Bake to Golden Perfection. Slide your masterpiece into the preheated oven and bake for 20-25 minutes. You’re looking for a deep golden brown color on top and you might even see some cheese starting to bubble out the sides—that’s a great sign! The smell in your kitchen will be absolutely divine.
Step 6: The Final Touch. Carefully remove the baking sheet from the oven (it’s hot and cheesy!). Immediately sprinkle the grated parmesan over the entire tree. The residual heat will wake up the parmesan’s flavor. Let it cool for about 5 minutes—this is crucial, as it allows the cheese inside to set slightly so it doesn’t all immediately ooze out when you tear into it (though a little ooze is encouraged!). Serve right on the sheet pan or carefully transfer to a serving board or platter with bowls of warm marinara and pesto for dipping.
How to Serve This Festive Masterpiece
Presentation is part of the fun! I love placing the entire baking sheet right in the middle of the table on a big trivet. It’s rustic, inviting, and says, “dig in!” For a fancier look, you can carefully slide the whole tree onto a large wooden cutting board or a festive platter. Tuck a few sprigs of fresh rosemary around the base to look like real Christmas tree branches—it adds a wonderful aroma, too.
Don’t forget the dips! Serve warm marinara sauce in one bowl and a bright green pesto in another. The red and green look so festive next to the golden bread. Place small plates and napkins nearby because things are about to get deliciously messy. This bread is the ultimate crowd-pleaser and is best served immediately while it’s still warm and the cheese is at its peak stretchiness. It’s the perfect starter to kick off a holiday feast or the star of a casual game-night gathering.
Mix It Up! Fun Recipe Variations
The beauty of this recipe is its versatility. Once you’ve mastered the basic tree, the flavor world is your oyster! Here are a few of my favorite twists:
- The Everything Bagel Tree: Mix 2 tablespoons of everything bagel seasoning into your melted butter before brushing. Stuff the dough balls with a mix of mozzarella and cream cheese for the ultimate savory treat.
- Pepperoni Pizza Tree: This is a kid (and adult!) favorite. Add a small slice of pepperoni into each dough ball along with the cheese. Brush with butter and garlic as usual, and after baking, sprinkle with a little dried oregano. Serve with extra marinara.
- Spinach & Artichoke Tree: Sauté a handful of chopped spinach and artichoke hearts until wilted and any liquid has evaporated. Let it cool, then mix it with the mozzarella and a tablespoon of grated parmesan before stuffing.
- Dessert Cinnamon Sugar Tree: Sweet twist! Omit the garlic and herbs. Instead, mix the melted butter with ½ cup of granulated sugar and 1 tablespoon of cinnamon. After sealing the plain dough balls, roll them in the cinnamon sugar mixture before arranging them on the pan. Bake as directed and serve with a vanilla glaze (mix powdered sugar and milk) for drizzling.
- Gluten-Free & Vegan Friendly: Use your favorite store-bought gluten-free pizza dough. For the filling, a vegan mozzarella shreds beautifully. Use vegan butter and nutritional yeast instead of parmesan for the topping.
Beau’s Chef Notes & Kitchen Stories
This recipe has evolved so much since that first chaotic Christmas Eve. I’ve made it probably a hundred times, and I’ve learned a thing or two. The first time I tried to make it “fancy,” I used a fancy cheese blend with asiago and provolone. Sounds great, right? Well, those cheeses have more oil and they melted *right* out of the dough balls, creating a delicious but hilariously messy cheese puddle on the baking sheet. My tree looked like it had melted in the sun! It still tasted incredible, but it was a good lesson: mozzarella is your best friend for that perfect, contained stretch.
Another time, I was filming a video for Feastical and I was so busy talking to the camera that I completely forgot to add the garlic to the butter. I didn’t realize it until we were done filming and I took a bite! We had a good laugh and just served it with extra-garlicky marinara. No one knew. The moral of the story? Don’t sweat the small stuff. Cooking is supposed to be fun, not perfect.
FAQs & Troubleshooting Your Tree
Q: My cheese is leaking out everywhere while baking! What did I do wrong?
A: A little leakage is totally normal and actually looks delicious! But if it’s a full-blown cheese exodus, it usually means your seals weren’t quite tight enough. Make sure you’re pinching the dough firmly and rolling it into a smooth ball. Also, ensure your cheese isn’t too wet—this is why I recommend shredding your own from a block.
Q: Can I make this ahead of time?
A: You can definitely get a head start! Assemble the entire tree on the parchment-lined baking sheet, cover it tightly with plastic wrap, and refrigerate for up to 8 hours. When you’re ready, take it out, let it sit at room temp for 20 minutes while the oven preheats, brush with butter, and bake. You may need to add a couple of extra minutes to the baking time since it’s starting from cold.
Q: My dough balls aren’t baking evenly. The top is brown but the inside is still doughy.
A: This usually means your oven was too hot, causing the outside to brown before the heat could penetrate to the center. Oven temperatures can vary, so an oven thermometer is a great tool. Next time, try lowering the temp to 375°F and baking for a few minutes longer. Also, make sure your dough balls are all roughly the same size for even cooking.
Q: Is it possible to freeze this?
A: Absolutely! Bake the tree completely, let it cool fully, then wrap it tightly in plastic wrap and foil. Freeze for up to 2 months. To reheat, unwrap and place it on a baking sheet in a 350°F oven for 15-20 minutes, until warmed through and crispy again.

Cheesy Pull-Apart Christmas Bread
Description
Bring the magic of the holidays to your table with this Cheesy Pull-Apart Christmas Bread! Soft dough balls are stuffed with gooey mozzarella, baked into a festive tree shape, brushed with garlic-herb butter, and sprinkled with parmesan. It’s fun, shareable, and perfect for dipping in marinara or pesto—no slicing required, just tear and enjoy!
Ingredients
-
1 batch pizza dough (homemade or store-bought)
-
2 cups shredded mozzarella cheese
-
3 tbsp unsalted butter, melted
-
2 garlic cloves, minced
-
1 tbsp fresh parsley, chopped (or 1 tsp dried)
-
2 tbsp grated parmesan cheese
-
Marinara or pesto sauce, for serving
Instructions
-
Preheat Oven:
Preheat oven to 350°F (180°C). Line a baking sheet with parchment paper. -
Prepare Dough Balls:
-
Roll dough into a rectangle (~½-inch thick).
-
Cut into ~30 squares.
-
Place 1 tsp mozzarella in the center of each, pinch edges to seal, and roll into smooth balls.
-
-
Assemble the Tree:
-
Arrange balls in a triangle shape for the tree, with 1 ball at the top, 2 below, 3 below that, and so on.
-
Add 1-2 balls vertically at the bottom for the trunk. Balls should touch each other.
-
-
Garlic Butter Glaze:
-
Mix melted butter, garlic, and parsley.
-
Brush generously over all dough balls.
-
-
Bake:
-
Bake 20–25 minutes until golden brown.
-
Sprinkle parmesan over the warm bread.
-
Let cool 5 minutes before serving.
-
-
Serve:
-
Serve warm with marinara, pesto, or your favorite dip.
-
Notes
-
Cheese Choice: Use low-moisture mozzarella for gooey, stringy cheese.
-
Seal Well: Slightly damp fingertips help prevent cheese leakage.
-
Even Baking: Keep dough balls similar in size and check oven temperature.
-
Make Ahead: Assemble, cover, and refrigerate up to 8 hours; then bake.
-
Freezing: Fully baked bread can be wrapped and frozen for up to 2 months. Reheat at 350°F (180°C) for 15–20 minutes.
Nutrition
- Calories: 310 Cal per 1/8 of recipe
- Sugar: 3g
- Carbohydrates: 28g
- Fiber: 1g
Nutritional Information*
*This is a rough estimate based on the specific ingredients used and may vary greatly depending on brands and substitutions.
Per Serving (1/8th of the recipe):
Calories: 310 | Total Carbohydrates: 28g | Dietary Fiber: 1g | Sugars: 3g | Protein: 12g | Total Fat: 15g | Saturated Fat: 8g | Cholesterol: 35mg | Sodium: 480mg
Remember, friends, this is a celebratory treat! It’s all about balance. Enjoy every cheesy, glorious bite surrounded by your favorite people. That’s what the holidays—and good food—are all about.
Final Thoughts from My Kitchen to Yours
Well, there you have it! Your guide to creating the most talked-about, fun, and downright delicious appetizer of the season. This Cheesy Pull-Apart Christmas Bread is more than just a recipe; it’s an experience. It’s about the joy of creating something beautiful with your own hands and the pure happiness of sharing it with others.
I hope this recipe brings as much laughter and warmth to your table as it has to mine over the years. Don’t be afraid to make it your own—add your favorite herbs, try a new cheese, or get the kids involved in shaping the tree. The best dishes are the ones filled with love and a little bit of personality.
If you make this (and I really hope you do!), I’d love to see your creation! Tag me @feastical on Instagram or use the hashtag #feastical so I can share in your culinary victory. From my kitchen to yours, happy holidays and happy eating!

Smoked Salmon & Cottage Cheese Wrap
Your New Secret Weapon for a Power-Packed, Delicious Day
Hey there, friend! Beau here, welcoming you back to my kitchen at Feastical. Ever have one of those mornings where your alarm feels like a personal insult, your to-do list is a mile long, and the last thing you have time for is a complicated breakfast? Or maybe it’s lunchtime, you’re staring into the abyss of your fridge, and a sad desk salad just isn’t going to cut it? I’ve been there more times than I can count. That’s exactly why I’m so utterly obsessed with the recipe I’m sharing with you today.
We’re talking about a Smoked Salmon & Cottage Cheese Wrap that is nothing short of a mealtime miracle. It’s the culinary equivalent of finding a twenty-dollar bill in your winter coat pocket. This isn’t just a wrap; it’s a 30-gram protein powerhouse disguised as a gourmet café treat. It’s creamy, savory, fresh, and satisfying all at once, and the best part? You can whip it up in under five minutes flat. No cooking, no fuss, just maximum flavor and fuel to conquer your day. So, let’s ditch the breakfast-skipping habit and the boring lunches together. Grab your favorite wrap, and let’s build something beautiful.
The Little Wrap That Could: A Beachside Revelation
This recipe, like so many of my favorites, was born out of a happy accident. A few summers back, my family and I were packing for a big day out at the coast. You know the drill: coolers, towels, sunscreen, and a mad dash to throw together a picnic that could survive a few hours in the sun. I’d bought a gorgeous package of smoked salmon for bagels, but we’d completely forgotten the cream cheese. Kitchen disaster, right?
Not so fast! My wife, always the brilliant one, spotted a tub of cottage cheese and suggested we just use that instead. I was skeptical—cottage cheese and salmon? But we layered it onto some whole-wheat wraps, tossed in the leftover arugula from last night’s dinner, and rolled them up. Sitting on that sunny beach, taking that first bite of our improvised creation, was a genuine revelation. It was cool, creamy, packed with flavor, and kept us full and energized for hours of wave-jumping and sandcastle building. It was a reminder that the best meals aren’t always the most elaborate ones; they’re the ones that fit perfectly into your life and bring a little burst of joy. This wrap has been a Feastical staple ever since.
Gathering Your Gourmet Ingredients
Part of the magic here is the simplicity. We’re using just a handful of high-quality ingredients that work in perfect harmony. Here’s what you’ll need for one glorious, protein-packed wrap:
- 1 whole-grain wrap (8–10 inches): This is our foundation. I love a good whole-grain or seeded wrap for the nutty flavor and extra fiber, which helps keep you full. Chef’s Insight: If you’re gluten-free, a brown rice or chickpea wrap works beautifully. For a lower-carb option, you can even use a large collard green leaf or a low-carb tortilla!
- ½ cup low-fat cottage cheese: Don’t you dare turn your nose up! This is the secret weapon—our creamy, high-protein base. It’s mild, tangy, and packs a massive protein punch for very few calories. Substitution Tip: If you’re truly not a cottage cheese person, Greek yogurt is a fantastic swap. It will be a bit tangier but equally delicious and protein-rich.
- 2–3 oz smoked salmon: The star of the show! Look for wild-caught smoked salmon if you can—the flavor is incredible. Chef’s Insight: This is where you can really treat yourself. The silky, smoky, savory flavor of the salmon is what makes this wrap feel so luxurious.
- Handful of fresh arugula: This isn’t just greenery; it’s a crucial flavor component. Arugula adds a wonderful peppery bite that cuts through the richness of the salmon and cheese. Substitution Tip: No arugula? Baby spinach, watercress, or even thinly sliced cucumber would add a lovely fresh crunch.
- (Optional) Fresh dill, capers, red onion, squeeze of lemon: These are your “gourmet upgrade” items. A sprinkle of fresh dill complements the salmon perfectly, capers add a briny punch, and a tiny bit of thinly sliced red onion and a squeeze of lemon juice can brighten up the whole wrap. I highly recommend them!
Crafting Your Culinary Masterpiece: A Step-by-Step Guide
Okay, let’s get rolling—literally! This process is so simple, but a few little chef hacks will take it from “good” to “can I have this every day?” levels of amazing.
- Lay the Foundation: Place your wrap on a clean, flat surface. Chef’s Hack: If your wraps tend to crack, you can very briefly warm it in a dry skillet for about 10-15 seconds per side. This makes it pliable and much easier to roll without any breakage!
- Spread the Love: Spoon your ½ cup of cottage cheese onto the center of the wrap. Using the back of your spoon, spread it out evenly, leaving about an inch and a half border around the edges. Chef’s Commentary: That border is key! It’s our built-in spill guard. It gives us a clean edge to start our roll and prevents the filling from squishing out the sides.
- Layer the Goodness: Now, artfully arrange your beautiful slices of smoked salmon over the bed of cottage cheese. Follow that with a generous handful of that peppery arugula. If you’re using any of the optional extras (please do!), now is the time to scatter them on. Chef’s Hack: Try to keep your fillings in a horizontal line across the center rather than a big pile in the middle. This makes the rolling process so much smoother and gives you a perfect distribution of ingredients in every single bite.
- The Art of the Roll: Here’s where people sometimes get nervous. Don’t be! Fold the sides of the wrap inward over the filling—just a little tuck to secure those ends. Then, from the bottom, gently but firmly pull the edge up and over the filling, tucking it under as you go. Continue rolling away from you until you have a tight, secure cylinder. Chef’s Tip: The first tuck is the most important. Get that right, and the rest is a breeze. If you’re planning to take this on the go, wrap it tightly in parchment paper or foil, twisting the ends like a big candy. It makes for a mess-free, portable meal.
- The Final Touch: If you’re eating it right away, I love slicing it in half on a sharp diagonal. It just looks more appetizing and shows off all those gorgeous layers you created! And that’s it. You’re done. In less than five minutes, you’ve created a healthy, gourmet-level meal.
How to Serve This Superstar Wrap
This wrap is incredibly versatile. For a quick breakfast, I enjoy it right on the go, maybe with a thermos of hot coffee. For a more leisurely weekend brunch, plate it up! Slice it in half, arrange it on a plate with some extra arugula on the side, add a couple of lemon wedges for squeezing, and maybe even a few extra capers. It instantly looks like it came from a chic neighborhood bistro.
For lunch, I often pair it with a light side. A simple cup of tomato basil soup, a handful of sweet cherry tomatoes, or some crispy carrot sticks make for a perfectly balanced and utterly satisfying meal. It’s light enough that you won’t hit that 3 p.m. slump, but substantial enough to keep you powered through your afternoon.
Make It Your Own: Delicious Variations
The beauty of this formula is that it’s a perfect canvas for your cravings. Here are a few of my favorite twists:
- The “Everything Bagel”: Channel your inner New York deli! Mix a teaspoon of everything bagel seasoning right into the cottage cheese before spreading. Garnish with extra seasoning and some thinly sliced red onion.
- Herb Garden Delight: Finely chop a mix of fresh chives, dill, and parsley and stir them into the cottage cheese. It adds a incredible burst of fresh flavor and makes it look so vibrant.
- Cucumber Crunch: Add some cool, crisp texture by laying a few slices of English cucumber over the salmon before adding the arugula. It’s incredibly refreshing.
- The Creamy Avocado Boost: For some healthy fats and extra creaminess, add a few slices of ripe avocado or even a smear of mashed avocado under the salmon layer.
- Dairy-Free Swap: Easily make this dairy-free by using a thick, plain, unsweetened vegan yogurt or a vegan cream cheese alternative in place of the cottage cheese.
Beau’s Kitchen Notes
This recipe has truly evolved into my go-to “I need something good, fast” meal. I’ve made it in hotel rooms using a tortilla and pre-packaged salmon from a convenience store, and I’ve made it at home with fancy salmon from the farmer’s market. It works every single time. One of my favorite kitchen memories is teaching my nephew how to make it. He was convinced he didn’t like “that weird cheese with the lumps,” but the moment he took a bite, he was sold. Now he makes it for himself after school. That, right there, is a Feastical win—making real, good food accessible and fun.
Your Questions, Answered!
Q: My wrap always falls apart when I try to eat it. What am I doing wrong?
A: The two most common culprits are overfilling and not tucking properly. Remember to leave that border when you spread the cottage cheese! Also, ensure you give those sides a good fold-in before you start your main roll. Wrapping it tightly in parchment or foil and letting it sit for a few minutes can also help it “set” and hold its shape better.
Q: Can I meal prep these wraps for the week?
A: You can, but with a caveat. If you assemble them completely, the wrap can get soggy from the cottage cheese after a day or two. For best results, prep the components separately: keep your cottage cheese in a container, your salmon and arugala in another. Then, assemble your wrap fresh each morning. It only takes two minutes! If you must pre-make, ensure it’s wrapped extremely tightly and eaten within 24 hours.
Q: I’m not a big salmon fan. What other protein could I use?
A: Absolutely! This is a fantastic template. Try with sliced grilled chicken, canned tuna (mixed with a little Greek yogurt instead of mayo), or even thinly sliced roast beef. The possibilities are endless.

Smoked Salmon & Cottage Cheese Wrap
Description
Looking for a fast, high-protein meal that feels gourmet but takes under 5 minutes to make? This wrap is creamy, savory, fresh, and packs 30g of protein. Perfect for breakfast, lunch, or an on-the-go snack, it’s a simple way to fuel your day without sacrificing flavor.
Ingredients
-
1 whole-grain wrap (8–10 inches)
-
½ cup low-fat cottage cheese (or Greek yogurt as a swap)
-
2–3 oz smoked salmon (wild-caught preferred)
-
Handful of fresh arugula
-
Optional: fresh dill, capers, thinly sliced red onion, squeeze of lemon
Chef’s Tips:
-
Warm the wrap 10–15 seconds per side if it tends to crack.
-
Leave ~1.5-inch border when spreading cottage cheese to avoid overfilling.
-
Keep fillings in a horizontal line for easier rolling.
Instructions
Place your wrap on a flat surface. Spoon the cottage cheese onto the center and spread evenly, leaving a border around the edges.
Arrange smoked salmon slices over the cottage cheese. Add arugula and any optional extras. Keep the ingredients in a horizontal line for a smooth roll.
Fold the sides inward over the filling, then roll from the bottom up into a tight cylinder. If taking on the go, wrap tightly in parchment paper or foil.
Slice diagonally for a beautiful presentation. Enjoy immediately!
Notes
-
Wrap falls apart? Don’t overfill; tuck sides first, roll tightly, and let it sit a few minutes.
-
Meal prep? Store components separately and assemble fresh for best texture.
-
Not a salmon fan? Swap in grilled chicken, canned tuna, or thinly sliced roast beef.
Nutrition
- Calories: 300 Cal
- Fat: 12g
- Carbohydrates: 20g
- Protein: 30g
The Healthy Lowdown
Let’s talk about why this wrap is such a nutritional rockstar. This approximate breakdown is for one serving using the core ingredients listed:
Per serving (approx.):
Calories: 300 | Protein: 30g | Carbs: 20g | Fat: 12g | Fiber: 3g
That 30 grams of protein is the real headline here. Protein is essential for building and repairing muscles, keeping you feeling full and satisfied, and providing sustained energy. The healthy fats from the salmon (hello, Omega-3s!) are fantastic for heart and brain health. Using a whole-grain wrap adds complex carbs and fiber for digestion and energy, making this a truly balanced meal that supports your health goals without sacrificing an ounce of flavor.
Wrapping It All Up (See What I Did There?)
So there you have it, friends. My not-so-secret secret for a meal that feels indulgent but is honestly doing your body a whole lot of good. It’s proof that eating well doesn’t have to be complicated, time-consuming, or boring. It’s about finding those simple, powerful combinations that you genuinely look forward to eating.
I hope this recipe becomes a trusted friend in your kitchen like it is in mine. Give it a try, get creative with the variations, and let me know how you make it your own! Tag me on social with #FeasticalEats—I love seeing your creations. Now, go forth and conquer your day, one delicious, protein-packed bite at a time.
With love and a well-stocked fridge,
Beau

Protein French Toast
Rise, Shine, and Fuel Your Day: The Ultimate High-Protein French Toast
Hey there, Feastical family! Beau here, coming at you from a sun-drenched kitchen with a stack of something that’s about to change your breakfast game forever. Let’s be real: we all love classic French toast. That warm, cinnamon-kissed, custardy comfort food that tastes like a lazy Sunday morning. But sometimes, that classic version leaves us crashing an hour later, searching for a snack and wondering where all our energy went. What if I told you you could have all that cozy, indulgent flavor and a massive boost of energy that keeps you full, focused, and fueled for hours?
That’s exactly why I’m so obsessed with this Protein-Packed French Toast. We’re talking a whopping 30 grams of protein and all under 300 calories for the entire, beautiful plate. This isn’t just breakfast; it’s a power move. It’s for the busy parent rushing out the door, the fitness enthusiast looking for a post-workout reward, or anyone who just wants to start their day feeling amazing without sacrificing an ounce of flavor. We’re taking a simple, beloved recipe and giving it a superhero upgrade with one secret ingredient you probably already have in your pantry. So, grab your favorite bowl and whisk, and let’s make a breakfast that truly loves you back!
The Pancake Mix Epiphany: A Kitchen Story
This recipe actually came from a place of pure, hilarious kitchen desperation. Picture this: It’s a few years back, and I’m trying to be that “healthy guy.” I’d just gotten back from the gym, I was starving, and all I wanted was my mom’s famous French toast. But I looked at the recipe—mostly eggs and bread—and my fitness-tracker-brain said, “Needs more protein, Beau!” I stared into my pantry, willing an answer to appear. And then I saw it: a nearly empty tub of vanilla protein powder sitting next to a box of pancake mix.
Lightbulb moment! I thought, “If pancake mix can make a batter, why can’t protein powder?” I literally scooped that powder right into my egg mixture, whisked it up, and held my breath. The result? Magic. The protein powder not only boosted the nutrition but created this incredibly rich, vanilla-scented custard that clung to the bread like a dream. It was a total happy accident that turned into a staple in my kitchen. It reminds me that sometimes, the best recipes aren’t planned—they’re discovered when you’re willing to play with your food.
Gathering Your High-Protein Power Players
Here’s the beautiful part: this powerhouse breakfast comes together with just a handful of simple ingredients. Let’s break them down, because each one plays a starring role.
- 2 slices Whole-Grain Bread: This is our foundation! I love a good, sturdy whole-grain or sourdough because it holds up to the batter without getting soggy. Chef’s Insight: Stale bread is actually your best friend here—it soaks up the custard like a champ without falling apart.
- 2 Large Eggs: The classic base of our protein-packed custard. They provide structure, richness, and a solid protein punch all on their own.
- 1 scoop Vanilla or Unflavored Protein Powder: The secret weapon! This is what rockets the protein content into the stratosphere and adds a wonderful flavor. Sub Tip: Vanilla is my go-to for a hint of sweetness, but unflavored works perfectly if you want to control the flavor profile entirely. Chocolate protein powder? Go for it! You’re the boss.
- Splash of Unsweetened Almond Milk: This just helps loosen up the mixture into a perfect dipping consistency. Any milk you have on hand—dairy, oat, soy—works great.
- Dash of Cinnamon: The soul of French toast! This warm spice is non-negotiable for that classic, comforting flavor.
Cooking Up Golden, Protein-Packed Perfection
Alright, team! Let’s transform these simple ingredients into the breakfast of champions. It’s so easy, you’ll have it memorized after one try.
- Create the Ultimate Custard: Grab a shallow bowl—a pie dish works perfectly. Crack in your two eggs and add the scoop of protein powder, your splash of milk, and that glorious dash of cinnamon. Now, whisk it! Really go to town until everything is completely smooth and there are no pesky clumps of protein powder left. You want a beautifully homogenous, slightly thick liquid. Chef’s Hack: If you’re worried about clumps, you can add the protein powder last and sift it in as you whisk. A tiny blender bottle also works wonders here!
- The Soak is Everything: Place your two slices of bread into the custard. Let them soak for about 15-20 seconds per side. Don’t just dip and flip—give it a little time to drink up all that protein goodness. You’ll see the bread change color as it absorbs the liquid. That’s exactly what we want! Pro Tip: Press down on the bread gently with your fork or spatula to ensure every nook and cranny gets saturated.
- Cook to Golden Brown Glory: Heat a non-stick skillet or griddle over medium heat. I don’t even use butter or oil because the non-stick surface does the job, but a light spritz of cooking spray never hurts. Once the pan is hot, carefully place your soaked bread slices down. Cook for 2-3 minutes on the first side. You’ll know it’s ready to flip when the edges look set and the bottom is a perfect, golden brown. Flip and cook for another 2-3 minutes on the other side. Watchful Eye: If your toast is browning too quickly, just nudge the heat down a bit. We’re aiming for a crisp exterior and a fully cooked, fluffy interior.
- Serve Immediately: Slide that gorgeous, golden French toast onto your plate. The smell alone is going to make your day better. Now, let’s talk toppings!
Plating Your Protein Masterpiece
How you finish this dish is where your personality shines! I love serving two slices stacked high, because let’s be honest, it just looks more impressive. For a classic feel, dust a little extra cinnamon over the top. Then, go wild with your favorites! I’m a sucker for a big handful of fresh berries—the burst of juicy sweetness against the warm, spiced toast is incredible. A drizzle of almond butter adds healthy fats and makes it feel decadent, while a sugar-free maple syrup keeps it light. For a final flourish of nutrition and a nice little crunch, I’ll sprinkle on some chia or flax seeds. It’s a plate that’s as beautiful as it is nutritious.
Make It Your Own: Delicious Twists & Swaps
The fun doesn’t stop here. This recipe is a blank canvas for your culinary creativity!
- Chocolate Lover’s Dream: Use chocolate protein powder and add a tablespoon of cocoa powder to the custard. Top with banana slices and a tiny drizzle of peanut butter.
- “Cinnamon Roll” Style: Add a 1/4 teaspoon of vanilla extract and a pinch of nutmeg to the custard. After cooking, mix a tablespoon of Greek yogurt with a dash of cinnamon and a zero-calorie sweetener for a healthy “frosting” dollop.
- Tropical Escape: Use unflavored or vanilla protein powder and add a 1/4 teaspoon of coconut extract to the batter. Top with toasted coconut flakes, mango chunks, and a squeeze of lime.
- Vegan Power-Up: No problem! Swap the eggs for a flax egg (1 tbsp ground flax + 2.5 tbsp water per egg, let sit 5 mins) and use your favorite plant-based protein powder.
- Bread Swap: Try this with thick-cut oatmeal, cinnamon-raisin, or even a low-carb tortilla for a quick “crepe” style wrap!
Beau’s Kitchen Notes
This recipe has evolved so much since that first desperate experiment. I’ve learned that letting the custard mixture sit for a minute after whisking can help it thicken up slightly, making it even better for coating. My biggest kitchen fail? I once used a *whey* protein powder that was super sweet and had a funky aftertaste. It taught me to always use a protein powder you genuinely enjoy the taste of on its own! These days, I’ll often double or triple the batch and keep the cooked slices in the fridge for up to 4 days. They reheat beautifully in the toaster for a instant healthy breakfast all week long. Meal prep victory!
Your Questions, Answered!
Q: My batter is super clumpy! How do I fix it?
A: Protein powder can be tricky to mix. The best fix is to use a blender bottle or a small electric whisk to combine everything until silky smooth. If you’re whisking by hand, add the protein powder slowly while whisking constantly.
Q: My French toast turned out soggy in the middle. What happened?
A: This usually means the heat was too high, causing the outside to brown before the inside could cook through. Next time, try lowering your heat to medium-low and cooking for a minute or two longer on each side. Patience is key!
Q: Can I make this without protein powder?
A: Absolutely! You’ll lose the big protein boost, but you can add an extra egg white to the mixture and a 1/4 teaspoon of vanilla extract for flavor. It’ll still be delicious and higher in protein than standard French toast.
Q: What’s the best type of protein powder to use?
A: I find that whey or casein protein blends the creamiest. Plant-based powders (like pea or brown rice protein) can work but sometimes result in a gummier texture. A blend is often your safest bet for the perfect consistency.
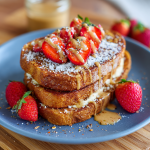
Protein French Toast
Description
Classic French toast is cozy and comforting, but it can leave you crashing mid-morning. This protein-packed French toast keeps you full and fueled with 30g of protein under 300 calories. It’s perfect for busy mornings, post-workout refuels, or anyone craving indulgent flavor without sacrificing nutrition.
Ingredients
-
2 slices whole-grain bread (stale works best)
-
2 large eggs
-
1 scoop vanilla or unflavored protein powder
-
Splash of unsweetened almond milk (or any milk)
-
Dash of cinnamon
Optional Toppings & Add-Ons:
-
Fresh berries (strawberries, blueberries, raspberries)
-
Drizzle of almond or peanut butter
-
Sugar-free maple syrup
-
Chia or flax seeds
-
A sprinkle of cocoa powder, vanilla, or nutmeg for extra flavor
Chef’s Tips:
-
Let custard sit for 1 minute after whisking to thicken slightly.
-
Use protein powder you enjoy—the flavor shows!
-
Stale bread absorbs custard without falling apart.
Instructions
In a shallow bowl (pie dish works well), whisk together eggs, protein powder, milk, and cinnamon until smooth and lump-free.
Pro Tip: Use a blender bottle or sift protein powder for an extra-smooth custard.
Dip each bread slice into the custard for 15–20 seconds per side, pressing gently to soak evenly.
Heat a non-stick skillet or griddle over medium heat. Lightly spray with cooking spray if desired. Cook bread slices 2–3 minutes per side until golden brown and cooked through. Reduce heat slightly if browning too fast.
Stack slices on a plate. Add toppings of your choice—berries, almond butter, sugar-free syrup, or chia seeds. Enjoy immediately!
Notes
-
Clumpy batter? Whisk protein powder slowly or use a blender bottle.
-
Soggy inside? Cook over medium-low heat longer; avoid high heat.
-
No protein powder? Use an extra egg white + ¼ tsp vanilla.
-
Best protein powder? Whey or casein blends work best; plant-based may be slightly gummier.
Nutrition
- Calories: 290 Cal
- Carbohydrates: 20g
- Fiber: 4g
- Protein: 30g
The Nutritional Lowdown (Approximate, Per Serving)
Let’s talk numbers! This is for the base recipe without toppings, calculated with whole-grain bread, two large eggs, one scoop of vanilla whey protein powder, and unsweetened almond milk.
- Calories: 290
- Protein: 30g (That’s a powerhouse breakfast!)
- Carbohydrates: 20g
- Fiber: 4g
- Fat: 10g
This macro profile is what makes this meal so special. The high protein and moderate fiber and fat content work together to promote satiety, balance blood sugar, and provide sustained energy, making it the perfect start to any day.
Final Thoughts from My Kitchen to Yours
Well, friends, there you have it—my not-so-secret secret for turning a comfort food classic into a nutritional powerhouse. This High-Protein French Toast proves that eating well doesn’t mean giving up the foods you love. It’s about getting clever in the kitchen and adding boosts of goodness wherever we can.
I hope this recipe becomes a new favorite in your home, bringing energy and joy to your mornings. If you make it (and I really hope you do!), tag me on social @Feastical or leave a comment below. I love seeing your creations and hearing your own kitchen stories. Now, go forth and conquer your day, one delicious, protein-packed bite at a time. Until next time, keep it feel-good and flavorful!
Beau
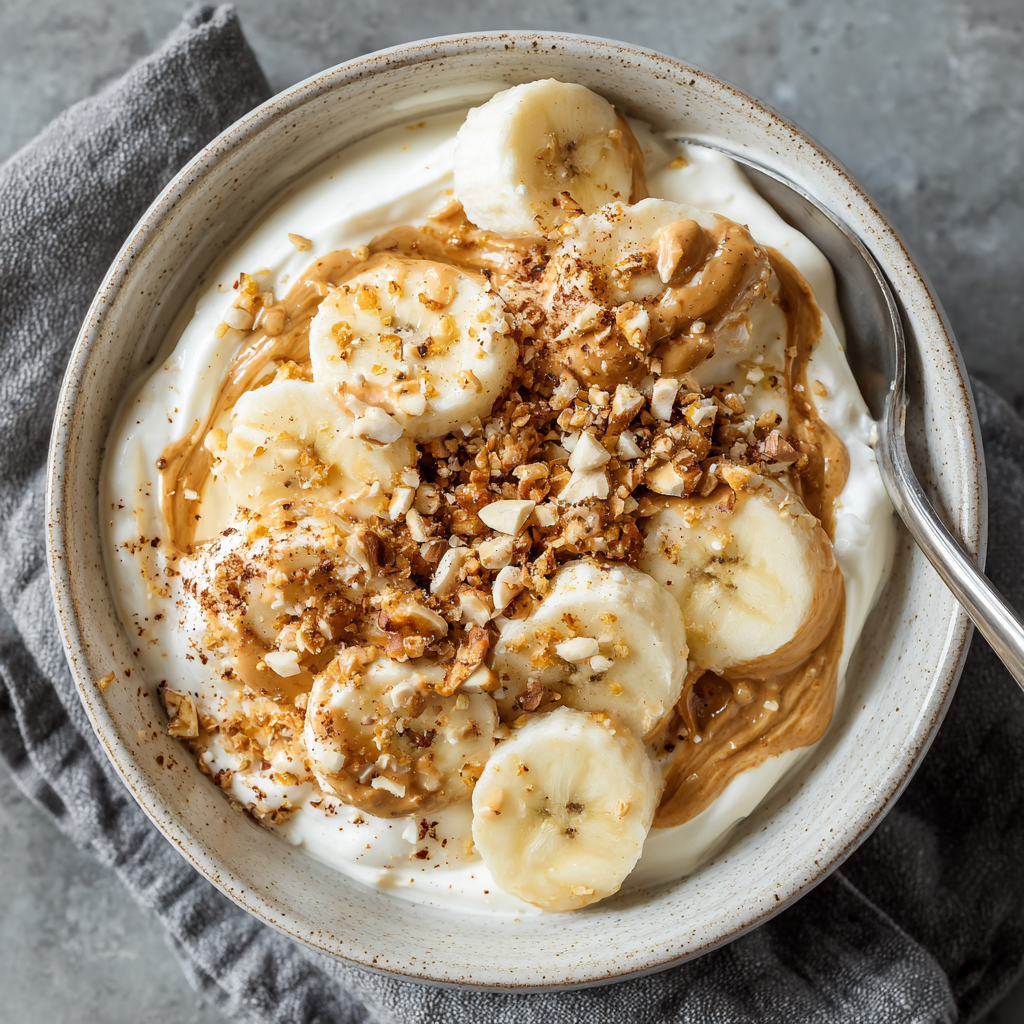
Greek Yogurt Bowls with Almond Butter
Your New Favorite Power Breakfast is Here (And It’s Ready in 5 Minutes!)
Hey friends, Beau here! Let’s talk about mornings. We’ve all had those days where the alarm clock feels like a personal enemy, the to-do list is a mile long before you’ve even had your coffee, and the last thing you have time for is whipping up a complicated, gourmet breakfast. But you also know that skipping breakfast or grabbing a sugar-loaded pastry is a one-way ticket to the 10:30 AM hunger crash and brain fog. I’ve been there more times than I’d like to admit!
That’s exactly why I’m so incredibly passionate about this little jar of magic: the Ultimate Greek Yogurt Bowl with Almond Butter. This isn’t just breakfast; it’s a protein-packed, creamy, dreamy fuel station that comes together faster than you can find your missing spatula (we’ve all been on that search mission, right?).
We’re talking a whopping 25 grams of protein to keep you full and focused, healthy fats from that glorious almond butter to satisfy your cravings, and just the right amount of natural sweetness from banana and a hint of cinnamon. It’s balanced, it’s soul-satisfying, and it truly tastes like a warm hug for your taste buds. So, let’s ditch the morning stress and dig into how to build your new go-to breakfast masterpiece.
The Story Behind the Bowl: A Happy Kitchen Accident
This recipe, like so many of the best things in life, was born from a happy little kitchen accident. Picture this: It was a chaotic Tuesday morning a few years back. I was filming a recipe video for a baked oatmeal and, in my classic pre-coffee frenzy, I realized I was out of both oatmeal and eggs. Major facepalm moment. My stomach was growling, and I was staring into the abyss of my fridge, willing breakfast to appear.
My eyes landed on a tub of plain Greek yogurt, a lonely banana on the counter, and my ever-present jar of almond butter. In a moment of “what do I have to lose?” energy, I just started swirling them together. I wasn’t aiming for a blog recipe; I was just a hungry guy trying to make it to lunch. But that first spoonful? Absolute revelation. The creamy tang of the yogurt melded perfectly with the rich, nutty almond butter, and the sweet banana brought it all home. It was so simple, yet so profoundly satisfying. I’ve tweaked it and made it almost every week since, and now I’m so excited to share my perfected version with you.
Gathering Your Breakfast Dream Team
Here’s the beautiful part: you only need a handful of simple, powerhouse ingredients to create this bowl of goodness. This recipe makes one generous serving, so feel free to double or triple it for the whole family!
- 1 cup plain Greek yogurt (2% or nonfat): This is the superstar, the protein-packed base of our operation. I prefer 2% for its incredible creaminess—that little bit of fat makes it feel so much more luxurious and helps with satiety. But nonfat works perfectly well if that’s your jam! Chef’s Insight: Always go for plain yogurt. Flavored versions are often loaded with sneaky sugars. We’re adding our own natural sweetness here!
- 1 tbsp almond butter: Our healthy fat and flavor hero. It adds a deep, toasty richness that makes this bowl feel decadent. Substitution Tip: Any nut or seed butter works wonders here! Peanut butter, cashew butter, sunflower seed butter—use what you love and have on hand.
- ½ banana, sliced: Nature’s perfect sweetener and a great source of potassium. Using a ripe, spotty banana will give you the best natural sweetness. Chef’s Insight: Slice it thin so you get a little bit of banana in every single bite.
- Sprinkle of cinnamon: This isn’t just for aroma! Cinnamon adds a warm, cozy depth and helps balance blood sugar levels. Don’t be shy with it.
Optional Add-Ins (The Fun Part!):
- 1 tsp chia or flaxseeds: An effortless fiber and omega-3 boost. They add a slight, pleasant texture, too.
- 1 tbsp chopped nuts or granola: For that essential CRUNCH factor. I’m a sucker for chopped almonds or a sprinkle of low-sugar granola.
- A drizzle of honey or maple syrup: If you have a serious sweet tooth, a tiny drizzle can take it over the top. Taste it first—you might not need it!
- Handful of berries: Blueberries, raspberries, strawberries… all fantastic for a pop of color and antioxidants.
Building Your Ultimate Bowl: A Step-by-Step Guide
Okay, team, let’s get building! This is less of a recipe and more of a joyful assembly process. The goal is maximum flavor with minimal effort.
- Scoop the Greek Yogurt. Grab your favorite bowl—I’m a firm believer that food tastes better in a bowl you love—and plop that creamy Greek yogurt right in the center. Chef’s Hack: If you have an extra minute, take your yogurt out of the fridge about 5-10 minutes before assembling. Letting it come just slightly closer to room temperature makes it creamier and more receptive to swirling.
- Swirl in the Almond Butter. Here’s where the magic happens. Dollop your tablespoon of almond butter right on top of the yogurt. Now, with the tip of your spoon, gently swirl it through the yogurt. Don’t over-mix! We’re going for a beautiful, marbled effect where you get pockets of rich almond butter and cool, tangy yogurt in every spoonful. This is my pro tip for texture heaven.
- Artfully Arrange Your Toppings. Time for the banana! Fan out those slices across the top. This isn’t just for looks (though it does look pretty); it ensures perfect banana distribution. Now, give the whole thing a generous dusting of cinnamon. It should look like a light, tasty snowfall landed on your breakfast.
- Add Your Crunch & Extras. This is your moment to shine. Sprinkle on those chia seeds for health, your chopped nuts or granola for crunch, or a handful of vibrant berries. If you’re using a liquid sweetener like honey, drizzle it on last so it cascades over everything beautifully.
- Enjoy Immediately! This bowl is best enjoyed right away while the granola is still crunchy and the banana is fresh. Grab your spoon and dig in to the most satisfying 5-minute breakfast of your life.
How to Serve & Savor Your Creation
This bowl is a complete meal all on its own, but I love thinking about the full experience. First, the vessel matters. I like to serve this in a wider, shallow bowl rather than a deep one. It gives you more surface area for creating a gorgeous landscape of toppings—it just makes it more fun to eat!
Pair it with a big glass of cold water or your morning coffee or tea. The cool, creamy yogurt and the hot, bitter coffee are a match made in heaven. If you’re really hungry or have a big day ahead, a slice of whole-wheat toast with avocado on the side never hurt anybody!
This is also a fantastic on-the-go option. Simply layer everything in a mason jar: yogurt on the bottom, then almond butter, then bananas, then your crunchy toppings on the very top so they don’t get soggy. Put the lid on, throw it in your bag, and you have a portable breakfast parfait ready whenever you are.
Mix It Up! 5 Delicious Variations to Try
The beauty of this formula is that it’s a template for endless creativity. Once you’ve mastered the basic bowl, try one of these twists to keep your taste buds dancing.
- Tropical Escape: Swap the banana for a handful of diced mango and pineapple. Use coconut yogurt instead of Greek yogurt, and swirl in coconut butter instead of almond butter. Top with unsweetened coconut flakes and a squeeze of lime juice. Instant vacation!
- Chocolate Lover’s Delight: Swirl in 1 teaspoon of unsweetened cocoa powder with the almond butter. Top with a few dark chocolate chips and some raspberries. It’s like a healthy, protein-rich chocolate mousse for breakfast.
- Berry Bliss: Skip the banana and use a full cup of mixed berries instead—fresh or frozen (thawed frozen berries create a lovely syrup). Swirl in a teaspoon of vanilla extract into the yogurt for an extra layer of flavor.
- Vegan Version: Super easy! Use a plant-based Greek-style yogurt (like those made from coconut or almond milk). Swap the honey for maple syrup and ensure your nut butter is vegan. All the protein, none of the dairy.
- Savory-Sweet Twist: Sounds wild, but trust me. Use a really high-quality, crunchy peanut butter. Top with sliced bananas and a tiny sprinkle of flaky sea salt. The salt makes the sweet flavors pop in an incredible way.
Beau’s Chef Notes & Kitchen Stories
This recipe has become such a staple in my life that I’ve started to play with the base. Sometimes I’ll mix a scoop of vanilla or chocolate protein powder into the yogurt first for an even bigger protein punch (if you do this, you might need a splash of milk to thin it out). I’ve also learned that the almond butter swirl technique is everything—my first attempt was an over-mixed, homogenous beige blob. Tasty, but not exactly Instagram-worthy! Now I embrace the marbled look.
A funny story: I once tried to make this for my niece but didn’t realize the almond butter at the back of my pantry had gone rancid. One bite and her face was priceless! So, a word to the wise: always give your nut butters a quick sniff test before diving in. Fresh ingredients make all the difference.
Your Questions, Answered!
Q: My Greek yogurt is super thick and tangy. Is that normal?
A: Absolutely! Greek yogurt is strained, which removes whey and results in a thicker, more protein-dense, and tangier product than regular yogurt. If the tang is too strong for you, a tiny drizzle of honey or maple syrup will balance it out perfectly.
Q: Can I meal prep this the night before?
A: You can prep *components* but I don’t recommend assembling the whole bowl. The bananas will brown and the granola will get soggy. Instead, portion your yogurt into jars. Keep your toppings (sliced banana, nuts, granola) in separate small containers or baggies. In the morning, just dump and go!
Q: I’m allergic to nuts. What can I use instead of almond butter?
A> No problem! Sunflower seed butter (often called SunButter) is a fantastic, nut-free alternative that has a similar rich and creamy texture. Just make sure to use plain Greek yogurt and check that any granola add-ins are also nut-free.
Q: It’s not keeping me full until lunch. What can I add?
A> Let’s power it up! Add 1/4 cup of oats right into the yogurt to make it more porridge-like. You can also add a tablespoon of hemp hearts for more protein and healthy fats, or even a spoonful of cooked quinoa for a serious fullness factor.

Greek Yogurt Bowls with Almond Butter
Description
Busy mornings don’t have to mean skipping breakfast. This Greek yogurt bowl is a protein-packed, creamy, and naturally sweet meal that keeps you full and focused. With almond butter, banana, and optional add-ins, it’s ready in 5 minutes and tastes like a cozy hug for your taste buds.
Ingredients
-
1 cup plain Greek yogurt (2% or nonfat)
-
1 tbsp almond butter (or any nut/seed butter)
-
½ banana, sliced
-
Sprinkle of cinnamon
Optional Add-Ins:
-
1 tsp chia or flaxseeds
-
1 tbsp chopped nuts or low-sugar granola
-
Drizzle of honey or maple syrup
-
Handful of berries (blueberries, raspberries, strawberries)
Chef’s Tips:
-
Use plain Greek yogurt to control sugar.
-
Slice banana thin for even distribution.
-
Swirl almond butter lightly for a marbled effect.
Instructions
Place the yogurt in your favorite bowl. If you have a minute, let it sit at room temperature for a creamier texture.
Add almond butter on top and gently swirl with a spoon. Aim for a marbled effect to get pockets of richness in each bite.
Fan out the banana slices and sprinkle cinnamon over the top. Add optional chia seeds, nuts, granola, or berries as desired. Drizzle honey or maple syrup last.
Eat immediately for the best texture, especially if using crunchy granola.
On-the-Go Option: Layer in a mason jar: yogurt, almond butter, banana, then granola/nuts on top. Keep covered in the fridge until ready to eat.
Notes
-
Mix protein powder into yogurt for an extra boost (thin with milk if needed).
-
Swirling almond butter gives texture and visual appeal—don’t overmix.
-
Always check nut butter freshness for the best flavor.
Nutrition
- Calories: 325Cal per serving
- Carbohydrates: 22g
- Fiber: 5–6g
- Protein: 25–28g
Nutritional Information (Approximate, for 1 serving with options)
Here’s a breakdown of what you’re fueling your body with. Remember, these numbers can vary based on the specific brands and exact amounts you use, but it’s a great guideline!
Per serving (with 2% Greek yogurt, almond butter, 1/2 banana, and 1 tsp chia seeds):
- Calories: ~325 kcal
- Protein: 25-28g (That’s a powerhouse!)
- Carbohydrates: 22g
- Fiber: 5-6g (Excellent for digestive health)
- Fat: 14g (Mostly healthy, unsaturated fats from the almond butter)
- Sugar: 14g (Primarily natural sugars from the banana and lactose in the yogurt)
This macro profile makes it an ideal balanced breakfast. The protein and fats provide sustained energy, the carbs give you a quick boost, and the fiber helps keep everything running smoothly and keeps you feeling full and satisfied.
Final Thoughts: Your Breakfast Game Just Leveled Up
And there you have it, friends! Your secret weapon against chaotic mornings and unhealthy choices. This Greek Yogurt Bowl is more than just a recipe; it’s a reminder that taking five minutes for yourself to create something nourishing and delicious is one of the best ways to start your day right.
It’s simple, flexible, and seriously satisfying. I’ve shared this with countless friends and family members, and it’s now a staple in their kitchens, too. That’s what Feastical is all about—sharing real food that brings joy and makes life a little easier.
I’d love to hear how you make it your own! Tag me on Instagram @feastical and show me your beautiful bowl creations. What’s your favorite combination? Until next time, keep your whisks busy and your bellies full!
With love and a full spoon,
Beau

High-Protein Breakfast Burritos
Your Mornings Just Got a Delicious, High-Protein Upgrade
Hey friends, Beau here from Feastical! Let’s talk about mornings. We’ve all been there: the alarm blares, you hit snooze one too many times, and suddenly you’re in a mad dash out the door with nothing but a sad granola bar or, worse, an empty stomach to fuel your day. I used to think a “good” breakfast was just a strong cup of coffee, but my energy levels would crash harder than a poorly set soufflé by 10 AM. I knew I needed a change—something fast, delicious, and packed with real, lasting fuel.
That’s when I perfected my now-legendary High-Protein Breakfast Burritos. We’re talking a whopping 30 grams of protein in every single, glorious bundle. These aren’t just any burritos; they’re a meal prep miracle. Imagine waking up on a Wednesday, stumbling to your freezer, and pulling out a perfectly wrapped parcel of deliciousness. Three minutes later, you’re eating a hot, satisfying, restaurant-quality breakfast that tastes like a warm hug and works like premium fuel for your body and brain. They’re loaded with fluffy scrambled eggs, lean turkey sausage, hearty black beans, and a zesty kick of salsa, all snuggled up in a wholesome whole-grain tortilla. Ready to revolutionize your A.M. routine? Grab your favorite skillet, and let’s get wrapping!
The Burrito That Saved My Sanity (And My Mornings)
This recipe was born out of pure, unadulterated chaos. Picture it: me, a few years back, trying to juggle launching Feastical, catering a friend’s weekend brunch, and generally just trying to be a functional human being. My breakfasts were… inconsistent, to say the least. I’d often find myself so busy prepping food for everyone else that I’d completely forget to eat myself!
The turning point was a particularly hectic Tuesday. I was filming a video for a new casserole recipe, my kitchen looked like a tornado had hit a farmstand, and my stomach was growling so loud the microphone was picking it up. In a moment of desperation, I grabbed the last bits of my prep ingredients—some leftover scrambled eggs, a handful of turkey sausage crumbles, a scoop of black beans—and wrapped it all in a tortilla. I took a bite standing over the sink, and it was a revelation. It was delicious, incredibly filling, and it powered me through the rest of the day without a single craving. I thought, “I need to make a big batch of these. This is the secret.” That messy, sink-side snack evolved into this precise, protein-packed, meal-prep dream. It’s my little kitchen secret for turning a chaotic morning into a victorious one.
Gathering Your Burrito Building Blocks
Here’s everything you need to build four powerhouse burritos. The beauty of this recipe is in its flexibility, so I’ve included my favorite chef insights and swaps to make it your own!
- 6 large eggs – The superstar! They provide a fantastic source of high-quality protein and make the burrito super fluffy. Chef’s Insight: For an even richer texture, whisk in a tablespoon of water or milk before scrambling.
- 1 cup cooked lean turkey sausage or ground turkey – I love the savory, slightly spicy flavor of a good turkey sausage. It keeps things lean without sacrificing taste. Substitution Tip: No turkey? No problem! Use ground chicken, pork sausage, or even chopped-up bacon. For a vegetarian option, my favorite swap is a plant-based ground “meat” or seasoned tempeh crumbles.
- 1 cup canned black beans, rinsed and drained – These little guys add a fantastic hit of fiber and plant-based protein, making the burrito extra hearty and satisfying. Chef’s Insight: Rinsing them is key! It washes away that thick, starchy canning liquid and lets the other flavors shine.
- ½ cup salsa (your favorite variety) – This is our flavor engine! It adds moisture, a little acidity, and a kick of spice. Choose from mild to hot, or even a fun fruity variety like mango or peach for a sweet twist.
- 4 whole-grain tortillas (8-inch) – The vessel! Whole-grain adds fiber and nutrients, making the meal more balanced. Chef’s Hack: Look for tortillas with at least 3-4g of fiber per serving. If you need a gluten-free option, almond flour or cassava flour tortillas work beautifully.
- Optional: ½ cup shredded cheese – Because cheese makes everything better, right? A sharp cheddar, pepper jack, or a Mexican blend is perfect here. It adds a lovely richness and that glorious meltiness.
- Optional: Diced bell peppers or onions – Want to sneak in more veggies? Sauté some diced bell peppers and onions with the turkey sausage. It adds wonderful flavor and a nice crunch.
- Optional: Avocado slices – For some healthy fats and creaminess. Important! Add these fresh after reheating, not before freezing.
Let’s Build the Ultimate Breakfast Burrito: A Step-by-Step Guide
Follow these steps, and you’ll have burrito perfection in no flat. I’m sharing all my best hacks along the way!
Step 1: Scramble the Eggs to Perfection
Crack your six eggs into a bowl, add a pinch of salt and pepper, and whisk them until the yolks and whites are completely uniform. Heat a non-stick skillet over medium-low heat with a tiny bit of oil or butter. Pour in the eggs and let them set for a moment before gently pushing them from the edges toward the center with a spatula. This creates soft, fluffy curds. Chef’s Hack: Don’t overcook them! They will continue to cook a little from residual heat, and we’re going to reheat them later. Take them off the heat just before they look 100% done. Transfer them to a clean plate to stop the cooking process.
Step 2: Brown the Turkey Sausage
In the same skillet (less dishes!), cook your turkey sausage over medium heat. Break it up with your spatula as it cooks until it’s nicely browned and cooked through. If you’re using plain ground turkey, now’s the time to season it well! I add a pinch of garlic powder, onion powder, smoked paprika, and a crack of black pepper. If you’re adding diced peppers or onions, throw them in for the last 3-4 minutes of cooking to soften them up.
Step 3: The Tortilla Warm-Up (A CRUCIAL Step!)
This is the secret to a burrito that doesn’t crack or tear. You MUST warm your tortillas. I do this one of two ways: directly over the low flame of my gas burner for a few seconds per side (watch them closely!) or wrapped in a damp paper towel and microwaved for 20-30 seconds. Warming them makes them pliable and stretchy, creating the perfect wrapper.
Step 4: The Art of the Layering and Roll
Lay a warm tortilla flat on your work surface. Now, let’s layer smartly. Don’t just dump everything in the center! Spoon your fillings in a line slightly below the horizontal center of the tortilla, leaving about a 2-inch border on the left and right sides. Start with a base layer of cheese (if using)—this acts as a delicious glue. Then add the eggs, turkey sausage, black beans, and finally, a spoonful of salsa. Chef’s Hack: Keep the salsa away from the edges to prevent a soggy tortilla. To roll: fold the left and right sides inward over the filling. Then, lift the bottom flap (the edge closest to you) up and over the filling, tucking it in tightly. Now, roll it forward, keeping it nice and snug, until it’s a perfect, sealed cylinder.
Step 5: The Freezer Prep
If you’re meal prepping (which you totally should be!), wrap each burrito tightly in parchment paper first. Then, follow it with a layer of aluminum foil. The parchment prevents any sticking, and the foil protects against freezer burn. Label them with the date and pop them in the freezer. They’ll be good for up to 2 months!
Step 6: Reheating for That “Just-Made” Taste
This is easy. You can microwave it straight from frozen! Leave the burrito in its parchment paper wrap (remove the foil!) and microwave on high for 2-3 minutes, flipping halfway through, until it’s piping hot all the way through. For a crispier exterior, you can unwrap it after microwaving and give it a quick toast in a dry skillet for a minute per side.
How to Serve Your Masterpiece
You can absolutely grab this burrito and run out the door—that’s the whole point! But if you have a few extra minutes to sit down and enjoy it, let’s make it a feast.
I love serving a hot burrito on a plate with a few extra sides. A big dollop of cool, creamy Greek yogurt or sour cream on the side is fantastic for dipping. A few extra spoonfuls of fresh salsa and maybe a sprinkle of chopped cilantro or green onions add a fresh, bright finish. If you didn’t add avocado inside, now’s the time to add a few creamy slices on the side. And don’t forget a hot sauce bar! I always have a few options on my table, from a classic Cholula to a super-spicy habanero sauce for the brave. Pair it with a fresh piece of fruit or a simple side salad for a truly complete and satisfying meal.
Mix It Up! 5 Delicious Twists on the Classic
Once you master the basic formula, the burrito world is your oyster! Here are a few of my favorite variations to keep things exciting.
1. The “Southwest Fiesta”: Swap the turkey sausage for seasoned ground beef with taco seasoning. Add a handful of frozen corn (thawed) and a tablespoon of chopped cilantro into the filling. Use a pepper jack cheese for an extra kick!
2. The “Green Machine” (Vegetarian): Omit the meat entirely. Instead, sauté a big handful of spinach with some garlic, and use a full cup of black beans. Add crumbled feta cheese and a big spoonful of cilantro pesto for an herby, green flavor bomb.
3. The “Huevos Rancheros” Style: Replace the salsa with a store-bought or homemade ranchero sauce. Keep the fillings simple: just eggs, black beans, and a sprinkle of queso fresco. It tastes just like your favorite brunch dish in portable form.
4. The “Everything Bagel”: This one is wild but delicious! Use cream cheese as your base spread on the tortilla. Fill it with scrambled eggs, a few slices of smoked salmon (add after reheating), and a generous sprinkle of everything bagel seasoning. Trust me on this one.
5. The “Low-Carb” Wrap: Simply swap the whole-grain tortilla for a large, pliable lettuce leaf like butter lettuce or romaine, or a low-carb tortilla. The filling is already protein-packed and perfect for this adaptation.
Beau’s Kitchen Confidential
This recipe has come a long way from that first desperate sink-side snack. I’ve probably made over a hundred batches at this point, and I’m still not tired of them. My biggest lesson learned? Do not overfill the tortilla. I know it’s tempting to pack in every last bit of filling, but it will only lead to a blowout—and nobody wants a blown-out burrito. Show restraint for a perfect roll every time. Also, my freezer is never without a stash of these. They’ve saved me on more busy mornings than I can count, and they’ve been a lifesaver when friends unexpectedly stop by for brunch. I just pull a few out, and I look like a hosting hero. It’s the best kind of kitchen magic.
Your Burrito Questions, Answered!
Q: My burrito gets soggy when I reheat it. What am I doing wrong?
A: The most common culprit is too much wet ingredient, like salsa, placed too close to the edge of the tortilla. Make sure your beans are well-drained and rinsed, and keep your salsa centralized in the filling. Also, wrapping in parchment before foil creates a barrier that helps steam the burrito without making the tortilla soggy.
Q: Can I make these with egg whites?
A: Absolutely! You can use 1 cup of liquid egg whites instead of the whole eggs. Just scramble them up the same way. The protein content will be similar, and they’ll be just as delicious.
Q: How long will they last in the fridge if I don’t freeze them?
A: They’ll stay fresh in the refrigerator for 3-4 days. I still recommend wrapping them tightly in parchment paper or storing them in an airtight container.
Q: The tortilla cracks when I try to roll it. Help!
A: This almost always means your tortilla wasn’t warm enough! Please don’t skip that step. Warming the tortilla makes the gluten relax and allows it to stretch and roll without cracking. It’s the number one trick for a perfect burrito.
Print
High-Protein Breakfast Burritos
Description
Busy mornings don’t have to mean skipping breakfast. These high-protein breakfast burritos are a meal prep miracle: 30 grams of protein per burrito, loaded with scrambled eggs, lean turkey sausage, black beans, and a kick of salsa, all wrapped in a whole-grain tortilla. Freeze them, reheat them, and enjoy a restaurant-quality breakfast in minutes.
Ingredients
-
6 large eggs
-
1 cup cooked lean turkey sausage or ground turkey
-
1 cup canned black beans, rinsed and drained
-
½ cup salsa (any variety)
-
4 whole-grain tortillas (8-inch)
-
Optional: ½ cup shredded cheese (cheddar, pepper jack, or Mexican blend)
-
Optional: diced bell peppers or onions
-
Optional: avocado slices (add fresh after reheating)
Substitutions & Tips:
-
Vegetarian: use plant-based crumbles or tempeh instead of sausage.
-
Low-carb: swap tortillas for large lettuce leaves or low-carb wraps.
-
Flavor variations: see “Mix It Up!” section below.
Instructions
1. Scramble the Eggs
-
Whisk eggs with a pinch of salt and pepper.
-
Heat a non-stick skillet over medium-low heat with a small amount of oil or butter.
-
Cook gently, folding eggs from edges to center until soft and fluffy. Remove slightly undercooked, as they’ll reheat later.
2. Cook the Turkey Sausage
-
In the same skillet, brown the turkey sausage.
-
Add optional diced peppers or onions in the last 3–4 minutes.
3. Warm the Tortillas
-
Heat tortillas directly over a low flame for a few seconds per side, or microwave wrapped in a damp paper towel for 20–30 seconds.
4. Assemble the Burritos
-
Lay a warm tortilla flat.
-
Layer cheese (if using) first, then eggs, sausage, black beans, and salsa.
-
Keep salsa away from edges.
-
Fold left and right sides inward, then roll from the bottom flap up, tucking in tightly.
5. Freezer Prep (Optional)
-
Wrap burritos in parchment paper, then aluminum foil.
-
Freeze up to 2 months.
-
Microwave from frozen 2–3 minutes, flipping halfway. Optional: toast in a skillet for a crisp exterior.
Notes
-
Avoid soggy burritos: Keep salsa centralized and beans well-drained.
-
Egg whites: 1 cup liquid egg whites = substitute for eggs.
-
Tortilla cracks: Always warm tortillas to make them pliable.
-
Storage: Refrigerate for 3–4 days, or freeze for up to 2 months.
Nutrition
- Calories: 380 Cal
- Carbohydrates: 28g
- Protein: 30g
Nutritional Information*
Let’s break down the fuel you’re putting in your tank! This approximate breakdown is for one burrito made with the core ingredients (eggs, turkey sausage, black beans, salsa, whole-grain tortilla) and does not include optional add-ins like cheese or avocado.
Per burrito (approx.):
- Calories: 380
- Protein: 30g
- Carbohydrates: 28g
- Dietary Fiber: 6g
- Total Fat: 16g
- Saturated Fat: 4g
This burrito is a nutritional powerhouse. The 30g of protein and 6g of fiber work together to keep you feeling full and satisfied for hours, helping to curb those mid-morning snack cravings. It’s a balanced meal that provides sustained energy, perfect for powering through a busy workday, a tough workout, or just a long list of errands.
*Please note that this is an estimate based on the specific ingredients I used. Your exact nutritional information may vary depending on your chosen brands and any additions or substitutions you make. For the most precise data, use a nutritional calculator with your exact ingredients.
Wrap It Up and Take On Your Day!
And there you have it, friends—my not-so-secret weapon for conquering chaotic mornings. These High-Protein Breakfast Burritos are more than just a recipe; they’re a strategy. A strategy for eating well, saving time, and starting your day with a serious win. They prove that healthy eating doesn’t have to be complicated or boring. It can be delicious, convenient, and deeply satisfying.
I hope this recipe becomes a staple in your kitchen like it is in mine. Give it a try this weekend for your meal prep, and thank me on Monday morning when you’re enjoying a hot, homemade breakfast without breaking a sweat. If you make them, I’d love to see your creations! Tag me on social @feastical and use the hashtag #feasticaleats.
Now, go forth and wrap! Until next time, remember: good food is meant to be shared.

Veggie Egg Muffins
Your New Favorite Breakfast Just Walked In: Meet the Mighty Veggie Egg Muffin!
Hey there, friend! Beau here, welcoming you back to my kitchen. Ever have one of those mornings where you’re scrambling (no egg pun intended, I promise!) to get out the door, your stomach is growling like a bear, and the siren call of a drive-thru biscuit is almost too loud to ignore? Yeah, me too. More times than I’d like to admit. For the longest time, my breakfast routine was a casualty of my chaotic schedule, and it left me feeling sluggish and, honestly, a little guilty by 10 AM.
But then, I had a revelation. What if a truly satisfying, protein-packed, delicious breakfast didn’t have to be a production? What if it could be waiting for you, ready to grab from the fridge, and taste just as amazing on a Wednesday as it did on a Sunday? That’s how I fell head over heels for the humble, the mighty, the absolutely brilliant veggie egg muffin.
These little cups of joy are my secret weapon for winning the week. They’re not just “eggs in a muffin tin.” Oh no. They’re a fluffy, savory, customizable masterpiece that packs a powerful 15 grams of protein to keep you fueled and focused. They’re meal-prep magic, freezer-friendly champions, and they’re ready from fridge to face in under 30 minutes. So, if you’re ready to banish breakfast stress for good, grab your favorite mixing bowl and let’s make your mornings Feastical.
The Little Muffin That Could: A Story of Kitchen Chaos & Redemption
I’ll never forget the first batch I ever made. It was for a family camping trip years ago. I had this grand vision of us all waking up to the smell of sizzling bacon and perfectly cooked eggs over the campfire. Reality, of course, had other plans. It was pouring rain, the fire was a sad, sputtering mess, and three hangry kids (and one hangry adult, ahem) were looking at me like I’d promised them a five-star meal and delivered a single, sad grape.
Then I remembered the dozen eggs and veggies I’d pre-chopped, stashed in a cooler. With a trustable muffin tin and a camp stove, I whipped up a batch of these egg muffins right there under the awning of our tent. The mood shifted instantly. We were huddled together, passing around these warm, savory muffins, laughing at the ridiculousness of it all. They were a total hit—saved the morning and became a staple for every adventure since. That’s the power of good food; it’s not just fuel, it’s a memory maker, even in the middle of a downpour.
Gathering Your Breakfast Dream Team: The Ingredients
The beauty of this recipe is in its simplicity and flexibility. This is your base camp—feel free to explore from here! Here’s what you’ll need to make about 6-8 perfectly portable protein pucks.
- 8 large eggs: This is your star player, the foundation of all that fluffy, protein-packed goodness. For an even richer texture, I sometimes use 7 eggs and add a splash of milk or cream, but it’s not necessary! The protein power is all in the whole egg.
- ½ cup diced bell peppers (any color): I love using a mix of red, yellow, and orange for a sweet, colorful crunch. Green peppers are great too, they just have a slightly more bitter, robust flavor. This is your chance to clean out the veggie drawer!
- ½ cup chopped spinach: Don’t be shy! Spinach wilts down beautifully, sneaking in a powerful nutrient punch without overpowering the flavor. If you only have frozen spinach, that’s totally fine—just be sure to thaw it and squeeze out every last drop of water with a clean kitchen towel. Soggy muffins are the enemy!
- ½ cup shredded low-fat cheese: I like a sharp cheddar for its tang, but Monterey Jack, pepper jack for a kick, or even a little feta are all fantastic. The cheese adds creaminess and helps everything bind together. Use full-fat if you prefer—this is a no-judgment zone!
- Salt and pepper to taste: The classic duo. I start with ¼ teaspoon of kosher salt and a few cracks of black pepper, then taste the mixture (yes, taste the raw egg mix! It’s the best way to gauge seasoning) and adjust from there.
Let’s Get Cooking: Building Your Egg Muffin Masterpieces
This is where the magic happens, and it’s so simple you’ll have it memorized after one try. Let’s walk through it together, step-by-step.
- Preheat and Prep: Fire up your oven to 350°F (175°C). This is the perfect temperature to cook the eggs through without drying them out or browning them too much. While it’s heating, generously grease your muffin tin with butter, cooking spray, or—my personal favorite—line it with silicone muffin liners. They are absolute game-changers. Nothing sticks, cleanup is a breeze, and they pop right out every single time.
- The Whisking Ritual: Crack your 8 eggs into a large mixing bowl. Now, here’s a chef’s hack: whisk them really, really well. You’re not just combining the yolks and whites; you’re incorporating air into them. I whisk for a good 45-60 seconds until the surface is nice and frothy. This is the secret to a light, airy, soufflé-like texture instead of a dense, rubbery one.
- The Mix-In Mixer: Now, dump in your diced bell peppers, chopped spinach, shredded cheese, salt, and pepper. Give it all a good stir with a fork or spatula until everything is evenly distributed. You’ll see those colorful little veggie confetti pieces floating in a sea of golden yellow. It’s a beautiful thing.
- The Perfect Pour: Slowly and carefully pour the egg mixture into your prepared muffin cups. I like to use a ladle or a large measuring cup with a spout for less mess. Fill each cup about ¾ of the way to the top. They will puff up a little while baking, and this gives them just the right amount of room to rise without spilling over.
- Bake to Perfection: Slide that tin into your preheated oven and set a timer for 18-20 minutes. You’re looking for the tops to be just set, no longer jiggly in the center, and lightly golden around the edges. A toothpick inserted in the center should come out clean. Try not to open the oven door too early—let that hot air work its magic!
- The Patient Cool-Down: This might be the hardest step! Once they’re out of the oven, let the muffins cool in the tin for at least 5 minutes. They will deflate slightly, which is totally normal. This rest period allows them to firm up, making them much easier to remove without breaking. Then, gently run a butter knife around the edges if you didn’t use liners, or just pop them out!
How to Serve Up These Savory Gems
Okay, they’re baked, they’re beautiful, and they’re smelling incredible. Now what? The possibilities are endless!
For the ultimate grab-and-go breakfast, just let them cool completely and pop them into a airtight container in the fridge. In the morning, you can eat them cold (they’re surprisingly good that way!), or reheat them in the microwave for 30-45 seconds until warm throughout.
If you’re serving them up on a lazy weekend morning, make it a feast! Plate two muffins alongside a handful of fresh fruit, a slice of whole-wheat toast with avocado, or even a few crispy strips of turkey bacon. They are also the undisputed MVP of brunch potlucks. Arrange a platter of these with a few different varieties (see twists below!) and watch them disappear faster than you can say “more coffee, please.”
Make It Your Own: 5 Flavorful Twists
The basic recipe is a blank canvas for your culinary creativity. Here are a few of my favorite ways to mix it up!
- The “Everything But The Kitchen Sink”: Clean out that fridge! Sautéed mushrooms, diced ham or cooked sausage, green onions, a little bit of broccoli florets—if it sounds good, it probably is. Just remember to keep the total volume of add-ins about the same (around 1.5 cups total) so your muffins set properly.
- Mediterranean Sunshine: Swap the cheese for crumbled feta, add in some chopped sun-dried tomatoes, a handful of kalamata olives, and a teaspoon of dried oregano. It’s like a vacation for your taste buds.
- Southwest Fiesta: Kick it up a notch! Use pepper jack cheese, add a tablespoon of diced green chiles, a pinch of cumin and chili powder, and maybe a spoonful of black beans (rinsed and dried well!). Top with a dollop of salsa or Greek yogurt after baking.
- Dairy-Free Delight: Simply omit the cheese! To make up for the creaminess, try adding a tablespoon of nutritional yeast for a cheesy flavor, or a splash of unsweetened almond milk into the egg mixture. Load up on extra veggies for bulk.
- Pure Protein Power-Up: Add ½ cup of cooked, crumbled turkey breakfast sausage or diced ham along with the veggies. You’ll bump that protein content even higher for the most demanding days.
Beau’s Chef Notes: A Few Things I’ve Learned
Over the hundreds of batches I’ve made, I’ve picked up a trick or two. First, if you’re using extra-wet veggies like tomatoes or zucchini, please, please sauté or roast them first to drive off the excess moisture. Your muffin texture will thank you profusely. Second, don’t be afraid of seasoning! Bland eggs are a sad affair. Taste your raw mixture (it’s safe, I do it all the time!) and don’t forget other great additions like a pinch of garlic powder, onion powder, or a dash of hot sauce right in the mix.
This recipe has evolved from a simple egg cup to a weekly ritual in my house. My kids now love to pick their own mix-ins and make their “signature” muffin, which makes them infinitely more likely to eat them. It’s a win-win!
Your Questions, Answered: Egg Muffin FAQ
Q: Can I freeze these egg muffins?
A: Absolutely! They freeze like a dream. Let them cool completely, then place them in a single layer on a baking sheet to “flash freeze” for about an hour. This prevents them from sticking together. Then, transfer them to a freezer-safe bag or container for up to 3 months. To reheat, just microwave straight from the freezer for 60-90 seconds, or thaw overnight in the fridge first.
Q: Why did my egg muffins get soggy/watery?
A: This is almost always due to excess moisture from the vegetables. The biggest culprits are frozen spinach that wasn’t squeezed dry, or fresh tomatoes and zucchini. The fix is easy: cook those watery veggies first to evaporate the liquid before adding them to your egg mixture.
Q: Can I use egg whites instead of whole eggs?
A: You sure can! Substitute 1 whole egg for ¼ cup of liquid egg whites. So for this recipe, you’d use about 2 cups of liquid egg whites. The texture will be a little less rich and more spongy, but they’ll still be delicious and ultra-high-protein.
Q: My muffins stuck to the pan! Help!
A: Oh, we’ve all been there. For next time, grease your non-stick pan more generously than you think you need to, or invest in those silicone liners—they’re foolproof. If they’re already stuck, just let the tin cool completely; sometimes they will release on their own once they’ve fully contracted.

Veggie Egg Muffins
Description
Busy mornings don’t have to mean skipping breakfast. These savory, protein-packed veggie egg muffins are ready to grab from the fridge and taste just as amazing on a Wednesday as on a Sunday. Fluffy, customizable, and freezer-friendly, they’re your secret weapon for a stress-free, energizing morning.
Ingredients
-
8 large eggs
-
½ cup diced bell peppers (any color)
-
½ cup chopped spinach (fresh or thawed & drained if frozen)
-
½ cup shredded low-fat cheese (cheddar, Monterey Jack, pepper jack, or feta)
-
Salt and pepper to taste
-
Butter, cooking spray, or silicone muffin liners for greasing
Optional mix-ins & variations:
-
Sautéed mushrooms, diced ham, cooked sausage, green onions, broccoli
-
Mediterranean: feta, sun-dried tomatoes, kalamata olives, oregano
-
Southwest: pepper jack, green chiles, cumin, chili powder, black beans
-
Dairy-free: omit cheese; add nutritional yeast or a splash of plant milk
-
Extra protein: add ½ cup cooked, crumbled turkey sausage or diced ham
Instructions
-
Preheat & prep: Oven to 350°F (175°C). Grease muffin tin or use silicone liners.
-
Whisk eggs: In a large bowl, whisk eggs 45–60 seconds until frothy.
-
Add mix-ins: Stir in bell peppers, spinach, cheese, salt, and pepper.
-
Fill muffin cups: Pour mixture ¾ full in each cup.
-
Bake: 18–20 minutes, until tops are set and lightly golden. Toothpick should come out clean.
-
Cool: Let muffins rest in the tin 5 minutes before removing.
Notes
-
Avoid soggy muffins: Sauté or roast watery veggies like tomatoes or zucchini before mixing in.
-
Freeze & reheat: Flash freeze 1 hour, then store in freezer-safe bag/container up to 3 months. Microwave 60–90 sec to reheat.
-
Egg whites option: Substitute 1 whole egg = ¼ cup liquid egg whites.
Nutrition
- Calories: 140 Cal per muffin
- Fat: 8g
- Protein: 15g
Nutritional Info (Because Knowledge is Power!)
Here’s the breakdown per muffin, based on a yield of 8 muffins and using low-fat cheese. Remember, this is an estimate—your exact numbers will vary based on the specific ingredients and brands you use.
Per muffin (approx.):
Calories: 140
Protein: 15g
Carbohydrates: 2g
Fat: 8g
As you can see, these muffins are a nutritional powerhouse. With 15 grams of protein, they provide a sustained energy release that helps keep you full and satisfied all morning long, curbing those mid-morning snack cravings. They’re relatively low in carbs and calories, making them a fantastic option for those watching their intake. Plus, you’re getting a healthy dose of vitamins and antioxidants from the veggies you mix in. It’s a breakfast that truly loves you back!
Final Thoughts: Your Breakfast Game, Leveled Up
Well, there you have it. Your guide to ditching the breakfast dilemma for good. These veggie egg muffins are more than just a recipe; they’re a tool for a less stressful, more delicious, and healthier start to your day. They prove that eating well doesn’t have to be complicated, expensive, or time-consuming.
I’d love to hear how your muffin-making adventure goes! What wild and wonderful combinations did you try? Did they become a family favorite? Tag me on social @feastical or drop a comment below. Nothing makes me happier than seeing you guys in the kitchen, creating your own Feastical moments.
Now, go forth and conquer your morning! Until next time, keep your whisks ready and your ovens warm.

High-Protein Pancake Sausage Mini Muffins
Your New Secret Weapon for Crazy Mornings: High-Protein Pancake Sausage Mini Muffins
Hey friends, Beau here from Feastical! Let’s be real for a second. Mornings can be pure chaos. Between scrambling to get dressed, finding that one missing shoe, and trying to remember if you fed the dog, a nutritious breakfast often gets lost in the shuffle. We’ve all been there, reaching for a less-than-ideal bar or, worse, just skipping it entirely. But what if I told you there’s a better way? A way that involves fluffy pancakes, savory sausage, melty cheese, and a whopping dose of protein—all in one delicious, grab-and-go bite?
That’s right, today we’re whipping up my famous High-Protein Pancake Sausage Mini Muffins. These little guys are the undisputed champions of my meal prep routine. They’re the ultimate fusion of sweet and savory, combining the cozy, familiar comfort of Saturday morning pancakes with the hearty, satisfying punch of a good breakfast sandwich. Imagine the best part of a pancake breakfast and a sausage McMuffin having a perfectly portable, protein-packed baby. That’s what these are.
Best of all, they come together in one bowl in about 10 minutes flat. Bake up a big batch on a Sunday, and you’ve got a ready-to-go breakfast, snack, or lunchbox superstar for the entire week. They’re kid-approved, freezer-friendly, and absolutely guaranteed to make your busy mornings feel a whole lot warmer, happier, and more delicious. So, let’s preheat that oven and get mixing!
The Happy Accident That Started It All
This recipe was born out of a classic “kitchen sink” moment. It was a Sunday morning after a big family camping trip. We were all tired, the fridge was looking a little bare, but the kids were chanting for pancakes. I had some leftover cooked sausage from our campfire breakfast and a half-empty bag of Kodiak mix staring back at me.
In a moment of “what the heck” inspiration, I decided to throw it all together into one big bowl. I figured I’d make some weird pancake hybrid. But then I spotted the mini muffin tin, still dusty from last month’s holiday party appetizers. A lightbulb went off. I poured the batter in, crossed my fingers, and waited. The smell that wafted from the oven was pure magic—sweet maple, savory sausage, and toasty pancake. The result was these unbelievably moist, flavorful, and perfectly portioned muffins. The kids devoured them, my wife declared them a genius move, and a new Feastical staple was officially born. Now, I never let a weekend go by without a batch tucked away in the freezer. It’s my little secret to starting the week off right.
Gathering Your A-Team: What You’ll Need
Here’s the beautiful cast of characters that makes these muffins so incredible. The best part? You probably have most of this in your pantry right now!
- 2 cups Kodiak Cakes Buttermilk Power Cakes Mix: This is our protein-packed foundation. I love Kodiak because it’s made with 100% whole grains and gives us a huge protein boost without any weird flavors. Chef’s Insight: If you don’t have Kodiak, any protein pancake mix will work, or you can use a whole wheat pancake mix and add a scoop of vanilla or unflavored protein powder.
- 1 lb Ground Sausage: The savory superstar! I use a mild breakfast sausage, but feel free to get spicy with it if you like a kick. Substitution Tip: For a leaner option, use ground turkey or chicken sausage. For a vegetarian twist, plant-based sausage crumbles work amazingly well!
- 2 cups High-Protein Milk: I highly recommend Fairlife milk because it has nearly double the protein of regular milk, which makes these muffins extra mighty. Substitution Tip: Any milk you have on hand will work—dairy, almond, oat, you name it. The protein count will just adjust slightly.
- 2 Large Eggs: Our binding agents! They bring everything together and add structure, richness, and more protein. Chef’s Insight: Make sure your eggs are at room temperature for a smoother, more cohesive batter. Just pop them in a bowl of warm water for 5 minutes if you forgot to take them out.
- ¼ cup Pure Maple Syrup: This is our touch of sweetness that perfectly balances the savory sausage. Substitution Tip: Honey or agave nectar are great substitutes. If you’re watching sugar, a sugar-free maple syrup will work too.
- 1 cup Shredded Cheese: Because everything is better with cheese! I use sharp cheddar for its bold flavor, but pepper jack, Colby jack, or even a Mexican blend would be delicious. Chef’s Insight: Always shred your own cheese from a block if you can! Pre-shredded bags are coated in anti-caking agents that can make the cheese a little grainy and less melty.
- Nonstick Cooking Spray: Essential for making sure your precious muffins pop right out of the tin without a fight.
Let’s Get Baking: Your Foolproof Steps to Muffin Glory
Ready to make magic? Follow these simple steps and you’ll be a muffin-making pro in no time.
- Preheat and Prep: Fire up your oven to 400°F (200°C). This is crucial for getting that perfect golden-brown rise. While it’s heating, generously spray your mini muffin tin with nonstick spray. Don’t be shy here—get in every nook and cranny! Chef’s Hack: If you’re nervous about sticking, you can also use those adorable mini muffin liners for even easier cleanup.
- Brown That Sausage: In a skillet over medium-high heat, cook your ground sausage, breaking it up into small, bite-sized crumbles with a wooden spoon. Cook until it’s no longer pink and is beautifully browned. Once cooked, drain off any excess grease and let it cool for a few minutes. Chef’s Tip: Letting the sausage cool a bit is important! If you add it piping hot to the batter, it can start to cook the eggs prematurely. We want to avoid that.
- The One-Bowl Wonder: In a large mixing bowl, combine your Kodiak mix, cooled sausage, high-protein milk, eggs, maple syrup, and shredded cheese. Now, here’s the key: mix until the ingredients are just combined. A few lumps are totally fine! Overmixing is the enemy of tender muffins—it develops the gluten and can make them tough. Chef’s Commentary: I use a sturdy spatula for this. It folds everything together gently without overworking the batter.
- Fill ‘Er Up: Using a small cookie scoop or a tablespoon, fill each prepared muffin cup about ¾ of the way full. This is the perfect amount to allow for a nice dome-top without any messy overflow in your oven. Chef’s Hack: That cookie scoop is a game-changer for keeping things neat, tidy, and evenly portioned. It’s one of my most-used kitchen tools!
- Bake to Perfection: Slide that tin into your preheated oven and bake for 12-15 minutes. You’re looking for gorgeous golden-brown tops and a muffin that springs back lightly when you press it. Chef’s Tip: Ovens can vary, so start checking at the 12-minute mark. A toothpick inserted into the center should come out clean or with a few moist crumbs attached.
- The (Hardest) Part: Let Them Rest: Once they’re out of the oven, let the muffins cool in the tin for at least 5 minutes. I know, the smell is irresistible and waiting is torture! But this rest time allows them to set up, making them much easier to remove without falling apart. After 5 minutes, gently transfer them to a wire rack to cool completely. Chef’s Commentary: This is the perfect time to brew a cup of coffee. You’ve earned it!
How to Serve Up These Savory-Sweet Bites
The beauty of these muffins is that they are fantastic warm, at room temperature, or straight from the fridge. But if you want to elevate them from a simple snack to a full-blown meal, here are my favorite ways to serve them:
For the Ultimate Breakfast Plate: Serve 3-4 muffins alongside some scrambled eggs and fresh fruit. The combination of textures and flavors is absolutely unbeatable and will keep you powered for hours.
The Dipper’s Delight: These little muffins are phenomenal dunked! Warm them up and serve with a side of extra maple syrup for a sweet treat, or with a side of warm marinara or ranch dressing for a more savory, appetizer-like experience. My kids are team syrup, all the way.
On-the-Go Power: Simply grab a couple and wrap them in a paper towel as you run out the door. They are completely self-contained and mess-free, making them the perfect car breakfast.
Lunchbox Hero: Toss a few into a lunchbox—they’re a guaranteed hit with kids and adults alike. They pack a ton of protein to avoid that afternoon slump, and they’re a fun break from the usual sandwich.
Make It Your Own: Delicious Twists & Swaps
This recipe is incredibly forgiving and a fantastic canvas for your own culinary creativity. Here are a few of my favorite variations:
- Everything Bagel Bliss: Stir 2 tablespoons of everything bagel seasoning into the batter and sprinkle a little extra on top before baking. Swap the cheddar for everything bagel-flavored cheese if you can find it! *Chef’s kiss*
- Southwest Fiesta: Use spicy chorizo or seasoned ground turkey instead of breakfast sausage. Add in ¼ cup of diced green chiles and swap the cheddar for a pepper jack cheese. A little pinch of cumin would be fantastic here, too.
- Apple Cinnamon Twist: For a sweeter, fall-inspired version, use a sweet chicken apple sausage (diced small). Add a half teaspoon of cinnamon to the dry mix and fold in ½ cup of finely chopped apple.
- Bacon Cheddar Upgrade: Love bacon? Replace the pound of sausage with ¾ cup of cooked, crumbled bacon. The smoky flavor is incredible with the maple and cheddar.
- Dairy-Free Delight: Easily make these dairy-free by using your favorite plant-based milk and cheese. Just ensure your sausage is dairy-free as well (many are, but always check the label!).
Beau’s Kitchen Notes & Stories
This recipe has evolved so much since that first happy accident. I’ve learned that browning the sausage well is key—it adds a deeper flavor. I’ve also started adding a tiny pinch of black pepper to the batter; it just makes the other flavors pop in a way I can’t explain.
One funny fail: I once tried to double the batch and use a regular-sized muffin tin to save time. Big mistake! The centers stayed gooey while the tops got too dark. The mini tin is non-negotiable for the perfect bake-to-surface-area ratio. Trust me on this one!
These muffins have also become my go-to gift for new parents. I’ll make a giant batch, freeze them in gallon bags, and drop them off. It’s a gift of time and energy, and it’s always, always appreciated more than another onesie.
Your Questions, Answered!
Q: Can I make these as regular-sized muffins?
A: You can, but the bake time will need to increase. I’d start checking them at around 18-20 minutes. The texture will be a bit different, and you’ll get fewer muffins, but they’ll still be delicious!
Q: My muffins turned out a bit dense. What happened?
A: The most likely culprit is overmixing! Remember, mix until the ingredients are just combined, even if there are a few lumps. The second possibility is that your baking powder in the pancake mix might be old. Baking powder loses its potency over time.
Q: How do I best freeze and reheat them?
A: Let them cool completely, then spread them in a single layer on a baking sheet to “flash freeze” for an hour. This prevents them from sticking together. Then, toss them all into a freezer-safe bag or container. They’ll keep for up to 3 months! To reheat, pop a frozen muffin into the microwave for 30-45 seconds, or into a toaster oven/regular oven at 350°F for about 10 minutes.
Q: Can I make the batter the night before?
A: I don’t recommend it. The leavening agents in the pancake mix will start to activate as soon as they hit the liquid, and you’ll likely end up with flat, dense muffins. This recipe is so quick, it’s truly best mixed and baked right away.

High-Protein Pancake Sausage Mini Muffins
Description
Mornings can be chaotic, but that doesn’t mean breakfast has to suffer. These high-protein pancake sausage mini muffins are the ultimate grab-and-go solution. Fluffy pancakes, savory sausage, melty cheese, and a protein boost—all in one bite-sized package. Make a batch, freeze extras, and enjoy a ready-to-eat, satisfying breakfast any day of the week.
Ingredients
-
2 cups Kodiak Cakes Buttermilk Power Cakes Mix (or protein pancake mix)
-
1 lb ground sausage (mild, or spicy if preferred)
-
2 cups high-protein milk (dairy or plant-based)
-
2 large eggs
-
¼ cup pure maple syrup (or honey/agave)
-
1 cup shredded cheese (cheddar, pepper jack, or your favorite)
-
Nonstick cooking spray
Optional variations & add-ins:
-
2 tbsp everything bagel seasoning
-
¼ cup diced green chiles
-
½ tsp cinnamon with ½ cup diced apple
-
¾ cup cooked, crumbled bacon
-
Plant-based milk and cheese for dairy-free version
Instructions
-
Preheat & prep: Oven to 400°F (200°C). Spray a mini muffin tin generously with nonstick spray.
-
Cook sausage: Brown in a skillet over medium-high heat, breaking into small crumbles. Drain and cool slightly.
-
Mix batter: In a large bowl, combine pancake mix, cooled sausage, milk, eggs, maple syrup, and cheese. Stir until just combined—lumps are fine.
-
Fill muffin tin: Scoop batter into muffin cups about ¾ full.
-
Bake: 12–15 minutes, until tops are golden and springy. Toothpick should come out clean.
-
Cool: Let rest in the tin for 5 minutes, then transfer to a wire rack.
Notes
-
Avoid dense muffins: Don’t overmix; a few lumps are perfect.
-
Freezing: Cool completely, flash freeze in a single layer, then store in a freezer bag for up to 3 months. Reheat in microwave 30–45 sec or oven at 350°F for 10 min.
-
Batter prep: Mix and bake immediately; don’t make it the night before.
Flavor variations: Everything Bagel, Southwest Fiesta, Apple Cinnamon, Bacon Cheddar, Dairy-Free Delight.
Nutrition
- Calories: 220 Cal
- Carbohydrates: 12g
- Protein: 18g
The Good Stuff: Nutritional Information
Now, let’s talk about why these muffins are such a powerhouse. This info is for approximately 3 mini muffins, which makes a perfect serving.
Per Serving (3 muffins):
Calories: ~220
Protein: 18g
Carbohydrates: 12g
Fat: 11g
As you can see, the protein is the real star of the show here. With 18 grams per serving, these muffins provide a sustained energy release that helps keep you full and focused throughout your morning. The balance of protein, carbs, and fat is ideal for a post-workout snack to aid muscle recovery or simply for keeping hunger at bay until lunch. Remember, these numbers can vary slightly based on the specific brands of sausage, milk, and cheese you use, but you can always count on a major protein punch!
Final Thoughts from My Kitchen to Yours
Well, there you have it, friends—my not-so-secret weapon for winning the morning. These High-Protein Pancake Sausage Mini Muffins are more than just a recipe; they’re a little packet of reassurance that even on the most chaotic days, you’ve got something wholesome and delicious to look forward to.
I love this recipe because it embodies everything Feastical is about: feel-good food that brings people together and makes life just a little bit easier and a whole lot tastier. It’s a recipe that encourages you to play, to adapt, and to make it your own.
So I really hope you give these a try. Whip up a batch, fill your kitchen with that incredible aroma, and tuck a few away for a rainy day. And when you do, be sure to tag me @feastical on social media—I love seeing your creations!
Until next time, keep your spatula close and your kitchen full of joy.