
Turmeric-Dill Shrimp Stir-Fry
Golden Hour in a Skillet: Turmeric-Dill Shrimp Stir-Fry
Hey friends, Beau here from Feastical! Ever stare into your fridge after a long day, willing dinner to magically appear? Yeah, me too. That’s why I’m utterly obsessed with this Turmeric-Dill Shrimp Stir-Fry – it’s weeknight wizardry that’s faster than takeout and tastes like sunshine on a plate. Imagine plump, juicy shrimp wearing golden turmeric coats, dancing with garlic in a hot skillet, then getting a fresh, herby hug from dill and lemon. It’s vibrant, zesty, and ridiculously simple. Perfect for when you’re juggling life but still want something that feels special. Turmeric isn’t just a pretty face either; it brings earthy warmth and a boost of goodness. In 20 minutes flat, you’ll have a colorful, nutrient-packed meal that’ll make your kitchen smell incredible and your taste buds throw a party. No fancy skills needed – just a skillet, hungry hearts, and that trusty spatula you finally found behind the blender. Ready to cook joy? Let’s turn up the heat!
Sunset Dinners & Dill Discoveries
This dish? It tastes like my first coastal summer in Maine. Picture this: I’m renting this tiny cabin with a kitchen the size of a postage stamp. One evening, after a long day fishing (more like untangling lines and debating seagulls over my bait), I had fresh local shrimp, a bunch of dill going wild in my window box, and a serious hunger. Turmeric was my go-to back then for adding warmth without heat. I threw it all together in a dented skillet as the sunset painted the sky orange. That first bite – the sweet shrimp, the earthy turmeric, the bright dill cutting through it all – was pure magic. I ate it right out of the pan, standing at the counter, watching the waves. It wasn’t fancy, but it was *real*. It became my victory meal after every fishing attempt (successful or not!). That combo of simplicity, freshness, and a little golden sunshine? That’s the soul of this stir-fry. It reminds me that the best meals often come from happy accidents and what’s on hand.
Your Vibrant Shopping List (Plus Chef Secrets!)
- 1 lb large shrimp, peeled and deveined: Go for 21-25 count size for perfect bites. Thaw frozen shrimp overnight in the fridge or under cold running water. Insider Tip: Pat ’em bone-dry with paper towels – moisture is the enemy of a good sear! Swap with chicken thighs or firm tofu if needed.
- 1 tsp ground turmeric: Our golden superstar! It adds earthy depth and that gorgeous color. Chef Hack: For a fresher punch, use 1-inch fresh turmeric root, grated (wear gloves, it stains!).
- 3 garlic cloves, minced: Flavor foundation! Mince finely so it distributes evenly. In a pinch? ½ tsp garlic powder works, but fresh is best.
- 2 Tbsp olive oil or avocado oil: High smoke point is key for stir-frying. Avocado oil is my fave here for its neutrality. Coconut oil adds a fun tropical twist!
- ½ tsp salt, ¼ tsp black pepper: Essential seasonings. Taste your shrimp before adding more later.
- 1 small red onion, thinly sliced: Adds sweetness and crunch. Yellow onion works, but red’s prettier!
- 1 bell pepper, sliced (any color!): I love red or yellow for sweetness. Slice uniformly for even cooking.
- 1 zucchini or yellow squash, sliced: Quick-cooking and light. Halve lengthwise first if it’s large, then slice. Summer squash or asparagus are great subs.
- 2 Tbsp chopped fresh dill: Non-negotiable for that bright, grassy finish! Dried dill (1 tsp) lacks vibrancy – seek out fresh if you can.
- 1 Tbsp lemon juice: The zesty wake-up call! Freshly squeezed, please. Lime juice works in a pinch.
- Cooked rice or quinoa, for serving: Fluffy basmati rice soaks up the glorious juices. Quinoa keeps it light and protein-packed.
Let’s Make Some Sunshine!
- Marinate the Shrimp: In a medium bowl, toss the shrimp with the turmeric, salt, pepper, and half of the minced garlic. Chef’s Whisper: Don’t skip the 10-minute rest! It lets the turmeric work its magic and flavors the shrimp deeply. Just don’t leave it swimming for hours – citrus or acid later can start “cooking” them if left too long.
- Sear the Shrimp: Heat 1 Tbsp oil in a large skillet or wok over medium-high heat until shimmering hot (a drop of water should sizzle and dance). Add the shrimp in a single layer – don’t crowd them! Crowding = steaming, not searing. Cook for 2-3 minutes per side until beautifully pink, opaque, and slightly curled. Golden Rule: Shrimp cook FAST! Overcooking makes them rubbery. Remove them to a plate immediately – they’ll finish cooking later.
- Stir-Fry the Veggies: Add the remaining 1 Tbsp oil to the same skillet. Toss in the onion, bell pepper, and zucchini. Stir-fry for 4-5 minutes, keeping things moving! We want tender-crisp veggies with a bit of char – that’s flavor town! Pro Tip: Listen for that satisfying sizzle. If it stops, your pan isn’t hot enough.
- Garlic & Grand Finale: Push the veggies to the sides. Add the remaining garlic to the center and cook for 30 seconds – just until fragrant! Burnt garlic is bitter sadness. Now, return the shrimp and any juices to the skillet. Sprinkle in the fresh dill and drizzle the lemon juice over everything. Toss vigorously for about 1 minute, letting the heat wilt the dill and blend the flavors. Chef’s Kiss: That sizzle when the lemon hits the hot pan? Music!
Plate It Pretty (It’s Easy!)
Scoop a generous bed of fluffy rice or quinoa into shallow bowls. Pile the vibrant turmeric-dill shrimp and veggies right on top. Let those golden juices mingle with the grains – that’s flavor gold! Garnish with an extra sprinkle of fresh dill fronds and a bright lemon wedge on the side for squeezing. Need a side? A simple arugula salad with lemon vinaigrette or some quick-steamed broccoli keeps it light and balanced. This dish screams “fresh,” so keep the plating clean and colorful!
Shake Up Your Stir-Fry!
- Mediterranean Escape: Stir in ¼ cup crumbled feta and 2 Tbsp chopped Kalamata olives with the dill.
- Creamy Dream: Right at the end, swirl in 2-3 Tbsp full-fat coconut milk or plain Greek yogurt for a luscious, tangy sauce.
- Spicy Sunset: Add ½ tsp red pepper flakes or 1 minced fresh chili (like serrano) with the second batch of garlic.
- Garden Bounty: Swap or add veggies! Thin asparagus, snap peas, or sliced mushrooms work wonders.
- No-Shrimp Zone: Use cubed firm tofu (pressed well!) or chickpeas. Marinate the tofu just like the shrimp.
Beau’s Backstory & Blunders
This recipe started life as a fridge-cleaner experiment! That summer in Maine (see story!), I was determined to use my garden dill before it bolted. The turmeric addition? Honestly, I loved the color and knew its benefits. The first version was good, but lacked punch – that’s how the lemon juice elbowed its way in later! Word to the wise: Turmeric is a notorious stainer. I once sacrificed my favorite white tee to the turmeric gods during a particularly enthusiastic stir-fry session. Now? Apron mandatory! I also learned fresh dill is non-negotiable. Tried dried once when the store was out… it tasted like dusty nostalgia, not vibrant summer. This dish evolves with the seasons – sometimes I add a handful of cherry tomatoes in summer for bursts of sweetness. It’s forgiving, flexible, and always feels like a little culinary victory.
Your Stir-Fry Questions, Answered!
Q: Help! My shrimp turned out rubbery. What went wrong?
A: Ah, the classic shrimp tragedy! Overcooking is the culprit. Shrimp cook incredibly fast – just 2-3 minutes per side on medium-high heat until pink and opaque. They continue cooking slightly from residual heat after you remove them. Pull them out *before* they look completely done. Also, ensure your pan is HOT before adding them for a quick sear, not a steam.
Q: Can I use frozen shrimp directly, or do I have to thaw?
A> Always thaw frozen shrimp completely! Cooking them frozen guarantees they’ll release tons of water, steaming instead of searing, and becoming tough. Thaw overnight in the fridge or place them in a sealed bag under cold running water for 15-20 minutes. Pat them incredibly dry with paper towels afterward – moisture is the enemy of that perfect sear.
Q: My stir-fry is watery! How do I fix it (or prevent it)?
A> Watery veggies are usually due to overcrowding the pan (which lowers the temp, causing steaming) or not patting the shrimp dry enough pre-marinade. Ensure your pan is large enough and HOT. Work in batches if needed. Also, slice veggies uniformly so they cook evenly and quickly. If it’s already watery, crank the heat for the last minute and toss constantly to evaporate excess liquid.
Q: Any tips for preventing turmeric stains EVERYWHERE?
A> Turmeric is a beautiful beast that loves to leave its mark! Use a non-stick or well-seasoned cast iron skillet. Wear an apron (trust me!). Wipe up spills IMMEDIATELY with soapy water. For stubborn stains on counters or cutting boards, a paste of baking soda and water can help, or lemon juice. For utensils, wash promptly with hot soapy water.

Turmeric-Dill Shrimp Stir-Fry
- Total Time: 20 min
Description
Looking for a weeknight win that delivers flavor, freshness, and good vibes in under 20 minutes? This Turmeric-Dill Shrimp Stir-Fry brings juicy shrimp, bright lemon, earthy turmeric, and herby dill together in one golden, sizzling skillet. It’s quick, clean, and tastes like a sunset vacation—no passport required.
Ingredients
-
1 lb large shrimp, peeled & deveined
-
1 tsp ground turmeric
-
3 garlic cloves, minced
-
2 Tbsp olive or avocado oil
-
½ tsp salt, ¼ tsp black pepper
-
1 small red onion, thinly sliced
-
1 bell pepper, sliced
-
1 zucchini, sliced
-
2 Tbsp chopped fresh dill
-
1 Tbsp fresh lemon juice
-
Cooked rice or quinoa, to serve
Instructions
-
Marinate Shrimp: Toss shrimp with turmeric, salt, pepper & half the garlic. Let sit 10 mins.
-
Sear Shrimp: Heat 1 Tbsp oil in skillet. Sear shrimp 2–3 mins per side. Remove to plate.
-
Cook Veggies: Add remaining oil. Stir-fry onion, bell pepper & zucchini 4–5 mins until crisp-tender.
-
Final Toss: Add remaining garlic, cook 30 secs. Return shrimp. Add dill & lemon juice. Stir 1 min.
-
Serve: Spoon over rice/quinoa. Garnish with dill and lemon wedges.
Notes
-
Pat shrimp dry for best sear.
-
Don’t overcook—shrimp go rubbery fast!
-
Add cherry tomatoes or red pepper flakes for a twist.
- Prep Time: 10 min
- Cook Time: 10 min
Nutrition
- Calories: 280Cal
- Carbohydrates: 10g
- Fiber: 2g
- Protein: 24g
Nourishment in Every Bite (Estimated per Serving)
Calories: ~280 | Protein: 24g | Carbs: 10g | Fat: 16g | Fiber: 2g | Prep Time: 10 min | Cook Time: 10 min | Total Time: ~20 min
Final Thoughts: Why This Dish Works Every Time
This Turmeric-Dill Shrimp Stir-Fry is more than a quick meal—it’s a lesson in balancing flavors and textures. The golden shrimp, crisp-tender veggies, and herby brightness make it feel gourmet, yet it’s simple enough for a Tuesday night.
It’s also adaptable:
-
Swap shrimp for chicken, tofu, or chickpeas.
-
Toss in whatever veggies you have.
-
Adjust spice levels with chili flakes or fresh peppers.
Most importantly, it’s a reminder that great cooking doesn’t need complexity—just fresh ingredients, bold flavors, and a little confidence. So grab that skillet, embrace the golden hour, and make something delicious tonight!

Chipotle-Citrus Ribs
When Ribs Get a Zesty, Smoky Hug (Your Taste Buds Will Thank You!)
Hey friends! Beau here from Feastical, waving a slightly sticky, sauce-covered hand your way. Ever have one of those meals where the first bite makes everyone at the table go completely silent? Just wide eyes, happy hums, and fingers licked clean? That’s the magic we’re conjuring today with these Chipotle-Citrus Ribs. Forget dry, boring ribs – we’re talking succulent, fall-off-the-bone tender meat wrapped in a glaze that’s a full-on fiesta: smoky chipotle heat, bright citrus sunshine, sticky-sweet caramelization, and a depth of flavor that’ll have you dreaming about them for days. Whether you’re firing up the grill for a summer bash or craving a soul-warming oven project on a cozy weekend, these ribs are your golden ticket. They look impressive but trust me, they’re built for real people with real lives (and maybe a slight spatula addiction). So crank up some tunes, grab your apron – the comfy one with the questionable stains – and let’s turn some humble ribs into an unforgettable, finger-licking masterpiece. Get ready for serious flavor fireworks!
Sunset, Smoke, and a Sauce Revelation
This recipe? It’s got roots in one of those perfect, messy, golden-hour moments. Picture it: My buddy Marco’s backyard, years ago. We were attempting a massive “rib-off” for his birthday. My usual dry rub was solid, but Marco, ever the showman, pulled out this rusty pot bubbling with something mysterious – orange juice, limes, and chipotles bobbing around. “Just gonna splash ’em with this!” he declared, grinning. Skeptical? You bet. But when those ribs came off his rickety grill, glistening with that sticky, charred glaze? Pure magic. The crowd went wild. That tangy citrus cut through the richness, the smoke sang with the chipotle heat, and the sweetness made it all irresistible. It wasn’t fancy technique; it was pure, joyful flavor alchemy. That rusty pot concoction became legend. I’ve tweaked it over countless BBQs since – balancing the heat, deepening the smoke, perfecting the caramelization – but the soul remains: that unforgettable Marco-inspired punch of bright, smoky, sticky goodness. Every time I make these, I smell that backyard smoke and hear the laughter. Food memories? They’re the best kind.
Your Flavor Arsenal: Simple Stuff, Big Impact
Gather your troops! This is where the party starts. Don’t sweat substitutions – cooking’s about making it work for YOU.
- 2 racks baby back ribs (about 4 lbs): The star! Baby backs are leaner, cook faster, and have that perfect meat-to-bone ratio. St. Louis style works too (meatier, richer) but add 30-60 mins cook time. Pro Tip: Ask your butcher to remove the tough membrane on the bone side for ultimate tenderness, or do it yourself (grip with a paper towel and pull!).
- Salt and pepper, to taste: The foundation! Kosher salt is my MVP for even seasoning. Freshly cracked black pepper? Non-negotiable for depth.
- 1 Tbsp olive oil: Helps the seasoning stick and promotes browning. Avocado oil works great too.
- For the Marinade/Glaze Symphony:
- 1/4 cup fresh orange juice: Brightness central! Squeeze it yourself – the bottled stuff lacks that vibrant zing. No oranges? Tangerine or grapefruit juice bring fun twists.
- 1/4 cup fresh lime juice: The essential tang! Bottled lime juice? Only in a pinch, friend. Fresh is fire.
- 2 chipotle peppers in adobo, minced: Smoky heat heroes! Minced fine for even distribution. LOVE heat? Add 3. Nervous? Start with 1 and add an extra tbsp adobo sauce.
- 2 Tbsp adobo sauce (from the can): Liquid gold! Packed with smoky, savory flavor. Don’t skip it!
- 2 Tbsp honey or brown sugar: Sweetness for balance and caramelization. Honey gives pure sweetness, brown sugar adds a deeper molasses note. Maple syrup? Go for it!
- 3 garlic cloves, minced: Savory backbone. Use a press if you’re lazy like me sometimes – no shame!
- 1 tsp ground cumin: Earthy warmth. Toasting whole seeds and grinding them? Next level, but pre-ground is A-OK.
- 1 tsp smoked paprika: Doubles down on that smoky vibe. Regular paprika lacks the magic here.
- 1 Tbsp soy sauce or Worcestershire: Umami depth and salt. Soy sauce (regular or low-sodium) keeps it clean. Worcestershire adds a more complex, fermented tang. Both rock!
Let’s Build Some Rib Magic: Slow, Low, Then Glow!
Okay team, time to get hands-on! This isn’t rocket science, it’s rib science (way more fun). We’re going low and slow in the oven for melt-in-your-mouth tenderness, then finishing with a sizzling glaze on the grill (or broiler) for that sticky, charred perfection. Follow along!
- Mix the Flavor Bomb: “In a medium bowl, whisk together ALL the marinade/glaze ingredients – orange juice, lime juice, minced chipotles, adobo sauce, honey/brown sugar, minced garlic, cumin, smoked paprika, and soy sauce/Worcestershire.” Chef Hack: Taste it! Adjust NOW. Want more heat? Add adobo sauce. Too intense? A touch more honey or OJ. This is YOUR sauce. Reserve HALF (about 1/2 cup) in a separate container for glazing later. Cover both and pop the glaze in the fridge.
- Rib Prep & Marinate: “Pat those rib racks super dry with paper towels – this helps the seasoning stick and promotes browning. Generously season ALL OVER with salt and pepper. Rub them down with the olive oil. Place them bone-side down in a large baking dish or sturdy zip-top bag. Pour the remaining marinade (not the reserved glaze!) over the ribs, turning to coat them completely.” Chef Insight: Massage that marinade in like you mean it! Get it into every nook. Cover the dish tightly with foil or seal the bag, squeezing out excess air. Refrigerate for at least 2 hours, but oh baby, overnight is where the real flavor magic happens! The citrus tenderizes while the smoky-spicy goodness permeates.
- Low & Slow Oven Tango: “Preheat your oven to 300°F (150°C). Line a large, rimmed baking sheet with heavy-duty aluminum foil (trust me, cleanup is a breeze!). Place a wire rack on top. Carefully transfer the ribs to the wire rack, bone-side down. Reserve any marinade left in the dish/bag. Cover the entire pan TIGHTLY with another sheet of foil, crimping the edges well to create a steam-sealed packet.” Pro Tip: Pour that reserved marinade over the ribs before sealing! Extra flavor boost. Bake for 2.5 to 3 hours. How to know they’re ready? They should be incredibly tender – a toothpick or fork should slide into the meat between the bones with ZERO resistance, and the meat should be pulling back noticeably from the ends of the bones. That’s fall-off-the-bone territory!
- Glaze & Sizzle (The Grand Finale!): “Carefully remove the ribs from the oven. Uncover (watch out for steam!) and let them rest for 10-15 minutes. This lets the juices redistribute. Now, fire up your grill to medium-high heat (about 400-450°F) for that perfect char. No grill? Crank your oven broiler to high and move a rack to the upper-middle position. Brush the ribs generously on both sides with the reserved glaze.” Chef Hack: Warm the glaze slightly for easier brushing! “Place the ribs on the hot grill (or on a broiler-safe pan if using the oven). Grill/Broil for 5-7 minutes per side. BE VIGILANT! We want gorgeous caramelization and slightly charred edges, not charcoal briquettes. Brush with another layer of glaze when you flip them. That double-glaze builds incredible flavor and shine!”
- Rest & Devour: “Transfer the beautifully glazed ribs to a clean cutting board. LET THEM REST for 10 minutes. Seriously, don’t skip this! It lets the juices settle back in, ensuring moist, succulent meat. Slice between the bones into individual ribs.” Final Flourish: Serve ’em up piping hot! That sticky glaze is everything.
Plating Up the Goodness
Presentation? Keep it rustic and real! Pile those glistening ribs high on a big, sturdy wooden board or a vibrant platter. Let those gorgeous charred edges and sticky glaze shine. Scatter some fresh lime wedges and maybe a few rough-chopped cilantro leaves around for a pop of color and freshness. Got extra glaze? Warm it slightly and serve it on the side for the true sauce enthusiasts. These ribs are the undisputed star, so keep sides simple but hearty: think creamy coleslaw (that cool crunch is perfection against the rich ribs), classic potato salad, grilled corn on the cob slathered in butter, or some crusty bread for mopping up every last drop of that incredible chipotle-citrus goodness. Napkins? Loads of them. You’ll need ’em!
Make It Your Own: Flavor Twists & Swaps
Love the base? Let’s riff!
- Pineapple-Jalapeño Twist: Swap OJ for pineapple juice! Add 1 finely minced fresh jalapeño (seeds removed for less heat) to the marinade. Tropical heat wave!
- Bourbon Smokiness: Replace 2 Tbsp of the OJ with bourbon in the marinade/glaze. Adds incredible depth and complexity. Perfect for a grown-up BBQ.
- Sticky Hoisin Fusion: Swap the honey/brown sugar for 2 Tbsp hoisin sauce + 1 Tbsp honey. Add 1 tsp grated ginger to the marinade. Asian-inspired smoky goodness!
- Slow Cooker Simplicity: Marinate as directed. Place ribs in slow cooker, pour over marinade. Cook on LOW 6-8 hrs until tender. Finish under broiler with reserved glaze. Easy win!
- Dietary Friendly: Use coconut aminos instead of soy sauce (GF, lower sodium). Swap honey for pure maple syrup (vegan). Ensure chipotles in adobo are GF if needed (most are, but check!).
Beau’s Backyard Rambles & Rib Wisdom
Confession: I’ve slightly scorched these more than once while deep in conversation (or distracted by a perfectly cold beverage). The key? That low-and-slow oven step is your safety net! It makes the ribs foolproof-tender before you even hit the fire. The grilling/broiling? That’s just for the glory shots (and incredible flavor). Over the years, I’ve learned: 1) Overnight marinating is WORTH IT. The citrus works wonders. 2) Don’t rush the oven time. True tenderness can’t be hurried. 3) That double-glaze (before and during grilling) is the secret to that lacquered, finger-licking perfection. One summer, I even tried adding a splash of coffee to the marinade – surprisingly awesome earthy note! Mostly though, it’s about the vibe. Put on some music, enjoy the process, and embrace the sticky fingers. These ribs are meant to be shared, laughed over, and maybe even argued about (who gets the last one!). That’s the Feastical spirit.
Rib Rescue: Your Questions, Answered!
Let’s tackle those common rib hiccups:
- Q: Help! My ribs are tough! What went wrong?
A: Almost always means they needed more time in the oven. Low-and-slow is KEY. The 2.5-3 hour range is a guide. If they aren’t super tender and pulling back from the bone ends, give them another 20-30 minutes, covered. Patience, grasshopper! - Q: Can I make these entirely in the oven without grilling?
A: Absolutely! After the initial slow cook, remove the foil, brush generously with the reserved glaze, and crank the oven to 400°F (200°C). Bake for 15-20 minutes, brushing with glaze again halfway, until sticky and caramelized. Keep a close eye to prevent burning! - Q: The sauce is burning on the grill! How do I prevent this?
A: Two main culprits: Heat too high or sugar content. Ensure your grill is medium-high, not inferno-high. Move ribs to a slightly cooler spot if flare-ups happen. Also, brush on the glaze *during* the last few minutes per side, not too early. Sugar caramelizes fast! Having a spray bottle with water handy for flare-ups helps too. - Q: Can I prep these ahead?
A: Yes! Marinate overnight. You can also cook them through the low-and-slow oven step 1-2 days ahead. Let cool, wrap tightly in foil, and refrigerate. When ready, bring close to room temp, then grill/broil with glaze as directed. The rest actually helps the flavors meld! - Q: Is there an easy way to remove the rib membrane?
A: Yes! Slide a butter knife or spoon handle under the thin membrane on the bone side, usually at one end. Loosen a section. Grab it firmly with a paper towel (for grip!) and pull it off in one piece. If it tears, just get the rest with the paper towel. Your teeth will thank you later!

Chipotle-Citrus Ribs
- Total Time: ~5 hrs
Description
Sticky, smoky, citrusy, and fall-off-the-bone tender—these Chipotle-Citrus Ribs are what backyard BBQ dreams are made of. Perfect for grill masters and casual cooks alike, they blend slow-cooked comfort with fiery, tangy flair. Whether it’s a summer bash or a cozy kitchen project, these ribs steal the spotlight with every glazed, finger-licking bite. Time to make some rib magic!
Ingredients
-
2 racks baby back ribs (about 4 lbs)
-
Salt & pepper
-
1 Tbsp olive oil
For the Marinade/Glaze:
-
1/4 cup fresh orange juice
-
1/4 cup fresh lime juice
-
2 chipotle peppers in adobo, minced
-
2 Tbsp adobo sauce
-
2 Tbsp honey or brown sugar
-
3 garlic cloves, minced
-
1 tsp ground cumin
-
1 tsp smoked paprika
-
1 Tbsp soy sauce or Worcestershire
Instructions
-
Mix the Marinade: Combine all glaze ingredients. Taste and adjust. Reserve half for glazing.
-
Prep & Marinate Ribs: Pat ribs dry, season with salt & pepper, rub with olive oil. Coat with marinade. Cover and chill 2+ hours (overnight = best).
-
Low & Slow Bake: Preheat oven to 300°F (150°C). Place ribs on foil-lined rack. Cover tightly with foil. Bake 2.5–3 hours until fork-tender.
-
Grill or Broil Finish: Rest ribs 10 mins. Brush with reserved glaze. Grill or broil 5–7 mins per side until caramelized. Glaze again when flipping.
-
Slice & Serve: Rest 10 mins. Slice between bones. Serve with lime wedges and lots of napkins!
Notes
-
No grill? Finish under the broiler.
-
Overnight marinating = deeper flavor.
-
Keep glaze from burning by brushing it on during the final grill stage.
- Prep Time: 15 min
- Cook Time: 3 hrs
Nutrition
- Calories: 540Cal Per Serving
- Carbohydrates: 18g
- Protein: 35g
Nutritional Info (Per Serving, serves 6 – Estimated)
- Calories: ~540
- Protein: 35g
- Carbohydrates: 18g
- Fat: 36g
- Sugar: 10g
- *Prep Time:* 15 min | *Cook Time:* 3 hrs | *Marinate Time:* 2 hrs–overnight | *Total Time:* ~5 hrs
Final Thoughts: Why These Ribs Are Worth the Wait
Good ribs aren’t fast food—they’re slow food, meant to be savored. From the overnight marinade to the low-and-slow roast and the final sticky glaze, every step builds toward a bite that’s unforgettable.
These Chipotle-Citrus Ribs are more than a recipe—they’re a celebration of contrasts: smoke and citrus, spice and sweetness, tenderness and caramelized crunch. They’re the kind of dish that turns a regular meal into a feast, a simple dinner into a memory.
So fire up that oven (or grill), grab your messiest apron, and get ready for a flavor explosion that’ll have everyone at the table licking their fingers—and maybe even fighting over the last rib.
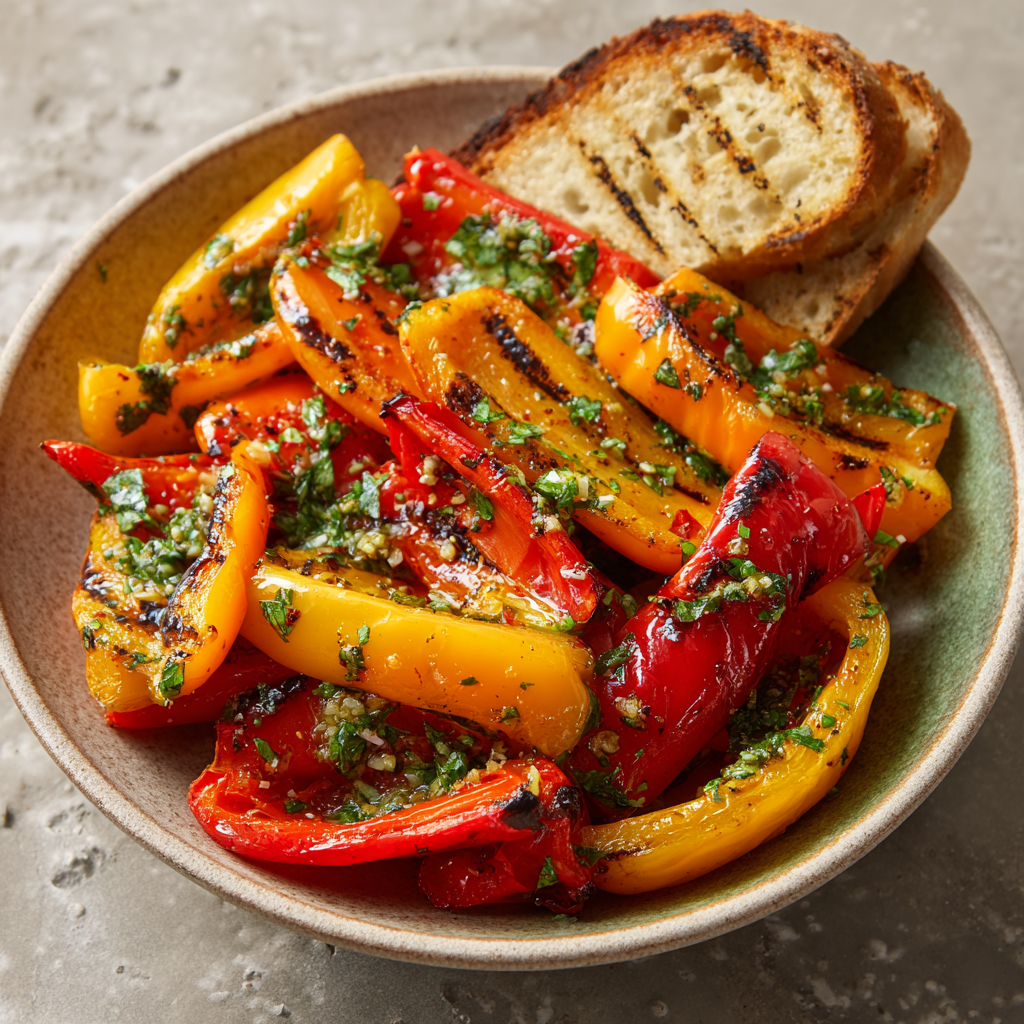
Marinated Grilled Peppers
Sun-Kissed Peppers & the Magic of Fire: Your New Summer Obsession
Hey friends, Beau here! Can you smell that? Charred sweetness dancing on warm summer air? If your grill’s feeling neglected between burger flips, I’ve got a fiery little secret that’ll steal the spotlight: Marinated Grilled Peppers. Picture this: plump bell peppers kissed by flames until blistered and tender, then bathed in garlicky, herb-infused goodness. They’re not just a side dish—they’re sunshine on a plate, the ultimate flexible flavor bomb ready to jazz up your weeknight dinners or impress at your next backyard bash. No fancy skills needed, just your trusty grill (or even a grill pan!) and 10 minutes of hands-on magic. Whether you’re a meal-prep maestro or a “oops-I-burnt-the-toast-again” newbie, these peppers are your ticket to tasting like a pro. Let’s turn up the heat and make your taste buds sing!
The Pepper That Started It All: A Fiery Memory
This recipe takes me straight back to my Grandma Lou’s rickety porch in Georgia. She’d tend her pepper plants like royalty, whispering secrets to those vibrant jewels. One sweltering July, 8-year-old me “helped” grill. Let’s just say… enthusiasm outweighed finesse. I yanked a pepper off the grate too soon, sending it sailing into her prize rosebush! Instead of scolding, she laughed that big, rumbling laugh, fished it out, and plopped the slightly dusty, half-charred pepper onto my plate. “Taste the adventure, Beau-Beau!” she winked. That messy, smoky-sweet bite? Pure revelation. It wasn’t pretty, but it taught me flavor trumps perfection. These marinated peppers? They’re my grown-up homage to Grandma Lou—bold, a little imperfect, and packed with soul.
Gather ‘Round: Your Flavor Toolkit
Simple ingredients, BIG impact! Here’s what you’ll need (and why):
- 6 bell peppers (red, yellow, or orange) – Halved & seeded! Chef’s Insight: Mix colors for visual pop & flavor depth. Reds are sweetest, yellows mellow, oranges bright. Avoid green—they’re unripe and bitter here.
- 1/4 cup olive oil – Sub Tip: Use a good extra-virgin for the marinade! Its fruity notes shine. In a pinch? Avocado oil works, but avoid neutral oils—they’re flavor vampires.
- 3 garlic cloves, thinly sliced – Chef’s Hack: Sliced (not minced) gives gentle, aromatic infusion without overpowering. Too garlicky? Reduce to 2 cloves.
- 2 Tbsp red wine vinegar – Sub Tip: White wine vinegar or lemon juice add different zing! Balsamic makes it richer (but darker).
- 1 tsp kosher salt – Why It Matters: Kosher salt adheres better & seasons evenly. Table salt? Use 3/4 tsp.
- 1/2 tsp freshly ground black pepper – Chef’s Rule: ALWAYS grind fresh! Pre-ground tastes like dust.
- 1/4 tsp red pepper flakes (optional) – Heat Level: My “friendly kick.” Omit or double—your call, rebel!
- 2 Tbsp chopped fresh basil or parsley – Pro Move: Toss in some oregano or thyme too! Dried? Use 2 tsp, but fresh herbs make it SING.
Let’s Get Grilling: Fire, Flavor & Foolproof Steps
Ready to transform humble peppers into smoky superstars? Follow my lead:
- Preheat & Prep: Fire up your grill to medium-high (about 400°F/200°C). Chef’s Hack: Brush grates with oil to prevent sticking! While it heats, halve peppers lengthwise, scoop out seeds/membranes. Drizzle halves lightly with oil from your measured 1/4 cup—just enough to coat (save the rest!).
- Grill That Goodness: Place peppers skin-side down on the grill. DO NOT PEEK for 5-7 minutes—let the flames work their magic! When skins are beautifully charred and blistered, flip. Grill flesh-side down for 3-4 minutes until tender-crisp. Watch-Out! If flames leap, move peppers to indirect heat.
- Steam & Slip: Transfer hot peppers to a bowl, cover tightly with foil or plastic wrap. Let steam 10 minutes. This loosens skins! Time-Saver: Skip peeling if you dig rustic texture. Otherwise, rub skins off gently—they’ll slide right off! Slice into strips.
- Marinate Magic: Whisk remaining oil, sliced garlic, vinegar, salt, pepper, and pepper flakes in a large bowl. Add warm pepper strips and toss like you mean it! Flavor Secret: Warm peppers absorb marinade like a sponge.
- Patience Pays: Let sit at room temp 30 minutes, or refrigerate overnight (covered). Chef’s Truth: Longer soak = deeper flavor! Give them a stir halfway.
- Herb It Up: Right before serving, toss in fresh herbs. Basil for sweetness, parsley for freshness!
Showtime! Serving Your Masterpiece
These peppers are social butterflies—they play well with everything! Pile them warm into a rustic bowl with crusty bread for dunking in that garlicky oil. Chill them and layer onto mozzarella & prosciutto sandwiches, or toss into grain bowls with quinoa and feta. My fave? Room temp beside grilled chicken or fish, letting their sweet smokiness shine. For parties, spear strips with toothpicks alongside olives and cheese—instant chic antipasto!
The Science of Char: Why Grilled Peppers Taste So Damn Good
Ever wonder why grilled peppers taste like a flavor explosion compared to raw or steamed ones? It’s not just magic—it’s science, baby! Let’s geek out on what happens when peppers meet fire.
1. The Maillard Reaction & Caramelization
When peppers hit the grill, two chemical reactions team up to create depth:
-
Maillard Reaction: The amino acids and sugars in the peppers react under heat, creating hundreds of new flavor compounds. That’s why you get those savory, umami-rich notes alongside the sweetness.
-
Caramelization: The natural sugars in the peppers (hello, red and yellow bells!) break down into richer, nuttier flavors. The longer the grill time, the deeper the caramelization—hence why slightly blackened bits taste like candy.
2. Smoke Infusion = Flavor Hack
Unlike oven roasting, grilling exposes peppers to open flames or smoldering wood/charcoal. Even a gas grill imparts a whisper of smokiness. That smoky aroma? It’s from compounds like guaiacol and syringol (also found in barbecue and whisky!), which cling to the peppers’ porous flesh.
3. Texture Alchemy
Heat collapses the peppers’ cell walls, turning crisp flesh into tender, almost buttery bites. Pro tip: Steaming them post-grill (as we do in this recipe) accelerates this breakdown, making them silky without turning mushy.
4. Fat’s Role in Flavor Delivery
Oil isn’t just for preventing stickage—it’s a flavor conductor. Olive oil’s fat molecules bind to the peppers’ charred compounds and the garlic/herbs in the marinade, ensuring every bite is infused with taste. Fun fact: Warm peppers absorb oil better than cold ones, which is why we marinate them hot!
5. Acidity Balance
Vinegar or lemon juice in the marinade isn’t just for tang—it brightens the peppers’ richness and helps preserve their color. Without it, the dish might taste one-note.
Try This Experiment: Grill two pepper halves—one with oil, one without. Taste the difference. The oiled one will have deeper char and more complex flavor. Science wins again!
Peppers Around the World: Global Twists on the Recipe
This marinated grilled pepper technique is a blank canvas for global flavors. Here’s how to globe-trot from your grill:
1. Spanish Pimiento de Padrón Vibes
-
Swap: Use padrón or shishito peppers (whole, not halved).
-
Marinade: Replace red wine vinegar with sherry vinegar, add 1 tsp smoked paprika.
-
Serve: Toss with flaky sea salt and lemon zest. Classic tapas move!
2. Middle Eastern Muhammara-Inspired
-
Add: 1 Tbsp pomegranate molasses + 1/2 cup toasted walnuts to the marinade.
-
Garnish: Fresh mint and a drizzle of tahini.
-
Pro Tip: Purée half the peppers for a dip-like texture.
3. Thai-Style Sweet Heat
-
Marinade: Substitute vinegar with lime juice + 1 Tbsp fish sauce (or soy sauce for vegan).
-
Heat: Add 1 minced bird’s eye chili.
-
Herbs: Swap basil for cilantro and Thai basil.
4. Mexican Esquites Fusion
-
Mix-In: Grilled corn kernels, cotija cheese, and a dash of chili powder.
-
Serve: With lime wedges and tortilla chips for scooping.
5. French Provençal Charm
-
Herbs: Use herbes de Provence (1 tsp dried) + fresh tarragon.
-
Bonus: Add Niçoise olives and anchovy fillets for a salade Niçoise twist.
Why It Works: Peppers are a staple in nearly every cuisine. Their sweetness adapts to bold spices, herbs, and acids, making them the ultimate cultural chameleon.
Meal Prep Magic: 10 Ways to Use Leftover Grilled Peppers
Made a double batch? Here’s how to repurpose them all week without boredom:
1. Breakfast Upgrade
-
Fold into scrambled eggs or omelets.
-
Top avocado toast with peppers + crumbled feta.
2. Sandwich Superstar
-
Layer into banh mi, muffulettas, or grilled cheese.
-
Vegan hack: Mash with chickpeas for a “tuna-less” salad.
3. Pasta’s BFF
-
Toss with hot pasta, reserved starchy water, and goat cheese.
-
Cold pasta salad? Add peppers, olives, and farfalle.
4. Pizza Night MVP
-
Swap marinara for a base of garlicky pepper strips.
-
Top with prosciutto post-bake for a salty contrast.
5. Grain Bowl Glow-Up
-
Mix into quinoa, couscous, or farro with lemon dressing.
-
Add to buddha bowls with hummus and falafel.
6. Soup Starter
-
Purée with roasted tomatoes for a smoky gazpacho.
-
Stir into minestrone for extra depth.
7. Dip Dynasty
-
Blend with cream cheese and Greek yogurt for a smoky spread.
-
Layer into a Greek tzatziki with grated cucumber.
8. Taco Tuesday Twist
-
Fill tacos with peppers, black beans, and cotija.
-
Top nachos for a gourmet touch.
9. Salad Drama
-
Pair with arugula, peaches, and burrata.
-
Add to a Niçoise-style potato salad.
10. Freezer Hack
-
Freeze flat in ziplock bags for up to 3 months.
-
Thaw for instant stir-fry boosters or frittata fillings.
Pro Tip: The oil in the marinade prevents freezer burn—nature’s preservation hack!
Mix It Up: 5 Flirty Twists
Once you master the base, get creative!
- Mediterranean Fling: Add 1/2 cup crumbled feta and 2 Tbsp chopped Kalamata olives to the marinade.
- Spicy Charmer: Swap red pepper flakes for 1 minced jalapeño (seeds in for heat!).
- Vegan Vibes: Drizzle with 1 Tbsp maple syrup and 1 tsp smoked paprika for “bacon-y” depth.
- Italian Nonna Style: Stir in 1 Tbsp capers and 1 tsp dried oregano with the herbs.
- Low-Carb Love: Skip bread—stuff peppers into lettuce wraps with tuna salad!
Beau’s Backstory: Pepper Tales & Trials
This recipe’s my kitchen workhorse! It started as a desperate fridge clean-out during a heatwave (hence the simple ingredients). Over the years, I’ve learned: don’t fear the char. That blackened skin? Flavor gold! Once, I forgot them steaming… for 30 minutes. Result? Silky, melt-in-your-mouth texture—now my intentional trick! They’ve survived a rogue rainstorm (finished in the oven—still delish) and won over my nephew, the “vegetable skeptic.” Pro tip: Double the batch. They keep 5 days in the fridge and get better daily. Trust me, you’ll want them on eggs, pizza, even stirred into hummus!
FAQs: Your Pepper Pitfalls Solved!
Q: My peppers are still crunchy after grilling! Help?
A: Patience, grasshopper! Grill skin-side down longer (up to 10 mins) until collapsed. If still firm, pop them in a 400°F oven for 5-10 mins after grilling.
Q: Can I make these without a grill?
A: Absolutely! Use a grill pan on high heat, or broil on a baking sheet 4-6 inches from heat. Rotate pans for even char!
Q: Why remove the skins? Seems fussy…
A: It’s optional! Charred skins add smoky depth, but can be tough. If you skip peeling, grill skin-side down only briefly (3-4 mins) to soften.
Q: Marinade too sharp? Tastes like vinegar!
A: Easy fix! Whisk in 1 tsp honey or maple syrup to balance. Or add 2 Tbsp grated Parmesan to the bowl—it mellows acidity beautifully.

Marinated Grilled Peppers
- Total Time: 10 minutes
Description
These fire-kissed bell peppers are smoky, sweet, and soaked in a garlicky-herb marinade that’ll make your taste buds dance. Whether you’re grilling for a crowd or elevating Tuesday’s leftovers, these vibrant beauties are pure sunshine on a plate. Serve warm, cold, or at room temp—they’re that good. Grab your tongs and get ready to grill like a flavor boss.
Ingredients
-
6 red, yellow, or orange bell peppers (halved & seeded)
-
1/4 cup extra-virgin olive oil
-
3 garlic cloves, thinly sliced
-
2 Tbsp red wine vinegar
-
1 tsp kosher salt
-
1/2 tsp freshly ground black pepper
-
1/4 tsp red pepper flakes (optional)
-
2 Tbsp chopped fresh basil or parsley
Instructions
-
Fire Up the Grill: Heat to medium-high (~400°F). Brush grates with oil.
-
Grill Peppers: Drizzle pepper halves lightly with oil. Grill skin-side down for 5–7 mins (don’t peek!). Flip, grill 3–4 mins until tender.
-
Steam & Peel (Optional): Place grilled peppers in a bowl, cover tightly. Steam 10 mins, then peel skins if desired. Slice into strips.
-
Marinate: In a bowl, whisk remaining oil, vinegar, garlic, salt, pepper & flakes. Toss warm pepper strips in. Let sit 30+ mins (or overnight).
-
Finish with Herbs: Add fresh basil or parsley just before serving.
Notes
-
No grill? Broil or use a grill pan.
-
Like heat? Add minced jalapeño instead of flakes.
-
Leftovers = magic on eggs, pizza, or hummus.
- Prep Time: 10 min
Nutrition
- Calories: 120 Cal
- Fat: 9g
- Fiber: 2g
- Protein: 1g
Nutritional Nibbles (Per Serving)
Calories: ~120 | Carbs: 8g | Fiber: 2g | Sugar: 5g | Fat: 9g (mostly heart-healthy olive oil!) | Protein: 1g
Note: Estimates vary with pepper size/oil absorption. Naturally gluten-free & vegan!
Prep Time: 10 min | Grill Time: 10-12 min | Marinate Time: 30 min+ | Total Time: ~50 min
Final Thoughts
Grilled marinated peppers are more than a recipe—they’re a lesson in simplicity and transformation. Charred edges and garlicky oil turn humble veggies into a dish that’s greater than the sum of its parts. Whether you’re riffing with global flavors, geeking out on food science, or stretching leftovers into new meals, this technique is a kitchen cornerstone. So light that grill, embrace the imperfections (Grandma Lou would approve), and let those peppers shine. After all, the best cooking isn’t about precision—it’s about passion, a little fire, and a willingness to taste the adventure. Now go forth and char!

Soy-Glazed Salmon Bowls
Why This Bowl Will Steal Your Dinner Heart
Hey friends! Beau here from Feastical, back with a recipe that’s basically a culinary high-five. You know those nights when you crave something nourishing but exciting, fancy-feeling but secretly easy? That’s where these Soy-Glazed Salmon Bowls swoop in like a weeknight superhero. Imagine this: tender, flaky salmon wearing a sticky-sweet soy glaze like its favorite leather jacket, perched atop fluffy rice with a confetti of crisp veggies. It’s vibrant, balanced, and cooks faster than you can binge an episode of your favorite show. Seriously, 30 minutes flat. This isn’t just dinner; it’s a flavor-packed experience that makes you feel like you’ve treated yourself without the fuss. Whether you’re wrangling hungry kids, impressing a date, or just craving something that tastes like sunshine, these bowls deliver. They’re my ultimate “I got you” meal – proof that healthy doesn’t mean boring and quick doesn’t mean bland. So grab your skillet, and let’s turn your kitchen into a happiness factory!
The Lake House & The Salmon That Started It All
This recipe? It’s got roots in one of my favorite memories. Picture this: It’s summer at my buddy’s rustic lake house. We’d spent all day swimming and kayaking, and everyone was STARVING. The plan was burgers, but… surprise! The grill ran out of propane. Cue mild panic. All we had was some salmon fillets, rice, random veggies, and a well-stocked Asian pantry. Challenge accepted! I whipped up a quick glaze with soy, honey, and ginger, seared that salmon until it was caramelized and gorgeous, and piled everything into mismatched bowls. We sat on the dock, feet dangling in the water, devouring these improvised bowls as the sunset painted the sky. The silence? Just forks scraping bowls and happy sighs. That’s the magic of this dish – it’s unplanned perfection. It’s about resourcefulness, sharing simple joy, and that unbeatable feeling when humble ingredients transform into something spectacular. Every time I make these bowls, I’m back on that dock, surrounded by friends and that golden-hour glow. Food memories? They’re the best kind.
Gathering Your Flavor Squad
Here’s your cast of characters! Don’t stress about perfection – substitutions are your friends (I’ve got notes!). Serves 4 hungry souls.
- 4 salmon fillets (about 6 oz each): Skin-on or off? Your call! Skin gives extra crispiness, but skinless works great. Look for bright, firm flesh. Frozen/thawed is fine! Sub: Arctic char or trout.
- Salt and pepper, to taste: The essential flavor foundation. Season generously!
- 1 Tbsp oil (vegetable or sesame): Sesame adds depth, vegetable is neutral. Use what you have! Chef Hack: A mix of both is *chef’s kiss*.
- 1/4 cup soy sauce: The savory backbone. Use reduced-sodium if preferred. Sub: Tamari (gluten-free) or coconut aminos (soy-free).
- 2 Tbsp honey or brown sugar: Sweetness to balance the salt. Honey gives shine, brown sugar adds molasses warmth. Sub: Maple syrup or agave.
- 1 Tbsp rice vinegar: Brightens everything up! Essential for that tangy lift. Sub: Apple cider vinegar (use 2 tsp).
- 1 tsp sesame oil: Nutty fragrance bomb! Don’t skip! Adds authentic aroma. Tip: Add AFTER cooking the glaze – heat dulls its magic.
- 2 garlic cloves, minced: Savory punch! Fresh is best. Sub: 1/2 tsp garlic powder.
- 1 tsp grated ginger: Warm, spicy zing. Use the real deal! Microplane is your friend. Sub: 1/4 tsp ground ginger.
- 1 tsp cornstarch + 1 Tbsp water (slurry): Glaze thickener. Crucial for that luscious, clingy sauce! Sub: Arrowroot powder.
- 2 cups cooked white or brown rice: The cozy base. Day-old rice works beautifully! Sub: Quinoa, cauliflower rice, or soba noodles.
- 1 cup shredded carrots, 1 cup sliced cucumber, 1 avocado (sliced): Fresh crunch & creaminess. Use pre-shredded/sliced to save time! Swaps: Edamame, bell peppers, snap peas, mango!
- 2 green onions, chopped, Sesame seeds, Lime wedges: The finishing flair! Fresh herbs (cilantro/mint) are awesome too.
Let’s Build Some Deliciousness!
Ready? This is where the magic happens fast. Preheat that skillet!
- Whip Up That Glorious Glaze: Grab a small saucepan. Whisk together the soy sauce, honey (or brown sugar), rice vinegar, minced garlic, and grated ginger. No sesame oil yet! Bring it to a lively simmer over medium heat – you’ll see bubbles dancing around the edges. While it simmers, quickly mix your cornstarch and water in a tiny bowl or cup until smooth (this is your slurry). Pour the slurry into the simmering sauce, whisking CONSTANTLY. Watch it transform! In just 1-2 minutes, it’ll thicken into a shiny, coat-the-back-of-a-spoon glaze. Chef Hack: Dip a spoon in – if the glaze clings nicely and leaves a clear path when you run your finger through it, it’s ready! Remove from heat and stir in that 1 tsp sesame oil. Set it aside. Why wait? The sesame oil’s delicate flavor gets damaged by high heat. Adding it off-heat keeps it vibrant!
- Salmon Sizzle Time: Pat those salmon fillets DRY with paper towels. This is CRUCIAL! Wet fish = steamed fish, not seared fish. Season both sides generously with salt and pepper. Heat your oil (vegetable or sesame) in a large non-stick or well-seasoned cast-iron skillet over medium-high heat. When the oil shimmers and a tiny flick of water sizzles fiercely, it’s showtime. Carefully place the salmon fillets in the hot skillet, skin-side down if using skin-on. Resist the urge to move them! Let them sear undisturbed for 3-4 minutes. You’re waiting for that beautiful golden crust to form. Flip carefully using a thin spatula. Sear the other side for another 3-4 minutes, or until the salmon feels slightly firm but still yields gently to pressure and flakes easily with a fork. Cooking time depends on thickness! Thicker fillets might need an extra minute.
- The Glaze Tango: About 1 minute before your salmon is perfectly cooked, it’s glaze o’clock! Reduce the heat to medium-low. Generously brush the top (and sides!) of each fillet with the reserved soy glaze. Let it bubble and caramelize onto the salmon for that final minute. Chef Hack: Tilt the pan slightly and spoon some of the bubbling glaze pooling in the pan over the fillets for extra love. This creates that irresistible sticky-sweet lacquer.
- Bowl Assembly Party: Time to create your edible rainbows! Divide the warm, fluffy rice among four bowls. Artfully arrange your shredded carrots, sliced cucumber, and creamy avocado slices around the edges. Place a gorgeous, glazed salmon fillet proudly in the center of each bowl. Drizzle any remaining warm glaze from the pan over the salmon and rice – don’t waste that liquid gold! Finish with a vibrant sprinkle of chopped green onions and sesame seeds. Plop a lime wedge on the side for that essential bright squeeze.
Plating Up Pure Joy
Presentation is part of the fun! Think color, texture, and ease. Use wide, shallow bowls so all the beautiful components shine. Pile the rice slightly off-center for visual interest. Fan the avocado slices and let the vibrant orange carrots and green cukes peek out. Place that glazed salmon front and center like the star it is. The final sprinkle of green onions and sesame seeds adds confetti-like celebration. That lime wedge isn’t just garnish – squeezing it over the bowl right before eating adds a crucial burst of freshness that cuts through the richness. Serve immediately while the salmon is warm and the rice is fluffy! These bowls are a complete meal, but a simple side of miso soup or a light Asian-inspired slaw never hurts.
Make It Uniquely Yours!
This recipe is a canvas! Play with these tasty twists:
- Protein Swap: Not a salmon fan? Try this glaze on chicken thighs (cook longer!), shrimp (cook 2-3 min/side!), or extra-firm tofu (press well, pan-fry crispy!).
- Veggie Fiesta: Swap or add veggies! Try edamame, quick-pickled radishes, sautéed mushrooms, shredded purple cabbage, bell peppers, or even roasted broccoli.
- Grain Goddess: Ditch the rice! Use quinoa, cauliflower rice (for low-carb), soba noodles, or even a mix of grains like farro and brown rice.
- Spice It Up: Add 1/2 tsp red pepper flakes to the glaze while simmering, or serve with sriracha or chili crisp on the side for heat lovers.
- Nutty Crunch: Add toasted chopped peanuts, cashews, or almonds right before serving for extra texture.
Beau’s Back-Pocket Tips & Tales
This recipe has been my weeknight wingman for years, evolving from that lake-house panic into pure comfort. One hilarious test run involved me accidentally using WAY too much ginger – let’s just say it was more “ginger with a side of salmon”! Lesson learned: measure the fresh stuff! Over time, I realized the cornstarch slurry is non-negotiable for that perfect clingy glaze. My biggest tip? Prep your veggies and rice ahead! Having those ready turns this into a 15-minute skillet wonder. Leftovers? Absolutely! Store components separately. Reheat salmon gently in the microwave or a low oven to avoid overcooking. The glaze thickens when cold – just warm it with a splash of water. Funny enough, my dog, Biscuit, is obsessed with the smell of this cooking. He now knows the sound of the salmon hitting the skillet and appears like magic, hoping for a tiny flake (don’t worry, salmon is dog-safe in moderation!). It’s become our little dinnertime ritual.
Your Salmon Bowl Questions, Answered!
Let’s tackle those common kitchen hiccups:
- Q: My glaze isn’t thickening! Help!
A: Don’t panic! Two main culprits: 1) The simmer wasn’t vigorous enough before adding the slurry. Bring it to a proper bubble! 2) The cornstarch slurry wasn’t mixed thoroughly, or it sat too long before adding (cornstarch settles). Whisk the slurry again right before adding. If it’s still thin, mix another 1/2 tsp cornstarch with 1/2 Tbsp cold water and whisk it in, simmering for another minute. - Q: My salmon stuck to the pan! What did I do wrong?
A: Likely causes: 1) The pan wasn’t hot enough before adding the salmon. Wait for that shimmering oil! 2) You moved the salmon too soon. Let it sear undisturbed for a full 3-4 mins to form a crust that naturally releases. 3) The fillets weren’t patted dry. Moisture is the enemy of a good sear! Ensure they’re very dry. - Q: Can I bake the salmon instead of pan-searing?
A: Absolutely! Preheat oven to 400°F (200°C). Line a baking sheet with parchment. Place seasoned salmon fillets on it. Bake for 12-15 minutes (depending on thickness), until cooked through. Brush generously with the glaze during the last 5 minutes of baking. - Q: How do I know when the salmon is perfectly cooked?
A: The best test! Gently press the thickest part of the fillet with your finger or the back of a fork. It should feel slightly firm but still yield gently (like the fleshy part of your palm below your thumb). It should flake easily with a fork. An instant-read thermometer inserted into the thickest part should read 125-130°F (52-54°C) for medium (it will carryover cook a bit). Avoid overcooking – salmon dries out fast!
Soy-Glazed Salmon Bowls
- Total Time: 30 min
Description
Craving something healthy, satisfying, and wildly flavorful without spending hours in the kitchen? This Soy-Glazed Salmon Bowl delivers it all in under 30 minutes. Picture this: golden, sticky-sweet salmon nestled on a bed of fluffy rice, surrounded by crunchy veggies and creamy avocado. It’s not just dinner—it’s a glow-up for your taste buds. Perfect for busy nights, date nights, or just when you want a meal that feels like a hug in a bowl. Let’s make magic happen!
Ingredients
-
4 salmon fillets (6 oz each)
-
Salt & pepper
-
1 Tbsp oil (sesame or vegetable)
-
1/4 cup soy sauce
-
2 Tbsp honey or brown sugar
-
1 Tbsp rice vinegar
-
1 tsp sesame oil
-
2 garlic cloves, minced
-
1 tsp grated ginger
-
1 tsp cornstarch + 1 Tbsp water (slurry)
-
2 cups cooked rice (white or brown)
-
1 cup shredded carrots
-
1 cup sliced cucumber
-
1 avocado, sliced
-
2 green onions, chopped
-
Sesame seeds & lime wedges for garnish
Instructions
-
Make the Glaze: In a small saucepan, combine soy sauce, honey, vinegar, garlic & ginger. Simmer 2 mins. Stir in slurry, cook until thick (~1–2 mins). Remove from heat, stir in sesame oil.
-
Cook the Salmon: Pat salmon dry, season with salt & pepper. Heat oil in a skillet over med-high. Sear salmon 3–4 mins per side until golden & just cooked.
-
Glaze It: In the last minute, brush glaze on salmon. Let it caramelize. Spoon extra glaze over top.
-
Assemble: Divide rice into bowls. Top with veggies, avocado, and salmon. Sprinkle green onions, sesame seeds. Squeeze lime before serving.
Notes
-
Pat salmon dry for a perfect sear.
-
Add chili flakes to glaze for heat lovers.
-
Make it yours: sub with shrimp, tofu, or soba noodles!
- Prep Time: 10 min
- Cook Time: 15–20 min
Nutrition
- Calories: 520 Cal Per Bowl
- Sugar: 8g
- Fat: 27g
- Carbohydrates: 36g
Nourishment in Every Bite (Estimated per serving)
- Calories: ~520
- Protein: 34g (Salmon power!)
- Carbohydrates: 36g (Mainly from wholesome rice & veggies)
- Fat: 27g (Rich in heart-healthy Omega-3s from salmon)
- Sugar: 8g (Primarily natural sugars from honey & veggies)
Final Thoughts: More Than Just a Meal
This Soy-Glazed Salmon Bowl isn’t just dinner—it’s a reminder that great food doesn’t have to be complicated. It’s about balancing flavors, embracing simplicity, and creating moments of joy, whether it’s a quiet night in or a shared meal with loved ones. Every component, from the sear to the glaze, plays a part in making something greater than the sum of its parts.
So next time you’re staring into the fridge wondering what to cook, remember: a few humble ingredients, a hot pan, and a little creativity can turn an ordinary weeknight into something special. Happy cooking, friends!

Jalapeño Popper Skillet Tacos
Spice Up Your Taco Night with a Cheesy Twist!
Hey foodie friends! Beau here from Feastical, and I’ve got a confession: I’ve never met a taco I didn’t want to hug. But these Jalapeño Popper Skillet Tacos? They’re the life-of-the-party mashup that’ll make your taste buds do a happy dance. Imagine all that glorious jalapeño popper magic—creamy, cheesy, smoky, with just the right kick—tucked into warm tortillas and ready in 25 minutes flat. No deep-frying, no fussy stuffing, just one sizzling skillet and a flavor explosion that turns Tuesday night into a fiesta. Whether you’re feeding hungry teens, prepping game-day grub, or just treating yourself (no judgment here!), this recipe’s your golden ticket. Grab your favorite cast-iron pan—let’s make some messy, delicious memories together!
That Time Jalapeños Saved Dinner
Picture this: It’s 2017, my food truck’s slammed during a summer festival. Suddenly, my fryer gives up—right as a crowd orders jalapeño poppers. Total chaos! I spot tortillas and ground turkey, and boom: skillet-taco salvation was born. I tossed the popper filling into tortillas, topped them with pickled jalapeños from my mom’s garden, and handed them out like edible peace offerings. People went wild! One guy came back twice saying, “These taste like my abuela’s kitchen meets a sports bar!” That happy accident became Feastical’s most-requested recipe. Now, every time I smell smoked paprika hitting hot oil, I grin remembering how a kitchen disaster turned into pure gold. Moral of the story? Sometimes the best recipes start with a little fire—literally and figuratively!
Your Flavor Toolkit
Makes 4-6 servings (about 8-10 loaded tacos)
- 1 lb ground chicken or turkey – Lean but flavorful! Insider swap: Use beef for richer vibes, or lentils for plant-powered magic.
- 1 Tbsp olive oil – Our trusty skillet starter. Avocado oil works too!
- 1/2 tsp each: salt, garlic powder, smoked paprika – The “holy trinity” for depth. Chef’s whisper: Smoked paprika is NON-negotiable—it’s the “campfire” in these tacos!
- 4–5 jalapeños, chopped – Remove seeds/ribs for mild heat; keep ’em for fireworks! Lazy hack: Use 1/4 cup canned green chiles.
- 4 oz cream cheese, softened – The creamy glue. MUST be soft—cold cream cheese = lumpy sadness.
- 1/2 cup sour cream – Tangy balancer. Greek yogurt subs beautifully.
- 1 1/2 cups shredded cheddar or pepper jack – Pepper jack = extra spice kick! Pro move: Hand-shred your cheese—it melts smoother than bagged stuff.
- 8–10 small flour or corn tortillas – Flour = pillowy comfort; corn = gluten-free crunch. Char ’em directly on your burner!
- 1/4 cup chopped green onions + cilantro/lime wedges – The confetti! Adds freshness against the richness.
Let’s Build Some Taco Magic!
Total Time: 25 mins (Prep: 10 mins | Cook: 15 mins)
- Sizzle your base: Heat oil in a large skillet (cast-iron is my ride-or-die!) over medium heat. Add ground chicken, salt, garlic powder, and smoked paprika. Chef’s hack: Crumble meat with a wooden spoon like you’re playing taco Tetris—small bits = max flavor coverage! Cook 6-8 mins until no pink remains. Drain any excess grease if needed.
- Jalapeño Tango: Toss in chopped jalapeños. Stir-fry 2-3 mins until they soften and smell like spicy heaven. Tip: Wear gloves while chopping if you’re sensitive to capsaicin! (Or just lick your fingers later like a daredevil.)
- Creamy Dream Time: Reduce heat to low. Add cream cheese and sour cream. Stir slowly—it’ll look messy at first, but keep faith! In 1-2 mins, it’ll melt into luscious velvet. Commentary: “This step feels like alchemy. One minute it’s lumpy chaos, next minute—BAM! Silky popper sauce.”
- Cheese Hug: Sprinkle in HALF your shredded cheese. Stir until it disappears into gooey bliss—about 1 min. Kill the heat now to avoid overcooking. Secret: Residual heat will finish melting without breaking the sauce.
- Tortilla TLC: While filling simmers, warm tortillas. My method: dry-skillet or directly over gas flame for 10 secs/side until slightly charred. Game-changer: Stack warmed tortillas in a clean kitchen towel—they’ll stay pliable!
- Load ’Em Up: Spoon filling into tortillas immediately—warm filling + warm tortillas = happy marriage. Top with remaining cheese (it’ll melt from residual heat), green onions, cilantro, extra jalapeños, or a lime squeeze.
Plating Like a Pro (Minimal Effort, Max Vibe)
Ditch fancy plating—these beauties shine in rustic chaos! Pile tacos on a big wooden board with lime wedges scattered like confetti. Serve with:
- Cool-Down Crew: Lime crema (sour cream + lime zest) or avocado slices to tame the heat.
- Crunch Boost: Quick-pickled red onions or radish slices.
- Set the Scene: Margaritas or ice-cold Mexican beer. Bonus points for picnic-style eating outdoors!
The Science Behind the Perfect Cheese Melt
There’s nothing worse than a taco filling where the cheese turns into rubbery clumps instead of a velvety, gooey sauce. So, let’s break down the science behind the perfect cheese melt—because understanding why things work makes you a better cook.
Why Cheese Melts (or Doesn’t)
Not all cheeses melt equally. The meltability depends on two key factors: moisture content and acidity.
-
High-moisture cheeses (like cheddar, pepper jack, and mozzarella) melt beautifully because their protein structure breaks down smoothly when heated.
-
Low-moisture, aged cheeses (like Parmesan) contain less water and more protein bonds, making them ideal for grating but prone to clumping when melted.
Pro Tip: Always shred your own cheese! Pre-shredded cheese is coated in anti-caking agents (like cellulose) to prevent sticking, but these additives also interfere with smooth melting.
The Role of Cream Cheese & Sour Cream
Cream cheese acts as an emulsifier in this recipe—its high fat content helps bind the liquid from the meat and jalapeños, preventing a greasy or watery mess. Sour cream adds tanginess while contributing to the creamy texture.
Common Mistake: Adding cold dairy directly to hot filling = lump city! Soften cream cheese first, and always reduce heat before stirring in dairy.
The Magic of Residual Heat
Ever notice how the recipe says to kill the heat before adding the last bit of cheese? That’s because cheese melts best at low, gentle heat. High heat causes proteins to tighten too quickly, squeezing out fat and leaving you with a grainy, separated mess.
Bonus Hack: If your sauce does break (looks oily or curdled), whisk in a splash of milk or broth off-heat to bring it back together.
Jalapeños—Taming the Heat Without Losing Flavor
Jalapeños are the star of this dish, but their heat level can be unpredictable. Here’s how to master them like a pro.
Anatomy of a Jalapeño
-
Seeds & Ribs: The white membrane (placenta) holds most of the capsaicin (the compound that creates heat). Remove both for mild tacos; leave some for a kick.
-
Fresh vs. Canned/Pickled: Fresh jalapeños offer bright, grassy heat, while pickled ones add tangy crunch. Canned green chiles are even milder.
Fun Fact: Red jalapeños (ripe versions of green ones) are sweeter and slightly hotter!
Controlling the Burn
-
Dilute the Heat: Dairy (sour cream, cheese) neutralizes capsaicin. Serve with a cooling lime crema.
-
Sweet Balance: A pinch of sugar or honey in the filling can counteract heat without dulling flavor.
-
Acid Trick: A squeeze of lime at the end brightens flavors and distracts from overwhelming spice.
Emergency Fix: If your filling is too hot, stir in extra cream cheese or a dollop of plain yogurt.
Jalapeño Prep Safety
-
Gloves Are Your Friend: Capsaicin can linger on skin (ever rubbed your eye after chopping peppers? Ouch!).
-
Vinegar Rinse: If bare-handed, wash hands with vinegar (not just soap) to break down oils.
Tortilla Mastery—Beyond the Microwave
A great taco lives or dies by its tortilla. Skip the sad, gummy microwaved versions—here’s how to elevate them.
Flour vs. Corn: The Eternal Debate
-
Flour Tortillas: Softer, more pliable, and slightly sweet. Ideal for rich, cheesy fillings.
-
Corn Tortillas: Gluten-free, nuttier flavor, but can crack if not warmed properly.
Pro Move: Mix both for texture contrast—use corn for crunch on the bottom, flour for flexibility on top.
The Art of Warming Tortillas
-
Gas Stove Method: Hold tortillas directly over flame with tongs for 5–10 secs/side until lightly charred.
-
Dry Skillet: Heat cast iron over medium, warm tortillas 30 secs/side.
-
Steam Hack: Wrap a stack in damp paper towels, microwave 30 secs (last resort but works in a pinch).
Storage Tip: Keep warmed tortillas in a clean kitchen towel—they’ll stay soft for up to 30 minutes.
Tortilla Hacks for Leftovers
-
Taco Casserole: Layer filling between tortillas, top with cheese, bake at 375°F for 15 mins.
-
Crispy Shells: Brush tortillas with oil, drape over oven rack, bake at 350°F until crisp (perfect for standing tacos).
Shake Up Your Taco Adventure!
This recipe’s a canvas—paint it your way!
- Meat-Free Marvel: Swap chicken for 2 cups black beans + 1 cup corn. Add 1 tsp cumin to spices!
- Breakfast Edition: Top with crispy bacon and a fried egg. Brunch hero unlocked!
- Buffalo Twist: Stir 1/4 cup buffalo sauce into filling. Blue cheese crumbles > cheddar.
- Taco Salad Bowl: Skip tortillas! Serve filling over greens with crushed tortilla chips.
- Loaded Nachos: Spread filling over chips, add extra cheese, broil 3 mins. Game-day MVP!
Beau’s Backstage Tidbits
Fun fact: My first test batch used waaaay too many jalapeños. Let’s just say my dog hid under the couch from my spicy muttering! Over time, I learned: balance is key. The cream cheese isn’t just for texture—it cools the heat like a fire blanket. Also, this recipe’s a fridge-cleaner superstar! Wilted spinach? Toss it in with the jalapeños. Leftover rotisserie chicken? Shred it instead of ground meat. My favorite evolution? Adding pickled jalapeños on top for tangy crunch. Last tip: Double the batch and freeze filling for up to 3 months. Future Beau always thanks Past Beau on busy nights!
Taco Talk: Your Questions, Answered!
Q: My filling turned out watery! What happened?
A> Likely culprit: high-fat meat or undercooked jalapeños releasing moisture. Fix it next time by draining meat after browning, or let filling simmer 1-2 extra mins uncovered. In a pinch, stir in 1 Tbsp cornstarch slurry.
Q: Can I make these ahead?
A> Absolutely! Cook filling (without topping cheese), refrigerate 3 days. Reheat gently with a splash of broth. But: Always assemble tacos fresh—pre-filled tortillas turn soggy.
Q> Too spicy for my kiddos?
A> Deseed all jalapeños AND swap pepper jack for mild cheddar. Serve with lime crema and extra sour cream—dairy neutralizes capsaicin!
Q> Why did my cheese clump instead of melt smoothly?
A> High heat murders cheese sauce. Always reduce heat before adding dairy! Also, pre-shredded cheese has anti-caking agents that hinder melting. Hand-shred for silky perfection.

Jalapeño Popper Skillet Tacos
- Total Time: 25 mins
Description
Craving something creamy, spicy, and downright addictive? These Jalapeño Popper Skillet Tacos take everything you love about classic poppers—cheddar, cream cheese, smoky jalapeños—and pile it into warm tortillas for a 25-minute flavor fiesta. It’s your weeknight dinner hero, game-day hit, and midnight snack all in one skillet. No frying, no fuss—just bold bites and cheesy bliss. Grab a napkin… and a second taco.
Ingredients
-
1 lb ground chicken or turkey
-
1 Tbsp olive oil
-
½ tsp each: salt, garlic powder, smoked paprika
-
4–5 jalapeños, chopped (seeded for less heat)
-
4 oz cream cheese, softened
-
½ cup sour cream (or Greek yogurt)
-
1½ cups shredded cheddar or pepper jack
-
8–10 small tortillas (flour or corn)
-
Garnish: chopped green onions, cilantro, lime wedges
Instructions
-
Sauté Base: In a large skillet, heat oil over medium. Add ground meat, salt, garlic powder, and smoked paprika. Cook 6–8 mins until browned.
-
Add Heat: Stir in jalapeños; cook 2–3 mins until softened.
-
Creamy Layer: Lower heat. Add cream cheese and sour cream. Stir until smooth and melted.
-
Cheesy Boost: Add half the shredded cheese. Stir until melty, then remove from heat.
-
Warm Tortillas: Char in a dry skillet or over gas flame for 10 seconds per side.
-
Assemble Tacos: Fill warm tortillas with creamy mixture. Top with remaining cheese, green onions, and cilantro. Serve with lime.
Notes
Want a milder version? Swap jalapeños for canned green chiles and go all cheddar. Feeling wild? Add a fried egg and call it brunch.
- Prep Time: 10 mins
- Cook Time: 15 mins
Nutrition
- Calories: 430 Cal Per 2 Tacos
- Carbohydrates: 22g
- Fiber: 2g
- Protein: 26g
Nutritional Nibbles (Per 2 Tacos)
- Calories: ~430
- Protein: 26g
- Carbs: 22g
- Fat: 28g
- Fiber: 2g
Note: Values vary based on toppings and exact ingredients used.
Final Thoughts: Why This Recipe Works (and How to Make It Yours)
This recipe is a masterclass in balance: spicy jalapeños mellowed by creamy cheese, smoky paprika deepening the savory meat, and fresh toppings cutting through richness. But the real magic? Its adaptability.
-
For Meal Preppers: Freeze the filling for quick-assembly tacos later.
-
For Health-Conscious Cooks: Swap in Greek yogurt, lean turkey, or load up on veggie toppings.
-
For Flavor Adventurers: Experiment with different cheeses (try smoked gouda!) or add pineapple for sweet-heat contrast.
At its core, cooking is about joy—not perfection. So burn a tortilla. Forget the gloves and cry over jalapeños. Laugh when cheese drips down your arm. Because the best recipes aren’t just about feeding mouths; they’re about creating stories. Now go forth and taco ’bout it!
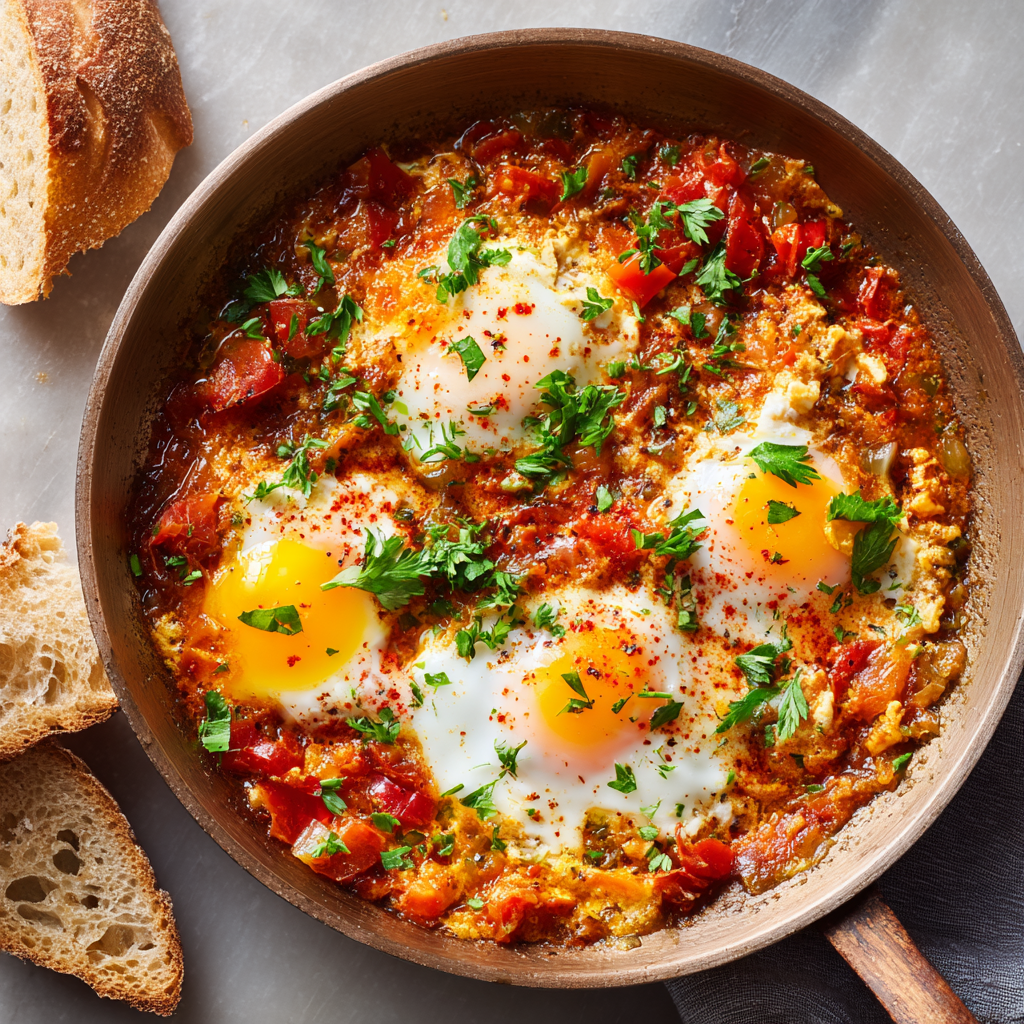
Turkish-Style Eggs and Tomatoes (Menemen)
Sunshine in a Skillet: Your New Favorite Morning Ritual
Hey there, food friends! Beau here, and I’ve got a sizzling secret that’ll turn your breakfast routine into a full-blown fiesta. Imagine this: ripe tomatoes bursting like tiny suns in a skillet, sweet peppers doing a happy dance, and eggs swirling through it all like golden ribbons. That’s Menemen (pronounced meh-neh-MEN) – Turkey’s answer to “how can something so simple taste like pure joy?” I discovered this one-pan wonder during a chaotic Istanbul food market adventure, and friends? It was love at first bite. Forget complicated brunch spreads – this 25-minute marvel is your ticket to that “I’m a kitchen rockstar” feeling. Whether you’re nursing a Sunday hangover or just craving something that tastes like sunshine, Menemen wraps you in a warm Mediterranean hug. Grab that crusty bread (you’ll need it for scooping!) and let’s make magic happen. Trust me – your taste buds will send you a thank-you note.
How a Rainy Morning in Istanbul Stole My Heart (and Stomach)
Picture this: It’s pouring rain in Istanbul’s Kadıköy market, and I’m ducking into a tiny cafe looking like a drowned rat. The air smells of wet wool and… something incredible. Behind the counter, a grandma-type (we’ll call her Auntie Zeynep) is furiously stirring a copper pan while scolding a waiter in Turkish. She takes one look at my soggy state and slams down a steaming dish without a word. One bite of those silky eggs swimming in tomato-pepper nectar and I swear I heard angels singing. The rain? Forgotten. The grumpy waiter? Background noise. I must’ve looked like a cartoon character with heart-eyes because Auntie Zeynep finally cracked a smile, patted my cheek, and said “Afiyet olsun!” (basically “bon appétit” with extra soul). That humble skillet taught me more about comfort than any fancy soufflé ever could. Now every time I make Menemen, I channel Auntie Zeynep – minus the Turkish scolding!
Your Flavor Arsenal: Simple Ingredients, Big Personality
- 2 Tbsp olive oil – The Mediterranean workhorse! Extra virgin gives grassy notes, but regular works. Feeling fancy? Try chili-infused oil!
- 1 onion, finely chopped – Yellow for sweetness, red for zing. Pro tip: Freeze onions 10 mins before chopping – no tears!
- 1–2 green peppers – Turkish sivri peppers are traditional (mild heat), but bell peppers work. For kick, add a jalapeño!
- 3–4 garlic cloves, minced – Measure garlic with your heart! Pre-minced saves time but fresh sings.
- 4 large ripe tomatoes – Summer garden tomatoes? Heaven. Off-season? Canned diced (drained!) are your BFF.
- 1 tsp paprika – Smoked paprika adds depth, sweet paprika keeps it bright. Hungarian or Turkish varieties rock.
- 1/2 tsp ground cumin – Earthy magic! Toast whole seeds and grind fresh for next-level aroma.
- Salt and pepper – Season in layers! Start light, taste after tomatoes simmer.
- 6 large eggs – Room temp eggs blend smoother. Farm-fresh yolks make it glow like sunshine!
- Fresh parsley, chopped – Non-negotiable freshness hit! Swap with dill or mint for fun twists.
- Crusty bread – Your edible spoon! Sourdough, baguette, or warm pita all welcome.
Chef’s Whisper: Menemen is forgiving! No peppers? Use zucchini. No fresh tomatoes? Fire-roasted canned work wonders. Make it yours!
Let’s Get Sizzling: Your Menemen Masterclass
Step 1: Heat olive oil in a large non-stick or cast-iron skillet over medium heat. Listen for that gentle sizzle – too hot and onions will scorch! (Tip: Swirl oil to coat the pan like you’re painting sunshine)
Step 2: Add onions and peppers. Sauté 5-6 minutes until they soften and flirt with golden edges. Stir like you’re folding love letters! (Hack: Add a pinch of salt now – it draws out moisture for faster cooking)
Step 3: Toss in garlic. Cook just 60 seconds until fragrant – golden, not brown! Burnt garlic is the villain here. (Chef’s Secret: Push veggies to the side, let garlic sizzle alone in the oil for 15 seconds before mixing)
Step 4: Stir in tomatoes, paprika, cumin, salt, and pepper. Reduce heat to medium-low. Simmer uncovered 8-10 minutes until thick and jammy. (Watch for the “slump” – when tomatoes collapse into saucy bliss!)
Step 5: Crack eggs directly into the pan. IMPORTANT: Let them sit untouched for 1 minute – this sets the whites slightly. Then, using your spatula, gently swirl JUST the whites into the tomato mixture, leaving yolks whole. Want it scrambled? Go wild! (Pro Move: Create little tomato wells before cracking eggs for picture-perfect yolks)
Step 6: Cover and cook 2-3 minutes for runny yolks, or 4-5 for set. Eggs keep cooking off-heat, so pull the pan early! (Resist stirring after yolks set – you want that marbled beauty!)
Step 7: Kill the heat. Scatter parsley like confetti. Serve IMMEDIATELY – Menemen waits for no one! (Emergency Save: If eggs overcook, drizzle with yogurt to add creaminess back)
Serving Sunshine: How to Dish Up Happiness
Authentic Menemen stays IN THE SKILLET, friends! Place that gorgeous pan right on the table (use a trivet!) with crusty bread piled high. Let everyone dig in family-style – it’s half the fun! For solo meals, spoon into deep bowls with bread soldiers on the side. Want to gild the lily? Add dollops of creamy feta or tangy Greek yogurt, a sprinkle of Aleppo pepper flakes, or a drizzle of herb oil. Pair with black tea with lemon or a frosty ayran (yogurt drink). Remember: The #1 rule? Get messy! Scoop, swipe, and savor every saucy bite.
The Science of Perfect Menemen: Why Technique Matters
Menemen’s magic isn’t just in the ingredients—it’s in the chemistry of how they’re cooked. Here’s the breakdown:
Tomato Alchemy: Ripe tomatoes contain glutamic acid, a natural flavor enhancer. Slow cooking breaks them down into umami-rich jam, intensifying sweetness. Canned tomatoes work in a pinch because they’re picked at peak ripeness and cooked during canning, which concentrates their taste.
Egg Texture: Room-temperature eggs blend smoothly into the dish because their proteins coagulate more evenly. Cold eggs can shock the pan, leading to rubbery patches. For silky curds, stir gently and avoid high heat—egg proteins tighten quickly at temperatures above 170°F (77°C).
The Oil Factor: Olive oil isn’t just for cooking; it emulsifies the tomato juices and egg yolks, creating a luscious sauce. Extra virgin olive oil’s polyphenols also withstand moderate heat, adding fruity notes without turning bitter.
Pepper Sweetness: Sautéing green peppers triggers the Maillard reaction, caramelizing their natural sugars. This balances the tomatoes’ acidity. For deeper flavor, char peppers under a broiler before chopping.
Salt Timing: Salting onions early draws out moisture, speeding up caramelization. But salting eggs too early can make them tough. Season the tomato base well, then lightly finish the eggs.
Pro Tip: A pinch of sugar in the tomatoes isn’t cheating—it counters acidity and aids caramelization. Just 1/4 teaspoon makes a difference!
Understanding these principles lets you troubleshoot like a pro. Watery Menemen? Simmer longer to evaporate excess liquid. Eggs overcooked? Next time, cover the pan earlier to trap gentle steam. Flavors flat? A splash of nar ekşisi (pomegranate molasses) or lemon juice brightens everything.
Make It Your Own: Delicious Twists on Tradition
Menemen is your culinary canvas! Try these fun spins:
- Meaty Marvel: Brown ½ lb spicy sausage or sujuk with onions. Hello, protein power!
- Veggie Delight: Add sliced mushrooms, spinach, or artichokes when sautéing peppers.
- Cheesy Dreams: Stir crumbled feta or grated kasar cheese into tomatoes before adding eggs.
- Spice Flight: Add ¼ tsp cinnamon or a pinch of red pepper flakes for warmth.
- Brunch Upgrade: Top with crispy fried halloumi or avocado slices.
Dietary Swaps: Vegan? Use silken tofu + turmeric instead of eggs. Gluten-free? Serve with GF bread or roasted potatoes!
Beau’s Backstage Pass: Menemen Musings
Fun fact: My first homemade Menemen was… tragic. I dumped in canned tomatoes with juice like a rookie, creating egg-tomato soup! Now I religiously drain tomatoes – texture is everything. Over the years, I’ve learned: 1) Cast iron makes the BEST caramelized veggies, 2) Room-temp eggs prevent that rubbery scramble, and 3) Turks would fight over stirring technique – some whisk eggs first, others crack directly. I’m Team Crack (for those dreamy yolk pockets!). Once, I even made it camping – used a camp stove and subbed peppers with roasted hatch chiles. Verdict? Menemen tastes even better with pine trees and a view! The recipe evolves, but the soul stays: simple ingredients + bold flavors = pure happiness. Auntie Zeynep would approve.
Menemen SOS: Your Burning Questions Answered
Q: Why is my Menemen watery?
A: Three culprits! Undrained canned tomatoes, overcrowded pan (steam can’t escape), or rushing the simmer. Fix: Drain tomatoes WELL, use a wide skillet, and let that tomato sauce reduce until it coats the spoon. Too late? Mix 1 tsp cornstarch with 1 Tbsp water, stir in, and simmer 1 min.
Q: Can I make this ahead?
A: Eggs hate waiting! Menemen is best fresh. BUT: Prep the tomato-pepper base (steps 1-4) up to 2 days ahead. Reheat it, then add eggs when ready. Leftovers? They’ll taste… fine, but eggs get rubbery. Repurpose them as pasta sauce!
Q: My eggs turned rubbery! Help?
A: Overcooking is the enemy! Remember: 1) Use medium-low heat after adding eggs, 2) Cover to cook gently with steam, 3) Pull off heat when eggs look 90% done – residual heat finishes them. Runny yolk lovers: aim for 2-3 mins covered.
Q: Traditional peppers are hard to find. Substitutes?
A: No stress! Bell peppers work great. For authentic flavor, find Cubanelle or Italian frying peppers. Want heat? Add poblano or banana peppers. Zucchini or eggplant make fun veg swaps too!

Turkish-Style Eggs and Tomatoes (Menemen)
- Total Time: 25 mins
Description
Say hello to your new favorite morning ritual! Menemen is Turkey’s cozy one-pan marvel—jammy tomatoes, sweet peppers, and eggs cooked to silky perfection, all swirled together in a rich, spiced embrace. It’s the brunch hero you didn’t know you needed: bold, beautiful, and done in under 30 minutes. Grab your skillet and that crusty bread—your taste buds are about to take a Mediterranean vacation.
Ingredients
-
2 Tbsp olive oil
-
1 onion, finely chopped
-
1–2 green peppers (or bell peppers), chopped
-
3–4 garlic cloves, minced
-
4 ripe tomatoes, chopped (or 1 can diced, drained)
-
1 tsp paprika
-
½ tsp ground cumin
-
Salt & black pepper to taste
-
6 large eggs
-
Fresh parsley, chopped
-
Crusty bread for serving
Instructions
-
Sauté the Base: Heat oil in a skillet. Sauté onion and peppers 5–6 mins until soft and golden. Add garlic; cook 1 min.
-
Build the Sauce: Stir in tomatoes, paprika, cumin, salt, and pepper. Simmer 8–10 mins until thick and saucy.
-
Add Eggs: Crack eggs into pan. Let sit 1 min, then swirl whites gently into tomato mix, keeping yolks intact. Cover and cook 2–4 mins depending on desired yolk doneness.
-
Serve: Top with parsley. Serve hot with bread for scooping!
Notes
For perfect texture, drain canned tomatoes well and don’t overcook the eggs. Want a twist? Add feta, sausage, or spinach before the eggs go in.
- Prep Time: 5 mins
- Cook Time: 20 mins
Nutrition
- Calories: 210 Cal
- Fat: 15g
- Carbohydrates: 10g
- Fiber: 2g
- Protein: 11g
Nutritional Spotlight (Per Serving)
Calories: ~210 | Protein: 11g | Carbs: 10g | Fat: 15g | Fiber: 2g
Note: Values are estimates. Using less oil or more veggies lowers calories; adding cheese or sausage increases them. This is nutrient-dense fuel!
Final Thoughts: Why Menemen Endures
Menemen is more than a recipe—it’s a lesson in culinary joy. It teaches us that great food doesn’t require complexity, just quality ingredients and a little patience. In a world obsessed with speed and novelty, Menemen remains a comforting constant, adaptable yet timeless.
It’s also a dish that invites participation. Like jazz, there’s a structure (the sofrito-like base, the eggs), but the improvisation—a handful of herbs, a daring spice, a personal preference for runny yolks—is where personality shines. Every cook leaves their fingerprint on it.
Most importantly, Menemen is meant to be shared. It’s the kind of dish that makes strangers at a hostel table swap stories, that turns quiet mornings into lingering feasts, and that—as Auntie Zeynep demonstrated—can bridge languages with a single bite. So grab that skillet, crack those eggs, and let Menemen remind you that the best meals aren’t just nourishing; they’re alive with stories and soul. Afiyet olsun!
Seared Steak with Cherry Tomato Chutney
Seared Steak with Cherry Tomato Chutney: Your New Weeknight Fancy Fix
Hey foodie friends! Beau here from Feastical, and I gotta tell you – nothing makes my kitchen heart happier than a recipe that straddles the line between “impressive enough for date night” and “easy enough for a Wednesday.” That’s why this Seared Steak with Cherry Tomato Chutney is my current obsession. Picture this: a gorgeous crusty-on-the-outside, juicy-on-the-inside steak wearing a glossy, sweet-tangy cherry tomato blanket that’ll make your taste buds do a happy dance. It’s the culinary equivalent of wearing sweatpants that look like designer jeans – all comfort with zero compromise on flavor.
We’ve all been there: scrolling through fancy food pics feeling like “Nope, too many steps, too many pans.” But trust me, this 30-minute wonder is your ticket to feeling like a rockstar chef without the stress. That chutney? It’s basically summer captured in a spoon – bursting cherry tomatoes mingle with caramelized onions and balsamic’s deep hug, creating a sauce that’ll have you licking the pan (no judgment here). And the steak? We’re keeping it real with a killer sear-and-baste technique that’s foolproof. So grab your favorite cast-iron skillet, crank up some tunes, and let’s turn dinner into a standing ovation moment!
That One Summer Night in Napa…
This dish takes me straight back to a warm August evening in Napa Valley. My buddy Marco – who thinks grilling is competitive sport – challenged me to “elevate basic steak” using only his garden haul. There I was, staring at buckets of cherry tomatoes threatening to riot if not used immediately. Inspired by roadside fruit stands selling pepper jelly, I thought: “What if tomatoes got that sweet-spicy treatment?” Cue the chaotic 20-minute experiment involving a smoking skillet, flambéed rosemary (accidental, but fabulous), and tomatoes popping like fireworks. When we drizzled that glossy ruby chutney over Marco’s perfectly charred ribeyes? Silence. Then simultaneous moans. Our wives still joke about our “caveman gourmet” moment, but that happy accident became my go-to steak topper. It’s proof that the best recipes aren’t made in test kitchens – they’re born in real kitchens, usually with wine spills and laughter.
Your Flavor Toolkit: Simple Stars, Big Impact
For the Steak:
- 4 steaks (ribeye, sirloin, or your choice): Ribeye’s my MVP for marbling (hello, flavor!), but sirloin’s a leaner budget hero. Pro tip: Thickness matters! Aim for 1.5-inch cuts so they sear without overcooking.
- Salt and black pepper, to taste: Be generous! I use 1 tsp kosher salt per steak – it’s the crust’s secret handshake.
- 1 Tbsp olive oil: High smoke point is key. Avocado oil works too if you’re searing super hot.
- 1 Tbsp butter: The basting magic! Unsalted lets you control seasoning. Ghee is great for lactose-free.
- 2 garlic cloves, smashed: Smashing (not mincing) releases oils without burning. No fresh? ½ tsp garlic powder in butter works.
- Fresh rosemary or thyme sprigs (optional): Rosemary’s piney punch loves steak, but thyme’s earthier. Dried? Use 1 tsp, but add to chutney instead.
For the Cherry Tomato Chutney:
- 2 cups cherry tomatoes, halved: Rainbow mix looks stunning! Grape tomatoes work, but chop larger ones.
- 1 small red onion, finely chopped: Soaks up vinegar beautifully. Yellow onion + 1 tsp sugar subs in a pinch.
- 2 garlic cloves, minced: Fresh is non-negotiable here – powdered tastes dusty in chutney.
- 1 Tbsp olive oil: Extra virgin adds fruitiness.
- 2 Tbsp balsamic vinegar: The flavor anchor! Aged balsamic = deeper sweetness. Apple cider vinegar + ½ tsp honey works.
- 1 Tbsp brown sugar or honey: Balances acidity. Maple syrup adds fun autumnal notes.
- Salt and pepper, to taste: Start with ¼ tsp salt – tomatoes vary.
- Pinch of red chili flakes (optional): My “secret” for a subtle backbeat. Smoked paprika is killer too!
Let’s Get Sizzling: Your Foolproof Roadmap
Step 1: Steak Prep (Patience = Crust!)
Pat those steaks DRY with paper towels – this is CRUCIAL for maillard reaction magic (aka flavor bombs). Season aggressively on all sides with salt and pepper. Let them sit 10 minutes while your skillet heats. Chef Hack: Cold steak + hot pan = perfect sear. No “coming to room temp” myth here!
Step 2: Sear Like a Boss
Heat olive oil in a heavy skillet (cast-iron is MVP) over medium-high until it shimmers. Carefully add steaks – they should hiss loudly! Resist poking! Sear 3-4 mins per side for medium-rare (adjust for thickness). Pro Move: Use tongs to sear the fatty edges for 30 seconds – renders flavor into the pan.
Step 3: Butter Basting Bliss
Reduce heat to medium. Toss in butter, smashed garlic, and herbs. As butter foams, tilt the pan and spoon that golden goodness over the steaks constantly for 1 minute. This buttery bath cooks garlic just enough and infuses the meat. Transfer steaks to a plate, tent loosely with foil, and REST 5-10 mins. No cheating! Resting = juicy slices.
Step 4: Chutney Chaos (The Good Kind!)
In the same glorious steak pan (don’t wash it! Those browned bits = flavor gold), add olive oil over medium heat. Sauté onions 3 mins until soft. Add garlic and chili flakes – stir 30 seconds until fragrant. Dump in tomatoes, balsamic, sugar, salt, and pepper. Stir well, scraping up any steak bits.
Step 5: Simmer to Jammy Perfection
Cook 10-12 mins, stirring occasionally. Tomatoes will burst and liquid will reduce into a glossy, chunky jam. Texture Tip: Mash a few tomatoes with your spoon if you want it saucier. Taste! Adjust sweet/acid balance if needed.
Plating: Where Beauty Meets Delicious
Slice rested steak against the grain – this is non-negotiable for tender bites! Fan slices slightly on warm plates (cold plates = sad steak). Generously spoon that vibrant chutney over the top, letting some tumble onto the plate. A final flaky salt sprinkle? Chef’s kiss. Keep sides simple: garlicky roasted potatoes or crusty bread to swipe through that chutney. For date-night vibes, add arugula tossed in lemon juice under the steak – the peppery crunch is *chef’s mic drop*.
Shake It Up: Your Recipe, Your Rules!
- Mediterranean Twist: Add 2 tbsp chopped Kalamata olives & 1 tsp oregano to chutney. Serve steak with feta crumbles.
- Spicy & Smoky: Swap chili flakes for 1 chipotle pepper in adobo (minced). Add ½ tsp cumin to chutney.
- Pork or Chicken Love: Chutney pairs perfectly with pan-seared pork chops or chicken thighs! Cook protein first, then proceed.
- Vegan Wonder: Use portobello “steaks” brushed with tamari. Swap honey for maple syrup. Divine!
- Peach & Tomato Duet: In summer, replace ½ cup tomatoes with diced ripe peaches. Add fresh basil at the end.
Beau’s Backstage Kitchen Notes
This recipe’s evolved from “random garden experiment” to my most-requested dish! Early versions used white vinegar – too harsh. Balsamic was the game-changer. I’ve also learned: 1) Cheap, thin steaks cry in this recipe. Invest in thickness! 2) That butter-basting step? Born when I dropped butter into the pan mid-sear and panicked-basted. Happy accidents rule. 3) Leftover chutney is GOLD. Store in a jar – it’s insane on eggs, grilled cheese, or even ice cream (try it!). Funny story: Once filmed a reel making this… only to realize I’d used cinnamon instead of chili flakes. My comment section still roasts me about “Christmas steak.” Moral? Taste as you go, folks!
Your Questions, My Answers!
Q: My chutney’s too runny! Help?
A: Simmer uncovered 3-5 more minutes to reduce. If desperate, mix 1 tsp cornstarch with 1 tbsp cold water, stir in, and simmer 1 min. But patience usually fixes it!
Q: Steak’s overcooked outside/raw inside. Why?
A: Classic “pan too hot” issue! Medium-high ≠ inferno. If oil smokes violently, lower heat slightly. For thicker cuts, finish in a 400°F oven for 5-7 mins after searing.
Q: Can I make chutney ahead?
A: Absolutely! Make it 3 days ahead and refrigerate. Reheat gently with 1 tsp water. Flavor actually deepens! Freezes beautifully too (up to 3 months).
Q: No fresh herbs? Is it ruined?
A: Never ruined! Add ½ tsp dried thyme directly to the chutney instead. Or finish with dried parsley for color. But fresh herbs add brightness!

Seared Steak with Cherry Tomato Chutney
- Total Time: 30 mins
Description
Ready to turn a regular night into something restaurant-worthy? This seared steak, sizzling with buttery herb goodness and crowned with a jammy, tangy-sweet cherry tomato chutney, is your weeknight hero. It’s bold, balanced, and blissfully simple—just one skillet, zero stress, and all the flavor. Whether it’s date night or “just because,” this dish proves that easy can still be extraordinary.
Ingredients
For the Steak:
-
4 steaks (ribeye or sirloin, 1.5-inch thick)
-
1 Tbsp olive oil
-
Salt & pepper to taste
-
1 Tbsp butter
-
2 garlic cloves, smashed
-
1 sprig rosemary or thyme (optional)
For the Cherry Tomato Chutney:
-
2 cups cherry tomatoes, halved
-
1 small red onion, finely chopped
-
2 garlic cloves, minced
-
1 Tbsp olive oil
-
2 Tbsp balsamic vinegar
-
1 Tbsp brown sugar or honey
-
Salt, pepper, pinch of chili flakes (optional)
Instructions
-
Prep the Steak: Pat steaks dry, season generously. Let sit while heating your skillet.
-
Sear & Baste: Heat oil in a skillet until shimmering. Sear steaks 3–4 mins per side. Add butter, garlic, herbs. Baste for 1 min. Remove steaks, rest 5–10 mins.
-
Make Chutney: In same skillet, sauté onion 3 mins in olive oil. Add garlic, chili flakes. Stir in tomatoes, balsamic, sweetener, salt, and pepper. Simmer 10–12 mins until thick and jammy.
-
Plate Like a Pro: Slice steak against the grain. Spoon chutney on top. Serve with roasted potatoes or arugula salad.
Notes
: Let the steak rest—it’s the secret to juicy, tender slices. Leftover chutney? Magic on eggs, sandwiches, or grilled cheese.
- Prep Time: 10 mins
- Cook Time: 20 mins
Nutrition
- Calories: 450 Cal Per Serving
- Fat: 30g
- Carbohydrates: 12g
- Protein: 35g
Nutritional Highlights (Per Serving)
Calories: ~450 • Protein: 35g • Carbs: 12g • Fat: 30g • Sugar: 7g
Note: Using lean sirloin reduces fat to ~22g. Sugar comes naturally from tomatoes and a touch of sweetener.
Final Thoughts: Why This Recipe Works
This dish is a masterclass in contrasts: the steak’s umami depth against the chutney’s vibrancy, the crisp crust versus the silky sauce. It’s also a lesson in efficiency—one pan, 30 minutes, minimal cleanup. Most importantly, it’s forgiving. Overcook the steak? Extra chutney adds moisture. Too spicy? A drizzle of honey mellows it.
Cooking should be joyful, not stressful. This recipe is your invitation to play, adapt, and savor. So grab a skillet, embrace the sizzle, and turn weeknights into something extraordinary.

Shredded Brussels Sprouts Salad
Hey, Let’s Talk Brussels Sprouts Salad Magic!
Picture this: It’s Tuesday night. You’re craving something fresh but hearty, healthy but exciting, and—let’s be real—you’ve got zero energy for a kitchen marathon. Enter this Shredded Brussels Sprouts Salad: crisp, tangy, nutty, and sweet, all doing a happy dance in your bowl. Forget everything you thought about Brussels sprouts (no soggy, bitter memories here!). This raw version is a revelation—crunchy like confetti, dressed in a zippy vinaigrette, and loaded with chewy cranberries, toasty nuts, and creamy cheese. It’s the salad that converts skeptics and makes veggie lovers swoon. Perfect for meal prep, potlucks, or when you need a 15-minute hero. At Feastical, we’re all about food that feels like a high-five for your taste buds, and this? It’s a standing ovation. Ready to chop, toss, and taste the joy? Let’s roll!
The Thanksgiving That Changed Everything
So, full confession: I used to be “that guy” at holiday dinners—the one sneaking roasted Brussels sprouts onto my niece’s plate when she wasn’t looking. (Sorry, Chloe!) Everything changed two years ago, though. My sister dared me to make a raw sprout dish for Friendsgiving. “They’ll hate it,” I mumbled, shredding sprouts like my life depended on it. I tossed in cranberries for festive cheer, pecans for crunch, and a lemony dressing as a Hail Mary. The result? Silence. Then forks clattering. Chloe even asked for seconds! Turns out, shredding transforms these little cabbages into delicate, confetti-like ribbons that soak up flavor like a dream. Now, it’s not Thanksgiving without this salad—and Chloe? She brings it to her college potlucks. Victory!
Your Flavor Toolkit: Ingredients & Swaps
Makes 4 generous servings
- 1 lb Brussels sprouts – Shred ’em yourself for max freshness (or grab pre-shredded to save time!). Chef’s tip: Pick tight, bright-green sprouts—no yellow leaves!
- ¼ cup toasted pecans – Or walnuts! Toast them in a dry pan until fragrant. Sub: Sunflower seeds for nut-free crunch.
- ¼ cup dried cranberries – Cherries or golden raisins work too. Chef’s insight: Soak ’em in warm water for 5 mins if they’re stiff!
- ¼ cup shaved Parmesan – Or goat cheese feta for tang. Vegan? Skip cheese or use nutritional yeast.
- 1 small shallot – Thinly sliced! It adds a gentle oniony punch. No shallot? Use 2 tbsp minced red onion.
- 1 crisp apple – Fuji or Honeycrisp hold up best. Swap: Thinly sliced pear or even pomegranate arils!
For the Dressing (aka Liquid Gold):
- 3 tbsp olive oil – Extra virgin for fruity notes.
- 1 tbsp lemon juice – Fresh-squeezed, please! Bottled tastes flat.
- 1 tbsp apple cider vinegar – Adds depth. Sub: White wine vinegar.
- 1 tsp honey – Or maple syrup to balance acidity. Vegan? Agave works!
- 1 tsp Dijon mustard – Secret weapon for creaminess + zing.
- Salt & pepper – Season like you mean it!
Let’s Build That Salad: Step-by-Step
Total Time: 15 mins (yes, really!)
- Whisk That Dressing: Grab a big bowl (less mess!). Add olive oil, lemon juice, vinegar, honey, Dijon, salt, and pepper. Whisk like you’re painting rainbows—emulsify until smooth and glossy. Chef hack: No whisk? Use a jar with a lid and shake it like a Polaroid picture!
- Shred & Massage Those Sprouts: Trim sprout ends, halve vertically, then slice thin crosswise (or use a food processor with the slicing disc). Add sprouts and shallots to the bowl with the dressing. Toss like you’re tossing pizza dough—get every strand coated! Let sit 10 mins. Why? This softens sprouts subtly—no chewiness!
- Fold in the Goodies: Time for confetti! Add toasted nuts, cranberries, apple slices, and cheese. Gently fold (don’t stir aggressively—keep those apples pretty!). Chef insight: Add apples last to prevent browning.
- Taste & Tweak: Grab a fork. Need more tang? A splash of vinegar. Too sharp? Drizzle honey. Salt? Pepper? Adjust now. Pro move: Let it chill 15 mins in the fridge—flavors mingle!
Serving: Keep It Simple & Stunning
Pile this beauty high in a rustic wooden bowl for family-style vibes. Garnish with extra shaved parm and a few whole pecans—it’s all about texture! For individual servings, line plates with butter lettuce cups and scoop salad on top. Pair with grilled chicken (toss leftovers right in!) or a cozy soup. Bonus: Pack in jars for lunches—dressing at the bottom, sprouts on top. Shake to mix when ready!
Mix It Up: 5 Tasty Twists
This salad’s a canvas—get creative!
- Protein Power: Add grilled shrimp, shredded rotisserie chicken, or chickpeas.
- Fall Feels: Swap apples for roasted butternut squash + pepitas.
- Bright & Zesty: Add orange zest to dressing + segments in the salad.
- Kale Combo: Mix half shredded kale with sprouts—massage with dressing first!
- Asian-Inspired: Use miso + rice vinegar in dressing, top with mandarins and sesame seeds.
The Science Behind Raw Brussels Sprouts – Why This Salad Works
At first glance, raw Brussels sprouts might seem like a tough sell. After all, these mini cabbages are notorious for their bitter reputation when overcooked. But when sliced thin and served raw, they transform into something entirely different—crisp, slightly sweet, and packed with texture. So, what’s the magic behind this salad? Let’s break it down.
1. The Shredding Effect
Slicing Brussels sprouts thinly (about 1/8-inch thick) completely changes their eating experience. Unlike whole roasted sprouts, shredded sprouts have more surface area, allowing the dressing to coat every strand. This also softens them slightly, making them tender-crisp rather than tough. A mandoline or food processor makes quick work of this, but a sharp knife works just as well.
2. The Massage Factor
Yes, massaging your Brussels sprouts is a thing! When you toss them with the acidic dressing (thanks to lemon juice and vinegar), the fibers break down slightly, reducing bitterness and improving texture. This is similar to massaging kale—it tenderizes without cooking.
3. The Flavor Balancing Act
Raw Brussels sprouts contain compounds called glucosinolates, which can taste bitter. But the sweetness from apples, cranberries, and honey in the dressing counteracts that bitterness. Meanwhile, the fat from olive oil and cheese mellows out any sharpness, creating a perfectly balanced bite.
4. The Crunch Equation
Texture is key in this salad. The toasted pecans add a deep, nutty crunch, while the apple provides a juicy crispness. Even the Parmesan contributes a slight firmness that contrasts beautifully with the tender sprouts.
Pro Tip: If you’re still worried about bitterness, try soaking the shredded sprouts in ice water for 10 minutes before dressing them. This can help tame any harsh flavors.
The Ultimate Make-Ahead Salad – Meal Prep & Storage Secrets
One of the best things about this Brussels sprouts salad? It actually gets better with time (within reason). Unlike delicate greens that wilt, shredded Brussels sprouts hold up beautifully, making this a meal-prep superstar. Here’s how to keep it fresh and flavorful.
1. Prepping in Advance
-
Dressing: Can be made up to 5 days ahead and stored in a jar in the fridge.
-
Shredded Sprouts: Stay fresh for 2-3 days in an airtight container (add a paper towel to absorb moisture).
-
Nuts & Apples: Store separately to maintain crunch. Toss them in just before serving.
2. Layering for Lunch Jars
Want a grab-and-go lunch? Build your salad in a Mason jar:
-
Bottom Layer: Dressing.
-
Middle Layer: Shredded sprouts, shallots, and cranberries.
-
Top Layer: Nuts, cheese, and apple slices.
When ready to eat, shake vigorously to mix!
3. Reviving Leftovers
If your salad sits overnight, it may soften. Bring it back to life with:
-
A fresh squeeze of lemon juice.
-
A handful of extra nuts or seeds.
-
A sprinkle of flaky salt.
Pro Tip: Avoid adding salt directly to the apples—it draws out moisture and can make them soggy.
Beyond the Bowl – Creative Ways to Serve This Salad
This isn’t just a side dish—it’s a versatile base for endless meals. Here’s how to take it from simple salad to star of the show.
1. As a Hearty Main Course
-
Protein Boost: Add grilled chicken, shrimp, or crispy chickpeas.
-
Grain Bowl Style: Serve over quinoa or farro for extra staying power.
-
Cheese Lover’s Dream: Crumble in blue cheese or aged cheddar for a bolder flavor.
2. On Toast or in Wraps
-
Brussels Sprouts Toast: Pile it on sourdough with a smear of goat cheese.
-
Wrap Filling: Mix with arugula and wrap in a tortilla with hummus.
3. Holiday Showstopper
-
Festive Twist: Swap cranberries for pomegranate seeds and add roasted squash.
-
Elegant Starter: Serve in endive leaves as a fancy appetizer.
4. Unexpected Pairings
-
With Eggs: Top a frittata or omelet with a handful for crunch.
-
Taco Topper: Skip the slaw and use this salad for a fresh taco garnish.
Pro Tip: For a warm version, lightly sauté the shredded sprouts before tossing with dressing—great for winter meals!
Chef’s Notes: From “Meh” to Magic
This recipe started as a fridge clean-out experiment—hence the “optional” apple (now mandatory!). The biggest game-changer? Massaging the sprouts. Early versions were toothsome (read: tough), but letting them soften in the dressing makes ’em tender-crisp. Funny story: I once subbed lime for lemon—do not recommend unless you want salad that tastes like tacos! Over time, I’ve learned: toast nuts fresh (stale ones sulk), and always taste before serving. It’s evolved from a side dish to my go-to lunch with added chicken. P.S. If your cheese clumps? Toss it with nuts first—they create “grip”!
FAQs: Your Salad Queries, Solved!
Q: Can I make this ahead?
A: Absolutely! Prep dressing + shred sprouts (store separately) up to 2 days ahead. Combine 1 hour before serving—add nuts/apples last minute to keep ’em crunchy.
Q: Why’s my salad bitter?
A: Two culprits: 1) Old sprouts (choose small, bright ones). 2) Skipping the “rest time.” Letting sprouts sit in dressing mellows bitterness. If needed, add a pinch of sugar to dressing!
Q: Help—my sprouts are tough!
A: Slice thinner! Use a mandoline or food processor. Still firm? Massage shredded sprouts with 1 tsp salt before adding dressing—wait 5 mins, then rinse and pat dry.
Q: Vegan version tips?
A: Skip cheese or use almond “parm.” Swap honey for maple syrup. Add avocado for creaminess!
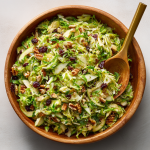
Shredded Brussels Sprouts Salad
- Total Time: 15 mins
Description
This isn’t just a salad—it’s your weeknight secret weapon. Bright, crunchy, and loaded with texture, this Shredded Brussels Sprouts Salad tosses away the soggy sprout stereotype. Picture whisper-thin ribbons of raw sprouts massaged with a zippy lemon vinaigrette, then showered with cranberries, apples, toasted nuts, and Parmesan. It’s part slaw, part power lunch, all craveable. Whether it’s a holiday hit or a make-ahead lunch hero, this bowl brings the kind of flavor that earns standing ovations.
Ingredients
-
1 lb Brussels sprouts, finely shredded
-
¼ cup toasted pecans or walnuts
-
¼ cup dried cranberries
-
¼ cup shaved Parmesan (or feta/goat cheese)
-
1 crisp apple, thinly sliced
-
1 small shallot, thinly sliced
For the Dressing:
-
3 tbsp olive oil
-
1 tbsp lemon juice
-
1 tbsp apple cider vinegar
-
1 tsp Dijon mustard
-
1 tsp honey or maple syrup
-
Salt & black pepper to taste
Instructions
-
Make the Dressing: In a large bowl, whisk olive oil, lemon juice, vinegar, mustard, honey, salt, and pepper until emulsified.
-
Shred & Soften Sprouts: Add Brussels sprouts and shallots to the bowl. Massage dressing into sprouts for 1 minute. Let sit 10 mins to mellow.
-
Fold in Flavor: Gently mix in cranberries, nuts, cheese, and apples.
-
Taste & Serve: Adjust seasoning if needed. Garnish with extra nuts and cheese.
Notes
For max freshness, add apples and nuts just before serving. Want to prep ahead? Store dressing and sprouts separately and combine when ready to eat.
- Prep Time: 15 mins
Nutrition
- Calories: 250 Cal Per Serving
- Fat: 16g
- Carbohydrates: 20g
- Fiber: 5g
- Protein: 6g
Nutritional Per Serving (Approx):
250 kcal | Protein: 6g | Carbs: 20g | Fat: 16g | Fiber: 5g
Note: Values include all ingredients/substitute similarly!
Final Thoughts: Why This Salad Deserves a Spot in Your Rotation
This Shredded Brussels Sprouts Salad isn’t just another side dish—it’s a game-changer. It’s proof that with the right techniques, even the most misunderstood veggies can become the star of the table. Whether you’re a Brussels sprouts skeptic or a veggie lover, this recipe delivers:
✅ Quick & Easy – Ready in 15 minutes.
✅ Meal-Prep Friendly – Stays fresh for days.
✅ Endlessly Adaptable – Sweet, savory, or spicy—make it your own.
So next time you’re staring down a bunch of Brussels sprouts, don’t just roast them. Shred, toss, and taste the magic. Your taste buds (and your inner chef) will thank you.
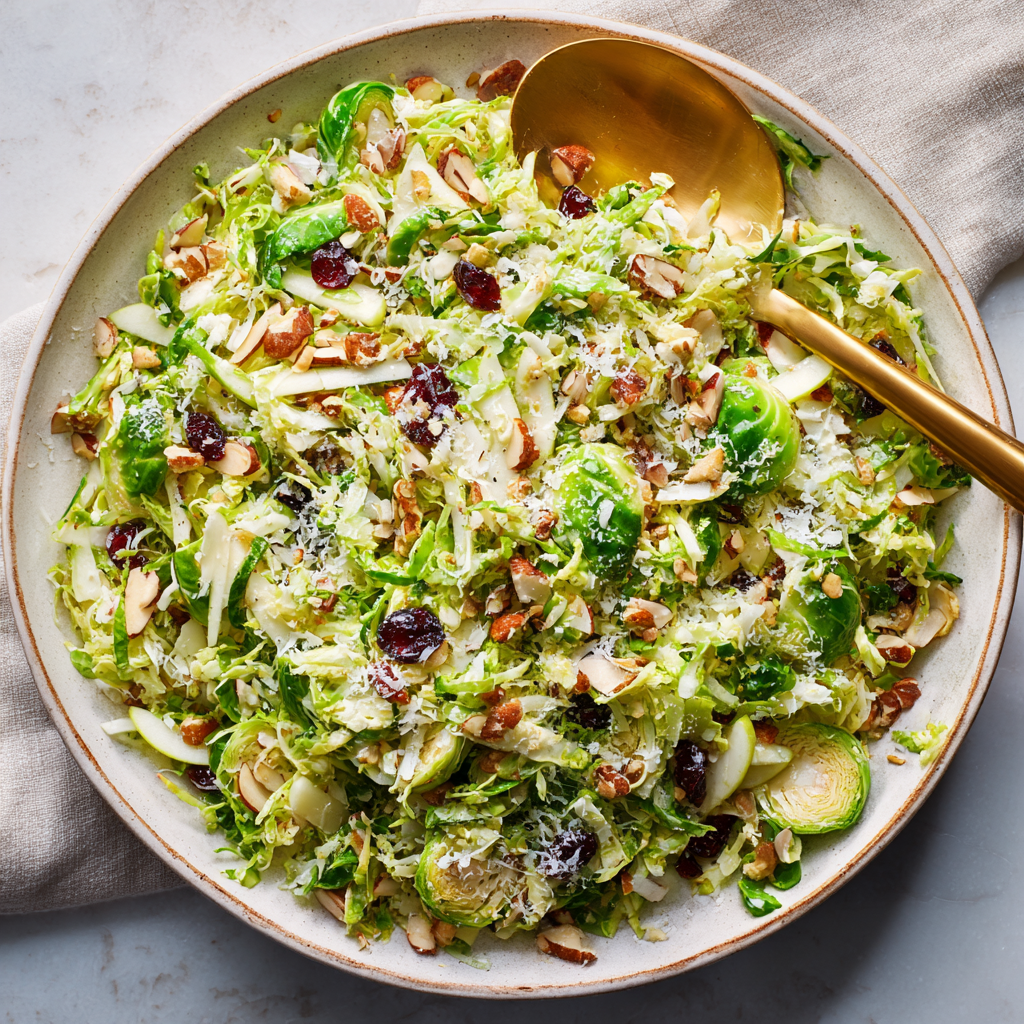
Shaved Brussels Sprouts Salad
Shaved Brussels Sprouts Salad: Your New Crunchy Obsession
Hey friends, Beau here from Feastical! Let’s talk about that sad bag of Brussels sprouts languishing in your fridge. I know, I know – they’ve got a reputation for being the “eat-your-vegetables” chore of the produce aisle. But what if I told you they could transform into the brightest, crunchiest, most crave-worthy salad you’ll make this year? This ain’t your grandma’s boiled sprouts. We’re shaving them whisper-thin, tossing them with a zippy lemon hug of a dressing, and loading up with nutty, cheesy, fruity goodness. It’s like coleslaw’s sophisticated cousin who traveled through Italy and came back with stories.
Picture this: no oven, zero cooking, just 15 minutes between you and a bowl of pure texture heaven. This salad is your secret weapon for potlucks (it won’t wilt!), your lunchbox game-changer, and that stunning side that makes everyone ask, “Wait, THIS is Brussels sprouts?!” Whether you’re a veggie skeptic or a salad fanatic, this recipe meets you where you are. So grab your sharpest knife or that food processor hiding in the cabinet – we’re making magic happen.
The Brussels Sprouts Breakthrough That Changed Everything
Okay, confession time: I used to hate Brussels sprouts. Like, childhood-trauma-level hate. My mom? Bless her heart, she boiled them into submission. Picture murky green orbs smelling like… well, defeat. Fast forward to my first restaurant gig in Napa. The chef handed me a mandoline and a crate of sprouts, barking: “Shave ’em thin, Collier! And don’t you dare cook ’em!” I was skeptical. But then – revelation! Tossed with lemon, good olive oil, and salty Parmesan? The raw sprouts were crisp, peppery, and weirdly addictive. No sulfurous gloom! Just bright, clean crunch. I brought a batch to family Thanksgiving. My mom took one bite, paused, and said: “Beau, these don’t suck.” High praise! Now it’s our mandatory holiday starter. Proof that even the most maligned veg can become a rockstar with the right approach.
What You’ll Need: Simple Stars, Big Flavor
- 1 lb Brussels sprouts, trimmed & finely shaved – The MVP! Look for tight, bright green heads (smaller = sweeter). Shave them yourself with a knife, mandoline, or food processor shredding disc. Chef’s Tip: No sprouts? Swap in shaved kale or broccoli stems!
- ¼ cup toasted almonds or walnuts, chopped – Toasting is NON-NEGOTIABLE for that deep, nutty crunch. Almonds = classic; walnuts = earthy twist. Pepitas or sunflower seeds work for nut-free.
- ¼ cup grated Parmesan or crumbled feta – Parmesan = salty umami punch. Feta = tangy brine. Vegan? Nutritional yeast or almond “parm” rocks here.
- 1 apple, thinly sliced (optional) – Crisp Honeycrisp or tart Granny Smith add juicy sweetness. Skip if you hate fruit in salad.
- 2 tbsp dried cranberries or cherries – Chewy, sweet-tart pops! Golden raisins or chopped apricots are fab too.
The “Make-It-Sing” Dressing:
- 3 tbsp olive oil – Use the good stuff! Extra virgin adds fruity depth.
- 1 tbsp lemon juice – Freshly squeezed, please! Bottled lacks brightness.
- 1 tbsp apple cider vinegar – Balances lemon with mellow tang. White wine vinegar works too.
- 1 tsp Dijon mustard – Secret weapon! Emulsifies the dressing and adds complexity.
- 1 tsp honey or maple syrup – Just a kiss of sweetness to round things out.
- Salt & black pepper – Season aggressively! Raw sprouts can handle it.
Let’s Build That Bowl: Effortless Steps, Chef-Level Tricks
Step 1: Wake Up That Dressing! Grab a big mixing bowl (trust me, you need space to toss!). Whisk together olive oil, lemon juice, vinegar, Dijon, honey, a big pinch of salt, and a few cranks of black pepper. Whisk like you mean it for 30 seconds until it looks creamy and unified – that’s the emulsification magic! Chef Hack: Taste it! Too tart? Add a smidge more honey. Too flat? More salt or lemon. Dressing should make your tongue tingle.
Step 2: Shower the Sprouts! Dump all your beautifully shaved Brussels sprouts into the bowl with the dressing. Now get hands-on! Massage that dressing into every nook and cranny for a full minute. Yes, massage! This softens the sprouts just enough, taking away any raw edge. Chef Insight: Let it sit for 10 minutes now. This “quick-pickle” time is GOLD – it tenderizes the sprouts and lets flavors mingle.
Step 3: The Grand Confetti Toss! Time for the party! Add toasted nuts, cheese, dried fruit, and apple slices (if using). Gently fold everything together with a big spoon or your hands. Be kind – you want to keep those shavings intact! Pro Move: Hold back a sprinkle of nuts and cheese for garnish on top. Pretty eats better!
Step 4: Taste & Tweak! Grab a fork. Taste it! Needs more zip? A squeeze of lemon. More depth? Another pinch of salt or cheese. This is YOUR salad. Adjust until it makes you do a happy dance.
How to Serve It: From Simple to Showstopper
Pile this beauty high in a wide, shallow bowl so everyone sees those layers! For a light lunch, top with grilled chicken, chickpeas, or crispy chickpea croutons. Fancy dinner? Serve alongside roast chicken or seared salmon – the bright salad cuts rich flavors perfectly. Presentation Pro-Tip: Finish with a flourish! Right before serving, add extra cheese, nuts, maybe some edible flowers or microgreens. That pop of color screams “chef-kissed!”
Beyond the Bowl – Creative Uses for Shaved Brussels Sprouts
This salad is fantastic on its own, but shaved Brussels sprouts are incredibly versatile. Here are unexpected ways to use them:
1. Breakfast Hash Base
Sauté shaved sprouts with onions, garlic, and potatoes for a veggie-packed breakfast hash. Top with a fried egg!
2. Tacos & Wraps
Use raw shaved sprouts as a slaw alternative in fish tacos or chicken wraps. Their crunch holds up better than lettuce.
3. Grain Bowl Star
Mix with quinoa, roasted squash, and tahini dressing for a nutrient-dense lunch.
4. Pizza Topping
After baking pizza, toss shaved sprouts with lemon and olive oil, then pile them on for fresh contrast.
5. Stir-Fry Boost
Add in the last 2 minutes of cooking for a crisp-tender veggie addition.
6. Pickled Sprouts
Quick-pickle shaved sprouts in vinegar, sugar, and spices for a tangy condiment (great on sandwiches!).
Pro Tip: Batch-shave sprouts and store them dry in the fridge for up to 3 days—ready to transform any meal!
Mix It Up! 5 Delicious Twists
1. Protein Powerhouse: Add shredded rotisserie chicken, crispy bacon, or canned tuna for a hearty main.
2. Mediterranean Sunshine: Swap in crumbled feta, kalamata olives, and fresh oregano. Skip the apple.
3. Autumn Harvest: Use toasted pecans, diced roasted butternut squash, and pomegranate seeds.
4. Creamy Dreamy: Stir in 2 tbsp Greek yogurt or avocado for richer dressing.
5. Asian Zing: Replace dressing with lime juice, sesame oil, soy sauce, and ginger. Top with sesame seeds and mandarin oranges.
Beau’s Backstory: Why This Salad Never Gets Old
This recipe has been my ride-or-die for years, evolving from that first nervous shave in Napa. Early versions were just sprouts, oil, and lemon – solid, but shy. The apple? Added after my niece sneakily dropped slices into the bowl. “Uncle Beau, it needs color!” Kid was right. The real game-changer? Massaging the sprouts. I discovered it accidentally while multitasking (read: juggling a boiling pot and a toddler!). Rubbing the dressing in softened them perfectly without any cooking. Now it’s a staple – I’ve even packed it for picnics in mason jars (dressing at the bottom, sprouts on top – shake when ready!). It’s foolproof, forgiving, and always gets that “Wait, Brussels sprouts?!” reaction. That never gets old.
Your Questions, Answered!
Q: Can I make this ahead? It won’t get soggy?!
A: That’s the SUPERHERO power of this salad! Unlike leafy greens, shaved Brussels sprouts get better as they marinate. Prep it (without the nuts/apple) up to 24 hours ahead. Add those crunchy bits right before serving. Leftovers still rock on day 2!
Q: Help! My sprouts taste bitter/too raw.
A: Two fixes: 1) Massage longer! Really work that dressing in for 1-2 minutes. 2) Marinate longer! Let it sit 15-20 mins before adding other ingredients. Also, ensure your sprouts are fresh (avoid yellowing leaves) and thinly shaved.
Q: Can I use a bag of pre-shaved sprouts?
A: Absolutely! It’s a huge time-saver. Just check they’re fresh and crisp. Give them a rinse and pat VERY dry – wet sprouts dilute the dressing.
Q: No nuts due to allergies. Sub ideas?
A: Totally! Try toasted sunflower seeds, pumpkin seeds (pepitas), or crispy roasted chickpeas. All add that essential crunch without the nuts.
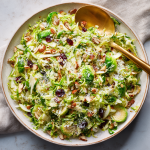
Shaved Brussels Sprouts Salad
- Total Time: 15 mins
Description
Who knew Brussels sprouts could go from childhood nemesis to crave-worthy champion? With just 15 minutes, no cooking, and a lemony Dijon dressing that wakes up every bite, this salad flips the script. Think crisp shaved sprouts massaged to tender perfection, juicy apple, nutty crunch, salty cheese, and chewy-sweet cranberries. It’s light yet bold, picnic-perfect, and potluck-famous. Salad skeptics, meet your new favorite dish.
Ingredients
-
1 lb Brussels sprouts, trimmed & thinly shaved
-
¼ cup toasted almonds or walnuts, chopped
-
¼ cup grated Parmesan or crumbled feta
-
1 apple, thinly sliced (optional)
-
2 tbsp dried cranberries or cherries
Dressing:
-
3 tbsp olive oil
-
1 tbsp lemon juice
-
1 tbsp apple cider vinegar
-
1 tsp Dijon mustard
-
1 tsp honey or maple syrup
-
Salt & black pepper to taste
Instructions
-
Whisk the Dressing: In a large bowl, combine all dressing ingredients and whisk until creamy. Adjust seasoning to taste.
-
Massage the Sprouts: Add shaved Brussels sprouts to the bowl and massage dressing into them for 1 minute. Let sit for 10 minutes.
-
Mix the Magic: Gently fold in nuts, cheese, cranberries, and apple if using.
-
Finish & Serve: Taste and adjust lemon, salt, or honey if needed. Garnish with extra nuts or cheese before serving.
Notes
Massage those sprouts! It’s the secret to making them tender and addictive. Use pre-shaved if you’re short on time—just dry them well first.
- Prep Time: 15 mins
Nutrition
- Calories: 240 Cal Per Serving
- Fat: 16g
- Carbohydrates: 18g
- Fiber: 5g
- Protein: 6g
Nutritional Per Serving (Approx)
Calories: 240 | Protein: 6g | Carbs: 18g | Fat: 16g | Fiber: 5g | Sugar: 8g (Note: Includes apple & cranberries)
Prep Time: 15 mins | Cook Time: 0 mins | Total Time: 15 mins | Serves: 4
Final Thoughts: Why This Salad Deserves a Spot in Your Rotation
This isn’t just another salad—it’s a textural masterpiece that converts veggie skeptics and satisfies salad lovers alike. It’s:
✅ Quick (15 minutes, no cooking!)
✅ Meal-Prep Friendly (gets better as it sits)
✅ Customizable (endless variations)
✅ Nutrient-Dense (raw = maximum vitamins)
Whether you serve it as a side, load it up with protein for a meal, or reinvent it in wraps and bowls, this recipe proves that Brussels sprouts can be anything but boring. So grab that knife and start shaving—your new obsession awaits!
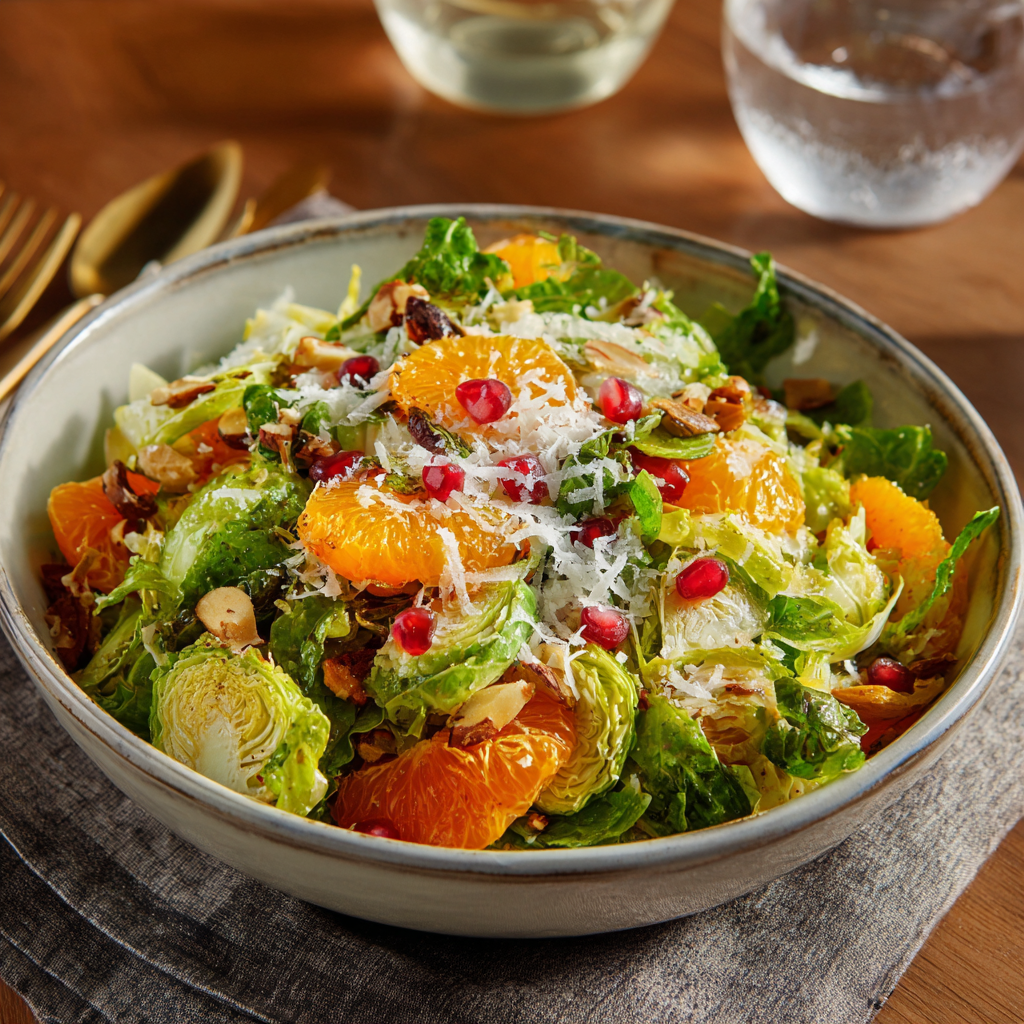
Brussels Sprouts Salad with Persimmons
Brussels Sprouts Salad: Your New Favorite Flavor Adventure!
Hey friends, Beau here from Feastical! Ever had one of those “why didn’t I try this sooner?!” moments? That’s exactly what happened when I first tossed raw Brussels sprouts with sweet persimmons. This ain’t your grandma’s boiled sprouts situation – we’re talking crunchy, colorful, and bursting with life! Picture this: earthy shaved sprouts hugging juicy persimmon slices, all tangled up with toasty nuts, jewel-like pomegranate seeds, and creamy cheese, then showered with a zippy citrus dressing. It’s like fall and winter decided to throw a flavor party in your bowl.
What makes this salad magic? First, it’s lightning-fast (15 minutes flat!). Second, it converts sprout-skeptics into believers. And third? That sweet-savory balance that makes you keep stealing bites while you’re “officially” just taste-testing. Whether you’re jazzing up Tuesday’s dinner table or impressing at a holiday potluck, this salad’s your golden ticket. So grab your sharpest knife and let’s make some kitchen magic!
That One Farmers’ Market That Changed Everything
Flashback to my early Feastical days: I’m at the Santa Monica farmers’ market, bundled up in November fog, when this vibrant orange fruit catches my eye. “Try a Fuyu persimmon!” beams the farmer. I bite into its crisp honeyed flesh and – BAM! – instant obsession. That weekend, I was experimenting with winter salads when my Brussels sprouts tumbled right into the persimmon bowl. Total happy accident!
The real test came at Friendsgiving. My buddy Dave eyed the bowl suspiciously: “Raw sprouts? Really, Beau?” Five minutes later, he’s scraping the serving spoon. Now it’s our annual tradition – with extra pomegranates because Dave insists they “make it fancy.” Lesson learned? Sometimes the best recipes start with a little chaos and a farmer’s nudge!
Your Flavor Toolkit: Ingredients & Smart Swaps
- 1 lb Brussels sprouts – The star! Trim those woody ends. Chef’s tip: Choose tight, bright green heads. Swap: Shaved kale or broccoli slaw.
- 2 ripe Fuyu persimmons – Must be FUYU (flat-bottomed). They’re sweet even when crisp! Swap: Crisp apples or Asian pears.
- ¼ cup toasted almonds – Toast ’em yourself! 350°F for 8 minutes = next-level crunch. Swap: Walnuts, pecans, or pepitas for nut-free.
- ¼ cup pomegranate seeds – Optional but HIGHLY recommended for festive pop. Swap: Dried cranberries or cherries.
- ¼ cup shaved Parmesan – Salty umami bomb. Swap: Crumbled goat cheese or feta for tang.
For the Zingy Dressing:
- 3 tbsp olive oil – Extra virgin for fruity notes.
- 1 tbsp apple cider vinegar – Brightness! Swap: White wine vinegar.
- 1 tbsp lemon juice – Freshly squeezed, please! Bottled tastes sad.
- 1 tsp Dijon mustard – Our emulsifying hero. Chef’s hack: Want creamier? Add ½ tsp mayo.
- 1 tsp honey – Balances acidity. Swap: Maple syrup for vegan version.
- Salt & black pepper – Season in layers!
Let’s Build Your Masterpiece: Step-by-Step
Step 1: Whisk that dressing like you mean it! In a large bowl, combine olive oil, vinegar, lemon juice, Dijon, honey, and a pinch of salt/pepper. Whisk until creamy and emulsified (about 30 seconds). Chef’s hack: Make it in a jar, screw on the lid, and shake like a Polaroid picture! Taste and adjust – want more zing? Add lemon. Too sharp? More honey.
Step 2: Shave those sprouts! Trim Brussels ends, halve vertically, then thinly slice crosswise. Or use a mandoline (watch those fingers!). Add to dressing IMMEDIATELY. Why? The acid starts tenderizing them, turning raw toughness into pleasant crunch. Toss thoroughly – get every leaf coated! Let sit 10 minutes while you prep other ingredients. Pro tip: No mandoline? Use food processor with slicing disc!
Step 3: Persimmon time! Slice off leafy tops, then cut fruit into matchsticks or thin wedges. Add to sprouts with toasted nuts and pomegranates. Gentle tossing alert! Use salad tongs or hands to fold ingredients – we want pretty persimmons, not mush.
Step 4: The grand finale! Top with cheese just before serving. Critical timing: Adding cheese too early makes it soggy. Give one final toss at the table for drama! Season with extra pepper if you’re fancy.
Serving Up the Good Vibes
Presentation matters! Pile this beauty into a wide, shallow bowl to show off those colors. For mains, top with grilled chicken or crispy chickpeas. As a side? Pair with roasted salmon or holiday turkey. Temperature tip: Serve within 1 hour for maximum crunch. If prepping ahead, keep dressing separate! Fun idea: Serve individual portions in mason jars – dressing at the bottom, sprouts in the middle, toppings on top. Shake it up tableside!
The Unexpected Science Behind Raw Brussels Sprouts
You might be wondering: Why raw Brussels sprouts? Aren’t they supposed to be roasted, sautéed, or at least blanched? Surprisingly, raw Brussels sprouts are a culinary powerhouse when treated right. Unlike their cooked counterparts, which can turn mushy or overly sulfurous, raw sprouts offer a crisp, slightly nutty flavor that holds up beautifully in salads.
The Magic of Massaging (Yes, Really!)
When you slice Brussels sprouts thinly and toss them with an acidic dressing, something fascinating happens. The acid (in this case, apple cider vinegar and lemon juice) begins to break down the sprouts’ tough cellular structure, softening them just enough while preserving their crunch. This process, similar to massaging kale, transforms them from fibrous and bitter into tender and pleasantly sharp.
Why Smaller Sprouts Matter
Size plays a crucial role in flavor. Larger Brussels sprouts tend to be more bitter because they contain higher levels of glucosinolates—the compounds responsible for that infamous “cabbagey” taste. Smaller sprouts, on the other hand, are milder and sweeter. When shopping, look for tight, bright green heads no bigger than a walnut.
The Persimmon Paradox
Persimmons are the unsung heroes of winter produce. Fuyu persimmons (the squat, tomato-shaped ones) are firm and sweet even when crisp, making them perfect for salads. Hachiya persimmons (the acorn-shaped ones) are astringent until fully ripe and jelly-soft—great for baking but disastrous here. The natural sugars in Fuyus balance the sprouts’ earthiness, creating a harmony of flavors.
The Toasted Nut Effect
Toasting nuts isn’t just a fancy chef move—it’s science. Heat triggers the Maillard reaction, breaking down proteins and sugars to create deeper, richer flavors. Almonds, walnuts, or pecans add not just crunch but a layer of umami that ties everything together.
The Art of Balancing Flavors & Textures
A great salad isn’t just about throwing ingredients together—it’s about balance. This Brussels sprout salad nails the five key elements of a perfect bite: sweet, salty, crunchy, creamy, and tangy.
Sweet: Persimmons & Pomegranates
Persimmons bring honeyed crispness, while pomegranate seeds add juicy bursts of tart-sweetness. Together, they prevent the salad from feeling too vegetal.
Salty: Parmesan & Dressing
Parmesan’s umami depth enhances the sprouts, while a well-seasoned dressing ensures every bite is vibrant.
Crunchy: Sprouts & Nuts
The shaved sprouts provide a sturdy base, while toasted almonds (or walnuts) add a contrasting snap.
Creamy: Cheese & Dressing Emulsion
Parmesan melts slightly into the dressing, creating a silky coating. For extra creaminess, a touch of mayo in the dressing works wonders.
Tangy: Citrus & Vinegar
Lemon juice and apple cider vinegar brighten the dish, cutting through richness and keeping flavors fresh.
Pro Tip: The 3-Bite Rule
A well-balanced salad should surprise you in three bites:
-
First bite: Bright acidity (dressing + lemon).
-
Second bite: Sweetness (persimmon + pomegranate).
-
Third bite: Savory depth (Parmesan + nuts).
Why This Salad Converts Brussels Sprout Haters
If you’ve ever pushed boiled Brussels sprouts around your plate as a kid, this salad is your redemption. Here’s why it wins over skeptics:
1. No Sulfur Overload
Overcooking sprouts releases sulfur compounds (hence the “stinky” reputation). Raw sprouts avoid this entirely, offering a cleaner, fresher taste.
2. Texture Triumph
Instead of mush, you get a satisfying crunch that feels more like a slaw than a sad side dish.
3. Flavor Distraction Tactics
The sweetness of persimmons, the pop of pomegranates, and the richness of nuts and cheese keep your taste buds so entertained, they forget to dislike sprouts.
4. Psychological Freshness
The vibrant colors (green, orange, red) make it feel healthier and more appealing than monochromatic cooked veggies.
5. Customizable for Picky Eaters
-
For kids: Skip the nuts (choking hazard) and add apple slices.
-
For cheese avoiders: Swap Parmesan for roasted sunflower seeds.
-
For sweet tooths: Add a drizzle of extra honey
Mix It Up: 5 Delicious Twists
- Protein Power: Add smoked turkey, bacon bits, or roasted chickpeas.
- Vegan Vibes: Skip cheese or use nutritional yeast; swap honey for maple syrup.
- Winter Citrus: Replace persimmons with blood oranges or grapefruit segments.
- Autumn Edition: Swap pomegranates for roasted cubed butternut squash.
- Cheese Switch-Up: Try blue cheese crumbles or shaved manchego for boldness.
Beau’s Backstage Notes
This recipe evolved from a fridge-cleanout experiment! Originally used apples, but persimmons made it special. True story: Once subbed hazelnuts for almonds and added too much – my salad turned into nut rubble! Moral: Measure nuts. Also learned the hard way – NEVER use Hachiya persimmons (the pointy ones). They’re mouth-puckeringly astringent until jelly-soft! Over the years, I’ve added more lemon juice (brightens winter produce) and started massaging sprouts gently post-dressing. It’s become my go-to for Friendsgivings – even my “salads are rabbit food” uncle asks for seconds!
Your Questions, My Answers!
Q: Can I make this ahead?
A: Absolutely! Prep components separately: Shave sprouts (store airtight with damp paper towel), toast nuts, make dressing, slice persimmons. Combine max 1 hour before serving. Cheese always last!
Q: Why are my sprouts bitter?
A: Two fixes: 1) Choose smaller sprouts (larger=more bitter). 2) Let them marinate in dressing 15+ minutes – acid mellows bitterness. Still bitter? Add extra honey to dressing.
Q: Help! My persimmons are mushy…
A: You likely got Hachiyas (soft when ripe). For this salad, you need FUYUS – firm like apples. At the store, choose squat, tomato-shaped fruits that feel rock-hard. They’ll ripen on your counter!
Q: Dressing too tart? Too oily?
A: Tart? Whisk in ½ tsp honey. Oily? Add ½ tsp Dijon or lemon juice. Always adjust incrementally!
Brussels Sprouts Salad with Persimmons
- Total Time: 15 mins
Description
Say goodbye to soggy sprouts and hello to your new go-to salad! This vibrant bowl is a joyful mashup of shaved Brussels sprouts, juicy Fuyu persimmons, crunchy nuts, and sparkly pomegranate seeds, all tied together with a zippy citrus-honey dressing. It’s fresh, fast (just 15 minutes!), and festive enough to wow a holiday crowd—or elevate your Tuesday dinner. One bite, and you’ll be hooked on this fall-to-winter flavor party.
Ingredients
-
1 lb Brussels sprouts, trimmed and thinly sliced
-
2 ripe Fuyu persimmons, sliced
-
¼ cup toasted almonds (or walnuts, pecans, pepitas)
-
¼ cup pomegranate seeds
-
¼ cup shaved Parmesan (or feta/goat cheese)
For the Dressing:
-
3 tbsp olive oil
-
1 tbsp apple cider vinegar
-
1 tbsp lemon juice
-
1 tsp Dijon mustard
-
1 tsp honey (or maple syrup)
-
Salt & black pepper to taste
Instructions
-
Whisk the Dressing: In a large bowl, combine olive oil, vinegar, lemon juice, Dijon, honey, salt, and pepper. Whisk or shake in a jar until creamy.
-
Shave the Sprouts: Slice sprouts thinly or use a mandoline. Add to dressing and toss well. Let marinate for 10 minutes to soften and mellow.
-
Add the Good Stuff: Gently fold in persimmons, almonds, and pomegranate seeds.
-
Final Touch: Sprinkle cheese just before serving. Toss gently and serve immediately.
Notes
Always use Fuyu persimmons (flat and firm). Want to meal prep? Keep dressing and toppings separate until just before serving.
- Prep Time: 10 mins
Nutrition
- Calories: 260 Cal
- Fat: 18g
- Carbohydrates: 18g
- Protein: 6g
Nutrition Per Serving (approx)
Calories: 260 | Protein: 6g | Carbs: 18g | Fat: 18g | Fiber: 5g | Sugar: 8g
Final Thoughts: A Salad That Grows With You
This isn’t just a recipe—it’s a flavor framework. Once you master the basics (shaved sprouts + acid + sweetness + crunch), the variations are endless. Try it with:
-
Spring: Shaved asparagus + strawberries + pistachios.
-
Summer: Peaches + basil + burrata.
-
Fall: Roasted squash + cranberries + pecans.
The lesson? Don’t fear raw Brussels sprouts. Embrace them. Play with them. And most importantly—let them surprise you.