
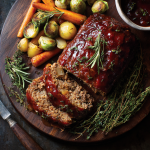
Slow-Cooker Meatloaf
Your New Weeknight Hero: Slow-Cooker Meatloaf That Hugs You Back
Hey friends, Beau here! Ever have one of those days where you’re juggling a million things, but still crave that soul-warming, home-cooked meal that tastes like childhood? I get it. Between chasing my dog Biscuit out of the herb garden and testing new recipes, some nights I just want dinner to happen without babysitting the oven. That’s where this glorious slow-cooker meatloaf struts in like a kitchen superhero. Imagine walking through the door after a chaotic day to that irresistible aroma of savory beef and sweet tomato glaze already filling your space – no oven monitoring, no frantic temperature checks. Just tender, juicy comfort waiting to hug you from the inside out. This isn’t just “meatloaf.” It’s your secret handshake with easy wins. We’re talking minimal prep (15 minutes, tops!), humble ingredients, and your crockpot doing the heavy lifting while you live your life. Whether you’re a meal-prep maestro or just rediscovered your slow cooker under a layer of dust, this recipe’s your golden ticket to comfort without the chaos. So tie on that apron (or don’t – no judgment here), and let’s make magic happen!
Grandma’s Apron Strings & My Aha Moment
This recipe? It’s got roots. Picture 8-year-old me, feet dangling off Grandma Ethel’s kitchen stool, “helping” her mix meatloaf with my little hands. She’d hum Patsy Cline tunes while that iconic loaf pan clattered into her avocado-green oven. Fast forward twenty years: I’m a frazzled line cook trying to recreate her magic on my one day off. Cue disaster – dry edges, a smoke alarm symphony, and that soul-crushing moment when your comfort food stresses you out. Then it hit me like a falling spatula: What if we ditch the oven’s hot spots for the slow cooker’s gentle embrace? Game. Changer. That first experimental batch? Pure nostalgia – moist through and through, glazed like a jewel, and tasting like Grandma’s hug (minus the oven angst). Now, every time that tangy-sweet scent fills my kitchen, I see her wink. Some traditions evolve, friends, and this one? Evolved into pure weeknight genius.
Your Flavor Toolkit: Simple Stuff, Big Impact
Gather these pantry pals – no fancy footwork required! Pro tip: Chill your bowl 10 mins before mixing for easier handling.
- 2 lbs ground beef (80/20 blend): The star! 80/20 keeps it juicy (leaner = dryness risk). Swap: Ground turkey or pork blend work too!
- 1 cup breadcrumbs (plain): Our binder & texture hero. Panko? Yes! Gluten-free? Crushed crackers or oats work magic.
- 2 eggs: The glue holding dreams together. Vegan? A flax “egg” (1 tbsp ground flax + 2.5 tbsp water per egg) saves the day.
- ½ cup milk: Adds moisture & tenderness. Dairy-free? Unsweetened almond or oat milk blend right in.
- ½ cup grated onion: Sweetness without crunchy bits! Chef’s hack: Grate it straight into the bowl – tears begone!
- 2 tbsp ketchup + 1 tbsp Worcestershire sauce: Our umami power couple. Worcestershire swap? Soy sauce or balsamic vinegar.
- 1 tsp garlic powder, 1 tsp salt, ½ tsp black pepper: The flavor trinity. Feeling fancy? Add smoked paprika!
That Irresistible Topping:
- ¼ cup ketchup + 2 tbsp brown sugar + 1 tsp mustard: Sweet, tangy, sticky perfection. Mustard type? Yellow, Dijon, or whole grain – your call!
Let’s Build Your Flavor Masterpiece (Stress-Free!)
Ready? Grab that big mixing bowl – it’s playtime!
- Mix It Like You Mean It (Gently!): Dump everything (beef, breadcrumbs, eggs, milk, onion, ketchup, Worcestershire, spices) into your bowl. Now, channel your inner artist: use clean hands or a fork to blend just until combined. Critical tip: Overmixing = tough meatloaf! Stop when no dry streaks remain. It’s messy fun – embrace it!
- Shape & Sling It Smart: Tear off a big sheet of foil or parchment paper (about 18 inches long). Shape your meat mixture into a 9-inch loaf right in the center – think football, not brick! Genius hack: Lift the paper ends to transfer it seamlessly into your slow cooker. This “sling” lets you lift the whole glorious loaf out later without it crumbling!
- Glaze & Grace: Whisk topping ingredients in a small bowl. Slather it generously over your raw loaf like you’re frosting a cake. Pro move: Leave a ½-inch border around the edges so the glaze doesn’t burn on the crock.
- Cook & Conquer: Lid on! Cook on LOW 6-7 hours or HIGH 3-4 hours. NO PEEKING! Trust the process. Done when internal temp hits 160°F. Chef’s secret: If using turkey, cook to 165°F.
- Rest = Juicy Rewards: Use the foil sling to lift the meatloaf onto a cutting board. Let it rest 10 minutes! Why? This lets juices redistribute = melt-in-your-mouth slices, not a crumbly mess. Patience pays, friends!
Plate It Pretty & Dig In!
Slice that beauty thick – show off its juicy interior! Serve it center-stage on a rustic platter or right on cozy dinner plates. Classic pairings? Creamy mashed potatoes are its BFF (scoop up that extra glaze pooling below!). Roasted garlic green beans or honey-glazed carrots add color. Feeling decadent? Drizzle warm gravy over the top! And hey, a meatloaf sandwich the next day? *Chef’s kiss.* Crumble leftovers into tomato soup – pure comfort alchemy!
Shake It Up! Your Meatloaf, Your Rules
This recipe’s your canvas! Try these tasty twists:
- BBQ Ranch Twist: Swap ketchup in the loaf for ¼ cup BBQ sauce + 1 tbsp ranch powder. Topping? More BBQ + a drizzle of ranch!
- Italian Stallion: Add ½ cup grated parmesan + 1 tsp dried Italian herbs to the mix. Top with marinara sauce instead of ketchup glaze.
- Mushroom & Swiss Bliss: Sauté 1 cup finely chopped mushrooms with the onion. Fold into the mix + ½ cup shredded Swiss cheese. Divine!
- Keto/Paleo Friendlier: Use almond flour instead of breadcrumbs, skip brown sugar (use 1 tsp maple syrup in glaze), and ensure sugar-free ketchup.
- Spicy Fiesta: Add 1 diced jalapeño and 1 tsp cumin to the mix. Topping? Chipotle ketchup + lime zest!
Beau’s Backstage Bites
This recipe’s been through some stories. Like the time Biscuit swiped a raw chunk mid-prep (don’t worry, he’s fine – just obsessed). Or my “bright idea” to add pineapple chunks (spoiler: too soggy!). Over time, I learned the foil sling is non-negotiable, resting is sacred, and grating the onion is the tear-free MVP. It’s also become my go-to potluck dish – travels like a dream! Funny thing? My food-snob cousin swore he hated meatloaf… until he tried this slow-cooked version cold from the fridge at midnight. Now he asks for it! Moral? Never underestimate the power of tender, slow-cooked comfort. It wins hearts, one juicy slice at a time.
Meatloaf Mysteries? Solved!
Q: My meatloaf fell apart when I sliced it! Help?
A: Three likely culprits: 1) Didn’t rest it (those 10 mins are GOLD!), 2) Overmixed the meat (treat it gently!), or 3) Skipped the eggs/breadcrumbs (they’re binders!). Next time, rest + use the sling!
Q: Can I add veggies like bell peppers or celery?
A: Absolutely! Finely chop or grate them (about ½ cup total) so they cook soft. Sautéing first removes excess water. Avoid watery veggies like zucchini though!
Q: Why does the glaze sometimes look watery around the edges?
A: That’s just delicious meat juices mingling! If it bothers you, spoon it over the slices when serving. It’s flavor gold, not a flaw!
Q: Can I prep this ahead?
A: Totally! Mix the meat (don’t shape), cover tightly, and refrigerate overnight. Shape + glaze right before cooking. Add 15-20 mins cook time if it’s fridge-cold!
Slow-Cooker Meatloaf
Description
Slow-Cooker Meatloaf with Sweet & Tangy Glaze
The easiest, juiciest meatloaf you’ll ever make – hands-off cooking for maximum comfort!
Ingredients
For the Meatloaf:
▢ 2 lbs ground beef *(80/20 blend for best juiciness)*
▢ 1 cup breadcrumbs (or crushed crackers)
▢ 2 eggs
▢ ½ cup milk (any kind)
▢ ½ cup grated onion
▢ 2 tbsp ketchup
▢ 1 tbsp Worcestershire sauce
▢ 1 tsp each: garlic powder, salt
▢ ½ tsp black pepper
For the Glaze:
▢ ¼ cup ketchup
▢ 2 tbsp brown sugar
▢ 1 tsp mustard (yellow or Dijon)
Instructions
1️⃣ Mix & Shape:
-
In large bowl, combine all meatloaf ingredients – mix gently with hands until just combined.
-
Shape into a 9″ loaf on a sheet of foil.
2️⃣ Glaze & Cook:
-
Whisk glaze ingredients; spread over loaf.
-
Use foil to transfer meatloaf to slow cooker.
-
Cook on LOW 6-7 hrs or HIGH 3-4 hrs (until 160°F internally).
3️⃣ Serve:
-
Lift loaf out using foil. Rest 10 mins before slicing.
-
Spoon over extra glaze from cooker.
Nutrition
- Calories: 380 Cal Per ServinG
- Fat: 23g
- Carbohydrates: 14g
- Protein: 29g
Nutritional Nibbles (Per Serving)
Calories: ~380 | Protein: 29g | Carbs: 14g | Fat: 23g | Fiber: 1g
Note: Using leaner beef or turkey reduces fat. Gluten-free/carb adjustments alter carbs.
Prep: 15 mins | Cook: 6-7 hrs (Low) / 3-4 hrs (High) | Total: Up to 7 hrs 15 mins | Serves: 6
Pin Title:
Set-It & Forget-It Slow Cooker Meatloaf | Juicy Every Time!
Final Thoughts: Why This Recipe Deserves a Spot in Your Rotation
This isn’t just meatloaf—it’s a weeknight revolution. It’s the dish that forgives your chaos, hugs your hunger, and leaves you with leftovers that spark joy. Whether you’re a slow-cooker loyalist or an Instant Pot adventurer, this recipe adapts to your life without sacrificing flavor. So dust off that crockpot, embrace the mess, and let dinner take care of itself. After all, the best meals aren’t just nourishing—they’re the ones that feel like a win.
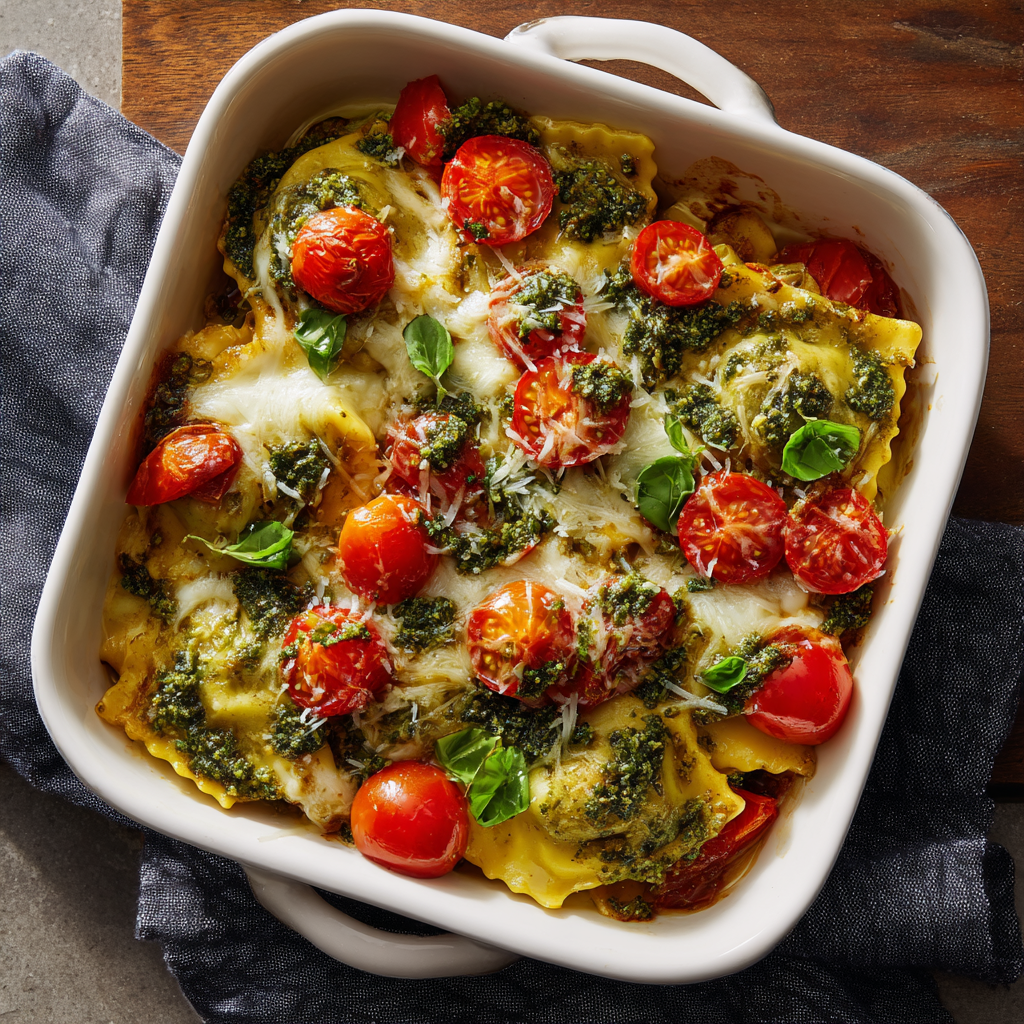
Cheesy Veggie Ravioli Bake
Cheesy Veggie Ravioli Bake: Your New Comfort Food BFF
Hey friends, Beau here! Ever have one of those nights where you’re craving something cozy, cheesy, and ridiculously satisfying—but *absolutely* don’t want to wrestle with homemade pasta dough? Yeah, me too. That’s exactly why this Cheesy Veggie Ravioli Bake is about to become your kitchen MVP. Picture this: plump veggie-stuffed ravioli swimming in vibrant pesto, blanketed under a golden layer of mozzarella that bubbles like a happy hot spring. It’s the culinary equivalent of your favorite sweatpants—comforting, zero-fuss, and always hits the spot.
I dreamed up this beauty for busy weeknights, surprise potlucks, or when you just need a edible hug. Using store-bought ravioli? That’s not a cheat—it’s *smart*. We’re amplifying it with bold flavors and that irresistible baked-cheese magic. In 30 minutes flat, you’ll have a dish that tastes like you slaved for hours. So grab your trustiest baking dish (and maybe a glass of wine), and let’s turn simplicity into something spectacular. Trust me, your spatula will thank you.
That One Rainy Night & a Ravioli Revelation
This recipe? It’s got roots in a soggy Tuesday last fall. My buddy Marco showed up at my door, drenched from a bike ride, muttering about “needing carbs STAT.” My pantry was bare except for frozen veggie ravioli, a jar of pesto from my neighbor’s garden, and a sad nub of mozzarella. Desperation = innovation. I boiled the ravioli, slammed everything into a dish, and baked it until the cheese sang. We devoured it straight from the pan, rain pounding the windows, feeling like we’d hacked the comfort food matrix. Marco still texts me “RAVIOLI EMERGENCY?” when he craves it. That’s the beauty of cooking—sometimes the unplanned, thrown-together moments become the ones you’ll crave forever. This bake? It’s edible nostalgia with extra cheese.
Gather Your Flavor All-Stars
- 1 (20 oz) package refrigerated vegetable ravioli – Your shortcut superstar! Look for ones with spinach or mushroom filling. *Chef’s tip:* Frozen works too—just add 2 mins to boil time.
- 1 cup basil pesto – The flavor rocket fuel! Jarred is perfect, but if you’ve got homemade? Even better. *Swap:* Sun-dried tomato pesto for a rosy twist.
- 1 ½ cups shredded mozzarella – The gooey glue! Pre-shredded saves time, but block cheese melts smoother. *Insider hack:* Toss a pinch of cornstarch with shreds to prevent clumping.
- ¼ cup grated Parmesan – Salty, umami magic! Grana Padano works too. *Avoid:* The shelf-stable powder—it won’t melt right.
- ½ cup halved cherry tomatoes (optional) – Bursty, juicy pops! Adds freshness. *Sub:* Roasted red peppers for sweetness.
- Salt and black pepper to taste – Pesto can be salty, so taste first! Freshly cracked pepper = non-negotiable.
- Fresh basil or parsley, for garnish – The green confetti! Adds brightness and makes it *~pretty~*.
Let’s Build Your Cheesy Masterpiece
Step 1: Fire up your oven to 375°F (190°C). This is the sweet spot for melt-without-burn! *Pro move:* Slide a baking sheet onto the rack below—catches any bubbly cheese escapes.
Step 2: Boil the ravioli just shy of al dente (check package time, minus 1 minute). They’ll finish cooking in the oven! *Why?* Mushy ravioli = sad bake. Drain ’em well—watery ravioli makes a soggy layer. Give ’em a gentle shake in the colander.
Step 3: In your baking dish (I use a 9×13!), toss the hot ravioli with pesto. Be gentle—ravioli bruise easy! Season lightly here. *Hack:* Warm the pesto slightly for easier coating.
Step 4: Shower with mozzarella and Parmesan, then scatter tomatoes if using. *Chef’s secret:* Layer some cheese UNDER the ravioli too for extra goo!
Step 5: Bake uncovered 15-20 mins until cheese is golden-bubbly. Watch like a hawk after 15 mins! *Bonus crisp:* Broil 1 min at the end—just don’t walk away!
Step 6: Garnish wildly with herbs. Let it rest 5 mins—this stops the cheese from becoming a lava flow on your plate.
Plate It Like a Pro (Or Just Grab a Spoon!)
Scoop this beauty onto shallow bowls—you wanna see those layers! Pair with a simple arugula salad (tossed with lemon juice) to cut the richness. Garlic bread? Obviously. For drinks, try a chilled Pinot Grigio or sparkling lemonade. Leftovers? (Ha, good one.) But seriously, it reheats like a dream—microwave + extra sprinkle of Parmesan.
Mix It Up, Make It Yours
1. Meat Lover’s: Brown Italian sausage or pancetta, mix into pesto before baking.
2. Creamy Dreamy: Stir ½ cup ricotta or mascarpone into the pesto.
3. Vegan Vibes: Use dairy-free ravioli, vegan pesto, and cashew mozzarella.
4. Spice It Up: Add red pepper flakes to pesto or top with chili crisp.
5. Garden Bounty: Toss in roasted zucchini or spinach with the ravioli.
Beau’s Backstory & Bonus Bits
This recipe started as my “lazy genius” hack, but it’s evolved into Feastical’s most-requested potluck dish! I once made it for my niece’s dorm friends using a *toaster oven*—proof it’s foolproof. Over time, I learned: undercooking the ravioli is KEY, and letting it rest post-oven saves fingertips from cheese burns (ask me how I know). Funny story: My dog, Biscuit, once stole an entire corner piece off the counter. Now he gets his own “puppy Parmesan” sprinkle on kibble. Moral? This bake makes everyone happy—even four-legged critics.
Your Ravioli Bake Questions, Solved!
Q: Can I assemble this ahead?
A: Totally! Prep through Step 4, cover, and refrigerate up to 24 hours. Add 5-10 mins to bake time since it’s cold.
Q: Why is my bake watery?
A: Two culprits: 1) Ravioli wasn’t drained well enough—pat ’em dry! 2) Low-oil pesto. Fix: Stir 1 tbsp olive oil into pesto before mixing.
Q: Can I use frozen ravioli without boiling?
A: Experiment-approved! Arrange FROZEN ravioli in dish. Whisk pesto with ¼ cup hot water or broth, pour over top. Bake covered 25 mins, uncover, add cheese, bake 15 more. Works!
Q: Cheese browning too fast?
A: Tent loosely with foil. No shame! Just remove it last 5 mins for crispness.

Cheesy Veggie Ravioli Bake
Description
Cheesy Veggie Ravioli Bake
*The ultimate no-fuss comfort food—ready in 30 minutes!*
Ingredients
▢ 20 oz refrigerated veggie ravioli (spinach or mushroom work great)
▢ 1 cup basil pesto (jarred or homemade)
▢ 1½ cups shredded mozzarella
▢ ¼ cup grated Parmesan
▢ ½ cup cherry tomatoes, halved (optional)
▢ Fresh basil or parsley, for garnish
Instructions
1️⃣ Prep:
-
Preheat oven to 375°F (190°C).
-
Boil ravioli 1 minute less than package directs. Drain well.
2️⃣ Assemble:
-
In a 9×13″ baking dish, toss ravioli with pesto.
-
Sprinkle with mozzarella and Parmesan. Top with tomatoes.
3️⃣ Bake:
-
Uncovered for 15-20 mins until bubbly and golden.
-
Optional: Broil 1 minute for extra crispiness!
4️⃣ Serve:
-
Garnish with fresh herbs. Let rest 5 minutes before devouring.
Nutrition
- Calories: 420 Cal Per Serving
- Fat: 24g
- Carbohydrates: 36g
- Protein: 17g
Nutrition Per Serving (Approx):
Calories: 420 | Protein: 17g | Carbs: 36g | Fat: 24g | Fiber: 3g
*Note: Stats vary by ingredient brands. Add tomatoes for vitamin C boost!
Final Thoughts: Why This Bake is More Than Just Dinner
The Cheesy Veggie Ravioli Bake isn’t just a recipe—it’s a mindset. It’s about embracing shortcuts without sacrificing flavor, turning pantry staples into something extraordinary, and remembering that the best meals often come from improvisation (like Marco’s rainy-night carb emergency).
This dish is forgiving, flexible, and universally loved—whether you’re feeding picky kids, impressing last-minute guests, or treating yourself to a solo comfort feast. It’s proof that great cooking doesn’t require perfection; it just requires a little creativity (and a lot of cheese).
So next time you’re staring into the fridge, wondering what to make, remember: ravioli + pesto + cheese + courage = dinner victory. Now go forth and bake with confidence, friends. And if all else fails? Just add more Parmesan.
Hungry for more? Try these twists:
-
Breakfast Ravioli Bake: Swap pesto for marinara, add scrambled eggs and bacon.
-
Dessert Version: Fill with chocolate ravioli, toss in Nutella, top with mascarpone.

Pumpkin Wonton Ravioli with Brown Butter
Fall’s Coziest Shortcut: Pumpkin Wonton Ravioli with Brown Butter
Hey friends, Beau here from Feastical! Can you feel it? That crisp snap in the air, the way sunlight turns liquid gold through changing leaves… Yep, fall’s magic is officially here. And you know what that means: it’s prime time for cozy kitchens, steaming mugs of cider, and flavors that hug your soul like your favorite flannel shirt. Today, we’re ditching the fuss but keeping ALL the flavor with a genius shortcut that’ll make you feel like a pasta wizard: Pumpkin Wonton Ravioli swimming in nutty brown butter. 🎃✨
Let’s be real – traditional homemade ravioli? Gorgeous, but sometimes life (or a serious pumpkin craving) doesn’t hand us hours for rolling dough. Enter the humble wonton wrapper – our secret weapon! These little squares transform into delicate, tender ravioli pockets faster than you can say “second helping.” We’re filling them with a luscious mix of sweet pumpkin, salty Parmesan, and a whisper of nutmeg – pure autumn harmony. Then, we bathe them in brown butter (that golden, toasty nectar!) kissed with crispy sage. It’s elegant comfort food that lands on your table in just 30 minutes. Ready to make your kitchen smell like a fall fairy tale? Grab your favorite apron – let’s get wrapping!
Grandma’s Apron & A Happy Accident
This recipe? It’s got a dash of nostalgia and a pinch of kitchen improv. Picture this: Years ago, pre-Feastical days, I was determined to impress my then-girlfriend (now wife!) with my Nonna’s legendary pumpkin ravioli for our first fall dinner date. Spoiler: I wildly underestimated the pasta-making process. Flour everywhere, dough too thick, filling oozing… disaster looming! Panic mode activated.
Then, my gaze fell on leftover wonton wrappers from takeout night. Hail Mary pass! I scooped that glorious pumpkin filling into those little squares, pinched ’em shut, and crossed my fingers. The result? Pure magic. They cooked in minutes, held their shape, and tasted like crispy-edged, pillowy clouds of fall. When I poured that nutty brown butter (slightly smoky from my near-butter-burning panic) over the top? Her eyes lit up. “Beau, this is incredible!” she breathed. That happy accident became our annual “Fall Kickoff” tradition. Every time I make these, I smell browned butter and remember that flustered, flour-dusted victory. Sometimes the best recipes are born from delicious desperation!
Your Autumn Flavor Toolkit
Gather these simple stars! Don’t stress – I’ve got notes and swaps to make it easy.
- 1 cup canned pumpkin purée (The heart of it all! Use pure pumpkin, NOT pie filling. It’s smoother and perfectly spiced. Chef’s tip: If using homemade, roast your pumpkin first for deeper flavor and drain excess liquid in a sieve.)
- ¼ cup grated Parmesan cheese (The salty, umami punch! Freshly grated melts better and tastes brighter than pre-grated. Vegan? Swap in 2 tbsp nutritional yeast + 1 tbsp cashew cream.)
- ¼ tsp ground nutmeg (Just a whisper! It’s pumpkin’s BFF, enhancing its natural sweetness without screaming “DESSERT!”. Freshly grated nutmeg is NEXT LEVEL if you have it.)
- Salt and pepper to taste (Essential seasoning! Start with ½ tsp salt & ¼ tsp pepper. Taste your filling – it should sing!)
- 1 package wonton wrappers (about 40) (The game-changing shortcut! Find them refrigerated near tofu/dairy. Square or round both work. Keep covered with a damp towel to prevent drying!)
- 4 tbsp unsalted butter (For browning glory! Unsalted lets you control salt. Vegan butter works surprisingly well for browning too.)
- 6–8 fresh sage leaves (optional but HIGHLY recommended) (The aromatic crown jewel! They crisp up in the butter, adding an earthy, almost tea-like fragrance that screams fall. No fresh? ½ tsp dried rubbed sage works in the filling.)
- Extra Parmesan, for garnish (Because more cheese is always the answer. A microplane makes beautiful snowy drifts.)
Let’s Make Some Ravioli Magic! (Step-by-Step)
Don’t let the fancy look fool you – this is pure, simple fun. Follow along with my pro-tips!
- Mix the Hug-in-a-Bowl Filling: “In a medium bowl, combine the pumpkin purée, grated Parmesan, nutmeg, salt, and pepper.” → Chef’s Hack: Use a fork to mix gently! Overmixing can make the pumpkin a bit gluey. Taste it! Does it need more salt? A smidge more pepper? Adjust now – this is your flavor foundation. It should be thick and spreadable, not runny. (Prep Time: 5 minutes)
- Wonton Wrapper Workshop: “Lay out several wonton wrappers on a clean, dry surface. Place about 1 teaspoon of filling in the center of each wrapper.” → Pro-Tip: Use a small spoon or a piping bag for less mess! KEY: Don’t overfill! Too much = burst ravioli. Leave a good ½-inch border. Keep unused wrappers covered! (Assembly Time: 10 minutes)
- Seal the Deal: “Dip your finger in water and lightly moisten the edges of the wrapper around the filling.” → Sealing Secret: This water is your glue! Be generous enough to stick, but don’t flood it. “Fold the wrapper over the filling to form a triangle (if square) or half-moon (if round), pressing firmly to seal. For extra security, press out any air pockets and crimp the edges with a fork.” → Shape Fun: Triangles are classic, but try squares folded diagonally or even little “prize pouch” bundles! Just seal tightly. Place finished ravioli on a lightly floured baking sheet, not touching. (Assembly Time: 5-7 minutes)
- Poach to Perfection: “Bring a large pot of well-salted water (like the sea!) to a gentle simmer (not a rolling boil!). Carefully lower ravioli in batches (don’t crowd!) using a slotted spoon. Cook for 2-3 minutes, until they float cheerfully to the top.” → Water Wisdom: Simmering water prevents violent boils that tear delicate wontons. Floating = done! They cook FAST. “Drain carefully.” → Handle with Care: They’re tender! Gently shake the colander. (Cooking Time: 3 minutes per batch)
- Brown Butter Bliss: “While ravioli cook, melt butter in a large skillet over medium heat. Let it cook, swirling occasionally, until it turns a beautiful golden amber and smells nutty (about 4 minutes).” → Butter Watch: DON’T walk away! It goes from golden to burnt fast. Listen for the crackling to subside and watch for those little brown specks (milk solids). That’s flavor gold! “Add sage leaves (if using) and cook for 30 seconds until fragrant and crisp.” → Sage Advice: They crisp up quick! Remove them to a paper towel if you fear burning, or leave them in for garnish. (Butter Time: 4-5 minutes)
- The Grand Finale: “Gently add the drained ravioli to the skillet with the brown butter. Toss very carefully for 1-2 minutes, just to coat and warm through.” → Tossing Tip: Use a gentle folding motion with a silicone spatula. We want to coat, not demolish! “Serve immediately!” → Timing is Key: Have plates warmed and ready! This dish waits for no one. (Finishing Time: 2 minutes)
Plating Your Pumpkin Masterpiece
Okay, gorgeous food deserves a gorgeous plate! Spoon those golden-brown ravioli and that glorious brown butter sauce onto warm plates or shallow bowls. Scatter over the crispy sage leaves (they’re like little flavor bombs!). Shower generously with extra freshly grated Parmesan – let it snow! For a pop of color and freshness, a tiny sprinkle of chopped fresh parsley or chives works wonders. Want to make it a full cozy feast? Pair it with a simple arugula salad dressed with lemon and olive oil, or some crusty bread to swipe up every last drop of that nutty butter. Serve immediately and watch those happy faces light up!
Shake It Up! Delicious Twists
Love the base recipe? Try these fun spins!
- Meat Lover’s Dream: Brown ¼ lb mild Italian sausage (casings removed) and mix it right into the pumpkin filling. Savory heaven!
- Veggie Boost: Stir ½ cup finely chopped, sautéed spinach (squeezed VERY dry) or roasted, mashed sweet potato into the filling for extra nutrients and color.
- Spice Explorer: Add ¼ tsp cinnamon or a pinch of cayenne to the filling for a warm kick! A tablespoon of maple syrup can also deepen the sweetness.
- Nutty Crunch: Sprinkle toasted pecans or walnuts over the plated dish before the Parmesan. Texture magic!
- Creamy Dreamy: Stir 2 tbsp of goat cheese or ricotta into the pumpkin filling for extra richness and tang.
Beau’s Behind-the-Scenes Scoop
This recipe has been on quite the journey! That first frantic date-night version? I totally forgot the sage. The butter was *this close* to burning. But the beauty of cooking is how recipes evolve. Over the years, I’ve learned that room-temperature filling is easier to work with than cold. I also tried baking these once (trying to be healthier!) – verdict? Stick to simmering! The texture is irreplaceable. One hilarious fail involved using egg roll wrappers by mistake (way too thick!). Lesson learned: stick to delicate wonton wrappers. Now, it’s my go-to for last-minute fall gatherings. Seeing friends’ eyes widen at the “homemade ravioli” they think took me hours? Priceless. The secret’s out now, though! 😉
Print
Pumpkin Wonton Ravioli with Brown Butter
Description
Pumpkin Wonton Ravioli with Brown Butter Sage
*The 30-minute shortcut to elegant fall flavors – crispy sage, nutty brown butter & pillowy pumpkin parcels!*
Ingredients
For the Ravioli:
▢ 1 cup canned pumpkin puree (not pie filling!)
▢ ¼ cup grated Parmesan + extra for serving
▢ ¼ tsp nutmeg (freshly grated if possible)
▢ ½ tsp salt + ¼ tsp black pepper
▢ 40 wonton wrappers (square or round)
For the Sauce:
▢ 4 tbsp unsalted butter
▢ 6-8 fresh sage leaves
▢ Optional garnish: chopped walnuts, parsley
Instructions
1️⃣ Make Filling:
-
Mix pumpkin, Parmesan, nutmeg, salt & pepper.
2️⃣ Assemble Ravioli:
-
Place 1 tsp filling in center of each wrapper.
-
Wet edges, fold into triangles/half-moons, press to seal.
3️⃣ Cook:
-
Simmer in salted water 2-3 mins until they float.
4️⃣ Brown Butter:
-
Melt butter over medium heat until golden (*4-5 mins*).
-
Add sage; cook 30 secs until crisp.
5️⃣ Serve:
-
Toss ravioli in brown butter. Top with crispy sage & Parmesan.
Final Thoughts: Why This Recipe is a Keeper
This Pumpkin Wonton Ravioli is more than a meal—it’s a celebration of fall’s simplicity and abundance. It’s proof that:
-
Shortcuts can be gourmet (wonton wrappers = genius).
-
Mistakes lead to masterpieces (thank you, date-night panic!).
-
Food is memory (every bite carries a story).
So tie on that apron, cue up your favorite cozy playlist, and let’s make this autumn deliciously unforgettable.
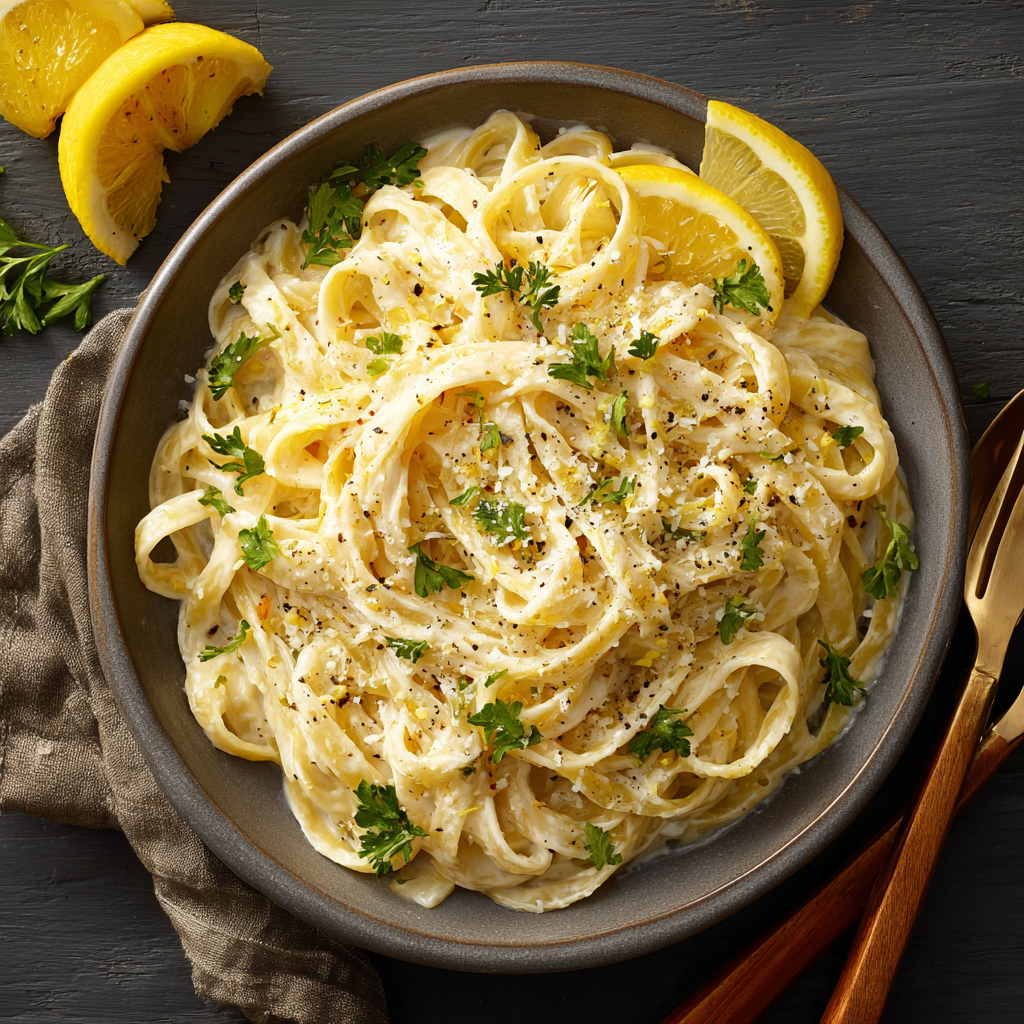
Lemon-Pepper Fettuccine
Lemon-Pepper Fettuccine: Your New 20-Minute Love Affair
Hey friends, Beau here! Let’s talk about that magical moment when you need something spectacular on the table FAST. You know those nights? When your stomach’s rumbling, the clock’s ticking, and takeout menus start looking tempting? That’s exactly when this Lemon-Pepper Fettuccine swoops in like a culinary superhero. Imagine silky ribbons of pasta dancing in a creamy sauce that’s got just the right pep in its step – bright lemon zest flirting with bold black pepper, all wrapped up in a Parmesan hug. It’s the kind of dish that makes you feel like a rockstar chef without breaking a sweat. Whether you’re cooking solo after a long day or whipping up something impressive for last-minute guests, this recipe’s got your back. In just 20 minutes, you’ll be twirling forks and soaking up compliments. So tie on that apron – we’re making magic happen!
Sunshine & Spaghetti: A California Kitchen Memory
This recipe always takes me back to my tiny apartment kitchen in Santa Monica. My buddy Marco would burst in unannounced every Thursday – “Collier! Feed me!” – still sandy from volleyball practice. One sweltering summer day, I was out of his favorite marinara… but had lemons from my mom’s tree. Desperation breeds genius, right? I tossed garlic in butter, splashed in cream, and showered it all with lemon zest and enough pepper to make us sneeze. When Marco took that first bite? Silence. Then: “Dude. This is IT.” We ate straight from the skillet, laughing as lemon zest stuck to our chins. That accidental creation became our ritual – eaten on a balcony overlooking the Pacific, with extra pepper for courage before Friday deadlines. Even now, that first citrusy aroma transports me to sunshine and sandy floors. Food memories? They stick to your ribs better than Parmesan.
Your Flavor Toolkit: Ingredients & Why They Shine
- Fettuccine (12 oz): Those wide ribbons cradle sauce like a dream. Chef’s swap: Tagliatelle or pappardelle work great too!
- Butter (2 tbsp): Our flavor foundation. Unsalted lets you control the salt. Dairy-free? Olive oil brings fruitiness.
- Garlic (2 cloves, minced): Fresh is non-negotiable! The pre-minced stuff just can’t compete.
- Heavy Cream (1 cup): The silky backbone. Lighter option: Half-and-half works, but sauce will be thinner.
- Black Pepper (1 tsp+): Freshly ground is EVERYTHING. Pre-ground tastes like dust – trust me.
- Lemon (zest + 2 tbsp juice): Brightness bomb! Zest first before juicing – way easier.
- Parmesan (½ cup grated): Buy a block! Pre-grated won’t melt smoothly. Vegetarian note: Check for rennet-free brands.
- Parsley (garnish): That fresh pop of color. No parsley? Basil or chives wink beautifully.
Let’s Get Cooking: Your Foolproof Roadmap
Step 1: Boil pasta in heavily salted water (tastes like the sea!). Cook 1 minute less than package says – it’ll finish in the sauce. SCOOP OUT ½ CUP PASTA WATER BEFORE DRAINING! That starchy liquid is gold for sauce consistency.
Step 2: Melt butter over medium-low heat. Add garlic and swirl 60 seconds until fragrant – don’t let it brown! Burnt garlic = bitter heartbreak.
Step 3: Pour in cream, lemon zest, and pepper. Simmer (no boiling!) 3-4 minutes. Chef’s hack: Run your finger across a coated spoon – if it leaves a clean line, it’s thickened!
Step 4: Reduce heat to low. Add drained pasta and Parmesan. Toss aggressively with tongs! The sauce will look tight at first – that’s normal. Add reserved pasta water 1 tbsp at a time until it flows like satin.
Step 5: Remove skillet from heat. Stir in lemon juice – heat kills its vibrancy, so we add it last! Taste: Need more pepper? Salt? Adjust now. Garnish with parsley.
Plating Perfection: Serving Up Sunshine
Slide those glossy noodles into shallow bowls with a confident twist of your tongs. Top with extra cracked pepper and a parsley snowstorm. For restaurant flair? Zest extra lemon right over each plate. Pair with garlic bread to swipe up every drop of sauce, and a crisp arugula salad with shaved radishes to cut the richness. Wine pairing? A citrusy Sauvignon Blanc is BFF material. Dim the lights, light a candle, and watch ordinary Wednesday transform into Italian bistro night.
Shake It Up: 5 Tasty Twists
1. Protein Power: Top with seared shrimp or lemon-herb chicken strips.
2. Veggie Delight: Fold in roasted asparagus or peas in the last 2 minutes of pasta cook time.
3. Spice Seeker: Add red pepper flakes with the garlic for a gentle kick.
4. Lighter Touch: Swap half the cream for whole milk and add 1 tsp cornstarch with the pepper.
5. Vegan Vibes: Use olive oil, cashew cream, nutritional yeast, and vegan Parmesan. Add lemon zest generously!
Beau’s Backstage Pass: Recipe Evolution & Rambles
This dish has come a long way from my “kitchen sink” days! Originally, I used bottled lemon juice (cringe!) until my Nonna visited and nearly threw my measuring cups at me. “Lemons are ALIVE, ragazzo!” she scolded. She was right – fresh zest makes all the difference. I’ve also learned pepper potency varies wildly – start with 1 tsp, then taste and add more after the lemon juice. Pro tip: Grate Parmesan onto a cold plate so it doesn’t clump! And my favorite kitchen fail? That time I used “hot” black pepper by accident… Let’s just say Marco needed three glasses of milk. Live and learn, friends!
Your Burning Questions: Solved!
Q: Help! My sauce looks grainy/separated. What happened?
A: Don’t panic! This usually means the heat was too high. Remove from heat immediately and whisk in 1-2 tbsp cold butter or cream. If it’s beyond rescue? Toss in a handful of fresh spinach – it’ll mask texture issues beautifully!
Q: Can I use pre-grated Parmesan?
A> You *can*, but it won’t melt as smoothly due to anti-caking agents. If it’s all you have, make a slurry: whisk cheese with 1 tbsp cream before adding. Still clumpy? Blend the sauce briefly with an immersion blender.
Q: How do I store leftovers?
A: Store in an airtight container 3-4 days. Reheat gently with a splash of milk or broth – microwaving dry makes pasta tough. Note: The pepper intensifies overnight – lunch might pack more punch!
Q: Why add lemon juice last?
A> Heat dulls lemon’s bright magic and can make dairy curdle. Adding it off-heat preserves that sunny zing!

Lemon-Pepper Fettuccine
Description
Lemon-Pepper Fettuccine in 20 Minutes
A silky, citrus-kissed pasta that’ll become your weeknight hero!
Ingredients
▢ 12 oz fettuccine (or tagliatelle)
▢ 2 tbsp unsalted butter (or olive oil)
▢ 2 garlic cloves, minced
▢ 1 cup heavy cream (or half-and-half for lighter version)
▢ 1 tbsp lemon zest (about 2 lemons)
▢ 2 tbsp fresh lemon juice
▢ 1 tsp freshly ground black pepper (plus more to taste)
▢ ½ cup grated Parmesan cheese (block cheese melts better!)
▢ ½ cup reserved pasta water
▢ Salt to taste
▢ Fresh parsley, chopped (for garnish)
Instructions
1️⃣ Cook Pasta:
-
Boil fettuccine in heavily salted water until al dente (1 min less than package says).
-
Reserve ½ cup pasta water before draining.
2️⃣ Make Sauce:
-
Melt butter in a large skillet over medium-low heat.
-
Add garlic; sauté 60 seconds until fragrant (don’t brown!).
-
Pour in cream, lemon zest, and pepper. Simmer 3-4 mins until slightly thickened.
3️⃣ Combine:
-
Reduce heat to low. Add drained pasta and Parmesan.
-
Toss vigorously, adding pasta water 1 tbsp at a time until sauce coats noodles.
-
Remove from heat. Stir in lemon juice.
4️⃣ Serve:
-
Garnish with parsley, extra pepper, and lemon zest.
-
Optional add-ons: Grilled chicken, shrimp, or roasted veggies.
Notes
✅ Zest lemons first – It’s easier before juicing!
✅ Freshly ground pepper makes all the difference
✅ Sauce too thick? Add more pasta water. Too thin? Simmer longer.
Nutrition
- Calories: 490 Cal
- Fat: 28g
- Carbohydrates: 48g
- Protein: 14g
Nutritional Notes (Per Serving)
Calories: ~490 | Protein: 14g | Carbs: 48g | Fat: 28g | Fiber: 2g
Remember: Nutrition varies with ingredient brands. For lower fat, see “Lighter Touch” variation!
Final Thoughts: Why This Recipe Sticks
Food memories are born from dishes that balance simplicity with soul—the kind you crave not just for taste, but for the way they make you feel. This Lemon-Pepper Fettuccine is more than a quick fix; it’s a blank canvas for creativity, a lesson in culinary chemistry, and a reminder that the best meals often come from happy accidents (and a well-stocked pantry). Whether it’s a solo weeknight dinner or an impromptu gathering, this recipe promises satisfaction in every twirl of the fork. So go ahead—play, adapt, and make it yours. After all, the secret ingredient is always joy.

Spiced Chicken with Apples
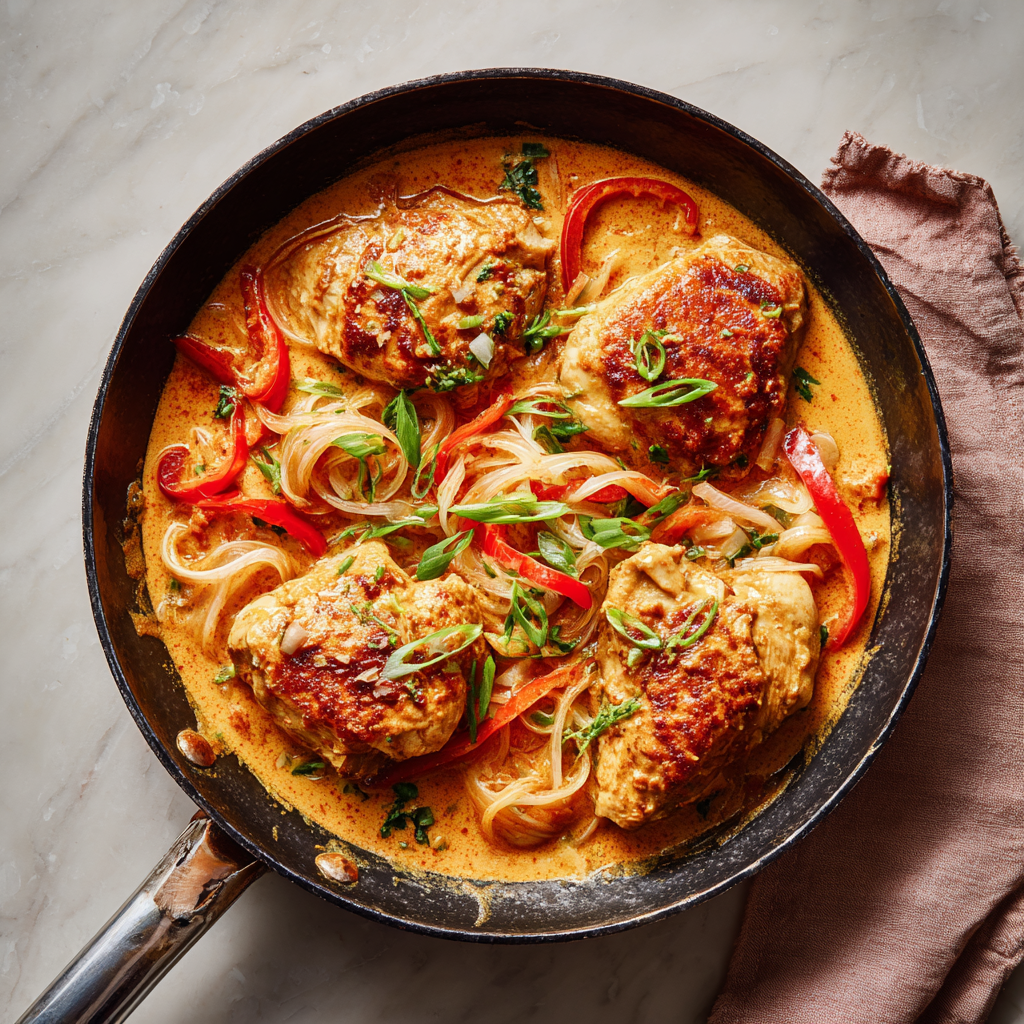
Fall’s Coziest Hug on a Plate: Spiced Chicken with Apples
Hey friends, Beau here! Can you smell that? Crisp air, woodsmoke, and the sweet promise of caramelizing apples in a buttery pan. That’s right—we’re diving fork-first into my ultimate autumn comfort dish: Spiced Chicken with Apples. Imagine juicy chicken thighs swimming in a golden sauce where sweet apples and savory onions tango with cinnamon’s warmth. It’s like your favorite flannel shirt tastes. Seriously, this recipe is my kitchen’s welcome mat for fall. Whether you’re juggling kids, deadlines, or just craving something soul-soothing after a long day, this 30-minute wonder solves dinner with a wink. No fancy skills needed—just a skillet and that spatula you found behind the blender. I’ll walk you through every step, spill my juiciest chef secrets, and share why this dish always makes me grin like a kid at a cider mill. Ready to turn your kitchen into a cozy cabin? Let’s get sizzling!
That One Rainy October Night…
Picture it: Vermont, 2017. My food truck, “The Cozy Cauldron,” was parked at a pumpkin festival when a surprise downpour drowned our grill. Soaked and shivering, I raced home to my tiny apartment with nothing but chicken thighs, apples, and a stubborn craving for warmth. In a haphazard “what the heck” moment, I tossed them together with spices from my grandma’s cookie tin. The result? Magic. My roommate (now business partner) barged in, sniffed the air like a bloodhound, and declared: “Dude, this needs to be on the menu—now.” We ate straight from the pan, rain drumming on the roof, and I knew this dish was special. It wasn’t just dinner; it tasted like resilience, laughter, and that perfect moment when chaos turns delicious. Every time I make it, I’m back in that steamy kitchen, proving great food doesn’t need perfect conditions—just heart and a dash of daring.
Your Flavor Toolkit: What You’ll Need
Pro tip: Use what you’ve got! Cooking is improv, not opera.
- 4 boneless, skinless chicken thighs or breasts — Thighs are my MVP (juicier!), but breasts work. If frozen? Thaw overnight in the fridge. Vegan swap? Portobello caps!
- 1 tbsp olive oil + 1 tbsp butter — Oil prevents butter burning; butter = flavor fireworks. Vegan? All olive oil or plant-based butter.
- 1 large onion, thinly sliced — Yellow onions bring sweet depth. Red onions add zing! Too sharp? Soak in cold water for 5 minutes.
- 2 apples (Honeycrisp or Fuji), sliced — Firm-sweet varieties hold shape. Chef hack: Leave peels on for fiber and color!
- 1 tsp ground cinnamon + ½ tsp ground allspice — Cinnamon’s warmth + allspice’s peppery kick. No allspice? Use ¼ tsp cloves + ¼ tsp nutmeg.
- Salt and pepper — Season chicken generously. Kosher salt sticks better!
- ½ cup chicken broth — Low-sodium to control salt. Veggie broth works great.
- 1 tsp Dijon mustard — Secret umami booster! Yellow mustard in a pinch.
- Fresh thyme or parsley — Thyme = earthy, parsley = bright. Dried? Use ⅓ the amount.
Let’s Cook! Your Foolproof Roadmap
Don’t rush the sear—it’s flavor gold.
- Season like you mean it: Pat chicken dry (crucial for browning!). Rub with salt, pepper, and a pinch of cinnamon. Why? Spices cling better to dry surfaces. Set aside while you slice apples—this lets seasoning penetrate.
- Sear that chicken: Heat oil and butter in a skillet over medium-high until butter foams. Add chicken. DO NOT TOUCH IT for 3–4 minutes. Peeking = pale chicken! Flip when golden-brown. Remove to a plate. Hack: If pan looks dry, add 1 tsp more oil.
- Apples & onions, unite! In the same skillet (keep those tasty bits!), sauté onions and apples 5 minutes until onions soften and apples glisten. Stir occasionally. Chef insight: Onions should smell sweet, not burnt—lower heat if needed.
- Spice it up: Sprinkle cinnamon, allspice, and Dijon over apples/onions. Stir 1 minute until fragrant. Pro move: Toasting spices wakes up their oils!
- Simmer to perfection: Pour in broth, scraping the pan bottom with a wooden spoon (hello, flavor!). Return chicken + any juices. Cover, reduce heat to medium-low. Cook 10–12 mins until chicken hits 165°F internally. Tip: Thicker breasts? Add 3–5 mins.
- Sauce magic: Uncover, simmer 2 mins to slightly thicken sauce. Taste—adjust salt if needed. Too thin? Mix 1 tsp cornstarch + 1 tbsp water, stir in.
Plating with Pizzazz
Spoon that glorious apple-onion jam over chicken like edible confetti. Garnish with thyme sprigs or parsley confetti for a pop of green. My go-to sides: Creamy mashed potatoes (sauce magnet!) or nutty wild rice. For crunch? Garlicky green beans. Serve in shallow bowls—this dish is saucy and deserves to be cozy! Bonus: Light a candle. Mood matters.
The Science of Sweet & Savory: Why This Flavor Combo Works
Ever wonder why apples and chicken taste so good together? It’s not just luck—it’s science! This dish is a masterclass in flavor balancing, where sweet, savory, and spicy elements play off each other like a jazz trio. Here’s the delicious breakdown:
-
The Maillard Reaction: When you sear the chicken, its proteins and sugars undergo the Maillard reaction—a chemical process that creates hundreds of new flavor compounds. That golden crust isn’t just pretty; it’s packed with umami depth that contrasts the apples’ sweetness.
-
Pectin Power: Apples contain pectin, a natural thickener that breaks down when cooked, lending body to the sauce without flour or cream. Firmer apples (like Honeycrisp) retain texture, while softer varieties (like McIntosh) dissolve into a jammy glaze.
-
Spice Synergy: Cinnamon’s cinnamaldehyde compound triggers warmth receptors on your tongue, tricking your brain into perceiving heat even though there’s no chili involved. Allspice (a berry, not a blend!) adds eugenol, the same molecule found in cloves, which numbs bitterness and enhances sweetness.
Pro Tip: For next-level flavor, deglaze with apple cider vinegar after sautéing the onions. The acidity brightens the dish and helps your taste buds detect more nuances in the spices.
Fun Experiment: Try swapping half the apples for pears. Their grainy texture holds up well, and their floral notes add complexity. Or, for a savory punch, add a splash of soy sauce to the broth—its glutamates will amplify the chicken’s savoriness.
Meal Prep Magic: How to Make This Dish Work for You
Busy week? This recipe is your secret weapon. Here’s how to adapt it for meal prep, freezer meals, and even brunch:
Batch Cooking
-
Double the recipe: Use a Dutch oven to cook 8 thighs at once. Store leftovers in airtight containers for up to 4 days. The flavors meld beautifully by day two!
-
Freezer-Friendly: Portion cooled chicken and sauce into freezer bags (squeeze out air to prevent frost). Reheat in a skillet with a splash of broth to revive the texture.
Breakfast Remix
-
Chicken-Apple Hash: Dice leftovers, sauté with potatoes, and top with a fried egg. The runny yolk turns the sauce into a luxurious gravy.
-
Savory Oatmeal: Stir shredded chicken and apples into steel-cut oats with a pinch of cinnamon. Sounds weird, tastes like fall in a bowl.
Kid-Friendly Hacks
-
Hide the Veggies: Finely grate carrots or zucchini into the apple-onion mix—they’ll sweeten and disappear.
-
DIY “Apple Dippers”: Serve sauce on the side for chicken nuggets or roasted sweet potato wedges.
Pro Tip: Label freezer bags with the date and a fun note (“Eat me with mashed potatoes!”) to make future-you smile.
Global Twists: A World Tour of Apples & Chicken
This dish is a blank canvas for global flavors. Here’s how to take it on a trip:
French Bistro Style
-
Swap cinnamon for herbes de Provence.
-
Deglaze with dry white wine instead of broth.
-
Finish with 2 tbsp crème fraîche for a silky sauce.
Moroccan Spice Route
-
Use ras el hanout (a warm spice blend) instead of allspice.
-
Add dried apricots with the apples and toasted almonds on top.
-
Serve with couscous to soak up the fragrant sauce.
Korean-Inspired
-
Marinate the chicken in 1 tbsp gochujang (Korean chili paste) + 1 tbsp honey before cooking.
-
Skip the cinnamon; garnish with sesame seeds and scallions.
-
Pair with kimchi for a tangy crunch.
Why It Works: Apples are a universal ingredient—think German pork chops with applesauce, Indian chicken korma with apple chutney, or British apple-stuffed sausages. Their sweetness bridges cultural gaps!
Shake It Up! 5 Tasty Twists
This recipe loves a remix:
- Maple-Bacon Bliss: Add 2 chopped cooked bacon strips with apples. Finish with 1 tbsp maple syrup.
- Curry-Kissed: Swap cinnamon/allspice for 1 tsp curry powder + ½ tsp turmeric.
- Root Veggie Roast: Toss in cubed sweet potatoes with apples (add 5 mins sauté time).
- Crockpot Comfort: Skip searing. Add all ingredients to a slow cooker. Low 6 hours.
- White Wine Wonder: Replace half the broth with dry white wine (hello, depth!).
Beau’s Backstage Secrets
Fun fact: I once made this with blueberry jam instead of mustard during a pantry emergency—total happy accident! Over the years, I’ve learned: apples vary in sweetness. Taste one slice pre-cooking. Tart? Add 1 tsp honey to the sauce. Sweet? A splash of apple cider vinegar balances it. Also, this dish gets better next day—the spices mingle like old friends. My dog, Biscuit, once stole a thigh off the counter… and I don’t blame him. If you’re doubling the recipe, use a Dutch oven for even cooking. Remember: Recipes are roadmaps, not rulebooks. Burn the onions? Start over. Laugh. Pour wine. Cook on!
Your Questions, Solved!
Q: My sauce is too thin/watery. Help!
A: Two fixes! 1) Uncover and simmer 3–5 extra minutes to reduce. 2) Make a “slurry”: Mix 1 tsp cornstarch + 1 tbsp cold broth/water. Stir into bubbling sauce; it’ll thicken in 60 seconds.
Q: Can I use bone-in chicken?
A: Absolutely! Add 5–7 mins to the simmer time. Bone-in = juicier, but longer cook time. Temp-check near the bone!
Q: Apples turned to mush. What happened?
A> Overcrowding or over-stirring! Use a wide skillet so apples sear, not steam. Stir gently 2–3 times max. Firmer apples (Granny Smith) also hold up better.
Q: Too sweet for my taste?
A> Balance is key! Add ½ tbsp lemon juice or 1 tsp apple cider vinegar at the end. Next time, reduce cinnamon to ½ tsp and use tart apples.

Spiced Chicken with Apples
- Total Time: 30 minutes
Description
Think juicy chicken bathed in golden spiced sauce, sweet apples mingling with caramelized onions, and a scent that could make a lumberjack cry. This 30-minute miracle is the edible version of your favorite flannel—warm, comforting, and always welcome. No special gear or gourmet skills required. Just one pan, a handful of pantry staples, and a craving for something that feels like home.
Ingredients
-
4 boneless, skinless chicken thighs or breasts
-
1 tbsp olive oil + 1 tbsp butter
-
1 large onion, thinly sliced
-
2 apples (Honeycrisp or Fuji), sliced
-
1 tsp ground cinnamon
-
½ tsp ground allspice
-
Salt & pepper to taste
-
½ cup chicken broth (or veggie broth)
-
1 tsp Dijon mustard
-
Fresh thyme or parsley for garnish
Instructions
-
Season Chicken: Pat dry and season with salt, pepper, and a pinch of cinnamon.
-
Sear: Heat oil + butter in skillet. Sear chicken 3–4 mins per side until golden. Remove from pan.
-
Sauté Apples & Onions: In same pan, cook onions and apples 5 mins until soft and shiny.
-
Spice & Simmer: Stir in cinnamon, allspice, Dijon. Toast spices for 1 min. Add broth, scrape pan.
-
Finish Cooking: Return chicken to pan, cover and simmer 10–12 mins until cooked through.
-
Thicken Sauce (optional): Simmer uncovered 2 mins. Need more body? Stir in 1 tsp cornstarch mixed with water.
-
Serve: Spoon sauce over chicken. Garnish. Pair with mashed potatoes, wild rice, or green beans.
Notes
-
Too sweet? Balance with lemon juice or apple cider vinegar.
-
Apple mush? Use firm apples and avoid over-stirring.
-
Remix Ideas: Try maple-bacon, curry spice, or wine-infused versions.
-
Make Ahead: Tastes even better the next day!
- Prep Time: 10 mins
- Cook Time: 20 min
Nutrition
- Calories: Cal per serving
- Fat: 20g
- Carbohydrates: 20g
- Fiber: 3g
- Protein: 30g
Nutritional Details (Per Serving)
Calories: ~370 | Protein: 30g | Carbs: 20g | Fat: 20g | Fiber: 3g
Note: Using breasts? Calories dip to ~330. Add bacon? Well… live deliciously.
Prep Time: 10 mins | Cook Time: 20 mins | Serves: 4
Final Thoughts: More Than a Recipe
This Spiced Chicken with Apples isn’t just dinner—it’s a reminder that cooking is alchemy. A few humble ingredients, a skillet, and a willingness to play can turn a rainy night into a memory. Whether you stick to the script or riff with Moroccan spices or maple-bacon, make it yours.
So light a candle, pour a cider, and dig in. And if you burn the onions? Welcome to the club. The best meals—like the best stories—often start with a little chaos. Now go forth and make your kitchen smell like autumn’s hug.
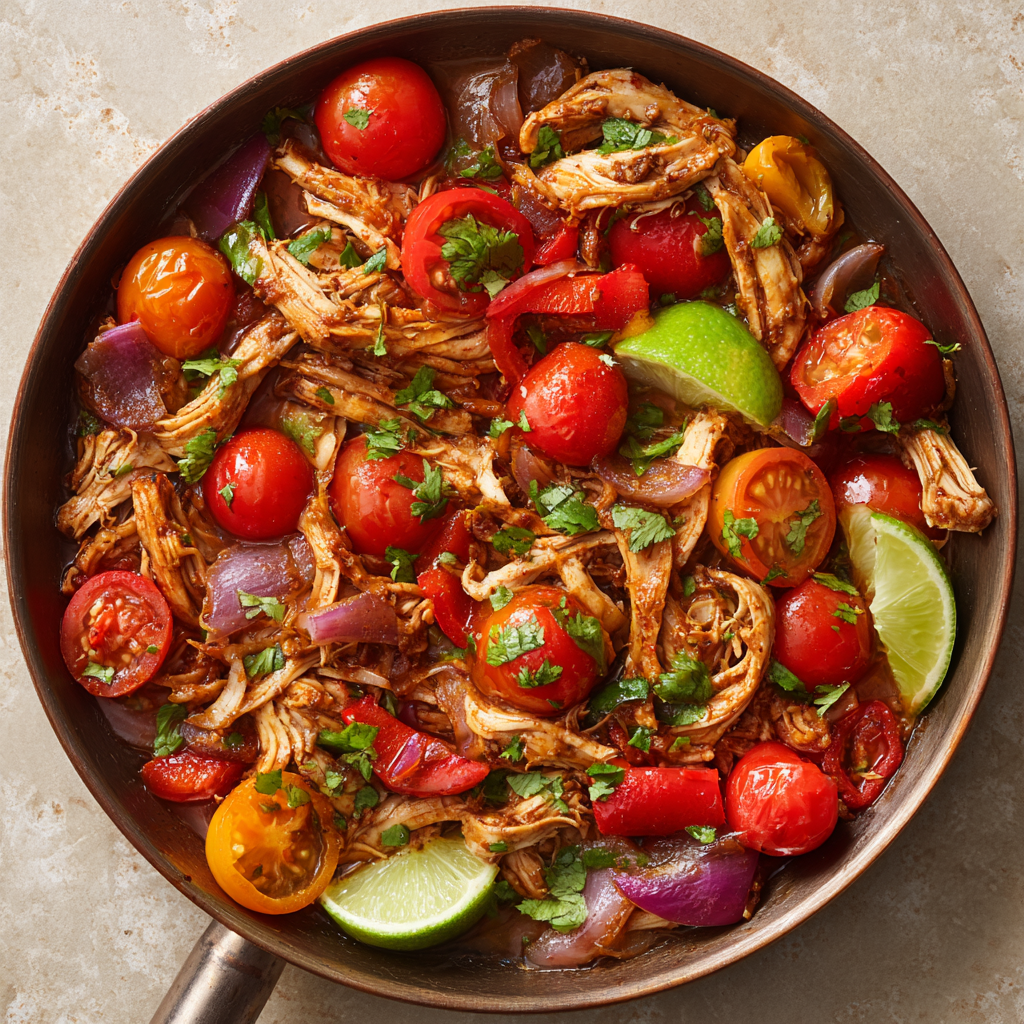
Tex-Mex Pulled Chicken
Ditch Dinner Drama with My 16-Minute Tex-Mex Miracle
Hey friends, Beau here! Ever have one of those nights where your stomach’s rumbling, the clock’s ticking like a time bomb, and your brain’s chanting, “Takeout… takeout… takeout”? Yeah, we’ve all been there. But what if I told you that in less time than it takes to scroll through delivery apps, you could have juicy, smoky pulled chicken swimming in a charred-veggie sauce that tastes like a sunset over Santa Fe? That’s the magic of this Tex-Mex Pulled Chicken—your weeknight superhero! Picture this: tender shreds of chicken wearing a velvety cloak of roasted tomatoes, peppers, and spices, all coming together faster than you can say, “¡Olé!” No fancy skills needed, just a broiler, a blender, and that trusty fork you found behind the toaster. Let’s turn kitchen chaos into a fiesta!
Why’s this my go-to lifesaver? First off, it’s unapologetically bold—we’re talking cumin-kissed, chili-powder-punched, lime-zested goodness. Second, it’s crazy versatile: stuff it in tortillas, pile it on rice, or devour it straight from the skillet (no judgment). And third? That 16-minute promise isn’t clickbait. It’s real, tested, and perfect for when soccer practice, work calls, or pure exhaustion crash your dinner plans. So tie on that apron (or don’t—I’m not your boss), and let’s make magic happen!
My Tex-Mex “Aha!” Moment: Smoke Alarms & Second Chances
This recipe? It’s got roots in my most hilariously disastrous kitchen fail. Picture college Beau, age 20, attempting “authentic” mole sauce in a shoebox apartment. I charred chilies just a smidge too long, setting off the smoke alarm—which summoned my entire dorm floor. Mortifying? Absolutely. But as my red-faced neighbors peered in, something wild happened: the sweet, smoky perfume of those blistered peppers had them drooling! We scraped my “ruined” experiment into tortillas, added shredded rotisserie chicken, and boom—impromptu dorm feast. That smoky depth became my obsession. Years later, playing with broiler shortcuts, I recreated that magic without the fire department. Every bite? A high-five to happy accidents.
Now, I make this for my niece Zoe during our “Taco Tuesdays.” Her verdict? “Uncle Beau, it’s like a party in my mouth!” Cue my heart melting faster than cheese on a hot skillet. Food isn’t just fuel—it’s laughter, connection, and stories that stick. This dish? It’s my edible hug to you.
Grab These Flavor Rockstars (Plus Easy Swaps!)
Here’s your treasure hunt list! Pro tip: quality spices are non-negotiable—they’re the soul of Tex-Mex. Fresh is fantastic, but pantry heroes work too!
- 2 boneless, skinless chicken breasts: The MVP! Chef’s hack: Swap thighs for richer flavor, or use rotisserie chicken to skip poaching (shred 3 cups).
- 2 large tomatoes, quartered: Sweet acidity base. No fresh? Canned fire-roasted tomatoes (drained) are a brilliant backup.
- 1 red bell pepper, sliced: Color + subtle sweetness. Yellow or orange bells work—or punch it up with a poblano!
- 1 small onion, chopped: White or yellow for bite. Red onion adds zing. Hate chopping tears? Toss it in frozen!
- 2 cloves garlic, unpeeled: Trust me—roasting in skin prevents bitter burns. No fresh? ½ tsp garlic powder blends into sauce.
- 1 tbsp olive oil: Coats veggies for perfect char. Avocado or canola oil subs fine.
- 1 tsp cumin: Earthy warmth. 1 tsp chili powder: Smoky depth. Spice insight: Use ancho chili powder for fruity heat!
- Salt and pepper: Season as you go—I start with ½ tsp salt.
- ½ cup chicken broth: Thins sauce. Veggie broth or water works in a pinch.
- Juice of 1 lime: Bright finish! Bottled lime juice? Use 2 tbsp, but fresh is fire.
- Fresh cilantro: The confetti! Skip if you’re a cilantro-hater—parsley or green onions rock too.
- Tortillas, rice, or salad: Your canvas! Grain-free? Try butter lettuce cups.
Let’s Cook: Speedrun to Flavor Town!
Step 1: Broil Those Veggies! Crank your broiler to high. Grab a baking sheet (no parchment needed—we want char!). Toss tomatoes, bell pepper, onion, and unpeeled garlic with olive oil. Spread ’em out—no overcrowding! Broil 8-10 mins until blistered and blackened in spots (rotate sheet halfway!). Chef’s hack: Place garlic cloves near the edge—they roast faster!
Step 2: Poach & Shred Chicken While veggies roast, poach chicken. Simmer breasts in water or broth (enough to cover) 10 mins on medium-low. Don’t boil—gentle bubbles only! Drain, then shred with two forks. Pro tip: Toss chicken in the bowl of your stand mixer with the paddle attachment. 10 seconds on low = perfect shreds!
Step 3: Blend the Magic Sauce Squeeze roasted garlic from skins (careful—hot!) into a blender. Add charred veggies, cumin, chili powder, salt, pepper, and lime juice. Blend until silky smooth. Sauce too thick? Stream in broth while blending. Texture trick: Want chunkier sauce? Pulse 3-4 times instead.
Step 4: Unite Chicken & Sauce Pour sauce over chicken in a skillet. Warm on medium heat 2-3 mins, stirring gently. Don’t boil! Just heat until it’s bubbling at the edges. Taste—add more lime or salt if needed. Time-saver: Mix in the skillet off-heat if using pre-cooked chicken!
Step 5: Feast Your Eyes (Then Your Belly!) Done! Spoon chicken into tortillas, over rice, or onto greens. Garnish with cilantro. My ritual: Squeeze extra lime on top—it wakes up every flavor!
Serving: Where the Fiesta Begins!
Ditch boring plating! For tacos, warm corn tortillas in a dry skillet until toasty. Load up chicken, then layer textures: creamy avocado slices, crunchy slaw, and a sprinkle of cotija cheese. Bowl lover? Fluffy cilantro-lime rice base, chicken, black beans, roasted corn, and a dollop of Greek yogurt (sour cream’s tangy cousin!). Salad style? Toss greens with lime vinaigrette, top with warm chicken, and crushed tortilla chips for that ¡crunch! Bonus: Serve with lime wedges—let guests customize!
Shake It Up: 5 Delicious Twists
This recipe’s a playground! Try these riffs:
- Pineapple Tango: Add ½ cup roasted pineapple chunks to the blender. Tropical sweetness cuts the smoke!
- White Bean Boost: Stir in 1 can rinsed white beans with the sauce. Fiber-rich and hearty.
- Buffalo-Mex Fusion: Replace lime juice with 2 tbsp buffalo sauce. Top with blue cheese crumbles!
- Vegan Vibes: Swap chicken for 2 cans jackfruit (drained, shredded). Use veggie broth.
- Cheesy Skillet: After heating chicken/sauce, top with shredded pepper jack. Broil 2 mins until bubbly!
The Cultural Roots – Tex-Mex’s Flavor Legacy
This dish isn’t just fast—it’s a delicious collision of Mexican and Texan traditions. Understanding its roots makes each bite richer.
1. What Is Tex-Mex?
Born along the Texas-Mexico border, Tex-Mex blends Northern Mexican flavors (like cumin and chili powder) with American ingredients (think yellow cheese, wheat tortillas, and beef). Unlike authentic Mexican cuisine, which varies by region, Tex-Mex is bold, saucy, and unapologetically hearty.
Fun Fact: Fajitas (skirt steak grilled with peppers) were popularized by Texan ranch workers in the 1930s!
2. Why Cumin & Chili Powder Rule
Mexican cooking often uses whole dried chilies, but Tex-Mex relies on ground spices for convenience. Cumin (not native to Mexico but brought via Spanish trade) adds earthy warmth, while chili powder (a blend of ground chilies, garlic, and oregano) delivers that iconic smoky kick.
Swaps: Ancho chili powder = fruitier heat; chipotle powder = deeper smoke.
3. The “Smoky” Secret
Traditional Mexican mole requires hours toasting chilies and spices. This recipe mimics that depth with broiled veggies—a genius shortcut paying homage to the original.
Cultural Twist: Adding lime (more common in coastal Mexican cuisine) gives a fresh, modern lift.
4. Why It’s Beloved Worldwide
Tex-Mex is adaptable, comforting, and packed with umami—the reason it’s a global favorite. From Korea’s “Mexican-Korean” fusion to Germany’s take on nachos, its core appeal is big flavors, easy prep.
Final Thought: Cooking this dish is a mini-celebration of culinary innovation!
Beau’s Backstage Notes
This recipe’s evolved more than my taste in aprons! Originally, I roasted veggies at 400°F for 25 mins—but who has time? Broiling was my game-changer. Funny story: Once, I accidentally used cinnamon instead of cumin (same jar shape—oops!). Surprisingly delicious, but let’s call it “Dessert Tacos” and never speak of it again. Now, I keep spices in labeled jars! Another tweak? Adding lime juice after blending preserves its zing. Pro move: Double the sauce and freeze it—future you will send thank-you notes! This dish? It’s survived my kitchen blunders so you don’t have to. Make it yours!
FAQs: Your Questions, My Answers!
Q: My sauce tastes bitter! What went wrong?
A> Likely over-charred garlic or spices. Fix it: Blend in 1 tsp honey or maple syrup to balance. Next time, don’t broil garlic past golden-brown.
Q: Chicken’s dry after poaching. Help?
A> Overcooking’s the culprit! Poach just until 165°F internally (use a thermometer!). Or, brine breasts in 1 cup water + 1 tbsp salt for 15 mins pre-cooking—juicy every time.
Q: Can I make this ahead?
A> Absolutely! Shred chicken and make sauce separately. Store in fridge 3 days. Reheat chicken in sauce gently on the stove. Freezes beautifully for 3 months!
Q: Too spicy for my kids?
A> Easy fix! Use mild chili powder or skip it. Stir in ¼ cup tomato paste while blending for sweetness. Serve with cooling toppings like avocado.

Tex-Mex Pulled Chicken
Description
No time? No problem. This weeknight wonder is a smoky, zesty lifesaver that beats takeout every time. In just 16 minutes, you’ll transform simple chicken into tender pulled perfection, swimming in a fire-roasted tomato and pepper sauce that screams “sunset in Santa Fe.” Whether you’re feeding a crowd or just yourself (with leftovers!), this bold, no-fuss recipe turns chaos into kitchen confidence.
Ingredients
-
2 boneless, skinless chicken breasts (or 3 cups shredded rotisserie)
-
2 large tomatoes, quartered (or 1 can fire-roasted, drained)
-
1 red bell pepper, sliced
-
1 small onion, chopped
-
2 garlic cloves, unpeeled
-
1 tbsp olive oil
-
1 tsp cumin
-
1 tsp chili powder (use mild or ancho for less heat)
-
Salt & pepper to taste
-
½ cup chicken broth
-
Juice of 1 lime
-
Fresh cilantro, for garnish
-
Tortillas, rice, or salad base
Instructions
-
Broil Veggies: Toss tomatoes, pepper, onion, and garlic with oil. Broil 8–10 mins until charred.
-
Poach & Shred Chicken: Simmer chicken in water/broth for 10 mins. Shred with forks (or stand mixer!).
-
Blend Sauce: Squeeze garlic from skin. Blend with charred veggies, spices, lime juice, and broth until smooth.
-
Sauce + Chicken: Heat sauce with chicken in skillet for 2–3 mins. Don’t boil—just warm through.
-
Serve It Up: Spoon into tortillas, bowls, or lettuce wraps. Top with cilantro and extra lime!
Notes
-
Make Ahead: Sauce freezes like a dream—double it!
-
Shortcut: Use rotisserie chicken to skip poaching.
-
Customize: Add beans, pineapple, or cheese for fun twists!
-
Texture Trick: Pulse blender 3–4 times for chunkier sauce.
Nutrition
- Calories: 320 Cal
- Fat: 16g
- Carbohydrates: 12g
- Protein: 29g
Nutritional Goodness (Per Serving)
Calories: ~320 | Protein: 29g | Carbs: 12g | Fat: 16g | Fiber: 3g
Note: Stats include chicken and sauce only—add-ons change counts!
Final Thoughts: More Than a Meal – A Mindset Shift
This 16-minute Tex-Mex miracle isn’t just about feeding your body—it’s about freeing your time, sparking joy, and reclaiming dinner. It proves that:
-
Fast food doesn’t mean compromise—it can be fresh, flavorful, and fulfilling.
-
Cooking can be fun, not frantic, when we embrace shortcuts.
-
Food is connection—whether it’s a dorm-room feast or a family Taco Tuesday.
So next time hunger strikes and takeout tempts you, remember: your skillet is mightier than your smartphone. ¡Buen provecho, friends!
Quick Chicken Paprikash
Hey There, Hungry Friends! Let’s Whip Up Some Comfort
Picture this: It’s pouring rain outside, your favorite sweatpants are on, and your stomach’s doing the hungry-growl tango. You need something warm, creamy, and soul-soothing—stat. Enter my Quick Chicken Paprikash! This isn’t just any recipe; it’s your golden ticket to a Hungarian grandma hug without the 3-hour simmer. I’ve taken the coziest flavors from Budapest’s kitchens and streamlined them for your busy life. No fancy techniques, no obscure ingredients—just juicy chicken swimming in a smoky-sweet paprika sauce that clings to noodles like a delicious security blanket. Whether you’re a weeknight warrior or just rediscovering your spatula (we’ve all been there!), this 30-minute marvel proves comfort food shouldn’t be complicated. So tie on that apron—let’s turn your kitchen into the coziest corner of Budapest!
My Paprikish “Aha!” Moment
This dish? It’s got history. My first taste was in a cramped Budapest café during a backpacking trip gone hilariously wrong. I’d missed my train, my socks were soaked, and I stumbled into this tiny place smelling like heaven. The owner, Mrs. Varga, took pity on my shivering self and slid a steaming bowl of paprikash across the counter. One bite—BAM!—the paprika warmth hit first, then the silky sauce, then that tender chicken. I swear angels sang. When I begged for the recipe, she just winked and said, “Butter, paprika, and patience, kicsim (that’s ‘little one’ in Hungarian—I melted).” Back home, I must’ve burned six batches trying to “perfect” it. Finally, my epiphany: ditch the fuss! I swapped whole chickens for quick-cooking thighs, simplified the steps, and kept that soul-stirring flavor. Now, every time I make it? I’m back in that steamy café, socks drying, heart full. Food magic, friends.
Gather Your Flavor Squad
Pro Tip: Paprikash lives or dies by paprika quality! Splurge on Hungarian sweet paprika if you can—it’s fruitier and brighter than regular.
- 1 ½ lbs boneless, skinless chicken thighs or breasts, cut into chunks – Thighs = juiciness hero! Breasts work but dry out faster. Frozen? Thaw first or sear longer.
- 1 tbsp olive oil – Or butter for extra richness. Bacon fat? YES for smoky depth!
- 1 medium onion, finely chopped – Yellow or white. No onions? Try 1 tsp onion powder.
- 2 cloves garlic, minced – Jarred works in a pinch, but fresh is best. Double it if you’re garlic-obsessed!
- 2 tbsp sweet paprika – NON-NEGOTIABLE. Hungarian is gold. Smoked paprika? Swap 1 tbsp for a campfire kick.
- 1 cup chicken broth – Low-sodium! Homemade stock? Even better. Veggie broth keeps it pescatarian-friendly.
- ½ cup sour cream – Full-fat for creaminess. Greek yogurt works but add a splash of cream to prevent tang overload.
- Salt and black pepper to taste – Season in layers! I do 1 tsp salt at searing, more later.
- 1 tbsp flour (optional) – My “sauce insurance” for thickness. Cornstarch? Mix ½ tbsp with broth first.
- Fresh parsley, for garnish – Color pop! Dill or chives rock too.
- Cooked egg noodles or rice – Noodles = classic. Rice soaks up sauce beautifully. Spaetzle? Be still my heart!
Let’s Build That Flavor, Step by Step!
Step 1: Heat olive oil in a large skillet over medium-high heat. Add chicken, season with salt and pepper. Chef Hack: DON’T crowd the pan! Work in batches if needed. We want golden-brown sear, not steamed chicken. Cook 5-6 mins until browned but not cooked through. Remove chicken—it’ll finish later. (Juice retention = 101!)
Step 2: In that same glorious skillet (flavor city!), sauté onions 4-5 mins until soft and translucent. Watch Closely: Add garlic and paprika. Stir CONSTANTLY for 60 seconds—burnt paprika tastes like bitter regret. Your kitchen should smell like Hungary’s countryside!
Step 3: Pour in chicken broth, scraping the bottom with a wooden spoon to lift those crispy bits (fond = free flavor gold!). Return chicken and any juices to the pan. Simmer uncovered 10-12 mins. Timing Tip: Chicken’s done at 165°F. If sauce reduces too fast, add 2 tbsp water.
Step 4: Reduce heat to LOW. Stir in sour cream and flour (if using). CRUCIAL MOVE: Temper the sour cream! Spoon 2 tbsp hot sauce into the sour cream first, mix, then pour it all in. This prevents curdling. Stir until velvety—about 2 mins. Taste! Need more salt? Pepper? Paprika? Fix it now.
Step 5: Serve immediately over egg noodles or rice. Garnish with parsley. Final Chef Whisper: Let it rest 3 mins before serving—sauce thickens perfectly!
Plating Like a Pro (Minimal Effort Required!)
Paprikash is rustic elegance! Pile buttered egg noodles in shallow bowls, ladle that ruby-red chicken and sauce generously over the top. Sprinkle with parsley for a fresh pop. Sidekick ideas? A crisp cucumber salad cuts the richness, or roast some carrots with paprika and garlic while you cook. For “wow” factor, serve in a cast-iron skillet family-style—pass it around with crusty bread for sauce-mopping emergencies. And light a candle! Cozy food deserves ambiance.
The Cultural Roots of Chicken Paprikash – More Than Just a Comfort Dish
Chicken Paprikash (or Paprikás Csirke in Hungarian) isn’t just a dish—it’s a cultural emblem. Originating in Hungary, this meal is deeply tied to the country’s love affair with paprika, a spice so revered it’s often called “red gold.” But how did this simple peasant dish become a global comfort food icon?
A Spice That Shaped a Nation
Hungary’s relationship with paprika dates back to the 16th century when the Ottomans introduced peppers to the region. Over time, Hungarians refined the spice, drying and grinding peppers into the vibrant powder we know today. Unlike Spanish or smoked paprika, Hungarian paprika is sweeter, fruitier, and more aromatic—making it the irreplaceable soul of paprikash.
From Peasant Food to National Treasure
Originally, paprikash was a humble farmhouse dish, made with whatever meat was available (often chicken or veal) and served over simple dumplings or bread. Its popularity soared in the 19th century when Hungarian nobility embraced it, elevating it from peasant fare to a national staple. Today, it’s as common in Budapest restaurants as it is in home kitchens, a testament to its enduring appeal.
The Ritual of Sharing
In Hungary, paprikash isn’t just eaten—it’s shared. Families gather around steaming bowls, dipping bread into the creamy sauce, while grandmothers fuss over the “perfect” balance of paprika and sour cream. It’s a dish that invites conversation, nostalgia, and second helpings.
Why This Matters for Your Kitchen
When you cook paprikash, you’re not just making dinner—you’re participating in a centuries-old tradition. The key? Respect the paprika. Use the best Hungarian sweet paprika you can find, and let it shine.
The Science of Creamy Paprikash – Why This Recipe Works
Ever wondered why paprikash has that velvety, cling-to-your-noodles sauce? It’s not magic—it’s science. Let’s break down why this recipe delivers maximum flavor with minimal effort.
The Maillard Reaction = Flavor Gold
Browning the chicken (Step 1) isn’t just for looks. The Maillard reaction—a chemical process between amino acids and sugars—creates hundreds of new flavor compounds. Those crispy bits stuck to the pan? They dissolve into the sauce, adding depth.
Paprika’s Fat-Soluble Magic
Paprika’s flavor compounds are fat-soluble, meaning they bloom and intensify when cooked in oil (Step 2). Stirring constantly prevents burning, which turns paprika bitter. This step is non-negotiable—undercooked paprika tastes grassy, while properly “fried” paprika is sweet and complex.
Sour Cream’s Role: Emulsification
Sour cream doesn’t just add tang—it emulsifies the sauce. The fat molecules coat the liquid, creating a smooth, unified texture. Tempering (mixing hot liquid into cold sour cream first) prevents curdling by gradually raising the temperature.
The Flour Factor (Optional but Effective)
A tablespoon of flour acts as a thickening agent, binding the sauce so it clings to noodles. For gluten-free, cornstarch works, but mix it with broth first to avoid clumps.
Pro Tip: If your sauce breaks (looks grainy), whisk in a splash of cold broth or cream off-heat. The emulsion will re-form.
Global Twists on Paprikash – Reinventing a Classic
While traditional paprikash is perfect as-is, global flavors can take it in exciting new directions. Here are three inspired variations:
1. Tex-Mex Paprikash
-
Swap chicken for shrimp or chorizo.
-
Use smoked paprika + 1 tsp cumin.
-
Stir in diced tomatoes and black beans.
-
Top with avocado and cilantro.
Why it works: Smoky paprika bridges Hungarian and Tex-Mex flavors.
2. Coconut Curry Paprikash
-
Replace sour cream with coconut milk.
-
Add 1 tbsp curry powder with the paprika.
-
Toss in bell peppers and spinach.
-
Serve over jasmine rice.
Why it works: The creaminess mimics the original, while curry spices add warmth.
3. Mediterranean Herb Paprikash
-
Add 1 tsp dried oregano and ½ tsp lemon zest.
-
Stir in kalamata olives and artichoke hearts.
-
Finish with crumbled feta instead of sour cream.
Why it works: Tangy feta mirrors sour cream’s richness, while olives add briny depth.
The Takeaway: Paprikash’s base (paprika + creamy sauce) is a blank canvas. Play with global spices to make it your own!
Shake It Up, Paprikash-Style!
This recipe’s your playground! Try these twists:
- Mushroom Magic: Sauté 8 oz sliced creminis with onions. Hello, umami bomb!
- Lighten Up: Swap chicken for firm tofu or chickpeas. Use coconut milk instead of sour cream (add ½ tsp lemon juice).
- Smoky Heat: Use 1 tbsp smoked paprika + 1 tsp cayenne. Top with pickled jalapeños.
- Hungarian Grandma Style: Add 1 diced bell pepper with onions. Stir in 1 tbsp tomato paste with paprika.
- Creamy Dreamy: Finish with 2 tbsp heavy cream for extra indulgence.
Beau’s Backstage Tips & Tales
Fun fact: My first test batch was so bad, my dog wouldn’t eat it. Turns out, using expired paprika = cardboard city! Lesson learned: check spice dates. Over the years, I’ve added the “temper sour cream” step after a curdled-sauce fiasco (RIP dinner party 2019). Now? It’s foolproof! Leftovers? Even better next day—the flavors marry like old friends. Store in fridge 3 days or freeze 2 months. Reheat SLOWLY on low with a splash of broth. And if you burn the paprika? Start over. Trust me. P.S. This pairs brilliantly with a dry Riesling—tell your wine guy Beau sent you!
Paprikash Pitfalls? We’ve Got Answers!
Q: My sauce broke/curdled! Help!
A: Don’t panic! Remove from heat. Whisk in 1 tbsp cold broth or cream. If stubborn, blend briefly with an immersion blender. Next time: TEMPER that sour cream (Step 4 hack!) and keep heat low.
Q: Can I use chicken breasts instead of thighs?
A: Absolutely—but cut them smaller (1-inch cubes) and reduce simmer time to 8 mins. Breasts cook faster and dry out easier. Brine them in salt water for 10 mins pre-cooking for juiciness!
Q: Too spicy? Too bland?
A: Spicy? Stir in 1 tsp honey or sugar to balance. Bland? Up your paprika! Freshness matters. Or add ½ tsp onion powder + pinch more salt. Taste as you go!
Q: Can I make this ahead?
A: 100%! Cook through Step 3. Cool, then fridge for 2 days. When ready, reheat gently, then do Step 4. Add extra broth if thick.

Quick Chicken Paprikash
- Total Time: 20 mins
Description
Imagine rain tapping on the window, your favorite show queued up, and a bowl of creamy, paprika-kissed chicken in your hands. This Quick Chicken Paprikash is a love letter to Hungarian comfort food—without the hours of simmering. Juicy chicken thighs, sweet paprika, and a swirl of sour cream come together in a silky sauce that clings lovingly to noodles or rice. Ready to turn your kitchen into a Budapest bistro?
Ingredients
-
1 ½ lbs boneless, skinless chicken thighs (or breasts), cubed
-
1 tbsp olive oil (or butter for richness)
-
1 medium onion, finely chopped
-
2 cloves garlic, minced
-
2 tbsp Hungarian sweet paprika (a must!)
-
1 cup chicken broth (low-sodium)
-
½ cup sour cream (full-fat = creamy dream)
-
Salt & pepper, to taste
-
1 tbsp flour (optional, for thicker sauce)
-
Fresh parsley, chopped (garnish)
-
Cooked egg noodles or rice
Instructions
-
Sear the Chicken: Heat oil in a large skillet. Brown chicken in batches, 5–6 mins. Remove and set aside.
-
Sauté Aromatics: In the same pan, cook onion until soft (4–5 mins). Stir in garlic and paprika for 60 secs.
-
Build Sauce: Add broth, scrape the pan, return chicken. Simmer 10–12 mins uncovered.
-
Creamy Finish: Lower heat. Temper sour cream with 2 tbsp hot sauce, then stir in with flour. Simmer 2 mins till velvety.
-
Serve: Spoon over noodles or rice. Top with parsley. Let rest 3 mins. Eat cozy!
Notes
-
Paprika Quality = Game-Changer: Hungarian paprika makes all the difference.
-
Sour Cream Hack: Always temper to avoid curdling.
-
Don’t Rush It: Let it sit before serving—it thickens beautifully.
-
Leftovers? Even better next day. Reheat gently with a splash of broth.
- Prep Time: 10 min
Nutrition
- Calories: 10 mins per serving
- Fat: 20g
- Carbohydrates: 20g
Quick Chicken Paprikash Nutrition (Per Serving)
Calories: ~400 | Protein: 32g | Carbs: 14g | Fat: 25g | Fiber: 2g
Note: Stats include 1 cup cooked egg noodles. Using rice? Carbs will vary.
Final Thoughts: Why Paprikash Belongs in Your Recipe Rotation
In a world of complicated recipes and fleeting food trends, paprikash stands out for its simplicity and soul. It’s a dish that rewards patience (toasting paprika properly) but forgives shortcuts (store-bought broth works fine). It’s adaptable (swap proteins, spices, or sides) yet always comforting.
Most importantly, it’s a reminder that great food doesn’t require perfection—just good ingredients, a little technique, and the willingness to savor each bite. So next time rain clouds roll in or life feels overwhelming, remember: a skillet of paprikash is 30 minutes away. And that, friends, is culinary therapy at its finest.
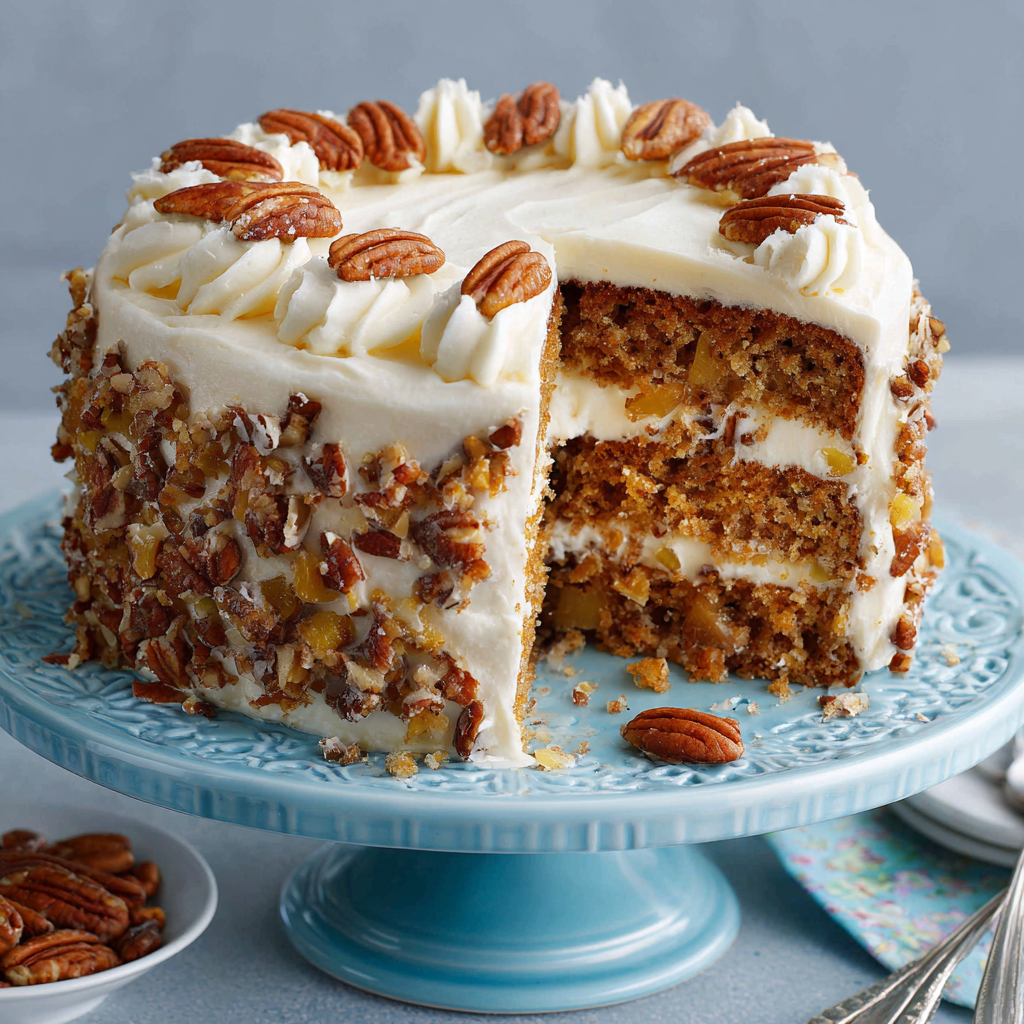
Hummingbird Cake
Hey Y’all, Let’s Bake Some Sunshine!
Picture this: a cake so moist it practically whispers sweet nothings to your fork, bursting with tropical banana and pineapple, hugged by toasty pecans, and slathered in a cloud of tangy cream cheese frosting. That, my friends, is the magic of Hummingbird Cake – the ultimate Southern belle of the dessert world! It’s like a vacation in every bite, no passport required. I’m Beau Collier, and at Feastical, we live for recipes that taste like a front-porch swing on a perfect spring day. This isn’t just cake; it’s edible joy, a guaranteed crowd-pleaser that’s surprisingly simple to whip up. Whether you’re feeding your book club, celebrating a birthday, or just treating yourself (because, honestly, you deserve it), this Hummingbird Cake wraps you up in pure comfort. Forget fussy techniques or obscure ingredients – we’re keeping it real, soulful, and packed with flavor. Ready to make your kitchen smell like a hug? Grab your mixing bowls, and let’s turn those ripe bananas sitting on your counter into pure, unadulterated bliss!
A Slice of Sweetness: My First Hummingbird Encounter
My love affair with Hummingbird Cake started at my Aunt Lulu’s farmhouse in Georgia. I was maybe ten, sticky-fingered from peach picking, when she unveiled this towering, nut-speckled masterpiece. It looked like something from a fancy bakery, but Lulu just winked and said, “Beau, honey, this is just pantry magic.” One bite, and I was hooked – the impossibly tender crumb, the way the pineapple tang danced with the sweet banana, that creamy frosting melting on my tongue… it tasted like sunshine and laughter. But the real magic? Watching my big, burly uncles, usually all about barbecue and cornbread, sneak *third* slices, grinning like kids. That cake transformed a simple Sunday supper into a full-blown celebration. It taught me then what I know now: food isn’t just fuel; it’s the golden thread weaving memories together. Every time I bake this Hummingbird Cake, I’m back on Lulu’s porch, feeling that same rush of pure, uncomplicated happiness. It’s more than dessert; it’s a taste of home.
Gathering Your Tropical Treasure Trove
Here’s your happy-making lineup! Don’t sweat substitutions – cooking should feel creative, not rigid. Let’s break it down:
- 3 cups all-purpose flour: Our sturdy foundation. For a lighter crumb, swap 1 cup with cake flour. Gluten-free? A quality 1:1 blend works wonders (I like Bob’s Red Mill!).
- 2 cups granulated sugar: Sweetens the deal. For a richer, caramel note, use 1 cup white + 1 cup packed brown sugar. Chef tip: Sugar helps keep this cake super moist!
- 1 tsp baking soda: Our lift-off agent! Ensure it’s fresh (test it with vinegar – if it fizzes, you’re golden!).
- 1 tsp ground cinnamon: The warm hug in every bite. Feeling adventurous? Add a pinch of nutmeg or cardamom too.
- 1/2 tsp salt: The flavor booster! Balances the sweetness. Always use kosher salt for the best control.
- 3 large eggs: Binders and richness heroes. Room temp eggs blend smoother – just pop ’em in warm water for 10 mins if you forgot!
- 1 cup vegetable oil: Guarantees that legendary moistness. Melted coconut oil adds a lovely tropical hint, or use melted butter for richness.
- 2 tsp vanilla extract: Pure magic! Use the real stuff – it makes a difference. Bourbon vanilla is my fave here.
- 1 (8 oz) can crushed pineapple, UNDRAINED: Tropical tang & moisture central! Don’t drain – that liquid gold is key! Fresh pineapple? Pulse it finely, but use the juice too.
- 2 cups mashed ripe bananas (about 4): The sweeter and spottier, the better! They should be almost black for maximum flavor and moisture. No ripe bananas? Bake some at 300°F for 30 mins!
- 1 cup chopped pecans: Toasty, earthy crunch. Walnuts work, or omit for nut-free. Toast them first – game changer! (350°F for 5-7 mins).
- For the Frosting: Creamy dream team! 8 oz softened cream cheese (full-fat for best texture!), 1/2 cup (1 stick) softened unsalted butter (salted works, just skip the added salt), 3 1/2 cups powdered sugar (sift it to avoid lumps!), 1 tsp vanilla extract. Optional extra pecans for that fancy crown.
Let’s Build This Beauty: Step-by-Step Sunshine
Alright, team! Preheat that oven to 350°F (175°C) – let’s get cozy. This isn’t rocket science; it’s joyful baking. Follow along:
- Prep Like a Pro: Grease AND flour three 9-inch round cake pans *generously*. Lining the bottoms with parchment paper? Absolute insurance policy against stuck cakes! Chef hack: Use the butter wrapper to grease – zero waste!
- Dry Team Unite: In your biggest bowl, whisk together the flour, sugar, baking soda, cinnamon, and salt. Whisk it like you mean it for 30 seconds – we want zero soda lumps and even spice distribution. This aerates the flour slightly too!
- Wet Team Assemble: Make a well in the dry ingredients. Crack in the eggs, pour in the oil and vanilla. Stir gently with a wooden spoon or spatula JUST until combined. Overmixing flour = tough cake. We want tender! It’ll be thick and shaggy – that’s perfect.
- Fold in the Fun Stuff: Time for the stars! Add the undrained crushed pineapple, mashed bananas, and chopped pecans. Fold GENTLY and lovingly until everything is evenly distributed. The batter will loosen up beautifully and smell divine. Chef insight: Folding preserves air and prevents gluten overdevelopment.
- Pan & Bake: Divide the batter evenly among your prepped pans. A kitchen scale ensures perfect layers (about 650g per pan). Smooth the tops gently. Bake for 25-30 minutes. DO NOT open the oven before 25 mins! Check with a toothpick – it should come out with a few moist crumbs (not wet batter) when done. Rotate pans halfway for even baking if your oven runs hot.
- Cool Your Jets (and Cakes): Let cakes cool IN pans on a wire rack for 10 minutes. This sets the structure. Then, run a knife around the edges, invert onto racks, peel off parchment (if used), and let cool COMPLETELY. Frosting a warm cake = melty disaster! Patience, grasshopper.
- Frosting Fantasy: While cakes cool, make that luscious frosting! Beat the softened cream cheese and butter together in a bowl with an electric mixer on medium-high until super smooth and fluffy (2-3 mins). Scrape bowl. Gradually add the sifted powdered sugar on low speed to avoid a sugar cloud, then beat on medium-high until light and dreamy (another 2 mins). Beat in the vanilla. Chef hack: If frosting seems thin, chill for 15 mins. Too thick? Add a TEENY splash of milk or pineapple juice.
- Assemble the Masterpiece: Place one cooled cake layer on your serving plate. Spread with a generous cup of frosting. Repeat with the second layer. Top with the third layer. Frost the top and sides smoothly or go for that charming, rustic “naked cake” look. Press extra pecans onto the top or sides for crunch and beauty. Stand back and admire!
Showtime: Serving Your Southern Star
Presentation is part of the fun! Slice this beauty with a sharp knife (wiping it clean between cuts for neat slices). It’s rich, so modest slices are perfect. Serve it at room temperature – that’s when the flavors sing loudest! Pair it with a hot cup of strong coffee for breakfast (no judgment here!) or a cold glass of milk for dessert. For a fancy brunch, add fresh edible flowers or a light dusting of cinnamon alongside the pecan garnish. Honestly? Just plop it on a pretty cake stand – its golden layers and creamy frosting are showstoppers all on their own. Dig in and watch those smiles appear!
Mix It Up: Your Hummingbird, Your Rules!
Love the base recipe? Try these fun twists to make it your own:
- Cupcake Craze: Pour batter into lined muffin tins (fill 2/3 full). Bake 18-22 mins. Frost when cool. Perfect for parties or lunchboxes!
- Tropical Twist: Add 1 cup shredded coconut (toasted or not) to the batter with the pecans. Garnish frosting with coconut flakes and dried pineapple.
- Bundt Beauty: Bake in a well-greased 12-cup Bundt pan for 55-65 mins. Cool 15 mins in pan, then invert. Drizzle with a simple glaze (1 cup powdered sugar + 2-3 tbsp pineapple juice) instead of frosting.
- Nut-Free & Gluten-Free: Omit pecans (add 1/4 cup oats for texture if desired). Use a certified GF 1:1 flour blend and ensure all other ingredients are GF.
- Spice Explorer: Add 1/4 tsp each of ground ginger and allspice to the dry ingredients for a warm, complex kick.
Beau’s Back-Porch Reflections
This recipe? It’s seen some things! I vividly remember attempting it for my then-girlfriend (now wife) early in our dating days. Let’s just say I underestimated the power of “cool completely.” My eager, warm-layer frosting attempt turned into a delicious but hilarious landslide cake! We ate it with spoons, laughing hysterically – and she still married me. Lesson learned: Patience is key! Over the years, I’ve tweaked the spice balance slightly (more cinnamon, always!) and become religious about toasting the pecans – it deepens the flavor so much. It’s also become my go-to “welcome to the neighborhood” cake. Nothing breaks the ice faster than handing someone a slice of this sunshine. It’s evolved, but its soul – that joyful, comforting, bring-people-together spirit – remains exactly the same. Bake it with love, share it generously, and don’t stress the small stuff. That’s the Feastical way!
Hummingbird Hurdles? We’ve Got Answers!
Q: Can I use fresh pineapple instead of canned?
A: Absolutely! Crush about 1 cup of fresh pineapple (core included for enzymes that help tenderness!) and include ALL its juice. Measure roughly 8 oz total with juice. The enzymes are great, but it works!
Q: Help! My bananas aren’t ripe enough!
A: No worries! Speed-ripen them: Bake unpeeled bananas on a baking sheet at 300°F (150°C) for 30-40 minutes, until skins are black. Cool, then mash. Or, use thawed frozen bananas (drain excess liquid).
Q: My cake layers sunk in the middle! What happened?
A: Usually, this means either: 1) The oven door was opened too early, causing a collapse. Resist peeking before 25 mins! 2) The baking soda was old (test it!). 3) The batter was overmixed after adding flour, developing too much gluten. Mix just until combined next time!
Q: Can I make this ahead of time?
A: YES! This cake gets moister! Bake layers, cool completely, wrap tightly in plastic wrap, and store at room temp 1 day, or freeze for up to 2 months. Thaw frozen layers before frosting. Frosted cake keeps beautifully covered in the fridge for 3-4 days. Let slices come to room temp for 30 mins before serving for best texture.

Hummingbird Cake
- Total Time: 1 hr (plus cooling/frosting)
Description
This crowd-pleasing, ultra-moist Hummingbird Cake is your one-way ticket to edible joy. Bursting with ripe bananas, crushed pineapple, toasted pecans, and crowned with tangy cream cheese frosting, it’s like Southern hospitality in cake form. Whether you’re baking for brunch, birthdays, or just for that porch-swing vibe, this beauty brings the celebration.
Ingredients
Cake:
-
3 cups all-purpose flour
-
2 cups granulated sugar (or 1 cup white + 1 cup brown)
-
1 tsp baking soda
-
1 tsp cinnamon
-
½ tsp salt
-
3 large eggs
-
1 cup vegetable oil
-
2 tsp vanilla extract
-
1 (8 oz) can crushed pineapple (undrained)
-
2 cups mashed ripe bananas (~4 bananas)
-
1 cup chopped toasted pecans
Cream Cheese Frosting:
-
8 oz cream cheese, softened
-
½ cup (1 stick) unsalted butter, softened
-
3½ cups powdered sugar, sifted
-
1 tsp vanilla extract
Instructions
-
Prep Oven & Pans: Preheat to 350°F (175°C). Grease and flour three 9″ cake pans; line bottoms with parchment.
-
Mix Dry: In large bowl, whisk flour, sugar, baking soda, cinnamon, and salt.
-
Add Wet Ingredients: Stir in eggs, oil, and vanilla just until combined.
-
Fold in Add-Ins: Gently fold in pineapple, bananas, and pecans.
-
Bake: Divide into pans. Bake 25–30 mins or until toothpick comes out with moist crumbs. Cool 10 mins, then invert onto racks to cool fully.
-
Make Frosting: Beat cream cheese and butter until fluffy. Add sugar gradually. Beat in vanilla.
-
Assemble: Layer and frost the cakes. Finish with extra pecans if desired. Chill briefly to set.
Notes
-
Add coconut for a tropical kick.
-
Try it as cupcakes (bake 18–22 mins).
-
Bundt option: Bake 55–65 mins in a greased Bundt pan.
- Prep Time: 20 min
- Cook Time: 30 min
Nutrition
- Calories: 520Ca Per Slice
- Sugar: 42g
- Fat: 28g
- Carbohydrates: 60g
- Fiber: 2g
Nutritional Nibbles (Per Slice, Est.)
Calories: ~520 | Carbs: 60g | Fat: 28g | Sugar: 42g | Fiber: 2g
Remember: This is celebratory soul food! Enjoy it mindfully as part of a balanced diet. Portion size matters – smaller slices are totally satisfying!
Final Thoughts: More Than Just a Cake
Hummingbird Cake isn’t just dessert; it’s a edible heirloom. It’s the cake you bring to new neighbors, serve at baby showers, or bake when you need a little comfort. Its magic lies in its balance—sweet but not cloying, fruity but not fussy, sturdy enough for a picnic but elegant enough for a wedding.
Every bite carries stories: of Aunt Lulu’s farmhouse, of kitchen disasters turned into laughter, of potlucks where the plate was scraped clean. It’s a reminder that the best recipes aren’t about perfection—they’re about connection. So bake it with ripe bananas, share it with someone you love, and let its sunny flavor do the rest.

No-Knead Cheddar-Jalapeño Loaf
Cheesy, Spicy, Effortless Magic: Your New Favorite Bread
Hey friends! Beau here from Feastical, and I’ve got a confession: nothing makes my kitchen heart happier than the smell of fresh bread baking. But between recipe testing, photo shoots, and chasing my toddler who thinks flour is “snow,” I don’t always have hours for kneading. Enter our hero today: the No-Knead Cheddar-Jalapeño Loaf. Imagine crusty golden armor giving way to a soft, cheesy interior flecked with spicy little surprises. This isn’t just bread—it’s a warm, cheesy hug with a playful jalapeño wink. Whether you’re a sourdough skeptic or just want something spectacular without the workout, this loaf is your golden ticket. Minimal effort? Check. Maximum flavor? Double-check. Let’s turn your kitchen into a bakery where the only requirement is a craving for adventure (and maybe a napkin for cheese-induced drooling).
That One Time Jalapeños Saved Game Night
Picture this: It’s 2018, and my poker buddies are coming over. I’d planned an artisanal charcuterie spread… until my dog BISCUIT (yes, named after food) swiped the prosciutto off the counter. Panic mode! All I had was flour, cheddar, and jalapeños from my garden. Desperation birthed this loaf—a haphazard mix of no-knead basics jazzed up with whatever screamed “party.” When I pulled that bronzed beauty from the oven, the room went silent… then erupted. Crust crackled, cheese oozed, and jalapeños gave that “oh hello!” kick. The charcuterie was forgotten. We tore into it like wolves, dipping warm chunks in chili oil between bluffing sessions. Now, it’s not poker night without this loaf. Moral? Sometimes kitchen disasters taste like victory. Thanks, Biscuit.
Your Flavor Arsenal: Simple Stars, Big Impact
- 3 ½ cups all-purpose flour – The trusty backbone! Want more chew? Swap ½ cup with bread flour. Gluten-free? Use 1:1 GF blend + 1 tsp xanthan gum.
- 2 ¼ tsp (1 packet) instant yeast – Our fermentation fairy! No instant? Use active dry but bloom it in the warm water + honey first for 5 mins.
- ½ tsp kosher salt – Flavor enhancer! If using table salt, reduce to ¼ tsp (it’s denser).
- 2 cups sharp cheddar, shredded – Aged = bold flavor punch! Pre-shredded works, but block cheese melts creamier. Feeling wild? Try smoked gouda or pepper jack.
- 1-2 jalapeños, chopped – Fresh is best! Seed for mild heat; leave seeds for 🔥. Pickled jalapeños? Pat dry first (extra moisture = sad bread).
- 1 cup warm water – Baby-bottle warm (105-110°F). Too hot = dead yeast. Too cold = sleepy yeast.
- 3 Tbsp honey – Yeast’s favorite snack! Agave or maple syrup work too. No sweet tooth? Skip it—your loaf, your rules.
- 4 Tbsp salted butter, melted – Richness booster! Unsalted? Add ¼ tsp extra salt to dry ingredients.
- 1 large egg – Our golden glue! Vegan? Use 3 Tbsp aquafaba (chickpea liquid).
Optional Honey Butter: 6 Tbsp butter + 3 Tbsp honey + flaky salt. Trust me—it’s the edible equivalent of a high-five.
Bread-Making Without the Bicep Curls
- Mix Dry Ingredients: In a large bowl, whisk flour, yeast, salt, cheddar, and jalapeños. Chef’s Hack! Toss cheese/jalapeños in 1 Tbsp flour first—this prevents sinking during baking!
- Whisk Wet Ingredients: In another bowl, combine warm water, honey, melted butter, and egg. Whisk until smooth like jazz. Pro Tip: Melt butter last so it doesn’t cook the egg!
- Combine & Rest: Pour wet mix into dry ingredients. Stir with a wooden spoon until no dry spots remain (dough will be shaggy/sticky—this is GOOD!). Cover bowl with a damp towel or plastic wrap. Let rise in a warm spot (like your oven with the light on) for 1 hour. Watch for: Doubled size + bubbles on surface = happy yeast!
- Shape & Rise Again: Gently scrape dough into a greased 9×5” loaf pan. Don’t punch it down—be kind to those air pockets! Smooth the top with wet fingers. Cover loosely. Let rise 30-45 mins until cresting the pan rim. Timing Tip: Cold kitchen? Place pan on a warm stovetop while oven preheats.
- Bake to Golden Glory: Preheat oven to 375°F (190°C). Bake loaf 25-30 mins. Doneness Test: Tap the top—it should sound hollow! If top browns too fast, tent with foil. Cheese bubbles? That’s flavor confetti.
- Finish with Flair: Cool in pan 10 mins, then transfer to a wire rack. Brush warm crust with honey butter and sprinkle flaky salt. Resist cutting for 20 mins! (Slicing too soon = gummy texture. I know—it’s torture.)
Slice, Savor, Repeat: How to Serve This Legend
This loaf demands an audience! Slice thick while warm and watch cheese strings dance. Serve with that honey butter for sweet-heat nirvana. Pair with tomato soup for dunking, or alongside scrambled eggs. For next-level indulgence, make “Cheesy Toast 2.0”: Grill slices in butter until crispy, top with avocado and hot honey. Leftovers? Transform into bread pudding or croutons for chili. Basically, anywhere bread goes, this jalapeño-cheddar wonder goes better.
The Science Behind No-Knead Bread – Why It Works So Well
No-knead bread might seem like magic, but there’s real science behind why this method produces such incredible results with minimal effort. Unlike traditional bread-making, which relies on vigorous kneading to develop gluten, no-knead bread uses time as its secret weapon. Here’s how it works:
Gluten Development Without the Work
When you knead dough, you’re aligning gluten proteins (glutenin and gliadin) to create a strong, elastic network that traps gas bubbles from yeast fermentation. No-knead bread skips the manual labor by letting autolysis (a fancy term for flour + water resting) do the work. As the dough sits, enzymes naturally break down starches, and gluten forms on its own. The result? A tender, airy crumb without the bicep workout.
The Role of Hydration
No-knead dough is typically wetter (around 75-80% hydration) than traditional dough. This high moisture content keeps the dough slack, allowing gases to expand slowly, creating those coveted irregular holes. The wetter dough also contributes to a crispier crust because excess moisture evaporates during baking, leaving behind a crackly exterior.
Long Fermentation = Big Flavor
A slow rise (especially if refrigerated overnight) lets yeast and bacteria produce more complex flavors. Lactic acid bacteria create a slight tang, while extended fermentation breaks down sugars, reducing bitterness. That’s why no-knead bread often tastes more nuanced than quick-rise loaves.
Steam for the Perfect Crust
No-knead bread benefits from a steamy oven environment in the first few minutes of baking. Steam delays crust formation, letting the loaf expand fully before hardening. If using a Dutch oven, the trapped moisture mimics a professional bakery’s steam injection. No Dutch oven? Place a pan of boiling water on the oven’s lower rack.
Pro Tip: For extra depth, try a 24-hour cold ferment—your patience will be rewarded with deeper flavor and improved texture.
Cheese & Heat – The Perfect Flavor Pairing
What makes cheddar and jalapeño such a legendary duo in this bread? It’s all about balance. The richness of cheese tempers the heat of peppers, while the peppers cut through the fat, creating a harmonious bite. Let’s break it down:
The Cheese Factor
-
Aged cheddar brings umami and a sharp tang, thanks to tyrosine crystals (those crunchy bits in well-aged cheese).
-
Melting properties: Cheddar’s moderate moisture content ensures gooey pockets without making the bread soggy.
-
Fat = Flavor: Cheese’s fat coats the palate, carrying spicy jalapeño notes for a longer finish.
Cheese Swap Ideas:
-
Pepper Jack – For extra kick.
-
Smoked Gouda – Adds a campfire depth.
-
Gruyère – Nutty and luxurious.
Jalapeño Science
-
Capsaicin is the compound responsible for heat. Removing seeds and membranes reduces spiciness, but leaving them in amps it up.
-
Pickled vs. Fresh: Pickled jalapeños add vinegar brightness, while fresh ones give grassy, vegetal notes.
-
Roasting mellows heat and adds sweetness—try charring them over a flame before chopping.
Heat Hack: For controlled spice distribution, toss jalapeños in a bit of flour before mixing—this prevents them from sinking to the bottom.
The Honey Butter Finish
A post-bake brush of honey butter isn’t just for shine—it’s a flavor amplifier. The sweetness contrasts the heat, while butter’s fat rounds out the sharpness. For a next-level twist, infuse the butter with roasted garlic or chili flakes.
Troubleshooting Your No-Knead Loaf
Even the simplest recipes can go awry. Here’s how to fix (or avoid) common pitfalls:
Problem: Dense, Gummy Texture
-
Cause: Over-measuring flour or cutting too soon.
-
Fix: Weigh flour (420g for this recipe) or fluff it before spooning into a measuring cup. Let bread cool completely before slicing—steam needs time to escape.
Problem: Pale, Soft Crust
-
Cause: Lack of steam or underbaking.
-
Fix: Bake 5-10 minutes longer, or use a Dutch oven. Spritzing the loaf with water pre-bake helps, too.
Problem: Cheese Leaks & Burns
-
Cause: Too much cheese near the edges.
-
Fix: Fold cheese into the dough’s center, not the sides. Lining the pan with parchment prevents sticking.
Problem: Weak Rise
-
Cause: Dead yeast or cold kitchen.
-
Fix: Test yeast in warm water with honey—if it doesn’t foam, replace it. For cold kitchens, let dough rise in a turned-off oven with the light on.
Problem: Jalapeño Overload
-
Cause: Uneven distribution or too many seeds.
-
Fix: Mix peppers thoroughly, or roast them first to tame heat.
Pro Tip: Keep a baking journal—note adjustments (e.g., “added 1 extra Tbsp water” or “used smoked cheddar”) to perfect your next batch.
Make It Your Own: 5 Flavor Adventures
- Southwest Fiesta: Swap jalapeños for roasted poblanos + add ½ cup corn + ¼ cup chopped cilantro.
- Everything Bagel Twist: Skip jalapeños. Fold in 2 Tbsp everything bagel seasoning + top loaf with extra before baking.
- Bacon Bliss: Add 1 cup cooked, crumbled bacon to dry ingredients (because bacon makes everything better).
- Vegan Vibes: Use vegan cheddar, flax egg (1 Tbsp ground flax + 3 Tbsp water), and plant-based butter.
- Italian Stallion: Replace cheddar with mozzarella + parmesan. Add 2 tsp dried oregano and sun-dried tomatoes (oil-packed, drained).
Beau’s Bread Confessions
This recipe evolved from my “lazy Sunday” experiments. Version 1.0 had zero egg (dense as a brick) and raw jalapeños that sometimes overpowered. Lesson learned: roast your peppers if you want mellow heat! One time, I forgot salt entirely—my friends still tease me about “flavorless wonderbread.” Now I triple-check! Over the years, I’ve learned: the messier the dough, the better the loaf. If it looks like a sticky alien blob after mixing, you’re winning. Also, BISCUIT still tries to steal jalapeños. Some things never change.
Your Bread Queries, Solved!
Q: Can I refrigerate the dough overnight?
A: Absolutely! After step 3, cover the bowl tightly and refrigerate. Next day, let dough sit at room temp 30 mins before step 4. Overnight cold ferment = deeper flavor!
Q: Why is my loaf dense/gummy?
A: Three common culprits: 1) Over-measuring flour (spoon flour into cup, don’t scoop!). 2) Cutting too soon—let it cool! 3) Old yeast. Test yeast in warm water with a pinch of sugar—if it doesn’t foam after 10 mins, replace it.
Q: Can I use a Dutch oven instead?
A: For artisan crust, yes! Skip the loaf pan. After step 4, bake covered in preheated Dutch oven at 450°F for 30 mins, then uncovered 15 mins. Adjust cheese slightly (it can scorch at high heat).
Q: How do I store leftovers?
A: Room temp in a bread bag for 2 days. Freeze slices in ziplocks for 2 months—toast straight from frozen! Avoid refrigeration (it dries bread out).

No-Knead Cheddar-Jalapeño Loaf
- Total Time: 45 minutes
Description
What happens when bold cheddar, kicky jalapeños, and a buttery, crusty loaf come together—without kneading? You get the ultimate comfort bread that’s as easy to make as it is addictive to eat. Whether you’re feeding a crowd, leveling up soup night, or just chasing cozy kitchen vibes, this loaf delivers molten cheese magic and zesty charm with minimal effort.
Ingredients
-
3½ cups all-purpose flour
-
2¼ tsp instant yeast (1 packet)
-
½ tsp kosher salt
-
2 cups sharp cheddar, shredded
-
1–2 jalapeños, chopped
-
1 cup warm water (105–110°F)
-
3 Tbsp honey
-
4 Tbsp salted butter, melted
-
1 large egg
Optional Honey Butter:
-
6 Tbsp butter + 3 Tbsp honey + flaky salt
Instructions
-
Mix Dry: In a large bowl, whisk flour, yeast, salt, cheddar, and jalapeños (toss jalapeños and cheese in flour first!).
-
Whisk Wet: In another bowl, whisk warm water, honey, melted butter, and egg.
-
Combine & Rest: Stir wet into dry until shaggy. Cover, let rise 1 hr in warm spot.
-
Shape & Proof: Scrape into greased 9×5” loaf pan. Let rise again 30–45 mins.
-
Bake: Preheat oven to 375°F (190°C). Bake 25–30 mins until golden and hollow-sounding. Tent with foil if browning too fast.
-
Cool & Finish: Cool 10 mins in pan, then on rack. Brush with honey butter, sprinkle with flaky salt. Rest 20 mins before slicing.
Notes
-
Try smoked gouda, pepper jack, or add cooked bacon for variation.
-
For artisan crust, bake in a Dutch oven at 450°F (covered 30 mins, uncovered 15).
-
Let dough rest overnight in the fridge for extra flavor depth.
- Prep Time: 15 min
- Cook Time: 30 min
Nutrition
- Calories: 260Cal Per Slice, ~12 slices
- Sugar: 5g
- Fat: 12g
- Protein: 7g
Nutritional Breakdown (Per Slice, 12 Slices)
Calories: ~260 | Carbs: 28g | Fat: 12g | Protein: 7g | Sugar: 5g
Note: Values are estimates. Honey butter adds ~50 cal/tbsp.
Prep: 15 min | Rise: ~1.5 hrs | Bake: 30 min | Total: ~2 hrs 15 min
Final Thoughts: Why This Bread Will Steal Your Heart (And Your Dinner Table)
This No-Knead Cheddar-Jalapeño Loaf isn’t just bread—it’s a celebration of contrasts: crispy yet tender, spicy yet sweet, indulgent yet effortless. It’s forgiving enough for beginners but versatile enough to inspire seasoned bakers. Whether you’re serving it at game night, gifting it to a neighbor, or devouring it straight from the pan (no judgment), this loaf proves that the best recipes aren’t about complexity—they’re about joy.
So preheat that oven, embrace the sticky dough, and let the aroma of melting cheese and baking bread work its magic. Because sometimes, the simplest things—like a slice of warm, spicy, cheesy bread—are the ones that stay with us longest.
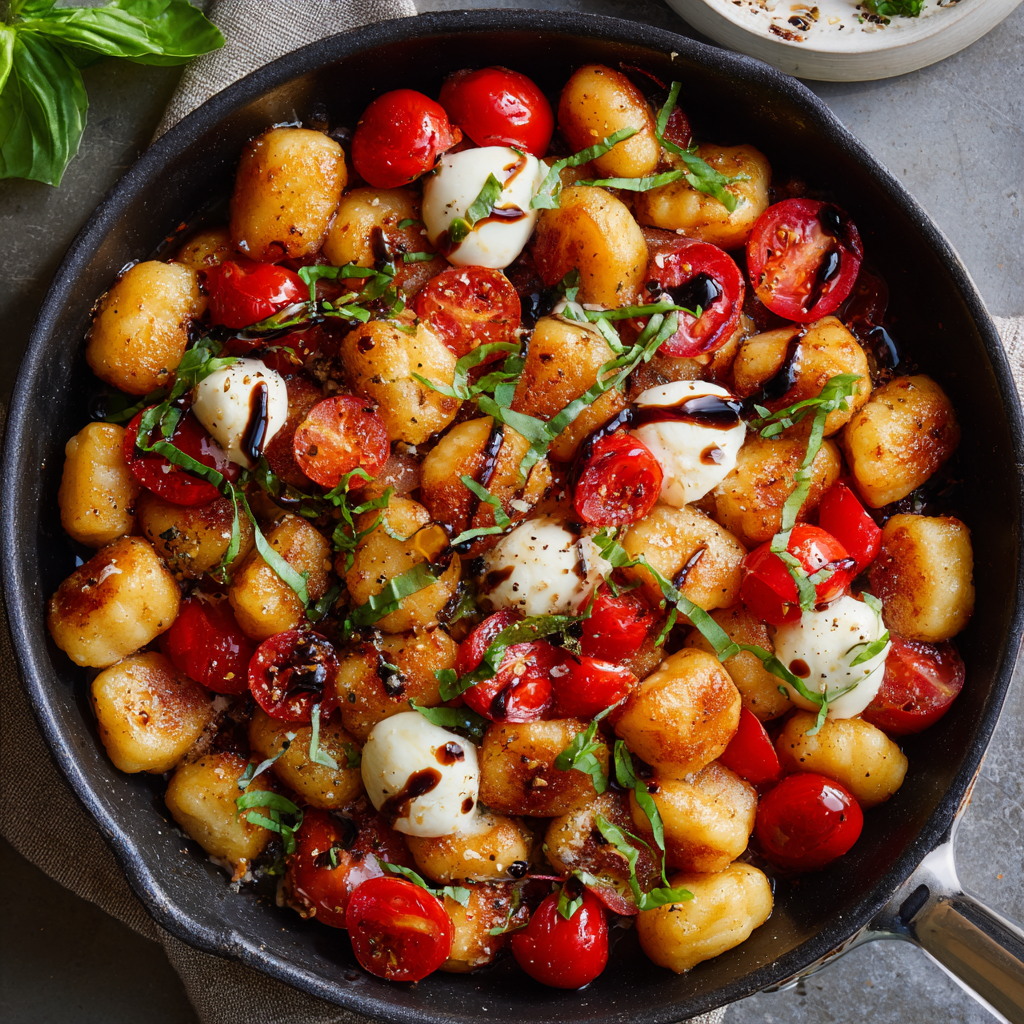
Crispy Gnocchi Caprese
When Crispy Gnocchi Meets Caprese Magic: Your New 20-Minute Obsession
Hey foodie friend! Beau here from Feastical, and I’ve got a confession: sometimes I stand in front of my pantry at 5:30 PM with absolutely zero dinner inspiration. Sound familiar? That’s exactly how this Crispy Gnocchi Caprese was born – when my love for Italian flavors collided with my desperate need for something speedy, satisfying, and soul-warming. Picture this: golden, pillowy gnocchi with crackly edges, juicy burst tomatoes, creamy mozzarella pearls, and that iconic fresh basil kiss. It’s like your favorite Caprese salad decided to put on cozy pants and cuddle up with carbs!
What makes this dish an absolute weeknight rockstar? First, we’re talking under 30 minutes from fridge to fork – no boiling water, no fancy techniques. Second, that magical textural contrast: crispy gnocchi against molten cheese and jammy tomatoes is pure happiness. Third? It’s endlessly adaptable (more on that later!). Whether you’re feeding hangry teens, impressing a date, or treating yourself after a long day, this skillet wonder delivers. So grab your trustiest non-stick pan – let’s turn simple ingredients into something extraordinary together!
The Little Gnocchi That Could: A Tuscan “Aha!” Moment
This recipe actually started as a happy accident during my backpacking days in Tuscany. I was volunteering on an organic farm, and one stormy evening, the nonna I worked for realized she’d forgotten to buy pasta for dinner. With hungry farmers incoming, she grabbed shelf-stable gnocchi from the pantry, sizzled them in olive oil until golden (instead of boiling!), and tossed them with sun-warmed cherry tomatoes from the garden. When she ripped fresh basil over the top, I swear I heard angels sing.
That humble pan taught me two life-changing lessons: 1) Crispy gnocchi are a GAME CHANGER, and 2) The best recipes often come from improvisation. Now, every time I make this, I’m back in that rustic kitchen – rain pounding on the terracotta roof, the smell of garlic and tomatoes filling the air, and that first bite of crispy-chewy bliss. It’s proof that sometimes the most unforgettable meals aren’t fancy… just full of heart (and maybe a little olive oil).
Your Flavor Toolkit: Simple Ingredients, Big Impact
- 1 lb shelf-stable or refrigerated gnocchi – Shelf-stable are my pantry heroes! They crisp up beautifully. Insider tip: Avoid frozen gnocchi here – they release too much water.
- 2 Tbsp olive oil – Extra virgin for flavor! This creates our crispy foundation. Substitute: Butter works for richness, but olive oil gives better browning.
- 1 pint cherry tomatoes, halved – Their sweetness pops when heated! Chef’s hack: Use multi-colored tomatoes for visual fireworks.
- 2 garlic cloves, minced – Fresh is non-negotiable! Substitute: 1/2 tsp garlic powder in a pinch, but add it with the gnocchi.
- Salt and pepper, to taste – Season in layers! Salt the gnocchi while crisping, then again after adding tomatoes.
- 1 cup fresh mozzarella pearls or diced mozzarella – Pearls are effortless! Insider tip: Let the residual heat melt them – no rubbery cheese!
- 1/4 cup fresh basil, torn – Tear, don’t chop! Preserves those precious oils. Substitute: 1 tsp dried basil in the sauce, but fresh is ideal.
- Optional: Balsamic glaze for drizzling – My sweet-tangy secret weapon! Chef’s hack: Reduce cheap balsamic vinegar with a spoon of honey for DIY glaze.
Let’s Get Crispy: Your Foolproof Roadmap
Step 1: Crisp Those Clouds! Heat olive oil in a large non-stick skillet over medium-high heat (a 7 out of 10 on your dial). Test the heat with one gnocchi – it should sizzle immediately! Add all gnocchi in a single layer (work in batches if needed – crowding is the enemy of crispiness!). Let them sear untouched for 2-3 minutes until golden undersides form. Toss occasionally for 8-10 minutes total. Listen for the happy crackle! They’re ready when about 60% are golden and slightly puffed.
Step 2: Tomato Tango Time! Push gnocchi to the skillet’s edges. Add garlic to the center and sizzle for 15 seconds (burnt garlic is bitter – stay vigilant!). Immediately add tomatoes, stirring everything together. Cook 2-3 minutes just until tomatoes soften and release juices, but still hold their shape. Pro Tip: A pinch of sugar balances acidic tomatoes! Season generously with salt and pepper here.
Step 3: The Cheesy Grand Finale! Remove skillet from heat (crucial step!). Scatter mozzarella pearls over the top. Gently fold ONCE or twice – residual heat will soften the cheese perfectly without turning it into goo. Let it sit untouched for 1 minute. Resist stirring here for that gorgeous half-melted texture!
Step 4: Basil & Bliss! Tear fresh basil over the skillet. For extra flair, drizzle with balsamic glaze in zigzags. Final Chef Hack: A tiny sprinkle of flaky sea salt now = flavor fireworks!
Feasting in Style: Serving Up the Comfort
Presentation is effortless charm here! Serve family-style straight from the skillet (pop it on a trivet!) for that rustic “gather round” vibe. For individual plates, spoon generous portions into shallow bowls. Pairings that sing: A simple arugula salad with lemon vinaigrette cuts the richness beautifully. For wine lovers, a chilled Pinot Grigio or light Sangiovese is magic. Don’t forget crusty bread for swiping up every last bit of tomato-garlic goodness! This dish shines brightest served immediately – that crispy texture waits for no one.
The 20-Minute Meal Revolution – Why Speed Doesn’t Mean Sacrifice
In a world of meal kits and fast food, this dish proves that quick cooking doesn’t have to mean bland or processed. Here’s why it’s a game-changer for busy weeknights:
The Efficiency Breakdown
-
One-Pan Wonder – No multiple pots for boiling gnocchi and sautéing veggies. Everything happens in a single skillet, minimizing cleanup.
-
No Pre-Cooking Required – Unlike pasta dishes that require boiling water first, gnocchi go straight into the pan.
-
Pantry-Friendly – Shelf-stable gnocchi, olive oil, garlic, and dried herbs mean you can make this even when the fridge is nearly empty.
How to Keep Fast Meals Exciting
-
Prep Shortcuts – Use pre-minced garlic or pre-washed basil to save time.
-
Batch Cooking – Crisp a big batch of gnocchi ahead and store them (uncovered) in the fridge. Reheat in the pan before adding fresh toppings.
-
Adaptable Formula – The base (gnocchi + oil + garlic) works with endless variations:
-
Mediterranean – Add olives, feta, and oregano.
-
Pesto & Pine Nut – Toss with pesto and toasted nuts.
-
Truffle & Parmesan – Finish with truffle oil and shaved cheese.
-
This dish isn’t just fast—it’s a template for creativity, proving that weeknight dinners can be both speedy and spectacular.
Make It Your Own: Delicious Twists & Swaps
This recipe is your culinary playground! Try these tasty spins:
- Protein Power-Up: Add sliced cooked Italian sausage or shredded rotisserie chicken with the tomatoes.
- Veggie Delight: Toss in baby spinach or arugula with the mozzarella – it wilts gorgeously!
- Pesto Passion: Swirl in 2 Tbsp of basil pesto after removing from heat for an herbal punch.
- Dairy-Free Dream: Use vegan mozzarella (the kind that melts!) and nutritional yeast for cheesy flavor.
- Spicy Kick: Add 1/2 tsp red pepper flakes with the garlic for a warm buzz.
Beau’s Bench Notes: From My Kitchen to Yours
This recipe has evolved more than my taste in aprons! My first attempt? Let’s just say I boiled the gnocchi first (soggy disaster!) and added cold mozzarella straight from the fridge (hello, cheese lumps!). Lesson learned: embrace the crispy sear and trust residual heat! I also used to mince basil – tearing releases WAY more aromatic oils. The balsamic drizzle was a reader suggestion years ago – genius! Now it’s a staple. One funny fail: I once mistook a tube of cinnamon rolls for gnocchi in a jet-lagged haze. Don’t recommend! The beauty of this dish is its forgiving nature. Mess up the crisp level? Call it “rustic.” Basil looking sad? A sprinkle of dried oregano works. Cooking is about joy, not perfection. Now go make some delicious memories!
Your Crispy Gnocchi Questions, Answered!
Q: My gnocchi are sticking to the pan! Help!
A: Three culprits: 1) Not hot enough oil – wait for that shimmer and test sizzle! 2) Moving them too soon – let them form a crust. 3) Overcrowding – work in batches! If stuck, deglaze with a splash of broth or water after removing gnocchi.
Q: Why is my mozzarella turning rubbery instead of melty?
A: You likely stirred too much or kept it on the heat! Remove the skillet from heat first, gently fold once, then let the dish rest. Residual heat is key. Also, use FRESH mozzarella pearls/bocconcini, not low-moisture shreds.
Q: Can I make this ahead of time?
A: The gnocchi lose their crisp magic when reheated. However! You *can* crisp the gnocchi ahead (let cool, store uncovered). When ready, quickly re-crisp in the pan, then proceed with tomatoes/cheese/basil fresh.
Q: Are there gluten-free options?
A> Absolutely! Many stores sell excellent GF potato or cauliflower gnocchi (just check they’re pan-fry friendly). Ensure your balsamic glaze is GF if using.

Crispy Gnocchi Caprese
- Total Time: 20–25 min
Description
Need comfort food that’s fast, fresh, and full of Italian soul? This skillet of golden gnocchi, jammy tomatoes, melty mozzarella, and fresh basil hits all the right notes. Crispy on the outside, tender inside, it’s like Caprese salad cozied up with warm, cheesy carbs—ready in under 30 minutes and made to impress without the stress.
Ingredients
-
1 lb shelf-stable or refrigerated gnocchi
-
2 Tbsp olive oil
-
1 pint cherry tomatoes, halved
-
2 garlic cloves, minced
-
Salt & pepper, to taste
-
1 cup fresh mozzarella pearls or diced fresh mozzarella
-
1/4 cup fresh basil, torn
-
Optional: Balsamic glaze for drizzling
Instructions
-
Crisp the Gnocchi: Heat oil in a non-stick skillet over medium-high. Add gnocchi in a single layer. Cook 8–10 mins, tossing occasionally, until golden and crisp.
-
Add Tomatoes & Garlic: Push gnocchi to edges. Sauté garlic 15 secs in center, then stir in tomatoes. Cook 2–3 mins until tomatoes soften and blister slightly. Season generously.
-
Cheese Time: Remove from heat. Scatter mozzarella over top, fold gently once or twice. Let sit 1 min to melt.
-
Basil Bliss: Tear basil over the skillet. Drizzle with balsamic glaze, if using.
Notes
-
Add spinach or cooked chicken for a hearty boost.
-
Try pesto instead of balsamic for an herby variation.
-
Use vegan mozzarella for a dairy-free version.
- Prep Time: 5 min
- Cook Time: 15–20 min
Nutrition
- Calories: 410Cal Per Serving
- Sugar: 5g
- Fat: 18g
- Protein: 14g
Nutritional Snapshot (Per Serving)
Calories: ~410 | Protein: 14g | Carbs: 48g | Fat: 18g | Sugar: 5g
Note: Estimates vary based on specific ingredients/brands. Adding protein or extra oil will increase calories.
Final Thoughts: Why This Dish Deserves a Spot in Your Rotation
Crispy Gnocchi Caprese is more than just a meal—it’s a celebration of contrasts: crispy and creamy, sweet and savory, rustic and elegant. It’s proof that the best recipes often come from improvisation (like that Tuscan nonna’s quick fix) and that minimal effort can yield maximum flavor.
Whether you’re a cooking novice or a seasoned chef, this dish delivers:
-
For Beginners – It’s forgiving and teaches key techniques (searing, balancing flavors).
-
For Foodies – It’s a canvas for gourmet twists (try adding prosciutto or brown butter).
-
For Busy Households – It’s faster than takeout and infinitely more satisfying.