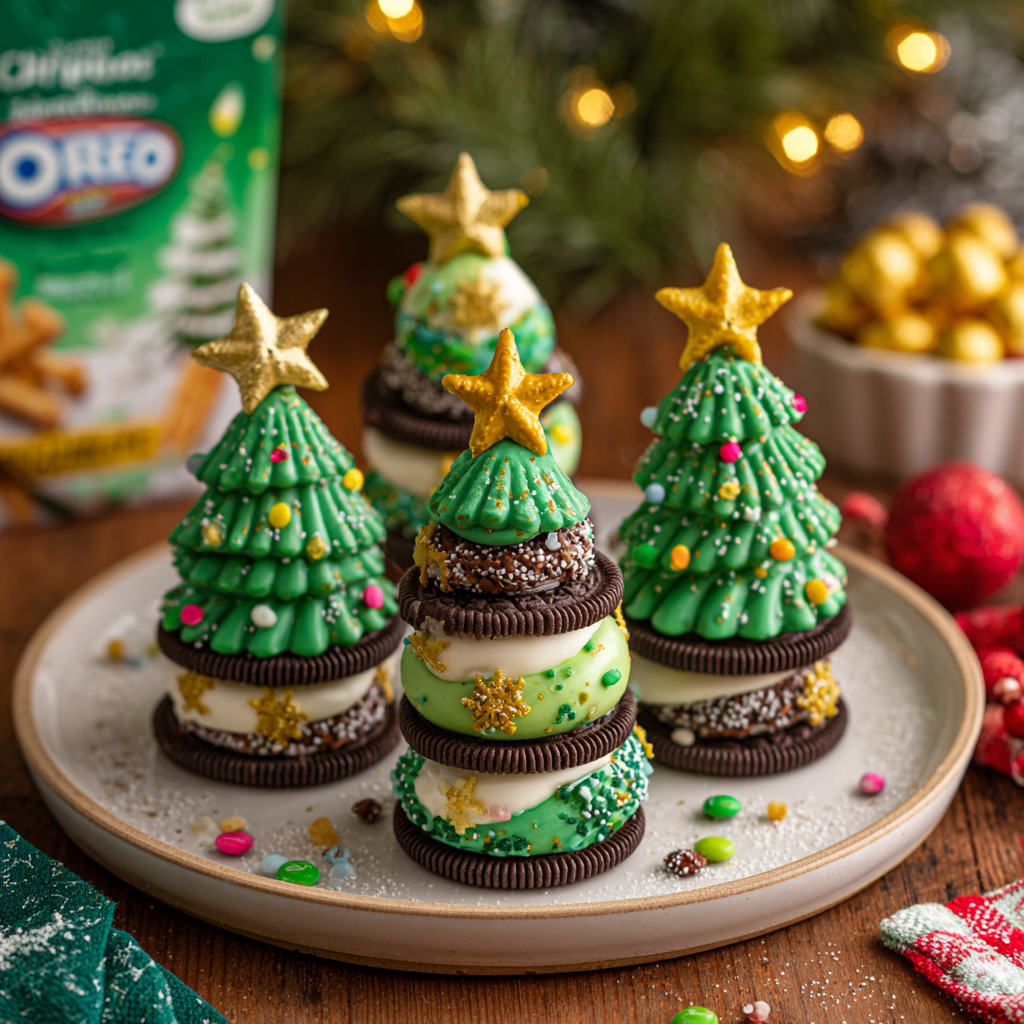
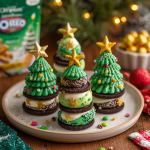
Oreo Christmas Trees
Your New Favorite Holiday Tradition: Oreo Christmas Trees!
Hey friends, Beau here! Welcome back to Feastical, your cozy corner for recipes that feel like a big, celebratory hug. Is it just me, or does the holiday season have a magical way of making even the simplest kitchen projects feel utterly joyful? The twinkle lights are going up, the classic movies are on a loop, and my brain is officially in full-on festive mode. And that can only mean one thing: it’s time for some seriously fun, no-bake holiday treats!
Today, we’re whipping up something that’s equal parts adorable and delicious: Oreo Christmas Trees. Imagine this: stacks of everyone’s favorite cookies, transformed into tiny, edible evergreens, dripping with sweet icing and decked out with colorful candy ornaments. They’re the perfect project to tackle with your family, a gorgeous addition to any cookie platter, and honestly, they’re just pure, unadulterated fun. The best part? You don’t need to be a pastry chef to pull these off. If you can stack cookies and get a little messy with sprinkles, you are already a master Christmas tree architect. So, put on your favorite holiday playlist, clear a little counter space, and let’s make some magic together!
A Sweet, Stacked Memory
This recipe takes me right back to my grandma’s kitchen table, which during December, was less of a dining surface and more of a festive command center. She’d have tins of cookies, trays of fudge, and us kids, armed with more sprinkles than common sense. One particularly chaotic (and wonderful) year, we were out of gingerbread but had a huge surplus of Oreos from a sale. A little experimentation later, and our first wobbly, over-decorated Oreo tree was born.
It was lopsided, the green icing was a questionable shade, and I’m pretty more sprinkles ended up on the floor than on the cookie. But when we placed it in the center of the table, we all just beamed with pride. We’d made something together, something silly and sweet that made everyone who saw it smile. That’s the spirit I want to bring to your kitchen with this recipe. It’s not about perfection; it’s about the laughter, the little fingers eagerly placing candy ornaments, and the shared joy of creating something wonderfully festive. These trees are more than a treat; they’re a tiny, edible memory in the making.
Gathering Your Evergreen Supplies
This is the fun part—the gathering! Here’s your simple shopping list to create a forest of sweet trees. Don’t stress about exact brands; this is all about creativity!
- 1 pack Oreo cookies: The mighty trunk of our tree! Classic original is perfect, but feel free to get festive—peppermint Oreos or even the golden ones would be a delicious twist.
- 250g white or green candy melts: This is our “snow” or “pine” coating. I love candy melts for this because they set firm and are designed for dipping. Chef’s Hack: No melts? No problem! Use high-quality white chocolate chips and mix in a drop or two of green gel food coloring. Gel is key—it won’t water down your chocolate!
- Assorted holiday sprinkles: This is where your personality shines! Think stars, pearls, snowflakes, red and green sanding sugars—the works! This is your ornament box.
- Mini M&Ms or candy dots: These act as our main “ornaments” on the tree. Their small, flat-bottomed shape is perfect for sticking to the icing.
- Piping bag or zip-top bag: Our tool for creating that perfect, drippy tree shape. A zip-top bag with a tiny corner snipped off works like a charm.
- Optional: Lollipop sticks or pretzel rods: If you want to turn your trees into pops for easy serving and fun lunchbox treats!
- Optional: Powdered sugar: For a light dusting of “snow” at the very end. It adds a beautiful finishing touch.
Building Your Edible Forest: Step-by-Step
Alright, team! Let’s get building. I’ll walk you through each step with all my best tips to ensure your trees are sturdy, sweet, and stunning.
- Melt Your Coating: Place your candy melts or white chocolate in a microwave-safe bowl. Heat in 20-second intervals on medium power, stirring vigorously between each burst. This is crucial! We want it smooth and fluid, not scorched. It usually takes about 60-90 seconds total. When it’s almost melted, just keep stirring—the residual heat will finish the job. Pro Tip: If your coating seems too thick for dipping, add a tiny, tiny amount of coconut oil or vegetable shortening (think ¼ tsp at a time) to thin it out to a perfect dipping consistency.
- Stack Your Tree Trunks: For each tree, you’ll need 3 Oreo cookies. Take your first Oreo and place a small dab of the melted coating in the center. Press your second Oreo on top, but offset it slightly so it’s not perfectly aligned. This creates that awesome tapered, tree-like shape! Repeat with a third Oreo, offsetting it again in the same direction. Hold it for a few seconds to let the “glue” set slightly. You’ve just built your core structure!
- The Icing Magic: Now, for the fun, messy part! You have two options here. You can carefully spoon the coating over the stacked cookies, letting it drip down the sides. Or, for more control, pour your melted coating into your piping or zip-top bag, snip a small hole in the tip, and drizzle it over the tree. Cover the entire stack, encouraging it to drip naturally for that beautiful, snowy evergreen look. Don’t worry about perfection—the drips are what make it charming!
- Deck the Halls (and the Trees!): This is a race against the clock, but a delicious one! Working quickly before the coating sets, decorate your tree. Press on your Mini M&M “ornaments,” add sprinkle “lights,” and most importantly, crown your creation with a star or large sprinkle at the very top. Let those kids go wild here—it’s their time to shine!
- The Big Chill: Gently place your finished masterpieces on a baking sheet lined with parchment paper. Let them set completely at room temperature, which takes about 15-20 minutes, or pop them in the fridge for a quicker set (about 10 minutes). This is the hardest part—waiting!
- Optional Finishing Touches: For a pop-able treat, you can carefully insert a lollipop stick or a pretzel rod into the base of the tree before the coating fully hardens. Just before serving, a light dusting of powdered sugar through a fine-mesh sieve creates a gorgeous, wintry snowfall effect.
How to Serve Your Sweet Conifers
Presentation is part of the fun with these guys! They are natural showstoppers. For a holiday party, arrange them on a platter as a centerpiece—maybe surround them with a few sprigs of fresh rosemary to look like little Christmas tree farm. They’re also perfect as individual place settings at a kids’ table; just pop one at each plate for an instant smile.
Thinking about holiday gifts? These make incredibly thoughtful and personal edible presents. Place each tree in a clear cellophane bag, tie it with a beautiful ribbon, and pair it with a mug for hot cocoa. It’s a gift that says, “I made this just for you,” and honestly, that’s the best kind of gift there is.
Branch Out: Fun Recipe Variations
Once you’ve mastered the classic, the forest is your oyster! Here are a few ways to mix it up:
- The Chocolate Forest: Use chocolate candy melts instead of white or green. Decorate with white nonpareils and red candy balls for a classic chocolate-orange color scheme.
- Peppermint Wonderland: Use peppermint Oreos and white candy melts. Crush up candy canes and use the碎片 as your main decoration for a refreshing, crunchy twist.
- Gingerbread Spice: Add a pinch of cinnamon, ginger, and nutmeg to your melted white chocolate coating before dipping. It’ll taste just like a gingerbread house!
- Vegan & Allergy-Friendly: Use gluten-free Oreo-style cookies and dairy-free/vegan white chocolate. Most sprinkles are naturally vegan, but always double-check the labels!
- Black Forest Tree: Use chocolate coating and decorate with dried cherry pieces and slivered almonds for a sophisticated, grown-up flavor profile.
Beau’s Chef Notes
This recipe has evolved so much since that first lopsided tree in grandma’s kitchen. We’ve learned that a tiny offset in the stacking makes all the difference and that gel food coloring is a game-changer. One of my favorite kitchen fails was the year I tried to use liquid green food coloring in white chocolate. It seized up immediately and turned into a grainy, green mess. We laughed so hard we cried, and then we ate the evidence with spoons. The moral of the story? Embrace the mess and the mistakes—they often taste just as good and make for the best stories later. This recipe is meant to be played with, so make it your own!
FAQs & Troubleshooting
Q: My coating is too thick and clumpy! What did I do wrong?
A: This is usually caused by overheating or getting even a single drop of water in the melts. Water is the enemy of melted chocolate! If it seizes, unfortunately, you can’t un-seize it. Start over slowly. If it’s just a little thick, try stirring in that tiny bit of coconut oil to smooth it out.
Q: My trees are wobbly and falling over. Help!
A: This likely means your “glue” (the dab of coating between layers) wasn’t enough or didn’t have a chance to set before you moved on. Make sure you’re using enough melted coating to act as a cement, and hold each new layer for a good 10-15 seconds before adding the next. Letting the fully assembled and decorated trees set on a flat surface in the fridge is your best bet for stability.
Q: Can I make these ahead of time?
A: Absolutely! They keep beautifully. Once set, store them in a single layer in an airtight container at room temperature for up to 3 days. If you stack them, they might stick together or break. I’d wait to add the powdered sugar “snow” until right before you serve them.
Q: My sprinkles are sliding off. How do I make them stick?
A: You have to work quickly! The coating sets fast. Make sure you’re adding your decorations immediately after applying the icing, while it’s still wet and tacky. If it starts to set, nothing will stick.
Oreo Christmas Trees
Description
Oreo Christmas Trees
No-bake, festive, and oh-so-fun! Perfect for family activities, holiday parties, or edible gifts.
Ingredients
-
1 pack Oreo cookies (classic, peppermint, or golden)
-
250 g white or green candy melts (or white chocolate + 1–2 drops green gel food coloring)
-
Assorted holiday sprinkles (stars, pearls, sanding sugars, snowflakes)
-
Mini M&Ms or candy dots (for ornaments)
-
Piping bag or zip-top bag (for drizzling the coating)
-
Optional: lollipop sticks or pretzel rods (for pop-style trees)
-
Optional: powdered sugar (for a snowy dusting)
Optional Variations:
-
Chocolate Forest: Chocolate candy melts + white nonpareils and red candy balls
-
Peppermint Wonderland: Peppermint Oreos + crushed candy canes
-
Gingerbread Spice: Add cinnamon, ginger, and nutmeg to white chocolate
-
Vegan/Allergy-Friendly: Gluten-free Oreos + dairy-free candy melts; check sprinkles for vegan compliance
-
Black Forest Tree: Chocolate coating + dried cherries and slivered almonds
Instructions
1. Melt Your Coating
-
Place candy melts or white chocolate in a microwave-safe bowl.
-
Heat in 20-second intervals, stirring between each, until smooth.
-
Tip: Add ¼ tsp coconut oil if too thick. Avoid overheating; water or steam can seize chocolate.
2. Stack Your Tree Trunks
-
Each tree uses 3 Oreo cookies.
-
Place a dab of melted coating on the first Oreo.
-
Stack the second Oreo slightly offset and press gently. Repeat with the third Oreo.
-
Hold for 10–15 seconds to let the “glue” set.
3. Coat the Tree
-
Spoon or drizzle melted coating over the stacked Oreos.
-
Allow it to drip naturally for a snowy evergreen effect.
4. Decorate Quickly
-
While coating is still wet, press Mini M&Ms, candy dots, and sprinkles onto the tree.
-
Top with a star or large sprinkle.
-
Optional: Insert a lollipop stick or pretzel rod for pops.
5. Let Set
-
Place trees on parchment-lined tray.
-
Room temperature: 15–20 minutes
-
Refrigerator: ~10 minutes for faster setting
6. Optional Finishing Touches
-
Dust with powdered sugar for a light snowfall effect just before serving.
Notes
-
Coating too thick or clumpy: Overheating or water contact may be the cause. Stir in a tiny bit of coconut oil to smooth.
-
Wobbly trees: Ensure enough coating “glue” between layers; hold each layer for 10–15 seconds before adding the next.
-
Sprinkles not sticking: Add decorations immediately after drizzling, while the coating is still tacky.
Quick Nutritional Info
Let’s be real—these are a celebratory treat! But here’s a general breakdown per tree (assuming a yield of 10 trees):
- Calories: ~180 kcal
- Fat: 8g
- Carbohydrates: 24g
- Protein: 2g
Allergy Info: The standard recipe contains gluten (from Oreos), dairy (from coating and Oreo cream), and may contain soy. As mentioned above, you can easily find gluten-free cookies and dairy-free/soy-free chocolate to make allergy-friendly versions for everyone to enjoy!
Final Thoughts
Well, that’s it, my friends! Your guide to creating the most delightful, conversation-starting, and downright tasty holiday treat on the block. I hope this recipe brings a little bit of Feastical joy and a whole lot of laughter into your kitchen this season. Remember, it’s not about creating a perfect, magazine-ready tree. It’s about the flour on your nose, the sprinkles on the floor, and the proud smile when you present your edible forest to the people you love.
If you make these (and I really hope you do!), I’d be absolutely thrilled to see your creations. Tag me @feastical on social media so I can share in your holiday baking fun. From my kitchen to yours, happy holidays and happy baking!
With love and a full plate,
Beau

No-Bake Snowman Oreo Pops (Vegan Edition)
No-Bake Snowman Oreo Pops (Vegan Edition): Your New Favorite Holiday Project!
Hey friends, Beau here from Feastical! Is there anything better than that feeling when December rolls around? The air gets crisp, the lights go up, and suddenly, all I want to do is spend my time in a cloud of powdered sugar and holiday cheer. But let’s be real—between gift shopping, party planning, and trying to remember where you stored the good wrapping paper, the last thing you need is a complicated, fussy recipe that dirties every bowl you own. Am I right?
That’s exactly why I’m so crazy about these unbelievably cute No-Bake Snowman Oreo Pops. We’re talking about charming, chocolatey, and downright adorable treats that are bursting with holiday spirit. They’re made with simple ingredients, require zero oven time, and are completely vegan-friendly! Whether you’re hosting a festive cookie swap, looking for a super fun activity to do with the kids (or your inner child!), or need the perfect edible gift that will absolutely wow everyone, these little snowman pals are your answer. They’re simple, soulful, and so satisfying to create. So, grab your favorite mug of cocoa, put on some holiday tunes, and let’s make some magic together!
A Snowy Kitchen Memory
This recipe takes me right back to one specific, snowed-in afternoon when my niece and nephew were visiting. The forecast predicted a monster storm, and we were prepared with enough groceries to hibernate for a week. When the snow started falling, we did what any sensible person would do: we turned the kitchen into a winter wonderland workshop. We had sprinkles everywhere, melted chocolate in various bowls, and more laughter than I thought possible.
We were attempting a complicated gingerbread house that, let’s just say, had some structural integrity issues. Frustration was starting to creep in. Then, I remembered a version of these Oreo pops I’d seen. We scrapped the blueprint, grabbed the Oreos and some vegan chocolate we had, and started creating these silly, happy snowmen. It was an instant game-changer. There were no rules, just creativity. My nephew gave one snowman a big, frowny chocolate face “because he’s cold,” and my niece made one with a crooked hat. They weren’t perfect, and that was the whole point. They were ours. That’s the real magic of these pops—it’s less about precision and all about the joy of making something together. Every time I make them now, I smile thinking of that chaotic, perfect, snowy day.
Gathering Your Snow Squad: The Ingredients
Here’s the beautiful part: the ingredient list is short, sweet, and probably has a lot of items you can already find in your pantry. This recipe makes about 12 cheerful snowmen, perfect for a platter or a round of gifting!
- 4 packs of Oreo cookies: Regular or Double-Stuff both work great! I often grab the Double-Stuff because the extra cream filling makes the cookie a bit sturdier for inserting the stick and gives a delicious creamy center. And yes, standard Oreos are accidentally vegan—how cool is that?
- 500g dairy-free white chocolate melting wafers or bars: This is your snowman’s body! I highly recommend using melting wafers (like King David or CandyMelts brand vegan options) over chocolate bars. They’re specifically formulated to melt smoothly, set firmly, and hold their shape, which is key for dipping. If you use a bar, just add a teaspoon of coconut oil to help it melt smoothly.
- 40g dairy-free dark chocolate, melted: This is for drawing on those cute little faces and buttons. You can melt this and put it in a small piping bag or just use a toothpick for detailing.
- 12 pretzel sticks, broken in half: These become the adorable little arms. Any thin pretzel stick will do! Break them gently to get 24 little arm pieces.
- 12 vegan mini peanut butter cups (like Doisy & Dam or Justin’s): The perfect top hat for our frosty friend! If you can’t find vegan PB cups, a small chocolate-covered peppermint patty or even a melted chocolate button would work.
- Orange food gel or an orange sprinkle/candy: The classic carrot nose! A tiny dab of orange gel is easiest, but if you have an orange jellybean or a piece of candy, you can totally shape it into a tiny nose.
- 12 lollipop sticks or sturdy paper straws: The backbone of your pop! You can find lollipop sticks at any craft store or online. Paper straws add a really cute, rustic touch if you’re going for a certain vibe.
Let’s Build a Snowman! Step-by-Step Instructions
Alright, team! Let’s get our hands dirty (or, more accurately, delightfully chocolatey). Follow these steps, and you’ll have a squad of snowmen in no time.
Step 1: The Foundation. First, carefully insert a lollipop stick into the cream filling of an Oreo. Gently twist the stick back and forth as you push it in about halfway. Chef’s Hack: If you’re worried about the cookie cracking, you can microwave the Oreo for just 3-4 seconds to very slightly soften the cream. This makes it much more pliable and forgiving! Repeat this with all your cookies and lay them on a tray.
Step 2: Melt the “Snow”. Next, we melt our dairy-free white chocolate. This is a crucial step! The best method is a double boiler. Simply place a heatproof bowl over a pot of simmering water (make sure the bottom of the bowl isn’t touching the water) and stir the wafers until they’re smooth and creamy. No double boiler? No problem! You can use the microwave. Heat the chocolate in a microwave-safe bowl in 20-second bursts, stirring vigorously between each burst. Chef’s Warning: Do NOT overheat it! White chocolate is delicate and can seize up (become clumpy) if it gets too hot. We want it smooth and dippable.
Step 3: The Big Dip. Now for the fun part! Hold an Oreo pop by the stick and dunk it completely into the melted white chocolate. Use a spoon to help coat it evenly on all sides. Gently tap the stick on the side of the bowl to let any excess chocolate drip off. This prevents a big puddle of chocolate from forming around your snowman’s base (we call that a “skirt,” and while it’s tasty, it’s not the look we’re going for!). Place the dipped pop onto a baking sheet lined with parchment paper.
Step 4: Accessorize Before He Freezes! You have to work relatively quickly here before the chocolate sets. This is where you become an artist!
- Immediately place a mini peanut butter cup on the top of the pop for the hat. Gently press it down so it adheres.
- Press two pretzel stick halves into the sides for the arms.
- Using your melted dark chocolate (a toothpick or a piping bag with a tiny tip is perfect for this), carefully dot on two eyes, a sweet little smile, and a few buttons down the front.
- Finally, add a tiny dot of orange gel or your orange candy for the nose.
Step 5: The Chill Out. Once all your snowmen are dressed to impress, let them set completely. You can leave them at room temperature if your kitchen isn’t too warm, or you can pop the entire tray into the refrigerator for about 15-20 minutes to speed things up. The chocolate will become firm to the touch.
How to Serve Your Frosty Friends
Presentation is part of the fun! You can stick these pops upright in a vase filled with sugar or granulated white chocolate to look like snow, and they make an incredible centerpiece for your holiday table. For a party, simply lay them flat on a beautiful platter lined with parchment paper. If you’re feeling extra, sprinkle a little powdered sugar “snow” over the whole tray right before serving.
And they make the most thoughtful edible gifts! Once they’re completely set, you can wrap each pop individually in clear cellophane treat bags, tie them with a festive ribbon or baker’s twine, and voilà—you have a homemade gift that’s guaranteed to delight friends, neighbors, teachers, or your mail carrier!
Mix It Up! Recipe Variations
One of the best things about this recipe is how customizable it is. Don’t be afraid to get creative and make these snowmen your own!
- Peppermint Sparkle: Roll the edges of the white chocolate-dipped Oreo in finely crushed candy canes or peppermints before it sets. It adds a beautiful sparkle and a classic holiday flavor.
- Coconut Snow Drifts: For a textured, snowy look, roll the pops in shredded coconut immediately after dipping. It gives them a wonderfully fuzzy, frosty appearance.
- The Dapper Snowman: Give your snowman a scarf! Cut thin strips of vegan fruit leather (like a strawberry or apple fruit roll-up) and gently wrap it around the “neck” of the pop before the chocolate fully hardens.
- Gluten-Free Frosty: Use gluten-free Oreos (or another gluten-free sandwich cookie) and ensure your pretzels and other ingredients are certified gluten-free. Easy swap!
- Different Hats: Not a peanut butter fan? Use a vegan chocolate mint, a strawberry cream vegan candy, or even a small round cookie for a different style of hat.
Beau’s Chef Notes & Kitchen Stories
I’ve made these pops more times than I can count, and they’ve evolved a bit over the years. The first batch I ever made… well, let’s just say the snowmen looked like they’d been in a blizzard. The chocolate was too thick, the faces were lopsided, and one pop’s hat fell off right after I took a picture. But you know what? Everyone still devoured them and raved about how fun they were.
The moral of the story is: don’t strive for perfection. Embrace the quirks! A slightly crooked smile gives your snowman personality. If the arms break, he’s just waving. The goal is to have fun and create something delicious. The more you make them, the more you’ll develop your own little tricks and style. Now, I can assemble them with a podcast playing in the background—it’s my happy place.
FAQs & Troubleshooting
Q: My white chocolate is thick and clumpy! What did I do wrong?
A: Ah, the dreaded seized chocolate! This usually means it got a little too hot or a tiny drop of water got into it. To fix it, try adding a teaspoon of coconut oil or vegetable shortening and stir vigorously. If that doesn’t work, sadly, it’s best to start with a new bowl of chocolate. Remember: low and slow when melting!
Q: My Oreo keeps cracking when I put the stick in. Help!
A: No worries! This is common. Try the quick microwave trick—just 3-4 seconds to soften the cream filling makes a world of difference. You can also try using a skewer to poke a pilot hole first before inserting the wider lollipop stick.
Q: Can I make these ahead of time?
A: Absolutely! Once set, these pops store beautifully. Keep them in a single layer in an airtight container in the refrigerator for up to 5 days. They’re also great for freezing! Freeze them solid on the tray first, then transfer to a freezer bag for up to a month. Thaw in the fridge overnight.
Q: I can’t find vegan white chocolate wafers. What can I use?
A: A good bar of vegan white chocolate (like Pascha or Happi) mixed with a teaspoon of coconut oil will work in a pinch. The texture might be a bit softer, so be extra gentle when handling them.

No-Bake Snowman Oreo Pops (Vegan Edition)
Description
No-Bake Snowman Oreo Pops (Vegan Edition)
Adorable, chocolatey, and completely vegan—perfect for holiday gifts, parties, or a festive kitchen activity!
Ingredients
-
4 packs of Oreo cookies (regular or Double-Stuff; naturally vegan)
-
500 g dairy-free white chocolate melting wafers or bars (e.g., King David or CandyMelts)
-
40 g dairy-free dark chocolate, melted (for eyes, buttons, and smiles)
-
12 pretzel sticks, broken in half (for arms)
-
12 vegan mini peanut butter cups (or chocolate mint buttons, small cookies, etc. for hats)
-
Orange food gel or small orange candy (for the nose)
-
12 lollipop sticks or sturdy paper straws
Optional Variations:
-
Peppermint Sparkle: Roll edges in crushed candy canes before chocolate sets
-
Coconut Snow Drifts: Roll pops in shredded coconut for a frosty texture
-
Dapper Snowman: Add a scarf using thin strips of vegan fruit leather
-
Gluten-Free: Use gluten-free Oreos and certified gluten-free pretzels
-
Hat swaps: Chocolate mint, small cookie, or candy as an alternative to PB cups
Instructions
1. Prepare the Oreo Base
-
Carefully insert a lollipop stick halfway into the cream filling of each Oreo.
-
Tip: Microwave the Oreos 3–4 seconds to soften the cream if cracking occurs.
2. Melt the White Chocolate
-
Use a double boiler or microwave in 20-second bursts, stirring frequently.
-
Add 1 tsp coconut oil if using a bar to ensure smooth, dippable chocolate.
-
Avoid overheating; white chocolate seizes easily.
3. Dip the Oreos
-
Hold an Oreo by the stick and dip completely into melted white chocolate.
-
Use a spoon to coat evenly and tap off excess chocolate.
-
Place on a parchment-lined baking sheet.
4. Decorate Your Snowmen
-
Place a mini peanut butter cup on top for a hat.
-
Insert pretzel halves into sides for arms.
-
Use melted dark chocolate (toothpick or piping bag) to draw eyes, smile, and buttons.
-
Add a tiny dot of orange gel or candy for the carrot nose.
5. Set the Chocolate
-
Allow to set at room temperature or chill in the fridge 15–20 minutes until firm.
Notes
-
Thick or clumpy white chocolate: Add a tsp coconut oil and stir; melt slowly at low heat.
-
Oreo cracking when inserting stick: Use microwave trick or make a pilot hole with a skewer first.
-
Make ahead: Store in a single layer, airtight container, in fridge up to 5 days. Freeze on a tray, then transfer to freezer bag for up to 1 month. Thaw overnight in fridge.
-
No vegan white chocolate wafers: Use a vegan white chocolate bar with 1 tsp coconut oil. Handle gently as it may be softer.
Nutrition
- Calories: 200Cal
- Fat: 10 g
- Carbohydrates: 25 g
Quick Nutritional Info
While these are definitely a treat, it’s always good to know what you’re enjoying! The estimated nutritional information per pop (assuming one pop is one decorated Oreo) is approximately:
- Calories: ~200 kcal
- Fat: 10g
- Carbohydrates: 25g
- Protein: 2g
Allergy Info: This recipe is vegan. However, it contains gluten (from Oreos and pretzels) and may contain soy (in the chocolate) and nuts (depending on the peanut butter cups used). Always check your specific ingredient labels to accommodate allergies.
Final Thoughts
Well, friends, that’s it! Your guide to creating the most delightful, no-fuss, vegan holiday treat on the block. I hope this recipe brings as much laughter and joy to your kitchen as it has to mine. Remember, cooking—and especially holiday baking—isn’t about being perfect. It’s about the music playing, the stories shared, and the love stirred into every single bite.
I’d love to see your creations! If you make these snowman pops, tag me on Instagram @feastical or use the hashtag #FeasticalHoliday. Seeing your kitchen adventures absolutely makes my day.
From my kitchen to yours, happy holidays and happy eating!
Beau
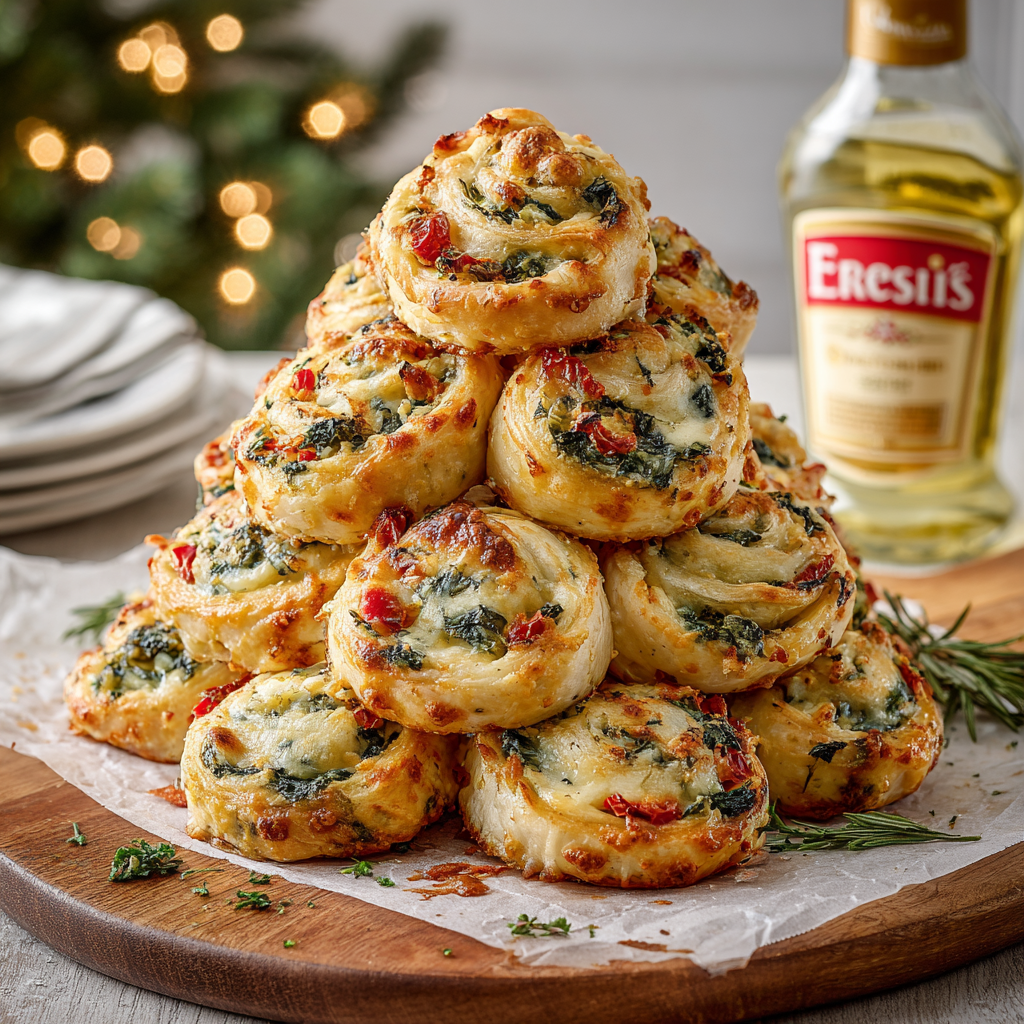
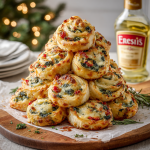
Artichoke Spinach Pinwheel Christmas Tree
Your New Favorite Holiday Showstopper Is Here!
Hey friends, Beau here! Can you smell it? That magical mix of buttery pastry, roasting garlic, and festive cheer wafting from the kitchen? It’s officially the most wonderful—and busiest—time of the year. And if you’re anything like me, you’re on the hunt for that perfect appetizer: something that looks absolutely stunning on your holiday spread, tastes even better than it looks, and (here’s the real kicker) doesn’t require a culinary degree or a full day of prep to pull off.
Well, pull up a chair, my foodie friend, because I’ve got the ultimate recipe that checks every single box. Say hello to my Artichoke Spinach Pinwheel Christmas Tree. This beauty is cheesy, savory, and shaped to sparkle right in the center of your holiday table. Imagine everyone’s faces when you bring out a flaky, golden-brown Christmas tree made of pinwheels, each one packed with a creamy, dreamy spinach and artichoke filling. It’s the kind of dish that gets “oohs,” “aahs,” and “how did you DO that?!” before it’s even touched.
The best part? It’s secretly simple. We’re using a brilliant shortcut (store-bought croissant dough, my forever hero) to create a masterpiece that tastes 100% homemade. So, whether you’re hosting the big family dinner, heading to a potluck, or just want to make a Tuesday night feel a little more special, this recipe is your new go-to. Let’s get rolling and create some edible magic together!
A Tree Grows in My Kitchen: A Festive Flashback
This recipe always takes me right back to one of my first big holiday parties. I was determined to impress. I’d spent hours on complicated canapés and a dessert that nearly brought me to tears. Everything was… fine. But the star of the night, the thing everyone raved about and devoured in minutes, was the simple, cheesy, pull-apart bread I’d thrown together at the last minute because I was worried I didn’t have enough food.
It was a messy, delicious, cheesy loaf—nothing pretty to look at, but boy, did it have soul. That experience taught me a huge lesson: the best holiday food isn’t about perfection; it’s about joy, flavor, and sharing. This Artichoke Spinach Pinwheel Christmas Tree is the elegant, festive evolution of that messy cheese bread. It captures that same crowd-pleasing, comforting heart but wraps it up in a package that’s just so darn fun and festive. It’s a reminder that cooking should be playful, especially during the holidays. Now, every time I shape that tree on the baking sheet, I smile, remembering that party and the happy accident that led me here.
Gathering Your Festive Forest Ingredients
Here’s everything you’ll need to create this edible evergreen. Don’t stress about exact brands—this is a wonderfully flexible recipe. I’ve included my favorite chef-y tips and substitutions so you can make it your own!
- 16 oz Croissant Dough (2 tubes): This is our secret weapon! The buttery, flaky layers are perfect. Chef’s Insight: If you can’t find croissant dough sheets, crescent roll dough works—just press the seams together. Puff pastry is a great gluten-free-friendly alternative (check the brand) and will give you an incredible, extra-flaky result.
- 3 cups Fresh Spinach, finely chopped: We’re wilting it down, so it seems like a lot, but it melts into the cheese beautifully. Sub Tip: A 10 oz box of frozen chopped spinach, thoroughly thawed and squeezed COMPLETELY dry, works like a charm.
- ½ cup Red Bell Pepper, finely chopped: This adds a sweet pop of color and flavor. Chef’s Insight: For a deeper, smokier flavor, use jarred roasted red peppers. Just pat them dry before chopping!
- 4 Artichoke Hearts, finely chopped: The star of the show! They bring a tangy, tender heartiness. Sub Tip: Canned or jarred artichoke hearts in water are perfect. Just give them a good rinse and drain.
- ⅔ cup Ricotta Cheese: This is the creamy base that holds our filling together. Sub Tip: Full-fat ricotta is best for richness, but cottage cheese (blended until smooth) can step in if needed.
- ½ cup Shredded Mozzarella: For that iconic, glorious cheese pull. Chef’s Insight: Pre-shredded bags are convenient, but shredding a block yourself melts even better!
- 2–4 cloves Garlic, minced: Because what’s a holiday dish without garlic? Adjust to your vampire-fighting preferences.
- 1 tsp Red Chili Flakes (optional): A little warmth to balance the richness. Leave it out if you’re serving spice-averse folks.
- 4 tbsp Parmesan Cheese, grated: The salty, umami kick that ties it all together.
- Salt and Black Pepper to taste: Season as you go! Taste your filling before you spread it.
- Optional: 1 Egg + 1 tbsp water (for egg wash), Fresh Rosemary or Basil: The egg wash gives a gorgeous golden shine, and the fresh herbs on top make it look professionally garnished.
Building Your Edible Evergreen: Step-by-Step
Alright, team, let’s build this tree! It’s easier than assembling a toy on Christmas Eve, I promise. Read through once, then let’s get our hands (happily) dirty.
Step 1: Preheat and Prep. Get that oven roaring to 375°F (190°C). This is the perfect temperature to cook the filling through and get that pastry beautifully golden without burning. Line a large baking sheet with parchment paper—trust me, this makes cleanup a dream and prevents any sticky situations.
Step 2: Create the Filling. In a medium-sized bowl, combine your finely chopped spinach, red pepper, and artichoke hearts. Add the ricotta, mozzarella, minced garlic, chili flakes (if using), parmesan, and a good pinch of salt and pepper. Now, get in there with a fork or your hands and mix it all up until it’s perfectly combined. Chef’s Hack: Taste it! This is your chance to adjust the seasoning. Need more garlic? More pepper? Now’s the time. Set this glorious mixture aside.
Step 3: Roll and Fill. Open your tubes of croissant dough. If it’s perforated into triangles, firmly press the seams together to form two solid rectangles. If you’re using a sheet of dough, you’re already ahead of the game! On a lightly floured surface, gently roll each rectangle out just a little to smooth it and make it a bit more uniform. Now, take your filling and spread it in an even layer over each rectangle, leaving about a half-inch border around the edges. This border is crucial—it’s the glue that seals our log!
Step 4: Roll It Up! Carefully, but with purpose, start rolling the dough from one of the long sides. Think “tight cinnamon roll,” not “loose burrito.” You want a nice, firm log so your pinwheels hold their shape. Once it’s rolled, give the final seam a little pinch to seal it shut. Repeat with the second rectangle.
Step 5: Slice and Shape the Tree. This is the fun part! Using a sharp serrated knife, slice each log into ¾-inch to 1-inch thick pinwheels. A gentle sawing motion works best to keep the shape. Now, for the magic: arrange them on your prepared baking sheet into a Christmas tree shape! Start with one pinwheel at the top for the star. Then, place two pinwheels side-by-side just below it for the next row. For the third row, use three, placing the center one slightly down to create a triangle shape. Keep going, making each row slightly wider until you have a beautiful tree. Use any leftover pinwheels or dough to form a little “trunk” at the bottom.
Step 6: Bake to Golden Perfection. If you’re using the egg wash, gently brush it over the tops of the pinwheels now. This is what gives it that professional, glossy, bakery-style finish. Pop that beautiful tree into the preheated oven and bake for 18-22 minutes. You’re looking for deeply golden brown pastry and you might even see some cheesy filling bubbling away happily. Your kitchen will smell like heaven.
Step 7: Garnish and Serve! Once out of the oven, let it cool on the sheet for just 5 minutes—this lets the cheese set a bit so they’re easier to pull apart. Then, sprinkle with fresh chopped rosemary or basil for a gorgeous green garnish and a fresh aroma. That’s it! You’ve just created a masterpiece.
How to Serve Your Savory Christmas Tree
Presentation is half the fun with this dish! I love placing the entire baking sheet right in the middle of the table and letting everyone “ooh” and “aah” before they dig in. It’s a real conversation starter! For a more polished look, carefully slide the parchment paper onto a large wooden cutting board or a festive platter.
Since these are rich and savory, they pair beautifully with lighter, brighter accompaniments. A simple marinara or arrabbiata sauce for dipping is a classic and always a hit. For something different, a creamy lemon-dill yogurt dip or a zesty pesto aioli cuts through the richness beautifully. Serve it as the stunning centerpiece of your appetizer spread alongside a crudité platter, some sliced cured meats, and a bowl of olives. It’s the ultimate shareable holiday snack!
Branch Out: Delicious Recipe Variations
The beauty of this recipe is its versatility. Want to mix it up? Here are a few of my favorite twists:
- The Sun-Drenched Italian: Swap the spinach for chopped sun-dried tomatoes (oil-packed and drained) and add a tablespoon of Italian seasoning to the cheese mixture. So much flavor!
- The Everything Bagel: Replace the artichokes with finely chopped everything bagel seasoned cream cheese and top the baked tree with a sprinkle of everything bagel seasoning. Mind-blowing.
- Green Goddess: Keep it vibrant! Use a mix of spinach, chopped broccoli florets, and basil pesto instead of the ricotta for an ultra-herby, green version.
- Meat Lover’s Holiday: Add about ½ cup of finely chopped cooked bacon, ham, or salami to the filling for a heartier, protein-packed tree.
- Dairy-Free Delight: Use your favorite plant-based ricotta and shreds (Violife and Kite Hill are great). Just make sure your dough is also dairy-free (many puff pastries are!).
Beau’s Chef’s Notes: A Pinwheel of Progress
I can’t tell you how many times I’ve made this recipe since that first party. It’s evolved from a simple log into this festive tree shape, which is just so much more fun. One year, in a hurry, I used a pre-made spinach-artichoke dip from the store as the filling. Was it cheating? Maybe. Was it delicious and saved me 10 minutes during a chaotic holiday crunch? Absolutely. No judgment here! The real goal is to get something delicious on the table that makes people happy. Don’t be afraid to make it your own. The worst kitchen disaster I ever had with these was when my dog, Biscuit, tried to help by “pre-cleaning” the floor of fallen cheese. Now, he gets his own plain, dog-safe pinwheel as a special holiday treat. Lessons learned!
FAQs & Troubleshooting: Your Questions, Answered
Q: My filling is leaking out during baking! What did I do wrong?
A: This usually happens for two reasons: too much filling or not a tight enough roll. Make sure you leave that ½-inch border and roll the dough tightly. A little leakage is totally normal and tastes great, but this will help minimize it.
Q: Can I make these ahead of time?
A: You bet! This is a fantastic make-ahead app. Assemble the entire tree on the parchment-lined baking sheet, cover tightly with plastic wrap, and refrigerate for up to 24 hours. When you’re ready, just brush with egg wash and bake. You might need to add 2-3 extra minutes since it’s going in cold.
Q: My dough ripped when I was rolling it. Help!
A: No panic! Dough can be a little finicky straight from the fridge. If it cracks or rips, just pinch it back together with your fingers. The filling and baking will hide a multitude of sins. It’s going to be beautiful, I promise.
Q: Can I freeze the unbaked tree?
A> Absolutely. Assemble the tree on the baking sheet and flash-freeze it until solid (about 2 hours). Then, transfer the frozen tree to a freezer-safe bag or wrap it tightly. Bake from frozen, adding 5-10 minutes to the baking time, until golden and hot throughout.
Artichoke Spinach Pinwheel Christmas Tree
Description
Flaky, golden croissant dough wrapped around a creamy, cheesy spinach and artichoke filling—shaped like a Christmas tree! Perfect for holiday parties, potlucks, or a festive appetizer spread.
Ingredients
-
16 oz croissant dough (2 tubes) – crescent dough or puff pastry works too
-
3 cups fresh spinach, finely chopped (or 10 oz frozen, thawed & squeezed dry)
-
½ cup red bell pepper, finely chopped (or roasted red pepper, drained)
-
4 artichoke hearts, finely chopped (canned/jarred, rinsed & drained)
-
⅔ cup ricotta cheese (or blended cottage cheese)
-
½ cup shredded mozzarella
-
2–4 cloves garlic, minced
-
1 tsp red chili flakes (optional)
-
4 tbsp Parmesan, grated
-
Salt & black pepper to taste
-
Optional: 1 egg + 1 tbsp water (for egg wash), fresh rosemary or basil for garnish
Optional Twists:
-
Sun-Drenched Italian: Swap spinach for sun-dried tomatoes + Italian seasoning
-
Everything Bagel: Use bagel-seasoned cream cheese instead of artichokes
-
Green Goddess: Add broccoli & basil pesto
-
Meat Lover’s: Add cooked bacon, ham, or salami
-
Dairy-Free: Use plant-based cheeses and dough
Instructions
1. Preheat & Prep
-
Preheat oven to 375°F (190°C).
-
Line a large baking sheet with parchment paper.
2. Make the Filling
-
In a bowl, combine spinach, red pepper, artichokes, ricotta, mozzarella, garlic, chili flakes, Parmesan, salt, and pepper.
-
Mix until fully combined. Taste and adjust seasoning.
3. Roll & Fill the Dough
-
Open croissant dough; press seams to form 2 rectangles.
-
Roll slightly on floured surface for uniformity.
-
Spread filling evenly, leaving a ½-inch border.
4. Roll Into Logs
-
Roll dough from one long side to form tight logs. Pinch seams to seal.
-
Repeat with second rectangle.
5. Slice & Shape the Tree
-
Slice logs into ¾–1 inch pinwheels using a serrated knife.
-
Arrange pinwheels on baking sheet in a Christmas tree shape:
-
1 pinwheel at top
-
2 on next row, 3 on the next, and so on, forming a triangle
-
Use extras for the trunk
-
6. Bake
-
Optional: Brush tops with egg wash for shine.
-
Bake 18–22 minutes until golden and cheese is bubbling.
7. Garnish & Serve
-
Let cool 5 minutes before serving.
-
Sprinkle with fresh rosemary or basil.
-
Serve with marinara, lemon-dill yogurt dip, or pesto aioli.
Notes
-
Filling leaks? Leave ½-inch border & roll tightly. A little leakage is tasty!
-
Dough rips? Pinch back together; baking hides imperfections.
-
Make ahead: Assemble, cover, and refrigerate 24 hrs. Add 2–3 min to bake.
-
Freeze: Flash-freeze assembled tree 2 hrs, then store in freezer-safe wrap. Bake 5–10 min longer.
Nutrition
- Calories: 130 Cal Approximate, per pinwheel
- Fat: 7 g
- Carbohydrates: 11 g
- Protein: 5 g
Nutritional Information (Per Pinwheel, Approximate)
Let’s be real—this is a holiday treat, and it’s meant to be enjoyed! But it’s also helpful to know what you’re biting into. This info is for one pinwheel (assuming 20 per tree).
- Calories: ~130 kcal
- Fat: 7g
- Carbohydrates: 11g
- Protein: 5g
Allergy Info: This recipe contains gluten and dairy. The optional egg wash adds egg. For gluten-free, use a certified GF puff pastry. For dairy-free, use plant-based cheese alternatives. Always check your specific ingredient labels for allergens.
Final Thoughts: Share the Feast, Share the Love
And there you have it, my friends! Your guide to creating the most festive, delicious, and surprisingly simple appetizer of the season. This Artichoke Spinach Pinwheel Christmas Tree is more than just a recipe; it’s a little project filled with love, a gorgeous centerpiece, and a guaranteed crowd-pleaser. It proves that you don’t need to be a professional pastry chef to create something truly spectacular for the people you care about.
I hope this recipe brings as much joy to your table as it has to mine. If you make it (and I really hope you do!), please tag me @Feastical on social media so I can see your beautiful creations! I love seeing your kitchen triumphs. From my kitchen to yours, happy holidays and happy eating!
Stay feastical,
Beau
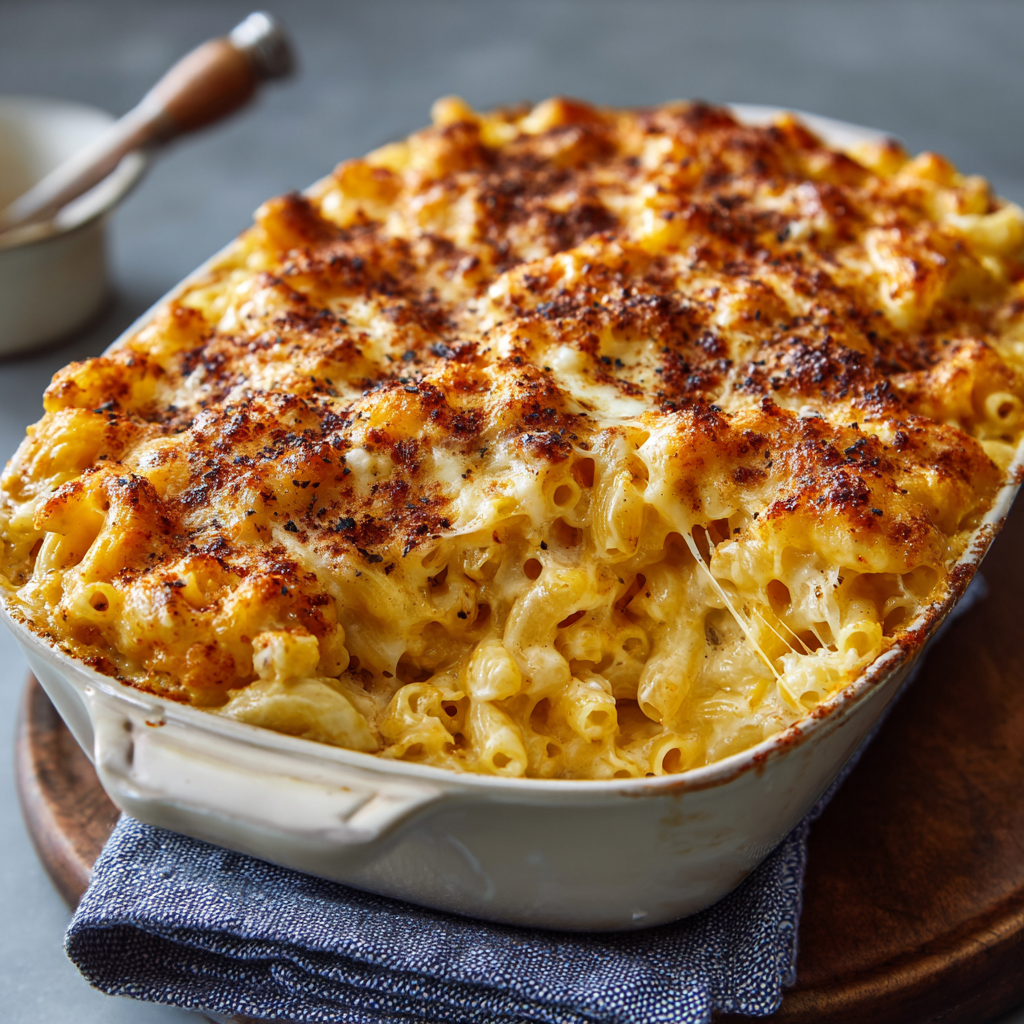
Southern-Style Mac and Cheese
Southern-Style Mac and Cheese: The Ultimate Comfort Food Hug
Hey there, friends! Beau here, welcoming you back to my kitchen. Is there anything in this world that smells more like home, more like pure, unadulterated joy, than a baking dish of mac and cheese bubbling away in the oven? That golden, crispy top, the promise of a creamy, cheesy interior… it’s the culinary equivalent of your favorite cozy sweater. Today, we’re not just making mac and cheese; we’re crafting a legend. We’re diving headfirst into the glorious, soul-warming world of Southern-Style Mac and Cheese.
Now, let’s be clear. This isn’t the quick, stovetop stuff from a blue box (though we’ve all been there and hey, no judgment!). This is the real deal. The kind of mac and cheese that shows up at family reunions, church potlucks, and holiday feasts, and is always, always the first dish to disappear. It’s thick, luxuriously creamy thanks to a custard-style base, and baked to a perfect golden-brown perfection. Every single bite has that iconic, stretchy cheese pull that makes you feel like you just won the comfort food lottery.
I know some of you might be thinking, “Beau, a baked mac and cheese? That sounds… complicated.” I’m here to tell you, with a wink and a nudge, that it’s anything but. We’re going to walk through this together, step-by-step. I’ll share all my favorite chef hacks and the little secrets that make this recipe absolutely foolproof. So, preheat that oven, grab your favorite mixing bowl, and let’s create some magic. This is the side dish that’s bold enough to be the main event, and I can’t wait for you to try it.
A Spoonful of Nostalgia: My First Bite of Southern Sunshine
My love affair with this dish didn’t start in a fancy restaurant; it began in a buzzing community hall in Savannah, Georgia. I was about ten years old, tagging along with my grandma to a massive family reunion. The tables groaned under the weight of platters of fried chicken, collard greens, and potato salad. But my eyes were locked on a massive, steaming aluminum pan of macaroni and cheese, its surface a mosaic of baked, bubbly cheddar.
I grabbed a spoonful, and it was a revelation. It was richer, creamier, and so much more substantial than anything I’d had before. It had weight. It had character. It tasted like a hundred grandmothers had poured their love into it. I must have gone back for thirds, my face probably smeared with cheese, and a lovely woman with a wide-brimmed hat saw me and just laughed. “That’s the good stuff, baby,” she said. “Custard-style. Holds its own.” I didn’t know what “custard-style” meant then, but I knew I needed it in my life forever. That dish became my white whale, and recreating that specific, soul-deep comfort became a mission. This recipe is my homage to that day, to that wonderful woman, and to the power of food to create lasting, delicious memories.
Gathering Your Culinary Crew: The Ingredients
Great food starts with great ingredients. Here’s everything you’ll need to bring this Southern masterpiece to life. Don’t just think of them as items on a list; think of them as the supporting cast for our cheesy star!
- 1 lb elbow macaroni: The classic vessel! Their small, tube-like shape is perfect for trapping all that cheesy goodness. Chef’s Insight: Don’t overcook it! We’re going for al dente (still with a slight bite) because it will continue to cook and absorb liquid in the oven.
- 3 cups shredded sharp cheddar cheese (divided): This is our flavor powerhouse. Sharp cheddar brings that tangy, robust punch. Pro Tip: Always shred your own cheese from a block! Pre-shredded bags contain anti-caking agents that can make your sauce grainy and less smooth.
- 1½ cups shredded mozzarella or Monterey Jack: These are our meltability masters. Mozzarella gives you that incredible stretch, while Monterey Jack is a bit more buttery and creamy. You can’t go wrong with either!
- 2 cups whole milk & 1 cup heavy cream: This combo is the secret to our luxuriously rich and creamy custard base. The fat in the cream is non-negotiable for that decadent mouthfeel. Substitution Tip: In a pinch, you can use all whole milk, but the cream truly makes it special.
- 2 large eggs: The magic binder! Whisked into the milk and cream, they create the custard that sets up as it bakes, giving the dish its signature firm-but-creamy texture.
- 4 tbsp unsalted butter, melted: For richness and flavor. Using unsalted lets you control the sodium level yourself.
- 1 tsp garlic powder & ½ tsp paprika (plus more for topping): Our simple but mighty flavor enhancers. Garlic powder adds a savory depth, and paprika gives a subtle warmth and that beautiful color on top. Smoked paprika is a fantastic upgrade here!
- Salt & black pepper to taste: The essentials. Season generously!
The Fun Part: Let’s Build This Cheesy Dream!
Okay, team! Aprons on, music playing—let’s do this. Follow these steps, and you’ll have a perfect mac and cheese every single time.
- Preheat and Prep: Fire up your oven to 375°F (190°C). Take a 9×13-inch baking dish and give it a light coating of butter or non-stick spray. This little step ensures easy serving and even easier cleanup later—a win-win!
- Pasta Perfect: Bring a large pot of well-salted water to a rolling boil. Add your elbow macaroni and cook it for about 1-2 minutes less than the package directions for al dente. Remember, it’s going to take a hot bath in the oven later! Drain it well and return it to the warm pot (off the heat). Chef’s Hack: While the pasta is still hot, stir in a tablespoon of your melted butter. This helps prevent the noodles from sticking together in a giant clump.
- Create the Custard: In a large bowl, whisk together the whole milk, heavy cream, eggs, remaining melted butter, garlic powder, paprika, and a good pinch of salt and pepper. Whisk it until it’s completely smooth and homogenous. This is the liquid gold that will transform into creamy magic.
- The Big Cheese Toss: To the pot with your drained pasta, add 2 cups of the shredded sharp cheddar and all of the mozzarella (or Monterey Jack). Pour your creamy custard mixture over everything. Now, take a sturdy spoon or spatula and stir it all together until every single noodle is gleaming and coated in cheesy, creamy goodness. This is the best part—watching it all come together!
- Pan and Top: Carefully pour the entire mixture into your prepared baking dish. Spread it out into an even layer. Now, take that reserved 1 cup of sharp cheddar and sprinkle it evenly over the top. Finish it with another light dusting of paprika for color. This top layer is going to become that iconic, crispy, golden cheese crust we’re all dreaming of.
- Bake to Perfection: Place the dish in the preheated oven, uncovered, for 30-35 minutes. You’re looking for the edges to be actively bubbling and the top to be a beautiful, spotted golden brown. Pro Tip: If you want an extra-crispy top, you can switch the oven to broil for the last minute or two—but don’t walk away! It can burn in a heartbeat.
- The Hardest Step: Rest! I know, I know. The smell is incredible and you just want to dive in. But trust me on this! Let the mac and cheese rest for 5-10 minutes after pulling it out of the oven. This allows the custard to set fully, making it creamy instead of runny, and ensures you get perfect, clean slices rather than a cheesy lava flow. It’s worth the wait, I promise.
Setting the Stage: How to Serve Your Masterpiece
This dish is a star, so let’s serve it like one! I love serving it right from the baking dish placed on a trivet in the middle of the table—it’s rustic, inviting, and says “dig in!” For serving, a good solid square spoon or a small spatula is your best friend for getting those perfect portions.
While this mac and cheese is a meal all on its own, it truly shines as the ultimate team player. It’s the perfect sidekick for:
- Fall-off-the-bone pulled pork or tender BBQ brisket.
- Classic fried chicken or juicy meatloaf.
- A simple plate of sautéed greens or a bright, tangy collard green salad to cut through the richness.
And for a little gourmand touch? Drizzle a tiny bit of hot sauce over your portion or sprinkle with fresh chopped chives or parsley. The contrast of the green herbs against the golden cheese is just gorgeous.
Make It Your Own: Delicious Twists & Swaps
The beauty of this recipe is its incredible versatility. Once you’ve mastered the base, feel free to get creative and make it your own!
- The Meat Lover’s: Stir in ½ lb of cooked, crumbled bacon, diced ham, or shredded rotisserie chicken along with the cheese. It becomes a hearty, complete meal.
- Gourmet Upgrade: Swap out half of the cheddar for Gruyère or Fontina cheese. Add a tablespoon of truffle oil or a handful of sautéed wild mushrooms for a seriously elegant twist.
- Spice it Up: Add a kick with a diced jalapeño (seeds removed for less heat), a pinch of cayenne pepper, or a few shakes of your favorite hot sauce into the custard mixture.
- Gluten-Free: This is an easy fix! Simply use your favorite gluten-free elbow macaroni (I love ones made from brown rice or quinoa blends) and ensure your other ingredients are GF. The method remains exactly the same.
- Vegetable Boost: Fold in a cup of steamed broccoli florets, sautéed spinach (squeezed dry), or roasted cherry tomatoes for a pop of color and nutrition.
Beau’s Kitchen Chronicles: A Few Parting Thoughts
This recipe has evolved so much in my kitchen over the years. I’ve tried every cheese under the sun, and I once, in a moment of pure madness, tried to skip the eggs. Big mistake. It turned into a soupy, cheesy mess that, while still tasty, was definitely not the sturdy, sliceable mac we know and love. The eggs are the silent heroes here, don’t forget them!
The other lesson? Always make more than you think you need. I can’t tell you how many times I’ve doubled this recipe for a party, only to be left with a single, sad square for myself. It’s that good. It also reheats like a dream, so leftovers are a blessing, not a curse.
Your Questions, Answered!
Q: My mac and cheese turned out a bit dry. What happened?
A: The most common culprit is overbaking. Ovens can vary, so start checking at the 25-minute mark. It should be jiggly but not liquidy in the center when you take it out—it will continue to set as it rests. Also, ensure you’re using the full amount of milk and cream!
Q: Why is my sauce grainy or oily?
A: This is almost always due to pre-shredded cheese. Those anti-caking agents (like potato starch) don’t melt smoothly. For a silky, restaurant-quality sauce, block cheese is the way to go! Also, avoid overmixing once it’s baked.
Q: Can I make this ahead of time?
A: Absolutely! Assemble the entire dish, cover it tightly, and refrigerate it for up to 24 hours. When you’re ready, you may need to add 5-10 minutes to the baking time since it’s going into the oven cold. You can also freeze the unbaked dish for up to 3 months. Thaw in the fridge overnight before baking.
Q: Do I have to use elbows? What other pasta works?
A: Not at all! Cavatappi, shells, penne, or rotini are all great choices. Anything with nooks and crannies to hold onto the sauce is perfect.

Southern-Style Mac and Cheese
Description
This baked mac and cheese is creamy, cheesy, and soul-warming. Custard-style with a golden, crispy top, it’s perfect for family dinners, holiday feasts, or anytime you want a hug on a plate.
Ingredients
-
1 lb elbow macaroni
-
3 cups shredded sharp cheddar cheese (divided)
-
1½ cups shredded mozzarella or Monterey Jack
-
2 cups whole milk
-
1 cup heavy cream
-
2 large eggs
-
4 tbsp unsalted butter, melted
-
1 tsp garlic powder
-
½ tsp paprika (plus more for topping)
-
Salt and black pepper, to taste
Optional Add-ins:
-
Bacon, diced ham, or shredded rotisserie chicken
-
Gruyère or Fontina for a gourmet twist
-
Jalapeños, cayenne, or hot sauce for spice
-
Steamed broccoli, sautéed spinach, or roasted cherry tomatoes
Instructions
1. Preheat & Prep
-
Preheat oven to 375°F (190°C).
-
Grease a 9×13-inch baking dish with butter or non-stick spray.
2. Cook the Pasta
-
Boil elbow macaroni in salted water for 1–2 minutes less than package directions (al dente).
-
Drain and return to pot; stir in 1 tbsp melted butter to prevent sticking.
3. Make the Custard
-
In a large bowl, whisk together milk, cream, eggs, melted butter, garlic powder, paprika, salt, and pepper until smooth.
4. Combine Pasta & Cheese
-
Add 2 cups cheddar and all mozzarella/Monterey Jack to the pasta.
-
Pour the custard over and stir until noodles are fully coated in cheesy goodness.
5. Assemble & Top
-
Transfer mixture to prepared baking dish.
-
Sprinkle remaining 1 cup cheddar evenly over the top; dust lightly with paprika.
6. Bake to Perfection
-
Bake uncovered for 30–35 minutes until edges are bubbling and the top is golden brown.
-
Optional: broil 1–2 minutes for an extra-crispy top—watch closely!
7. Rest & Serve
-
Let mac and cheese rest 5–10 minutes to set the custard before slicing.
-
Serve as a side or main with BBQ, fried chicken, or sautéed greens.
Notes
-
Avoid Grainy Sauce: Always shred cheese from a block; pre-shredded often contains anti-caking agents.
-
Make Ahead: Assemble and refrigerate for up to 24 hours; bake with 5–10 extra minutes. Freeze unbaked up to 3 months.
-
Pasta Swap: Cavatappi, shells, penne, or rotini work perfectly.
-
Flavor Boost: Add a little truffle oil, wild mushrooms, or a pinch of cayenne.
Nutritional Information*
*This is an estimate provided for informational purposes only. I’m a chef, not a dietitian!
Per Serving (1 of 8 servings): Approximately 450 calories | 26g fat | 36g carbohydrates | 17g protein
This is a rich, indulgent comfort food dish designed to be enjoyed as part of a balanced diet. It’s a fantastic source of calcium and protein from the dairy. To lighten it up slightly, you can use 2% milk and a reduced-fat cheese blend, though the texture and richness will be slightly different.
Allergy Info: This recipe contains dairy (milk, cheese, cream), gluten (pasta), and eggs.
Dig In and Enjoy!
And there you have it, my friends! My heart, soul, and a whole lot of cheese poured into this ultimate Southern-Style Mac and Cheese recipe. This is more than just food; it’s a feeling. It’s the taste of celebration, of community, and of coming together around a table to share something made with love.
I hope this recipe becomes a staple in your home, creating its own stories and memories for you and your loved ones. If you make it (and I really hope you do!), tag me on social @Feastical with your photos. There’s nothing I love more than seeing your culinary creations!
Now, if you’ll excuse me, I have a date with a baking dish and a very large fork. Until next time, keep cooking with joy!
Beau
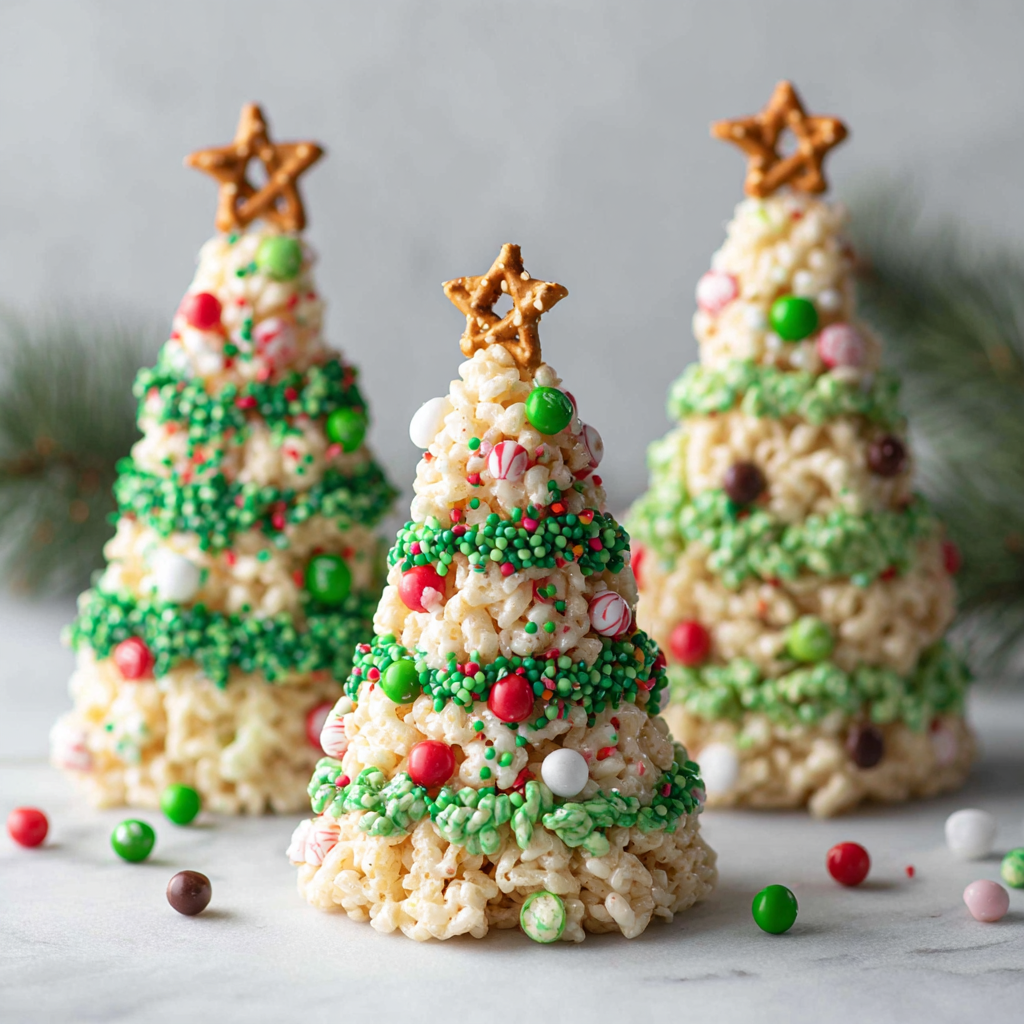
Christmas Rice Krispy Trees
Your New Favorite Holiday Tradition: Christmas Rice Krispy Trees!
Hey friends, Beau here from Feastical! Can you smell that? That’s the smell of melted marshmallows, a hint of butter, and pure, unadulterated holiday joy wafting from my kitchen. I’m absolutely buzzing to share this recipe with you today because it’s one of those magical ones that checks every single box on the holiday baking list. It’s incredibly easy (we’re talking no-bake, one-pot easy), it’s a total crowd-pleaser for both kids and adults, and it’s just so darn CUTE.
We’re making Christmas Rice Krispy Trees! These aren’t your average, everyday rice crispy treats. Oh no. We’re transforming that classic, chewy, nostalgic treat into adorable little evergreen trees, decked out with colorful candy ornaments and topped with a shining star. Imagine a platter of these cheerful green trees at your holiday party, cookie exchange, or just sitting on the counter for a sweet little pick-me-up. They bring a smile to your face before you even take a bite.
The best part? You don’t need to be a pastry chef or have a pantry full of obscure ingredients. This is about having fun, getting a little messy, and creating something delicious that brings people together. So, grab your biggest pot, round up your favorite little helpers (if you have them!), and let’s make some edible holiday magic together.
A Sticky, Sweet, and Unforgettable Memory
This recipe always takes me right back to my grandma’s kitchen, circa 1996. The year my younger cousin, Leo, decided he was a “professional dessert decorator” at the ripe old age of five. We were making a batch of these very trees, and I was meticulously placing red hots in neat little rows. Leo, however, had a more… abstract vision.
While my back was turned, he grabbed a full fistful of rainbow sprinkles and, with the dramatic flair of a budding artist, launched them into the air above our freshly formed trees. It looked less like a forest and more like a festive sprinkle bomb had gone off. There were sprinkles *everywhere*—in the trees, on the floor, even stuck to the cat who had wandered in to investigate. Grandma just laughed, wiped a sprinkle off her nose, and declared them the “most joyful trees she’d ever seen.” We still talk about “Leo’s Blizzard” every Christmas. The moral of the story? Don’t stress about perfection. The best kitchen memories often come from the happy little accidents and the messes made along the way.
Gathering Your Evergreen Forest Ingredients
Here’s everything you need to create your own edible forest. The beauty of this list is its simplicity! I’ve included my best chef-y tips and substitutions to make sure you can make this work with whatever you have on hand.
- 3 tbsp unsalted butter: This is the rich, flavorful base that gives our treats that incredible, melt-in-your-mouth quality. Using unsalted lets you control the salt level. Chef’s Tip: For a dairy-free version, a great plant-based butter works perfectly here!
- 1 (10 oz) bag mini marshmallows (~6 cups): Mini marshmallows melt faster and more evenly than large ones, which is key for a smooth, lump-free “dough.” Substitution Tip: You can use large marshmallows in a pinch—just give them a little more time to melt down.
- Green food coloring: Gel food coloring is my absolute top recommendation! It gives you a vibrant, forest-green color without thinning out your marshmallow mixture like liquid coloring can. Add it drop by drop until you hit that perfect evergreen hue.
- 6 cups Rice Krispies cereal: The iconic crispy star of the show! Make sure your cereal is fresh for the best snap, crackle, and pop. Chef’s Insight: Feel free to experiment with other crispy rice cereals—many store brands are fantastic.
- Assorted mini candies, sprinkles, or M&Ms (for ornaments): This is where your personality shines! Red hots, mini M&Ms, round sprinkles, even tiny silver dragées all make fantastic little tree ornaments. Raid your baking cupboard and have fun with it.
- Chocolate chips or candy melts (for decorating/drizzling): A little drizzle of white or dark chocolate looks like snow or icy details! Melting wafers are easiest, but chocolate chips thinned with a tiny bit of coconut oil work great too.
- Star-shaped candies or yellow M&Ms (for toppers): The crowning glory! Those classic yellow star sprinkles are perfect. If you can’t find them, a yellow M&M or even a dab of yellow frosting with a star tip works beautifully.
- Optional: pretzel sticks for “trunks”: This is my favorite pro-move. Pushing a small piece of pretzel stick into the base gives your tree a trunk and makes it so much easier for little hands to hold without getting sticky!
Crafting Your Christmas Forest: A Step-by-Step Guide
Alright, team, let’s get building! This process is simple, but a few key tips will ensure your trees are the talk of the North Pole. Read through once before you start!
- Melt the Butter: Grab your largest, heaviest-bottomed pot or Dutch oven and place it over medium-low heat. Add your butter and let it melt completely, swirling the pan occasionally. We’re using low heat for a reason—we want to gently melt the marshmallows, not caramelize or burn them. Chef’s Hack: Lightly grease the spatula you’ll be using with butter or cooking spray. Trust me, this is a game-changer for preventing marshmallow glue from taking over your utensil.
- Melt the Marshmallows: Once the butter is foamy and melted, dump in the entire bag of mini marshmallows. Now, the most important step: STIR CONSTANTLY. Use a silicone spatula or wooden spoon and keep those marshmallows moving. They’ll first puff up, then slowly collapse into a smooth, glorious, white lava. Once they’re completely melted and no lumps remain, take the pot off the heat. This whole process should only take about 5-7 minutes.
- Color Your “Dough”: Now for the fun part! Add your green food coloring. If you’re using gel, start with 3-4 drops, stir it in, and assess the color. You can always add more, but you can’t take it away! We’re going for a deep, festive green. Remember, the color will lighten slightly once we add the cereal, so go a shade darker than you think you need.
- Fold in the Cereal: Immediately pour all 6 cups of Rice Krispies cereal into the marshmallow goo. Here’s my technique: gently fold the cereal in from the bottom of the pot upwards, trying to coat every single piece without aggressively crushing them. We want to maintain that light, crispy texture. Keep folding until no dry pockets of cereal remain.
- Cool Slightly & Shape: Dump the mixture out onto a large sheet of parchment paper. Let it sit for just 2-3 minutes. You want it to be cool enough to handle but still warm and pliable. This is the perfect time to lightly grease your hands with butter or cooking spray. Pinch off a handful of the mixture and gently press and shape it into a cone form, wider at the bottom and tapering to a point at the top. Pro-Shaping Hack: For super uniform trees, pack the mixture into a lightly greased measuring cup (a 1/2 or 1/3 cup works well), then turn it out onto the parchment and gently pinch the top to a point.
- Decorate Immediately: While the trees are still slightly warm and sticky, press your candy “ornaments” into the sides. This is the time to get creative! Add a drizzle of melted chocolate for a snowy effect. If you’re using a pretzel trunk, poke it into the base now. Finally, press your star candy firmly onto the very top.
- Let Them Set: Allow your beautifully decorated trees to set completely on the parchment paper for at least 30 minutes. This lets the marshmallow re-solidify, making them easy to handle and package. Try to resist eating one right away—I know, it’s hard!
How to Serve Your edible Masterpiece
Presentation is part of the fun! You’ve made these adorable little trees, now let’s show them off.
For a simple, rustic look, arrange them on a wooden cutting board or a simple white platter. For a full-on winter wonderland scene, dust the platter with a light shower of powdered sugar “snow” before placing the trees. You can even add a few plastic reindeer or a little Santa figurine next to the plate for an extra dose of holiday cheer.
These also make incredible edible gifts! Let them set completely, then place each tree in a clear cellophane bag tied with a festive ribbon. Stack a few in a holiday tin separated by layers of parchment paper. They’re a guaranteed hit at school parties, neighbor gifts, or as a sweet treat for your mail carrier or garbage collection crew.
Branch Out: Fun Flavor Twists & Variations
Once you’ve mastered the classic, the forest is your oyster! Here are a few ways to mix things up:
- Peppermint Forest: Add 1/2 teaspoon of peppermint extract to the marshmallow mixture along with the food coloring. Decorate with crushed candy canes and a white chocolate drizzle for a cool, refreshing twist.
- Chocolate Tree Trunks: Replace 1 cup of the Rice Krispies cereal with 1 cup of Cocoa Krispies. You’ll get a marbled green-and-brown effect that looks just like a tree bark texture!
- “Snow-Covered” Pines: Skip the green food coloring altogether! Keep the mixture white and roll the shaped cones in sweetened shredded coconut or white sprinkles for a frosty, snow-laden evergreen look.
- Nutty Evergreens: For a little crunch and grown-up flavor, fold in 1/2 cup of finely chopped pistachios or almonds into the cereal mixture. The salty-nutty flavor pairs amazingly with the sweet marshmallow.
- Gluten-Free & Vegan Friendly: Easily done! Use a certified gluten-free crispy rice cereal. Use vegan butter and ensure your marshmallows are vegan (Dandies or Trader Joe’s brands are great). All the decorating candies can be swapped for vegan-friendly options too.
Beau’s Chef Notes: Lessons from a Sticky Kitchen
This recipe has evolved in my kitchen from a simple, flat square cut into triangles into these 3D cones. The pretzel stick trunk was a total happy accident—I was eating a pretzel while baking one day and it just clicked! It solved the “sticky fingers” problem and added a cute, salty crunch that balances the sweetness perfectly.
A funny note: I highly recommend designating a “sprinkle cleanup crew” if you have kids or pets. I’ve learned the hard way that those tiny colorful dots have a mysterious ability to migrate to every room in the house. I’m still finding red sanding sugar from 2018 behind my microwave. And you know what? I wouldn’t have it any other other way. Those little messes are the glitter of a life well-lived and a kitchen well-loved.
Your Questions, Answered!
Q: My mixture is too sticky to shape! What did I do wrong?
A: This usually means the mixture is still too warm. Let it rest on the parchment for another 2-3 minutes. Also, greasing your hands thoroughly is non-negotiable! A little butter or cooking spray on your palms makes the world of difference.
Q: Why are my trees turning out hard and crunchy instead of soft and chewy?
A: You likely overheated the marshmallows. Cooking them over too high a heat can make them set very hard. Always use medium-low heat and take the pot off the stove the moment the marshmallows are melted. Also, using stale cereal can lead to a less-chewy texture.
Q: Can I make these ahead of time?
A: Absolutely! These are a fantastic make-ahead treat. Once set, store them in a single layer in an airtight container at room temperature for up to 3 days. For longer storage, they freeze beautifully for up to a month. Just thaw at room temperature for an hour before serving.
Q: My green color isn’t vibrant enough. How can I fix it?
A: Gel food coloring is your best friend for vibrant colors. If you only have liquid, you’ll need to use quite a bit more, but be aware it might make the mixture a tad stickier. You can always knead in a little extra color with greased hands after the mixture is out of the pot.

Christmas Rice Krispy Trees
Description
Hey friends! These festive Rice Krispy Trees are chewy, colorful, and oh-so-fun to make. No-bake, one-pot, and totally customizable, they’re perfect for holiday parties, school treats, or just a cozy kitchen activity with kids. Think of crunchy Rice Krispies coated in marshmallow, dyed vibrant green, and decorated like little edible Christmas trees—complete with candy ornaments, chocolate drizzle, and a star on top!
Ingredients
-
3 tbsp unsalted butter (or plant-based for dairy-free)
-
1 (10 oz) bag mini marshmallows (~6 cups)
-
Green gel food coloring
-
6 cups Rice Krispies cereal
-
Assorted mini candies or sprinkles (for ornaments)
-
Chocolate chips or candy melts (for drizzle)
-
Star-shaped candies or yellow M&Ms (for toppers)
-
Optional: pretzel sticks for tree trunks
Instructions
1. Melt the Butter & Marshmallows
-
In a large pot over medium-low heat, melt the butter.
-
Add marshmallows, stirring constantly until fully melted and smooth.
2. Color the Mixture
-
Stir in green gel food coloring until you reach a vibrant evergreen hue.
3. Fold in Cereal
-
Gently fold in Rice Krispies until evenly coated.
4. Shape the Trees
-
Let mixture cool 2–3 minutes. Grease hands lightly with butter.
-
Pinch portions and shape into cones (wider at the bottom, tapering to a point).
-
Optional: insert pretzel stick for a trunk.
5. Decorate
-
Press candies into the sides as ornaments.
-
Drizzle with melted chocolate for a snowy effect.
-
Top with star candies.
6. Let Set
-
Allow trees to set on parchment for at least 30 minutes before serving.
Notes
-
Peppermint Twist: Add ½ tsp peppermint extract and top with crushed candy canes.
-
Chocolate Trunks: Mix in Cocoa Krispies for a bark effect.
-
Snowy Trees: Skip the green coloring and roll in shredded coconut.
-
Nutty Add-In: Fold in ½ cup chopped nuts for extra crunch.
-
Vegan/Gluten-Free: Use vegan butter, vegan marshmallows, and certified gluten-free cereal.
Nutrition
- Calories: 150 Cal Per Tree
- Fat: 4g
- Saturated Fat: 2.5g
Nutritional Information (Per Tree, based on 12 trees)
Let’s be real, these are a holiday treat, meant to be enjoyed for their joy and flavor! But it’s always good to know what you’re enjoying.
Calories: ~150 | Fat: 4g | Saturated Fat: 2.5g | Carbohydrates: 28g | Sugar: 16g | Protein: 1g
Allergy Info: This recipe contains dairy (from butter). To make it gluten-free, ensure your crispy rice cereal and pretzels are certified gluten-free. Always check marshmallow labels for potential allergens.
Final Thoughts: Share the Holiday Spirit
Well, friends, there you have it—your guide to creating the most whimsical, delicious, and fun holiday treat around. These Christmas Rice Krispy Trees are more than just a dessert; they’re an activity, a memory-maker, and a guaranteed spirit-lifter.
I hope you have as much fun making these as I do. I’d love to see your creations! Tag me @Feastical on Instagram or Facebook with your photos. Show me your forests, your decorating styles, and your happy little kitchen helpers. You’re not just making treats; you’re building traditions.
From my kitchen to yours, happy holidays and happy baking! Until next time, keep your spatula close and your marshmallows melting.

Cranberry Apple Mocktail
Bubbly, Bright, and Bursting with Flavor: Your New Favorite Fall Sip
Hey friends, Beau here! Can you feel it? That crisp, cool snap in the air, the leaves starting to put on their fiery show, and that undeniable urge to cozy up with something delicious. Fall is whispering its hello, and I don’t know about you, but my first thought is always… what are we drinking?
Now, I’m a firm believer that the best sips of the season shouldn’t be reserved for any one type of celebration—or any one type of drinker. Whether you’re hosting a big holiday bash, having a quiet movie night, expecting a little one, or just taking a break from the booze, you deserve a beverage that feels special. A drink that’s as beautiful to look at as it is delicious to drink. That’s where this superstar comes in.
I’m talking about my Cranberry Apple Mocktail. This isn’t just juice poured into a fancy glass, my friends. This is a thoughtfully crafted, non-alcoholic cocktail that brings together the tart zing of cranberry, the sweet, crisp comfort of apple, and a fizzy, festive sparkle that feels like a celebration in a glass. It’s incredibly easy to whip up, meaning you can spend less time fussing in the kitchen and more time laughing with your people. So, let’s shake off the stress, grab a pitcher, and make something that truly tastes like a fall hug.
A Toast to Cozy Evenings & New Traditions
This recipe brings me right back to my first autumn in this house. We had just moved in, boxes were still stacked to the ceiling, and the only thing unpacked in the kitchen was the coffee maker and one singular saucepan. My best friend Mara came over, not to help unpack (smart woman), but to just be there. We were both exhausted, a little overwhelmed by adulting, and craving a sense of comfort.
I rummaged through a box labeled “Pantry – Misc.” and found a bottle of cranberry juice, a carton of apple cider, and a lone lime rolling around. I had some sparkling water in the fridge. It was a “spare parts” situation, but sometimes the best creations are born from necessity, right? I threw it all together in a couple of mismatched mugs because the glasses were who-knows-where. We clinked our mugs right there on the floor, surrounded by cardboard, and took a sip. And you know what? It was perfect. It was refreshing, it felt festive, and it instantly shifted the mood from chaotic to cozy. That simple drink on the floor became our little tradition. Now, every time I make this mocktail, it tastes like friendship and the happy chaos of building a home.
Gathering Your Mocktail Magic
The beauty of this recipe is in its simplicity and flexibility. You likely have most of this in your kitchen right now! Here’s what you’ll need to serve four lucky people.
- 2 cups 100% Cranberry Juice: This is your flavor powerhouse! I prefer unsweetened for a beautifully tart base, but if you have a sweeter tooth, cranberry cocktail juice works wonderfully. Chef’s Insight: The tartness is what makes this drink so refreshing and not cloyingly sweet. It’s the perfect counterpoint to the apple.
- 1 cup Apple Cider (or Apple Juice): Here’s where the cozy, autumnal sweetness comes from. Apple cider will give you a richer, spicier, more complex flavor (especially if it’s fresh from the orchard!). Apple juice is a fantastic, always-available substitute that keeps things bright and crisp. You truly can’t go wrong.
- 1 tbsp Fresh Lime (or Lemon) Juice: Don’t you dare skip this! That squeeze of fresh citrus is the “secret weapon” that makes all the other flavors pop. It brightens everything up and adds a necessary layer of acidity. Bottled juice just doesn’t have the same vibrant magic.
- 1½ cups Sparkling Water or Club Soda (chilled!): This is your fun, fizzy finish. I love a plain sparkling water to let the fruit flavors shine, but a ginger beer or lemon-lime soda would add a delicious kick of extra flavor (just know it will make the mocktail sweeter). Pro Tip: Always chill your bubbly before adding it to keep the drink cold and maximize fizz.
- Ice Cubes: The foundation of any good cold drink. Use filtered water for the clearest, cleanest-tasting ice!
- For Garnish: Apple Slices, Fresh Cranberries, and Mint Sprigs: This isn’t just for looks, folks! The garnishes add a wonderful aromatic element. When your nose hits that mint and fresh apple as you take a sip, it elevates the entire experience. Plus, it’s just so pretty!
Building Your Brilliant Mocktail
Ready to play bartender? This comes together in about five minutes flat. I’ll walk you through each step with a few of my favorite kitchen hacks to make it even easier.
Step 1: The Base Mix
Grab a nice pitcher—something you’d be happy to bring to the table. Pour in your 2 cups of cranberry juice, 1 cup of apple cider, and that all-important tablespoon of fresh lime juice. Now, take a spoon and give it a really good stir. You’re not just mixing; you’re melding those flavors together into one harmonious syrup. Give it a tiny taste. Amazing, right? Chef’s Hack: You can make this base mix up to a day ahead and keep it covered in the fridge. Talk about getting a head start on your party!
Step 2: The Glassware Prep
Now, let’s talk glasses. Highball glasses, mason jars, fancy coupes—whatever makes you happy! For each glass, drop in a handful of ice cubes. Then, get creative with your garnish. I like to slide a thin apple slice onto the rim of the glass and drop a few fresh cranberries right into the ice. They look like little ruby jewels! Finally, gently clap a sprig of mint between your hands to release its incredible aroma and place it gently on top. Pro Tip: If you’re prepping for a crowd, you can do this step for all the glasses ahead of time and keep them on a tray in the fridge.
Step 3: The Pour
Time to assemble! Take your pitcher of beautiful red base mix and carefully pour it over the ice in each prepared glass. Fill it up until the glass is about ¾ of the way full. Leave that top quarter empty—that’s prime real estate for our fizz!
Step 4: The Fizzy Finale
Here’s the most important step for maximum bubble enjoyment: add the sparkle last, and just before serving. Grab your chilled sparkling water and slowly top off each glass. You’ll see those gorgeous bubbles rush to the top, mixing everything together in a effervescent dance. Give it one very gentle stir with a long spoon or a cocktail stirrer to combine, and you are done! Serving immediately ensures every sip is perfectly crisp and carbonated.
How to Serve This Stunner
You’ve made a masterpiece—now let’s show it off! Presentation is part of the fun. I love setting out a big pitcher of the base mix (without the bubbles) on a rustic wooden board or a nice tray. Place the chilled sparkling water, extra garnishes (like a bowl of cranberries and a few extra lime wedges), and the empty glasses around it. This lets your guests build their own mocktail, which is always a hit and feels incredibly interactive.
If you’re serving it at a dinner party, pre-making them in individual glasses is the way to go. Line them up on a serving tray—the uniformity is so visually satisfying. For a cozy night for two, why not skip the glasses altogether? Make a big batch directly in a beautiful carafe, give it a gentle stir, and pour it right at the table. It feels intimate and special.
And don’t forget the snacks! This mocktail pairs beautifully with a sharp cheese board (a nice aged cheddar is fantastic), some spiced nuts, or even a savory appetizer like mini quiches. The tartness of the drink cuts through rich flavors beautifully.
Make It Your Own: Delicious Twists & Swaps
The fun doesn’t stop here. This recipe is a fantastic canvas for your own creativity. Here are a few of my favorite ways to mix it up:
- The “Spiced Cider” Twist: Warm ½ cup of the apple cider with a cinnamon stick, a few whole cloves, and a star anise pod. Let it steep and cool completely, then strain out the spices. Use this spiced cider in place of the regular cider for a deeply aromatic, cozy fall flavor.
- Ginger Zing: Swap the sparkling water for ginger beer! This adds a wonderful spicy kick that plays so well with the apple and cranberry. It’s a bolder, more dynamic version of the drink.
- Herbal Elegance: Muddle a few sprigs of fresh thyme or rosemary in the bottom of your pitcher before adding the base mix. The herbal notes are unexpectedly delicious and make the mocktail taste incredibly sophisticated.
- Pomegranate Power: Replace half of the cranberry juice with pomegranate juice. You’ll get an even deeper red color and a complex, antioxidant-rich flavor boost.
- Frozen Fun (For Kids & Kids-at-Heart): Skip the sparking water and pour the base mix into popsicle molds. Freeze for a few hours for the most delicious, fruity ice pops!
Beau’s Chef Notes & Kitchen Stories
This recipe has evolved so much from that first mug-on-the-floor version. I’ve served it at Thanksgiving to relatives who don’t drink, and they were thrilled to have something special. I’ve made big batches for baby showers, and it’s always the first thing to disappear. My favorite recent evolution? Turning it into a slushy! I’ll blend the base mix with a ton of ice until it’s a smooth, frozen delight, then pour it into a glass and top with just a splash of soda. It’s like a fall-themed granita and it is absolutely irresistible.
A funny story: I once accidentally used lemon-lime soda instead of club soda for a whole party batch. I was mortified for a second, thinking I’d made it too sweet. But you know what? People raved about it! It just goes to show that there are very few “mistakes” in the kitchen—just happy accidents and new recipe variations.
Your Questions, Answered!
Q: Can I make a big batch of this for a party ahead of time?
A: Absolutely! My best tip is to mix the cranberry juice, apple cider, and lime juice together in a pitcher and keep it refrigerated for up to 24 hours. Do NOT add the sparkling water until you are literally about to serve. Keep the sparkling water chilled separately and top off each glass (or the whole pitcher) at the last second to preserve the bubbles.
Q: My mocktail isn’t very sweet. Did I do something wrong?
A: Not at all! If you used unsweetened cranberry juice, the drink is designed to be tart and refreshing. If you prefer a sweeter sip, you have options: 1) Use cranberry cocktail juice instead, 2) Add a tablespoon of maple syrup, agave, or simple syrup to the base mix and stir until dissolved, or 3) Top with lemon-lime soda instead of plain sparkling water.
Q: I can’t find fresh cranberries for garnish. What can I use instead?
A: No problem! Frozen cranberries work beautifully and actually look gorgeous as they frost up in the glass. You could also use a twist of orange or lemon peel, a cinnamon stick, or even a few pomegranate arils for a different kind of red pop.
Q: Is there a way to make this a warm drink?
A: Yes, and it’s lovely! Gently heat the cranberry juice, apple cider, and a cinnamon stick in a saucepan until it’s steaming but not boiling. Remove from heat, stir in the lime juice, and pour into mugs. Skip the sparkling water. It’s like a cozy, non-alcoholic wassail!
Print
Cranberry Apple Mocktail
Description
Hey friends! Fall is here—the air is crisp, the leaves are turning, and it’s the perfect time to cozy up with a delicious drink. This Cranberry Apple Mocktail is tart, sweet, and sparkling, making it a festive, non-alcoholic treat for any occasion. It’s easy to make, looks gorgeous in a glass, and tastes like autumn in every sip!
Ingredients
-
2 cups 100% cranberry juice (unsweetened or cocktail)
-
1 cup apple cider or apple juice
-
1 tbsp fresh lime or lemon juice
-
1½ cups sparkling water or club soda, chilled
-
Ice cubes (filtered water for the best clarity)
-
Garnish: Apple slices, fresh cranberries, mint sprigs
Instructions
1. Make the Base
-
In a pitcher, combine cranberry juice, apple cider, and lime juice.
-
Stir well to mix the flavors. Taste and adjust sweetness if desired.
Tip: Prepare this base up to a day in advance and refrigerate.
2. Prepare Glasses
-
Add ice cubes to each glass.
-
Garnish with apple slices, cranberries, and a mint sprig.
Tip: For a crowd, pre-garnish all glasses and keep them in the fridge until serving.
3. Assemble the Mocktail
-
Pour the base mix into each glass, filling about ¾ full.
-
Slowly top with sparkling water to maintain the fizz.
-
Stir gently once to combine.
4. Serve
-
Present a pitcher of the base mix with extra sparkling water and garnishes so guests can customize their drinks.
Notes
-
Spiced Cider: Heat ½ cup apple cider with cinnamon, cloves, and star anise. Cool and use in place of cider.
-
Ginger Kick: Use ginger beer instead of sparkling water for a spicy twist.
-
Herbal Notes: Muddle fresh thyme or rosemary into the pitcher for a sophisticated flavor.
-
Pomegranate Swap: Replace half the cranberry juice with pomegranate juice for deeper color and flavor.
-
Frozen Fun: Pour the base mix into popsicle molds for fruity ice pops!
Quick Nutritional Note
While I’m all about flavor first, I know many of you are mindful of what you’re sipping on! This mocktail is a wonderfully light and refreshing choice. Based on using unsweetened cranberry juice and apple cider (without added sugar), each serving comes in at around 80 calories, with virtually no fat or protein. The carbs come naturally from the fruit juices. It’s naturally vegan, gluten-free, and of course, alcohol-free, making it a fantastic option for almost everyone at your table. As always, specific numbers can vary based on the exact brands and ingredients you use, but it’s a guilt-free pleasure you can feel great about serving.
Final Thoughts
Well, there you have it, friends. My all-time favorite fall sip that’s more than just a drink—it’s a mood. It’s about inclusivity, celebration, and finding joy in the simple act of making something delicious for yourself and your people. It proves that you don’t need complicated techniques or a dozen obscure ingredients to create something memorable.
So, I hope you’ll give this Cranberry Apple Mocktail a try. Whip it up for your next gathering, for a quiet Friday night, or just because you deserve a little something special. I’d love to hear how it turns out! Tag me on Instagram @feastical with your creations—I always love seeing your kitchen adventures.
Until next time, keep your kitchen messy and your heart full.
– Beau

Brownie Candy Melt Christmas Trees
Brownie Candy Melt Christmas Trees: Your New Favorite Holiday Treat!
Hey friends, Beau here from Feastical! Is there anything better than the smell of brownies baking in the oven? It’s like a warm, chocolatey hug for your entire house. Now, imagine taking that incredible feeling and wrapping it up in a festive, fun, and absolutely adorable package that screams holiday cheer. That’s exactly what we’re doing today with these unbelievably cute Brownie Candy Melt Christmas Trees!
I’m a huge believer that holiday baking should be full of joy, not stress. These little edible evergreens are the perfect project—whether you’re baking with wide-eyed kiddos, prepping for a cookie exchange, or just want to add a seriously impressive (yet secretly simple) dessert to your Christmas table. They combine the rich, fudgy heart of a perfect brownie with the smooth, sweet crunch of candy melts, all dressed up in their holiday best with sprinkles and sparkle. They’re the kind of treat that makes people’s eyes light up before they’ve even taken a bite. So, preheat that oven, grab your favorite mixing bowl, and let’s create some edible magic that’s guaranteed to spread smiles.
A Kitchen Full of Laughter & Lopsided Trees
This recipe always takes me back to one particularly chaotic, flour-dusted Christmas Eve at my Grandma Lou’s house. I was maybe ten years old, and my job was to help her decorate the Christmas cookies. Well, I got a little… overzealous with the red sprinkles. Let’s just say Santa looked like he’d had a very unfortunate encounter with a rogue glitter bomb.
Grandma Lou just laughed, her eyes crinkling at the corners. Instead of scolding me, she scooped up a blob of leftover frosting, plopped it on a spare cookie, and said, “Well, Beau, if it’s a mess you want, let’s make a glorious mess! Let’s build a forest!” We proceeded to create the most wildly decorated, lopsided, and sprinkly-encrusted cookie forest imaginable. They were ridiculous. They were perfect. They were the hit of the party because they were made with pure, unadulterated joy.
That’s the spirit I want you to bring to these brownie trees. Don’t worry about perfection. Maybe one tree gets a little extra green coating, or another has a slightly crooked star. Who cares? It just adds to the charm. These aren’t just desserts; they’re little edible memories in the making.
Gathering Your Festive Forest Ingredients
One of the best parts of this recipe is its beautiful simplicity. You likely have most of this hanging around your kitchen already! Here’s your shopping list for these fudgy wonders.
- 1 Box Brownie Mix (plus the ingredients listed on the package) – I’m a firm believer in using a good boxed mix as a fantastic shortcut! It delivers consistent, delicious results every time. My pro tip? Look for a mix labeled “fudgy” or “chocolatey” rather than “cakey” for the richest, densest trees. You’ll typically need oil, water, and an egg, but always double-check your box!
- Non-Stick Baking Spray – This is non-negotiable! Even if you’re using a silicone mold, a quick spritz ensures your brownies pop out cleanly and your candy coating has a smooth surface to adhere to. It’s your best insurance policy against broken trees.
- 2 cups Green Candy Melts (or color of choice) – This is what gives our trees their iconic festive look! Candy Melts (found in the baking aisle) are designed to melt smoothly and set firm. Chef’s Insight: You can use green melting wafers, or even get creative with white chocolate chips mixed with a little green oil-based food coloring. Just avoid water-based food coloring, as it will cause the chocolate to seize up into a grainy mess.
- Holiday Sprinkles, Candy Stars, or M&M’s for Decorating – This is where your personality shines! Raid your sprinkle collection. I love using red and white nonpareils for a classic look, tiny silver balls for shimmer, or even little candy stars for the treetops. M&M’s make for fantastic, colorful “ornaments.” Go wild!
Building Your Edible Evergreen Forest: A Step-by-Step Guide
Alright, team, let’s get our hands dirty (or at least a little chocolatey). Follow these steps, and you’ll have a forest of tasty trees in no time.
Step 1: Preheat & Prep
First things first, get that oven heating to 350°F (175°C). While it’s warming up, prepare your brownie batter exactly as the package directs. Give it a good whisk until it’s just combined and no dry streaks remain. Overmixing can make your brownies tough, so easy does it! Place your silicone Christmas tree mold on a sturdy baking sheet. This makes it much easier to move in and out of the oven without the flexible mold flopping over. Give that mold a generous coating of non-stick spray into every single cavity. Get into all those little tree points and corners!
Step 2: Fill & Bake
Now, using a spoon or a small cookie scoop, fill each tree cavity about ¾ of the way full with brownie batter. Chef’s Hack: Do not overfill! The brownies will rise as they bake, and if you fill them to the top, you’ll lose that beautiful tree shape and end up with a messy, muffin-top situation. We want defined trees, not brownie blobs! Pop the whole baking sheet with the mold on it into the oven and bake for 12-15 minutes. You’ll know they’re done when the tops look set and a toothpick inserted into the center of a tree comes out with a few moist crumbs (not wet batter).
Step 3: The All-Important Cool Down
Patience is a virtue, especially in baking! Let the brownies cool in the mold for a full 15 minutes. They need this time to set and firm up. If you try to remove them too early, they might break. After 15 minutes, gently pop them out onto a wire rack and let them cool completely. I mean it—completely. If the brownies are even slightly warm when you add the candy coating, the heat will cause the coating to melt and slide right off. Not cool. Literally.
Step 4: The Magic Coat
Here’s the transformative step! Wash and thoroughly dry your silicone mold. You want to get rid of any grease or crumbs. Now, melt your Candy Melts according to the package directions. The best way is in short 30-second bursts in the microwave, stirring well between each burst. Pro Tip: If your melted candy seems too thick for coating, you can add a tiny, tiny amount of coconut oil or paramount crystals (about ½ tsp per cup of melts) to thin it to a perfect, dippable consistency. Pour a thin, even layer of the melted green candy into the bottom of each tree cavity. Now, take your completely cooled brownie and press it firmly back into the candy-filled cavity. This is how you get that gorgeous, smooth, professional-looking chocolate coating on the outside. It’s like the brownie is putting on its perfect Christmas sweater!
Step 5: Chill & Decorate
Place the entire mold back onto the baking sheet and slide it into the refrigerator for about 20-30 minutes, or until the candy coating is completely firm and set. Once they’re rock solid, they should pop out of the mold with effortless ease. Now, for the best part: decorating! Use a little extra melted candy melt as “glue” to attach sprinkles, place a candy star on the top, or create ornament patterns with M&Ms. You can also drizzle contrasting colors (like white or red candy melts) over the trees for a fancy finish.
How to Serve Your Festive Masterpieces
Presentation is half the fun with these guys! You’ve put in the work, now let’s show them off.
For a real show-stopping effect, create a “winter wonderland” scene on your serving platter. Dust the plate with a light shower of powdered sugar “snow.” You can even place a few of the trees around a small bowl filled with extra sprinkles or a dollop of whipped cream to look like a snowbank. They look incredible arranged on a tiered dessert stand amidst other holiday cookies.
These trees are rich, so one per person is usually plenty. Serve them alongside a glass of cold milk for the kids, a hot cup of coffee for the adults, or even a glass of peppermint hot chocolate for the ultimate cozy Christmas moment. They are the perfect sweet ending to a big holiday meal or a fabulous centerpiece for your dessert table.
Branch Out! Fun Variations to Try
Feel like mixing it up? This recipe is a fantastic canvas for creativity. Here are a few of my favorite twists:
- The Peppermint Patty: Add ½ teaspoon of peppermint extract to your brownie batter before baking. Decorate the finished trees with crushed candy canes and a drizzle of white candy melt. It’s like a Christmas party in your mouth!
- Cookie Butter Bliss: Swirl a few tablespoons of speculoos or biscoff cookie butter into your brownie batter. Use light brown or white candy melts for the coating, and decorate with crushed speculoos cookies. So warm and spiced!
- Nutty Forest: Fold ½ cup of finely chopped toasted pecans or walnuts into your brownie batter for a wonderful crunch. This adds a lovely grown-up, sophisticated flavor profile.
- Gluten-Free & Dairy-Free Friendly: This is so easy to adapt! Simply use your favorite gluten-free brownie mix. For the coating, make sure to find dairy-free candy melts or chocolate chips (Enjoy Life is a great brand).
- Snow-Capped Peaks: Instead of fully coating the trees in green, only dip the bottom two-thirds of the tree cavity in green candy. Fill the top third with white candy melts before pressing the brownie in. It creates a beautiful snowy effect without any extra decorating!
Beau’s Chef Notes: Tales from the Kitchen
This recipe has become a staple in my holiday lineup, but it wasn’t always smooth sailing. The first time I tested it, I was so excited I skipped the “cool completely” step. Let’s just say I ended up with ghostly, green-streaked brownie blobs that looked more like something from a swamp than a winter forest. It was a delicious, but very ugly, mistake.
I’ve also learned that the quality of your silicone mold matters. I once bought a super cheap one from a random online store, and the tree shapes were so shallow and poorly defined that my “trees” looked like green lumps. Invest in a good, deep, food-grade silicone mold—it makes all the difference in getting those beautiful, sharp details on your candy coating. Now, I can make a whole forest in under an hour, and I always double the batch because they disappear faster than Christmas morning!
FAQs & Troubleshooting: Your Questions, Answered
Q: My candy melts are too thick and gloppy! What did I do wrong?
A: This usually means they got a little too hot. Candy melts can be finicky. If they’re too thick, try adding a tiny bit of coconut oil or vegetable shortening (about ½ teaspoon at a time) and stirring until it smooths out. Remember, low and slow when melting!
Q: My brownie stuck to the mold! How do I prevent this?
A: First, never skip the non-stick spray! Second, make sure you let the brownies cool in the mold for the full 15 minutes to set before trying to remove them. If they’re still sticking, your mold might need a more heavy-duty spray, or you might have overbaked them slightly, making them stickier.
Q: Can I make these ahead of time?
A: Absolutely! These are a great make-ahead treat. Once decorated, store them in a single layer in an airtight container in the refrigerator for up to 5 days. You can also freeze them for up to a month! Just thaw in the fridge overnight before serving.
Q: Can I use homemade brownie batter instead of a mix?
A> You sure can! Use your favorite homemade fudgy brownie recipe. Just be mindful that baking times might vary slightly depending on the recipe, so keep an eye on them after the 10-minute mark.

Brownie Candy Melt Christmas Trees
Description
Fudgy brownies meet smooth candy melts in adorable, festive tree shapes. Perfect for baking with kids, cookie exchanges, or a show-stopping holiday dessert table.
Ingredients
-
1 box brownie mix (plus required ingredients on the package; choose “fudgy” for best results)
-
Non-stick baking spray
-
2 cups green candy melts (or color of choice)
-
Holiday sprinkles, candy stars, or mini M&M’s for decorating
Optional Variations:
-
Peppermint: ½ tsp peppermint extract in batter; crushed candy canes on top
-
Cookie Butter Bliss: Swirl 2–3 tbsp speculoos/biscoff cookie butter in batter; decorate with crushed cookies
-
Nutty Forest: Fold ½ cup finely chopped toasted pecans or walnuts into batter
-
Snow-Capped Peaks: Dip only bottom 2/3 of tree in green, fill top 1/3 with white candy melts
-
Gluten-Free/Dairy-Free: Use GF brownie mix and dairy-free candy melts
Instructions
1. Preheat & Prep
-
Preheat oven to 350°F (175°C).
-
Prepare brownie batter as directed on the package.
-
Place silicone Christmas tree mold on a baking sheet; spray generously with non-stick spray.
2. Fill & Bake
-
Fill each cavity ~¾ full. Do not overfill.
-
Bake 12–15 minutes until tops are set and a toothpick comes out with a few moist crumbs.
3. Cool Completely
-
Let brownies cool in the mold for 15 minutes.
-
Gently remove and cool completely on a wire rack.
4. Coat with Candy Melts
-
Melt candy melts per package instructions (microwave in 30-second bursts, stir well).
-
Thin if necessary with ½ tsp coconut oil per cup.
-
Pour a thin layer into each mold cavity, press cooled brownie in to coat evenly.
5. Chill & Decorate
-
Refrigerate 20–30 minutes until candy coating is firm.
-
Pop out trees and decorate with melted candy “glue,” sprinkles, stars, or M&M ornaments.
Notes
-
Candy melts too thick: Add a tiny amount of coconut oil or vegetable shortening.
-
Brownies sticking: Always spray mold and let brownies cool completely.
-
Make-ahead: Store decorated trees in a single layer in an airtight container in the fridge up to 5 days; freeze up to a month.
Nutrition
- Calories: 320 kcal 1 tree, 6 trees total
- Fat: 14g
- Carbohydrates: 46g
- Protein: 3g
Nutritional Information (Approximate)
Okay, let’s be real—these are a holiday treat, through and through. They’re meant to be enjoyed in the spirit of the season! This nutritional info is a rough estimate based on the ingredients listed and will vary depending on the specific brands you use. This is per serving (assuming one tree per serving and the recipe makes 6 trees).
- Calories: ~320
- Protein: 3g
- Fat: 14g
- Carbohydrates: 46g
- Fiber: 2g
- Sugar: 35g
Remember, it’s all about balance! Enjoy one of these delightful trees with your loved ones and savor every single bite.
Final Thoughts: Share the Joy!
And there you have it, my friends! Your guide to creating the most whimsical, delicious, and conversation-starting holiday dessert on the block. These Brownie Candy Melt Christmas Trees are more than just a recipe; they’re an experience. They’re about the laughter that happens while decorating them, the pride of creating something beautiful with your own hands, and the joy of sharing something made with love.
I hope this recipe brings a little extra magic and a whole lot of chocolate to your holiday season. If you make them (and I really hope you do!), I’d love to see your creations. Tag me @feastical on Instagram or Facebook so I can admire your edible forests! From my kitchen to yours, Merry Christmas and Happy Holidays. Now, let’s go eat!
With love and a full plate,
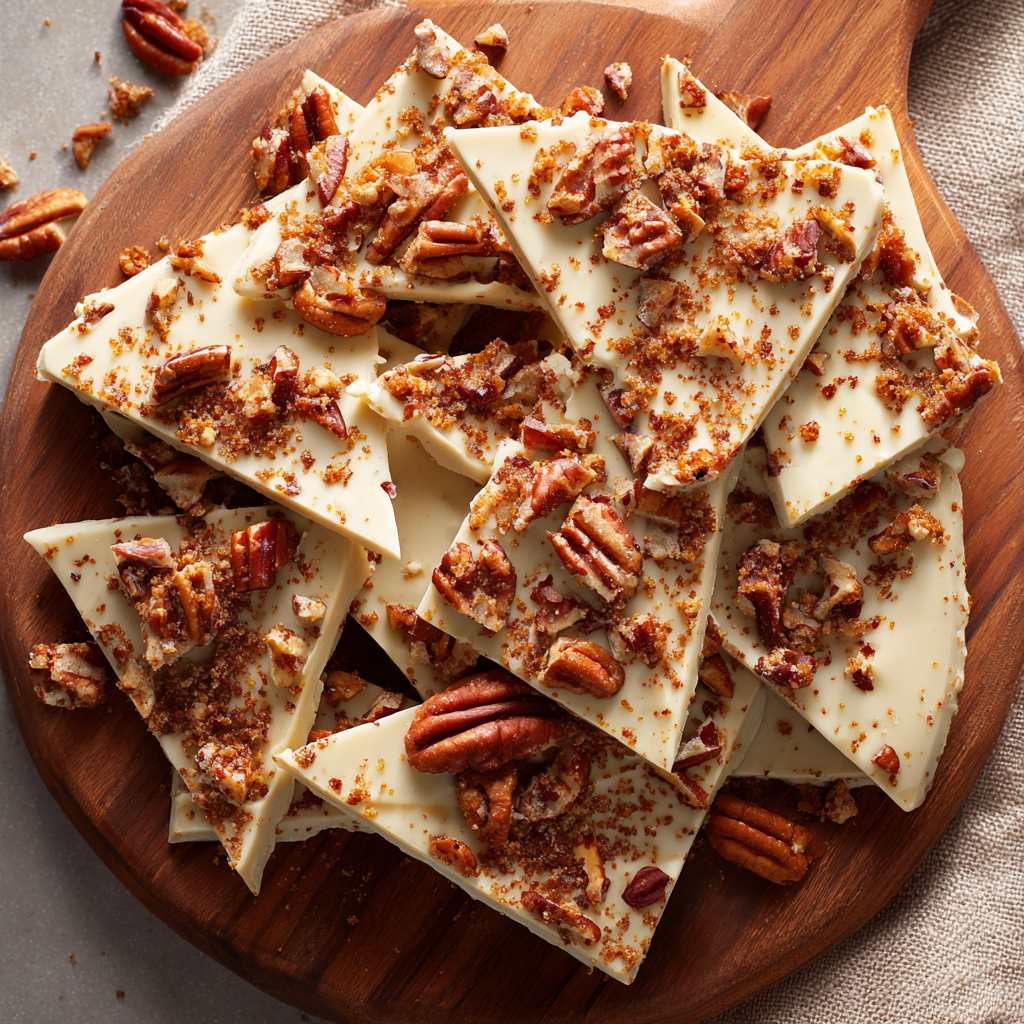
Pumpkin Spice Bark
Your New Favorite Fall Obsession: Pumpkin Spice Bark That’s Actually Easy!
Hey friends, Beau here from Feastical! Can you feel it? That crisp, cool snap in the air that smells faintly of woodsmoke and infinite possibility? Yeah, me too. And my kitchen radar immediately starts pinging for one thing: recipes that taste like a cozy autumn hug. We’re talking about those no-fuss, maximum-flavor treats that make your whole house smell incredible and have everyone asking, “Wow, did you make that?”
Well, get ready to become the most popular person at your next fall gathering, because today we’re diving headfirst into the easiest, most addictive seasonal candy you’ll ever make: Pumpkin Spice Bark. This isn’t just another recipe; it’s a game-changer. Imagine creamy, sweet white chocolate infused with the warm, familiar embrace of pumpkin spice, all loaded up with the satisfying crunch of gingersnap cookies and the rich, buttery depth of toasted pecans. It shatters into beautiful, rustic pieces that are perfect for gifting, serving on a platter, or (my personal favorite) hiding in a secret container for yourself. So, grab your favorite apron, and let’s create some magic together. This is one of those “looks like you fussed but secretly took barely any time” recipes that I live for.
A Bark That Brings Back Memories
This recipe always takes me right back to my grandma’s kitchen. She wasn’t a fancy pastry chef—far from it. She was a “little of this, little of that” kind of cook, and her greatest creations often came from clearing out the pantry. One blustery October afternoon, I was “helping” her (which mostly meant sneaking tastes of chocolate chips), and she decided to melt down the last of some white chocolate. She tossed in the dregs of a pumpkin pie spice jar, crushed up the few remaining gingersnaps from the bottom of the box, and sprinkled on some pecans from a freezer bag. What came out of her fridge 30 minutes later was this incredible, crazy-delicious bark.
I remember my eyes going wide. It felt like she’d performed a magic trick. She just winked, broke off a huge piece for me, and said, “See, Beau? The best things in life don’t have to be complicated.” That moment of simple, unexpected joy is exactly what I want to bring to your kitchen with Feastical. This bark is that feeling, crystallized into a delicious treat. It’s about using what you have, embracing imperfection, and creating something wonderful without the stress.
Gathering Your Bark-Making Brigade
Part of the beauty of this recipe is its simplicity. You only need a handful of ingredients to create something truly spectacular. Here’s the lineup:
- 12 oz (340 g) High-Quality White Chocolate (chips or a bar chopped up): This is the foundation, so let’s make it good! I highly recommend using chocolate bars meant for baking (like Ghirardelli or Baker’s) instead of chips. They often contain more cocoa butter and less stabilizer, which means they melt smoother and set with a better snap. Chef’s Insight: If you must use chips, look for a brand that lists “cocoa butter” as the first ingredient. Substitution Tip: Not a white chocolate fan? Dark or semi-sweet chocolate works beautifully for a richer, less sweet bark!
- 1 tsp Pumpkin Pie Spice: The warm, aromatic soul of this treat. This cozy blend usually includes cinnamon, ginger, nutmeg, allspice, and cloves. Chef’s Insight: For the absolute best flavor, make your own blend! I do ½ tsp cinnamon, ¼ tsp ginger, and a pinch each of nutmeg, allspice, and cloves. It makes a world of difference.
- ½ cup Crushed Gingersnap Cookies: This is our crunch factor and a flavor match made in heaven. The spicy, molasses-kissed crunch of a gingersnap is the perfect textural contrast to the creamy chocolate. Substitution Tip: No gingersnaps? Graham cracker crumbs, biscoff cookies, or even vanilla wafers would be delicious here.
- ⅓ cup Toasted Pecans, Chopped: Toasting the pecans is non-negotiable, friends! It unlocks their deep, nutty, buttery flavor and adds another layer of incredible crunch. Chef’s Insight: Don’t have pecans? Toasted walnuts or almonds would be a fantastic swap. For a nut-free version, try toasted pumpkin seeds (pepitas)!
Let’s Get Crafting: Your Foolproof Bark Blueprint
Alright, team, let’s do this! This process is so simple and fun. Read through once, then just go for it. I’m right here with you, talking you through every step.
- Prep Your Station: First things first, line a standard baking sheet with parchment paper. Don’t use wax paper! The wax can melt into your beautiful chocolate. A silicone baking mat also works wonders here. Having this ready before you melt the chocolate is a crucial pro-move because melted chocolate waits for no one.
- Melt the Chocolate Like a Pro: This is the most important step. You can use a double boiler (a heatproof bowl set over a pot of gently simmering water, making sure the bottom of the bowl doesn’t touch the water) or the microwave. I prefer the microwave for its speed and ease. Microwave Method: Place your white chocolate in a microwave-safe bowl. Heat on 50% power in 30-second intervals. After each interval, stop and stir vigorously. It won’t look melted at first, but keep stirring! This prevents hot spots and seizing. Repeat until it’s almost completely smooth; the residual heat will finish the job. Chef’s Hack: If your chocolate seizes (gets clumpy and grainy), don’t panic! Stir in a teaspoon of solid vegetable shortening or coconut oil. It won’t fix it perfectly, but it will help enough to be salvageable for bark.
- Spice It Up: Once your chocolate is silky smooth, immediately stir in that glorious teaspoon of pumpkin pie spice. Mix it until it’s fully and evenly incorporated. Take a whiff. Seriously, do it. That’s the smell of autumn victory.
- Spread the Love: Immediately pour your spiced chocolate onto the prepared parchment paper. Use an offset spatula or the back of a spoon to spread it into an even layer, about ¼-inch thick. It doesn’t have to be a perfect rectangle! Rustic is the name of the game here.
- The Grand Topping: Working quickly before the chocolate sets, generously sprinkle your crushed gingersnaps and chopped toasted pecans all over the surface. Gently press them down with your hand or the back of a spoon so they adhere nicely.
- The Big Chill: Very carefully transfer the entire baking sheet to your refrigerator. Let it chill, undisputed, for at least 30-45 minutes, or until it’s completely firm to the touch. Chef’s Hack: No time to wait? You can pop it into the freezer for 15-20 minutes for a super-quick set.
- The Best Part: The Break: Remove the firm bark from the fridge. Lift the entire slab by the parchment paper and place it on a cutting board. Now, using your hands, break it into beautiful, irregular, rustic pieces. You can also use a knife to cut cleaner pieces if you’re gifting them. It’s your creation—you make the rules!
How to Serve This Autumnal Masterpiece
Okay, you’ve made this stunning bark. How do you show it off? The possibilities are endless!
For everyday snacking, just pile the pieces high in a big, beautiful bowl and leave it on the counter. Watch how quickly it disappears. For your next party or Friendsgiving, arrange the pieces artfully on a wooden board or a elegant platter. It adds incredible texture and height to a dessert spread. It pairs wonderfully with a cheese board—think sharp cheddar, brie, and some fresh apples and pears.
And let’s talk gifting! This bark makes for the most thoughtful, homemade present. Place pieces in a clear cellophane bag, tie it with some rustic twine and a cute fall-themed tag, and you’ve got a gift that looks like it came from a fancy artisanal shop. It’s perfect for neighbors, teachers, hostesses, or anyone who needs a little sweetening up this season. Serve it with a hot mug of coffee, spiced chai tea, or a glass of cold milk for the ultimate cozy experience.
Make It Your Own: Delicious Twists & Swaps
The fun doesn’t stop here! This recipe is an incredible blank canvas. Get creative and make a version that’s uniquely yours.
- The Salted Caramel Swirl: Before you add the toppings, drizzle 2-3 tablespoons of warm salted caramel sauce over the melted chocolate. Use a toothpick or knife to swirl it gently into the chocolate for a marbled effect. Then add your toppings. Sweet, salty, and sublime.
- Cranberry-Pistachio Celebration: Swap the pecans for chopped pistachios and the gingersnaps for dried cranberries. The red and green make it incredibly festive for the holidays, and the tartness of the cranberries cuts through the sweetness perfectly.
- Dark Chocolate Decadence: As mentioned, using dark chocolate instead of white creates a richer, less sweet bark that chocolate purists will adore. The pumpkin spice still shines through beautifully against the deep cocoa background.
- Everything But the Kitchen Sink: Feel free to raid your pantry! Mini pretzels for salty crunch, a sprinkle of flaky sea salt, chopped toffee bits, or even a few handfuls of festive sprinkles can all find a happy home here.
- Dietary Friendly Options: For a gluten-free version, simply use certified GF gingersnaps (or substitute with crushed gluten-free graham crackers). For dairy-free, use a high-quality dairy-free white chocolate brand.
Beau’s Kitchen Confidential
This recipe has evolved a bit from my grandma’s original “pantry clean-out” version. I’ve learned that toasting the nuts is the difference between good bark and “oh-my-goodness-what-is-this” bark. I also started making my own spice blend because, well, I’m a spice control freak. The beauty of this treat is its flexibility. I’ve made it with my nephews, and their little hands are perfect for breaking it apart (and sneaking bits of chocolate). I’ve also made fancy versions for dinner parties with gold leaf flakes—because why not? The core of it remains the same: simple, joyful, and utterly delicious. It’s a reminder that the best cooking often comes from the heart, not a complicated textbook.
Your Bark Questions, Answered!
Q: My white chocolate seized and got clumpy! What did I do wrong?
A: Ah, the classic chocolate seize! This usually happens if a tiny drop of water or steam gets into the melting chocolate, or if it gets too hot too fast. This is why we melt slowly and gently. If it happens, try stirring in a tiny bit of neutral oil (like vegetable or coconut) to smooth it out. It might not be perfect, but it’ll work for bark!
Q: Can I use pumpkin spice coffee creamer or syrup instead of the spice?
A: I wouldn’t recommend it. Those liquid flavorings can cause the chocolate to seize up for the same reason water does. Stick with the dry pumpkin pie spice for guaranteed success.
Q: How long does this bark keep, and how should I store it?
A: Stored in an airtight container in the refrigerator, it will stay fresh and crunchy for up to 2 weeks! You can also freeze it for up to 2 months. Just separate layers with parchment paper so it doesn’t stick together.
Q: My bark is sticky and doesn’t snap cleanly. Why?
A: This usually means it wasn’t chilled long enough, or your chocolate might not have been high quality (lower cocoa butter content). Pop it back in the fridge or freezer for another 15-20 minutes, and it should firm right up.

Pumpkin Spice Bark
Description
Creamy white chocolate, warm pumpkin spice, crunchy gingersnaps, and buttery toasted pecans come together in a rustic, gift-worthy bark that’s simple to make and irresistibly delicious.
Ingredients
-
12 oz (340 g) white chocolate (chips or chopped bar; high-quality baking chocolate preferred)
-
1 tsp pumpkin pie spice (homemade or store-bought)
-
½ cup crushed gingersnap cookies
-
⅓ cup toasted pecans, chopped
Optional Twists & Swaps:
-
Drizzle of salted caramel sauce (2–3 tbsp)
-
Dark chocolate instead of white chocolate
-
Pistachios and dried cranberries for a festive twist
-
Mini pretzels, toffee bits, or sprinkles for extra crunch
-
Gluten-free: use certified GF gingersnaps
-
Dairy-free: use a high-quality dairy-free white chocolate
Instructions
-
Prep: Line a baking sheet with parchment paper or a silicone mat.
-
Melt Chocolate:
-
Microwave: Heat on 50% power in 30-second intervals, stirring between each.
-
Double Boiler: Melt over simmering water, stirring constantly.
-
Tip: If chocolate seizes, stir in 1 tsp vegetable oil or coconut oil.
-
-
Spice It Up: Stir in pumpkin pie spice until fully incorporated.
-
Spread Chocolate: Pour melted, spiced chocolate onto the prepared sheet. Spread into an even ¼-inch layer. Rustic edges are perfect.
-
Add Toppings: Sprinkle crushed gingersnaps and toasted pecans evenly over the chocolate. Gently press to adhere.
-
Chill: Refrigerate for 30–45 minutes until firm. Quick set: freeze 15–20 minutes.
-
Break & Serve: Lift parchment and break into rustic pieces by hand or cut with a knife for cleaner edges.
Notes
-
Chocolate Bloom: Chocolate may turn cloudy—still safe to eat. Prevent by using dry bowls and gentle chilling.
-
White Chocolate Seize: Avoid liquid flavorings; add a tiny bit of neutral oil if necessary.
-
Storage: Airtight container in the fridge up to 2 weeks; freeze up to 2 months (separate layers with parchment).
-
Sticky or Soft Bark: Chill longer, or ensure high-quality chocolate with good cocoa butter content.
A Quick Nutritional Note
Now, I’m a chef, not a nutritionist, but I believe in being transparent about what we’re creating! This Pumpkin Spice Bark is very much a decadent treat. The white chocolate provides a quick energy source (from sugar) and fats (from cocoa butter and milk solids). The pecans add healthy monounsaturated fats, a little protein, and some fiber. The spices, while used in a small amount, do contain antioxidants. A serving (about 1/10th of the recipe) is roughly 180 calories. The key, as with all good things, is to enjoy it mindfully and savor every single delicious, crunchy, spiced bite! It’s made with real ingredients and a whole lot of love, which is the best nutrient of all.
Go Forth and Make Bark!
Well, my friends, there you have it. Your complete guide to creating the easiest, most impressive fall treat that’s sure to become a seasonal tradition. This Pumpkin Spice Bark is more than just a recipe; it’s a feeling. It’s the joy of creating something with your own hands, the warmth of sharing it with people you love, and the simple pleasure of a flavor that tastes like autumn feels.
I hope you have as much fun making this as I do. Don’t forget to get creative with your toppings and make it your own. And when you do, I’d be absolutely thrilled if you tagged me @feastical on social media so I can see your beautiful creations! You’ve got this. Now, go warm up that kitchen.
With love and a full bowl of bark,

Salted Caramel Pretzel Bark
Salted Caramel Pretzel Bark: Your New Favorite Sweet & Salty Obsession
Hey friends, Beau here from Feastical! Let’s be real for a second. Life is busy. Between work, family, and trying to remember to water that one slightly-sad-looking houseplant on the windowsill, sometimes the last thing you feel like doing is spending hours in the kitchen on a complicated dessert. But what if I told you that you could whip up something truly spectacular, something that looks like it came from a fancy artisanal candy shop, with just a handful of ingredients and about 10 minutes of active effort?
Enter my go-to, no-fail, crowd-pleasing miracle: Salted Caramel Pretzel Bark. This stuff is the holy grail of easy treats. We’re talking a luxurious layer of melted chocolate, a generous crunch of salty pretzels, rivers of gooey caramel, and a final flourish of flaky sea salt that just makes everything pop. It’s the perfect symphony of sweet, salty, crunchy, and smooth in every single bite.
Whether you need a last-minute gift that says “you’re amazing,” a potluck contribution that will disappear in seconds, or just a little something to satisfy that 3 pm craving, this bark has got your back. So, let’s ditch the stress and embrace the simplicity. Grab your favorite baking sheet, and let’s make some magic happen together!
A Happy Accident in My Grandma’s Kitchen
This recipe always takes me right back to my grandma’s warm, always-smelling-like-cinnamon kitchen. I wasn’t always the confident cook I am today (trust me, I’ve had my share of kitchen disasters!). One rainy afternoon, I was trying to impress her by making her famous chocolate fudge. Long story short, I got distracted, overheated the chocolate, and ended up with a grainy, separated mess. I was so disappointed.
But my grandma, being the absolute legend she was, didn’t bat an eye. She looked at my sad chocolate puddle, at the bag of pretzels on the counter we’d been snacking on, and the jar of caramel ice cream topping in the fridge. “Honey,” she said with a wink, “we’re not making fudge anymore. We’re inventing.” She had me pour the chocolate onto a pan, crush those pretzels right over the top, and drizzle everything with that caramel. We sprinkled on a little salt from the pretzel bag and popped it in the icebox. What emerged was a revelation—a broken, messy, imperfectly perfect bark that tasted a million times better than my original fudge plan ever could. It taught me that the best creations often come from happy little accidents and a willingness to play with your food.
Gathering Your Bark-Making Brigade
One of the best things about this recipe is its simplicity. You only need a few key players to create something extraordinary. Here’s what you’ll need:
- 16 oz semi-sweet or milk chocolate, chopped (or chips): This is your foundation! I like using a good-quality baking bar (like Ghirardelli or Baker’s) and chopping it myself—it often melts a bit smoother than chips, which contain stabilizers. Chef’s Insight: Use semi-sweet for a richer, less sweet bark, or milk chocolate for a classic, crowd-pleasing sweetness. Feel free to go wild with dark chocolate if that’s your jam!
- 2 cups mini pretzels, lightly crushed: The salty crunch is non-negotiable! Mini pretzels are perfect because they give you lots of little bits and pieces. Substitution Tip: No minis? Just break up standard pretzel twists or rods into small, bite-sized chunks. Gluten-free pretzels work beautifully here too!
- ½ cup caramel sauce (homemade or store-bought): The gooey glue that holds it all together. For a quick fix, a good-quality store-bought sauce like Mrs. Richardson’s or Smucker’s is perfect. If you’re feeling fancy, my easy homemade caramel sauce takes it to a whole new level. Chef’s Hack: If your caramel is too thick to drizzle, warm it up for 10-15 seconds in the microwave to make it nice and pourable.
- 1 tsp flaky sea salt (like Maldon): Don’t you dare skip this! This isn’t just regular salt. The delicate, flaky crystals add little bursts of salinity and a fantastic textural contrast. Substitution Tip: In a pinch, a fine-grained sea salt or even coarse kosher salt will work, but use a lighter hand—about ½ tsp—as it can be saltier by volume.
Let’s Build Some Bark: Your Foolproof Steps
Ready? This is the fun part. I’ll walk you through each step, and before you know it, you’ll have a tray of gorgeous bark chilling in your fridge.
- Line a baking sheet with parchment paper. This is your number one rule for easy cleanup and release! Don’t use wax paper, as it can stick. A rimmed quarter-sheet pan (9×13 inches) is the perfect size for this amount. Let a little extra parchment hang over the sides—it makes it so easy to lift the whole slab out later.
- Melt chocolate in a microwave or double boiler until smooth.
- Microwave Method (My Quick Go-To): Place chopped chocolate in a microwave-safe bowl. Heat on 50% power in 30-second bursts, stirring vigorously between each interval. This prevents the chocolate from scorching. Stop when it’s almost all melted—the residual heat will melt the last few lumps as you stir.
- Double Boiler Method (The Classic): Place a heatproof bowl over a pot of simmering water, making sure the bottom of the bowl doesn’t touch the water. Add your chocolate and stir constantly until melted and glossy.
Chef’s Hack: However you melt it, your chocolate should be smooth and fluid. If it seems too thick, you can stir in a tiny teaspoon of coconut oil or vegetable shortening to help it spread more easily.
- Spread evenly onto the prepared sheet, about ½ inch thick. Use an offset spatula or the back of a spoon to spread it into a relatively even rectangle. It doesn’t have to be perfect! The rustic, broken look is part of its charm. Aim for that ½-inch thickness so your bark has a nice snap and substantial feel.
- Sprinkle crushed pretzels evenly over melted chocolate. Don’t just dump them in one spot! Take a handful and gently sprinkle them from a height so they get a nice, even distribution. Gently press them down *just* slightly so they adhere to the chocolate.
- Drizzle caramel sauce generously over the top. Here’s where you get to be an artist. You can use a spoon, a squeeze bottle, or even a zip-top bag with a tiny corner snipped off. Don’t be shy! Swirl it, zig-zag it, make it beautiful. More caramel is always a good idea.
- Sprinkle with flaky sea salt. Hold your hand up high and let the salt snow down evenly over the entire surface. This ensures you get a little bit of salt in every bite, not just one super-salty spot.
- Chill in the refrigerator for 30–40 minutes until set. Patience, young grasshopper! You want it to be completely firm to the touch. The fridge is faster, but you can also let it set at cool room temperature for a few hours if you prefer.
- Break into pieces and store in an airtight container. The most satisfying step! Just grab the edges of the parchment paper and lift the entire slab out. Use your hands to break it into rustic, irregular pieces. For cleaner breaks, you can carefully use a knife to score it before it fully sets, or tap the back of a knife on it once chilled.
How to Serve This Sweet & Salty Masterpiece
This bark is a star all on its own, but presentation is half the fun! Pile the broken pieces high on a beautiful wooden board or a vintage cake stand for a seriously impressive look. For gifting, nothing beats a simple clear cellophane bag tied with a bit of baker’s twine or a cute ribbon. It’s the perfect homemade touch for teachers, neighbors, or hostess gifts during the holidays.
My absolute favorite way to enjoy it? With a hot cup of coffee after lunch. The bitterness of the coffee cuts through the sweetness of the chocolate and caramel in the most perfect way. It’s also a killer dessert served alongside a scoop of good vanilla bean ice cream—just break a few pieces over the top for an epic sundae situation.
Get Creative: 5 Fun Ways to Mix It Up
Once you’ve mastered the basic formula, the flavor world is your oyster! Here are a few of my favorite twists:
- The Peanut Butter Lover: Swirl ¼ cup of warm peanut butter in with the caramel drizzle. You can even use peanut butter pretzels for a double PB punch!
- The Tropical Twist: Swap the pretzels for 1 cup of crushed potato chips (for salt) and 1 cup of toasted coconut flakes. The combo is unexpectedly incredible.
- The Cookie Crunch: Use crushed Oreos or chocolate chip cookies instead of (or in addition to!) the pretzels. A classic combo that never fails.
- The Nutty Professor: Add ½ cup of chopped toasted pecans, almonds, or peanuts along with the pretzels for an extra layer of flavor and crunch.
- The “Everything Nice” Bark: Go all out! Use a mix of white and dark chocolate, and add a handful of dried cranberries or raisins for a chewy, fruity contrast.
Beau’s Kitchen Chronicles: A Few Parting Thoughts
This recipe has evolved so much from that first accidental batch in my grandma’s kitchen. I’ve made it for probably every birthday, holiday, and casual get-together since. One of my favorite kitchen memories is of my nephew, who was about four at the time, “helping” me by “testing” every single pretzel before it went on the bark. His little face was covered in chocolate and salt by the end, and it was worth every messy second.
The beauty of this bark is its flexibility. It forgives mistakes and encourages creativity. So don’t stress about making it perfect. Make it yours! That’s what cooking is all about.
Your Bark Questions, Answered!
Q: My chocolate got cloudy and blotchy after I chilled it. What happened?
A: Ah, that’s called “bloom.” It happens when the chocolate gets too cold too quickly or if moisture got into it. Don’t worry! It’s 100% still safe to eat and will taste exactly the same. It just loses its perfect glossy appearance. To prevent it next time, make sure your bowl is completely dry when melting, and try letting the bark set in a cooler spot (like a cold garage in winter) instead of the super-cold fridge.
Q: Can I use white chocolate instead?
A: Absolutely! White chocolate bark is delicious. Just be extra careful when melting it, as white chocolate is more delicate and can seize up or burn more easily. Melt it on very low heat and stir constantly.
Q: How far in advance can I make this?
A: It keeps beautifully! Stored in an airtight container at cool room temperature (so it doesn’t sweat), it will stay fresh and crunchy for up to 2 weeks. You can also layer it between sheets of parchment paper so the pieces don’t stick together.
Q: My bark is too hard to break! Did I do something wrong?
A: If it’s rock hard, it might have been in the fridge a bit too long. Simply let it sit on the counter for 5-10 minutes to slightly warm up—it will become easier to snap. Also, ensure you’re spreading the chocolate to the recommended ½-inch thickness; a much thicker layer will be harder to break.
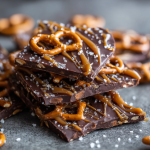
Salted Caramel Pretzel Bark
Description
A no-bake, crowd-pleasing bark that combines melted chocolate, crunchy pretzels, gooey caramel, and a sprinkle of flaky sea salt. Perfect for gifting, snacking, or impressing at any gathering.
Ingredients
-
Chocolate: 16 oz semi-sweet or milk chocolate, chopped (or chips)
-
Crunch: 2 cups mini pretzels, lightly crushed
-
Caramel: ½ cup caramel sauce (homemade or store-bought)
-
Finishing Touch: 1 tsp flaky sea salt (like Maldon)
Optional Add-Ins/Variations:
-
Peanut butter drizzle (¼ cup)
-
Crushed Oreos or cookies
-
Nuts (½ cup toasted pecans, almonds, or peanuts)
-
Dried fruit (cranberries or raisins)
-
Mix of white and dark chocolate
Instructions
-
Prep: Line a 9×13” rimmed baking sheet with parchment paper, leaving extra overhang for easy lifting.
-
Melt Chocolate:
-
Microwave: Heat chopped chocolate at 50% power in 30-second intervals, stirring between each.
-
Double Boiler: Melt chocolate in a heatproof bowl over simmering water, stirring until glossy.
-
Optional: Stir in 1 tsp coconut oil or vegetable shortening if too thick.
-
-
Spread Chocolate: Pour onto prepared pan and spread ½-inch thick using a spatula or spoon. Rustic edges are perfect.
-
Add Toppings:
-
Evenly sprinkle crushed pretzels over the chocolate.
-
Drizzle caramel sauce generously in a zig-zag or swirl pattern.
-
Sprinkle with flaky sea salt evenly across the top.
-
-
Chill: Refrigerate for 30–40 minutes until firm.
-
Break & Serve: Lift slab using parchment overhang and break into rustic pieces by hand. For cleaner edges, score lightly with a knife before fully set.
Notes
-
Chocolate Bloom: Cloudy chocolate is safe to eat; prevent by using dry bowls and gentle cooling.
-
White Chocolate: Use carefully—it melts faster and can seize if overheated.
-
Storage: Keep airtight at cool room temperature for up to 2 weeks. Layer with parchment paper to prevent sticking.
-
Breaking: Allow slightly to warm if too hard from the fridge; ½-inch chocolate layer snaps best.
Nutrition
- Calories: 160 kcal Per Piece
- Fat: 8g
- Carbohydrates: 22g
- Protein: 2g
Nutritional Information (Because We’re Curious!)
Okay, let’s be clear: this is a treat, through and through. It’s not a salad. But it’s made with real ingredients, and it’s nice to know what you’re enjoying! This nutritional estimate is per piece, assuming you break the batch into 20 pieces.
- Calories: ~160 kcal
- Protein: 2g
- Fat: 8g
- Carbohydrates: 22g
- Fiber: 1g
- Sugar: 14g
Remember, these are estimates and can vary based on the specific brands of ingredients you use, especially the chocolate and caramel. The key, as with all good things, is to savor a piece or two and enjoy every single sweet, salty, crunchy bite!
Final Thoughts from My Kitchen to Yours
Well, there you have it, friends. My not-so-secret secret for the easiest, most addictive treat in my recipe arsenal. I hope this Salted Caramel Pretzel Bark brings as much joy to your kitchen as it has to mine over the years. It’s more than just a recipe; it’s a reminder that the best things in life don’t have to be complicated.
So tell me, did you try it? What variations did you dream up? Tag me on social @feastical with your creations—I love seeing your kitchen adventures! Now, go break some bark (and maybe share a piece with a friend).
Until next time, keep your spatula close and your chocolate melted.
Gingerbread Chocolate Bark
Your New Favorite Holiday Treat: Gingerbread Chocolate Bark
Hey friends, Beau here from Feastical! Can you smell it? That magical, spicy-sweet aroma of gingerbread cookies baking in the oven? It’s the unofficial scent of the holiday season, and it always fills my kitchen with pure, unadulterated joy. But let’s be real for a second—between shopping for gifts, decking the halls, and trying to remember where you packed the “good” wrapping paper, spending hours baking intricate cookies isn’t always in the cards. That’s where this absolute lifesaver of a recipe comes in: my Gingerbread Chocolate Bark.
This isn’t just any bark; it’s a no-bake, impossibly easy, and wildly delicious treat that combines creamy, dreamy chocolate with the warm, nostalgic flavor of gingerbread. It’s the kind of recipe that makes you look like a holiday baking wizard with minimal effort. We’re talking melt, sprinkle, chill, and break. That’s it! It’s perfect for last-minute hostess gifts, for leaving out for Santa (he’ll appreciate the upgrade, trust me), or for just keeping on hand for when that 3 p.m. sugar craving hits during a marathon of holiday movies. So, grab your favorite mixing bowl and let’s create something magical together. This Gingerbread Chocolate Bark is about to become your new holiday tradition.
A Story of Sweet Salvation (And a Near Kitchen Disaster)
I have to share a quick story about why this bark holds a special place in my heart. A few years back, I volunteered to bring a massive platter of holiday desserts to my friend’s annual ugly sweater party. I had grand plans: intricately decorated sugar cookies, a towering Yule log, the works. But, as fate would have it, my oven decided to stage a full-blown rebellion and quit on me the morning of the party. I was in a full-blown panic, surrounded by ingredients and zero way to bake them.
That’s when I remembered this bark recipe, a no-bake gem I’d been tinkering with. I raided my pantry, melted every bar of chocolate I could find, and used a bag of store-bought mini gingerbread men I’d picked up for… well, honestly, for myself to snack on. In about 15 minutes, I had two giant trays of this chocolate and gingerbread creation setting in the fridge. I showed up to the party, slightly flustered, with my broken oven story and a platter of broken chocolate. Guess what? The bark was the absolute hit of the night. It was the first thing to disappear, and I got more requests for the recipe than for my usually-famous cookies. It was a beautiful lesson that sometimes, the simplest, most thrown-together things, made with a little bit of love and a lot of chocolate, are the most memorable.
Gathering Your Gingerbread Bark Ingredients
Here’s everything you need to make a double batch (because trust me, you’ll want a double batch!). I’ve included some of my chef-y insights and easy swaps to make this recipe your own.
- 4 White Dairy Milk bars (or 400g white chocolate): I love the creamy, vanilla-forward sweetness of white chocolate here—it’s the perfect canvas for the spicy gingerbread. Chef’s Tip: You can use white chocolate chips, but bars often melt a little smoother. For a dairy-free version, simply grab your favorite vegan white chocolate bar!
- 2 Cadbury Caramilk bars (or 200g caramelized white chocolate): This is the secret weapon! Caramilk has this incredible buttery, caramelized flavor that adds a gorgeous depth and makes the bark taste even more decadent. Chef’s Tip: Can’t find Caramilk? Just use two more white chocolate bars and add a big pinch of brown sugar to the melted chocolate—it’s not exactly the same, but it gives a lovely caramel hint.
- 1 ½ cups mini gingerbread men biscuits: The star of the show! These little guys pack all the warm spice flavor we’re after. Chef’s Tip: If you can’t find mini ones, just roughly chop regular-sized gingerbread cookies or gingersnaps. Homemade gingerbread crumbs work fantastically too!
- ½ cup gingerbread sprinkles and shapes: This is where the festive fun comes in! These sprinkles add extra crunch, color, and a major dose of holiday cheer. Chef’s Tip: No gingerbread-specific sprinkles? A mix of red and green sugar sprinkles, cinnamon imperials, or even some crushed-up cinnamon candies will work beautifully.
How to Make Your Gingerbread Chocolate Bark: A Step-by-Step Guide
Alright, team, let’s get our hands dirty (or, more accurately, keep them clean because this is so simple). Follow these steps, and you’ll be a bark-making pro in no time.
Step 1: Prep Your Pan. First things first, line a large baking sheet (a standard half-sheet pan, about 13×18 inches, is perfect) with parchment paper. Smooth it out as best you can—this will be your non-stick lifesaver later. Chef’s Hack: Give the pan a very light spritz of cooking spray first. The parchment paper will stick to the pan and won’t slide around while you’re spreading the chocolate. You’re welcome!
Step 2: Melt the Chocolate. Break all of your chocolate bars into pieces and add them to a microwave-safe bowl. Now, the golden rule for melting chocolate: LOW AND SLOW. Microwave in 30-second bursts on 50% power, stirring well between each burst. It usually takes about 2-3 rounds. Stop when there are still a few small lumps and just stir until they melt completely. This prevents the chocolate from seizing up and becoming a grainy mess. Chef’s Hack: If you’re nervous about the microwave, use a double boiler! Simply place a heatproof bowl over a pot of gently simmering water (make sure the bottom of the bowl doesn’t touch the water) and stir until melted. It’s foolproof.
Step 3: Spread It Out. Pour your beautifully melted, smooth chocolate directly onto the center of your prepared parchment paper. Use an offset spatula or the back of a spoon to spread it into an even layer, about 1/4 to 1/2 inch thick. Don’t worry about making a perfect rectangle—rustic and irregular is part of the charm! Chef’s Tip: Work relatively quickly here, as the chocolate will start to set at room temperature.
Step 4: The Fun Part: Decorating! This is where you get to be an artist. Immediately after spreading the chocolate, take your mini gingerbread men and gently press them into the chocolate. Scatter them evenly across the surface. Then, go to town with your gingerbread sprinkles and any other optional toppings you’re using. The key is to do this before the chocolate even thinks about setting, so everything sticks perfectly.
Step 5: Chill Out. Very carefully transfer the entire baking sheet to your refrigerator. Let it chill for a solid 30-40 minutes, or until the chocolate is completely firm to the touch. Chef’s Hack: No room in the fridge? If it’s cold outside, a garage or porch can work in a pinch! Just make sure it’s safe from any curious critters.
Step 6: Break and Enjoy! Once it’s fully set, take the bark out of the fridge. Lift the entire slab of chocolate by grabbing the edges of the parchment paper. Place it on a cutting board and, using your hands, break it into beautiful, irregular shards and pieces. Don’t you dare use a knife—the messy, rustic break is what makes it so charming!
How to Serve This Festive Masterpiece
Presentation is part of the fun! You’ve made something gorgeous, so let’s show it off. I love piling the broken bark high on a large wooden board or a beautiful vintage platter. It creates a gorgeous centerpiece that guests can’t resist. For gifting, grab some clear cellophane treat bags and tie them with a festive ribbon. Stack a few pieces in each bag, and you’ve got the most thoughtful, homemade gift for neighbors, teachers, postal workers, or anyone who deserves a sweet treat.
This bark is fantastic all on its own, but it also plays well with others. Serve it alongside a warm mug of spiced hot chocolate, a rich coffee, or even a glass of cold milk for the ultimate nostalgic combo. It’s the perfect sweet ending to a big holiday meal that doesn’t feel too heavy. Honestly, just leave a plate of it out on the counter and watch it magically disappear throughout the day.
Get Creative: 5 Delicious Variations to Try
The beauty of this recipe is its versatility. Once you’ve mastered the base, the flavor world is your oyster! Here are a few of my favorite twists:
- The Peppermint Swirl: Drizzle melted dark chocolate over the top of the finished bark right after you add the sprinkles. Then, take a toothpick and swirl it through the dark and white chocolate for a marbled effect. Finish with a generous sprinkle of crushed candy canes for that classic, refreshing peppermint crunch.
- The Nutty Professor: Add a fantastic textural contrast by scattering a 1/2 cup of toasted pecans, almonds, or walnuts over the chocolate along with the gingerbread men. The toasty, savory notes of the nuts cut through the sweetness perfectly.
- The Salty-Sweet Sensation: This is for all my fellow salt lovers. Just before chilling, sprinkle the entire bark with a light dusting of flaky sea salt. It amplifies every single flavor and creates an irresistible sweet-and-salty situation.
- The Triple Chocolate Threat: Feeling extra decadent? Use a mix of chocolates! Make a layer with melted milk chocolate first, then drizzle the white and Caramilk chocolate over the top and swirl. You get multiple layers of chocolatey goodness in every bite.
- The Fruit & Nut: For a different kind of holiday flavor, swap half the gingerbread sprinkles for dried cranberries or chopped dried apricots and some pistachios. It’s chewy, crunchy, and incredibly festive.
Beau’s Chef Notes & Kitchen Stories
This recipe has evolved so much since that first panicked batch. I started with just white chocolate and gingerbread, but adding the Caramilk was a complete game-changer—it tastes like you spent hours making a complicated caramel when you really just melted a bar of chocolate! I also learned the hard way that if you try to break the bark before it’s fully set, you’ll get fingerprints everywhere and it might crack in weird ways. Patience is a virtue, especially when chocolate is involved.
One of my favorite kitchen memories involving this bark was when my little nephew came over to “help.” He was in charge of sprinkles, and let’s just say he believed in a very… generous… application. We ended up with what looked like a sprinkle avalanche had hit our bark. It was a mess, and it was absolutely perfect. He was so proud. It reminded me that cooking isn’t about perfection; it’s about the joy you make along the way. Even if that joy is measured in cups of sprinkles.
Your Gingerbread Bark Questions, Answered!
Q: My chocolate seized and got grainy! What did I do wrong and can I fix it?
A: This usually means a tiny bit of moisture or steam got into the chocolate. To try and save it, stir in a teaspoon of neutral oil (like vegetable or coconut oil) at a time until it smooths back out. If it’s really bad, sadly, it’s best to start over. Remember: low heat and dry bowls are key!
Q: How far in advance can I make this?
A: It keeps brilliantly! Stored in an airtight container in the fridge, it will stay fresh and delicious for up to 2 weeks. You can also freeze it for up to 2 months. Just thaw it in the fridge overnight before serving.
Q: Why did my bark get a white, cloudy film on it?
A> Don’t worry, it’s still safe to eat! That’s called “bloom.” It happens when the chocolate gets too warm or experiences temperature fluctuations. It’s just the cocoa butter separating and rising to the surface. The flavor is still great, even if it’s not picture-perfect.
Q: Can I use chocolate chips instead of bars?
A> You can, but be aware that chocolate chips often contain stabilizers to help them hold their shape, which can make them a bit trickier to melt smoothly. If you use them, add that teaspoon of oil when melting to help it stay silky.

Gingerbread Chocolate Bark
Description
This no-bake Gingerbread Chocolate Bark combines creamy chocolate with warm, nostalgic gingerbread flavors. Quick, easy, and festive—it’s perfect for gifts, holiday parties, or snacking during cozy movie marathons.
Ingredients
-
Chocolate:
-
4 white chocolate bars (≈400g)
-
2 Caramilk bars (≈200g) – optional, or use white chocolate + pinch of brown sugar
-
-
Gingerbread Elements:
-
1½ cups mini gingerbread men cookies
-
½ cup gingerbread-themed sprinkles or shapes
-
Optional Toppings:
-
Crushed candy canes, nuts, dried cranberries, or extra chocolate drizzle
Instructions
-
Prep the Pan: Line a large baking sheet (≈13×18″) with parchment paper. Optional: light spray of cooking oil to prevent shifting.
-
Melt Chocolate: Break chocolate bars into pieces. Microwave in 30-second bursts at 50% power, stirring each time until smooth. Alternatively, melt using a double boiler.
-
Spread Chocolate: Pour melted chocolate onto the center of the pan and spread ¼–½ inch thick using an offset spatula or back of a spoon. Rustic shapes are perfect.
-
Decorate: Immediately press mini gingerbread men and sprinkles into the chocolate. Add optional toppings as desired.
-
Chill: Refrigerate for 30–40 minutes or until firm.
-
Break & Serve: Lift chocolate using parchment edges and break into irregular shards by hand. Arrange on a platter or package in treat bags for gifting.
Notes
-
Chocolate can seize if moisture gets in; add a teaspoon of neutral oil to fix it.
-
Let bark fully set before breaking for clean, charming shards.
-
Store airtight in the fridge for up to 2 weeks, or freeze for up to 2 months.
-
White, cloudy film on chocolate (“bloom”) is harmless and won’t affect flavor.
Nutrition
- Calories: 180 Cal per piece
- Sodium: 45mg
- Fat: 10g
- Saturated Fat: 6g
- Carbohydrates: 20g
- Cholesterol: 5mg
Nutritional Information (Because We’re Curious!)
Okay, let’s be clear: this is a holiday treat, through and through. It’s meant to be enjoyed in moderation as part of the festive fun! Here’s a rough nutritional breakdown per serving (based on getting 24 pieces from a double batch). Remember, these are estimates and can vary based on your specific ingredients and toppings.
Per Piece (approx.):
Calories: 180 | Total Fat: 10g | Saturated Fat: 6g | Cholesterol: 5mg | Sodium: 45mg | Total Carbohydrates: 20g | Dietary Fiber: <1g | Sugars: 17g | Protein: 2g
The main contributors are the chocolate (providing fat and sugar) and the cookies (adding carbs and a tiny bit of fiber). If you’re looking for ways to lighten it up slightly, you could use a sugar-free chocolate alternative and look for lower-sugar gingerbread cookies. But my philosophy? Enjoy a piece or two of the real, delicious stuff and savor every single bite!
Final Thoughts from My Kitchen to Yours
Well, friends, that’s it! My go-to, never-fail, always-impresses Gingerbread Chocolate Bark. I hope this recipe brings as much joy and ease to your holiday season as it has to mine. It’s more than just a dessert; it’s a reminder that the best moments often come from simple ingredients, a little bit of creativity, and sharing something sweet with the people you love.
I’d love to see your creations! If you make this bark (or one of the fun variations), tag me on social @feastical and use the hashtag #FeasticalHolidays. You know I live for your kitchen photos. From my family to yours, happy holidays and happy baking!
With love and a full plate,