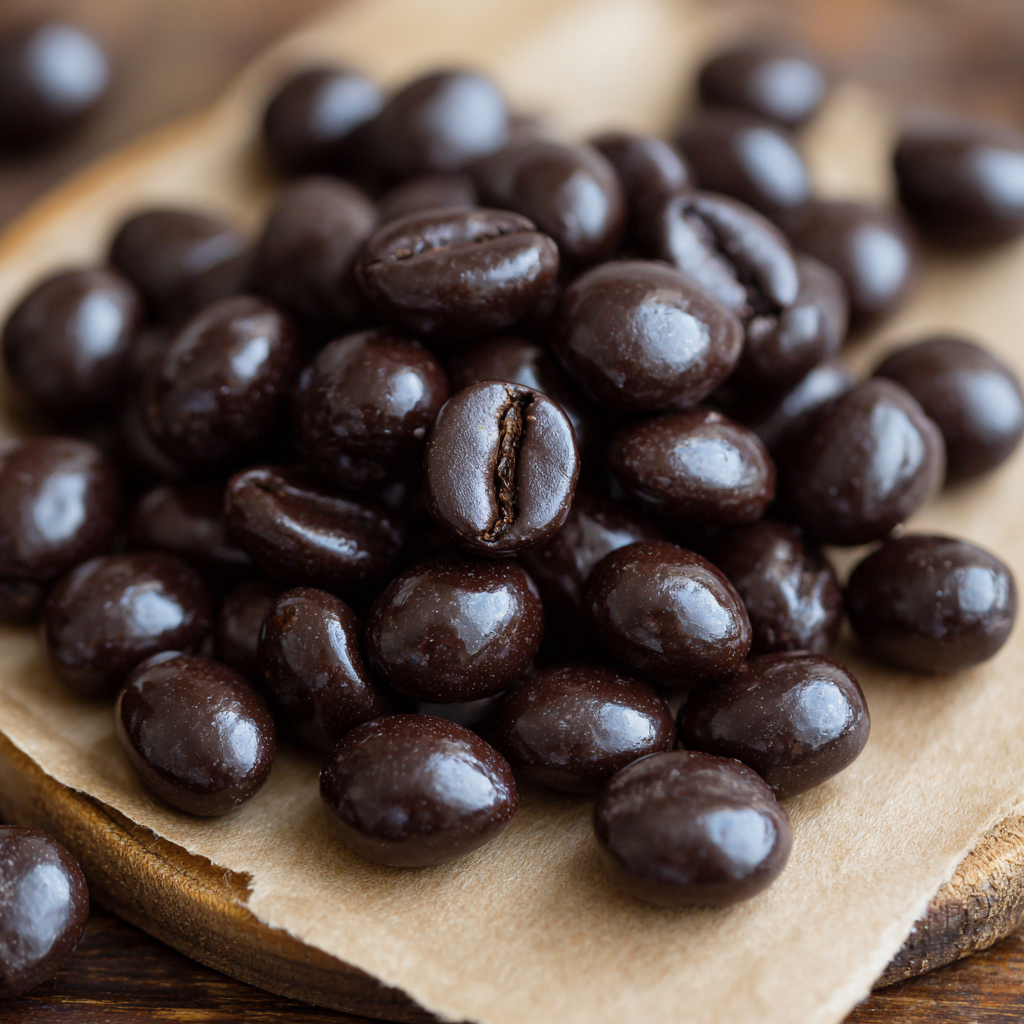
Chocolate Covered Espresso Beans
Your New Favorite Coffee Break Is Here: Homemade Chocolate Covered Espresso Beans
Hey friends, Beau here from Feastical! Let’s talk about that 3 PM slump. You know the one. Your energy is dipping, your focus is fading, and the siren song of the nearest coffee pot is getting louder by the minute. But what if I told you there’s a better way? A more delicious, more fun, and downright addictive way to get that little jolt of joy and caffeine you’re craving? Friends, meet my not-so-secret weapon: Homemade Chocolate Covered Espresso Beans.
These little powerhouses are the ultimate two-in-one treat. They’re not just a snack; they’re an experience. You get the bold, aromatic crunch of a premium roasted espresso bean, instantly followed by the luxurious, melt-in-your-mouth bliss of rich, dark chocolate. It’s a sophisticated flavor bomb that feels indulgent but is surprisingly simple to whip up in your own kitchen. Forget the overpriced, often waxy versions you find at the store. When you make them yourself, you control the quality of the chocolate, the roast of the bean, and you get to infuse them with that most special ingredient of all: a little bit of your own love.
Whether you’re looking for a quick pick-me-up to stash in your desk drawer, a utterly unique homemade gift for the foodie in your life, or the perfect crunchy topping for your favorite dessert, these chocolate covered espresso beans are your answer. So, grab your favorite apron, and let’s turn your kitchen into a artisan candy shop for the afternoon. I promise, it’s easier than you think, and the results are absolutely… Feastical.
A Bean of a Tale: My First Foray into Caffeinated Confection
I’ll never forget my first encounter with a chocolate covered espresso bean. I was about sixteen, working my first real job as a barista at a quirky, independent coffee shop that smelled like heaven and old books. My manager, a wonderfully eccentric woman named Clara who wore mismatched earrings and knew everything there was to know about coffee, caught me yawning during a late shift. Without a word, she slid a small ceramic bowl across the counter. It was filled with these dark, lumpy, mysterious little nuggets.
“Try one,” she said, a knowing glint in her eye. “It’s like a coffee break without the cup.”
I was skeptical. Eating a coffee bean? But I trusted her, so I popped one in my mouth. What happened next was nothing short of a revelation. The initial snap of bitter, intense coffee was almost immediately soothed by the sweet, creamy chocolate melting around it. The flavors danced together—earthy, sweet, robust, smooth. It was complex and utterly delightful. From that moment on, I was hooked. I started making my own batches at home, gifting them in little mason jars at Christmas, and always keeping a stash handy. They’re more than just a treat; they’re a tiny, edible souvenir from a formative time in my life, a little reminder of Clara’s wisdom and the magic that happens when two simple, incredible ingredients decide to become best friends.
Gathering Your Flavor Arsenal: What You’ll Need
Part of the beauty of this recipe is its simplicity. You only need a few key players, but choosing high-quality ingredients here makes a world of difference. This is where you become the artist!
- 1 cup whole roasted espresso beans: This is your star! Look for a high-quality, freshly roasted bean. You can often find these in the bulk section of grocery stores or at your local coffee roaster. The roast level is up to you—a medium roast will be a bit brighter and more acidic, while a dark roast will give you that classic, deep, bitter coffee punch. Chef’s Insight: Avoid pre-ground coffee! You need the whole bean for that satisfying crunch. If you can’t find beans specifically labeled “espresso,” any high-quality whole coffee bean will work beautifully.
- 8 oz dark chocolate (60-70%), chopped or chips: This is your supporting actor that absolutely steals the show. I highly recommend using a chocolate bar that you enjoy eating on its own and chopping it up. It melts more evenly than chips, which contain stabilizers. The 60-70% cacao range provides the perfect balance of sweetness and bitterness to complement the coffee. Substitution Tip: You can use semi-sweet chocolate if you prefer a sweeter treat, or even milk chocolate for a gentler, creamier experience. For a dairy-free version, just ensure your chocolate is vegan-friendly!
- 1 tsp coconut oil or neutral oil (optional): This little trick is a game-changer. Adding a tiny bit of oil to your melting chocolate creates a smoother, thinner consistency that makes coating the beans much easier and gives the finished product a more professional, snappy shell. Chef’s Hack: Coconut oil adds a very subtle flavor that works wonderfully here, but a flavorless oil like vegetable or canola will work just fine if you want to avoid any coconut taste.
- Cocoa powder or powdered sugar (optional, for dusting): This is purely for aesthetics and a final flavor boost! A light dusting of cocoa powder reinforces the chocolate intensity and looks beautifully professional, while powdered sugar adds a lovely sweet contrast and prevents sticking if you’re packing them together.
Crafting Your Caffeinated Crunch: A Step-by-Step Guide
Alright, team! Let’s get our hands dirty (or, more accurately, a little chocolatey). This process is fast, fun, and incredibly satisfying. Read through all the steps once before you begin, and remember—cooking is about feeling, not just following. You’ve got this!
Step 1: Melt the Chocolate (The Foundation)
Place your chopped chocolate (or chips) and the teaspoon of coconut oil (if using) into a microwave-safe bowl. Now, the key to perfectly melted chocolate is patience. Microwave on high for 20 seconds, then stop and stir. Repeat this process—20 seconds, stir, 20 seconds, stir—until the chocolate is almost entirely melted. It should only take 2-3 intervals. Once it’s mostly liquid, stop microwaving and just keep stirring. The residual heat in the bowl will melt the last few lumps, giving you a perfectly smooth, silky, and glossy chocolate pool. Why we do this: Blasting chocolate on high heat is a one-way ticket to a scorched, grainy mess. Gentle, incremental heat protects the delicate cocoa fats and ensures a smooth dip every time.
Step 2: Coat the Beans (The Fun Part)
Pour your whole cup of espresso beans into the bowl of melted chocolate. Grab a spatula and gently fold the beans into the chocolate, ensuring every single bean is thoroughly and lovingly enveloped. You want a good, even coating, but not a comically thick one. Pro Tip: Make sure your beans are at room temperature! If they’re cold, they can cause the chocolate to seize up and become clumpy when you mix them in.
Step 3: Remove & Separate (The Finesse)
Line a baking sheet with parchment paper or a silicone baking mat. Now, using a fork or a slotted spoon, scoop up a small cluster of coated beans. Gently tap the fork against the edge of the bowl to shake off any excess chocolate. This is the secret to avoiding one giant, connected “espresso bean brittle” and ensuring you get distinct, separate beans. Carefully place the small clusters or individual beans onto your prepared baking sheet. Chef’s Hack: Have two forks handy! Using one fork to lift the beans and a second fork to help slide them onto the tray can make this process much cleaner and faster.
Step 4: Set & Dust (The Grand Finale)
Once all your beans are neatly arranged on the tray, slide the entire sheet into the refrigerator. Let them chill for at least 15-20 minutes, or until the chocolate shell is completely firm to the touch. If you’re opting for the optional dusting, now’s the time! Place your set beans in a clean bowl, add a small spoonful of cocoa powder or powdered sugar, put a lid on the bowl, and give it a few gentle shakes until they’re lightly and evenly coated. This adds that final, beautiful, professional touch.
How to Serve & Savor Your Masterpiece
You’ve done it! You’ve created a truly spectacular treat. Now, how do you enjoy them? Let me count the ways!
The most obvious way is also the best: by the handful as a straight-up, powerful snack. Keep a small jar on your desk for an afternoon energy boost that’s miles better than a sad energy drink. But don’ stop there! These beans are incredibly versatile. Crush them up and use them as a show-stopping topping for vanilla ice cream, Greek yogurt, or a luxurious chocolate mousse. The crunch and flavor they add are unbelievable.
They also make for absolutely unforgettable homemade gifts. Package them in small cellophane bags tied with a rustic piece of twine, or pile them into a elegant little jar with a custom label. Give them to your coffee-loving friends, your coworkers, your host at a dinner party—I promise, they will be remembered and requested. However you choose to enjoy them, do so with a cup of your favorite brew nearby. It’s the circle of coffee life, my friends.
Get Creative: Delicious Twists & Variations
Once you’ve mastered the classic, it’s time to play! Your kitchen is your laboratory. Here are a few of my favorite ways to mix things up:
- The Mocha Marvel: After your dark chocolate beans have set, melt a quarter cup of white chocolate and drizzle it over the top. Let it set again. The combination of dark chocolate, coffee, and sweet white chocolate is a next-level experience.
- The Spicy Kick: Feeling adventurous? Add a tiny pinch of cayenne pepper or chili powder to the melted dark chocolate and stir well before adding the beans. The subtle heat that follows the chocolate and coffee is a fantastic and sophisticated surprise.
- The Nutty Professor: Who says it has to be just beans? Mix in a handful of roasted, chopped almonds or hazelnuts with the espresso beans before coating them in chocolate. You get a fantastic variety of textures and flavors in every bite.
- The Sweet & Salty Sensation: Right after you’ve placed the coated beans on the baking sheet but before they go in the fridge, sprinkle them with a tiny bit of flaky sea salt (like Maldon). The salt makes the chocolate taste even richer and more complex.
- The Vanilla Dream: For a smoother, sweeter note, add a 1/4 teaspoon of vanilla extract or the seeds from a vanilla bean pod to your melted chocolate. It creates a beautiful aromatic background that complements the coffee perfectly.
Beau’s Chef Notes & Kitchen Stories
Over the years, this recipe has seen many iterations in my kitchen. I once, in a moment of what I thought was pure genius, decided to triple the batch for a holiday party. I got a little overzealous and tried to melt all the chocolate in one big bowl. Let’s just say I learned the hard way that melting chocolate in large quantities requires even more patience and a double boiler. I ended up with a slightly grainy texture, but you know what? Nobody at that party noticed or cared. They were too busy happily munching away.
The moral of the story? Don’t stress about perfection. Even a “mistake” with chocolate and coffee is still a pretty darn delicious thing. This recipe is forgiving and fun. Make it your own. Use your favorite chocolate. Try a new coffee roast. The best part of cooking is putting your own stamp on a dish, and these little beans are the perfect canvas for your creativity.
Your Questions, Answered: FAQs & Troubleshooting
Q: My chocolate became thick and clumpy when I melted it. What did I do wrong and can I fix it?
A: This is called “seizing,” and it usually happens when a tiny bit of moisture gets into the chocolate. Even a drop of water or steam can cause it! To prevent it, always ensure your bowl and utensils are completely dry. If it does happen, don’t panic. You can sometimes save it by immediately stirring in a teaspoon of neutral oil (like vegetable or canola) at a time until it becomes smooth again.
Q: How should I store these, and how long will they keep?
A: Store your finished chocolate covered espresso beans in an airtight container at room temperature in a cool, dry place. They’ll be at their best for about 2 weeks. You can also store them in the fridge, but let them come to room temperature for a few minutes before eating for the best texture and flavor. Avoid storing them somewhere warm, or your chocolate might get soft and melty.
Q: Are these really caffeinated? How many should I eat?
A: Yes, absolutely! You are eating whole coffee beans, so they contain caffeine. The exact amount depends on the bean, but it’s roughly similar to the caffeine in a cup of coffee per 1/4 cup of beans. I recommend enjoying them in moderation—a small tablespoon-sized serving (about 10-15 beans) is a great place to start. Listen to your body!
Q: Can I use milk chocolate or white chocolate instead?
A: You absolutely can! The recipe works exactly the same way. Just keep in mind that milk and white chocolate are sweeter and more delicate, so they will create a very different, much sweeter treat that lets more of the coffee’s bitterness shine through. It’s a delicious variation!

Chocolate Covered Espresso Beans
Description
Need a 3 PM pick-me-up that’s delicious, fun, and energizing? These chocolate covered espresso beans deliver bold coffee flavor with a crunchy bite, wrapped in smooth, rich chocolate. Perfect as a snack, dessert topping, or homemade gift!
Ingredients
-
1 cup whole roasted espresso beans
-
8 oz dark chocolate (60–70%), chopped or in chips
-
1 tsp coconut oil or neutral oil (optional, for smoother coating)
-
Cocoa powder or powdered sugar (optional, for dusting)
Tips:
-
Use high-quality beans for best flavor and crunch.
-
Choose chocolate you enjoy eating—bar chocolate melts more evenly than chips.
-
Coconut oil helps create a glossy, firm shell, but any neutral oil works.
Instructions
1. Melt the Chocolate
-
Place chocolate and oil (if using) in a microwave-safe bowl.
-
Microwave in 20-second intervals, stirring in between, until mostly melted. Stop and stir to let residual heat melt remaining chunks.
Tip: Avoid overheating—high heat can scorch chocolate and make it grainy.
2. Coat the Beans
-
Add espresso beans to the melted chocolate.
-
Gently fold to ensure each bean is fully coated.
Pro Tip: Make sure beans are at room temperature to prevent chocolate from seizing.
Notes
-
Chocolate seizes: Add a small amount of neutral oil and stir.
-
Too bitter? Use milk or semi-sweet chocolate.
-
Caffeine alert: Whole beans contain significant caffeine—1 tbsp (~10–15 beans) is a good starting serving.
Nutrition
- Calories: 85 kcal per 1 tbsp / ~10–15 beans
- Fat: 5 g
- Carbohydrates: 9 g
- Protein: 1 g
A Quick Note on Nutrition
While I’m all about indulgence and joy first, I know many of you are curious about what’s in your food. Here’s a general breakdown per tablespoon serving (roughly 10-15 beans). Remember, this is just an estimate, as it depends on the specific chocolate and beans you use.
These little guys are an energy-dense food, providing a quick source of energy from fats and carbohydrates. The dark chocolate offers antioxidants and flavonoids, while the coffee bean provides that famous caffeine kick. They’re a perfect example of a “sometimes food”—a powerful, satisfying treat that’s best enjoyed mindfully as part of a balanced diet. So go ahead, savor a few. You’ve earned it!
Final Thoughts from My Kitchen to Yours
Well, there you have it, my friends. Everything you need to know to create your own batch of incredibly delicious, homemade chocolate covered espresso beans. This recipe is a testament to the fact that the best things in life are often the simplest: two incredible ingredients, a few minutes of your time, and a whole lot of love.
I hope this recipe brings as much joy to your kitchen as it has to mine. It’s more than just a snack; it’s a conversation starter, a perfect gift, and a tiny, mighty boost of happiness. So, what are you waiting for? Get out there and make something Feastical.
And remember, if you make them, I’d love to see your creations! Tag me on social @Feastical and use the hashtag #FeasticalEats. Happy cooking!
With love and a full coffee mug,
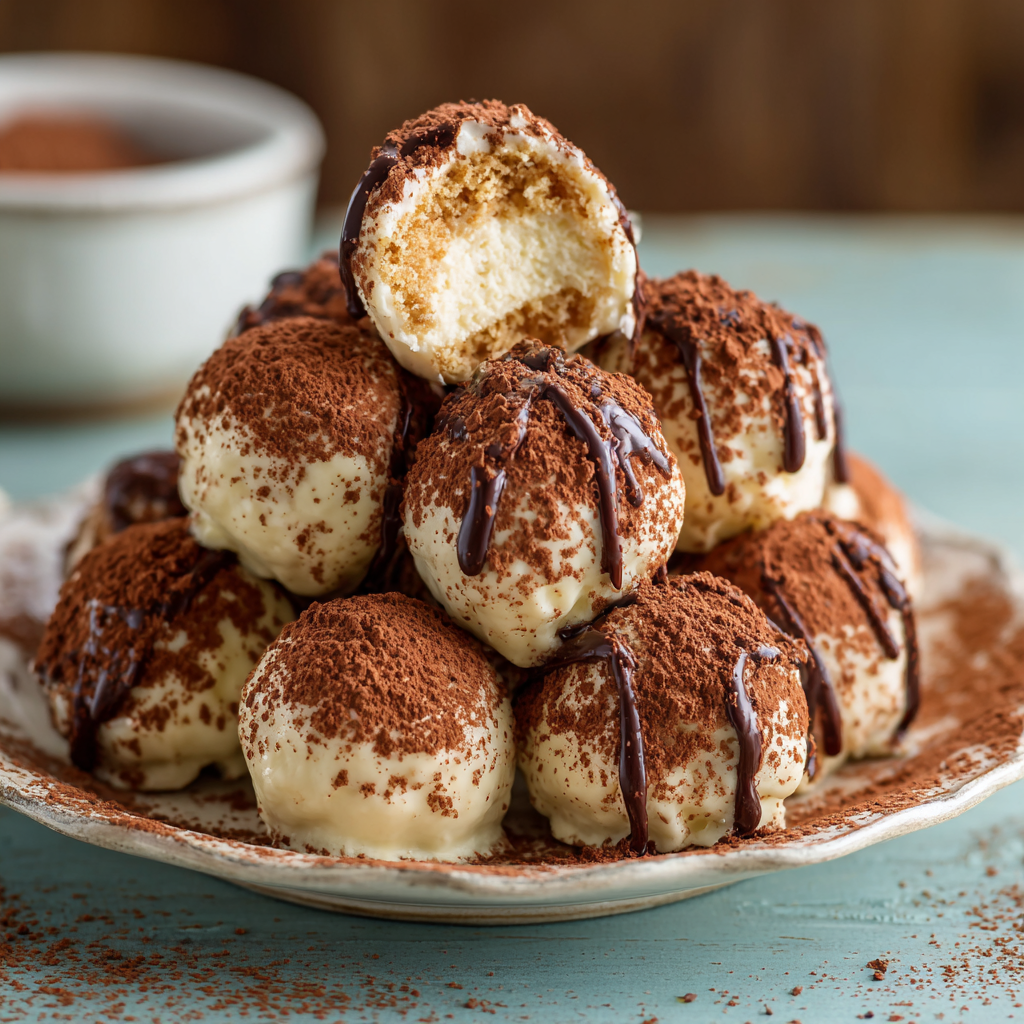
Tiramisu Truffles
Tiramisu Truffles: Your New Favorite No-Fork-Needed Dessert
Hey friends, Beau here! Let’s be real for a second: sometimes you need a dessert that’s a total showstopper. The kind of thing that makes people’s eyes light up the second you bring it out. But, and this is a big but, sometimes you also don’t have the time (or the energy) to layer a delicate Italian dessert in a fancy dish, carefully dust each portion, and hope it doesn’t turn into a soupy mess while you’re serving it. I’ve been there more times than I’d like to admit! That’s exactly why I became obsessed with creating the perfect Tiramisu Truffle. We’re talking all the iconic, dreamy flavors of classic tiramisu—the rich coffee, the creamy mascarpone, the soft ladyfingers, the bitter cocoa—all rolled up into one incredible, pop-in-your-mouth bite. No plates, no forks, no fuss. Just pure, unadulterated joy. These little guys are perfect for parties, potlucks, holiday gatherings, or just for stashing in your fridge for a sneaky 3 pm treat (your secret is safe with me). So, let’s ditch the dishes and dive into making these irresistibly Italian truffles together. Trust me, your taste buds will thank you.
A Sweet Slice of Memory
My love affair with tiramisu started not in a fancy restaurant, but in my Nonna’s kitchen. Well, my best friend Mike’s Nonna, to be exact. I spent half my childhood at their house, and the scent of freshly brewed espresso and sweet yeast was practically woven into the wallpaper. One Sunday, after a massive family dinner, Nonna brought out this beautiful, layered dessert dusted with what looked like chocolate. I’d never seen anything like it. She placed a generous slice in front of me with a wink. One bite and I was transported. The creamy, coffee-soaked layers were magic. But the best part was watching Mike, his little sister, and all the cousins try to sneak finger-fulls of the filling from the leftovers in the kitchen when they thought no one was looking. That’s the spirit I wanted to capture with these truffles—that same sense of playful, communal, finger-licking goodness. It’s all the nostalgia of that first life-changing bite, but designed for grabbing, sharing, and creating new memories (without the need to sneak around!).
Gathering Your Truffle Toolkit
Part of what makes this recipe so brilliant is its simplicity. You only need a handful of key players to create something truly spectacular. Here’s what you’ll need:
- 1 cup mascarpone cheese – This is the non-negotiable star of the show. Mascarpone is an Italian cream cheese that’s richer, thicker, and less tangy than its American cousin. It gives tiramisu its signature luxurious texture. Chef’s Tip: Make sure it’s cold and firm right out of the fridge for easier mixing.
- 1½ cups crushed ladyfingers – These dry, delicate sponge cakes (often called Savoiardi) are the traditional base. Their mild sweetness and airy texture soak up the coffee perfectly. Substitution Tip: In a pinch, vanilla wafers or even graham crackers will work, though the flavor will be slightly different.
- ¼ cup brewed espresso or strong coffee, cooled – This is where the deep, robust coffee flavor comes from. I strongly recommend a freshly brewed espresso or strong dark roast for the most authentic taste. Chef’s Insight: Using cooled coffee is crucial! Warm coffee will melt the mascarpone and make your mixture too runny.
- ½ tsp vanilla extract – A little splash of vanilla enhances all the other flavors and adds a warm, comforting aroma.
- ½ tsp rum or coffee liqueur (optional) – This is the “adults-only” upgrade! A tiny bit of dark rum, Kahlúa, or Marsala wine adds incredible depth. Feel free to leave it out for a family-friendly version—the truffles will still be amazing.
- 1 cup white or dark chocolate, melted (for coating) – This is our tasty shell! White chocolate complements the creamy interior beautifully, while dark chocolate adds a wonderful bittersweet contrast. Use high-quality baking bars for the best melt and flavor.
- Unsweetened cocoa powder (for dusting) – The classic tiramisu finish! A light dusting of high-quality cocoa powder (I prefer Dutch-processed for its deep color and smooth flavor) adds that final touch of bitterness and elegance.
Let’s Get Rolling: Your Foolproof Truffle Method
Don’t let the fancy name fool you—this process is a breeze. I’ve broken it down step-by-step with all my best kitchen hacks to ensure your truffle-making is a total success.
Step 1: Make the Filling
In a medium-sized bowl, gently whisk together the cold mascarpone, cooled espresso, vanilla extract, and your optional liqueur until it’s just combined and smooth. Chef’s Hack: Avoid over-mixing here! We want to keep that mascarpone fluffy and airy, not dense. Now, add your crushed ladyfingers. I like to crush mine by putting them in a zip-top bag and rolling a rolling pin over them—it’s a great way to get out any frustrations of the day! Fold the cookie crumbs into the mascarpone mixture until a soft, slightly sticky dough forms. It should hold together when you press it. Pop this bowl into the refrigerator for a solid 30 minutes. This chill time is non-negotiable—it firms up the mixture, making it a million times easier to roll.
Step 2: Shape & Chill
Once your mixture is nicely chilled, it’s time to get your hands dirty! Using a small cookie scoop (a melon baller or even a teaspoon works too), portion out the mixture. I aim for about 1 tablespoon per truffle. Roll each portion quickly between your palms to form a neat ball. Pro Tip: If the mixture is sticking to your hands too much, lightly dampen them with water or put a tiny bit of neutral oil on your palms. This creates a non-stick barrier. Place each rolled truffle on a parchment or wax paper-lined baking sheet. Once they’re all rolled, send that tray back into the fridge for another 15-20 minutes. This second chill ensures they’re firm and won’t fall apart when we dip them.
Step 3: Dip & Dust (The Fun Part!)
Now for the magic! Melt your chocolate in a heatproof bowl set over a pot of simmering water (a double boiler) or in short bursts in the microwave, stirring frequently until smooth. Using a fork, a dipping tool, or even two spoons, carefully dip each chilled truffle into the melted chocolate, rolling it around to coat it completely. Gently tap the fork on the edge of the bowl to let any excess chocolate drip off—this prevents a big chocolate puddle from forming at the base (we call that a “foot”). Place the dipped truffle back onto the parchment paper. You have two options for the cocoa dusting: either dust them lightly while the chocolate is still wet so it sticks, or wait until the chocolate shell has fully set and then give them a gentle dusting right before serving. Both ways work great!
Step 4: Set & Store
Let the chocolate coating set completely. You can leave them at room temperature if your kitchen is cool, but I usually just pop the whole tray back in the fridge for about 10-15 minutes to speed things up. Once set, transfer your beautiful tiramisu truffles to an airtight container. They MUST be stored in the refrigerator due to the fresh cheese and will keep happily for up to 5 days. If you’re making them for a party, they are absolutely perfect made a day ahead.
How to Serve These Little Beauties
Presentation is part of the fun! While these truffles are delicious straight from the fridge, I like to let them sit at room temperature for about 5-10 minutes before serving to take the edge off the chill and let the flavors really sing. For a simple, elegant look, arrange them on a beautiful platter or in a shallow bowl. If you’re feeling fancy, you can place each one in a mini paper candy cup—it looks professional and makes them super easy to pick up. For a dinner party, I love serving a couple of truffles alongside a freshly brewed espresso or a small glass of amaretto. It feels incredibly special and is a conversation starter every single time. Remember, food that brings people together is what Feastical is all about, and these truffles are guaranteed to do just that.
Get Creative: Delicious Twists on a Classic
Once you’ve mastered the basic recipe, the world is your tiramisu truffle! Here are a few of my favorite ways to mix things up:
- The Cocoa Core: Skip the chocolate dip entirely! Instead, roll the set truffle balls directly in unsweetened cocoa powder. It’s faster, less messy, and delivers a super intense coffee-cocoa punch. Just be warned: these are a bit messier to eat, but oh-so-worth it.
- Topped Off: Elevate your truffles with a gorgeous garnish. Immediately after dipping, while the chocolate is still wet, top each one with a chocolate coffee bean, a delicate chocolate curl, or a tiny sprinkle of sea salt for a sweet-and-salty situation.
- Dark Side: Are you a dark chocolate devotee? Use a high-quality bittersweet or dark chocolate (70% cacao) for the coating. Its deep, complex bitterness pairs phenomenally well with the sweet, creamy filling.
- Nutty Note: Add a wonderful crunch and nutty flavor by stirring 2-3 tablespoons of very finely ground toasted hazelnuts or almonds into the filling mixture. You could also roll the finished truffles in crushed nuts instead of cocoa.
- Dairy-Free Delight: You can absolutely make this vegan! Use a plant-based mascarpone alternative (many stores carry them now), ensure your ladyfingers and chocolate are dairy-free, and use a non-dairy milk to thin your coffee if needed.
Beau’s Chef’s Notes & Kitchen Stories
This recipe has evolved from a bit of a kitchen disaster! The first time I tried it, I got impatient and used warm coffee. Let’s just say I ended up with tiramisu soup instead of truffle dough. Lesson learned: patience and cold ingredients are key! Over time, I’ve found that a cookie scoop is the ultimate tool for getting evenly sized truffles, and that chilling the shaped balls is the secret weapon against dip-day disasters. These truffles have become my go-to gift during the holidays. I pack them in little gift boxes lined with parchment paper, and they’re always a massive hit. More than once, I’ve had friends text me asking for the recipe before they’ve even left my driveway!
Your Tiramisu Truffle Questions, Answered!
Q: My mixture is too soft to roll! What did I do wrong?
A: This usually means one of two things: either your mascarpone was too warm to start with, or you didn’t chill the mixture long enough. Don’t panic! Just pop the whole bowl back into the fridge for another 20-30 minutes. If it’s still too soft, you can add a few more tablespoons of crushed cookie crumbs to help absorb the moisture and firm it up.
Q: Can I freeze these truffles?
A: You can! Place the undipped, shaped truffle balls on a parchment-lined tray and freeze until solid. Then transfer them to a freezer-safe bag or container for up to 2 months. When you’re ready to serve, let them thaw in the fridge, then dip and dust as usual.
Q: The chocolate coating is clumpy and hard to work with. Help!
A: This is likely seized chocolate! Chocolate is very sensitive to moisture. Make sure your truffle balls are completely chilled and dry before dipping. If your chocolate does seize, try adding a tiny amount of neutral oil (like coconut or vegetable oil) and stirring vigorously—this can sometimes bring it back.
Q: I don’t have espresso. What can I use?
A: No problem! Just make a very strong cup of coffee using your preferred method. Instant espresso powder dissolved in hot water is also a fantastic and convenient option that I use all the time.

Tiramisu Truffles
Description
Sometimes, you want the classic tiramisu flavor without the fuss of layering, dusting, and serving delicately. These Tiramisu Truffles pack all the iconic flavors—rich coffee, creamy mascarpone, soft ladyfingers, and a chocolatey finish—into bite-sized, finger-friendly treats. Perfect for parties, gifts, or a sneaky afternoon indulgence!
Ingredients
-
1 cup cold mascarpone cheese
-
1½ cups crushed ladyfingers (or substitute with vanilla wafers/graham crackers)
-
¼ cup brewed espresso or strong coffee, cooled
-
½ tsp vanilla extract
-
½ tsp rum or coffee liqueur (optional)
-
1 cup white or dark chocolate, melted (for coating)
-
Unsweetened cocoa powder, for dusting
Instructions
1. Make the Filling
-
In a medium bowl, gently whisk together mascarpone, cooled espresso, vanilla, and optional liqueur until smooth.
-
Fold in the crushed ladyfingers until a soft, slightly sticky dough forms.
-
Chill in the fridge for 30 minutes to firm up.
Tip: Don’t overmix! Keep the mascarpone light and fluffy.
Notes
-
Cocoa Core: Roll truffles in cocoa powder instead of chocolate for a more intense flavor.
-
Nutty Twist: Add finely ground toasted nuts to the filling or coat the finished truffles.
-
Dark Chocolate Lover: Use 70% cacao for a rich, bittersweet finish.
-
Dairy-Free: Use plant-based mascarpone, dairy-free chocolate, and non-dairy coffee to make vegan truffles.
Nutrition
- Calories: 120 kcal (per truffle
- Fat: 8 g
- Carbohydrates: 10 g
Nutritional Info (Because Knowledge is Power!)
Okay, let’s be clear: these are a treat, through and through. But it’s always good to know what you’re enjoying! The estimated nutritional information per truffle (assuming a yield of 24) is approximately:
- Calories: ~120 kcal
- Fat: 8g
- Carbohydrates: 10g
- Protein: 2g
Remember, these values can vary based on the specific brands of ingredients you use, the size of your truffles, and how much chocolate coating you use. The primary sources of calories are the mascarpone cheese and the chocolate, providing energy from fats and carbohydrates. Enjoy them mindfully as part of a balanced diet—one or two are perfect for satisfying a serious sweet tooth!
Final Thoughts
And there you have it, friends! Your complete guide to making unbelievably delicious Tiramisu Truffles right in your own kitchen. This recipe is a testament to the idea that the best food doesn’t have to be complicated. It’s about capturing a feeling, a memory, and a whole lot of flavor in one simple, bite-sized package. I hope these truffles bring as much laughter and joy to your table as they have to mine. Remember, cooking is an adventure—don’t be afraid to get your hands a little dirty and make the recipe your own. Now, I’d love to hear from you! Did you try the classic version or one of the fun twists? Tag me @Feastical on social media with your creations. Until next time, happy cooking!
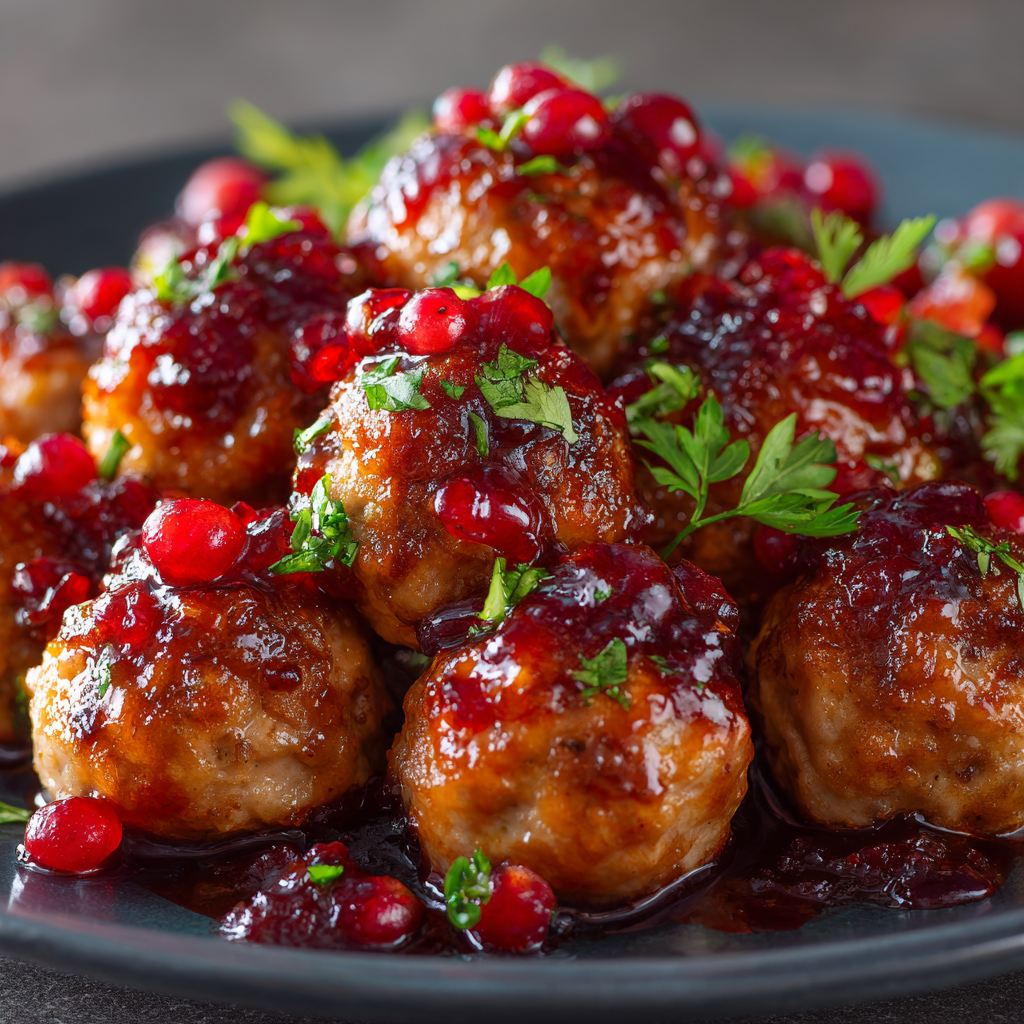
Sweet & Spicy Turkey Cocktail Meatballs
Your New Party Hero: Sweet & Spicy Turkey Cocktail Meatballs
Hey friends, Beau here from Feastical! Can you smell that? It’s the unmistakable aroma of a party about to happen. I’m talking about that magical moment when a platter of something incredible emerges from the kitchen, and a hush falls over the room—followed by a happy, hungry murmur. If you’ve been searching for that dish, the one that disappears in minutes and has everyone begging for the recipe, you’ve just found it.
These Sweet & Spicy Turkey Cocktail Meatballs are my absolute go-to for any gathering that calls for a serious flavor punch. We’re taking lean, juicy turkey meatballs and giving them a whirl in a glossy, sticky glaze that’s the perfect dance partner of sweet, citrusy, and just-the-right-amount-of-heat. They’re the life of the party, the star of the potluck, and the secret weapon in your weeknight dinner rotation (trust me, they’re fantastic over rice!).
I know what you might be thinking: “Turkey meatballs can be dry,” or “Cranberry sauce is just for Thanksgiving.” Well, my friend, we’re about to break all the rules and create something so deliciously addictive, you’ll want to make a double batch every single time. So, tie on your favorite apron, crank up some tunes, and let’s get cooking. This is going to be fun.
A Holiday Kitchen Mishap That Started It All
This recipe was born out of a little bit of chaos and a whole lot of “let’s see what happens.” Picture it: My kitchen, circa a few holidays ago. The oven is going, the stovetop is packed, and I’m on my third attempt at a fancy appetizer that was just not working. I was stressed, the clock was ticking, and my guests were due to arrive.
In a moment of “culinary desperation,” I looked at the lonely pound of ground turkey destined for next-day lunches and the half-used cans of cranberry sauce and marmalade hanging out in the fridge door. I thought, “What if…?” I quickly mixed the turkey with basic pantry spices, rolled a bunch of tiny meatballs, and whipped up a glaze with my fridge finds. I tossed it all together, threw it in a dish, and crossed my fingers.
Friends, it was the first platter to be completely emptied. People were hovering around the slow cooker, skewering two and three at a time. They weren’t just good; they were legendary. That happy accident taught me a beautiful lesson: the best recipes often come from ditching the rulebook, leaning into what you have, and cooking with heart. Now, it’s a Feastical staple, and I’m so excited to share the refined, perfected version with you.
Gathering Your Flavor All-Stars
Here’s everything you’ll need to create this flavor explosion. I’ve made notes on why each ingredient is there and how you can swap things in or out based on what’s in your pantry. This is a double batch because, honestly, a single batch is just a tease.
For the Turkey Meatballs:
- 2½ lbs ground turkey: I prefer a mix of 93% lean for the best balance of flavor and juiciness. All breast meat can dry out easier, so a little fat is your friend here! Chef’s Insight: You can absolutely swap this for ground chicken or even a 50/50 mix of pork and turkey.
- ½ teaspoon poultry seasoning: This little powerhouse blend (usually sage, thyme, marjoram) adds a deep, savory backbone that makes the turkey sing.
- 1 teaspoon garlic salt & 2 teaspoons onion powder: The dynamic duo of easy flavor. They distribute evenly throughout the meat, ensuring every single bite is packed with taste.
- 2 teaspoons salt & 1 teaspoon black pepper: Essential for seasoning the meat properly. Don’t be shy!
- ½ teaspoon Worcestershire sauce: Our secret umami weapon. It adds a complex, savory depth that makes the meatballs taste incredibly rich.
- ¼ teaspoon cayenne pepper: This is our first layer of heat. It’s subtle but builds a nice warmth. Omit if you’re super sensitive to spice.
- 2 large eggs, beaten: The binder that holds our little flavor orbs together.
- ½ cup milk: The key to tenderness! The milk keeps the lean turkey moist and juicy. Any kind you have on hand works.
- 1 cup plain breadcrumbs: They absorb the moisture and help give the meatballs their perfect texture. Substitution Tip: Panko breadcrumbs work great for a slightly lighter texture, and gluten-free breadcrumbs are an easy swap.
- 2 tablespoons olive oil: For brushing or drizzling before baking. It helps them achieve that beautiful golden-brown color.
For That Irresistible Glaze:
- 2 cups canned jellied cranberry sauce: Don’t knock it! It creates a beautifully smooth, sweet, and tangy base that clings perfectly to the meatballs. Chef’s Insight: If you only have whole-berry sauce, you can use it—just expect a chunkier, more rustic glaze.
- 1 cup orange marmalade: The citrus zing is what takes this glaze to the next level, cutting through the richness and adding a bright, sunny note.
- 1 cup chicken broth: This thins the glaze to the perfect saucy consistency and adds a savory element so it’s not cloyingly sweet.
- 2 tablespoons minced jalapeño pepper & 2 tablespoons minced Fresno pepper: The star of the “spicy” show! Jalapeño gives a green, bright heat, while the Fresno (a slightly sweeter, fruitier red chili) adds a gorgeous color and a more complex kick. Substitution Tip: No Fresno? Use another jalapeño or a red jalapeño. For less heat, remove the seeds and membranes from both peppers before mincing.
- Salt & black pepper, to taste: Always taste and season your sauce! It balances the sweetness.
Let’s Get Rolling: Your Step-by-Step Guide
Ready to make some magic? Follow these steps, and you’ll be a cocktail meatball master in no time. I’ve sprinkled in my favorite chef hacks to make the process even smoother.
- Preheat and Prep: Fire up your oven to 375°F (190°C). This is the perfect temp for cooking the meatballs through without drying them out. Line a large baking sheet with parchment paper – this is a non-negotiable for me. It makes cleanup an absolute dream and prevents any sticking. Chef’s Hack: Give the parchment a very light spritz of cooking spray for 100% non-stick insurance.
- The Mixing Bowl Mingle: In a large bowl, add your ground turkey. To it, add the poultry seasoning, garlic salt, onion powder, salt, black pepper, Worcestershire, and cayenne. Now, here’s my pro tip: use your hands! Yes, it’s a little messy, but it’s the only way to evenly distribute the spices and fat without overmixing, which can lead to tough meatballs. Mix until the spices are just incorporated.
- Add the Binders: Pour in the beaten eggs and milk. Sprinkle the breadcrumbs over the top. Gently mix again with your hands until everything is combined. The mixture will be moist—that’s exactly what we want for a tender result. Chef’s Hack: To test your seasoning, fry a tiny piece of the mixture in a small skillet. Taste it and adjust the salt or pepper in the main batch if needed.
- The Roll Call: Time to form the meatballs! I use a small cookie scoop (about 1 tablespoon size) to keep them uniform. This isn’t just for looks; it ensures they all cook at the same rate. Roll them gently between your palms—no need to pack them tightly. A light touch makes for a more tender bite. You should get about 48 glorious little orbs.
- Bake to Golden Perfection: Arrange the meatballs on your prepared baking sheet. They don’t need a ton of space between them, as they shrink a bit. Drizzle or lightly brush them with the olive oil. This helps them brown beautifully. Slide them into the oven and bake for 20-25 minutes. You’re looking for them to be cooked through (an internal temp of 165°F is perfect) and lightly golden on the outside.
- Glaze Glory: While the meatballs are baking, let’s make that incredible glaze. Combine the jellied cranberry sauce, orange marmalade, chicken broth, and minced peppers in a medium saucepan. Whisk it together over medium heat. Bring it to a lively simmer, then reduce the heat just a bit and let it cook for 10-12 minutes, whisking occasionally. It will reduce slightly and become glossy and gorgeous. Give it a taste and add a pinch of salt and pepper to balance the flavors.
- The Grand Finale Toss: When the meatballs are out of the oven, carefully add them directly to the saucepan with the glaze. Gently toss them with a spoon until every single meatball is lovingly coated in that shiny, spicy-sweet goodness. Let them simmer together for another 5 minutes. This allows the flavors to marry and the meatballs to soak up some of that saucy goodness.
How to Serve These Superstar Meatballs
Presentation is part of the fun! Here’s how I love to serve them up:
For a party, transfer them to a slow cooker set to “WARM.” This is the ultimate host hack—it keeps them perfectly heated for hours without a hint of drying out. Place a bowl of festive toothpicks or small skewers next to it and watch them vanish.
For a more elegant touch, arrange them on a beautiful platter. Spoon a little extra glaze over the top and finish with a generous sprinkle of freshly chopped parsley or chives. The green pop of color makes them look like they came from a gourmet caterer.
And don’t forget, these aren’t just for cocktail hour! For a killer weeknight dinner, serve them over a bed of fluffy jasmine rice, creamy mashed potatoes, or even zucchini noodles. Pour any extra glaze from the pan over the top. It’s a complete, satisfying meal that feels anything but ordinary.
Make It Your Own: Delicious Twists & Swaps
One of the best things about this recipe is its flexibility. Feel free to get creative and make it suit your taste buds!
- The Tangy Twist: Whisk 1 tablespoon of Dijon mustard into the glaze. It adds a wonderful sharpness that cuts through the sweetness and adds another layer of complexity.
- The Warming Kick: Add 1 teaspoon of freshly grated ginger to the glaze along with the peppers. Ginger and cranberry are a match made in heaven, and it brings a warm, aromatic spice that’s incredibly cozy.
- The Fruity Swap: Not a fan of marmalade? No problem! Swap it out for an equal amount of apricot preserves. It creates a slightly different, but equally delicious, sweet and fruity profile.
- The Heat Adjuster: Control your spice level! For mild, use only one pepper and remove all the seeds. For extra hot, leave all the seeds in and add a pinch of red pepper flakes to the glaze while it simmers.
- The Herbaceous Finish: Right before serving, fold in a handful of fresh chopped cilantro instead of parsley. It adds a bright, fresh note that plays amazingly well with the sweet and spicy flavors.
Beau’s Chef Notes & Kitchen Stories
This recipe has seen a few evolutions since that first frantic holiday experiment. I found that baking the meatballs, instead of pan-frying them, is not only easier and less messy but also results in a more uniform shape and a lighter final dish since they’re not sitting in oil.
A funny story: I once accidentally used smoked paprika instead of cayenne pepper in the meatball mix. The result was a wildly smoky, almost BBQ-like flavor that was completely unintended… and absolutely fantastic! It just goes to show that sometimes the best recipes are born from happy little mistakes. So don’t be afraid to play around in the kitchen.
Lastly, these meatballs freeze like a dream. I often make a double batch, freeze half after baking (before glazing), and then just make a fresh half-batch of glaze when I need a quick appetizer. It’s a lifesaver!
FAQs: Your Questions, Answered
Q: My meatballs turned out a bit dry. What did I do wrong?
A: The most common culprit is overmixing! When you work the meat too much, the proteins tighten up. Mix just until everything is combined. Also, ensure you’re using the milk—it’s crucial for moisture. Finally, don’t overbake them. A digital thermometer is your best friend; pull them at 165°F.
Q: Can I make these ahead of time?
A: Absolutely! You have two great options. 1) Assemble the uncooked meatballs on the baking sheet, cover tightly, and refrigerate for up to 24 hours before baking. 2) Cook and glaze the meatballs completely, let them cool, and store them in the fridge for up to 3 days. Reheat gently on the stovetop or in a slow cooker.
Q: My glaze is too thin! How can I thicken it?
A> No worries! Let it simmer a bit longer to reduce further. If you’re in a real hurry, make a quick slurry by mixing 1 teaspoon of cornstarch with 1 tablespoon of cold water. Whisk this into the simmering glaze and cook for another 1-2 minutes until thickened.
Q: Is there a way to make this recipe gluten-free?
A> Easily! Just ensure your breadcrumbs are certified gluten-free (or use crushed gluten-free crackers) and double-check that your chicken broth and Worcestershire sauce are gluten-free brands (like Lea & Perrins). The rest of the ingredients are naturally GF!

Sweet & Spicy Turkey Cocktail Meatballs
Description
Juicy turkey meatballs coated in a glossy, sweet-and-spicy cranberry-orange glaze. Perfect for parties, potlucks, or a weeknight dinner over rice!
Ingredients
For the Turkey Meatballs:
-
2½ lbs ground turkey (93% lean preferred)
-
½ tsp poultry seasoning
-
1 tsp garlic salt
-
2 tsp onion powder
-
2 tsp salt
-
1 tsp black pepper
-
½ tsp Worcestershire sauce
-
¼ tsp cayenne pepper (optional for mild heat)
-
2 large eggs, beaten
-
½ cup milk
-
1 cup plain breadcrumbs (or panko/gluten-free)
-
2 tbsp olive oil (for brushing or drizzling)
For the Glaze:
-
2 cups jellied cranberry sauce
-
1 cup orange marmalade (or apricot preserves)
-
1 cup chicken broth
-
2 tbsp minced jalapeño
-
2 tbsp minced Fresno pepper (optional)
-
Salt & black pepper, to taste
Optional Garnishes:
-
Chopped parsley, chives, or cilantro
Instructions
-
Preheat & Prep:
-
Oven to 375°F (190°C).
-
Line a baking sheet with parchment paper; lightly spray with cooking oil.
-
-
Mix Meatball Ingredients:
-
In a large bowl, combine turkey, poultry seasoning, garlic salt, onion powder, salt, pepper, Worcestershire, and cayenne.
-
Add eggs and milk, then sprinkle breadcrumbs on top. Gently mix with hands until just combined.
-
-
Form Meatballs:
-
Use a 1-tablespoon cookie scoop or roll by hand into ~1-inch balls.
-
Should yield ~48 meatballs.
-
-
Bake:
-
Arrange meatballs on prepared sheet; drizzle or brush with olive oil.
-
Bake 20–25 min until cooked through (165°F internal temp) and lightly golden.
-
-
Make Glaze:
-
In a saucepan, combine cranberry sauce, marmalade, chicken broth, and minced peppers.
-
Simmer 10–12 min, whisking occasionally, until slightly reduced and glossy. Season with salt & pepper.
-
-
Coat Meatballs:
-
Transfer baked meatballs to the glaze. Gently toss and simmer 5 min to marry flavors.
-
Notes
-
Tangy Twist: Add 1 tbsp Dijon mustard to glaze.
-
Warming Kick: Add 1 tsp freshly grated ginger to glaze.
-
Fruit Swap: Use apricot preserves instead of marmalade.
-
Heat Adjuster: Reduce or increase peppers/seeds to control spice.
-
Herbaceous Finish: Use cilantro instead of parsley for fresh flavor.
-
Make-Ahead: Bake and freeze meatballs before glazing for quick prep.
Nutrition
- Sugar: 12g
- Sodium: 580mg
- Fat: 11g
- Saturated Fat: 2.5g
- Carbohydrates: 18g
- Fiber: 1g
- Protein: 20g
- Cholesterol: 85mg
Nutritional Information (Because We Care!)
Disclaimer: The following is an estimate provided by an online nutritional calculator. It should not be considered a substitute for a professional nutritionist’s advice.
Per Serving (Approximately 4 meatballs with sauce):
- Calories: 260
- Total Fat: 11g
- Saturated Fat: 2.5g
- Cholesterol: 85mg
- Sodium: 580mg
- Total Carbohydrates: 18g
- Dietary Fiber: 1g
- Sugars: 12g
- Protein: 20g
Using lean ground turkey keeps the saturated fat content lower than traditional beef or pork meatballs, while still providing a powerful protein punch. The sugars come primarily from the natural and added sugars in the cranberry sauce and marmalade. For a lower-sugar option, you could seek out sugar-free or reduced-sugar varieties of those ingredients.
Final Thoughts: Your New Go-To Party Legend
Well, friends, there you have it—the story, the secrets, and the step-by-step guide to creating what will undoubtedly become your most-requested party dish. These Sweet & Spicy Turkey Cocktail Meatballs are more than just a recipe; they’re a testament to the magic that happens when you’re not afraid to play with your food.
They prove that lean turkey can be incredibly juicy and flavorful, that cranberry sauce deserves a spot in your pantry year-round, and that the best culinary creations often come from a place of joyful experimentation rather than rigid rules.
So whether you’re prepping for a holiday bash, a game-day potluck, or just a Tuesday night that needs a little extra spark, remember this: you’ve got this. You have everything you need to create something truly memorable. Whip up a batch, watch them disappear, and get ready to share the recipe—because you will be asked.
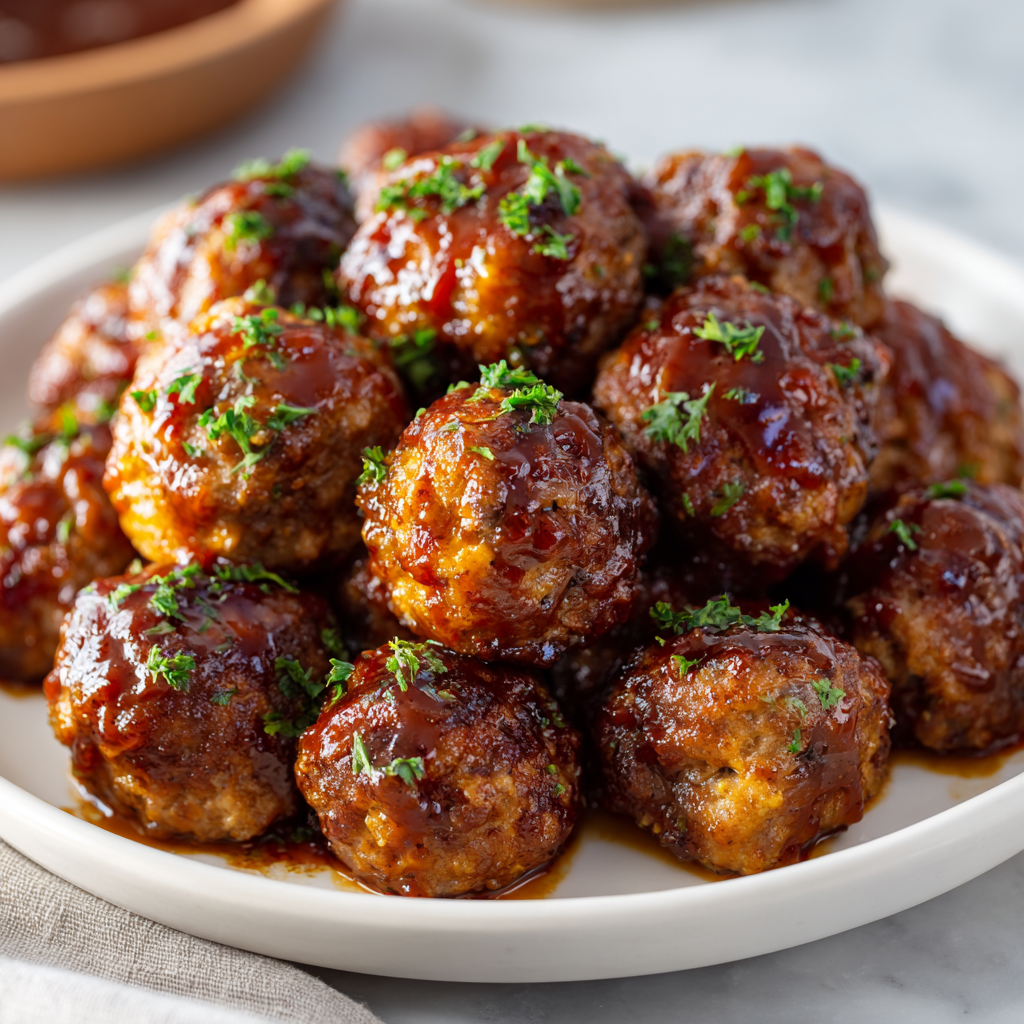
Cajun Appetizer Meatballs
Your New Party Superpower: Cajun Appetizer Meatballs
Hey friends, Beau here! Let’s talk about party food for a second. We’ve all been there. You’re hosting, the doorbell is about to ring, and you’re frantically trying to get five different things on the table at once. You need a hero. A dish that’s not just delicious, but reliable, make-ahead friendly, and guaranteed to have your guests hovering around the platter, asking, “Wow, what’s in these?”
Well, pull up a stool, because I’m about to hand you the keys to the kingdom. These Cajun Appetizer Meatballs are my absolute go-to for a reason. Imagine this: juicy, perfectly spiced meatballs, baked until golden, then glazed in a sticky, sweet, and smoky peach BBQ sauce that’s got just the right amount of kick. They’re bold, they’re comforting, and they taste like a Mardi Gras parade in your mouth.
The best part? These little flavor bombs are secretly simple. We’re using a few powerhouse ingredients to build layers of flavor, and the method is practically foolproof. Plus, I’m sharing my favorite chef hack for making them ahead of time, so when party day arrives, you can be the cool, calm, and collected host who actually gets to enjoy their own shindig. So, grab your favorite mixing bowl and let’s turn your next gathering into a Feastical!
A Taste of Louisiana in My Midwest Kitchen
This recipe takes me right back to my first-ever trip to New Orleans. I was wide-eyed, wandering through the French Quarter, completely intoxicated by the sounds of jazz and the incredible smells wafting from every doorway. It was a sensory overload in the best way possible. I ended up at this tiny, hole-in-the-wall joint where a guy with the most magnificent beard was serving food out of a window. I ordered a paper plate piled high with… something. I didn’t even ask what it was. It was messy, spicy, sweet, and utterly unforgettable.
When I got home, I was obsessed with recreating that flavor—that perfect balance of heat, sweet, and soul. I must have made a hundred versions of meatballs that month. My poor roommates were my (very willing) taste-testers. After more than a few “good, but not quite it” attempts, I finally nailed it. The secret wasn’t one fancy ingredient; it was the combination of classic Cajun spices with a sweet, fruity glaze. These meatballs are my love letter to that New Orleans afternoon, a way to bring a little of that Big Easy magic right into your kitchen, no matter where you are.
Gathering Your Flavor Arsenal
Here’s everything you’ll need to create these crowd-pleasing bites. Don’t stress about being exact—cooking is about feeling, and I’ve got plenty of substitution ideas for you.
For the Meatballs:
- 1 lb lean ground beef (90/10): Lean beef gives us great flavor without too much grease pooling in the pan. Chef’s Insight: For an even more complex flavor, try a half-and-half mix of ground beef and pork!
- 1½ teaspoons hot pepper sauce (like Crystal or Frank’s): This isn’t just for heat; it adds a tangy, vinegar-based punch that brightens the whole mix. Sub Tip: Use your favorite! Tabasco will be hotter, while Sriracha will add a touch of garlicky sweetness.
- 2 tablespoons Cajun seasoning: The MVP of flavor town! This blend usually has paprika, garlic powder, onion powder, cayenne, and oregano. Chef’s Insight: Check the sodium level! If your blend is salt-heavy, you may want to reduce the Worcestershire sauce slightly.
- 1 tablespoon Worcestershire sauce: The ultimate umami booster. It adds a deep, savory, slightly sweet complexity that is non-negotiable for depth.
- 1 tablespoon dried parsley: Mostly for that little pop of color and a faint, fresh herbaceous note.
- ¼ cup finely chopped onion: Make sure it’s finely chopped so it blends seamlessly into the meatball and cooks through. Chef’s Hack: If you’re sensitive to raw onion crunch, sauté it in a tiny bit of oil for 2-3 minutes to soften it first.
- ¼ cup fresh breadcrumbs: The binder! They keep the meatballs tender and juicy by absorbing the fats and juices. Sub Tip: No breadcrumbs? Blitz a piece of toast in a blender, or even use crushed-up plain crackers.
- ¼ cup milk: Combined with the breadcrumbs, this creates a “panade” – a magical paste that is the secret to preventing tough, dense meatballs. Trust me on this one.
- 1 egg: Our other binder, holding everything together in perfect, juicy harmony.
For the Glaze:
- ½ cup BBQ sauce: A good, smoky BBQ sauce is the base of our glaze. Hickory or mesquite flavors work beautifully here.
- ½ cup peach preserves: This is the game-changer! The sweet, fruity peach flavor cuts through the spice and creates that incredible sticky glaze. Sub Tip: Apricot preserves are a fantastic alternative if that’s what you have on hand.
Let’s Get Rolling: Making the Magic Happen
Alright, team, time to get our hands a little dirty. Don’t worry—it’s the fun part! Follow these steps for meatball perfection.
- Preheat and Prep: Fire up your oven to 375°F (190°C). This is our first step because we want that oven hot and ready for our meatballs. Line a baking sheet with foil or parchment paper. Chef’s Hack: Give the foil a light spritz of cooking spray. It guarantees a non-stick surface and makes cleanup an absolute dream. You’ll thank me later.
- The Mixing Bowl Mingle: In a large bowl, add your ground beef, hot sauce, Cajun seasoning, Worcestershire sauce, dried parsley, onion, breadcrumbs, milk, and the egg. Now, here’s the most important tip I can give you: use your hands! But be gentle. Mix everything until it is just combined. Overmixing is the enemy of tender meatballs—it makes them tough. Think of it as gently folding the ingredients together, not kneading bread dough.
- The Roll Call: Time to portion them out. I use a small cookie scoop (about 1 tablespoon size) for perfectly uniform meatballs that cook evenly. If you don’t have a scoop, just eyeball it and roll them into about 1-inch balls. Pro tip: lightly wet your hands with cold water before rolling. This prevents the meat mixture from sticking to your palms like glue!
- Bake to Perfection: Place your handsome little meatballs on the prepared baking sheet, making sure they aren’t touching. We want hot air to circulate around them for even browning. Pop them in the oven and let them bake for 25-30 minutes. You’re looking for them to be cooked through, firm to the touch, and beautifully browned.
- Glaze Glory: While the meatballs are working their magic in the oven, let’s make that glorious glaze. In a small saucepan, combine the BBQ sauce and peach preserves. Warm it over low heat, stirring frequently until it becomes a smooth, luscious, bubbly sauce. This only takes about 5 minutes. Your kitchen is going to smell amazing.
- The Grand Finale Toss: When the meatballs are done, carefully transfer them from the baking sheet into the saucepan with the warm glaze. Gently toss them until every single meatball is lovingly coated in that sweet, spicy, sticky sauce. Let them simmer together for another 5-10 minutes on low heat. This allows the flavors to marry and get deeply acquainted. This step is non-negotiable for maximum flavor infusion!
How to Serve These Cajun Beauties
Presentation is part of the fun! You’ve made something incredible; now let’s show it off.
I love serving these straight from the simmering pot for a real “help yourself” family-style vibe. For a cleaner look, pile them high on a white platter—the deep red glaze really pops against white. Always have a bowl of toothpicks or some cute little appetizer forks nearby so guests can dig in easily.
Garnish is your friend! A sprinkle of freshly chopped parsley or a few thin slices of fresh jalapeño not only adds a fresh flavor contrast but also makes the whole platter look professionally styled. For a full Southern-inspired spread, pair them with some cool, creamy coleslaw, tangy pickles, and a stack of cornbread muffins on the side. They’re also the perfect topping for a bowl of creamy grits—trust me on that!
Mix It Up! Creative Twists on the Classic
This recipe is a fantastic canvas. Play with it and make it your own!
- Spicy Pineapple Twist: Swap the peach preserves for pineapple preserves and add an extra teaspoon of hot sauce to the glaze. It gives a tropical, Tiki-bar vibe that’s so fun.
- Turkey Swap: For a leaner option, use ground turkey or chicken instead of beef. Just note that poultry is leaner, so don’t skip the panade (breadcrumb-milk mix)—it’s essential for keeping them moist.
- Slow Cooker Simmer: Want to keep them warm for hours at a party? After baking, add the meatballs and glaze to your slow cooker and set it to “Warm.” They’ll stay perfect for the entire event.
- Extra Smoky: Add a teaspoon of smoked paprika to the meatball mixture and use a hickory-smoked BBQ sauce for an incredible double-smoke effect.
- Appetizer Meatball Subs:Spoon a few meatballs and extra sauce into slider buns for the most incredible mini sandwiches your game day party has ever seen.
Beau’s Chef Notes & Kitchen Stories
This recipe has been a Feastical staple for years, and it’s evolved from my early days of kitchen experimentation. I once, in a pre-party panic, realized I had no breadcrumbs. I used crushed-up plain potato chips instead. And you know what? They were delicious! A little extra salt, but a great crunchy texture. Don’t be afraid to improvise.
The biggest lesson I’ve learned is the make-ahead tip. Forming and freezing the raw meatballs on a tray before bagging them has saved me on more occasions than I can count. It’s like having a secret weapon in your freezer for last-minute guests or those days when you just don’t feel like cooking from scratch. This recipe is built for real life—it’s forgiving, flexible, and always, always a hit.
Your Questions, Answered
Q: Can I make these meatballs ahead of time and reheat them?
A: Absolutely! They reheat like a dream. You can make the entire recipe, let the sauced meatballs cool, and store them in an airtight container in the fridge for up to 3 days. Reheat gently in a saucepan over low heat or in the microwave, stirring occasionally. You might need a tiny splash of water to loosen the glaze.
Q: My meatballs turned out a bit tough. What happened?
A: This almost always comes down to overmixing. When you mix the meatball ingredients, you’re developing the proteins in the meat, which can make them dense. Next time, mix just until you see no more streaks of egg or loose breadcrumbs. Also, ensure your oven isn’t too hot, as rapid, high heat can cause them to seize up.
Q: How spicy are these? I’m feeding a crowd with mixed heat tolerance.
A: The recipe as written has a mild-to-medium kick. The peach sweetness really balances the spice. For a milder version, use a low-heat Cajun seasoning and a mild hot sauce. For spice lovers, serve extra hot sauce on the side or add a pinch of cayenne to the glaze.
Q: Can I pan-fry these instead of baking?
A: You can! Heat a tablespoon of oil in a skillet over medium heat. Brown the meatballs on all sides (in batches to avoid steaming), then reduce the heat and cover to cook through, about 10-15 minutes. Baking is easier for large batches, but pan-frying gives a fantastic crust.

Cajun Appetizer Meatballs
Description
Juicy, perfectly spiced meatballs baked and coated in a sweet, smoky peach BBQ glaze. Make-ahead friendly, crowd-pleasing, and perfect for parties or game day!
Ingredients
For the Meatballs:
-
1 lb lean ground beef (90/10)
-
1½ tsp hot sauce (Crystal, Frank’s, Tabasco, or Sriracha)
-
2 tbsp Cajun seasoning
-
1 tbsp Worcestershire sauce
-
1 tbsp dried parsley
-
¼ cup finely chopped onion
-
¼ cup fresh breadcrumbs
-
¼ cup milk
-
1 egg
For the Glaze:
-
½ cup BBQ sauce (smoky hickory or mesquite recommended)
-
½ cup peach preserves (apricot preserves work too)
Optional Garnishes:
-
Chopped fresh parsley
-
Thin jalapeño slices
Instructions
-
Prep Oven & Pan:
-
Preheat oven to 375°F (190°C).
-
Line a baking sheet with foil or parchment and lightly spray with cooking oil.
-
-
Mix Meatball Ingredients:
-
In a large bowl, gently combine beef, hot sauce, Cajun seasoning, Worcestershire, parsley, onion, breadcrumbs, milk, and egg.
-
Mix just until combined—overmixing = tough meatballs.
-
-
Form Meatballs:
-
Use a small cookie scoop or roll by hand into ~1-inch balls.
-
Lightly wet hands with water to prevent sticking.
-
-
Bake:
-
Place meatballs on prepared sheet, spaced evenly.
-
Bake 25–30 minutes until cooked through and browned.
-
-
Prepare Glaze:
-
In a small saucepan, combine BBQ sauce and peach preserves.
-
Warm over low heat, stirring until smooth and bubbly (~5 minutes).
-
-
Coat Meatballs:
-
Transfer baked meatballs to the glaze.
-
Gently toss to coat and simmer 5–10 minutes for flavor infusion.
-
Notes
-
Spicy Pineapple: Swap peach preserves for pineapple and add 1 tsp hot sauce to glaze.
-
Turkey/Chicken: Use lean ground turkey or chicken; keep the breadcrumb-milk panade to stay moist.
-
Slow Cooker: Keep warm for hours by simmering in a slow cooker after baking.
-
Extra Smoky: Add 1 tsp smoked paprika to meatballs and use hickory-smoked BBQ sauce.
-
Make-Ahead: Form and freeze raw meatballs on a tray, then bag for last-minute cooking.
Nutrition
- Calories: 350 Cal per 6 meatballs
- Fat: 18g
- Carbohydrates: 22g
Nutritional Information*
Okay, friends, let’s talk fuel. This is comfort food, meant to be enjoyed as part of a balanced feast! Here’s a rough breakdown per serving (about 6 meatballs).
- Calories: ~350
- Fat: 18g
- Carbohydrates: 22g
- Sugar: 15g (primarily from the natural fruit sugars in the preserves and the BBQ sauce)
- Protein: 22g (a great protein-packed appetizer!)
- Sodium: 640mg
*Please note: This is an estimate based on the specific ingredients I used. Values can vary significantly based on the brands of BBQ sauce, preserves, and Cajun seasoning you choose. For the most accurate info, I always recommend plugging your exact ingredients into a nutritional calculator.
Final Thoughts from My Kitchen to Yours
Well, there you have it! My secret weapon for stress-free, flavor-packed entertaining. These Cajun Appetizer Meatballs are more than just a recipe; they’re a tool for creating great times around great food. They’re the dish that lets you be present with your guests instead of stuck in the kitchen.
I hope you make them, love them, and make them your own. Tag me @Feastical on social media if you do—nothing makes me happier than seeing your creations. Now go forth, cook with confidence, and bring a little taste of the bayou to your table. Until next time, happy cooking!

Whipped Cream Cream Cheese Frosting
Ditch the Heavy Frosting: Your New Favorite Whipped Cream Cheese Frosting Awaits
Hey friends, Beau here from Feastical! Let’s have a little heart-to-heart about frosting. We’ve all been there, right? You take a glorious bite of a beautiful cupcake, and… wham. You’re hit with a sugary sledgehammer. It’s so sweet it makes your teeth ache, so heavy it sits in your stomach like a brick, and it often tastes like pure confectioner’s sugar and not much else. I used to just scrape it off and go straight for the cake, feeling a little guilty for wasting it but knowing my taste buds would thank me.
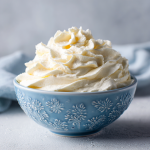
But what if I told you there’s a better way? A frosting that’s so light and cloud-like you could eat it with a spoon (and believe me, you will). A frosting that has the tangy, sophisticated flavor of cream cheese but the airy, dreamy texture of freshly whipped cream. A frosting that holds its shape beautifully for piping those Instagram-worthy swirls but won’t weigh down your delicate cake layers.
Friends, meet your new baking best friend: my Ultra-Decadent Whipped Cream Cheese Frosting. This isn’t just a recipe; it’s a game-changer. It’s the perfect union of two classic favorites, creating something truly magical. It’s rich yet light, tangy yet sweet, and utterly irresistible. So, grab your mixer and your favorite bowl—we’re about to whip up something spectacular.
The Frosting Fiasco That Started It All
This recipe was born out of a minor kitchen disaster that I now laugh about. It was my niece’s birthday, and I, the “cool uncle who cooks,” volunteered to make the cake. I went all out: three layers of my best chocolate cake, a from-scratch raspberry filling, the works. For the frosting, I wanted something lighter than buttercream to complement the rich chocolate. I decided on a classic cream cheese frosting.
But I got a little… enthusiastic. I over-whipped it. Way past smooth and creamy, straight into slightly grainy and almost too thick to spread. In a panic, I looked in my fridge for something, anything, to loosen it up. I saw a carton of heavy cream and, in a moment of pure desperation, whipped some up and folded it in. The result? Pure magic. The frosting transformed. It became fluffy, pipeable, and so much easier to work with. The birthday girl loved it, the adults raved about it not being too sweet, and a star was born. Now, I make it this way on purpose every single time.
Gathering Your A-Team: The Ingredients
One of the best things about this frosting is its beautiful simplicity. You only need a handful of pantry staples, but the quality and temperature of these ingredients are the secret keys to success. Let’s break it down.
- 1½ cups heavy whipping cream, cold: This is non-negotiable. You must use heavy whipping cream or heavy cream (they’re essentially the same thing), as it has the high fat content needed to whip up into stiff, stable peaks. Don’t try to substitute half-and-half or milk! Chef’s Insight: I always pop my bowl and whisk attachment in the freezer for 10-15 minutes before I start. A cold bowl is your best friend for whipping cream quickly and effectively.
- 1 (8 oz) package cream cheese, softened: Use the full-fat, brick-style cream cheese, not the spreadable kind in a tub. The tub versions often have stabilizers that can throw off the texture of your frosting. Substitution Tip: For a tangier flavor, you can use Neufchâtel cheese. It has slightly less fat but will work in a pinch.
- 1 cup white sugar: Granulated white sugar is perfect here. It dissolves into the softened cream cheese, creating a smooth base. Some recipes use powdered sugar, but I find it can sometimes give a slight chalky texture. Granulated sugar gives a cleaner, purer sweetness. Chef’s Insight: If you’re worried about graininess, just make sure your cream cheese is truly soft. Beat the sugar and cream cheese together for a good 2-3 minutes until it’s completely smooth.
- ⅛ teaspoon salt: Don’t you dare skip this! Salt is a flavor enhancer. It cuts the sweetness and makes the vanilla and cream cheese flavors pop. It’s the difference between a one-dimensional sweet frosting and a complex, “I-can’t-stop-eating-this” frosting.
- 1 teaspoon vanilla extract: Use the good stuff! Pure vanilla extract makes a world of difference. This is the aromatic soul of your frosting.
Let’s Get Whipping: The Step-by-Step Guide
This process is simple, but a few key techniques will ensure you get that perfect, stable, fluffy frosting every single time. Read through these steps before you begin!
- Prep Like a Pro: Before you do anything else, place your metal or glass mixing bowl and your whisk attachment (if using a stand mixer) into the freezer. Let them chill for at least 10-15 minutes. This is the single best trick for getting voluminous whipped cream. Also, take your cream cheese out of the fridge now to let it soften on the counter. It should be room temperature and squishy to the touch.
- Whip the Cream: Grab your chilled bowl from the freezer. Pour in the cold heavy whipping cream. Using your stand mixer or a hand mixer fitted with the chilled whisk attachment, whip the cream on medium-high speed until stiff peaks form. This means when you lift the whisk out of the bowl, the peak of cream stands straight up and doesn’t droop over. Be careful not to over-whip it into butter! Once it’s done, gently set this bowl aside. Chef’s Hack: If your kitchen is warm, you can place this bowl of whipped cream in the fridge while you work on the next step.
- Cream the Base: In another large bowl, combine the softened cream cheese, granulated sugar, salt, and vanilla extract. Using the paddle attachment on your stand mixer (or the beaters on your hand mixer), beat this mixture on medium speed for a full 2-3 minutes. You want it to be completely smooth, creamy, and free of any lumps. Scrape down the sides of the bowl halfway through to ensure everything is incorporated. This step is crucial for dissolving the sugar and preventing a grainy texture.
- The Grand Fold: This is where the magic happens. Take about one-third of your whipped cream and add it to the cream cheese mixture. Use a spatula to fold it in. Folding is a gentle, deliberate motion where you cut through the center of the mixture, scrape along the bottom of the bowl, and fold it over the top. You’re incorporating air, not beating it out. Once that first third is incorporated, add the remaining whipped cream and continue to fold gently until no white streaks remain. The mixture should be uniform, light, and incredibly fluffy. Chef’s Tip: Resist the urge to stir or mix aggressively! You’ve worked hard to get air into that cream; let’s keep it there.
- Ready to Rock: Your frosting is now ready to use immediately! It’s perfect for piping, spreading, or dolloping. If you need to store it for later, cover the bowl tightly with plastic wrap and refrigerate for up to 2 days.
How to Serve This Fluffy Dream
This frosting is incredibly versatile. Its light texture makes it a dream to work with, and its not-too-sweet flavor profile pairs with so many things.
My absolute favorite way to use it: on a classic red velvet cake or carrot cake. The tangy cream cheese is a match made in heaven for the warm spices in these cakes, and the light texture is a welcome relief from the denser, heavier frostings typically used.
It’s also phenomenal on chocolate cupcakes, vanilla bean cake, or pumpkin spice loaf. I love using a large open-star tip (like a 1M) to pipe giant, beautiful swirls on top of cupcakes. Because the frosting is so stable, those swirls will hold their shape for hours.
Don’t limit yourself to cakes! Use it as a decadent fruit dip for strawberries, pineapple, and grapes. Or, spoon it into pre-baked mini tart shells and top with fresh berries for an easy, elegant dessert. You can even use it to fill cream puffs or layer it in a parfait with granola and fruit!
Make It Your Own: Delicious Variations
Once you’ve mastered the base recipe, the fun really begins. Here are a few of my favorite ways to mix it up:
- Citrus Zing: Add the finely grated zest of one lemon, lime, or orange to the cream cheese mixture before adding the whipped cream. This adds a incredible burst of fresh, bright flavor that cuts through the richness beautifully.
- Berry Beautiful: Gently fold in ½ cup of crushed freeze-dried strawberries or raspberries at the very end. They’ll add a gorgeous natural color and a intense, fruity flavor without adding extra liquid that could make your frosting runny.
- Nutty Twist: Swap the vanilla extract for ½ teaspoon of almond extract. It pairs incredibly well with stone fruit, so try it on a peach or apricot cake!
- Chocolate Lover’s Dream: Sift ⅓ cup of unsweetened cocoa powder into the cream cheese mixture along with the sugar. You may need to add a tiny splash of milk (a teaspoon at a time) to get it to the right consistency if it becomes too thick.
- Maple Bliss: Replace the white sugar with ¾ cup of pure maple syrup (reduce the heavy cream by 2 tablespoons to account for the extra liquid). The maple and cream cheese combination is out-of-this-world good on spice cakes and waffles!
Beau’s Chef’s Notes
This recipe has become a cornerstone of my baking, and it’s evolved a bit over the years. I initially used powdered sugar, but I found that granulated sugar, when given enough time to dissolve into the soft cream cheese, provides a superior texture and less of that “powdery” taste. The biggest lesson I’ve learned is all about temperature. I can’t stress it enough: cold cream and bowl for whipping, room temp cream cheese for beating. It seems simple, but it’s the absolute foundation for success. This frosting is also surprisingly sturdy! I’ve frosted a cake in the morning, and it held up perfectly on a picnic table (in the shade, of course) for an afternoon party. It’s a reliable, crowd-pleasing winner.
Frosting FAQs: Your Questions, Answered
Q: My frosting turned out runny. What did I do wrong?
A: The most common culprit is that your cream wasn’t cold enough, your bowl wasn’t chilled, or you didn’t whip the cream to truly stiff peaks. Another possibility is that your cream cheese was still too cold, causing you to over-mix the base and not get it smooth before folding. If your frosting is runny, you can try to salvage it by placing the entire bowl in the fridge for 30 minutes and then re-whipping it briefly.
Q: Can I make this frosting ahead of time?
A: Absolutely! You can make it up to 2 days in advance. Store it in an airtight container in the refrigerator. It will firm up quite a bit. When you’re ready to use it, let it sit on the counter for 10-15 minutes to slightly soften, then give it a quick, gentle stir with a spatula to fluff it back up. Avoid re-whipping it with a mixer, as you can easily overdo it.
Q: Why did my frosting become watery after I added the whipped cream?
A: This is likely because the cream cheese was still too cold and therefore a little lumpy. When you tried to fold, you over-mixed to incorporate the lumps, which deflated the whipped cream and caused it to separate. Always ensure your cream cheese is softened to room temperature!
Q: Is this frosting stable enough for a layered cake?
A> Yes! It’s perfectly stable for layer cakes. It’s lighter than buttercream, so for tall, heavy cakes, I’d recommend using dowel supports for structural integrity. For standard 2 or 3-layer cakes, it works like a dream.
Whipped Cream Cream Cheese Frosting
Description
Say goodbye to heavy, overly sweet frostings. This light, fluffy, tangy frosting combines cream cheese and whipped cream for a pipeable, airy texture that’s perfect on cakes, cupcakes, or even as a fruit dip.
Ingredients
-
1½ cups heavy whipping cream, cold
-
1 (8 oz) package cream cheese, softened (room temperature)
-
1 cup granulated sugar
-
1 tsp vanilla extract
-
⅛ tsp salt
Optional Variations:
-
Citrus Zing: zest of 1 lemon, lime, or orange
-
Berry: ½ cup crushed freeze-dried berries
-
Nutty Twist: ½ tsp almond extract instead of vanilla
-
Chocolate: ⅓ cup cocoa powder, add tiny splash of milk if needed
-
Maple: replace sugar with ¾ cup pure maple syrup (reduce cream by 2 tbsp)
Instructions
-
Prep Your Tools:
-
Chill mixing bowl and whisk attachment for 10–15 minutes in the freezer.
-
-
Whip the Cream:
-
Pour cold heavy cream into chilled bowl.
-
Whip on medium-high until stiff peaks form. Set aside.
-
-
Cream the Base:
-
In a separate bowl, beat softened cream cheese, sugar, salt, and vanilla for 2–3 minutes until completely smooth. Scrape sides halfway through.
-
-
Fold in Whipped Cream:
-
Add 1/3 of whipped cream to the cream cheese base. Fold gently with a spatula.
-
Add remaining whipped cream and continue folding until uniform and fluffy. Avoid over-mixing.
-
-
Use or Store:
-
Use immediately for piping or spreading.
-
To store: cover tightly and refrigerate up to 2 days. Bring to room temp and gently fluff before using.
-
Notes
-
Always use cold cream and a chilled bowl for stable, voluminous whipped cream.
-
Ensure cream cheese is fully softened for smooth texture.
-
Gentle folding preserves the air in whipped cream—do not stir aggressively.
-
Perfect for cakes, cupcakes, tart fillings, parfaits, or fruit dips.
Nutrition
- Calories: 210 Cal per ¼ cup serving
- Sodium: 60mg
- Fat: 17g
- Saturated Fat: 11g
- Carbohydrates: 12g
- Cholesterol: 60mg
Nutritional Information*
*Please note: This is an estimated nutritional breakdown provided by an online calculator. For precise dietary needs, please use your preferred calculator with the exact brands and measurements you use.
Per Serving (approx. ¼ cup):
Calories: 210 | Fat: 17g | Saturated Fat: 11g | Cholesterol: 60mg | Sodium: 60mg | Carbohydrates: 12g | Fiber: 0g | Sugar: 11g | Protein: 2g
This is a decadent frosting, and that’s okay! It’s a treat meant to be enjoyed in celebration. Because it’s so flavorful, you often find you need less of it than a super-sweet buttercream, which can help balance things out. The tang from the cream cheese and the airy texture make it feel indulgent without being overwhelming.
Final Thoughts from My Kitchen to Yours
Well, there you have it, my friends. My secret weapon for frosting that actually tastes as good as it looks. This Whipped Cream Cheese Frosting has saved the day more times than I can count, and it’s brought so much joy to our family table. I love that it’s simple enough for a beginner but impressive enough for a seasoned baker.
The best part about cooking and baking is sharing it with the people you love. So I hope you’ll whip up a batch of this frosting, slather it on your favorite cake, and share it with your friends and family. I have a feeling it’s going to become a staple in your kitchen, just like it is in mine.

Lemon Truffles
Sunshine in a Bite: Your New Favorite Lemon Truffles
Hey there, friend! Beau from Feastical here. Can we talk about the holiday dessert table for a second? It’s a glorious, decadent landscape of deep chocolate, rich caramel, and spicy gingerbread. I love it all, I really do. But sometimes, after that third slice of pie, your taste buds send out an S.O.S. for something… different. Something bright, zesty, and refreshingly light. That’s exactly where these little spheres of sunshine, my famous Lemon Truffles, swoop in to save the day.
Imagine this: a creamy, melt-in-your-mouth center that’s bursting with the perfect balance of sweet and tangy lemon, all wrapped up in a crisp, elegant shell of white chocolate. They’re like a burst of summer sunshine on a cloudy winter day. The best part? They’re unbelievably easy to make. Seriously, if you can stir and roll a ball, you are already a master truffle chef in the making. We’re keeping it simple, soulful, and satisfying—no fancy culinary degree required. So, let’s ditch the stress, put on some good music, and create a treat that’s going to have everyone asking, “How did you make these?!” Get ready to bring a pop of pure, citrusy joy to your kitchen.
A Zesty Slice of Memory
This recipe always takes me right back to my grandma’s kitchen, which always smelled like a combination of fresh-baked bread and lemon polish. One particularly grey December afternoon, I was helping her tidy up after a massive holiday baking session. The counters were dusted with flour and the air was heavy with the scent of chocolate and cinnamon. We were both feeling a little… over-sugared. Grandma, never one to be defeated, looked at a lone lemon sitting in the fruit bowl and declared, “What this day needs is a little zip!”
She whipped up a version of these truffles with what she had on hand: some white chocolate melting wafers, a lemon, a splash of cream, and a whole lot of love. We rolled them in powdered sugar, laughing as we got it absolutely everywhere. That first bite was a revelation. It cut through the richness of the day and completely reset our palates. They were an instant hit with the whole family, and they’ve been a non-negotiable part of our holiday spread ever since. For me, they’re more than candy; they’re a reminder that the simplest ideas, born from a need for a little brightness, are often the very best ones.
Gathering Your Sunshine: The Ingredients
Here’s the beautiful lineup of ingredients you’ll need. The magic is in the freshness and quality here, so let’s break it down!
- 1 cup white chocolate chips: This forms the base of our creamy filling. I recommend a good quality brand like Ghirardelli or Guittard for the best melt and flavor. Chef’s Insight: The quality of your chocolate is the star of the show, so don’t skimp here!
- ¼ cup heavy cream: This is what creates that luxurious, melt-in-your-mouth ganache center. For a richer flavor, you can substitute with full-fat coconut milk. Substitution Tip: If you’re in a pinch, half-and-half will work, but the truffles will be a tad softer.
- 1 tbsp unsalted butter: This adds an extra layer of richness and a silky-smooth texture to the ganache. Make sure it’s at room temperature so it blends in seamlessly.
- 1 tbsp fresh lemon juice: This is non-negotiable! Please, please use freshly squeezed juice. The bottled stuff just doesn’t have the same vibrant, bright flavor. This is our primary source of tang!
- 1½ tsp lemon zest: This is where the powerful lemon aroma and flavor live. Zest your lemon before you juice it—it’s infinitely easier! Chef’s Hack: Use a microplane for the finest zest that will blend perfectly into the ganache.
- ½ tsp vanilla extract: A classic flavor enhancer that rounds out the sharpness of the lemon and adds a touch of warmth.
- Pinch of salt: Never forget the salt! It heightens all the other flavors and keeps the sweetness from being one-dimensional.
- 8 oz white chocolate (for coating): Using bar chocolate for the coating is my pro-move. It melts smoother and creates a much snappier shell than chips, which often contain stabilizers. You can use chips if it’s all you have, but a bar is highly recommended.
- Optional: yellow sanding sugar or powdered sugar for garnish: A little roll in some sparkly sanding sugar makes these look professionally pretty, while a dusting of powdered sugar gives a classic, snowy look.
Crafting Your Citrus Dreams: The Step-by-Step Guide
Alright, let’s get our hands dirty (or at least a little sticky)! Follow these steps, and you’ll have perfect truffles in no time.
- Create the Lemon Ganache: In a small saucepan, combine the heavy cream, butter, fresh lemon juice, lemon zest, vanilla extract, and that all-important pinch of salt. Heat this over low heat, stirring gently, until the butter is melted and the mixture is just beginning to steam and show tiny bubbles around the edges. Chef’s Tip: Do NOT let it boil vigorously! We just want it hot enough to melt the chocolate.
- Melt the Base Chocolate: Remove the pan from the heat immediately. Pour in your 1 cup of white chocolate chips. Let it sit for one minute to allow the heat to soften the chips, then start stirring. Stir slowly and consistently until you have a beautifully smooth, pale yellow, uniformly mixed ganache. Chef’s Hack: If you find a few stubborn chips won’t melt, you can place the saucepan back over the lowest heat for literally 5 seconds while stirring, or pop the mixture into the microwave for 10-second bursts, stirring between each.
- The Chill Time: Pour your gorgeous lemon ganache into a shallow bowl. Press a piece of plastic wrap directly onto the surface of the ganache. This crucial step prevents a skin from forming. Place it in the refrigerator to chill for 1-2 hours, or until it’s firm enough to scoop and hold its shape. You can even leave it overnight! Chef’s Note: If you’re short on time, the freezer will speed this up, but check it every 15-20 minutes to ensure it doesn’t freeze solid.
- Scoop and Roll: Once firm, use a small cookie scoop, a melon baller, or a teaspoon to portion out the ganache. Roll each portion quickly between your palms to form a smooth, 1-inch ball. Pro-Tip: If your hands are warm, run them under cold water and dry them thoroughly before rolling. This prevents melting! Place the rolled balls on a baking sheet lined with parchment paper.
- The Deep Freeze: Once all your truffles are rolled, pop the entire tray into the freezer for 15 minutes. This is the secret to a perfect coating! A frozen truffle center means the melted coating chocolate will set almost instantly upon contact, giving you a beautiful, crisp shell and a mess-free dipping experience.
- Melt the Coating Chocolate: While the truffles are chilling, melt your 8 oz of white chocolate (the bar chocolate, if you have it!). The best way to do this is in a double boiler, or create a makeshift one by placing a heatproof bowl over a pot of simmering water (make sure the bottom of the bowl doesn’t touch the water). Stir until just melted and smooth. Alternatively, you can microwave it in 20-second bursts, stirring vigorously between each burst, until smooth.
- The Grand Dip: Remove your truffles from the freezer. Using a fork or a dipping tool, submerge one truffle completely into the melted chocolate. Lift it out, gently tap the fork on the edge of the bowl to allow the excess chocolate to drip off, and then place it back onto the parchment-lined tray. Chef’s Hack: If you want a perfectly round bottom, use a second fork to gently push the truffle off the dipping fork onto the tray.
- Garnish Immediately: If you’re using sanding sugar or any other garnish, sprinkle it on top right now, before the chocolate shell sets! They harden quickly thanks to the cold center.
- The Final Set: Once all truffles are dipped and garnished, place the tray back in the refrigerator for about 10-15 minutes to allow the chocolate coating to set completely.
Sharing the Sunshine: How to Serve
Presentation is part of the fun! These little gems deserve to be shown off. For a casual gathering, I love piling them high on a simple white platter—the yellow pop of color looks so cheerful. For a more elegant touch, place each truffle in a petite gold or silver candy cup. They make gorgeous additions to holiday cookie boxes; nestled among the darker cookies and brownies, they truly shine like beacons of citrusy hope. They’re the perfect palate cleanser after a big meal, so serve them with coffee or tea at the end of your feast. Honestly, they also make a fantastic little gift! Tuck a few into a cute cellophane bag tied with a ribbon, and you’ve just become someone’s favorite person.
Mix It Up! Delicious Variations
The beauty of this recipe is its versatility. Once you’ve mastered the classic, feel free to get creative!
- Lemon Blueberry Bliss: Add 2 tablespoons of very finely chopped dried blueberries to the ganache mixture after you’ve melted the chocolate. The berry-lemon combo is a classic for a reason!
- Coconut Lemon Dream: For a tropical twist, substitute the heavy cream with full-fat coconut milk and add 2 tablespoons of toasted coconut flakes to the ganache. Roll the finished truffles in more toasted coconut instead of sugar.
- Lemon Ginger Zing: Add ¼ teaspoon of ground ginger or a tablespoon of very finely chopped crystallized ginger to the ganache for a warm, spicy kick that pairs wonderfully with the lemon.
- Dairy-Free Delight: Use a high-quality dairy-free white chocolate (like Pascha or Enjoy Life brands), coconut cream instead of heavy cream, and coconut oil instead of butter. It works like a charm!
- Dark Chocolate Dip: Love contrast? Dip your lemon truffles in melted dark chocolate instead of white. The bitter-dark shell with the bright, sweet interior is absolutely incredible.
Beau’s Chef Notes & Kitchen Stories
This recipe has evolved a bit from my grandma’s original. She used to just roll the ganache balls in powdered sugar and call it a day (still delicious!). But one year, I decided to try dipping them in chocolate, and it was a total game-changer. The textural contrast took them to a whole new level. A funny kitchen story? The first time I made these with a friend, we didn’t chill the ganache long enough. We ended up with more of a lemon truffle *puddle* than balls. We salvaged it by calling it a “Lemon Truffle Dip” and serving it with graham crackers. It was a hit! So remember, no kitchen “failure” is ever final—it’s just a new recipe in disguise.
Your Questions, Answered!
Q: My ganache is too soft and sticky to roll. What happened?
A: This usually means it needed more chilling time. Pop it back in the fridge for another 30-60 minutes. If it’s still too soft, your kitchen might be very warm. Don’t be afraid to use the freezer to help it along! Also, ensure you measured your cream correctly—too much liquid will make a softer ganache.
Q: Why did my white chocolate coating seize up or get clumpy when I melted it?
A: White chocolate is very sensitive to heat and moisture! Even a single drop of water can cause it to “seize” and become a grainy mess. Make sure all your tools are completely dry. If it does seize, you can sometimes save it by immediately stirring in a teaspoon of vegetable oil or melted coconut oil until it smooths out again.
Q: Can I make these ahead of time?
A: Absolutely! These are perfect for making ahead. Store them in a single layer in an airtight container in the refrigerator for up to 2 weeks. You can also freeze them for up to 3 months. Just thaw in the fridge overnight before serving.
Q: Can I use milk chocolate or dark chocolate for the ganache instead?
A: You can, but it will change the character completely! The lemon flavor is designed to cut through the sweetness of white chocolate. With dark chocolate, you’ll get more of a dark chocolate lemon truffle, which is also delicious but much richer and less bright.
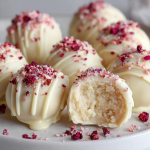
Lemon Truffles
Description
Bright, creamy, and melt-in-your-mouth, these lemon truffles are the perfect palate cleanser after rich desserts. They’re easy to make and absolutely irresistible!
Ingredients
Ganache:
-
1 cup white chocolate chips (high-quality)
-
¼ cup heavy cream (or full-fat coconut milk for richness)
-
1 tbsp unsalted butter, room temp
-
1 tbsp fresh lemon juice
-
1½ tsp lemon zest
-
½ tsp vanilla extract
-
Pinch of salt
Coating:
-
8 oz white chocolate bar (for a smooth, crisp shell)
-
Optional: yellow sanding sugar or powdered sugar for garnish
Tips: Use fresh lemon juice and zest for maximum brightness.
Instructions
-
Make the Lemon Ganache:
-
In a small saucepan, combine cream, butter, lemon juice, zest, vanilla, and salt. Heat gently over low, just until steaming and butter melts.
-
Remove from heat and add white chocolate chips. Let sit 1 minute, then stir until smooth.
-
-
Chill:
-
Pour ganache into a shallow bowl, press plastic wrap directly on the surface, and refrigerate 1–2 hours (or overnight) until firm.
-
-
Scoop and Roll:
-
Using a small scoop or teaspoon, portion ganache and roll into 1-inch balls.
-
Place on a parchment-lined tray and freeze 15 minutes.
-
-
Melt Coating Chocolate:
-
Use a double boiler or microwave (20-second bursts, stirring in between) to melt 8 oz white chocolate.
-
-
Dip Truffles:
-
Remove truffles from freezer. Submerge in melted chocolate, tap off excess, and return to tray.
-
Garnish immediately with sanding sugar or powdered sugar, if desired.
-
-
Set:
-
Refrigerate 10–15 minutes until chocolate shell is firm.
-
Notes
-
Serve on a white platter or in petite candy cups.
-
Perfect as a palate cleanser, party treat, or holiday gift.
Nutritional Information (Per Truffle)
Alright, let’s keep it real—these are a treat, and that’s okay! Here’s a rough breakdown of what’s in one of these delightful Lemon Truffles. This information is an estimate based on the specific ingredients used and the yield of the recipe.
Calories: 110 | Fat: 6g | Saturated Fat: 4g | Carbohydrates: 12g | Sugar: 10g | Protein: 1g | Sodium: 20mg
Remember, life is all about balance. Enjoying a homemade treat made with real ingredients is a wonderful thing. These truffles are portion-controlled little bites of joy, perfect for satisfying a sweet craving without overdoing it.
Final Sweet Thoughts
And there you have it! Your complete guide to making incredible, sunshine-filled Lemon Truffles that are guaranteed to brighten any day and impress every crowd. This recipe is a testament to the fact that the most joyful things in life—and in the kitchen—are often the simplest. It’s about taking a few basic ingredients and transforming them into something magical that brings people together.
I hope you have as much fun making these as I do. I hope your kitchen fills with the incredible scent of lemon and chocolate, and I hope you get to see the smile on someone’s face when they take that first bite. Remember, cooking is an adventure, not a test. So put on your apron, embrace the mess, and create something delicious.
If you make these (and I really hope you do!), tag me @feastical on social media so I can see your beautiful creations! Now, go grab that spatula—it’s probably hiding in that one drawer with everything else—and let’s get cooking.
With love and a sprinkle of lemon zest,

Chocolate Peanut Butter Frosting
Your New Favorite Frosting Awaits
Hey there, friend! Beau here from Feastical, and I have to ask: have you ever had one of those days where only a serious dose of chocolate and peanut butter will do? You know the ones. Maybe it’s a rainy Tuesday, maybe you’re celebrating a big win, or maybe you just looked at your spatula and decided it was time for a kitchen adventure. Whatever the reason, I’m so glad you’re here. Because today, we’re whipping up what I genuinely believe is one of the greatest creations to ever come out of a mixing bowl: my legendary Silky, Sweet & Nutty Chocolate Peanut Butter Frosting.
This isn’t just any frosting. This is the kind of frosting that makes people’s eyes go wide. The kind that gets you asked for the recipe before the cake is even cut. It’s luxuriously rich, perfectly fluffy, and has that iconic sweet-and-salty combo we all crave. It spreads like an absolute dream on a classic chocolate layer cake, pipes into gorgeous swirls on top of peanut butter cupcakes, and let’s be real—it’s also 100% spoon-worthy straight from the bowl. I’ve built this recipe to be incredibly simple, because the best things in life (and the kitchen) shouldn’t be complicated. So, preheat your stand mixer (or flex those arm muscles!), and let’s make something magical together.
The Frosting That Started It All
I’ll never forget the first time this frosting truly saved the day. It was my nephew Leo’s eighth birthday, and I, the “cool uncle who bakes,” had volunteered to make the cake. I baked these beautiful dark chocolate layers, let them cool, and went to make my usual chocolate buttercream. Disaster struck. I was out of confectioners’ sugar. The party was in two hours, and the grocery store was a madhouse. Panic mode: engaged.
But then, I saw it. A nearly full jar of creamy peanut butter and a can of cocoa powder, sitting right next to my trusty butter. In a moment of pure, desperate genius, I threw it all together, crossed my fingers, and hit mix. What emerged from that bowl was nothing short of a miracle. It was smoother, richer, and more delicious than anything I’d planned. I slathered it on that cake, sprinkled on some chopped peanuts, and brought it to the party. Leo took one bite, looked at me with chocolate all over his face, and said, “Uncle Beau, this is the best cake ever.” That’s the power of this frosting. It’s not just a recipe; it’s a kitchen hero, a happy accident, and a reminder that sometimes the best creations come from a little bit of chaos and a whole lot of heart.
Gathering Your Dream Team: The Ingredients
Part of what makes this recipe so foolproof is the short, sweet ingredient list. Each one plays a starring role, so let’s get to know them a little better. Here’s what you’ll need:
- ½ cup unsalted butter, softened: This is the base of our frosting, providing structure and that classic, creamy mouthfeel. Using unsalted lets us control the salt level. Chef’s Insight: “Softened” is key! Leave it on the counter for about 30-60 minutes. It should yield gently to pressure but not be melty. If you forget, you can cut it into tablespoons and microwave it for 5-second bursts until just pliable.
- ½ cup creamy peanut butter: The co-star of the show! I prefer standard creamy peanut butter (like Jif or Skippy) for its smooth, spreadable consistency and slight sweetness. The oils in natural peanut butter can sometimes separate and make the frosting greasy. Sub Tip: If you’re a texture person, feel free to use chunky! It adds a wonderful peanutty crunch.
- ½ cup unsweetened cocoa powder: This is where our deep, chocolatey flavor comes from. Use a good-quality cocoa powder you enjoy the taste of. Dutch-processed will give a darker color and mellower flavor, while natural cocoa powder is a bit more acidic and sharp. Both work beautifully here!
- 3 cups confectioners’ sugar (aka powdered sugar): This sweetens the deal and gives the frosting its light, fluffy structure. Because it’s so fine, it dissolves instantly, preventing any grittiness. Pro Hack: I always sift mine! It’s an extra step, but it guarantees a silky-smooth texture with no lumps.
- 1 teaspoon vanilla extract: The flavor enhancer. It rounds out the chocolate and peanut butter notes and adds a layer of warm, aromatic complexity. Don’t skip it!
- 3–5 tablespoons milk or cream: This is our consistency wizard. Whole milk, 2%, or even heavy cream will work. Cream will make it slightly richer. We add it slowly because humidity and ingredient temperatures can affect how much you need.
- Pinch of salt (optional): I almost always add this. It’s not to make the frosting salty, but to make it taste more chocolatey and more peanut buttery by balancing the sweetness. Trust me on this one.
Crafting Your Masterpiece: Step-by-Step Instructions
Alright, team! Let’s get mixing. This process is a breeze, but a few little tips along the way will ensure frosting perfection.
Step 1: The Creamy Foundation
Grab your large mixing bowl and your hand mixer or stand mixer fitted with the paddle attachment. Toss in your softened butter and that glorious ½ cup of peanut butter. Now, beat them together on medium-high speed for a good 2-3 minutes. We’re not just mixing here; we’re aerating. You want it to become light, pale, and perfectly smooth. This initial creaming is the secret to a fluffy, not dense, frosting. Scrape down the sides of the bowl with a spatula to make sure everything is incorporated.
Step 2: Chocolate Integration
Time for the cocoa powder! Sprinkle it into the butter-peanut butter mixture. Start your mixer on low speed unless you want a cocoa powder cloud all over your kitchen (been there, done that, don’t recommend it!). Once the powder is somewhat incorporated, crank the speed up to medium and beat for another minute. You’ll see it transform into a thick, dark, and incredibly fragrant paste. Scrape the bowl again—this is a good habit to get into!
Step 3: The Sweet Build
Here comes the confectioners’ sugar. Add it gradually, about one cup at a time, mixing on low speed after each addition. Once all three cups are in, let the mixer run on low for another 30 seconds. It will look dry and crumbly, and you might think you’ve gone wrong. You haven’t! This is exactly what we want. This slow incorporation prevents a sugar snowstorm and helps the sugar dissolve properly.
Step 4: Fluff & Flow
Now, pour in your vanilla extract and 3 tablespoons of your milk or cream. Place a kitchen towel over your mixer (trust me, another messy lesson learned) to catch any initial splashes. Start on low, then gradually increase the speed to medium-high. Beat for a full 2-3 minutes. Watch the magic happen! It will go from that crumbly mess to light, fluffy, and spreadable. If it still seems too thick for your liking, add more milk, one tablespoon at a time, until it reaches your desired consistency. For spreading, I like it like a thick cloud. For piping, I add a touch more liquid so it flows smoothly through the tip without straining your hand (or your piping bag!). This is also the time to add that optional pinch of salt. Give it one final quick mix to combine.
How to Serve This Frosting Fame
You’ve done it! You’ve created a bowl of chocolate peanut butter heaven. Now, let’s put it to work. The obvious choice is slathering it generously on a classic chocolate cake. For a next-level experience, try it between the layers of a yellow butter cake—the flavor contrast is incredible. It’s the perfect topping for a batch of fudgy brownies, turning them from a snack into a decadent dessert.
If you’re feeling fancy, fit a piping bag with a large star tip (I’m a sucker for a Wilton 1M or 2D) and pipe elegant, high swirls onto cupcakes or a sheet cake. For a final flourish, a sprinkle of chopped roasted peanuts adds crunch, a light dusting of cocoa powder looks professional, or a drizzle of melted chocolate takes it over the top. And hey, if you just grab a graham cracker or a spoon and dive in, I fully support that decision. Your kitchen, your rules!
Make It Your Own: Delicious Variations
The beauty of this recipe is its versatility. Feel free to play around and create your own signature version!
- The Crunch Lover: Swap the creamy peanut butter for chunky! Those little peanut bits add a fantastic textural surprise in every single bite.
- The Warm Spice: Add ½ to 1 teaspoon of ground cinnamon to the dry ingredients. It gives the frosting a subtle, warm depth that pairs amazingly well with chocolate and peanut butter. It’s like a hug in frosting form.
- The Marbled Marvel: After your frosting is made, gently swirl in 2-3 tablespoons of cooled, melted chocolate (semi-sweet or dark) with a butter knife. Don’t overmix! You want beautiful, bold streaks of chocolate running through it.
- The Dietary Swap: To make this dairy-free, use a plant-based butter stick (like Miyoko’s or Earth Balance) and your favorite unsweetened non-dairy milk (oat milk works great!). For a vegan version, ensure your sugar is vegan-friendly (some are processed with bone char) and use the dairy-free swaps.
- The Flavor Twist: Add a tiny splash of espresso powder dissolved in the milk. It won’t taste like coffee; it will just make the chocolate flavor taste even richer and more intense.
Beau’s Chef’s Notes
This recipe has been my go-to for years now, and it’s evolved in little ways. I used to just dump all the sugar in at once and would inevitably end up with a tiny dust storm on my counter. I learned the hard way, so you don’t have to! The salt tip was another late addition. I made it once for a friend who said, “This is amazing, but it just needs… something.” I added a pinch of salt, and she immediately said, “THAT’S it!” It’s been a staple ever since. Remember, baking is about joy, not perfection. If your frosting is a little too soft, pop it in the fridge for 15 minutes. If it’s too thick, add a splash more milk. You’ve got this.
Frosting FAQs & Troubleshooting
Q: My frosting is too runny! What did I do wrong?
A: Don’t worry, we can fix it! This usually happens if the butter was too soft or a bit too much liquid was added. The easiest solution is to chill it in the refrigerator for 20-30 minutes to let the fats firm up, then re-whip it. If it’s still too soft, you can beat in a little more confectioners’ sugar, a quarter cup at a time, until it thickens up.
Q: Can I use natural peanut butter?
A: You can, but proceed with caution. Natural peanut butters often have oil that separates and can make the frosting greasy and thin. If it’s all you have, be sure to stir the jar extremely well to fully incorporate the oil before measuring. You will likely need less milk, so add it very slowly.
Q: How far in advance can I make this?
A: You can make it up to 2-3 days in advance! Keep it in an airtight container in the refrigerator. When you’re ready to use it, let it sit on the counter to come to room temperature (this is crucial for spreadability), then give it a quick re-whip with your mixer to bring back its fluffy texture.
Q: Why is my frosting gritty?
A: Grittiness usually means the confectioners’ sugar wasn’t fully dissolved. This can happen if you add the sugar too quickly or don’t mix it long enough after adding the liquid. Sifting your sugar first is the best prevention. If it’s gritty now, just keep beating! The extended mixing time should help dissolve those sugar particles.
Print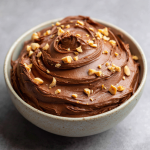
Chocolate Peanut Butter Frosting
Description
This frosting is rich, smooth, and perfectly fluffy, combining chocolate and peanut butter in the ultimate sweet-and-salty combo. It’s amazing on cakes, cupcakes, brownies, or just eaten straight from the bowl.
Ingredients
-
½ cup (1 stick) unsalted butter, softened
-
½ cup creamy peanut butter (standard brands recommended for smoothness)
-
½ cup unsweetened cocoa powder
-
3 cups confectioners’ sugar, sifted if possible
-
1 teaspoon vanilla extract
-
3–5 tablespoons milk or heavy cream
-
Pinch of salt (optional, but recommended to enhance flavor)
Tip: Start with 3 tablespoons of milk, then adjust for your desired consistency.
Instructions
-
Cream Butter & Peanut Butter:
Beat butter and peanut butter together on medium-high speed for 2–3 minutes until light and smooth. Scrape down the bowl. -
Add Cocoa:
Sprinkle in cocoa powder and start mixing on low to avoid a powder cloud. Once partially incorporated, increase to medium speed and mix 1 more minute. Scrape the bowl again. -
Incorporate Sugar:
Add confectioners’ sugar gradually, one cup at a time, on low speed. Mix an extra 30 seconds after the last cup—frosting may look dry or crumbly; this is normal. -
Add Vanilla & Milk:
Pour in vanilla and 3 tablespoons milk. Beat on low to start, then increase to medium-high for 2–3 minutes until light, fluffy, and spreadable. Adjust milk if needed for consistency. Add optional pinch of salt and mix briefly.
Notes
-
-
Runny: Chill 20–30 minutes, then re-whip; add sugar if needed.
-
Gritty: Sift sugar and mix longer.
-
Using Natural Peanut Butter: Stir thoroughly and add milk slowly.
-
Make-Ahead: Refrigerate 2–3 days in an airtight container; re-whip after reaching room temp.
-
Nutrition
- Calories: 170 CaL per 2 tbsp
- Sodium: 55mg
- Fat: 11g
- Carbohydrates: 15mg
Nutritional Information*
*Please note: This is an estimate provided for informational purposes only. I’m a chef, not a nutritionist, so values can vary based on specific ingredients used.
Per Serving (2 tbsp):
Calories: ~170 | Total Fat: 11g | Saturated Fat: 5g | Trans Fat: 0g | Cholesterol: 15mg | Sodium: 55mg | Total Carbohydrates: 19g | Dietary Fiber: 1g | Sugars: 17g | Protein: 2g
This is a treat, through and through! It’s perfect for topping your favorite desserts and sharing with friends and family. Enjoy it as part of a balanced diet filled with lots of other delicious things.
Final Sweet Thoughts
Well, friend, we’ve reached the end of our frosting journey. I hope you’re as excited to make this as I am every single time. This Chocolate Peanut Butter Frosting is more than just a recipe; it’s a tool for making someone’s day a little brighter, for turning a simple cake into a celebration, and for enjoying the pure, simple joy of creating something delicious with your own two hands.
I’d love to hear how it turns out for you! Did you add cinnamon? Did you pipe it onto a giant birthday cake? Tag me on social @feastical or drop a comment on the blog. Sharing our kitchen adventures is my favorite part of this whole Feastical community. Now, go forth and frost! Until next time, happy baking.

Chocolate Buttercream Frosting
Your New Go-To Chocolate Buttercream Frosting (It’s a Game-Changer!)
Hey friends, Beau here from Feastical! Let’s have a little heart-to-heart. We’ve all been there, right? You spend hours carefully measuring, mixing, and baking the most beautiful, moist, and perfect chocolate cake. It comes out of the oven smelling like a dream. It cools on the rack, patiently waiting for its crowning glory. And then… disaster. The frosting is grainy. It’s too stiff and tears the crumb. Or worse, it’s a sad, runny mess that slides right off the side and pools around the base of the cake like a delicious but deeply disappointing chocolate moat.
I’m here to tell you that those days are over. Consider this recipe your frosting flop insurance. This chocolate buttercream frosting is the one I’ve relied on for years—at birthday parties, bake sales, and those late-night “I just need a little chocolate comfort” moments. It’s luxuriously smooth, impossibly creamy, and packed with a rich, decadent cocoa flavor that never tastes overly sweet. It spreads like a dream, pipes beautiful swirls that hold their shape, and frankly, it might just upstage whatever you decide to put it on. So, grab your mixer and your favorite bowl. We’re about to make the only chocolate buttercream recipe you’ll ever need.
The Birthday Cake That Started It All
This recipe takes me right back to my grandma’s kitchen, with its checkered curtains and the always-present smell of something baking. Every year for my birthday, she’d let me choose the cake. And every year, without fail, I’d choose her devil’s food cake with her famous chocolate frosting. I wasn’t allowed to help with the cake itself—that was serious business—but the frosting? That was our domain.
She’d hand me the big, yellow bowl and the wooden spoon, and I’d watch in awe as a simple stick of butter transformed into something magical with the addition of powdered sugar and her special dark cocoa powder. She’d always let me lick the spoon, and I remember closing my eyes, completely transported by that deep, fudgy, not-too-sweet flavor. It was love at first taste. This recipe is my homage to hers—a little refined, but with the exact same soul. It’s more than just frosting; it’s a vessel for memory, for connection, and for pure, unadulterated joy.
Gathering Your Frosting A-Team
Great frosting starts with great ingredients. Here’s what you’ll need to make about 3 cups of this chocolatey heaven—enough to frost a 9×13” sheet cake, a two-layer 8” cake, or 24 cupcakes with beautiful swirls.
- 1 cup (2 sticks) unsalted butter, softened – This is the foundation. Using unsalted butter lets you control the salt level perfectly. And softened is the key word here! Your butter should give slightly when pressed but not be oily or melted. Think cool room temperature. This makes it creamier and helps incorporate air for a fluffier frosting.
- 3 ½ cups confectioners’ sugar (aka powdered sugar) – This sweetens and gives structure. I always recommend sifting it if you have time—it prevents lumps and makes for a silkier texture. No sifter? A fine-mesh strainer works wonders!
- ½ cup unsweetened cocoa powder – The star of the show! For the deepest, richest flavor, use a natural unsweetened cocoa powder. My personal favorite is Dutch-processed for its smoother, less acidic taste, but standard grocery store cocoa works beautifully, too.
- ¼ teaspoon salt – Don’t you dare skip this! Salt is a flavor enhancer. It cuts the sweetness and makes the chocolate flavor pop in a way you’ll immediately notice.
- 2 teaspoons vanilla extract – Use the good stuff! Pure vanilla adds a warm, complex depth that imitation vanilla just can’t match. It’s the secret handshake between the butter and chocolate.
- 2–4 tablespoons milk or heavy cream – This is your consistency control. Milk will work great, but heavy cream adds an extra layer of richness and makes the frosting even creamier. Start with 2 tablespoons and add more as needed.
Crafting Your Masterpiece: Step-by-Step
Alright, team, let’s get mixing! This process is simple, but a few chef-approved hacks will take your frosting from good to “I-can’t-stop-eating-this-with-a-spoon” great.
Step 1: The Butter Beat-Down
Place your softened butter in a large mixing bowl. Using either a stand mixer fitted with the paddle attachment or a hand mixer, beat the butter on medium-high speed for a full 2-3 minutes. We’re not just mixing it; we’re aerating it. You’ll know it’s ready when it turns pale yellow and looks light and fluffy. This crucial step incorporates tiny air bubbles that are the secret to a fluffy, not dense, frosting.
Step 2: Cocoa Incorporation
Sift the cocoa powder and salt directly into the whipped butter. Yes, sifting is a little extra step, but trust me, it’s the #1 way to avoid lumpy frosting. It ensures every particle of cocoa gets coated in fat, which unlocks its full flavor potential. Mix on low speed until the cocoa is fully absorbed and the mixture looks like a thick, dark chocolate paste. Scrape down the sides of the bowl with a spatula to make sure everything is incorporated.
Step 3: The Sweet Addition
Now, with your mixer on LOW speed, gradually add the confectioners’ sugar, about one cup at a time. I cannot stress “low speed” enough here unless you want a romantic (but messy) powdered sugar snowstorm all over your kitchen. Let each cup incorporate fully before adding the next. Once all the sugar is in, scrape the bowl again and mix on medium for another minute until it’s completely combined.
Step 4: Bringing It All Together
Add the vanilla extract and 2 tablespoons of your milk or heavy cream. Now, turn that mixer up to medium-high and let it rip for another 2-3 minutes. This is where the magic happens. Watch as the frosting transforms from a thick paste into a light, airy, and gloriously smooth cloud of chocolate goodness. Listen for the sound to change—it’ll get quieter as it whips up.
Step 5: Consistency Check
Stop the mixer and grab a spatula. Give the frosting a stir. Is it too thick for your needs? For spreading, you might want it a tad softer. For piping intricate designs, you’ll want it a bit stiffer. Add more liquid, one tablespoon at a time, beating well after each addition, until you reach your perfect consistency. Remember, you can always add more liquid, but you can’t take it out!
How to Serve & Savor Your Creation
You’ve done it! You’re standing over a bowl of perfection. Now, let’s put it to work.
If you’re frosting a cake, make sure your cake layers are completely cool. A warm cake will melt your beautiful buttercream. For a smooth finish, I like to do a “crumb coat”: a thin layer of frosting all over the cake that traps any loose crumbs. Pop it in the fridge for 15 minutes to set, then apply your final, thick, luxurious layer of frosting.
For cupcakes, fit a piping bag with your favorite tip—a large open star tip (like a 1M) is my go-to for those gorgeous bakery-style swirls. Fill the bag and pipe away! If you’re more of a “spreader,” use an offset spatula to create beautiful swoops and peaks.
And hey, let’s think outside the cake box! This frosting is incredible as a fruit dip for strawberries or pretzels, sandwiched between cookies, or just eaten straight from the bowl with a graham cracker (no judgment here).
Make It Your Own: Delicious Variations
Once you’ve mastered the classic, the world is your chocolate oyster! Here are a few of my favorite ways to mix it up.
- Mocha Madness: Dissolve ½ to 1 teaspoon of instant espresso powder into the vanilla extract before adding it. The coffee doesn’t make it taste like coffee; it just deepens and intensifies the chocolate flavor in the most incredible way.
- Flavor Twist: Swap the vanilla extract for an equal amount of almond extract (a classic pairing with chocolate) or ½ teaspoon of peppermint extract for a festive, frosty treat perfect for the holidays.
- Ultra-Dark & Rich: Use a dark black cocoa powder (like the kind used in Oreos!) for a frosting that’s less sweet and has an intense, almost oreo-like flavor. It’s stunningly dark.
- Chocolate-Chocolate Chunk: For extra texture and richness, fold in ½ cup of finely chopped dark chocolate or mini chocolate chips after the frosting is whipped.
- Dairy-Free Delight: This is an easy swap! Use your favorite plant-based butter sticks (I find the ones formulated for baking work best) and unsweetened almond or oat milk instead of dairy. It works like a charm!
Beau’s Chef Notes & Kitchen Stories
This recipe has been my faithful companion through countless baking adventures. I once accidentally doubled the vanilla extract in a batch I was making for a friend’s wedding cake trial. I was panicked, but it turned out to be the best mistake I ever made—the flavor was incredible! The bride and groom loved it so much it became the “secret ingredient” for their actual wedding cake.
Over time, I’ve learned that the real secret is in the whipping. Don’t rush the process. Those few minutes of creaming the butter and then whipping the final frosting are what separates a good frosting from a legendary one. It’s the difference between something that just sits on top of a cake and something that becomes one with it.
Frosting FAQs: Your Questions, Answered!
Q: My frosting is too runny! What did I do wrong? How can I fix it?
A: This usually happens if the butter was too soft or you added a bit too much liquid. No worries! Pop the whole bowl into the refrigerator for 20-30 minutes to let the butter firm up, then re-whip it. If it’s still too soft, you can add a little more sifted powdered sugar, a quarter cup at a time, until it thickens up.
Q: Why is my buttercream grainy?
A: Graininess almost always comes from the powdered sugar not being fully dissolved. Next time, ensure your butter is properly softened and mix on low speed when adding the sugar. For this batch, just keep mixing! Sometimes a few extra minutes on medium speed can help dissolve those stubborn sugar crystals.
Q: Can I make this frosting ahead of time?
A: Absolutely! Make it up to 3 days in advance. Store it in an airtight container in the refrigerator. When you’re ready to use it, let it come to room temperature on the counter (this might take a few hours) and then re-whip it in your mixer for a minute or two to bring back its smooth, fluffy texture.
Q: Can I freeze chocolate buttercream?
A: You bet. It freezes beautifully for up to 3 months. Thaw it overnight in the fridge, then let it come to room temperature and re-whip before using.
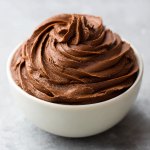
Chocolate Buttercream Frosting
Description
Tired of grainy, stiff, or runny frosting ruining your perfect chocolate cake? This Chocolate Buttercream is rich, smooth, and creamy with a deep chocolate flavor that’s never too sweet. It spreads beautifully, pipes like a dream, and can transform any cake, cupcake, or cookie into something extraordinary.
Ingredients
-
1 cup (2 sticks) unsalted butter, softened
-
3 ½ cups confectioners’ sugar, sifted if possible
-
½ cup unsweetened cocoa powder
-
¼ teaspoon salt
-
2 teaspoons vanilla extract
-
2–4 tablespoons milk or heavy cream
Tip: Start with 2 tablespoons of liquid and add more to reach your desired consistency. Use softened, room-temperature butter for a fluffy texture.
Instructions
-
Beat the Butter: In a large bowl, beat softened butter on medium-high speed for 2–3 minutes until light and fluffy.
-
Add Cocoa & Salt: Sift cocoa powder and salt into the butter. Mix on low until fully combined. Scrape down sides.
-
Add Sugar Gradually: Add confectioners’ sugar one cup at a time on low speed to avoid a sugar cloud. Mix on medium for 1 minute once all sugar is in.
-
Add Vanilla & Milk: Pour in vanilla extract and 2 tablespoons of milk or cream. Beat on medium-high for 2–3 minutes until smooth and creamy. Adjust liquid for spreading or piping consistency.
Notes
-
Cakes: Apply a thin crumb coat first, chill for 15 minutes, then frost generously.
-
Cupcakes: Pipe with a star tip for bakery-style swirls.
-
Other Uses: Spread between cookies, dip fruit, or enjoy straight from the bowl.
Pro Tip: Always frost fully cooled cakes or cupcakes to prevent melting.
Nutrition
- Calories: 160Cal per 2 tbsp serving
- Sugar: 16g
- Sodium: 35mg
- Fat: 10g
- Carbohydrates: 18g
- Cholesterol: 25mg
Nutritional Information*
*Please note: This is an estimate provided by an online nutrition calculator. For exact information, we recommend using your preferred calculator with the specific brands of ingredients you use.
Prep Time: 10 minutes
Yield: ~3 cups (Frosts one 9×13” cake or 24 cupcakes)
Per Serving (2 tablespoons):
Calories: 160 | Total Fat: 10g | Saturated Fat: 6g | Trans Fat: 0g | Cholesterol: 25mg | Sodium: 35mg | Total Carbohydrates: 18g | Dietary Fiber: 1g | Sugars: 16g | Protein: 1g
Final Sweet Thoughts
Well, there you have it, my friends. This isn’t just a recipe; it’s a trusty tool for your kitchen toolbox, a way to turn a simple Tuesday into a celebration, and a guaranteed crowd-pleaser. It’s the frosting that will have people asking, “How did you make this?!”
I hope this recipe brings as much joy to your kitchen as it has to mine. Remember, cooking and baking are about the journey—the little stories, the happy accidents, and the connections we make over something delicious. So don’t be afraid to get in there, get your hands a little messy, and make it your own.
I’d love to hear how it goes! Tag me @feastical on social media with your beautiful creations. Now, go forth and frost!
With love and a full bowl of buttercream,
Beau

Classic Vanilla Buttercream Frosting
Let’s Make Some Magic: The Ultimate Vanilla Buttercream
Hey friends, Beau here! Let’s have a real kitchen chat for a second. How many times have you slaved over a beautiful cake, only to top it with a frosting that’s just… meh? Maybe it’s too sweet, maybe it’s gritty, or maybe it just doesn’t have that soul-satisfying richness you were dreaming of. I’ve been there. We’ve all been there. That’s why today, we’re going back to basics—but we’re making it spectacular. We’re ditching the overly sweet, one-note frostings and we’re making a Classic Vanilla Buttercream that’s in a league of its own. This isn’t just butter and sugar, folks. This is a silky, luxurious, custard-kissed cloud of perfection. The secret weapon? Egg yolks. Yep, that gorgeous, golden yolk adds a depth of flavor and a velvety texture that will absolutely ruin you for any other frosting. It’s the kind of frosting that makes you close your eyes after the first bite. It’s the stuff of birthday legends and cupcake fame. So, tie on your favorite apron, grab your trusty mixer, and let’s create something unforgettable together. This is the only vanilla buttercream recipe you’ll ever need.
The Birthday Cake That Started It All
This recipe takes me right back to my grandma’s kitchen, with its checkered curtains and the constant, warm smell of sugar and butter. Every year for my birthday, she’d let me stand on a wobbly wooden stool and “help” her make my cake. Her frosting was always different from the ones my friends had. It wasn’t stark white; it had a beautiful, pale yellow hue. It wasn’t cloyingly sweet; it was rich and almost elegant. I never knew why until I was finally old enough to pay real attention. While other recipes just creamed butter and sugar, she’d separate eggs, carefully sliding the yolks into her mixing bowl with a practiced hand. She’d whisper that it was her “little secret” for a frosting that tasted like it came from a fancy bakery. That subtle, custard-like flavor was the taste of pure love and kitchen wisdom. This recipe is my homage to her. It’s a nod to the old ways, the tricks that our grandparents knew that made simple food extraordinary. It’s more than frosting; it’s a delicious, edible memory.
Gathering Your A-Team: The Ingredients
Simple ingredients, incredible results. That’s the Feastical promise. Here’s what you’ll need to create this masterpiece. Let’s break it down, because every player has a role!
- ½ cup (1 stick) unsalted butter, softened – This is the foundation. Unsalted lets you control the salt level. Chef’s Tip: “Softened” is KEY. It should give slightly when you press it, but not be oily or melted. Leave it on the counter for 1-2 hours before you start. In a pinch? Cut it into tablespoons and microwave for 5-second bursts until perfect.
- ⅛ teaspoon salt – Don’t you dare skip this! Salt is the flavor enhancer that cuts the sweetness and makes the vanilla pop. It’s the difference between flat and fantastic.
- 4 cups confectioners’ sugar (aka powdered sugar) – This gives us that smooth, melt-in-your-mouth texture that granulated sugar can’t. Substitution Tip: If you’re out, you can make your own by blending 1 cup granulated sugar with 1 tablespoon of cornstarch until it’s a fine powder.
- 2 large egg yolks, beaten – Here’s our superstar! The yolks provide an incredible richness, a beautiful color, and that signature custard depth. Safety First: Use pasteurized eggs if you have any concerns about consuming raw egg yolks.
- 1 teaspoon vanilla extract – Use the good stuff! Pure vanilla extract makes a world of difference compared to imitation. This is the main flavor voice, so let it sing.
- 2 tablespoons milk (or heavy cream) – This is our liquid to bring it all together. Start with 2 tablespoons and add more as needed to reach your perfect spreading consistency. Heavy cream will make it even richer and creamier.
Let’s Get Mixing: Step-by-Step to Frosting Heaven
Alright, team. Let’s do this. Follow these steps, and you’ll have flawless frosting every single time. I’m talking you through it like you’re right here in the kitchen with me.
Step 1: The Creamy Foundation. In a large mixing bowl, combine your softened butter and that all-important ⅛ teaspoon of salt. Using an electric hand mixer or a stand mixer fitted with the paddle attachment, beat on medium-high speed for 2-3 minutes. We’re not just mixing; we’re aerating. You want it to become pale in color, light, and fluffy. This step incorporates air, which is what gives your frosting that gorgeous, cloud-like texture instead of being dense and heavy. Scrape down the sides of the bowl with a spatula to make sure everything is getting loved equally.
Step 2: The Sweet Embrace. Now, with your mixer on low speed, gradually add the confectioners’ sugar, one cup at a time. I mean it—gradually. If you dump it all in at once, you and your entire kitchen will be wearing a sweet, white cloud. After each cup is added, let the mixer run until the sugar is fully incorporated before adding the next. Once all the sugar is in, crank the speed up to medium and beat for another full minute. This ensures any little sugar lumps are completely beaten out and the mixture is perfectly smooth.
Step 3: The Golden Touch. In a small separate bowl, lightly beat your two egg yolks with a fork just to break them up. Reduce your mixer speed to low and slowly pour in the beaten yolks and your teaspoon of vanilla extract. Let it mix until just combined—this should only take about 30 seconds. You’ll immediately see the color transform into a beautiful pale yellow. Marvel at it! That’s the magic happening.
Step 4: Bringing It All Together. Finally, it’s time for the milk. With the mixer still on low, add your two tablespoons of milk. Once it’s incorporated, stop the mixer, scrape down the bowl again, and then turn the mixer to medium-high speed. Now, beat the living daylights out of it for a good 2-3 minutes. This is where the magic *really* happens. Watch as it transforms from a somewhat gritty mixture into an impossibly smooth, light, and spreadable masterpiece. If it seems too thick, add more milk, one teaspoon at a time. If it’s too thin (unlikely, but possible), add a bit more confectioners’ sugar.
How to Serve & Showcase Your Masterpiece
You’ve made it! Now, let’s put this golden goodness to work. This buttercream is incredibly versatile.
For Cakes: For a 9×13 sheet cake, this recipe is the perfect amount. For a two-layer 8-inch cake, I’d recommend making a double batch so you can generously frost between the layers and all over the outside. Use an offset spatula for smooth, professional-looking sides, or a spoon to create beautiful, rustic swirls.
For Cupcakes: This will frost 18-24 cupcakes, depending on how generous you are! For a classic bakery look, fit a piping bag with a large star tip (I love a Wilton 1M or 2D) and pipe tall, beautiful swirls onto each cooled cupcake. It feels fancy but is so easy.
For Cookie Sandwiches: This is a next-level move. Spread a thick layer between two sugar cookies, oatmeal cookies, or even chocolate chip cookies for the most decadent homemade sandwich cookie you’ve ever tasted.
Pro Tip: Always, always make sure your cakes or cupcakes are completely cooled to room temperature before you frost. Otherwise, your beautiful frosting will melt right off!
Get Creative: Flavor Twists & Swaps
The classic vanilla is perfect, but who doesn’t love options? Here are a few of my favorite ways to mix it up.
- Chocolate Dream: Reduce the confectioners’ sugar by ¼ cup and add ½ cup of good-quality unsweetened cocoa powder (sifted!) along with it. You might need an extra tablespoon of milk to get to the right consistency.
- Citrus Zing: Replace the vanilla extract with ½ teaspoon of almond extract and add the finely grated zest of one lemon or orange. The almond and citrus combo is unreal.
- Berry Blast: After the frosting is made, gently fold in ¼ cup of freeze-dried strawberry or raspberry powder (just blend freeze-dried berries in a blender until fine). It gives an incredible, natural fruit flavor and a gorgeous pink hue.
- Rich & Creamy: Simply swap the milk for an equal amount of heavy cream. It amplifies the richness and makes it even more decadent.
- Vegan/Pasteurized Swap: Concerned about raw egg? You can achieve a similar richness by swapping the egg yolks for ¼ cup of store-bought pasteurized liquid egg product. For a fully vegan version, use a high-quality plant-based butter (the kind that comes in sticks, not tubs) and replace the milk with your favorite non-dairy alternative. The flavor profile will be slightly different, but still delicious!
Beau’s Chef Notes & Kitchen Stories
This recipe has been my go-to for years, and it’s evolved through plenty of happy (and messy) accidents. I once was filming a video for the site and, in my excitement, added the sugar with the mixer on high. Let’s just say my dog, Biscuit, had a sweet dusting for days and we had to pause for a serious clean-up. Lesson learned! The slow add is non-negotiable. I’ve also found that if your kitchen is really warm, popping the finished frosting into the fridge for 10-15 minutes before piping can help it hold its shape beautifully. This frosting is a testament to the idea that sometimes, the old ways are the best ways. That little extra step of adding egg yolk is what separates a good frosting from a legendary one.
Frosting FAQs: Your Questions, Answered
Q: My frosting is too runny! What did I do wrong?
A: The most likely culprit is butter that was too soft or even slightly melted. Don’t worry! Pop the whole bowl into the refrigerator for 20-30 minutes to let the butter firm up, then re-whip it. You can also add a bit more confectioners’ sugar, a quarter cup at a time, to help thicken it.
Q: Why is my frosting gritty?
A: This is almost always because the confectioners’ sugar wasn’t fully incorporated. When you add the sugar, make sure you’re beating it on low until it’s *just* mixed in, and then beat it on high for a full minute or two at the end. This ensures any tiny sugar granules are completely dissolved.
Q: Can I make this ahead of time?
A: Absolutely! You can make it up to 2 days ahead. Store it in an airtight container in the refrigerator. When you’re ready to use it, let it come to room temperature on the counter for about an hour, then re-whip it in your mixer for a minute or two to bring back its smooth, spreadable texture.
Q: Is it safe to eat raw egg yolks?
A: This is important. There is a minimal risk associated with consuming raw eggs. To eliminate this risk entirely, please use pasteurized eggs or pasteurized liquid egg yolks. This is especially crucial if you are serving the frosting to young children, the elderly, pregnant individuals, or anyone with a compromised immune system.

Classic Vanilla Buttercream Frosting
Description
Ever baked a cake that deserved a frosting as spectacular as it looked? This Classic Vanilla Buttercream isn’t just sweet—it’s silky, rich, and perfectly balanced. Thanks to a touch of egg yolk, it has a custard-like depth that elevates any cake, cupcake, or cookie sandwich. Simple ingredients, extraordinary results—let’s make magic in your kitchen.
Ingredients
-
½ cup (1 stick) unsalted butter, softened
-
⅛ teaspoon salt
-
4 cups confectioners’ sugar
-
2 large egg yolks, beaten (use pasteurized if preferred)
-
1 teaspoon vanilla extract
-
2 tablespoons milk or heavy cream (more as needed)
Tip: Ensure butter is softened but not melted for the best texture.
Instructions
-
Cream the Butter: In a large bowl, beat butter and salt on medium-high for 2–3 minutes until light and fluffy. Scrape down the bowl.
-
Add Sugar Slowly: With mixer on low, add sugar 1 cup at a time. Beat on medium for 1 minute after all sugar is incorporated.
-
Mix in Yolks & Vanilla: Slowly add beaten egg yolks and vanilla. Mix until just combined, about 30 seconds.
-
Add Milk & Finish: Add milk, scrape the bowl, then beat on medium-high for 2–3 minutes until light, smooth, and spreadable. Adjust consistency with more milk or sugar as needed.
Notes
-
If frosting is runny, chill for 20–30 mins and re-whip.
-
If frosting is gritty, beat longer at high speed to dissolve sugar.
-
Make ahead: Store in airtight container up to 2 days in the fridge. Re-whip before use.
Nutrition
- Calories: 130 Cal per 2 tbsp serving
- Fat: 5g
- Cholesterol: 30mg
Nutritional Information*
*This is an estimated nutritional breakdown. Remember, we’re making frosting—it’s a treat, meant to be enjoyed in celebration!
Prep Time: 10 minutes
Yield: ~2½ cups (enough for one 9×13 cake or 18-24 cupcakes)
Serving Size: 2 tablespoons
Per Serving:
Calories: 130 | Total Fat: 5g | Saturated Fat: 3g | Trans Fat: 0g | Cholesterol: 30mg | Sodium: 30mg | Total Carbohydrates: 21g | Dietary Fiber: 0g | Sugars: 20g | Protein: 0.5g
Final Thoughts
And there you have it, my friends. You’re now armed with the recipe for what I truly believe is the world’s best vanilla buttercream. It’s not just a topping; it’s the crowning glory of any bake. It has history, heart, and a secret ingredient that makes all the difference. So the next time you’re baking a cake for a birthday, an anniversary, or just a Tuesday that needs a little brightening, I hope you give this a try. Remember, the best kitchens are filled with laughter, a little bit of mess, and a whole lot of love. Now, go forth and frost!
I’d love to hear how it turns out for you! Tag me @feastical on Instagram or pop over to Feastical.com and leave a comment on this post. Happy baking!
Viral Thanksgiving Mac & Cheese
Your New Thanksgiving Legend Starts Right Here
Hey friends, Beau here from Feastical! Let’s talk about the real star of the Thanksgiving show. Sure, the turkey gets the parade and the pie gets the swoons, but let’s be honest: the side dishes are the headline act. And sitting right there at the top of the charts, in all its glorious, creamy, cheesy splendor, is the one, the only… mac and cheese.
But not just any mac and cheese. We’re talking about the kind that makes Aunt Carol stop mid-sentence. The kind that has your cousin secretly sneaking a second scoop before the prayer is even over. The kind that earns you a permanent spot on the Thanksgiving invite list. This, my friends, is that recipe. This is the Viral Thanksgiving Mac & Cheese that’s been breaking the internet (and winning family arguments) one buttery, golden bite at a time.
What’s the secret? It’s stunningly simple. We’re skipping the fussy roux and the potential curdle of eggs. Instead, we’re leaning into pure, unadulterated cheesy goodness. It’s a no-stress, all-joy situation that results in the creamiest, dreamiest, most melt-in-your-mouth mac you’ve ever made. It’s rich, it’s soulful, and it’s packed with more flavor than a holiday movie marathon. So, grab your biggest pot and your stretchy pants. We’re about to make a memory.
The Mac That Started It All
I’ll never forget my first solo Thanksgiving. I was 22, living in a tiny apartment with a kitchen barely bigger than the turkey itself. I was in charge of one thing: the mac and cheese. No pressure, right? My grandma’s recipe was legendary, but it was a multi-page epic involving a double boiler and a prayer. I was terrified. In a panic, I started throwing things in a pot based on pure instinct and a serious craving for comfort. Butter, pasta, cream, and every single cheese I could find in my fridge.
I held my breath as it came out of the oven. It wasn’t my grandma’s mac. It was something else entirely. It was bubbling, gloriously golden, and so creamy it practically waved at me. When my friends dug in, the room went silent. Then came the chorus of “Oh my GOSH, Beau.” That was the moment I learned a kitchen truth I carry with me to this day: the best recipes aren’t about perfection; they’re about feeling. That mac was a warm hug in a baking dish. It was the taste of friendship and figuring it out together. And now, I’m so thrilled to share that same feeling with you.
Gathering Your Cheesy All-Stars
This recipe is all about the cheese blend, but don’t let that intimidate you! Here’s your simple shopping list. Remember, the quality of your cheese matters—always grate it yourself for the best melt! The pre-shredded stuff is coated to prevent clumping, which can make your sauce a little grainy.
- 2 lbs elbow macaroni: The classic vessel for holding all that cheesy goodness. Chef’s Insight: For even more nooks and crannies, try cavatappi or cellentani pasta. Their spiral shapes are sauce magnets!
- 1 stick (½ cup) unsalted butter: The rich, flavorful foundation of our “sauce.” Using unsalted lets you control the seasoning perfectly.
- 4–5 cups heavy cream: This is the magic that creates our luxuriously creamy base without a roux. Substitution Tip: For a slightly lighter version, you can substitute half with whole milk, but the cream is what makes it irresistibly decadent.
- 3 cups shredded sharp cheddar: The flavor backbone. Its bold, tangy profile cuts through the richness. Chef’s Insight: Buy a block and shred it yourself! It melts so much smoother.
- 2 cups shredded Monterey Jack: Our melting MVP. It brings a buttery, creamy smoothness that is absolutely essential.
- 2 cups shredded mozzarella: The stretch-factor! This cheese gives you those incredible, Instagram-worthy cheese pulls.
- 1 block (8 oz) Velveeta, cubed (optional but highly recommended): Don’t you dare turn your nose up! Velveeta is a game-changer for ultra-creamy, stable meltiness. It’s the secret weapon against a grainy sauce. Substitution Tip: If you’re anti-Velveeta, a few slices of American cheese will do a similar trick.
- Salt & black pepper to taste: Season generously! Taste as you go.
- Optional topping: 1 cup crushed Ritz crackers or seasoned breadcrumbs mixed with 2 tbsp melted butter: This is your crunch contrast. The buttery, salty Ritz cracker topping is a revelation.
Let’s Build That Creamy Dream
Ready to create some magic? Follow these steps, and you’ll be a mac and cheese hero in no time. Remember, cooking is about vibe, not stress. Put on some music and enjoy the process!
- Preheat and Prep: Fire up that oven to 350°F (175°C). Take your 9×13-inch baking dish and give it a light coating of butter or non-stick spray. This is like setting the stage for your cheesy masterpiece. Chef’s Hack: If you’re serving a crowd, you can split this between two 8×8 dishes—one for now, one to freeze for a future lazy dinner!
- Pasta Perfect: Get a large pot of well-salted water boiling. Cook your pasta until it’s just al dente (meaning it still has a slight bite to it). This is crucial! It’s going to keep cooking in the oven, and we do NOT want mushy mac. Drain it well and immediately return it to the hot pot. Chef’s Commentary: That residual heat from the pot is your friend. We’re about to use it to melt our first layer of goodness.
- The Butter Baste: Slice that stick of butter and add it right to the hot pasta. Give it a good stir until every single noodle is glistening and coated. This buttery blanket not only adds flavor but also helps create a barrier so the pasta doesn’t absorb too much liquid and get bloated.
- The Big Cheese Mix-In: Now for the fun part! Dump in all your gorgeous, freshly shredded cheeses—but remember to save about 1 cup of the cheddar for the top. Add the cubed Velveeta now, too. Pour in 4 cups of the heavy cream and stir, stir, stir over low heat until the cheeses start to melt into a glorious, gooey sauce. Chef’s Hack: If the mixture seems too thick, add the remaining cream a half-cup at a time until it’s creamy and pourable. It should be saucy but not soupy. Season liberally with black pepper and taste before adding salt (the cheeses are already salty!).
- Top and Bake: Pour this beautiful, cheesy river of dreams into your prepared baking dish. Spread it out evenly. Top with your reserved cheddar cheese. If you’re using the Ritz topping, now’s the time to sprinkle that glorious, buttery crunch all over the top. Chef’s Insight: The topping isn’t just for looks; it gives a fantastic textural contrast to the creamy interior.
- Bake to Bubbly Bliss: Slide that dish into your preheated oven and bake uncovered for 20-25 minutes. You’re looking for bubbling around the edges and a fully melted, integrated top.
- The Grand Finale (The Broil): This is the pro move. Turn your oven to broil for just 2-3 minutes to get that picture-perfect, crispy, golden-brown top. WATCH IT LIKE A HAWK. The line between golden and charcoal is thin under the broiler! You’ve put in too much work to look away now.
- The Tortuous Wait: I know, I know. It’s hard. But you MUST let it rest for 5-10 minutes after pulling it out of the oven. This allows the sauce to thicken up slightly and set, so when you scoop it, you get a clean, gorgeous serving instead of a cheesy lava flow. Trust me on this.
How to Serve This Showstopper
Presentation is part of the fun! You’ve made a masterpiece; let’s show it off. I love serving this family-style, right in the center of the table where everyone can admire it. Use a large serving spoon to get those beautiful, generous scoops that showcase the layers of creamy pasta and that crispy, golden top.
This mac and cheese is the ultimate team player on your Thanksgiving plate. It pairs beautifully with the savory notes of roasted turkey and the sweetness of cranberry sauce. For a little freshness to cut through the richness, I love serving it with a simple arugula salad with a bright lemon vinaigrette. And don’t forget the beverages! A crisp, chilled Chardonnay or a malty brown ale are fantastic grown-up pairings. For the kids (and kids at heart), a tall glass of sparkling apple cider is the perfect festive companion.
Make It Your Own: 5 Delicious Twists
The beauty of this base recipe is that it’s a canvas for your creativity! Here are a few of my favorite ways to mix it up:
- The Gourmet Upgrade: Swap out the Monterey Jack for the same amount of nutty, creamy Gruyère. Add in ½ cup of grated Parmesan to the mix and top with crispy fried shallots for a seriously next-level experience.
- The Smoky BBQ Lover: Stir in 1½ cups of shredded smoked pulled pork or chopped smoked chicken into the pasta before baking. Add a teaspoon of smoked paprika to the cheese sauce. Top with crispy fried onions for a Southern-inspired twist.
- The Veggie-Packed Delight: Sauté 2 cups of chopped broccoli florets or baby spinach and fold it into the cheesy pasta before baking. It’s a great way to add color, nutrients, and a little freshness.
- The Spicy Kick: For those who like a little heat, add 1-2 diced jalapeños (seeds removed for less heat) to the pasta mix. You can also use Pepper Jack cheese instead of regular Monterey Jack and add a dash of hot sauce to the cream.
- The Gluten-Free/Dairy-Free Friend: You don’t have to miss out! Use your favorite gluten-free pasta (the brown rice or lentil varieties work great). For the sauce, use vegan butter, a rich, plain, unsweetened oat or cashew milk, and a blend of your favorite meltable vegan cheeses. The method remains exactly the same!
Beau’s Kitchen Confidential
This recipe has evolved so much since that first anxious Thanksgiving. I’ve learned that the Velveeta, while controversial to some, is the ultimate insurance policy against a broken sauce—it melts like a dream every single time. I’ve also learned that the type of pasta matters more than I thought; those curly shapes really do hold onto the sauce better!
One of my favorite kitchen fails turned into a win: I once ran out of cheddar and had to use a pre-shredded “pizza blend” in a panic. It had provolone and asiago in it, and you know what? It was incredible! So don’t be afraid to play around with what you have. The worst thing that can happen is you make a delicious pot of mac and cheese. And really, is that so bad?
Your Mac & Cheese Questions, Answered
Q: Can I make this mac and cheese ahead of time?
A: Absolutely! Assemble the dish completely (through step 5), cover tightly with plastic wrap and then foil, and refrigerate for up to 24 hours. When you’re ready, bake it straight from the fridge, but add an extra 10-15 minutes to the baking time. You may need to tent the foil over the top for the first half to prevent the topping from burning before the center heats up.
Q: Why is my sauce grainy/oily?
A: Graininess usually happens if the cheese is heated too quickly or at too high a temperature, causing the proteins to tighten and squeeze out fat. This is why we melt everything gently over low heat on the stovetop. Using pre-shredded cheese can also contribute to this. If you see oil separating, it’s a sign of overheating. Sadly, you can’t fully fix it, but stirring in a tablespoon of fresh lemon juice can sometimes help bring it back together.
Q: Can I freeze baked mac and cheese?
A: You can, but be warned that creamy sauces can sometimes separate a bit upon thawing and reheating. For best results, freeze it before baking. Assemble the dish, wrap it incredibly well in both plastic wrap and foil, and freeze for up to 2 months. Thaw in the refrigerator for 24 hours before baking as directed.
Q: It’s a little dry. What happened?
A: The pasta likely absorbed too much liquid. Next time, make sure you’re not overcooking the pasta initially, and ensure you’re using the full amount of cream. You can also add an extra ½ cup of cream before baking if your mixture seems thick.

Viral Thanksgiving Mac & Cheese
Description
Viral Thanksgiving Mac & Cheese
The creamy, cheesy, no-fail crowd-pleaser that steals the Thanksgiving show.
Ingredients
Mac & Cheese Base:
-
2 lbs elbow macaroni (or cavatappi/cellentani for extra sauce-holding power)
-
1 stick (½ cup) unsalted butter
-
4–5 cups heavy cream (substitute half with whole milk for lighter version)
-
3 cups shredded sharp cheddar cheese (reserve 1 cup for topping)
-
2 cups shredded Monterey Jack
-
2 cups shredded mozzarella
-
1 block (8 oz) Velveeta, cubed (optional, but highly recommended)
-
Salt & black pepper, to taste
Optional Crunchy Topping:
-
1 cup crushed Ritz crackers or seasoned breadcrumbs
-
2 tbsp melted butter
Instructions
1. Prep
-
Preheat oven to 350°F (175°C).
-
Grease a 9×13-inch baking dish with butter or non-stick spray.
-
Tip: For large gatherings, split into two 8×8 dishes; one can be frozen for later.
2. Cook Pasta
-
Boil pasta in well-salted water until just al dente.
-
Drain and return to the hot pot.
3. Add Butter
-
Stir in butter until noodles are evenly coated.
4. Melt the Cheese
-
Over low heat, add shredded cheeses and Velveeta to the pasta.
-
Pour in 4 cups heavy cream and stir until fully melted and smooth.
-
Adjust thickness with remaining cream if necessary.
-
Season with black pepper and taste before adding salt.
5. Assemble & Top
-
Pour cheesy pasta into prepared baking dish.
-
Sprinkle reserved cheddar on top.
-
Add optional Ritz or breadcrumb topping.
6. Bake
-
Bake uncovered for 20–25 minutes, until edges are bubbling.
7. Broil for Golden Finish
-
Broil for 2–3 minutes for a crispy top—watch closely!
8. Rest Before Serving
-
Let rest 5–10 minutes for sauce to thicken slightly.
Notes
-
Shredding cheese yourself ensures smoother melt and prevents grainy texture.
-
Velveeta is optional but helps create the ultra-creamy, stable sauce everyone loves.
-
Experimenting with pasta shapes can enhance the sauce cling factor.
Nutrition
- Calories: 580Cal per serving
- Fat: 38 g
- Saturated Fat: 24 g
- Cholesterol: 125 mg
Nutritional Information*
*Please note: These are estimates based on the specific ingredients listed and can vary greatly based on exact products used and portion sizes.
Per Serving (based on 12 servings):
Calories: ~580 | Total Fat: 38g | Saturated Fat: 24g | Cholesterol: 125mg | Sodium: 580mg | Total Carbohydrates: 38g | Dietary Fiber: 1g | Sugar: 3g | Protein: 20g
This is a rich, indulgent dish meant for celebrating special occasions. It’s a source of calcium and protein from the dairy, and the pasta provides energy-boosting carbohydrates to fuel your holiday festivities. To balance your plate, enjoy it alongside lean proteins like turkey and plenty of vegetable-based sides!
Dig In and Make Memories
And there you have it, my friends. Your ticket to Thanksgiving fame. This recipe is more than just a list of ingredients and steps; it’s an invitation to create something wonderful and share it with the people you love most. Food has this incredible power to connect us, to comfort us, and to create stories that we tell for years to come.
I hope this mac and cheese becomes a part of your story. I hope it’s the dish that gets requested every single year. I hope it fills your kitchen with incredible aromas and your home with even better laughter. From my kitchen to yours, Happy Thanksgiving. Now go forth and be cheesy!
Did you make this viral mac? I’d love to see it! Tag me @Feastical on Instagram or Pinterest with your creations. You just might feature in our weekly community spotlight!