
The Best French Toast
The Best French Toast You’ll Ever Make (I Promise!)
Hey there, friends! Beau here, welcoming you back to Feastical. You know that feeling? The one where a lazy Saturday morning dawns, the sun is streaming through the kitchen window, and your stomach starts whispering sweet nothings about something warm, comforting, and downright delicious for breakfast. Not just any breakfast, though. A breakfast that feels like a celebration. For me, that whisper always turns into a full-blown, joyful shout for French toast.
But we’re not talking about the sad, soggy, barely-eggy version you might remember from rushed mornings past. Oh no. We’re on a mission for French toast greatness. We’re chasing that perfect, golden-brown crust that gives way with a satisfying crackle to a center so rich and custardy it’s practically a dessert. We’re talking about French toast that turns an ordinary morning into a brunch showstopper, the kind that has everyone hovering around the stove, plate in hand, begging for the next slice.
This recipe is my ultimate, no-fail, crowd-pleasing masterpiece. It’s the one I make for holiday mornings, for when friends sleep over, and for those days when my soul just needs a warm, syrupy hug. I’ve packed it with a few gourmet twists—a kiss of orange zest, a whisper of nutmeg—that elevate it from simple to sublime. It’s surprisingly easy, but the results are absolutely unforgettable. So, grab your favorite bowl and your trusty whisk, and let’s make some morning magic together.
A Slice of Sunshine: My First French Toast Victory
I’ll never forget the first time I truly fell in love with French toast. I was about ten years old, spending the weekend at my grandma’s house. Her kitchen was her kingdom, and the smell of butter and cinnamon was her royal scent. One morning, I decided I was going to be the chef. I pulled a chair up to the counter, determined to make French toast all by myself.
Of course, my first attempt was… ambitious. I used sandwich bread, barely dipped it in a murky egg-and-milk mixture, and then proceeded to burn the first batch to a crisp. I was devastated. But my grandma, with infinite patience, just smiled. She showed me how the secret wasn’t in rushing, but in letting the bread soak up all that custardy goodness. She handed me a thick slice of her homemade challah and said, “Beau, the bread is the heart of it. You gotta treat it right.”
That second batch? Pure gold. The edges were crisp, the center was like a sweet, warm cloud, and the pride I felt was even sweeter than the maple syrup we drowned it in. That’s the feeling I want to share with you today—that joy of creating something simple, soulful, and spectacularly delicious.
Gathering Your French Toast Dream Team
Great food starts with great ingredients. This lineup is simple, but each one plays a starring role. Here’s what you’ll need to serve a hungry crowd of 12 (because trust me, you’ll want leftovers!).
- 2 loaves Challah or Brioche, thick-sliced (about 1.5 inches thick): This is non-negotiable for the BEST French toast! Challah and brioche are slightly sweet, eggy, and have a tight crumb that soaks up the custard like a dream without falling apart. Chef’s Insight: Stale bread is actually your best friend here—it absorbs even more custard! If your bread is fresh, just lay the slices out on a baking sheet for a few hours or toast them lightly in a low oven first.
- 4 cups Half-n-Half or Heavy Cream: This is our secret weapon for that luxuriously rich, custardy interior. Half-n-half gives you amazing creaminess without being overly heavy. For the ultimate indulgence, go for heavy cream. Substitution Tip: Whole milk works in a pinch, but the result won’t be as decadent.
- 8 large eggs: The backbone of our custard, providing structure and that beautiful golden color.
- 1/2 cup granulated sugar: Just the right amount of sweetness to caramelize beautifully in the pan.
- 4 tsp pure vanilla extract: Use the real stuff! It adds a deep, warm flavor that imitation vanilla just can’t match.
- 1 tsp ground cinnamon: The classic warm spice that says “comfort food.”
- 1/4 tsp ground nutmeg (our optional twist!): This little addition adds a wonderful, warm complexity. It’s subtle but makes a huge difference.
- Zest of 1 orange (our other optional twist!): Don’t skip this! The bright, citrusy aroma cuts through the richness and makes the entire dish sing with flavor.
- Salted butter, for cooking: Butter gives the French toast those gorgeous, crispy, buttery edges. I prefer salted for a nice sweet-and-salty balance.
- Optional toppings: The fun part! Maple syrup, fresh berries, whipped cream, powdered sugar, or even a drizzle of Nutella.
Let’s Get Cooking: Your Path to French Toast Glory
Okay, team! It’s time to turn these beautiful ingredients into the star of the breakfast table. Follow these steps, and you’ll be a French toast master in no time.
- Make the Custard: Grab your largest mixing bowl—trust me, you’ll need the space. Crack in the 8 eggs and give them a good initial whisk to break them up. Now, pour in the half-n-half, sugar, vanilla, cinnamon, nutmeg, and that glorious orange zest. Whisk it all together until it’s completely smooth and homogenous. You shouldn’t see any streaks of egg white. Chef’s Hack: I like to pour my custard through a fine-mesh sieve into another bowl. This catches any little bits of egg white or zest, ensuring a super-smooth custard for a flawless finish.
- Soak the Bread (This is the crucial step!): Now, take your beautiful thick slices of challah or brioche. One by one, gently lower them into the custard. Let them soak for a solid 20-30 seconds on each side. You’ll see the bread start to drink up the liquid. You want it to be fully saturated but not so soggy that it falls apart. Little Chef Tip: Use a timer! It’s easy to get distracted and under-soak the bread. This patient soaking is what gives you that incredible custard center.
- Cook to Golden Perfection: Place a large skillet or griddle over medium heat. Don’t go higher—we’re not searing a steak! We want the inside to cook through before the outside burns. Add a generous pat of salted butter and let it melt until it’s foaming slightly. Carefully place your soaked bread slices in the pan. Don’t overcrowd it; cook in batches. Let them cook undisturbed for about 3-4 minutes. Peek underneath—when it’s a deep, golden brown, it’s time to flip. Chef’s Insight: Listen for the sizzle. It should be a happy, steady sound. If it’s silent, your pan isn’t hot enough. If it’s smoking and angry, it’s too hot!
- Finish and Repeat: Cook on the second side for another 3-4 minutes until equally golden and gorgeous. The French toast should feel firm but slightly soft in the center when you press it gently. As each batch finishes, transfer them to a wire rack set over a baking sheet. This keeps the bottom from getting steamy and soft. If you’re cooking for a crowd, you can keep the finished slices warm in a 200°F (95°C) oven while you cook the rest.
Plating Up: The Grand Finale
Now for the best part—serving! Presentation is part of the joy. I like to stack two slices high on a warm plate for that “wow” factor. Drizzle generously with warm, pure maple syrup—the real stuff is worth every penny. Let that amber goodness cascade down the sides.
Then, let your creativity shine! A handful of fresh, vibrant berries (raspberries, blueberries, strawberries) adds a pop of color and a burst of freshness that balances the richness. A dusting of powdered sugar from a fine-mesh sieve looks like a light snowfall and adds a touch of extra sweetness. For the ultimate indulgence, a dollop of freshly whipped cream is never a bad idea. The goal is a plate that looks as incredible as it tastes.
Make It Your Own: Delicious Twists & Swaps
The beauty of this recipe is that it’s a perfect canvas for your creativity. Here are a few of my favorite ways to mix it up:
- Blueberry Lemon Bliss: Swap the orange zest for lemon zest and add a handful of fresh blueberries to the custard. The blueberry-lemon combo is a classic for a reason!
- Stuffed French Toast: Take two slices of soaked bread and sandwich them with a layer of sweetened cream cheese, Nutella, or even sliced bananas. Press the edges together gently and cook as directed. It’s a decadent, surprise-filled treat.
- Almond Joy: Add 1 teaspoon of almond extract to the custard along with the vanilla. After cooking, top with toasted sliced almonds and a drizzle of chocolate sauce.
- Dairy-Free Delight: Easily make this dairy-free by using canned coconut milk instead of half-n-half and vegan butter for cooking. The coconut flavor pairs amazingly well with the cinnamon.
- “Healthier” Hack: For a lighter version, you can use whole milk instead of cream and add a tablespoon of flaxseed or chia seeds to the custard for a fiber boost. It’s still delicious, I promise!
Beau’s Back-Pocket Tips & Stories
This recipe has been my go-to for years, and it’s evolved with every batch. I once accidentally used a whole tablespoon of nutmeg (note to self: don’t measure while chatting!) and created “Spice Toast.” It was… intense, but my spice-loving uncle adored it. It taught me that recipes are guides, not rules.
My biggest piece of advice? Don’t rush the soak. I know it’s tempting to just dunk and go, but those 30 seconds per side are what separate good French toast from legendary French toast. Also, if you have any leftover custard, you can pour it into a baking dish with any leftover bread cubes and bake it into a fantastic bread pudding! Waste not, want not.
French Toast FAQs: Solving Your Breakfast Dilemmas
Q: My French toast is soggy in the middle. What did I do wrong?
A: This usually means the heat was too high. The outside cooked too quickly, leaving the inside raw. Always cook over a steady medium heat. Also, make sure your pan is preheated before adding the bread.
Q: Can I make the custard the night before?
A: Absolutely! This is a fantastic time-saver. Mix the custard (without the orange zest, add that right before soaking to keep it bright) the night before, cover it, and keep it in the fridge. The flavors will meld together beautifully.
Q: What if I don’t have challah or brioche?
A: No worries! A sturdy, thick-sliced Texas Toast or even a dense, artisanal sourdough works well. Just avoid super-soft, thin sandwich bread—it tends to get mushy.
Q: How do I keep cooked French toast warm for a crowd?
A: The wire rack on a baking sheet method is key! Place the cooked slices in a single layer on the rack and keep them in a preheated 200°F (95°C) oven. This keeps them warm and crisp for up to 30 minutes.

The Best French Toast
Description
Hey friends! Beau here from Feastical. Imagine a lazy Saturday morning, sun streaming through the window, and the smell of something warm and comforting filling your kitchen. That’s the magic of French toast done right—a golden-brown crust that cracks satisfyingly under your fork, giving way to a rich, custardy center that feels like dessert for breakfast.
Ingredients
The Custard & Bread
-
2 loaves Challah or Brioche, thick-sliced (~1.5 inches)
-
4 cups Half-n-Half or heavy cream (whole milk works in a pinch)
-
8 large eggs
-
1/2 cup granulated sugar
-
4 tsp pure vanilla extract
-
1 tsp ground cinnamon
-
1/4 tsp ground nutmeg (optional twist)
-
Zest of 1 orange (optional twist)
For Cooking
-
Salted butter
Optional Toppings
-
Maple syrup
-
Fresh berries
-
Whipped cream
-
Powdered sugar
-
Nutella
Chef’s Insight: Stale bread is best—it soaks up custard perfectly. If fresh, let slices air-dry a few hours or toast lightly.
Instructions
1. Make the Custard
-
Whisk eggs in a large bowl.
-
Add half-n-half, sugar, vanilla, cinnamon, nutmeg, and orange zest. Mix until smooth.
-
Optional: strain through a fine-mesh sieve for an ultra-smooth custard.
2. Soak the Bread
-
Dip thick slices one at a time into the custard, 20–30 seconds per side.
-
Bread should be fully saturated but not falling apart.
-
Tip: Use a timer—the soak is the secret to a custardy center.
3. Cook to Golden Perfection
-
Heat a skillet or griddle over medium heat.
-
Melt butter until foaming slightly.
-
Cook slices 3–4 minutes per side until deep golden.
-
Use a wire rack over a baking sheet to keep cooked slices crisp.
Pro Tip: Keep cooked French toast warm in a 200°F (95°C) oven for a crowd.
Notes
-
Don’t rush the soak—it’s what separates good from legendary French toast.
-
Leftover custard + bread cubes = amazing bread pudding.
-
Once, a tablespoon of nutmeg made “Spice Toast” unforgettable for spice lovers—recipes are guides, not rules!
Nutrition
- Calories: 280 Cal
- Fat: 15g
- Carbohydrates: 25g
- Protein: 7g
Nutritional Information (A Quick Note!)
Let’s be real—this is a treat, a celebration breakfast. It’s meant to be indulgent and joyful! That said, here’s a rough estimate per slice (without toppings), so you can enjoy it mindfully. Remember, these values can vary based on your specific ingredients.
Estimated per slice: Calories: ~280, Fat: 15g, Carbohydrates: 25g, Protein: 7g.
If you’re looking for a lighter option, check out the “Healthier Hack” in the variations section above. But my philosophy? It’s all about balance. Enjoy a slice or two of this incredible French toast with some fresh fruit on the side, savor every single bite, and then maybe go for an extra walk later. Food is fuel, but it’s also joy. Don’t forget the joy part.
Your New Go-To Brunch Masterpiece
And there you have it, my friends—my heart and soul poured into a recipe for The Best French Toast. It’s more than just a breakfast; it’s a way to slow down, to create a moment of pure, simple happiness. It’s the recipe I turn to when I want to show my people I love them, one golden, custardy slice at a time.
I hope this recipe becomes a staple in your kitchen, creating its own set of warm memories and happy bellies. If you make it (and I really hope you do!), tag me on social media with #Feastical so I can see your beautiful creations. Nothing makes me happier than seeing you guys in the kitchen, whipping up something wonderful.
Until next time, keep your spatula close and your joy closer.

Crispy Fried Ravioli – Golden, Cheesy & Crowd-Pleasing
The Ultimate Party Starter: Crispy Fried Ravioli That’ll Steal the Show
Hey friends, Beau here from Feastical! Let’s talk about one of life’s greatest simple pleasures: that magical moment when you bite into something hot, crispy, and cheesy, and the entire room goes quiet except for the sounds of happy munching. If you’re looking for a guaranteed crowd-pleaser, a recipe that’s equal parts impressive and incredibly easy, you’ve just hit the jackpot. We’re diving fork-first into my recipe for Crispy Fried Ravioli.
Now, I know what some of you might be thinking: “Frying? At home? Beau, that sounds messy!” But trust me on this one. This isn’t a complicated, splatter-filled ordeal. This is about taking a fantastic shortcut (hello, store-bought ravioli!) and transforming it into a golden, crunchy, utterly addictive appetizer that feels straight out of your favorite Italian trattoria. They’re perfect for game day, a fun Friday night with the family, or whenever you need a plate of food that says, “Let’s celebrate!” So, tie on your favorite apron, pour yourself a little something to sip on, and let’s create some kitchen magic together. I promise, these little parcels of joy are about to become your new secret weapon.
A Bite of Nostalgia: My First Taste of Toasted Rav
This recipe always takes me back to a tiny, hole-in-the-wall joint in St. Louis I visited years ago with some college buddies. The place was all checkered tablecloths and the hum of happy conversation. We ordered a plate of something called “toasted ravioli” on a whim, not really knowing what to expect. What arrived were these gorgeous, golden-brown pillows, dusted with parmesan and sitting in a pool of vibrant marinara. One bite and we were absolutely hooked. The contrast of the crunchy exterior giving way to that burst of molten cheese was a revelation.
We ended up ordering two more plates and arguing over the last one. I remember leaning back in my chair, completely satisfied, and thinking, “I have to figure out how to make these at home.” It became a fun mission. I’ve tweaked and tested over the years, but that core memory of shared laughter and incredible flavor is what I try to bake into every batch I make now. It’s more than a recipe; it’s a ticket to that feeling of pure, uncomplicated joy. That’s the spirit I want to bring to your kitchen today.
Gathering Your Golden Goodies: The Ingredients
Part of the beauty of this recipe is its simplicity. You only need a handful of key players to create something truly spectacular. Here’s your shopping list:
- 40 oz refrigerated cheese ravioli: This is our superstar! Using pre-made ravioli is the ultimate time-saver. Look for them in the refrigerated section near the other fresh pasta. Chef’s Insight: Don’t thaw frozen ravioli if you go that route—fry them straight from frozen, just add a minute or two to the cooking time.
- 4 eggs: Our binding agent. They create the glue that helps the breadcrumbs stick for that perfect, even crust.
- 2/3 cup milk: Whisked with the eggs to create an egg wash. This thins it out just enough for a lighter, more manageable coating that doesn’t overwhelm the delicate pasta.
- 4 cups Italian-style breadcrumbs: The source of that iconic crunch and flavor. The Italian seasoning blend (usually with oregano, basil, garlic) is built right in! Substitution Tip: No Italian-style? Use plain breadcrumbs and add 2 tsp of dried Italian herbs, a pinch of garlic powder, and a generous crack of black pepper.
- Oil for frying (vegetable or canola): You’ll need enough to come up about 1.5 inches in your pot or skillet. These oils have a high smoke point, meaning they can get nice and hot without burning. Chef’s Hack: Avocado or peanut oil also work great for high-heat frying.
- 1/2 cup grated parmesan cheese: For finishing! A snowy shower of parm right after frying makes everything better. Use the good stuff from the refrigerated section, not the shelf-stable canister, for the best flavor.
- 2 tbsp chopped fresh parsley: This isn’t just for color (though it adds a beautiful pop!). The fresh, slight bitterness of parsley cuts through the richness of the fried cheese beautifully.
- Marinara sauce, for dipping: The essential sidekick. Use your favorite jarred sauce warmed up, or if you’re feeling fancy, whip up a quick homemade version. It’s the tangy, herby dip that brings the whole dish together.
Let’s Get Frying: Your Step-by-Step Guide to Perfection
Okay, team! Let’s fire up the stove and get these ravioli crisped up to golden perfection. Follow these steps, and you’ll be a frying pro in no time.
- Set Up Your Dredging Station: This is key for an efficient, non-messy process. Get three shallow bowls or plates. In the first, just your ravioli. In the second, vigorously whisk together the eggs and milk until they are completely smooth and unified. In the third, pour your Italian-style breadcrumbs. Line them up: ravioli, egg wash, breadcrumbs. Chef’s Hack: Use one hand for the wet steps (dipping in egg) and your other hand for the dry steps (coating in breadcrumbs). This keeps you from getting “club hands”—fingers completely caked in breading!
- Bread Like a Boss: Working with a few ravioli at a time, gently drop them into the egg wash. Make sure they’re fully submerged. Let the excess drip off, then transfer them to the breadcrumb bowl. Use your dry hand to sprinkle and press the breadcrumbs onto all sides, ensuring a complete, even coating. Place the beautifully breaded ravioli on a clean plate or baking sheet. Repeat until your entire army of ravioli is ready for action!
- Heat the Oil: Pour your oil into a heavy-bottomed Dutch oven or deep, large skillet. You want it to be about 1.5 inches deep. Attach a deep-fry or candy thermometer to the side and heat the oil over medium-high heat until it reaches a steady 350°F (175°C). This is the magic temperature! If you don’t have a thermometer, test the oil by dropping in a single breadcrumb. If it sizzles vigorously and turns golden within 15 seconds, you’re good to go.
- Fry to Golden Glory: Carefully lower a batch of ravioli into the hot oil using a spider strainer or slotted spoon. Don’t overcrowd the pot! This is crucial. If you add too many at once, the oil temperature will plummet, and you’ll end up with greasy, soggy ravioli. We want them to have room to swim. Fry for 2-3 minutes per side, flipping once, until they are a deep, glorious golden brown and incredibly crispy.
- Drain and Season: Once perfectly fried, use your spider strainer or slotted spoon to lift the ravioli out of the oil, letting any excess oil drip back into the pot. Immediately transfer them to a wire rack set over a baking sheet lined with paper towels. The rack allows air to circulate, preventing the bottom from getting soggy. While they are still piping hot, immediately sprinkle with that glorious grated parmesan and fresh parsley. The heat will help the cheese adhere perfectly.
Plating Up: How to Serve These Golden Gems
Presentation is part of the fun! You’ve created something beautiful, so let it shine. I love serving these family-style on a large, rustic wooden board or a big warm platter. Pile them high so everyone can see what they’re diving into. Pour your warm marinara sauce into a small, cute bowl right in the center of the platter for dipping, or offer a few small ramekins around the table so no one has to reach too far.
This is finger food at its finest, so have plenty of napkins ready! For a full Italian-inspired spread, pair these crispy fried ravioli with a bright, crisp salad to balance the richness, some warm, garlicky breadsticks, and a chilled glass of Pinot Grigio or a light Italian red like Chianti. For a casual night, they’re the perfect centerpiece alongside a big bowl of popcorn and a great movie.
Mix It Up! Delicious Recipe Variations
Once you’ve mastered the classic, the world is your crispy, fried oyster! Here are a few of my favorite ways to mix things up:
- Spicy Kick: Add 1 teaspoon of garlic powder and 1 teaspoon of red pepper flakes directly into your breadcrumb mixture. This gives every single bite a warm, savory heat that’s absolutely irresistible.
- The Variety Pack: Use a mix of cheese, spinach, and meat-filled ravioli! This creates a fun surprise on the platter and caters to all tastes. A three-cheese blend, a veggie option, and a hearty meat option make for a perfect combo.
- Dip Upgrade: While marinara is a classic for a reason, don’t be afraid to experiment! A creamy pesto dip, a spicy vodka sauce, or even a cool, creamy ranch or garlic aioli can be an incredible pairing.
- Zesty Finish: Right after they come out of the fryer, sprinkle them with a little lemon zest along with the parmesan. The bright, citrusy aroma cuts through the richness and adds a whole new dimension of flavor.
- Air Fryer Method: Want a lighter version? You can absolutely make these in an air fryer! Spray the breaded ravioli generously with cooking spray and air fry at 375°F (190°C) for 8-10 minutes, flipping halfway through, until crispy and golden.
Beau’s Chef Notes & Kitchen Stories
This recipe has been a staple in my kitchen for years, and it’s evolved in the funniest ways. I’ll never forget the first time I made them for a big family gathering. I was so focused on frying that I didn’t notice my nephew, about five years old at the time, had set up a “guard post” next to the cooling rack. I’d turn around to fry the next batch, and he’d sneak one. By the time I was done, he’d “sampled” about six of them and had a huge, cheesy grin on his face. Now, I always make a few extra specifically for the kitchen helpers and sneaky taste-testers.
One thing I’ve learned is that the brand of ravioli can make a slight difference. Some have thicker pasta, some thinner. Don’t stress! Just keep an eye on them in the oil. If they’re browning too quickly, lower your heat a touch. The goal is to get the inside molten and hot while the outside achieves that perfect crunch. It’s a dance, and you’ve got the lead.
Your Questions, Answered: FAQs & Troubleshooting
Q: My breading is falling off in the oil! What did I do wrong?
A: This usually happens for one of two reasons. First, the oil might not be hot enough. If the oil isn’t at a steady 350°F, the breading will absorb oil instead of searing instantly, causing it to slip off. Second, make sure you’re letting the excess egg wash drip off before coating in breadcrumbs. Too much egg can act as a slippery layer.
Q: Can I make these ahead of time?
A: You can bread them ahead of time! After coating them in breadcrumbs, place them in a single layer on a baking sheet, cover with plastic wrap, and refrigerate for up to 4 hours before frying. This can actually help the coating set. I don’t recommend frying them too far in advance, as they are truly best served immediately.
Q: My ravioli are browning but the cheese inside isn’t melting.
A: Ah, the oil is likely too hot! The outside is cooking too fast before the heat can penetrate to the frozen or cold filling. Reduce the heat a bit to around 325°F (160°C) and try frying for a minute longer. It’s a balancing act between a crispy exterior and a hot, melted interior.
Q: How do I reheat leftovers and keep them crispy?
A: The oven or air fryer is your best friend here. Never the microwave—it will make them soft and chewy. Spread leftovers on a baking sheet and bake at 375°F (190°C) for 5-8 minutes, or air fry at 375°F for 3-4 minutes, until hot and re-crisped.

Crispy Fried Ravioli – Golden, Cheesy & Crowd-Pleasing
Description
Hey friends! Let’s talk about that magical moment when you bite into something hot, crispy, and cheesy, and the whole room goes quiet except for happy munching. If you’re looking for a guaranteed crowd-pleaser that’s easy, impressive, and utterly addictive, you’ve just hit the jackpot. Today, we’re making Crispy Fried Ravioli—golden, crunchy, and perfectly melty inside.
Ingredients
For the Fried Ravioli
-
40 oz refrigerated cheese ravioli (frozen works too—just fry straight from frozen)
-
4 eggs
-
2/3 cup milk
-
4 cups Italian-style breadcrumbs (or plain breadcrumbs + 2 tsp dried Italian herbs, pinch of garlic powder, black pepper)
-
Oil for frying (vegetable, canola, avocado, or peanut)
For Finishing
-
1/2 cup grated parmesan cheese
-
2 tbsp chopped fresh parsley
-
Marinara sauce, for dipping
Instructions
1. Set Up Your Dredging Station
Use three shallow bowls:
-
Ravioli
-
Egg wash (eggs + milk, whisked smooth)
-
Breadcrumbs
Pro Tip: One hand for wet, one for dry—no sticky fingers!
2. Bread the Ravioli
-
Dip each ravioli in egg wash, letting excess drip off.
-
Coat thoroughly with breadcrumbs.
-
Place on a clean plate or baking sheet. Repeat for all ravioli.
3. Heat the Oil
-
Use a heavy-bottomed skillet or Dutch oven with 1.5 inches of oil.
-
Heat to 350°F (175°C). Test with a breadcrumb—it should sizzle and brown in ~15 seconds.
4. Fry to Golden Perfection
-
Fry in batches, 2–3 minutes per side, until deep golden and crispy.
-
Drain on a wire rack over a paper-towel-lined baking sheet.
5. Finish & Serve
-
While hot, sprinkle with parmesan and parsley.
-
Serve family-style on a platter with warm marinara in the center.
Notes
-
Rustic wooden boards or big platters look beautiful.
-
Pair with a crisp salad, garlic breadsticks, or a light Italian wine for a full Italian-inspired spread.
-
Perfect as finger food—napkins are essential!
Nutrition
- Calories: 260 Cal
- Fat: 14g
- Carbohydrates: 25g
- Protein: 9g
A Quick Note on Nutrition
Hey, we’re all about balance here at Feastical! While these crispy fried ravioli are definitely an indulgent treat, it’s helpful to know what you’re enjoying. The estimated nutritional info per serving (about 4-5 ravioli) is roughly:
Calories: 260 | Fat: 14g | Carbs: 25g | Protein: 9g | Sodium: Moderate
Remember, these are estimates and can vary based on the specific brands of ingredients you use, how much oil is absorbed, and your portion size. The key is to enjoy them mindfully as part of a fun gathering or a special meal! Pairing them with a fresh salad or veggie platter can help create a more rounded eating experience.
Final Thoughts: Your New Go-To Party Recipe
And there you have it, my friends! Your complete guide to creating insanely delicious, crispy fried ravioli that will have everyone asking for the recipe. This dish is proof that you don’t need to be a professional chef to create restaurant-quality magic in your own kitchen. It’s about good ingredients, a few simple techniques, and the intention of sharing something wonderful with the people you love.
I hope this recipe brings as much laughter and empty plates to your table as it has to mine. Remember, cooking is an adventure—don’t be afraid to get a little sizzle in your life! If you make them (and I really hope you do), tag me @Feastical on social media so I can see your beautiful creations. Now, go forth and fry!

Soft Frosted Crumbl-Style Cookies – Pink, Puffy & Party-Perfect
Soft Frosted Crumbl-Style Cookies: Your New Favorite Sweet Treat
Hey there, friends! Beau here from Feastical, and I have to ask: have you ever found yourself scrolling through social media, completely hypnotized by those gorgeous, pastel-frosted, puffy cookies from a certain famous bakery? You know the ones. They look like a fluffy cloud and a sugar cookie had the most delicious baby, all dressed up for a party. I feel you. There’s something about that specific combination of a soft, chewy base and a thick, creamy swirl of frosting that just calls to your soul. But what if I told you that you don’t have to wait in a long line or check your bank account to enjoy that magic? What if you could create that same bakery-style perfection right in your own kitchen?
Well, pull up a stool, because that’s exactly what we’re doing today. We’re whipping up a batch of my absolute favorite Soft Frosted Crumbl-Style Cookies. These aren’t just any cookies; they’re thick, they’re pillowy-soft in the center with the slightest hint of a crisp edge, and they’re topped with a luxurious cream cheese frosting that’s so good you’ll want to eat it with a spoon (no judgment here). They’re pink, they’re puffy, and they are absolutely party-perfect, whether you’re hosting a full-blown celebration or just celebrating making it through a Tuesday.
This recipe is my love letter to that iconic treat, but simplified for our home kitchens. We’re using straightforward ingredients, a few key chef secrets (which I’ll happily spill!), and a whole lot of heart. So, preheat your oven, grab your favorite mixing bowl, and let’s bake up some serious joy together. Get ready to impress yourself, your family, and anyone lucky enough to get a taste!
The Birthday Cookie That Started It All
This recipe takes me right back to my niece Lily’s sixth birthday party. She’s a pink-everything kind of kid, and her one request was a cookie “as big as her face” with “the pinkest, prettiest frosting.” The local bakery was all out, and panic was starting to set in for my sister. I got the classic big brother SOS call: “Beau, you’re the food guy, help!”
So, we dove into her kitchen, armed with basic pantry staples and a whole lot of determination. We whipped up a simple sugar cookie dough, but I remembered a trick about cornflour for that dreamy soft texture. We baked them, watching them puff up just right. The real magic happened with the frosting. We beat that cream cheese and butter until it was fluffier than a summer cloud, then went all-in with the pink food coloring until it was the exact shade of a flamingo’s feather. The moment we swirled that frosting onto the cooled cookies and topped them with a blizzard of sprinkles, Lily’s eyes went wide. She declared them “even better than the store ones” because we made them together. That’s the real secret ingredient, friends: a little bit of love and a great kitchen story. Now, every time I make these, I think of that happy, pink-smudged smile.
Gathering Your Cookie Crew: The Ingredients
Don’t let the simple list fool you—each of these ingredients plays a specific role in creating that iconic texture and flavor. Here’s exactly what you’ll need and why it matters.
For the Cookie Dough (Makes ~12 generously sized cookies)
- 70g Brown Sugar & 70g White Sugar: This dynamic duo is non-negotiable! The white sugar gives us that classic sweetness and a slight crispness on the edge, while the brown sugar brings moisture, chew, and a subtle caramel depth. Chef’s Insight: Using a digital scale for accuracy is my #1 baking hack for perfect results every time.
- 115g Unsalted Butter, melted: Melted butter is our key to a chewy, dense texture rather than a cakey one. It also helps create those slightly crispy edges we love. Substitution Tip: You can use salted butter, but just omit the extra 1/2 tsp of salt later on.
- 1 Large Egg: Our binding agent! It brings the dough together and adds structure and richness.
- 1 tsp Vanilla Extract: The soul of the cookie. Use the real stuff, not imitation, for that warm, bakery-quality flavor.
- 220g Plain Flour (All-Purpose): The foundation of our cookie. Chef’s Insight: We’re sifting this with the other dry ingredients to ensure a perfectly soft and lump-free crumb.
- 1 tbsp Cornflour (Cornstarch): This is the SECRET WEAPON! Cornflour is the magic trick that gives these cookies their incredibly soft, tender, melt-in-your-mouth texture. Don’t skip it!
- 1/2 tsp Baking Powder & 1/2 tsp Baking Soda: Our leavening dream team. They work together to give the cookies their perfect puff and spread.
- 1/2 tsp Salt: Balances all the sweetness and makes the flavors pop. Trust me, it’s essential.
For the Cream Cheese Frosting
- 90g Unsalted Butter, softened: “Softened” is key here! It should be at room temperature so it whips up light and fluffy, not melted or oily.
- 90g Cream Cheese, softened: Same rule applies—full-fat, brick-style cream cheese, softened, for the tangiest, creamiest frosting. Don’t use the spreadable kind in a tub.
- 250g Icing Sugar (Powdered Sugar): Sweetens and thickens our frosting to the perfect pipeable consistency.
- 1 tsp Vanilla Extract: Because frosting deserves flavor, too!
- Pink Food Coloring (Gel or Liquid) & Sprinkles: For that iconic party-ready look! Gel coloring gives vibrant color without thinning the frosting.
Let’s Get Baking: The Step-by-Step Guide
Follow these steps, and you’ll be a cookie hero in no time. I’ve packed each one with my best tips to ensure your success.
- Mix the Sugars and Butter: In a large bowl, combine your brown sugar, white sugar, and melted butter. Whisk them together until they’re completely smooth and well-combined. You’ll see the mixture thicken slightly as you go. Chef’s Hack: If your butter is too hot, let it cool for a minute so you don’t accidentally cook the egg in the next step!
- Add Egg and Vanilla: Crack in your egg and add that glorious teaspoon of vanilla. Whisk again for about a minute until the mixture is smooth, pale, and slightly frothy. This incorporates air, which helps with the texture.
- Sift and Combine Dry Ingredients: Here’s where we build that soft texture. Place a sieve over your bowl and sift in the plain flour, cornflour, baking powder, baking soda, and salt. This prevents lumps and ensures everything is evenly distributed. Use a spatula or wooden spoon to gently mix until a soft, slightly sticky dough forms. Don’t overmix! Just stir until you no longer see dry flour.
- Portion and Shape: This is important for that classic large cookie look. I use a kitchen scale to portion the dough into 50g balls. Roll them smoothly between your palms, then place them on a baking sheet lined with parchment paper. Gently press down on each ball to slightly flatten it—this helps them bake evenly instead of staying too domed.
- The Chill Factor: Pop the entire baking sheet into the fridge for 1 hour. I know, the wait is tough, but this is CRUCIAL! Chilling the dough solidifies the butter, which prevents the cookies from spreading too much in the oven. It gives us that coveted thick, puffy center. This is the step that separates good cookies from great ones.
- Bake to Perfection: Preheat your oven to 175°C (350°F). Space your chilled cookie dough discs about 2 inches apart on the baking sheet. Bake for 11-12 minutes. They’re done when the edges are lightly golden and set, but the centers still look soft and slightly underdone. Chef’s Secret: They will continue to cook on the hot tray as they cool. This is how we achieve that chewy, soft center! Let them cool on the baking sheet for 10 minutes before transferring them to a wire rack to cool completely. Do not frost warm cookies! The frosting will melt into a sad, delicious puddle.
Making the Frosting
- Whip the Butter: In a clean bowl, use an electric hand mixer (or a stand mixer with the paddle attachment) to beat the softened butter on medium speed for about 30 seconds until it’s smooth and creamy.
- Add Cream Cheese: Add the softened cream cheese and beat them together on medium-high speed for a full minute until the mixture is light, fluffy, and completely lump-free. Scrape down the sides of the bowl to make sure everything is incorporated.
- Sweeten and Flavor: Gradually add the icing sugar and vanilla extract. Start your mixer on low speed unless you want a sugar dust storm in your kitchen! Once incorporated, beat on high speed for 2-3 minutes. Seriously, let it go! You want it to become very pale, incredibly fluffy, and smooth.
- Color and Decorate: Add a few drops of pink food coloring and beat until the color is uniform. Fit a piping bag with a large star or round tip, fill it with frosting, and pipe a generous swirl onto each completely cooled cookie. Immediately add your sprinkles so they stick! If you don’t have a piping bag, you can just use a knife or offset spatula to spread it on—it will be just as delicious.
How to Serve These Show-Stopping Cookies
Presentation is part of the fun! These cookies are a celebration all on their own. For a true bakery-style moment, place each frosted cookie in a classic white bakery box or a cute cupcake liner. It makes gifting them feel extra special.
If you’re serving them at a party or brunch, pile them high on a beautiful cake stand or a rustic wooden board. They are rich and sweet, so I love serving them alongside a pot of freshly brewed coffee, a cold glass of milk (a classic for a reason!), or even a tangy berry smoothie to cut through the sweetness. They’re the star of the show, so let them shine!
Mix It Up! Delicious Recipe Variations
Once you’ve mastered the base, the world is your cookie! Here are a few of my favorite ways to switch things up:
- Lemon Bliss: Add the zest of one lemon to the cookie dough and substitute the vanilla extract in the frosting with lemon juice. Top with yellow sprinkles for a sunny, zingy twist.
- Chocolate Lover’s Dream: Replace 30g of the plain flour with 30g of unsweetened cocoa powder for a chocolate cookie base. Frost with a classic vanilla buttercream or even a chocolate cream cheese frosting.
- Almond Joy: Add 1/2 tsp of almond extract to the cookie dough instead of vanilla. Frost as usual and top with toasted sliced almonds and a few flakes of coconut.
- Funfetti Party: Fold 3 tablespoons of rainbow sprinkles into the cookie dough right before chilling. Bake as normal and frost with a classic vanilla buttercream for the ultimate birthday cookie.
- Dairy-Free Delight: Use a plant-based butter and cream cheese alternative. For the egg, a “flax egg” (1 tbsp ground flaxseed mixed with 3 tbsp water, let sit for 5 mins) works great as a binder.
Beau’s Chef Notes & Kitchen Stories
This recipe has evolved so much since that first birthday batch. I’ve learned that the chill time is the ultimate game-changer. I once got impatient and baked a test cookie without chilling—it spread into a delicious but very flat pancake! We nicknamed it the “cookie crepe,” and while it was tasty, it wasn’t the puffy masterpiece we were after.
Another time, I was filming a tutorial and accidentally used baking powder instead of cornflour. The cookies turned into giant, cakey puffs! They were a hilarious fail, but my team happily ate the evidence. It just goes to show that even kitchen mishaps can be delicious. The beauty of baking is in the experimentation, so don’t be afraid to make it your own!
Your Questions, Answered: FAQs & Troubleshooting
Q: My cookies spread too much and got flat. What happened?
A: The most common culprit is not chilling the dough long enough. The butter needs to be cold to prevent excessive spreading. Also, make sure your baking soda and powder aren’t expired, as they provide the necessary lift.
Q: Can I make the dough ahead of time?
A: Absolutely! You can portion the dough balls, flatten them slightly, and store them in an airtight container in the fridge for up to 2 days. You can also freeze them on a tray, then transfer to a freezer bag for up to 3 months. Bake from frozen, adding a minute or two to the baking time.
Q: My frosting is too runny. How can I fix it?
A> This usually happens if the butter or cream cheese was too soft or warm. Pop the whole bowl of frosting into the fridge for 20-30 minutes to firm up, then re-whip it. You can also add a little more icing sugar, a tablespoon at a time, to thicken it up.
Q: Why is the cornflour so important?
A: Cornflour (cornstarch) tenderizes the gluten in the flour, resulting in a much softer, more delicate crumb. It’s the secret to that signature soft, almost meltaway texture that makes these cookies so special.

Soft Frosted Crumbl-Style Cookies – Pink, Puffy & Party-Perfect
Description
This recipe is inspired by my niece Lily’s sixth birthday. She wanted a cookie “as big as her face” with the pinkest frosting. The bakery was out, so we improvised with pantry staples. Melted butter, cornflour for softness, and whipped cream cheese frosting created cookies even better than the store-bought kind. The lesson? Love + good technique = magic.
Ingredients
Cookie Dough (makes ~12 large cookies)
-
70g brown sugar
-
70g white sugar
-
115g unsalted butter, melted
-
1 large egg
-
1 tsp vanilla extract
-
220g plain flour (all-purpose), sifted
-
1 tbsp cornflour (cornstarch) – secret to soft, tender cookies
-
½ tsp baking powder
-
½ tsp baking soda
-
½ tsp salt
Cream Cheese Frosting
-
90g unsalted butter, softened
-
90g cream cheese, softened (full-fat, brick-style)
-
250g icing sugar (powdered sugar)
-
1 tsp vanilla extract
-
Pink food coloring (gel or liquid)
-
Sprinkles (optional, for topping)
Instructions
Combine brown sugar, white sugar, and melted butter in a large bowl. Whisk until smooth. Let the butter cool slightly if it’s hot.
Crack in the egg and add vanilla extract. Whisk until pale and slightly frothy.
Sift flour, cornflour, baking powder, baking soda, and salt into the bowl. Gently fold with a spatula until just combined. Don’t overmix.
Use a kitchen scale to form 50g dough balls. Roll smooth and place on a parchment-lined baking sheet. Press slightly to flatten.
Refrigerate for 1 hour. This keeps the cookies thick and puffy while baking.
Preheat oven to 175°C (350°F). Bake chilled dough 11–12 minutes. Edges should be lightly golden, centers soft. Cool 10 minutes on the tray, then transfer to a wire rack.
Notes
-
Cookies spread too much? Dough wasn’t chilled long enough or baking soda/powder is expired.
-
Make ahead? Dough can be portioned and stored in fridge (2 days) or freezer (3 months). Bake from frozen, adding a minute or two.
-
Frosting too runny? Chill 20–30 minutes and re-whip, or add more icing sugar.
-
Cornflour importance: Tenderizes gluten for that soft, melt-in-your-mouth texture.
Nutrition
- Calories: 310 kcal per cookie
- Fat: 17g
- Saturated Fat: 10g
Nutritional Information (Per Cookie, Approximate)
Let’s be real, we’re here for a good time, not a long time! But I believe in transparency. This nutritional info is an estimate based on the specific ingredients listed. Remember, this is a treat cookie, so enjoy it mindfully!
Calories: 310 | Fat: 17g | Saturated Fat: 10g | Carbohydrates: 37g | Sugar: 24g | Protein: 3g
To lighten them up slightly, you could reduce the sugar in the dough by 10-15g, though it will affect texture. Using a lighter hand with the frosting will also save on calories and sugar. But sometimes, you just need the full, glorious experience!
Final Sweet Thoughts
And there you have it, friends! My go-to recipe for creating pure, frosted, sugary joy. These Soft Frosted Crumbl-Style Cookies are more than just a dessert; they’re a project, a gift, and a guaranteed smile-maker. They prove that with a few simple ingredients and a couple of chef-approved tricks, you can create something truly spectacular at home.
I hope this recipe brings as much happiness to your kitchen as it has to mine. Remember, the best dishes are the ones we share. So

Strawberry Cheesecake Danishes
Strawberry Cheesecake Danishes: Your New Favorite Brunch Showstopper
Hey friends, Beau here from Feastical! Let’s be real for a second. Is there anything better than that moment you walk into a bakery first thing in the morning? The air is warm and sweet, the coffee is brewing, and there, shining like a jewel under the glass case, is the perfect pastry. It’s flaky, it’s creamy, and it’s just begging to be devoured. That feeling—that pure, unadulterated joy—is exactly what I want you to experience in your own kitchen today.
We’re not talking about a complicated, all-day baking project that leaves you with a flour-dusted kitchen and a frazzled mind. Nope. We’re making magic with a brilliant shortcut that feels 100% gourmet: Strawberry Cheesecake Danishes. Imagine this: buttery, golden puff pastry that shatters with every bite. A cloud of sweet, tangy cream cheese filling that’s smoother than your favorite jazz playlist. And right on top, a glistening pile of fresh strawberries that have been cooked down just enough to become their most jammy, glorious selves.
These danishes are your secret weapon. They look like you trained in a Parisian patisserie, but I promise, they are incredibly approachable. Whether you’re hosting a fancy brunch, need a sweet treat for a book club, or just want to make a regular Tuesday feel special, this recipe is your answer. So, tie on your favorite apron, and let’s create some berry bliss together!
The Bakery Window That Started It All
This recipe takes me right back to my grandma’s kitchen. Well, sort of. It actually starts with me, a hungry teenager, pressing my nose against the window of a local bakery every Saturday morning. I’d stare at the fruit danishes, mesmerized by their intricate braids and perfect swirls. They seemed like an impossible dream, something only true pastry wizards could conjure.
One day, my grandma caught me in the act. She laughed her warm, knowing laugh and said, “Beau, honey, the best magic often has a simple trick.” Later that afternoon, she pulled out a roll of puff pastry from the fridge—something I’d only ever seen used for appetizers. With a twinkle in her eye, she showed me how to transform those simple sheets into golden, impressive pastries filled with jam and cream. It was a revelation! That day, she didn’t just teach me a recipe; she taught me that incredible food isn’t about being complicated—it’s about being clever, resourceful, and made with a whole lot of heart. This strawberry cheesecake version is my loving, berry-filled upgrade on her classic lesson.
Gathering Your Cast of Characters
Part of the beauty of this recipe is its simplicity. You likely have most of this in your kitchen right now! Here’s what you’ll need to make about 12-16 stunning danishes.
For the Strawberry Topping:
- 2 cups fresh strawberries, diced – The star of the show! Using fresh berries gives you that incredible, bright flavor and juicy texture. Frozen will work in a pinch, but no need to thaw—just toss them right in, but expect a bit more liquid.
- 3 tbsp granulated sugar – This draws out the natural juices from the berries, creating a simple syrup. If your strawberries are super sweet, you can knock this back to 2 tbsp.
- 1 ½ tsp cornstarch – Our thickening agent. This is crucial for turning the strawberry juices into a luscious, glossy glaze instead of a runny mess. Arrowroot powder works great as a 1:1 substitute.
- Optional Flavor Twist: 1 tsp balsamic glaze OR a few drops of rose water – Trust me on this. A tiny splash of balsamic glaze intensifies the berry flavor beautifully, adding a subtle depth. Rose water makes it taste incredibly romantic and floral.
For the Cheesecake Filling:
- 8 oz (one block) cream cheese, softened – Full-fat is non-negotiable here for the creamiest texture. Take it out of the fridge at least an hour beforehand. If you forget, pop it in the microwave for 15-second bursts until it’s pliable but not melted.
- 4 tbsp granulated sugar – Sweetens the deal perfectly. You can also use vanilla sugar for an extra flavor kick.
- 2 tsp vanilla extract – The backbone of warmth and flavor. Use the real stuff—it makes a difference!
- 2 tbsp fresh lemon juice – The key to cutting through the richness and making the filling taste bright and alive. Bottled juice works, but fresh is always best.
- Zest of 1 lemon – This is where the magic is! The oils in the zest pack a powerful, aromatic punch that makes the filling sing.
For the Pastry & Assembly:
- 28 oz puff pastry (2 sheets), thawed – Our glorious shortcut! Look for it in the freezer aisle. Thaw it overnight in the fridge or on the counter for about 40 minutes. Keep it cold until the very second you’re ready to use it for the flakiest layers.
- 1 egg + 2 tsp water (for egg wash) – This is your pastry’s best friend. It gives the danishes that gorgeous, professional-looking golden brown shine.
- Powdered sugar, for dusting – The finishing touch of snowy sweetness.
- Fresh mint leaves, for garnish (optional) – A little green goes a long way in making these look restaurant-worthy.
Let’s Build Some Beautiful Danishes!
Ready to see the magic happen? Follow these steps, and you’ll be a danish master in no time. Remember, we’re having fun—this isn’t a test!
- Preheat and Prep: Crank that oven to 400°F (200°C). This high heat is essential for getting the puff pastry to, well, PUFF! Line your baking sheets with parchment paper. No sticking, no fuss.
- Macerate the Strawberries: In a medium bowl, toss your diced strawberries with the 3 tablespoons of sugar and the cornstarch. Let it sit for a good 10 minutes. You’ll see the berries start to release their juices and create a syrupy mixture. This is exactly what you want! If you’re using the balsamic or rose water, stir it in now.
- Whip the Filling: In another bowl, beat the softened cream cheese with an electric hand mixer or a sturdy whisk until it’s smooth and lump-free. Add in the 4 tablespoons of sugar, vanilla, lemon juice, and lemon zest. Beat again until everything is combined and beautifully creamy. Set this aside. Chef’s Hack: Give it a taste! This filling is so good you might just eat it with a spoon. Adjust the lemon or sugar to your liking.
- Shape the Pastry: Unfold your thawed puff pastry sheets onto a lightly floured surface. I like to give them a gentle roll with a rolling pin just to smooth out any seams and even them out. Using a sharp knife or a pizza cutter, slice each sheet into 6-8 even squares or rectangles. Don’t stress about perfection—rustic is charming!
- Create a Border: This is a pro-move that’s super easy. Using the tip of your knife, lightly score a smaller square border (about ½ inch from the edge) around each piece of pastry. Be careful not to cut all the way through! Then, take a fork and prick the entire center of the square dozens of times. This “docking” prevents the center from puffing up like a pillow, giving you a perfect, well-defined bed for your filling.
- Assemble! Now for the fun part. Spoon about 1 tablespoon of the cream cheese filling into the center of each pastry square. Use the back of the spoon to spread it evenly within your scored border. Next, top the cream cheese with a spoonful of the strawberry mixture, including some of that gorgeous syrupy juice.
- The Egg Wash: Whisk that egg with 2 teaspoons of water until it’s uniform. Using a pastry brush (your finger works in a pinch!), carefully brush the egg wash onto the raised border you created. This will give it that deep golden brown color and beautiful shine.
- Bake to Perfection: Carefully transfer your assembled danishes to the prepared baking sheets. Slide them into the hot oven and bake for 15-18 minutes. You’re looking for the edges to be puffed and a beautiful deep golden brown, and the strawberry filling to be bubbly.
- Cool and Garnish: Let the danishes cool on the baking sheet for at least 5-10 minutes. They are molten lava fresh out of the oven! Just before serving, give them a generous dusting of powdered sugar through a fine-mesh sieve. Toss on a few mint leaves for a pop of color, if you’d like.
How to Serve These Beauties
Presentation is part of the joy! You’ve put in the work, now let’s make them shine.
For a casual family breakfast, just pile them high on a rustic wooden board and let everyone dig in. The powdered sugar will dust everything, and it’ll be a happy, delicious mess.
If you’re hosting a brunch, plate them individually. Place one danish slightly off-center on a simple white plate. Drizzle any leftover strawberry syrup from the bowl around the plate for a professional chef’s touch. A dollop of lightly sweetened whipped cream or a small scoop of vanilla mascarpone on the side takes it to a whole new level of decadence.
And of course, the beverage pairing is key. These danishes are a match made in heaven with a strong cup of coffee, a black tea with a hint of lemon, or even a glass of cold milk for the ultimate nostalgic treat.
Mix It Up! Delicious Variations
The fun doesn’t stop with strawberries! This recipe is a fantastic base for all your favorite flavors.
- Mixed Berry Bliss: Swap the strawberries for a mix of raspberries, blueberries, and blackberries. A hint of orange zest in the filling instead of lemon is a wonderful complement.
- Peach Melba Danish: Use diced, fresh peaches and a few raspberries. Add a tiny pinch of cinnamon or cardamom to the cream cheese filling.
- Lemon Curd Swirl: Omit the strawberries. Fill with the cream cheese mixture, then swirl a tablespoon of store-bought or homemade lemon curd on top before baking. Pure sunshine!
- Chocolate Hazelnut: For a non-fruit option, replace the strawberry topping with a spoonful of chocolate-hazelnut spread. Sprinkle with chopped hazelnuts before baking.
- Gluten-Free Friendly: Many brands now make excellent gluten-free puff pastry! Use that as a 1:1 substitute to make this recipe celiac-friendly.
Beau’s Chef Notes & Kitchen Stories
This recipe has evolved so much since my grandma first showed me the way. I’ve made these danishes for probably every holiday and potluck known to man. One time, I was so excited to bring them to a friend’s party that I stacked them all in a Tupperware while they were still warm. Big mistake! I opened the lid to find a once-beautiful tower of danishes now fused together by melted powdered sugar into one giant, delicious monstrosity. We just broke pieces off with our hands—it was a hit anyway, but I learned my lesson: always let them cool completely before storing!
Don’t be afraid to make this recipe your own. That’s what cooking is all about. Add a dash of your favorite spice, use the fruit you love most, and create your own kitchen memories.
Your Questions, Answered!
Q: My pastry didn’t puff up very much. What happened?
A: The most common culprit is the pastry getting too warm before baking. Remember, you want to keep it cold! Work quickly, and if the kitchen is hot, pop the assembled danishes into the fridge for 10 minutes before baking. Also, ensure your oven is fully preheated—that blast of heat is crucial for lift.
Q: My filling leaked everywhere in the oven. How do I prevent that?
A: A little leakage is normal and delicious! But a flood usually means you overfilled them. Stick to about a tablespoon of each filling. Also, making sure you have a solid, pricked border helps contain everything. Finally, ensure your strawberry mixture has the cornstarch—it’s vital for thickening the juices.
Q: Can I make these ahead of time?
A: Absolutely! You can assemble the danishes the night before, cover the baking sheet tightly with plastic wrap, and keep them in the fridge. In the morning, just brush with egg wash and bake. You may need to add a minute or two to the baking time since they’ll be going in cold.
Q: My cream cheese filling is lumpy. Can I fix it?
A: Lumpy filling almost always means the cream cheese wasn’t soft enough. To fix it, you can try beating it vigorously with your mixer, or for a super smooth fix, press the mixture through a fine-mesh sieve. For next time, just remember to take that cream cheese out early!

Strawberry Cheesecake Danishes
Description
Hey friends! Imagine walking into a bakery on a Saturday morning. The air smells sweet and buttery, the coffee is brewing, and there, under the glass, are pastries so perfect they almost seem magical. That feeling—that pure joy—is exactly what I want you to experience in your own kitchen with these Strawberry Cheesecake Danishes.
Ingredients
Strawberry Topping:
-
2 cups fresh strawberries, diced
-
3 tbsp granulated sugar
-
1 ½ tsp cornstarch (or arrowroot powder)
-
Optional: 1 tsp balsamic glaze or a few drops of rose water
Cheesecake Filling:
-
8 oz cream cheese, softened
-
4 tbsp granulated sugar
-
2 tsp vanilla extract
-
2 tbsp fresh lemon juice
-
Zest of 1 lemon
Pastry & Assembly:
-
28 oz puff pastry (2 sheets), thawed
-
1 egg + 2 tsp water (for egg wash)
-
Powdered sugar, for dusting
-
Fresh mint leaves, for garnish (optional)
Instructions
1. Preheat & Prep
-
Preheat oven to 400°F (200°C). Line baking sheets with parchment paper.
2. Macerate the Strawberries
-
Toss diced strawberries with sugar and cornstarch in a medium bowl. Let sit 10 minutes to release juices and create a syrupy glaze. Add balsamic or rose water if using.
3. Make the Cheesecake Filling
-
Beat cream cheese until smooth. Add sugar, vanilla, lemon juice, and zest. Mix until creamy and lump-free.
4. Shape the Pastry
-
Roll out puff pastry sheets on a lightly floured surface. Cut each sheet into 6–8 squares. Lightly score a ½-inch border around each square, and prick the center with a fork to prevent excessive puffing.
5. Assemble the Danishes
-
Spoon 1 tbsp cheesecake filling into the center of each square. Top with 1 tbsp of the strawberry mixture. Brush the borders with egg wash.
6. Bake
-
Bake 15–18 minutes until edges are puffed and golden brown, and the strawberry filling is bubbly.
7. Cool & Garnish
-
Let cool 5–10 minutes. Dust with powdered sugar and garnish with mint leaves if desired. Serve warm or at room temperature.
Notes
-
Mixed Berry Bliss: Swap strawberries for raspberries, blueberries, and blackberries. Add orange zest to the filling.
-
Peach Melba: Use fresh peaches and raspberries; sprinkle a pinch of cinnamon or cardamom in the filling.
-
Lemon Curd Swirl: Replace the strawberries with a swirl of lemon curd.
-
Chocolate Hazelnut: Use chocolate-hazelnut spread instead of strawberries and sprinkle chopped hazelnuts on top.
-
Gluten-Free: Use gluten-free puff pastry as a 1:1 substitute.
Nutrition
- Calories: 230 kcal per danish
- Sugar: 10g
- Fat: 14g
- Carbohydrates: 20g
- Protein: 3g
Nutritional Information (Approximate, Per Danish)
Let’s be real—these are a treat, and they’re worth every bite! But here’s a general breakdown so you can enjoy them mindfully. This estimate is based on a yield of 14 danishes.
- Calories: ~230 kcal
- Fat: 14g
- Carbohydrates: 20g
- Sugar: 10g
- Protein: 3g
Remember, this is just an estimate. Using low-fat cream cheese will slightly alter these numbers, but for the best texture and flavor, I always recommend full-fat.
Final Thoughts from My Kitchen to Yours
Well, friends, there you have it. My all-time favorite shortcut to an absolutely showstopping pastry. I hope this recipe brings you as much joy making it as it does everyone eating it. The real secret ingredient isn’t the vanilla or the lemon zest—it’s the confidence to try something new and the love you pour into it.
So the next time you’re craving something special, skip the bakery line. You’ve got this. You are the pastry wizard now! I’d love to see your creations. Tag me @Feastical on social media so I can share in your delicious success.

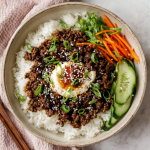
Quick & Easy Korean Ground Beef Bowl
Dinner in a Flash: Your New Favorite Korean Ground Beef Bowl
Hey friends, Beau here from Feastical! Let’s be real for a second. How many times have you stared into the fridge after a long day, your stomach growling, your brain completely out of ideas, and the temptation to just order a pizza is screaming your name? I’ve been there more times than I can count. That moment, right there, is exactly why this recipe exists.
I’m talking about my Quick & Easy Korean Ground Beef Bowl. This isn’t just a recipe; it’s your weeknight superhero, your secret weapon against boring dinners. We’re talking about sizzling, savory-sweet ground beef, glazed in a sticky, garlicky sauce that comes together in the time it takes to cook a pot of rice. The flavor is absolutely massive—like your favorite takeout joint decided to move into your kitchen—but the effort is hilariously minimal. No fancy techniques, no hard-to-find ingredients, just pure, unadulterated comfort food that feels like a warm hug after a crazy day.
So, if you’re ready to banish dinner dread for good and make a meal that will have everyone at the table asking for seconds (and the recipe!), grab your favorite skillet. We’re about to create some magic, and it’s going to be delicious.
The Story Behind The Sizzle
This recipe takes me right back to my early days in a tiny apartment kitchen, where counter space was a luxury and my culinary skills were, well, a work in progress. My friend Ji-hoon lived down the hall, and he was the king of whipping up incredible meals with what seemed like nothing. One particularly brutal Tuesday, he found me contemplating a dinner of cereal and called an intervention.
He marched into my kitchen, pulled a pack of ground beef from my freezer, and got to work. In under 20 minutes, the entire hallway smelled like a gourmet Korean BBQ restaurant. That first bite was a revelation. The beef was so tender and flavorful, the sauce a perfect balance of salty, sweet, and a gentle kick of heat. I couldn’t believe something so simple could taste so complex and soul-satisfying. It became our go-to “roommate dinner,” a dish we’d make while venting about our days and dreaming big dreams. It’s more than a recipe to me; it’s a taste of friendship, community, and the beautiful truth that the best meals don’t have to be complicated.
Gathering Your Flavor Arsenal
Here’s the beautiful part: you probably have most of this already in your pantry. This is about building layers of flavor with simple, powerful ingredients.
- 1 lb ground beef – I like an 85/15 blend for a good balance of flavor without being too greasy. Chef’s Insight: For a lighter option, ground turkey or chicken works wonderfully here, just add an extra tablespoon of sauce to keep it juicy.
- 3 cloves garlic, minced – Fresh is best! That punchy, aromatic flavor is non-negotiable for authenticity.
- ¼ cup soy sauce – This is our salty, umami base. Substitution Tip: For a gluten-free version, simply swap in tamari or a good gluten-free soy sauce. It works perfectly.
- 2 tablespoons brown sugar – This is the sweet counterpart to the salty soy, creating that incredible caramelized glaze. Chef’s Insight: You can use white sugar, honey, or even maple syrup in a pinch!
- 1 tablespoon sesame oil – Do not skip this! It’s not for cooking; we stir it in at the end. This is the secret weapon that provides that deep, nutty, quintessential Korean flavor.
- ½ teaspoon ground ginger – Adds a warm, slightly spicy zing. Substitution Tip: If you have fresh ginger, mince up about a tablespoon—it’s even better!
- ¼ teaspoon red pepper flakes – This is for a gentle warmth. Chef’s Hack: Love heat? Double it! Or add a squirt of sriracha or gochujang (Korean chili paste) for a more authentic kick.
- 2 cups cooked white or jasmine rice – The fluffy, neutral base that soaks up all that glorious sauce.
- 2 green onions, sliced & 1 tablespoon sesame seeds – These aren’t just garnish; they provide essential fresh crunch and visual pop.
- Optional toppings: shredded carrots, cucumber, fried egg, kimchi – This is where you make it your own! The cool, crunchy veggies and the rich runny yolk of a fried egg take this bowl to a 10/10.
Let’s Get Cooking: Your Foolproof Guide
Ready? This is so easy. Put on some good music, and let’s turn these simple ingredients into a masterpiece.
Step 1: The Sizzle
Grab a large skillet and get it over medium-high heat. No need for oil here—we’re going to brown that ground beef beautifully. Add the beef and break it up with your spatula. Cook it until it’s no longer pink, about 5-6 minutes. Once it’s cooked, if there’s a lot of excess fat, you can drain it off. I usually leave a tablespoon or two for extra flavor. Chef’s Hack: Don’t stir it constantly! Let it sit for a minute to get a nice brown crust on some bits—that’s pure flavor.
Step 2: The Aroma
Now, push the beef to one side of the skillet. In the empty space, add your minced garlic. Ahhh, smell that? Let the garlic cook for just about 60 seconds until it becomes incredibly fragrant. You don’t want to burn it, just wake it up! Then, mix it into the beef. Chef’s Tip: Cooking the garlic directly in the beef drippings toasts it and deepens its flavor immensely.
Step 3: The Magic Sauce
Time for the transformation! Reduce the heat to medium. Pour in the soy sauce, sprinkle in the brown sugar, ground ginger, and red pepper flakes. Give it all a really good stir, making sure every bit of beef is coated in that saucy goodness. Let it simmer for 2-3 minutes. You’ll see the sauce start to bubble, thicken slightly, and cling to the beef. This is what we want! Chef’s Insight: The sugar caramelizes, the soy reduces, and you’re left with a glossy, sticky glaze.
Step 4: The Finishing Touch
Take the skillet off the heat! This is crucial. Now, drizzle in that one tablespoon of sesame oil and stir it through. Adding it off the heat preserves its delicate nutty flavor. Taste it! Isn’t that incredible? Adjust anything it might need—a pinch more sugar, a dash more heat?
Step 5: The Grand Finale
Scoop fluffy rice into bowls. Pile the hot, saucy beef right on top. Now, for the crown: a generous sprinkle of sliced green onions and sesame seeds. This is mandatory for texture and freshness. Then, go wild with those optional toppings!
Building the Perfect Bowl
Presentation is part of the fun! We eat with our eyes first, right? I’m a big believer in the bowl meal—it’s casual, cozy, and everything gets beautifully mingled.
I like to start with a solid base of steaming jasmine rice. Then, I artfully spoon the Korean beef over one side. On the other side, I’ll add a cool, crunchy pile of quick-pickled cucumbers or shredded carrots for a fresh contrast. The crowning glory? A perfectly fried egg with a gloriously runny yolk placed right on top. When you break into it, the yolk becomes a rich, additional sauce. A big spoonful of spicy kimchi on the side is the perfect tangy accompaniment. Don’t forget those green onions and sesame seeds for that final pop of color and crunch. Serve it immediately and watch it disappear!
Make It Your Own: Delicious Twists
The beauty of this recipe is its versatility. Play around and find your family’s favorite version!
- Spicy Firecracker Version: Swap the red pepper flakes for 1-2 tablespoons of gochujang (Korean chili paste). It adds a deeper, fermented heat that is absolutely authentic.
- Turkey or Chicken Twist: Using lean ground poultry? No problem! Just add an extra tablespoon of soy sauce and a tablespoon of water to the sauce to ensure it doesn’t dry out. It’s just as delicious!
- Veggie-Packed Power Bowl: Add a cup of finely diced bell peppers or onions to the skillet when you cook the garlic. You can also stir in a handful of spinach right at the end until it wilts.
- Pineapple Sweet & Tangy: Love Hawaiian flavors? Stir in ½ cup of crushed pineapple (juice drained) along with the sauce. The sweetness and acidity are a fantastic combo.
- Low-Carb/Keto Friendly: Ditch the rice! Serve the beef over cauliflower rice, in lettuce cups (like little Korean beef tacos!), or even on top of a big salad with a sesame ginger dressing.
Beau’s Chef Notes
This recipe has evolved so much since that first night in my apartment. I’ve made it for countless potlucks, busy weeknights, and even fancy dinner parties (just add a fancy egg and call it “Bibimbap-Inspired!”). My favorite kitchen story involves my niece, who is a notoriously picky eater. I made this, called it “Special Sweet Meat,” and she devoured two whole bowls. Her mom called me the next day for the recipe—that’s a win in my book! The biggest lesson? Don’t be afraid to taste and adjust as you go. Your palate is your best tool. Want it sweeter? Add a touch more sugar. More umami? A dash of fish sauce works wonders. Make it yours!
FAQs: Your Questions, Answered
Q: My sauce didn’t thicken up. What did I do wrong?
A: No worries! This usually happens if there’s too much liquid in the pan from the beef. Simply let it simmer for another minute or two over medium heat, stirring frequently. You can also create a quick slurry by mixing ½ teaspoon of cornstarch with a tablespoon of water and stirring it in, then simmering for 60 seconds until thickened.
Q: Can I make this ahead of time?
A: Absolutely! The beef mixture keeps beautifully in an airtight container in the fridge for 3-4 days. Reheat it gently in a skillet or the microwave. I’d cook fresh rice when you’re ready to serve for the best texture.
Q: Is there a way to make this less sweet?
A: Of course! Start with one tablespoon of brown sugar instead of two. You can always add more, but you can’t take it out. Taste it after the sauce simmers and decide if you want to add the rest.
Q: Can I freeze the Korean beef?
A: You sure can. Let the cooked beef mixture cool completely, then store it in a freezer-safe container for up to 3 months. Thaw overnight in the fridge and reheat gently.
Quick & Easy Korean Ground Beef Bowl
Description
Hey friends! After a long day, staring blankly into the fridge and debating between takeout or cereal is a familiar scene, right? I’ve been there. That’s exactly why I created this Quick & Easy Korean Ground Beef Bowl—a weeknight superhero that delivers big flavor with minimal effort. Imagine savory-sweet, garlicky ground beef glazed to perfection over steaming rice, with just the right touch of heat. It’s comforting, fast, and way better than ordering out.
Ingredients
-
1 lb (450g) ground beef (85/15 recommended)
-
3 cloves garlic, minced
-
¼ cup soy sauce (or tamari for gluten-free)
-
2 tablespoons brown sugar (or honey/maple syrup)
-
1 tablespoon sesame oil (added at the end)
-
½ teaspoon ground ginger (or 1 tbsp fresh, minced)
-
¼ teaspoon red pepper flakes (adjust to taste)
-
2 cups cooked white or jasmine rice
-
2 green onions, sliced
-
1 tablespoon sesame seeds
-
Optional toppings: shredded carrots, cucumber, fried egg, kimchi
Instructions
Heat a large skillet over medium-high heat. Add ground beef and cook until no longer pink, breaking it up with a spatula, about 5–6 minutes. Drain excess fat, leaving a tablespoon for flavor.
Tip: Let the beef sit briefly without stirring to create a nice brown crust—it adds depth of flavor.
Push the beef to one side of the skillet. Add minced garlic to the empty side and cook for 60 seconds until fragrant. Mix into the beef.
Tip: Cooking garlic in the beef drippings intensifies its flavor.
Reduce heat to medium. Add soy sauce, brown sugar, ground ginger, and red pepper flakes. Stir to coat evenly and simmer 2–3 minutes until the sauce thickens slightly and clings to the beef.
Tip: If sauce isn’t thick enough, mix ½ tsp cornstarch with 1 tbsp water and stir in, simmering another minute.
Remove skillet from heat. Drizzle in sesame oil and stir. Taste and adjust seasoning if needed.
Scoop rice into bowls, top with saucy beef, and sprinkle with green onions and sesame seeds. Add optional toppings like a fried egg, shredded carrots, or kimchi for extra flavor and texture. Serve immediately.
Notes
-
Spicy Firecracker: Swap red pepper flakes for 1–2 tbsp gochujang (Korean chili paste) for authentic heat.
-
Lean Proteins: Use ground turkey or chicken; add 1 tbsp extra soy sauce for juiciness.
-
Veggie Boost: Stir in diced bell peppers, onions, or spinach.
-
Low-Carb: Serve over cauliflower rice or in lettuce cups instead of rice.
-
Sweet Twist: Add ½ cup drained crushed pineapple to the sauce for tangy sweetness.
Nutrition
- Calories: 400 Cal per serving
- Sugar: 10g
- Fat: 18g
- Carbohydrates: 35g
- Protein: 23g
Nutritional Info (For the Curious!)
Okay, let’s talk numbers! This is a rough estimate per serving (assuming 4 servings with white rice and without optional toppings) and is provided for informational purposes. Remember, your specific nutrition will vary based on the exact ingredients you use, especially the lean-ness of your beef.
Approximate Nutrition Per Serving:
Calories: 400 | Protein: 23g | Fat: 18g | Carbohydrates: 35g | Sugar: 10g | Sodium: 900mg
A Quick Note: The sodium is primarily from the soy sauce. If you are watching your sodium intake, you can easily use a lower-sodium soy sauce with great results. To boost the nutrition, load up on those veggie toppings! Adding shredded carrots, cucumbers, and spinach increases the vitamins and fiber without adding many calories.
Final Thoughts
And there you have it, friends! Your new secret weapon for a stress-free, flavor-packed dinner. This Korean Ground Beef Bowl is more than just a recipe; it’s a reminder that incredible food doesn’t have to be complicated or time-consuming. It’s about using a few simple, good ingredients and a little bit of know-how to create something that truly brings people together around the table.
I really hope this recipe becomes a trusted favorite in your home, just like it is in mine. If you make it (and I really hope you do!), tag me on social @Feastical—I love seeing your creations! Now, go forth and conquer dinner. You’ve got this.
With love and a full plate,
Beau

Easy Cheesy Ground Beef Enchiladas
Your New Favorite Weeknight Hero: Easy Cheesy Ground Beef Enchiladas
Hey friends, Beau here from Feastical! Let’s talk about that magical, sometimes chaotic, time of day: the dinner hour. You know the scene. The day has gotten away from you, stomachs are starting to rumble, and the question “What’s for dinner?” hangs in the air like a delicious, yet daunting, challenge. You want something that feels like a warm, comforting hug but doesn’t require a culinary degree or three hours of your life. You, my friend, are in the right place.
Today, we’re rolling up our sleeves (and some tortillas) to create the ultimate crowd-pleaser: Easy Cheesy Ground Beef Enchiladas. This isn’t just a recipe; it’s your ticket to a stress-free, flavor-packed meal that will have everyone at the table asking for seconds. Imagine tender flour tortillas, stuffed with perfectly seasoned ground beef and onions, smothered in a vibrant red enchilada sauce, and blanketed with a layer of melted cheese that’s so gooey and golden it should have its own fan club. It’s bold, satisfying, and the definition of feel-good food. So, grab your favorite skillet, and let’s turn a simple weeknight into a fiesta!
A Taste of Home and a Dash of Nostalgia
This recipe takes me right back to my mom’s bustling kitchen on a busy Wednesday night. It wasn’t a fancy occasion, but there was something special about the ritual. I’d be perched on a stool, “officially” in charge of shredding the block of cheddar cheese (and sneakily eating a few strands, of course). The air would fill with the incredible aroma of browning beef and toasted spices, a scent that somehow meant everything was right in the world.
She’d let me spoon the filling onto the tortillas, and without fail, I’d always overfill them, causing a delicious mess that we’d just laugh about. The best part was the grand finale: pulling that steaming, bubbling pan out of the oven, the cheese stretching for miles. It was more than a meal; it was a moment of connection. It taught me that the best recipes aren’t about perfection—they’re about the joy of creating something together and the comfort of sharing it. That’s the spirit I want to bring to your kitchen with this dish.
Gathering Your Flavor Dream Team
One of the best things about this recipe is its beautiful simplicity. You likely have most of these ingredients already waiting for you! Here’s what you’ll need to create this cheesy masterpiece.
- 1 lb Ground Beef (80/20 blend): This is our hearty base. The little bit of fat in an 80/20 blend adds so much flavor and keeps the filling moist. Chef’s Insight: For a leaner option, you can use ground turkey or chicken, but add a tablespoon of olive oil to the pan to compensate for the lack of fat.
- 1 Small Onion, finely chopped: This sweet, aromatic base builds a foundation of flavor. Don’t skip it! Sub Tip: No fresh onion? A teaspoon of onion powder will work in a pinch.
- 2 Cloves Garlic, minced: Because is it even a proper meal without garlic? It adds that essential punch. Chef’s Hack: Use the pre-minced stuff from a jar to save time! I won’t tell.
- 1 teaspoon Chili Powder, ½ teaspoon Cumin, ½ teaspoon Paprika: This is our simple but mighty spice trifecta! The chili powder provides warmth, the cumin gives that earthy, authentic note, and the paprika adds a subtle sweetness and gorgeous color. Pro Move: Toast the spices in the pan with the beef for 30 seconds before adding liquid to really wake up their flavors.
- Salt and Pepper to taste: The essential flavor enhancers. Season at every step!
- 1 (10 oz) Can Red Enchilada Sauce: The shortcut hero! It delivers complex, tangy flavor without hours of work. Sub Tip: Feel free to use green enchilada sauce for a different, tangier vibe!
- 1½ cups Shredded Cheddar Cheese + 1 cup Shredded Monterey Jack Cheese: The CHEESE! Cheddar brings the sharp, familiar flavor, while Monterey Jack is the champion of meltiness. Chef’s Commandment: Please, for the love of gooey cheese, shred it yourself! Pre-shredded bags contain anti-caking agents that prevent it from melting as smoothly.
- 8 Flour Tortillas (6-inch): The soft, pliable vessel for all that goodness. Sub Tip: Corn tortillas are a classic and gluten-free alternative. Just warm them first to prevent cracking.
- Fresh Cilantro, Sour Cream, or Sliced Jalapeños for topping (optional): The “make it your own” finale. These add fresh, cool, and spicy contrasts that take the dish to the next level.
Let’s Get Rolling: Your Foolproof Enchilada Assembly
Ready to build your masterpiece? Follow these steps for enchilada perfection. I’ve packed them with all my best kitchen hacks to make sure you’re a total pro.
- Preheat and Prep: Fire up your oven to 375°F (190°C). Take a 9×13-inch baking dish and give it a light coating of cooking spray or a quick wipe of oil. This little step prevents any tragic sticking and makes cleanup a breeze.
- Brown the Beef: Grab a large skillet and place it over medium heat. Toss in your ground beef, chopped onion, and minced garlic. Cook it all up, breaking the meat into small crumbles with your spoon, until the beef is no longer pink and the onions are soft and translucent. This usually takes about 7-8 minutes. Now, here’s a key step: drain off the excess fat. This keeps your filling from being greasy.
- Spice It Up: Return the drained beef mixture to the skillet. Now, shower it with your amazing spices: the chili powder, cumin, paprika, salt, and pepper. Stir for 30 seconds until you can really smell the spices blooming. Pour in about ¼ cup of the enchilada sauce—just enough to bring everything together into a saucy, fragrant filling. Let it simmer together for about 5 minutes. Take it off the heat.
- Sauce the Pan: Grab your prepared baking dish. Spoon a few tablespoons of the plain enchilada sauce onto the bottom and spread it into a thin, even layer. This is my secret weapon against soggy-bottomed tortillas! It creates a steamy base that cooks the tortillas perfectly.
- The Fun Part: Assembly! Now, set up your assembly line: beef filling, cheese, tortillas, and baking dish. Warm your tortillas for about 15 seconds in the microwave, wrapped in a damp paper towel. This makes them incredibly pliable and prevents them from tearing when you roll. For each tortilla, spoon a generous amount of the beef mixture down the center, then top with a hearty pinch of both cheeses. Don’t be shy! Now, fold the sides over the filling and roll it up tightly. Place it seam-side down in your sauced baking dish. Repeat until all your tortillas are snug in the dish.
- Smother and Cheese: Once all your enchiladas are lined up, pour the remaining enchilada sauce evenly over the top. Use the back of a spoon to spread it into every nook and cranny. Finally, unleash the remaining cheese over the top, creating a glorious, uniform blanket of cheesy goodness.
- Bake to Perfection: Cover the baking dish tightly with aluminum foil. This traps the steam, gently cooking the enchiladas and melting the cheese beautifully. Bake covered for 20 minutes. Then, remove the foil and bake for another 10 minutes, or until the sauce is bubbly around the edges and the cheese is gloriously golden and melted.
Plating Up the Perfect Bite
Okay, the hard part is over. You’ve resisted opening the oven door a dozen times, and now your masterpiece is ready. But wait! Let’s serve it up right.
Use a large spatula to carefully lift out one or two enchiladas onto each plate. Now, it’s time for the toppings—this is where you get to play! A dollop of cool, tangy sour cream is a must for me. It cuts through the richness perfectly. A scatter of fresh, chopped cilantro adds a brilliant pop of color and freshness. For those who like a little heat, sliced jalapeños (fresh or pickled) are the way to go.
What to serve on the side? Keep it simple! A quick side of cilantro-lime rice or some warm, seasoned black beans are classic choices that turn this into a feast. For a lighter option, a simple, crisp green salad with a lime vinaigrette works wonders. Most importantly, serve them immediately, right out of the oven, when the cheese is at its peak stretchiness!
Make It Your Own: Delicious Twists & Swaps
The beauty of this recipe is its versatility. Once you’ve mastered the basic blueprint, the world is your enchilada! Here are a few of my favorite ways to mix it up.
- Chicken Enchiladas: Swap the ground beef for 2 cups of shredded cooked chicken (a rotisserie chicken is your best friend here!). Mix it with the spices and a ¼ cup of sour cream or cream cheese for extra moisture and creaminess.
- Beanie & Cheesy (Vegetarian): Ditch the meat altogether! Use a can of black beans or pinto beans (rinsed and drained) and a cup of corn kernels as your filling. It’s hearty, flavorful, and perfect for Meatless Monday.
- Green Chile & Pork: Use shredded cooked pork (like from a slow-cooked pork shoulder) and swap the red enchilada sauce for a green verde sauce. Stir a small can of diced green chiles into the filling for an extra kick.
- Spicy Kick: Turn up the heat by adding a diced jalapeño (seeds and all for maximum fire) to the beef as it cooks, or mixing a teaspoon of chipotle chili powder into your spice blend.
- Breakfast Enchiladas: Yes, really! Fill them with scrambled eggs, crispy bacon or sausage, diced potatoes, and cheese. Use a creamy salsa verde or a cheesy sauce instead of enchilada sauce. Bake as usual for the ultimate weekend brunch showstopper.
Beau’s Kitchen Confidential
This recipe has been a work in progress for years. I remember one time, early on, I made the classic mistake of using cold, straight-from-the-fridge tortillas. They cracked and split like the Grand Canyon the second I tried to roll them. It was an enchilada catastrophe! That’s how I learned the vital lesson of warming them up first—a game-changer.
I’ve also found that letting the assembled enchiladas sit for 10-15 minutes before baking (if you have the time) helps the tortillas soak up just a little sauce and become even more tender. And don’t stress about making them look perfect! Even if they burst open a little, I promise they will taste incredible. Some of the best ones are the messy, cheesy, “ugly” ones.
Your Enchilada Questions, Answered!
Q: My tortillas keep cracking when I roll them. What am I doing wrong?
A: This is the #1 question! The answer is almost always that your tortillas are too cold. Always warm them up first. You can do this quickly in the microwave (wrapped in a damp paper towel for 15-20 seconds) or individually for a few seconds each in a dry skillet. This makes them soft and pliable.
Q: Why are my enchiladas soggy?
A: Sogginess usually comes from not draining the beef fat properly or using too much sauce inside the rolls. Make sure to drain the cooked beef well, and don’t over-sauce the filling. The sauce on the bottom and top is plenty! Also, don’t skip the step of baking them covered with foil first—this steams them to perfection without drying them out.
Q: Can I make these ahead of time?
A: Absolutely! You can assemble the entire dish, cover it tightly, and refrigerate it for up to 24 hours before baking. You might need to add 5-10 minutes to the baking time since it will be going into the oven cold. You can also freeze the unbaked assembled dish for up to 3 months. Thaw in the fridge overnight before baking.
Q: Can I use corn tortillas instead?
A: Of course! Corn tortillas are a traditional and delicious gluten-free option. The key is to warm them up even more meticulously to prevent cracking. I like to lightly fry them in a little oil for a few seconds per side to make them flexible and add flavor.

Easy Cheesy Ground Beef Enchiladas
Description
Easy Cheesy Ground Beef Enchiladas
Weeknight comfort food, cheesy, flavorful, and totally satisfying!
Servings: 6 | Prep Time: 20 min | Cook Time: 30 min
Ingredients
-
1 lb ground beef (80/20 blend)
-
1 small onion, finely chopped
-
2 cloves garlic, minced
-
1 tsp chili powder
-
½ tsp cumin
-
½ tsp paprika
-
Salt and pepper, to taste
-
1 (10 oz) can red enchilada sauce
-
1½ cups shredded cheddar cheese
-
1 cup shredded Monterey Jack cheese
-
8 flour tortillas (6-inch)
-
Optional toppings: sour cream, chopped cilantro, sliced jalapeños
Instructions
1 – Preheat & Prep:
-
Oven to 375°F (190°C). Lightly grease a 9×13-inch baking dish.
2 – Cook the Beef:
-
In a large skillet, cook beef, onion, and garlic over medium heat until beef is browned and onions are translucent. Drain excess fat.
3 – Season:
-
Stir in chili powder, cumin, paprika, salt, and pepper. Add ¼ cup enchilada sauce and simmer 5 minutes. Remove from heat.
4 – Sauce the Pan:
-
Spread a few tablespoons of enchilada sauce evenly on the bottom of the baking dish.
5 – Assemble Enchiladas:
-
Warm tortillas briefly to prevent cracking.
-
Spoon beef mixture down the center of each tortilla, top with a pinch of both cheeses, roll up, and place seam-side down in the dish.
6 – Top & Bake:
-
Pour remaining enchilada sauce over rolls and sprinkle with remaining cheese.
-
Cover with foil and bake 20 minutes. Remove foil and bake 10 more minutes until cheese is golden and bubbly.
7 – Serve:
-
Plate and garnish with sour cream, cilantro, and jalapeños if desired. Serve with rice, beans, or a fresh salad.
Notes
-
Chicken: Swap beef for shredded cooked chicken; add a bit of sour cream for creaminess.
-
Vegetarian: Use black beans and corn instead of meat.
-
Green Enchiladas: Swap red sauce for green chile sauce for a tangy twist.
-
Spicy Kick: Add diced jalapeño or a teaspoon of chipotle chili powder to the filling.
-
Make Ahead: Assemble and refrigerate for up to 24 hours or freeze for up to 3 months.
Nutrition
- Calories: 470 Cal per serving
- Fat: 28g
- Carbohydrates: 30g
- Fiber: 3g
- Protein: 28g
Nutritional Info (For Your Inner Foodie Nerd)
I’m all about balance—enjoying indulgent, comforting food while being mindful of what’s in it. Here’s a rough breakdown per serving (assuming this recipe serves 6). Remember, these are estimates and can vary based on your specific ingredients (especially the fat content of your beef and cheese).
Approx. per serving:
Calories: 470 | Protein: 28g | Fat: 28g | Carbohydrates: 30g | Fiber: 3g | Sugar: 4g
To lighten it up, you can use lean ground beef (93/7) or ground turkey, reduce the cheese slightly, load up on veggie toppings like lettuce and pico de gallo, and use low-carb tortillas. But sometimes, your soul needs the full, cheesy, glorious experience, and that’s perfectly okay too!
Dig In and Enjoy!
And there you have it, folks! Your complete guide to creating the most incredibly satisfying, easy, and cheesy ground beef enchiladas right in your own kitchen. This recipe is built for real life: it’s flexible, forgiving, and guaranteed to deliver a whole lot of joy to your dinner table.
I hope this becomes a new staple in your home, creating its own stories and happy, full bellies. Remember, cooking isn’t about being perfect; it’s about the love you stir into it. So have fun with it, make it your own, and most importantly, share it with someone you care about.
If you make this recipe (and I really hope you do!), tag me @Feastical on social media so I can see your beautiful creations! Now, go forth and get your enchilada on.
Until next time, happy cooking!

Grinch Christmas Truffles
Hey, Let’s Make Some Holiday Magic: Grinch Christmas Truffles!
Alright, friends, gather ’round! Beau here, and I am absolutely buzzing with holiday energy. Is there anything better than that feeling in December? The twinkling lights, the cozy sweaters, the scent of pine and sugar cookies wafting through the house… it’s pure magic. And in the midst of all that magic, we find ourselves in the kitchen, right? It’s the heart of the home, especially during the holidays. It’s where memories are baked, simmered, and, in today’s case, rolled into adorable, bite-sized pieces of joy.
Now, I’m a firm believer that holiday treats should be two things: incredibly delicious and seriously fun to make. There’s enough stress out there with shopping and travel plans—our kitchen time should be our happy place. That’s why I am completely, 100% obsessed with these Grinch Christmas Truffles. They are the ultimate feel-good food project. We’re talking a no-bake, creamy, sweet center hugged by a vibrant green chocolate coat, all finished with a cute little red candy heart. They’re whimsical, they’re colorful, and they capture the mischievous yet ultimately big-hearted spirit of the Grinch himself. They’re the perfect treat to make with your family, to gift to neighbors, or to proudly place on your holiday dessert table. So, put on your favorite festive playlist, tie on that apron (even if it’s just for show), and let’s create something that’s as fun to look at as it is to eat. Trust me, your inner child (and your actual children) are going to freak out over these.
A Story of Green Food Coloring and Growing Hearts
This recipe takes me right back to my niece’s first Christmas party. She was about four, utterly captivated by the story of the Grinch, and desperately wanted to help in the kitchen. I knew we needed a project that was little-hand friendly and wouldn’t end in a flour explosion. We started with a simple no-bake base, and when I brought out the green food coloring, her eyes went wide. “We’re making GRINCH food?!” she whispered, as if it were a secret mission.
As we rolled the dough into little balls, she declared each one was a Grinch’s heart before it grew three sizes. She was so focused, her tiny tongue peeking out in concentration. When it came time to add the red candy hearts, she placed each one with the solemn gravity of a heart surgeon. The proud smile on her face when we presented the platter to the family was worth more than any five-star review. It wasn’t just about the candy; it was about the story we told together with our hands. That’s the magic of this recipe—it’s a tiny, tasty vessel for connection, laughter, and a whole lot of green-stained fingers. It reminds me that the best recipes aren’t just lists of ingredients; they’re invitations to make memories.
Gathering Your Grinch-Worthy Ingredients
Here’s the beautiful part: this recipe uses simple, pantry-friendly ingredients that come together to create something truly spectacular. Let’s break it down.
- 8 oz cream cheese, softened: This is the rich, tangy base of our truffle. Pro Chef Tip: Full-fat cream cheese is the way to go here for the creamiest texture. Make sure it’s truly softened at room temperature for about an hour—this is non-negotiable for a smooth, lump-free dough!
- 2 cups powdered sugar: This sweetens the deal and helps firm up our mixture. Sift it if you have time to avoid any little lumps.
- 2 cups crushed graham crackers: This gives our truffles that fantastic, slightly crumbly texture and a hint of honey-like flavor that balances the sweetness perfectly. Substitution Tip: No graham crackers? Vanilla wafers or even digestive biscuits work wonderfully!
- 1 cup white chocolate chips, melted: This is for our iconic green coating. I prefer chips for melting, but a high-quality white chocolate baking bar chopped up will work even better for a smoother finish.
- Green food coloring: The star of the show! Chef Insight: Gel food coloring is my secret weapon. It gives you that vibrant, true-Grinch green without thinning out your chocolate or adding a weird taste. A little goes a long way!
- Red candy melts (for heart decoration): These are designed to melt smoothly and set firmly, making them ideal for detailed decoration. You can find them in little disks or wafers at most craft or baking stores.
Crafting Your Grinch Hearts: A Step-by-Step Adventure
Alright, team, let’s get our hands dirty! This process is a blast, and I’ve got a few hacks to make it even easier.
- Make the Base: In a medium-sized bowl, beat the softened cream cheese with a hand mixer (or a whole lot of arm power and a spatula) until it’s completely smooth and creamy. Gradually add in the powdered sugar, beating well after each addition. You want this mixture to be silky and free of lumps. This is the foundation of your truffle, so take your time here!
- Bring in the Crunch: Now, gently stir in the crushed graham crackers. I like to switch to a sturdy spatula for this part. Fold until everything is fully combined and a soft, slightly sticky dough forms. It should hold together when you pinch it.
- The Chill Factor: Cover the bowl with plastic wrap and pop it into the refrigerator for at least 20 minutes. Chef Hack: This isn’t a suggestion, it’s a rule! Chilling the dough makes it infinitely easier to handle and roll. Trying to roll a soft, sticky dough is a recipe for frustration and oddly shaped truffles.
- Roll Call: Line a baking sheet with parchment paper. Using a small cookie scoop (about 1 tablespoon) or a spoon, portion out the dough. Roll each portion between your palms into a nice, smooth 1-inch ball. Place each ball on the prepared tray. Once they’re all rolled, slide the entire tray into the freezer for a solid 30 minutes. Why freeze? This hardens them up just enough so that when you dip them in the warm chocolate, they hold their perfect round shape and don’t fall apart.
- Create the Green Goo: While the balls are chilling, melt your white chocolate chips. You can do this in a double boiler, but my quick kitchen hack is to use the microwave. Place the chips in a microwave-safe bowl and heat in 20-second bursts, stirring vigorously between each burst, until completely smooth. Be careful not to overheat! Now, stir in your green gel food coloring, a little at a time, until you achieve that perfect, glorious Grinch-green hue.
- The Dip: Remove the truffle balls from the freezer. Using a fork or a dipping tool, submerge one ball at a time into the green chocolate. Gently tap the fork on the side of the bowl to let the excess chocolate drip off. Carefully place it back on the parchment-lined tray. Repeat with all truffles. If your chocolate starts to thicken, you can pop it back in the microwave for 10 seconds.
- The Final Touch: Melt the red candy melts using the same method as the white chocolate. Transfer the melted red candy to a small zip-top bag, snip a TINY corner off, and pipe a small heart onto the top of each green truffle. You can also use a toothpick for this—just dip the tip and make a little dot or a heart shape.
- Set It and Forget It: Allow the truffles to set completely at room temperature. This could take an hour or so. If you’re impatient (like me), you can speed things up by placing them in the refrigerator for about 15 minutes.
How to Serve Your Festive Masterpieces
Presentation is part of the fun with these guys! I love to arrange them on a festive platter or a cake stand. For a real Whoville vibe, sprinkle a little edible glitter or green sugar around them. You can also place them in mini red or green cupcake liners—this makes them look super professional and makes them easy to pick up. They are the perfect addition to any holiday cookie swap, the star of your Christmas movie night dessert spread, or a wonderfully personal homemade gift. Tuck a few into a cute cellophane bag, tie it with a ribbon, and you’ve just made someone’s day. They’re rich, sweet, and decadent, so one or two is the perfect little treat to satisfy that holiday sugar craving.
Get Creative: Grinch Truffle Variations
Feel like mixing it up? This recipe is a fantastic canvas for your creativity!
- The Cindy Lou Who: Add a teaspoon of peppermint extract to the cream cheese mixture for a cool, festive minty flavor that pairs amazingly with the chocolate.
- Gluten-Free Whoville: Simply swap the graham crackers for your favorite gluten-free cookie crumbs! Gluten-free vanilla cookies or even gluten-free Oreo-style cookies (without the filling) work great.
- Chocolate Lover’s Grinch: Replace the white chocolate coating with green-tinted milk or dark chocolate for a deeper, richer flavor profile.
- Max the Dog: Roll the truffles in crushed green sugar or sprinkles after dipping for an extra textured, sparkly, and festive look.
- Grinch Kabobs: For a fun party trick, skip the dip! Instead, after rolling the balls, simply roll them in green-colored sugar or coconut. Then, skewer them with a pretzel stick “arrow” and add a red candy heart. Adorable!
Beau’s Chef Notes & Kitchen Confessions
Over the years, I’ve made these truffles more times than I can count, and they’ve evolved a bit. The first time, I used liquid food coloring in the white chocolate and it seized up into a grainy mess—lesson learned! Always opt for gel or oil-based coloring when working with chocolate. Another time, I was in a huge rush and tried to roll the dough without chilling it. Let’s just say I ended up with more truffle on my hands than on the tray. Patience is key! Now, I see this recipe as a kitchen companion—it’s reliable, it’s fun, and it always brings a smile. Don’t be afraid if your hearts aren’t perfect; that’s part of their handmade charm. The goal is to have fun and enjoy the process. After all, that’s what Feastical is all about.
Your Grinch Truffle Questions, Answered
Q: My chocolate coating is thick and clumpy. What happened?
A: This is usually a case of overheated chocolate. Chocolate can be finicky! If it seizes (gets thick and grainy), try adding a tiny bit of coconut oil or vegetable shortening (about ½ tsp at a time) and stirring vigorously. This can sometimes bring it back to a dippable consistency.
Q: Can I make these ahead of time?
A: Absolutely! These are a great make-ahead treat. Store them in a single layer in an airtight container in the refrigerator for up to 5 days. You can also freeze the un-dipped balls for up to a month. Thaw in the fridge before dipping and decorating.
Q: My truffle mixture is too sticky to roll. Help!
A: No worries! This likely means it needed more chilling time. Pop the whole bowl back in the fridge for another 15-20 minutes. If it’s still sticky, you can add a tablespoon or two more of crushed graham cracker crumbs to help absorb some moisture.
Q: I don’t have a microwave. How else can I melt the chocolate?
A: The classic double-boiler method is your best friend. Place a heatproof bowl over a pot of simmering water (make sure the bottom of the bowl doesn’t touch the water). Add your chocolate to the bowl and stir until melted. This gives you more control and prevents burning.

Grinch Christmas Truffles
Description
Grinch Christmas Truffles
No-bake, creamy, and delightfully festive—perfect for gifts, parties, or holiday snacking!
Yield: ~24 truffles | Prep Time: 20 min | Chill + Set Time: 50 min
Ingredients
-
8 oz cream cheese, softened
-
2 cups powdered sugar
-
2 cups crushed graham crackers (or vanilla wafers/digestive biscuits)
-
1 cup white chocolate chips, melted
-
Green gel food coloring
-
Red candy melts, for heart decoration
Instructions
Step 1 – Make the Base:
-
Beat cream cheese until smooth. Gradually mix in powdered sugar.
Step 2 – Add the Crunch:
-
Stir in crushed graham crackers until a soft, slightly sticky dough forms.
Step 3 – Chill the Dough:
-
Cover and refrigerate for at least 20 minutes to make rolling easier.
Step 4 – Roll Truffles:
-
Line a tray with parchment. Scoop ~1 tbsp portions, roll into smooth 1-inch balls, and freeze 30 minutes.
Step 5 – Melt the Chocolate:
-
Melt white chocolate chips gently (microwave in 20-second bursts or double boiler). Stir in green gel coloring until vibrant.
Step 6 – Dip the Truffles:
-
Submerge chilled truffle balls into green chocolate, tap off excess, and place on parchment.
Step 7 – Add Heart Decoration:
-
Melt red candy melts. Pipe small hearts on top of each truffle using a zip-top bag or toothpick.
Step 8 – Set:
-
Allow chocolate to harden at room temperature (~1 hour) or refrigerate for ~15 minutes.
Notes
-
Use gel or oil-based coloring—liquid can seize chocolate.
-
Chill dough thoroughly to prevent sticky, messy truffles.
-
If chocolate thickens while dipping, microwave 10 seconds and stir.
Nutrition
- Calories: 130 Cal per truffle
- Sugar: 14g
- Fat: 6g
- Saturated Fat: 3.5g
- Carbohydrates: 17g
Nutritional Information (Because Knowledge is Power!)
Okay, let’s be real—these are a holiday treat, through and through. They’re meant to be enjoyed in moderation as part of the festive fun! Here’s a rough nutritional breakdown per truffle (assuming the recipe yields 24 truffles). Please note that this is an estimate and can vary based on specific ingredients and brands used.
Approx. per truffle:
Calories: 130 | Fat: 6g | Saturated Fat: 3.5g | Carbohydrates: 17g | Fiber: 0g | Sugar: 14g | Protein: 1g
The main contributors are the powdered sugar and the chocolate coating. While they’re not a health food, making them at home means you control the ingredients, and you’re creating an experience that feeds the soul as much as the stomach. So enjoy one (or two!) guilt-free.
Final Thoughts from My Kitchen to Yours
Well, we did it! We took a handful of simple ingredients and spun them into something truly magical. I hope you have as much fun making these Grinch Christmas Truffles as I do. Remember, the messier your hands get with the green chocolate, the better the story will be later. Cooking and baking, especially during the holidays, is about so much more than the final product. It’s about the laughter that fills the kitchen, the stories you tell while you wait for the dough to chill, and the proud moment you present your creation to the people you love.
These little green truffles are a celebration of that spirit—the spirit of togetherness, fun, and a heart that’s growing three sizes with every moment spent together. So from my kitchen at Feastical to yours, I wish you the happiest of holidays filled with delicious food and even better company. Now, go on and share the goodness!
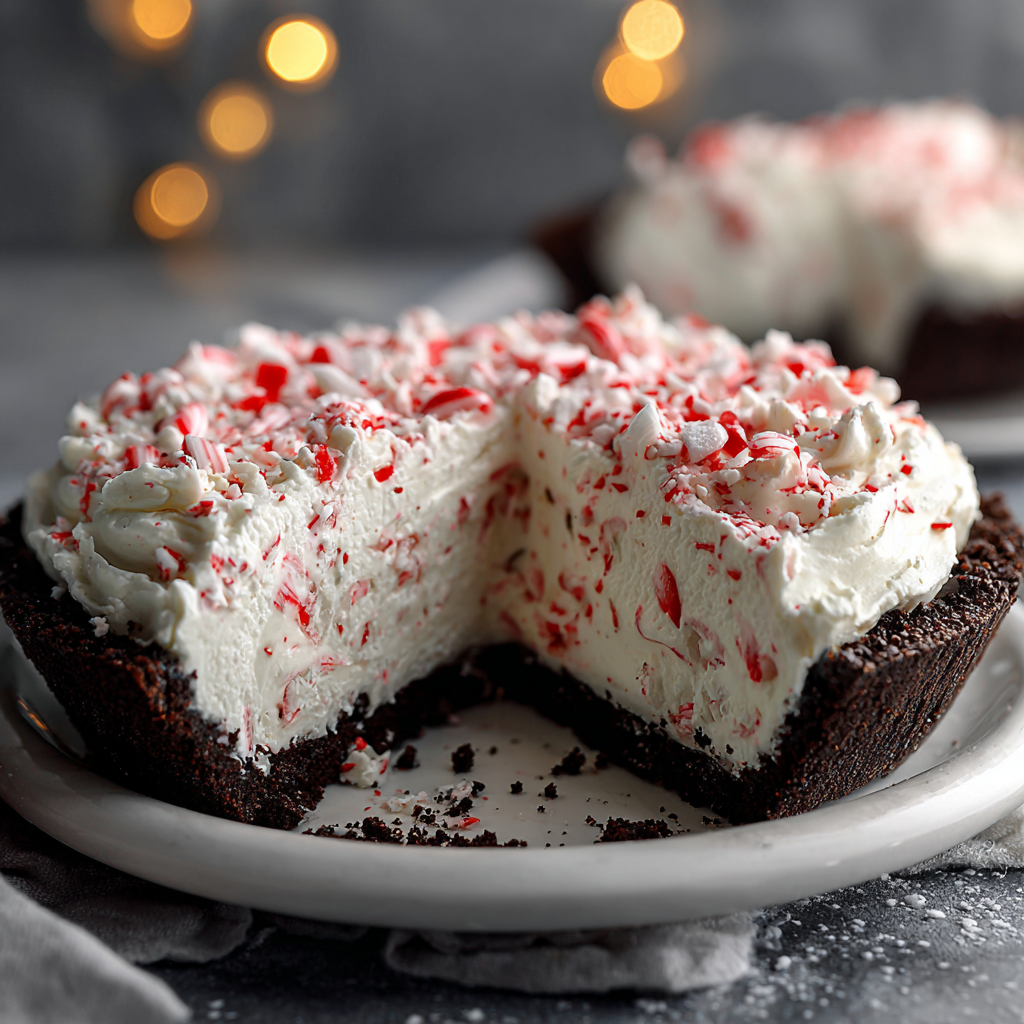
Easy Christmas Peppermint Pie
Your New Favorite Christmas Dessert is Cool, Creamy, and No-Bake!
Hey friends, Beau here from Feastical! Can you smell that? It’s officially that time of year—the air is crisp, the twinkle lights are going up, and the unmistakable scent of peppermint and chocolate is beginning to waft through kitchens everywhere. If your holiday season feels as busy as Santa’s workshop on December 24th, I’ve got the perfect dessert solution for you. Forget slaving over a hot oven; this year, we’re keeping things cool, creamy, and utterly stress-free with my legendary Easy Christmas Peppermint Pie.
Imagine this: a rich, crunchy chocolate cookie crust that gives way to an impossibly fluffy, minty, and sweet filling that tastes like a candy cane cloud. It’s cool, it’s refreshing, and it’s bursting with festive cheer in every single bite. This pie is the hero your holiday table deserves, whether you’re hosting a big family feast, heading to a potluck, or just treating yourself to a little slice of magic after a long day of wrapping presents. It’s the kind of dessert that gets people talking, asking for the recipe, and sneaking back into the kitchen for just one more sliver. So, let’s put on our favorite holiday playlist, tie on our aprons, and create something magical together. This isn’t just a recipe; it’s a delicious, memory-making moment waiting to happen.
A Slice of Christmas Past
This pie recipe holds a special place in my heart, and it all goes back to my Grandma Ellie’s kitchen. Grandma Ellie believed Christmas desserts should be joyful, not joyless, and she was the queen of no-fuss, maximum-flavor treats. One particularly chaotic Christmas Eve, her oven decided to take an unscheduled vacation right as her famous Yule Log was supposed to go in. Panic? Not Grandma Ellie. She just smiled, wiped her hands on her flour-dusted apron, and declared, “Well, guess we’re making a refrigerator pie instead!”
With what seemed like kitchen wizardry, she whipped together a chocolate crust, a creamy peppermint filling, and a mountain of whipped topping. She let us kids crush the candy canes with a rolling pin (a task we took very, very seriously). That pie, born from a potential disaster, became the star of the night. It was cool, refreshing, and felt like a modern, exciting twist on our traditional spread. Every time I make it now, I’m transported back to that linoleum floor, the sound of laughter mixing with Christmas carols, and the taste of a dessert that saved the day. It’s a reminder that sometimes the best holiday memories come from the unplanned, imperfect, and incredibly delicious moments.
Gathering Your Festive Ingredients
The beauty of this pie is its simplicity. You likely have most of these items in your pantry already! Here’s what you’ll need to create this winter wonderland in a pie dish.
- 1 (9-inch) chocolate cookie crust: I’m a big fan of the store-bought kind for ultimate ease (no judgment here!), but if you’re feeling fancy, a homemade crust from chocolate wafer cookies or even Oreos (filling removed) is absolutely divine.
- 1 (8-ounce) package cream cheese, softened: This is the structural backbone of our filling. Chef’s Tip: Let it sit on the counter for a good 30-45 minutes before you start. A soft cream cheese blends into a silky-smooth filling; a cold one will leave you with lumpy frustration.
- 1 cup powdered sugar: It sweetens everything beautifully and dissolves instantly, unlike granulated sugar which can stay gritty.
- ½ teaspoon peppermint extract: A little goes a long way! This is where that classic, cool mint flavor comes from. You can use 1 teaspoon of vanilla extract if you’re in a pinch, but you’ll lose that signature holiday taste.
- 1½ cups whipped topping (like Cool Whip), plus extra for topping: This is the secret to that light, airy, mousse-like texture. Make sure it’s thawed according to the package directions.
- ½ cup crushed peppermint candies or candy canes: The festive crunch! I use a zip-top bag and a rolling pin to crush them. You want a mix of fine powder and a few small chunks for texture.
- Optional: red food coloring (for a festive pink hue): A drop or two gives it that beautiful, blushing pink color that just screams “Christmas!” Gel food coloring works best as it won’t thin out your filling.
- Extra crushed peppermint, for garnish: Don’t skip this! It makes the pie look professionally decorated with zero effort.
Let’s Build the Magic: Step-by-Step
Ready to make some holiday magic? Follow these simple steps, and you’ll have a show-stopping dessert in no time flat.
Step 1: The Creamy Base
In a large mixing bowl, beat your softened cream cheese with the powdered sugar. Use an electric hand mixer or a stand mixer fitted with the paddle attachment on medium speed. Beat it for a good 2-3 minutes, scraping down the sides of the bowl once or twice, until the mixture is completely smooth, lump-free, and slightly fluffy. This is the most important step—getting this base smooth ensures your entire pie will be luxurious.
Step 2: The Flavor Infusion
Now, add your ½ teaspoon of peppermint extract. If you’re using the red food coloring, add a single drop now and mix it in. You can always add more to reach your desired shade of pink, but you can’t take it out! Mix on low speed until the extract and color are fully incorporated.
Step 3: Lighten It Up
Here’s where we get that cloud-like texture. Take your 1½ cups of thawed whipped topping and add it to the bowl. Now, put the mixer away! For this step, you need to fold gently with a spatula. We worked hard to get air into that whipped topping, and aggressive mixing will deflate it. Use a sweeping motion, turning the bowl as you go, until no white streaks remain.
Step 4: The Festive Crunch
Sprinkle in your ½ cup of crushed peppermint candies. Gently fold these in just until they’re distributed. Don’t overmix, or the color from the candies might start to bleed and turn the whole filling a light pink (which is still tasty, just less visually striking if you were going for a white filling).
Step 5: The Grand Finale
Scoop all that beautiful, fluffy, minty filling into your waiting chocolate crust. Use the back of a spoon or an offset spatula to smooth the top into an elegant, even layer.
Step 6: The Patience Game
This is the hardest part! Carefully place the pie in the refrigerator. It needs to chill for at least 4 hours, but honestly, overnight is even better. This waiting time is non-negotiable—it allows the filling to set firmly so you get clean, beautiful slices.
Step 7: Dress to Impress
Right before you serve, crown your masterpiece! Dollop or pipe on the extra whipped topping and give it a generous shower of the remaining crushed peppermint. This final touch adds texture, flavor, and that wow factor.
How to Serve Your Peppermint Masterpiece
Presentation is part of the fun! For picture-perfect slices, I like to dip my sharp knife in hot water and wipe it dry before each cut. This gives you those incredibly clean, professional-looking edges. This pie is rich, so a modest slice is usually plenty. I love serving it on a simple white plate with a small sprig of fresh mint or a tiny dusting of cocoa powder for contrast. It’s the perfect finale to a heavy holiday meal because it’s so light and refreshing. Pair it with a cup of strong coffee, a glass of cold milk, or even a mug of rich hot chocolate for the ultimate chocolate-mint experience. It’s also a stunning addition to a dessert buffet—just be prepared for it to disappear first!
Make It Your Own: Delicious Variations
This recipe is a fantastic canvas for your creativity. Here are a few of my favorite ways to mix it up:
- Chocolate Lover’s Dream: Fold ½ cup of mini chocolate chips into the filling along with the peppermint. You could also drizzle the finished pie with a simple chocolate ganache before adding the final peppermint sprinkle.
- DIY Crust Adventure: Instead of a chocolate crust, try a gingersnap crust for a warm, spicy note that pairs amazingly with the cool mint. Just swap the chocolate wafers for crushed gingersnaps mixed with butter.
- Boozy Twist (For the Adults!): Replace the peppermint extract with 1-2 tablespoons of peppermint schnapps or crème de menthe. Just note that adding liquid might make the filling a bit softer, so you might need to reduce the whipped topping slightly or add a pinch of cornstarch to help it set.
- Dairy-Free Delight: You can easily make this vegan! Use a store-bought or homemade vegan chocolate crust, a plant-based cream cheese alternative, and coconut whipped topping. It works like a charm.
- Peppermint Bark Pie: Create layers! Press half the filling into the crust, then sprinkle a layer of chopped dark chocolate and more crushed peppermint. Gently spread the remaining filling on top. It’s a surprise inside!
Beau’s Chef Notes & Kitchen Stories
This recipe has evolved a bit since that first Christmas with Grandma Ellie. She used sweetened condensed milk in her version, which is also delicious but much denser and sweeter. I love this whipped topping method because it stays so light and fluffy. One year, I was in a huge rush and tried to mix the filling with the stand mixer on high speed instead of folding. Big mistake. It turned the filling into a runny, soupy mess that never set properly. We ended up calling it “Peppermint Pie Dip” and serving it with graham crackers! It was a hit, but it taught me a valuable lesson: gentle folding is key. Don’t be like a rushed Beau—take your time and fold with love.
FAQs & Troubleshooting Your Pie
Q: My filling is runny. What did I do wrong?
A: The most common culprits are: 1) The cream cheese wasn’t soft enough, leading to overmixing as you tried to beat the lumps out, which then broke down the structure. 2) The whipped topping was overmixed and deflated. 3) It simply didn’t chill long enough. If it’s still runny, pop it back in the fridge for another few hours. If it’s a total disaster, see my note above about turning it into a delicious dip!
Q: Can I make this pie ahead of time?
A: Absolutely! This pie is a make-ahead dream. You can assemble it completely and keep it covered in the fridge for up to 2 days. I’d wait to add the final whipped topping and garnish until just before serving to keep everything looking fresh.
Q: Can I use real whipped cream instead of whipped topping?
A: You can, but be aware that real whipped cream is less stable and may weep or soften more quickly. If you go this route, whip 1 cup of heavy cream with 2 tablespoons of powdered sugar until you get stiff peaks, and use that in place of the 1½ cups of whipped topping. The pie will be delicious but might not hold its shape for multiple days.
Q: My crushed candy canes melted into the filling and turned it pink. Is that okay?
A: Totally okay! It will still taste amazing. The visual might just be a soft pink instead of white with red specks. To prevent this, make sure your filling is very cold before you fold in the candy, and fold as gently and quickly as possible.

Easy Christmas Peppermint Pie
Description
Easy Christmas Peppermint Pie
Cool, creamy, and no-bake—holiday magic in every bite!
Ingredients
-
1 (9-inch) chocolate cookie crust (store-bought or homemade)
-
1 (8-ounce) package cream cheese, softened
-
1 cup powdered sugar
-
½ tsp peppermint extract
-
1½ cups whipped topping (like Cool Whip), thawed, plus extra for topping
-
½ cup crushed peppermint candies or candy canes
-
Optional: 1–2 drops red gel food coloring
-
Extra crushed peppermint for garnish
Instructions
Step 1 – Make the Creamy Base:
-
Beat softened cream cheese with powdered sugar 2–3 minutes until smooth and fluffy.
Step 2 – Add Flavor:
-
Mix in peppermint extract and optional food coloring until evenly combined.
Step 3 – Fold in Whipped Topping:
-
Gently fold in 1½ cups whipped topping with a spatula until no streaks remain.
Step 4 – Add Peppermint Crunch:
-
Fold in crushed peppermint candies carefully to avoid color bleeding.
Step 5 – Assemble the Pie:
-
Spread filling evenly into the chocolate crust using a spoon or spatula.
Step 6 – Chill:
-
Refrigerate at least 4 hours (overnight is best) to set the filling.
Step 7 – Garnish & Serve:
-
Top with extra whipped topping and crushed peppermint just before serving.
-
Tip: Dip a sharp knife in hot water and wipe dry for clean slices.
Notes
-
For smooth filling, cream cheese must be soft.
-
Fold whipped topping gently to keep it airy.
-
Chill long enough to ensure firm, sliceable bars.
-
If candy melts and colors the filling pink, don’t worry—it tastes amazing!
Nutrition
- Sugar: 28g
- Saturated Fat: 10g
- Carbohydrates: 36g
- Fiber: 0.5g
- Protein: 3g
- Cholesterol: 30mg
Nutritional Information*
*Please note: This is an estimated nutritional breakdown based on the specific ingredients listed. Values can vary based on specific brands and ingredient choices.
Servings: 8 | Prep Time: 10 min | Chill Time: 4 hours | Total Time: 4 hours 10 min
Approximate values per serving:
Calories: 320 | Fat: 18g | Saturated Fat: 10g | Carbohydrates: 36g | Fiber: 0.5g | Sugar: 28g | Protein: 3g | Cholesterol: 30mg | Sodium: 180mg
This is a decadent dessert, and that’s exactly what the holidays are for! Because it’s so rich and satisfying, a little goes a long way. Enjoy it mindfully as a special treat during the festive season.
Final Thoughts from My Kitchen to Yours
Well, there you have it, my friends—the easiest, most festive dessert that’s guaranteed to bring smiles to every face at your table. This Easy Christmas Peppermint Pie is more than just a recipe; it’s a ticket to a less stressful, more delicious holiday. It’s proof that you don’t need complicated techniques or hours of work to create something truly special and memorable.
I hope this pie becomes a new tradition in your home, just like it is in mine. It’s a little bit of cool, creamy magic that captures the joyful spirit of the season. So from my kitchen at Feastical to yours, I’m wishing you a holiday filled with love, laughter, and absolutely fantastic food. Now, go forth and create something delicious!
If you make it (and I really hope you do!), tag me on social @feastical so I can see your beautiful creations! Happy holidays, and happy eating!
With love and a sprinkle of peppermint,

Gluten-Free Blueberry Lemon Bars
Sunshine in a Square: My Gluten-Free Blueberry Lemon Bars
Hey friends, Beau here from Feastical! Let’s talk about one of life’s simple, perfect pleasures: a dessert that’s both vibrantly cheerful and incredibly easy to whip up. If your soul, like mine, craves a little burst of sunshine even on the cloudiest of days, you are absolutely going to fall in love with these Gluten-Free Blueberry Lemon Bars.
Picture this: a soft, moist, cake-like bar that’s studded with juicy, bursting blueberries and packed with a bright, zesty lemon flavor that dances on your tongue. They’re naturally gluten-free, thanks to a fantastic flour blend I’ve been loving, and completely dairy-free to boot. The best part? This is a one-bowl, one-pan situation. We’re talking ten minutes of prep, a quick bake, and you’ve got a tray of wholesome happiness ready to go. These bars are the ultimate crowd-pleaser—perfect for a quick snack with your afternoon coffee, a star at your weekend brunch spread, or a light, satisfying dessert that doesn’t leave you feeling weighed down. So, grab your favorite mixing bowl and let’s bake up a little bit of joy together.
The Lemon Bar Legacy
My love affair with lemon bars didn’t start in some fancy culinary school; it started in my grandma’s kitchen, which always smelled like citrus and sugar. She wasn’t a gluten-free pioneer by any means—her version was a classic, buttery shortbread crust with a tangy lemon curd topping, and it was legendary. She’d always let me squeeze the lemons, warning me not to get the juice in any paper cuts (a constant hazard for a curious kid in the kitchen).
When I started Feastical and began exploring gluten-free baking, her lemon bars were one of the first recipes I wanted to recreate, but in my own way. I wanted something simpler, a one-layer wonder that captured that same spirit of sunny comfort. The first time I added a handful of blueberries to the batter, it was a total “aha!” moment. The sweet berries mellowed the sharp lemon perfectly, creating this gorgeous purple swirl throughout the bake. It felt like I was honoring her tradition while also making something uniquely mine—a recipe that’s become a new favorite for my own friends and family. It’s a reminder that the best recipes aren’t just about ingredients; they’re about the stories and the people we share them with.
Gathering Your Sunshine Ingredients
One of the things I adore about this recipe is the short, sweet ingredient list. Every component plays a key role, and I’ve got some easy swaps and chef insights to make it work perfectly for you.
- 1 ½ cups Judee’s All Purpose Gluten Free Bread Flour Mix: This is my secret weapon here! Not all gluten-free flours are created equal, and Judee’s blend is specifically designed for breads and cakes, giving us a light, moist crumb that doesn’t taste gritty or chalky. Chef’s Insight: If you can’t find this specific brand, a good quality 1:1 gluten-free baking flour with xanthan gum already in it will work well. I don’t recommend using almond or coconut flour alone for this, as they behave very differently.
- 2 large eggs: Our trusty binders! They give the bars structure and a lovely, tender texture. Make sure they’re at room temperature to help them incorporate smoothly into the batter.
- ½ cup dairy-free creamer or milk: This adds moisture and richness. I love using an oat or almond milk creamer for a little extra indulgence, but any plain, unsweetened dairy-free milk works great. Substitution Tip: Regular dairy milk or even buttermilk would be fantastic if you’re not avoiding dairy!
- ¼ cup fresh lemon juice: This is non-negotiable for that authentic, bright flavor. Please, please use fresh lemons! The bottled stuff just can’t compare. You’ll need about 2 large lemons. Pro Hack: Roll your lemons on the counter firmly with your palm before juicing—you’ll get way more juice out of them!
- 1 ½ teaspoons baking powder: Our leavening agent. This is what gives the bars their lovely, soft lift. Make sure yours is fresh for the best rise.
- ¼ teaspoon salt: The flavor enhancer. It balances the sweetness and makes the lemon flavor pop. Don’t skip it!
- 1 ½ cups fresh or frozen blueberries: The sweet, juicy jewels of the recipe! Frozen berries work perfectly here—no need to thaw them, just toss them in straight from the freezer to prevent them from bleeding too much into the batter.
Baking Your Bars: A Step-by-Step Dance
Alright, team, let’s get mixing! This process is so simple it feels like magic. Follow these steps, and you’ll be a gluten-free bar hero in no time.
Step 1: Preheat and Prep. Fire up your oven to 350°F (175°C). This is the perfect temperature for a gentle, even bake that cooks the center without burning the edges. Now, grab an 8×8-inch baking pan. Lightly grease it with a little oil or butter, or my personal favorite—line it with a strip of parchment paper with overhanging edges. This creates a “sling” that lets you lift the entire baked square out of the pan for super clean, easy slicing later. Trust me, it’s a game-changer!
Step 2: The Wet Mix. Grab a medium-sized bowl—this is the only one we’re dirtying! Crack in your two room-temperature eggs. Add in the fresh lemon juice and your dairy-free milk of choice. Now, take your whisk and go to town! Whisk it all together until it’s completely smooth and slightly frothy. You’re not just mixing; you’re incorporating a little air, which is the first step to a light texture.
Step 3: Bringing It All Together. Time for the dry team to join the party. Add your gluten-free flour, baking powder, and salt right into the bowl with the wet ingredients. Put the whisk away and grab a spatula or a wooden spoon. We’re going to gently fold the dry ingredients into the wet. The key word here is JUST combined. A few streaks of flour are okay! Overmixing is the enemy of tender gluten-free baked goods, as it can make them gummy. Stop as soon as you no longer see dry flour patches.
Step 4: The Blueberry Fold. Now for the star of the show: your blueberries! Scatter them over the top of the batter. Using that same gentle folding motion, incorporate them evenly throughout. If you’re using frozen berries, work relatively quickly to avoid the cold temperature solidifying the batter. The goal is to distribute them without smashing them to bits—we want whole, juicy berries in every bite.
Step 5: Into the Pan and Oven. Pour your beautiful, purple-speckled batter into your prepared pan. Use your spatula to spread it into an even layer, nudging it into the corners. Slide it into the middle rack of your preheated oven and set your timer for 25 minutes.
Step 6: The Toothpick Test. At the 25-minute mark, take a peek. The edges should be pulling away from the pan slightly, and the top should be a lovely light golden brown. The real test is the toothpick: poke it into the center of the pan. If it comes out clean or with a few moist crumbs (but not wet batter), you’re done! If it’s still wet, give it another 3-5 minutes. All ovens vary, so trust your instincts.
Step 7: The Crucial Cool Down. This might be the hardest step: patience! You must let the bars cool completely in the pan on a wire rack. I know it’s tempting to dive right in, but if you try to cut them while they’re warm, they’ll be crumbly and messy. Letting them cool allows the structure to set, giving you those perfect, clean slices.
How to Serve Up These Sunny Bars
Once your bars are completely cool, it’s time for the fun part: serving! Lift the entire block out of the pan using your parchment paper sling. Place it on a cutting board and slice it into 9 even squares (or 12 for smaller portions).
They are absolutely delicious all on their own, a perfect handheld treat. But if you want to dress them up for a special occasion, here are a few of my favorite ways:
- A Dusting of Magic: A light shower of powdered sugar (use a gluten-free brand) right before serving makes them look like they came from a fancy bakery. It adds a subtle extra sweetness that pairs beautifully with the tart lemon.
- Lemon Glaze Drizzle: Whisk together about ½ cup of powdered sugar with 1-2 tablespoons of fresh lemon juice until smooth. Drizzle this over the cooled bars for an extra punch of citrus and a pretty finish.
- À La Mode, Please: For the ultimate dessert, serve a slightly warm bar with a scoop of vanilla coconut milk ice cream. The contrast of warm and cold, tart and sweet, is absolutely divine.
- Brunch Star: Arrange them on a pretty platter alongside fresh fruit and a pot of coffee for the most impressive (and easy!) brunch addition.
Make It Your Own: Delicious Variations
The beauty of this base recipe is its versatility. Feel free to get creative and play with flavors! Here are a few twists I love:
- Triple Berry Bliss: Swap out the blueberries for a mix of raspberries, blackberries, and blueberries. The combination of tart and sweet berries is incredible.
- Lemon Lavender Dream: Add 1 teaspoon of culinary-grade dried lavender buds to the dry ingredients for a sophisticated, floral twist that pairs wonderfully with lemon.
- White Chocolate Chip Craze: Fold in ½ cup of dairy-free white chocolate chips along with the blueberries for pockets of creamy sweetness.
- Poppy Seed Crunch: Stir 2 tablespoons of poppy seeds into the batter for a classic lemon-poppy seed flavor and a delightful little crunch in every bite.
- Extra Zest: For an intense lemon flavor, add the zest of one lemon to the wet ingredients. The zest is where all the powerful citrus oils live!
Beau’s Chef Notes & Kitchen Stories
This recipe has been through a few iterations in my kitchen. The first time I made it, I was so excited I forgot the baking powder. Let’s just say we ended up with lemon blueberry hockey pucks—edible, but definitely not blog-worthy! It was a good reminder that even the simplest recipes need our attention. Another time, my nephew “helped” me by adding what he thought was a cup of blueberries but was actually closer to three cups. The bars were practically purple and took forever to bake through, but they were ridiculously moist and berry-filled. It’s now his special requested version. Don’t be afraid to make mistakes or experiment—that’s often where the best kitchen memories (and recipes!) are born.
Your Questions, Answered!
Q: My bars are gummy in the middle. What happened?
A: The most common culprit here is overmixing the batter. Once you add the flour, mix just until combined. Overmixing can overwork the starches in the GF flour, leading to a gummy texture. Also, ensure your baking powder is fresh!
Q: Can I make these vegan?
A: I haven’t tested it fully, but a good bet would be to try using a “flax egg” substitute (1 tbsp ground flaxseed mixed with 3 tbsp water per egg, let sit for 5 mins). The texture might be slightly denser but should still work!
Q: My berries all sank to the bottom! How do I prevent that?
A: This is a common baking quandary. Tossing your blueberries in a light dusting of the gluten-free flour mix before folding them into the batter can help suspend them throughout the bake.
Q: How should I store these bars?
A: Keep them in an airtight container at room temperature for up to 2 days, or in the fridge for up to 5 days. They also freeze beautifully for up to 3 months! Just thaw at room temperature.
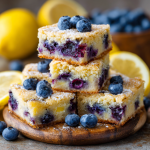
Gluten-Free Blueberry Lemon Bars
Description
Gluten-Free Blueberry Lemon Bars
Sunshine in a square—bright, zesty, and bursting with berries!
Ingredients
-
1½ cups gluten-free all-purpose flour (Judee’s or 1:1 blend with xanthan gum)
-
2 large eggs, room temperature
-
½ cup dairy-free milk or creamer (oat, almond, or regular milk)
-
¼ cup fresh lemon juice (about 2 lemons)
-
1½ tsp baking powder
-
¼ tsp salt
-
1½ cups blueberries (fresh or frozen)
Optional Toppings:
-
Powdered sugar (gluten-free)
-
Lemon glaze: ½ cup powdered sugar + 1–2 tbsp fresh lemon juice
-
Vanilla coconut ice cream
Instructions
Step 1 – Preheat & Prep:
-
Preheat oven to 350°F (175°C).
-
Line an 8×8-inch pan with parchment paper or lightly grease it. Leave overhanging edges for easy lifting.
Step 2 – Mix Wet Ingredients:
-
In a medium bowl, whisk eggs, lemon juice, and dairy-free milk until smooth and slightly frothy.
Step 3 – Add Dry Ingredients:
-
Add gluten-free flour, baking powder, and salt. Fold gently with a spatula until just combined—stop as soon as no dry streaks remain.
Step 4 – Fold in Blueberries:
-
Gently fold in blueberries, keeping them intact. Toss frozen berries in a little flour first to prevent sinking if desired.
Step 5 – Bake:
-
Pour batter into the prepared pan, spread evenly.
-
Bake 25 minutes, or until edges are lightly golden and a toothpick comes out with a few moist crumbs.
Step 6 – Cool Completely:
-
Let bars cool in the pan on a wire rack. Cooling is crucial for clean slicing.
Step 7 – Serve:
-
Lift bars using the parchment sling, slice into 9 squares (or 12 for smaller bars).
-
Optional: dust with powdered sugar, drizzle lemon glaze, or serve with ice cream.
Notes
-
Triple Berry: Swap blueberries for a mix of raspberries, blackberries, and blueberries.
-
Lemon Lavender: Add 1 tsp dried culinary lavender to the dry ingredients.
-
White Chocolate: Fold in ½ cup dairy-free white chocolate chips.
-
Poppy Seed Crunch: Add 2 tbsp poppy seeds for texture.
-
Extra Zest: Add zest of 1 lemon for more citrus punch.
Nutritional Information (Approximate)
While we’re all about feel-good food here at Feastical, I know it’s helpful to have a general idea of what’s in your treats. This info is per bar (based on 9 bars per batch) and is an estimate calculated using generic ingredients. Your specific brands may cause variations.
- Calories: 140 kcal
- Protein: 3g
- Fat: 2.5g
- Carbohydrates: 26g
- Sugar: 9g
- Fiber: 2g
These bars are a source of energy from complex carbs, with a little protein and fiber to help keep you satisfied. The blueberries add a dose of antioxidants and vitamin C, making them a treat you can genuinely feel good about enjoying!
Final Thoughts
Well, there you have it, my friends—my go-to recipe for bringing a little sunshine into any day. These Gluten-Free Blueberry Lemon Bars are proof that eating well doesn’t mean sacrificing flavor or fun. They’re simple, soulful, and incredibly satisfying. I hope this recipe finds a place in your kitchen and becomes a new tradition for you, just like my grandma’s bars were for me.
If you make them (and I really hope you do!), tag me @feastical on social media so I can see your beautiful creations! Nothing makes me happier than seeing you guys enjoy the recipes I share. Now, go preheat that oven and get baking! Until next time, keep your kitchen messy and your heart full.
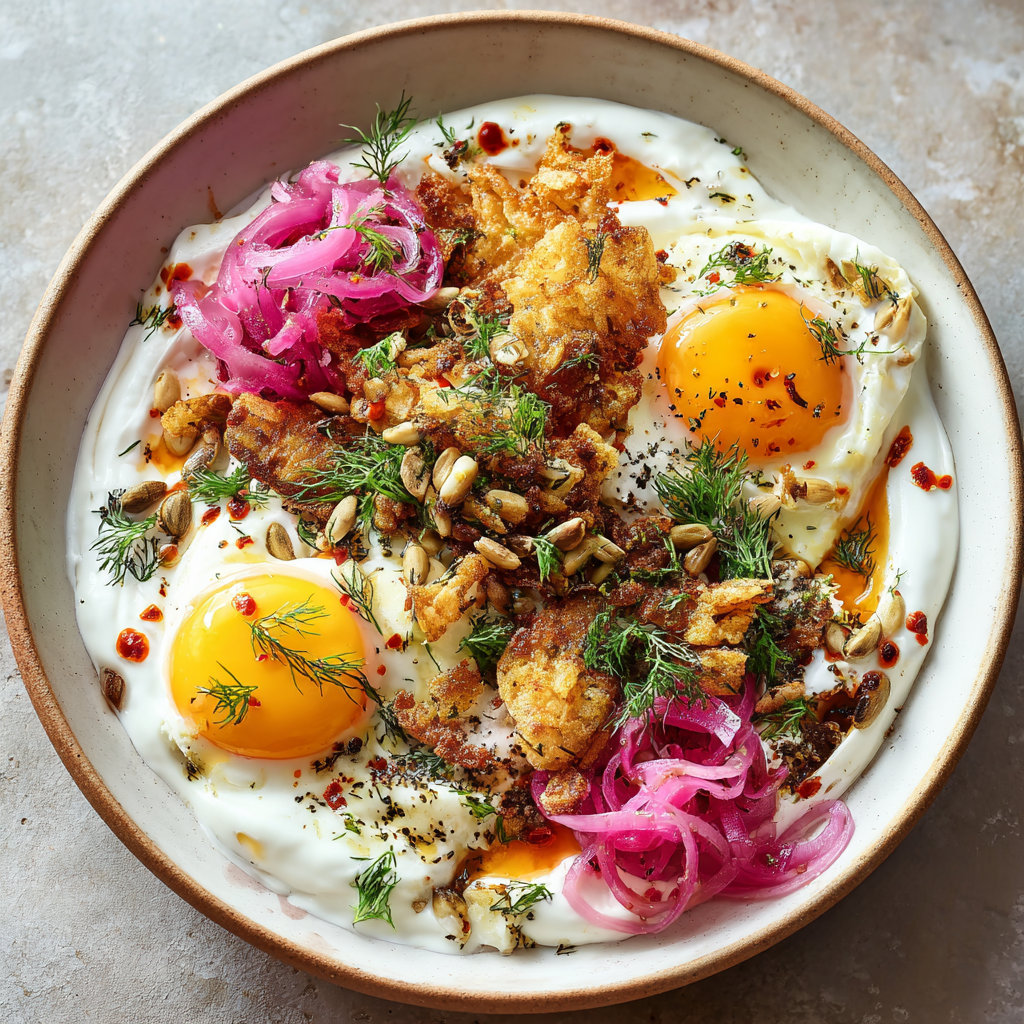
Poached Eggs with Garlic Yogurt, Chilli Oil & Hash Browns
Wake Up to a Flavor Fiesta: Poached Eggs with Garlic Yogurt & Chili Oil
Hey friends, Beau here from Feastical! Let’s talk about breakfast. Or lunch. Or, let’s be real, that glorious “brinner” (breakfast for dinner) we all secretly crave. You know those mornings when a simple bowl of cereal just won’t cut it, but you also don’t want to spend an hour slaving over a hot stove? You want something that feels special, a meal that’s a vibrant celebration of textures and tastes, but is actually deceptively simple to pull together. You want a dish that says, “I’ve got my life together,” even if you’re still in your pajamas.
Well, my foodie friend, you have just found your new favorite power bowl. Today, we’re making Poached Eggs with Garlic Yogurt, Chilli Oil, and Hash Browns. This isn’t just food; it’s an experience. We’re talking about a cool, creamy, garlicky yogurt base that cradles perfectly poached, runny-yolked eggs. Then, we turn up the volume with a drizzle of spicy, aromatic chili oil, a scatter of quick-pickled onions for a tangy punch, and a crunch of toasted sunflower seeds. And because no breakfast bowl is complete without something golden and crispy, we’re serving it all up with a side of seriously good hash browns.
This dish is a beautiful dance of contrasts: hot and cold, creamy and crunchy, spicy and cool. It’s the kind of meal that looks like it came from a trendy brunch spot but comes together in about 20 minutes in your own kitchen. So, grab your favorite apron (or don’t, I won’t tell), and let’s create some magic together. Trust me, your taste buds are going to send you a thank-you note.
A Brunch Revelation in a Cozy Café
I’ll never forget the first time a version of this dish completely rewired my brain. It was a drizzly Sunday in Portland, Oregon, years ago. My wife and I stumbled into this tiny, unassuming café, seeking shelter and strong coffee. The menu was brief, but one item jumped out: “Yogurt with Poached Egg & Brown Butter.” It sounded… curious. Intriguing. Maybe a little weird. I had to try it.
When it arrived, it was a masterpiece in a bowl. The creamy yogurt, the oozing golden yolk, the crispy potatoes on the side—it was a revelation. It was simultaneously light and decadent, simple and complex. I spent the entire meal dissecting every bite, trying to figure out how I could recreate that magic at home. That bowl taught me a powerful lesson: the best recipes often come from breaking the rules and combining things you wouldn’t normally think go together. It’s a lesson I’ve carried into my cooking ever since, and it’s the heart and soul of this recipe we’re making today. It’s my homage to that rainy day and that brilliant, rule-breaking chef.
Gathering Your Flavor Arsenal
Here’s everything you’ll need to build this incredible bowl. Don’t stress about exact brands—this is about using what you have and what you love!
For the Garlic Yogurt Base:
- 1 cup natural yogurt: I love using full-fat Greek yogurt for its ultra-creamy, thick texture and tangy punch. It acts as a luxurious base that won’t get watery. Chef’s Insight: If you’re using regular plain yogurt, strain it in a cheesecloth for 10 minutes to thicken it up. For a dairy-free swap, coconut yogurt works surprisingly well!
- Juice of ½ lemon: Fresh is key here! This bright, acidic zing cuts through the richness of the yogurt and egg yolk. It wakes up all the other flavors.
- 1 clove garlic, grated: Grating it ensures you get a subtle, even garlic flavor throughout the yogurt without any harsh, crunchy bits. Pro Tip: If raw garlic is too intense for you, a tiny pinch of garlic powder is a great mellow substitute.
- Freshly ground black pepper: Not just a seasoning—it’s a core flavor. The peppery warmth is essential. Grind it fresh; you’ll taste the difference, I promise.
- 1 tbsp chopped fresh dill: This herb brings a beautiful, grassy freshness. Don’t have dill? Fresh chives, mint, or even a little parsley would be delightful.
For the Toppings & Assembly:
- 2 large eggs: The stars of the show! Get the best you can afford—the flavor of the yolk is everything. Make sure they’re fresh; fresh eggs hold their shape better when poaching.
- 2 tbsp pickled red onion: That pop of pink color and vinegary tang is non-negotiable for balancing the dish. Quick Hack: No time to pickle? Thinly slice red onion and soak it in the lemon juice for 5 minutes while you prep everything else. Instant “quickle”!
- 1–2 tsp chili oil: This is where you can personalize the heat. I use a Sichuan-style chili oil for its complex, numbing heat and crunchy bits. Sriracha or harissa would also be fantastic.
- 1 tbsp sunflower seeds: Our textural hero! Toasting them in a dry pan for a minute until they’re golden brown takes them from good to “can’t-stop-eating-these” good. Pepitas (pumpkin seeds) work great too.
- Extra dill, for garnish: A little fresh green on top makes it look restaurant-ready.
To Serve:
- 2 crispy hash browns: The ultimate crispy vehicle for scooping up all that goodness. I am 100% team frozen hash browns for convenience—air fry them for maximum crunch! Of course, homemade shredded potato patties are next-level if you have the time.
Let’s Build Your Masterpiece, Step-by-Step
Okay, team! Let’s fire up the kitchen. The key here is multitasking. We’ll get everything moving at once so it all comes together hot and fresh.
Step 1: The Yogurt Base (Do this first!)
Grab a small bowl and plop in your yogurt. Grate in that garlic clove directly—it catches all the yummy juices. Add the juice from half a lemon, a few generous cranks of black pepper, and your chopped fresh dill. Now, give it a really good whisk until it’s smooth, creamy, and everything is happily combined. Chef’s Hack: Do this first and let it sit for 5-10 minutes while you work on everything else. This lets the flavors get to know each other and mellow out beautifully. Spread this glorious garlic yogurt onto the bottom of your serving bowl or plate.
Step 2: Crisp Those Hash Browns
Whether you’re using frozen or homemade, get these going now. Follow the package directions for the frozen ones—I highly recommend the air fryer (about 10-12 minutes at 400°F) or pan-frying in a little avocado oil for a super crispy exterior. If you’re going homemade, shred that potato, squeeze out ALL the moisture, season, and pan-fry until golden brown on both sides. Keep them warm in a low oven while you poach.
Step 3: The Art of the Poach (You can do this!)
I know poached eggs can feel intimidating, but follow these steps and you’ll be a pro. Fill a medium saucepan about two-thirds full with water. Bring it to a gentle simmer over medium heat—you want tiny bubbles, not a rolling boil. Add a good splash of white vinegar (this helps the egg whites coagulate faster). Now, here’s the trick: create a gentle whirlpool in the water by stirring it with a spoon. Crack your egg into a small ramekin or cup. Gently lower the ramekin into the water and let the egg slide out into the center of your whirlpool. The swirling water will help the egg wrap around itself into a neat little package. Let it cook for 3-4 minutes for a firm white and a gloriously runny yolk. Use a slotted spoon to lift it out, letting the water drain off. Gently place it on a paper towel to absorb any excess water. Repeat for the second egg!
Step 4: The Grand Assembly
This is the fun part! Your yogurt is already waiting on the plate. Gently place your two beautiful poached eggs right on top of that creamy bed. Now, drizzle that fiery chili oil all over everything—be generous! Scatter your bright pink pickled onions and your toasted sunflower seeds around the eggs. Give it one last flourish with a few extra fronds of dill. Don’t forget those crispy, golden hash browns on the side. And just like that, you’re a culinary rockstar.
How to Serve This Beautiful Bowl
Presentation is part of the fun! I love serving this in a wide, shallow bowl so everything has room to shine. The key to eating this is to break the yolks immediately and mix everything together, letting the yogurt, egg yolk, and chili oil create a dreamy, pink-orange sauce. Then, you get a little bit of everything in each bite: a scoop of saucy yogurt, a piece of egg, a crunchy seed, a tangy onion, all on the end of a crispy hash brown. It’s a textural symphony!
This dish is a complete meal on its own, but if you’re feeding a crowd or want to make it even more substantial, it pairs wonderfully with a simple side of peppery arugula salad or some roasted asparagus. And of course, a big mug of excellent coffee or a freshly squeezed glass of orange juice is the non-negotiable beverage pairing. This is leisurely weekend fuel at its finest.
Make It Your Own: Delicious Twists & Swaps
The beauty of this recipe is its flexibility. Play around and make it suit your mood and pantry!
- The Protein Power-Up: Add crumbled crispy bacon, torn pieces of prosciutto, or a few slices of seared halloumi cheese for an extra savory, salty punch.
- Green Goddess Version: Load it up with veggies! Sautéed spinach or kale, sliced avocado, or a handful of microgreens would be fantastic additions for a nutrient boost.
- Mediterranean Twist: Swap the dill for fresh mint, use a zhug or zhoug (a spicy Yemeni green sauce) instead of chili oil, and add a sprinkle of crumbled feta cheese.
- Spice Level Adjustment: Control the heat! For a milder version, use a flavored olive oil or a smoked paprika oil. For extra fire, add a sprinkle of red pepper flakes or a dash of hot sauce on top.
- Potato Swap: No hash browns? No problem! Serve it with roasted baby potatoes, crispy smashed potatoes, or even a thick slice of toasted, crusty sourdough bread for soaking up all that deliciousness.
Beau’s Kitchen Notes
This recipe has evolved so much in my kitchen over the years. I’ve poached eggs in a tornado of water, I’ve forgotten the vinegar and ended up with egg drop soup, and I’ve definitely over-toasted a sunflower seed or two. The lesson? It’s all part of the process! Don’t fret if your first poached egg isn’t magazine-perfect. It will still taste incredible. The first time I made this for my wife, she looked at me like I was crazy until she took the first bite. Now, it’s her most-requested lazy weekend meal. The garlic yogurt base has also become my secret weapon—I use it as a dip for veggies, a sauce for grilled chicken, you name it. Once you make it, you’ll find a million uses for it!
Your Questions, Answered!
Q: My poached eggs always turn out messy. Any pro tips?
A: The two biggest game-changers are 1) very fresh eggs (the whites are tighter and hold together better), and 2) the whirlpool method. The vortex really does help wrap the egg around itself. Also, don’t overcrowd the pot—poach in batches if you’re making more than two.
Q: Can I make any part of this ahead of time?
A: Absolutely! The garlic yogurt can be made and stored in the fridge for up to 2 days (the garlic flavor will get stronger, which I love). The pickled onions will keep for weeks in the fridge. You can even poach eggs ahead! Poach them as normal, then transfer them to a bowl of ice water. Store them in the fridge for up to 2 days. To reheat, just drop them into simmering water for 30-60 seconds.
Q: I don’t have chili oil. What can I use instead?
A: No worries! A good quality extra virgin olive oil with a pinch of red pepper flakes warmed up in a pan works wonderfully. Alternatively, a drizzle of sriracha, harissa, or even a smoky hot sauce would be delicious.
Q: Is this dish served cold or warm?
A: It’s a fantastic contrast of temperatures! The yogurt base is cool, which makes the warm, runny poached eggs and the hot, crispy hash browns really stand out. It’s that mix that makes it so special.
Print
Poached Eggs with Garlic Yogurt, Chilli Oil & Hash Browns
Description
Poached Eggs with Garlic Yogurt, Chili Oil & Hash Browns
The ultimate brunch bowl: creamy, spicy, tangy, and crunchy all at once.
Ingredients
Garlic Yogurt Base:
-
1 cup full-fat Greek yogurt (or thickened plain yogurt)
-
Juice of ½ lemon
-
1 clove garlic, grated (or ¼ tsp garlic powder)
-
1 tbsp fresh dill, chopped (or chives/parsley)
-
Freshly ground black pepper, to taste
Toppings & Assembly:
-
2 large eggs, very fresh
-
1–2 tsp chili oil (or sriracha/harissa)
-
2 tbsp pickled red onions (or quick “quickle”)
-
1 tbsp sunflower seeds, toasted (or pepitas)
-
Extra dill for garnish
To Serve:
-
2 crispy hash browns (frozen or homemade)
Instructions
Step 1 – Prepare the Yogurt Base:
-
In a small bowl, mix yogurt, garlic, lemon juice, dill, and black pepper until smooth.
-
Let it rest 5–10 minutes for flavors to meld. Spread onto your serving plate or bowl.
Step 2 – Cook Hash Browns:
-
Frozen: Air fry 10–12 min at 400°F, or pan-fry in a little oil until golden and crispy.
-
Homemade: Shred, squeeze out moisture, season, and pan-fry until golden on both sides. Keep warm.
Step 3 – Poach the Eggs:
-
Fill a saucepan ⅔ with water, bring to gentle simmer. Add a splash of white vinegar.
-
Stir to create a gentle whirlpool. Crack egg into a ramekin and slide into water.
-
Cook 3–4 min for runny yolk. Lift with slotted spoon, drain, and place on paper towel. Repeat for second egg.
Step 4 – Assemble the Bowl:
-
Place poached eggs on yogurt.
-
Drizzle with chili oil, scatter pickled onions and toasted sunflower seeds.
-
Garnish with extra dill. Serve hash browns on the side.
Notes
-
Eat immediately: break the yolks to mix with yogurt and chili oil for a creamy, saucy bite.
-
Great with arugula salad, roasted asparagus, or crusty sourdough.
-
Adjust heat to taste with chili oil, red pepper flakes, or hot sauce.
Nutrition
- Calories: 450 Cal per serving
- Fat: 30g
- Carbohydrates: 28g
- Protein: 18g
Nourishment That Feels Good
This bowl isn’t just a flavor explosion; it’s also packed with nourishing goodness. Here’s a rough breakdown of what you’re getting in one generous serving:
Approximate Nutrition (per serving):
Calories: 450 | Protein: 18g | Fat: 30g | Carbohydrates: 28g | Fiber: 3g | Sugars: 4g
The protein from the eggs and Greek yogurt will keep you full and satisfied for hours. The healthy fats from the yogurt, eggs, and oil are essential for energy and help your body absorb all the fat-soluble vitamins. Using high-quality ingredients makes all the difference here—you’re fueling your body with real, whole foods that taste amazing. It’s comfort food that comforts you from the inside out.
Dig In & Enjoy!
And there you have it, friends! My ultimate feel-good, flavor-packed poached egg bowl. This recipe is a perfect example of what I love about cooking: it’s about creativity, contrast, and, most importantly, joy. It’s about taking a few simple ingredients and transforming them into something that feels truly extraordinary.
I hope this recipe becomes a new staple in your home, a dish you make for yourself on a quiet morning or to impress your friends at your next brunch gathering. Remember, the kitchen is your playground. Don’t be afraid to experiment, to make a mess, and to make it your own.
If you make this (and I really hope you do!), tag me @feastical on social media so I can see your beautiful creations! Nothing makes me happier than seeing you guys enjoy these recipes. Now, go forth and poach with confidence!
With love and a full belly,
Beau