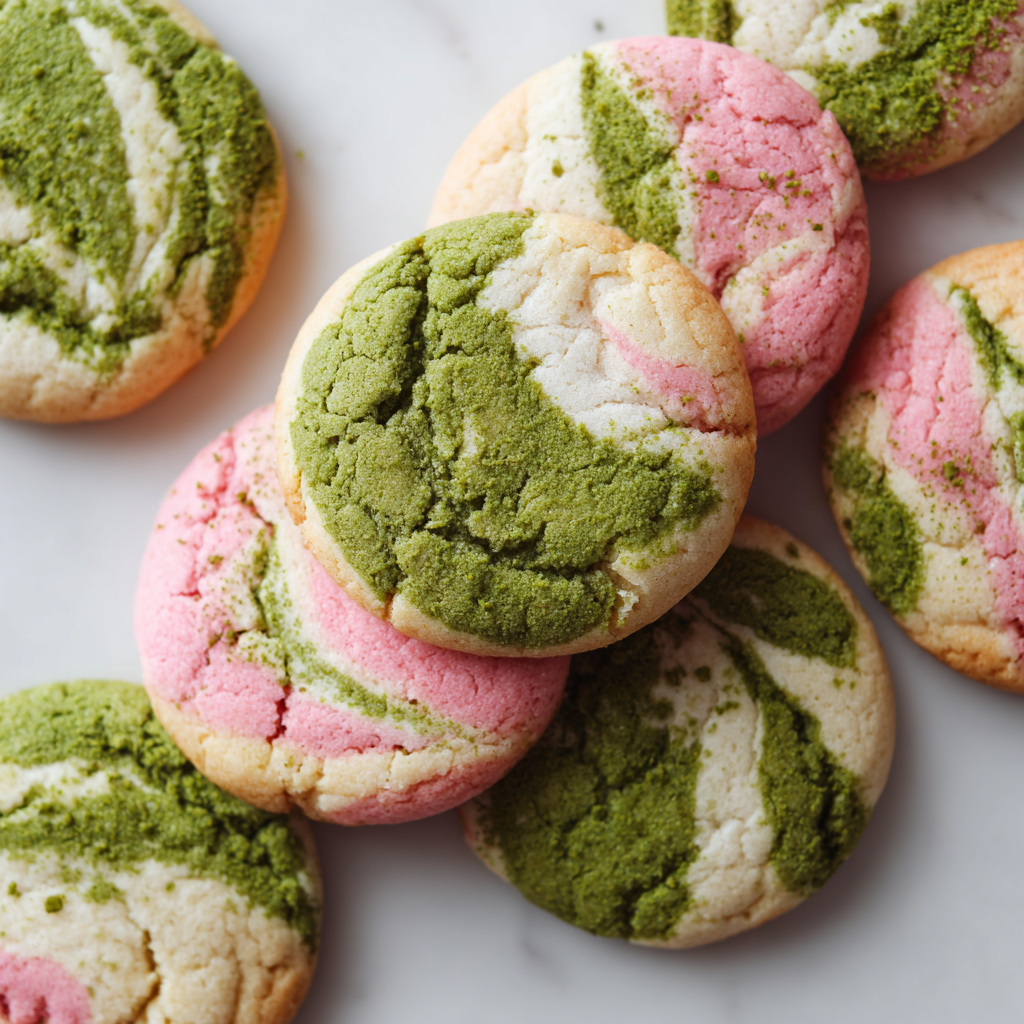
Strawberry Matcha Marble Cookies Recipe
Strawberry Matcha Marble Cookies – Swirled Butter Cookies with Tea and Berry Flavors
Let’s Bake Some Happy (and a Little Magic!)
Hey friends, Beau here! Grab your favorite apron and let’s have some fun. Today, we’re not just baking cookies; we’re creating edible artwork. I’m talking about my Strawberry Matcha Marble Cookies – buttery, soft, and absolutely breathtaking. Imagine the deep, earthy whisper of ceremonial-grade matcha, the sunny, fruity kiss of strawberry, and the classic comfort of vanilla, all swirled together in one gorgeous, melt-in-your-mouth bite.
I know “marble” might sound like a fancy-pants baking challenge, but trust me, it’s pure, simple kitchen joy. It’s the kind of recipe that makes you feel like a pastry wizard with minimal effort. These cookies are my go-to when I want to impress at a tea party, pack a seriously lovely gift box, or just turn a regular Tuesday into something special. They look like you fussed for hours, but our little secret? It’s mostly just playful squishing and twisting. So, preheat that oven, and let’s dig into the marbling magic together!
The Day I Discovered Marbling (And a Happy Mess)
This recipe was born from a happy accident, as the best ones often are. A few years back, I was determined to make my nephew’s birthday cookies “extra.” I had a batch of green matcha dough and a batch of pink strawberry dough ready to go. Then, in a classic Beau move, I got distracted by a bubbling pot on the stove. When I turned back, my then-toddler nephew had “helped” by smooshing the two colorful dough balls together into one magnificent, marbled lump.
Instead of starting over, I rolled it out, cut some shapes, and crossed my fingers. What came out of the oven was a revelation! Each cookie was a unique, stunning landscape of green and pink swirls. The flavors melded perfectly, and the textures were somehow even better. It taught me that sometimes, the best recipes come from letting go of perfect separation and embracing the beautiful blend. Now, every time I make these, I think of that messy, joyful kitchen moment and smile.
Your Cookie Canvas: What You’ll Need
Here’s the lineup for our masterpiece. I’ve added my little chef notes next to each one because knowing the “why” makes you a more confident baker!
For the Base Dough:
- 1 cup (227g) unsalted butter, softened – This is the soul of our cookie. True softness is key – it should dent easily when poked but not be oily or melted. This creams into the sugar perfectly for that tender crumb.
- 1 cup (200g) granulated sugar – Our sweetener and texture-helper. It helps the cookies spread just right and get those lightly crisp edges.
- 2 large eggs – They bind everything together and add richness. Make sure they’re at room temperature to play nicely with the butter.
- 1 teaspoon vanilla extract – The flavor backbone. Use the real stuff! It rounds out the matcha and strawberry beautifully.
- 2 ¾ cups (345g) all-purpose flour – The structure. I fluff my flour in the container before gently spooning it into the measuring cup and leveling it off. This avoids dense, dry cookies.
- ½ teaspoon baking powder + ½ teaspoon baking soda – Our dynamic leavening duo. The powder gives lift, the soda encourages spread and browning. Yes, we need both!
- ¼ teaspoon salt – The flavor enhancer. It makes all the other flavors pop and balances the sweetness. Don’t skip it.
For the Flavor & Color Swirls:
- 1 tablespoon matcha powder – Chef’s Insight: Splurge on a good culinary or ceremonial-grade matcha if you can. The color will be a vibrant jade green, and the flavor will be smooth and complex, not bitter. This is where the magic happens!
- 1 tablespoon freeze-dried strawberry powder – My #1 recommended option. It gives an intense, natural strawberry flavor and that gorgeous pink hue without adding extra moisture. You can buy it or make it by blitzing freeze-dried strawberries in a clean coffee grinder until powdery.
- Substitution Tip: No powder? Use ½ teaspoon strawberry extract + a tiny drop of pink food gel. The extract gives flavor, the gel gives color. Natural food colorings work great too!
- 2–3 teaspoons flour (optional) – Sometimes, especially if your kitchen is warm, the dough can get a tad sticky after adding the flavorings. A dusting of extra flour helps you handle it for perfect marbling.
Let’s Create the Swirl: Step-by-Step
Follow these steps, and you’ll have a tray of edible art in no time. I’m walking you through every twist and turn!
- Make the Master Dough. In a large bowl, cream your softened butter and sugar together with a hand mixer or stand mixer fitted with the paddle attachment. Don’t rush this! Beat on medium-high for a solid 2-3 minutes until it’s pale, fluffy, and almost looks like whipped cream. This incorporates air, which equals a lighter cookie. Scrape down the bowl. Add the eggs one at a time, beating well after each so they fully incorporate. Mix in the vanilla.
- Bring It Together. In a separate bowl, whisk together your flour, baking powder, baking soda, and salt. With your mixer on low, add the dry ingredients to the wet in two additions. Mix just until no dry flour remains. Overmixing at this stage leads to tough cookies. We want tender!
- Divide and Conquer. Now, weigh or eyeball dividing your dough evenly into three separate bowls. (Yes, three! One for matcha, one for strawberry, and one for plain vanilla. The vanilla acts as a beautiful, neutral canvas that lets the other colors shine.)
- Color and Flavor Time!
- Bowl 1 (Pink): Add your strawberry powder (or extract+color). Mix with a spatula or your hands until the color is fully, evenly distributed. It smells amazing already, right?
- Bowl 2 (Green): Add your matcha powder. Mix thoroughly. You’ll see that beautiful earthy green come to life.
- Bowl 3 (Vanilla): Leave this one just as it is – our buttery masterpiece.
Chef Hack: If any dough feels too sticky to handle comfortably for marbling, work in 1 teaspoon of flour at a time until it’s pliable but not dry.
- The Marbling Magic – Choose Your Adventure!Method A: The Color Block (My Go-To): Pinch off small, rough pieces of each color of dough (about marble-sized). Press them together randomly into a ball about the size of a golf ball. Give it a gentle twist, then flatten it slightly into a thick disc on your baking sheet. This method gives awesome abstract swirls.
Method B: The Elegant Spiral: Roll a small piece of each color into a short rope. Lay the three ropes side-by-side and pinch them together at one end. Twist them together gently, then coil the twist into a spiral (like a cinnamon bun). Flatten slightly. This gives a stunning, defined swirl pattern.
- Bake to Perfection. Preheat your oven to 350°F (175°C). Line your baking sheets with parchment paper. Space your cookie dough discs about 2 inches apart—they’ll spread a little. Bake for 9 to 11 minutes. You’re looking for the edges to be just barely turning golden. The centers will still look soft—this is perfect! They’ll firm up as they cool. Overbaking is the enemy of a soft, chewy cookie.
- The Patient Part. Let the cookies cool on the hot baking sheet for 5 full minutes. This lets them set. Then, use a spatula to transfer them to a wire rack to cool completely. I know it’s hard to wait, but this prevents breakage and lets the flavors settle.
How to Serve These Showstoppers
Presentation is half the fun with these beauties! For a simple afternoon treat, pile them high on a rustic wooden board or a vintage plate. They pair divinely with a cup of hot green tea, a latte, or a glass of cold milk.
Want to make them gift-ready? Stack a few in a clear cellophane bag tied with baker’s twine, or arrange them in a decorative tin lined with parchment. They’re the perfect “just because” or “thank you” gift that always wows. For a party, create a dessert platter with these, some dark chocolate-dipped fruits, and maybe some mini macarons. The color combo is simply unforgettable.
Make It Your Own: Fun Variations
Love the marble technique? Let’s play with it! Here are a few of my favorite twists:
- Chocolate Matcha Marble: Swap the strawberry powder for 2 tablespoons of sifted unsweetened cocoa powder. You get a stunning dark brown and green swirl with a classic chocolate-matcha pairing.
- Lemon Blueberry Marble: Use the zest of one lemon and a drop of yellow coloring for one portion. For another, use 1 tablespoon of powdered dried blueberries (processed like the strawberries) for a purple-blue hue. Keep the third vanilla. Bright and zingy!
- “Everything But The…” Marble: Feeling adventurous? Divide dough into four parts. Do matcha, strawberry, cocoa, and leave one vanilla. Combine small pieces of all four for a wild, confetti-like cookie that’s pure fun.
- Gluten-Free Swap: Use a 1:1 gluten-free all-purpose flour blend (I like the ones with xanthan gum already included). The texture will be slightly more delicate but just as delicious.
- Vegan Version: Use a high-quality plant-based butter (sticks, not tubs) and a flax egg (1 tbsp ground flax + 3 tbsp water per egg, set for 5 mins). The marbling works the same way!
Beau’s Kitchen Notes & Stories
Over the years, I’ve learned a few things. First, every batch will be uniquely beautiful—embrace it! No two cookies have the same swirl, and that’s the charm. Second, if your dough gets too soft while you’re working, just pop it in the fridge for 10-15 minutes to firm up. Chilled dough also spreads a little less, giving you a slightly thicker cookie.
This recipe has evolved from that first toddler-assisted batch. I added the vanilla portion later to give the eye a place to rest between the vibrant colors, and I found the freeze-dried berry powder was a game-changer for flavor. Baking, like life, is all about happy evolution. Don’t be afraid to make it your own!
Your Questions, Answered
- Q: My colors bled together into a muddy brown/green. What happened?A: This usually means the dough was too warm or was over-mixed when combining the colors. Work with cool dough, and when you press the colors together, do it gently and just enough to adhere. We’re marbling, not fully blending!
- Q: Can I make the dough ahead of time?A: Absolutely! You can prepare the three colored doughs, wrap them tightly in plastic wrap, and refrigerate for up to 2 days. Let them sit at room temp for 15-20 minutes to become pliable before marbling and baking.
- Q: My matcha tastes bitter. How can I prevent that?A: Two tips: 1) Use a higher-quality matcha meant for drinking (ceremonial grade). Lower-grade “culinary” matcha can be harsh. 2) Ensure your baking powder and soda are fresh. Old leaveners can create a bitter aftertaste that amplifies the matcha’s bitterness.
- Q: The cookies spread too much and lost their swirl definition.A: Your butter was likely too soft or the dough wasn’t chilled. Next time, ensure your butter is just soft, not melty. If your kitchen is hot, chill the shaped cookies on the baking sheet for 10 minutes before putting them in the oven.
Strawberry Matcha Marble Cookies Recipe
Description
These Strawberry Matcha Marble Cookies are soft, buttery, and beautifully swirled with natural green tea and strawberry flavors. They look fancy but are actually simple to make. Perfect for tea time, gifts, or when you want cookies that stand out on the plate.
Ingredients
Base Dough
-
1 cup (227 g) unsalted butter, softened
-
1 cup (200 g) granulated sugar
-
2 large eggs, room temperature
-
1 tsp vanilla extract
-
2¾ cups (345 g) all-purpose flour
-
½ tsp baking powder
-
½ tsp baking soda
-
¼ tsp salt
Flavor Swirls
-
1 tbsp matcha powder
-
1 tbsp freeze-dried strawberry powder
(or ½ tsp strawberry extract + tiny drop pink food color) -
2–3 tsp extra flour (only if dough gets sticky)
Instructions
-
Preheat oven to 350°F (175°C). Line baking sheets with parchment.
-
Cream butter & sugar
Beat butter and sugar for 2–3 minutes until light and fluffy. -
Add wet ingredients
Mix in eggs one at a time, then vanilla. -
Mix dry ingredients
In another bowl whisk flour, baking powder, baking soda, and salt. -
Combine
Add dry ingredients to wet and mix just until a soft dough forms. -
Divide dough
Split evenly into 3 bowls. -
Flavor & color
-
Bowl 1: mix in matcha powder
-
Bowl 2: mix in strawberry powder
-
Bowl 3: leave plain vanilla
If sticky, mix in a little extra flour.
-
-
Marble the dough
Pinch small pieces of each color, press together, gently twist, and roll into balls. Flatten slightly into thick discs. -
Bake
Place 2 inches apart. Bake 9–11 minutes until edges are lightly golden and centers look soft. -
Cool
Let rest 5 minutes on tray, then move to rack.
Notes
-
Use soft, not melted butter for good texture.
-
Don’t overmix after adding flour — keeps cookies tender.
-
If dough gets warm, chill 10–15 minutes before shaping.
-
Twist colors gently — too much mixing will blur the marble.
-
Better matcha = brighter color and smoother flavor.
Nutritional Info (Because We Like to Know!)
Here’s a general estimate per cookie (based on a yield of 24). Remember, this is a treat meant to be savored for its joy and flavor!
- Calories: ~140
- Fat: 7g
- Carbohydrates: 18g
- Sugar: 9g
- Protein: 2g
These values are approximate and can vary based on specific ingredients used and cookie size. The matcha does provide a small dose of antioxidants (like EGCG) and a gentle lift from natural caffeine, while the strawberry powder adds a touch of vitamin C. Mostly, though, they provide a big dose of baking happiness!
Final Thoughts from My Kitchen to Yours
And there you have it, friends – the full story of my beloved Strawberry Matcha Marble Cookies. More than just a recipe, I hope this is an invitation to play in the kitchen, to embrace beautiful imperfections, and to create something that delights all the senses.
The best part about these cookies isn’t just how stunning they look on Instagram (though, go ahead, snap that pic!). It’s the moment you break one in half to see the unique swirl inside, or the smile on someone’s face when you offer them a plate. It’s food that feels like a celebration. So, give it a whirl, make a glorious mess, and taste the magic. Happy baking!
Always remember – in my kitchen and yours, food should taste like a warm hug. Now, go enjoy your well-earned cookies!

Crab Stuffed Salmon Pinwheels
Crab Stuffed Salmon Pinwheels – Your New Go-To Elegant Seafood Dinner
Hey there, friend! Beau here from Feastical. Tell me if this sounds familiar: You want to make a meal that feels special, maybe for a date night at home or when you’ve got friends coming over. You want that “wow” factor, the kind of dish that makes everyone’s eyes light up when you bring it to the table. But you also don’t want to spend your entire evening slaving over a hot stove, juggling seventeen pans, and feeling like you need a sous chef just to get through it.
I’ve been there more times than I can count. That’s why I’m absolutely obsessed with these Crab Stuffed Salmon Pinwheels. They look like you trained under a Michelin-starred chef, but the process is so straightforward and forgiving. We’re taking beautiful, flaky salmon and rolling it around a luxurious, flavorful crab stuffing that’s inspired by the best parts of a classic crab cake. Then we bake it until it’s just perfectly cooked. The result? A gorgeous spiral of tender salmon and creamy, savory filling that’s bursting with flavor in every single bite.
This recipe is the definition of “elevated easy.” It’s the secret weapon in my back pocket for making any dinner feel like a celebration. So, tie on your apron, grab your favorite baking sheet, and let’s create some kitchen magic that’s guaranteed to get you compliments. Trust me, this is one of those recipes you’ll come back to again and again.
The Beach Trip That Inspired a Feast
This recipe always takes me back to a chaotic, wonderful family trip to the Oregon coast a few summers ago. We rented a tiny cabin with an even tinier kitchen, and I was tasked with cooking a “nice dinner” one night with groceries we’d just grabbed from a local fish market. I had stunning wild-caught salmon and a container of fresh Dungeness crab meat staring back at me.
The problem? Minimal tools. One pan, a wonky oven, and a very skeptical audience (my nieces were deep in a chicken nugget phase). I knew I had to make something impressive but foolproof. I remembered the technique of rolling meat around a filling from an old cookbook and just went for it, mixing the crab with whatever we had on hand—some crackers, mayo, and veggies. When those pinwheels came out of the oven, golden and smelling like the sea, the whole crowd went silent… then devoured them. It was the hit of the trip. It proved that great food isn’t about fancy equipment; it’s about simple, good ingredients combined with a little bit of love and courage. That’s the spirit I want to bring to your kitchen today.
Gathering Your Flavor Team: Ingredients & Insights
Here’s everything you’ll need to build these beautiful pinwheels. Think of this as your flavor team, and each player has an important role!
- 2 lbs center-cut skinless salmon filet: This is your canvas. A center-cut piece is more uniform in thickness, which makes rolling so much easier. You can ask your fishmonger to remove the skin, or do it yourself with a sharp, flexible knife. Chef’s Insight: If wild salmon is available, its firmer texture and richer flavor are fantastic here, but a good quality farm-raised Atlantic salmon works beautifully and is often more budget-friendly.
- ½ lb lump crab meat: The star of the stuffing! I prefer fresh lump crab for its sweet, delicate flavor and nice chunks. Substitution Tip: Canned lump crab (drained well) or even high-quality claw meat are perfect, cost-effective alternatives. Just avoid “surimi” (imitation crab stick) for this—it changes the flavor profile completely.
- ¾ cup mayonnaise: This is our binder and adds wonderful creaminess. Chef’s Insight: A good, full-fat mayo is key here for flavor and structure. For a tangier twist, you could swap half with sour cream.
- ¾ cup plain Italian breadcrumbs: They soak up moisture, add texture, and the subtle herbs in Italian-style crumbs are a bonus. Substitution Tip: Panko breadcrumbs will give a slightly airier texture. For a gluten-free version, use gluten-free breadcrumbs or crushed pork rinds for a low-carb option.
- The “Holy Trinity” Sauté: ¼ cup each of diced yellow onion, celery, and green bell pepper. This classic combo builds a foundational layer of savory flavor. Sautéing them first is non-negotiable—it softens their bite and sweetens them up.
- 4 tablespoons unsalted butter + 2 tablespoons olive oil: We use both for sautéing. The butter gives incredible flavor, and the olive oil raises the smoke point so the butter doesn’t burn. A perfect partnership!
- 1 tablespoon fresh lemon juice: Brightness is essential with rich seafood. Chef’s Insight: Please, please use fresh lemon juice here. The bottled stuff just doesn’t bring the same vibrant, clean acidity.
- 1 teaspoon Worcestershire sauce: Our secret umami booster. It adds a deep, savory note that makes the filling taste “complete.”
- 1 teaspoon paprika: For a warm, subtle color and a hint of sweetness. Smoked paprika is a fun twist if you love a smoky flavor.
- Fresh Herbs: 3 tablespoons chopped parsley & 2 tablespoons chopped chives, divided. We mix most into the filling and save some for a fresh, green garnish at the end. They add a pop of color and a garden-fresh flavor.
- Kosher salt and freshly ground black pepper: Season at every stage! Taste your filling before adding the crab.
Let’s Get Rolling: Step-by-Step Instructions
Don’t let the fancy look intimidate you. We’re going to break this down into simple, manageable steps. I’ll be with you the whole way with my best tips and hacks.
- Prep Your Station & Preheat: Crank your oven to 400°F (200°C). This high heat will give us a beautiful cook on the salmon and a lightly golden top. While it heats, chop all your veggies and herbs. This “mise en place” (everything in its place) makes the actual cooking process a calm, joyful breeze.
- Sauté the Veggie Trinity: In a medium sauté pan, heat the olive oil and 2 tablespoons of the butter over medium heat. Once the butter melts and foams a bit, add the diced onion, celery, and bell pepper. Cook, stirring occasionally, for about 5-6 minutes. You want them soft and fragrant, but not browned. Take the pan off the heat and let this mixture cool for a few minutes. Chef’s Hack: Spreading them on a plate speeds up the cooling!
- Build the Crab Filling: In a medium mixing bowl, combine the cooled sautéed veggies, mayonnaise, breadcrumbs, lemon juice, Worcestershire, paprika, and about two-thirds of your chopped parsley and chives. Mix it well until it’s a cohesive, creamy mixture. Now, season it generously with salt and pepper. Here’s the crucial part: gently fold in the crab meat. Use a spatula and a light touch—we want to preserve those beautiful lumpy pieces, not turn it into paste.
- Prepare the Salmon Canvas: Pat your salmon filet completely dry with paper towels. Place it on a cutting board. Using a sharp knife, slice the filet in half lengthwise, so you have two long, thinner strips. Lightly season both sides of each strip with salt and pepper.
- The Roll-Up: Divide the crab filling evenly between the two salmon strips, spreading it in an even layer over the entire surface, leaving just a tiny border at one of the short ends. Starting from the opposite short end, tightly roll up the salmon jelly-roll style. Don’t be shy—a tight roll is a good roll! If they feel a little loose, you can secure the seam with a couple of toothpicks. Chef’s Hack: For easier slicing, pop the rolls in the freezer for 10-15 minutes to firm up.
- Slice & Bake: Using a very sharp serrated knife, carefully slice each log in half, creating two large pinwheels per roll (four total). Place them seam-side down on a parchment-lined or lightly greased baking sheet. Melt the remaining 2 tablespoons of butter and brush it lightly over the tops of each pinwheel—this promotes gorgeous browning.
- Bake to Perfection: Slide the baking sheet into your preheated oven. Bake for 15-18 minutes. The salmon should be opaque and flake easily with a fork, and the filling should be hot and golden on top. Because ovens vary, start checking at 15 minutes. Remember, salmon continues to cook a bit after it comes out, so it’s okay if it looks *just* done in the center.
- Garnish & Serve: Once out of the oven, let the pinwheels rest for 2-3 minutes. This lets the juices settle. Then, sprinkle with the remaining fresh parsley and chives for that final touch of color and freshness. Time to plate up!
Plating Up Your Masterpiece
Presentation is part of the fun! I like to place one gorgeous pinwheel in the center of a warm plate. The golden-brown top and the spiral are the showstoppers, so don’t cover them up. Here are a few ways to complete the plate:
- Keep it Light & Fresh: A simple arugula salad with a lemon vinaigrette or a pile of roasted asparagus is perfect. The freshness cuts through the richness.
- Go for Comfort: For a truly decadent meal, serve alongside creamy garlic mashed potatoes or fluffy jasmine rice. Spoon any pan juices over the top.
- Add a Sauce: While they don’t *need* it, a little dish of lemon-dill aioli or a simple beurre blanc takes it to a whole new restaurant level.
- Garnish Smart: A thin lemon wheel or twist on the side, plus those fresh herbs, makes everything look intentional and elegant.
Make It Your Own: Delicious Recipe Variations
Once you’ve mastered the classic, play around! Here are some of my favorite twists:
- The “Cajun Kick”: Add 1 tsp of Creole or Cajun seasoning to the filling, and swap the green pepper for diced andouille sausage. Brush the tops with a little hot sauce mixed into the melted butter.
- Herb Garden Delight: Swap the parsley for fresh dill or tarragon, which pair phenomenally with both salmon and crab. Add a teaspoon of Dijon mustard to the filling for extra zing.
- Lemon-Zested Bliss: Add the zest of one whole lemon to the filling for an incredible burst of citrus fragrance. It brightens the entire dish.
- Dairy-Free & Lighter: Use a high-quality avocado oil mayonnaise and replace the butter for sautéing with all olive oil. It’s still incredibly flavorful.
- Shrimp Scampi Twist: No crab? No problem! Use an equal amount of finely chopped cooked shrimp and add a clove of minced garlic to the veggie sauté.
Beau’s Chef Notes & Kitchen Confessions
This recipe has seen many iterations in my kitchen. I once, in a pre-dinner panic, used crushed Ritz crackers instead of breadcrumbs because it was all I had. Guess what? It was outrageously delicious and added a buttery note everyone loved. So don’t stress about perfection.
The biggest lesson I’ve learned is the power of the “chill before slicing” step. That first time on the beach, I didn’t do it, and my rolls were a bit messy. A short rest in the freezer firms everything up and gives you those clean, photo-worthy slices. It’s a game-changer. Also, these are fantastic for making ahead! Assemble the whole rolls, wrap them in plastic, and refrigerate for up to 8 hours before slicing and baking. It turns dinner party stress into serene confidence.
Your Questions, Answered: FAQs & Troubleshooting
Q: My salmon pinwheel unrolled in the oven! What happened?
A: This usually means the roll wasn’t quite tight enough, or the filling was too wet (excess liquid from the crab or veggies). Make sure to drain your crab well and cool your sautéed veggies completely. Also, don’t overfill—a ½-inch layer is plenty. The toothpick trick is your friend, and chilling before baking helps the roll hold its shape.
Q: Can I use frozen salmon?
A: Absolutely. Thaw it completely in the refrigerator overnight, then pat it extremely dry. Thawing slowly in the fridge is key to preserving texture.
Q: How do I know when the salmon is done without overcooking it?
A: The visual and texture test is best. The salmon will turn from translucent to opaque pink, and it will flake easily when nudged with a fork. An instant-read thermometer inserted into the thickest part of the salmon (not just the filling) should read between 125°F and 135°F for medium-rare to medium. It will carryover cook to the safe 145°F.
Q: What’s the best way to reheat leftovers?
A: To prevent dryness, reheat gently. Place pinwheels in a covered oven-safe dish with a splash of water or broth at 325°F for 10-12 minutes, or use the microwave at 50% power in short bursts. They’re also fantastic cold on a salad the next day!

Crab Stuffed Salmon Pinwheels
Description
If you want a dinner that looks restaurant-level but is totally doable at home, these crab stuffed salmon pinwheels are a perfect choice. Tender salmon is rolled around a creamy, savory crab filling and baked until flaky and golden. They’re ideal for date nights, small dinner parties, or anytime you want a meal that feels special without complicated steps.
Ingredients
Servings: 4
Prep Time: 20 minutes
Cook Time: 15–18 minutes
Ingredients
For the salmon
-
2 lb center-cut skinless salmon fillet
-
Salt and black pepper
-
2 tablespoons melted butter (for brushing)
For the crab filling
-
½ lb lump crab meat, well drained
-
¾ cup mayonnaise
-
¾ cup Italian breadcrumbs (or panko)
-
¼ cup finely diced onion
-
¼ cup finely diced celery
-
¼ cup finely diced green bell pepper
-
2 tablespoons olive oil
-
2 tablespoons butter
-
1 tablespoon fresh lemon juice
-
1 teaspoon Worcestershire sauce
-
1 teaspoon paprika
-
3 tablespoons chopped fresh parsley
-
2 tablespoons chopped fresh chives
-
Salt and pepper to taste
Instructions
-
Preheat oven
Heat oven to 400°F (200°C). Line a baking sheet with parchment or lightly grease it. -
Sauté the vegetables
Heat olive oil and 2 tablespoons butter in a pan over medium heat. Add onion, celery, and bell pepper. Cook 5–6 minutes until soft. Cool slightly. -
Make the filling
In a bowl, mix sautéed vegetables, mayonnaise, breadcrumbs, lemon juice, Worcestershire, paprika, and most of the herbs. Season with salt and pepper. Gently fold in crab meat so the lumps stay intact. -
Prepare the salmon
Pat salmon dry. Slice lengthwise into two long, thinner pieces. Season both sides with salt and pepper. -
Fill and roll
Spread crab mixture evenly over each salmon strip, leaving a small border at one short end. Roll up tightly from the opposite end. Secure with toothpicks if needed. -
Chill briefly (recommended)
Chill rolls in the freezer for 10–15 minutes to firm up for easier slicing. -
Slice and arrange
Cut each roll in half to create pinwheels. Place seam-side down on the baking sheet. Brush tops with melted butter. -
Bake
Bake 15–18 minutes until salmon is opaque and flakes easily and the tops are lightly golden. -
Finish
Rest 2–3 minutes, then sprinkle with remaining herbs and serve.
Notes
-
Drain crab well so the filling isn’t too wet.
-
Cool the sautéed veggies before mixing — heat can loosen the filling.
-
Roll tightly to keep the spiral shape.
-
Use a sharp serrated knife for clean slices.
-
Salmon is done when it flakes easily or reaches about 125–135°F in the fish portion.
Nutritional Information (Per Serving)
Please note: The following is an estimate based on the specific ingredients listed. Values will vary with substitutions.
- Calories: 914
- Protein: 59g
- Carbohydrates: 18g
- Dietary Fiber: 2g
- Total Fat: 66g
- Saturated Fat: 16g
- Sodium: 1170mg
This dish is an excellent source of high-quality protein and heart-healthy omega-3 fatty acids from the salmon. The majority of the fat content comes from these beneficial fats, along with the oils and butter used in cooking. To reduce sodium, you can use low-sodium breadcrumbs and mayonnaise, and be mindful of added salt.
Final Thoughts from My Kitchen to Yours
There you have it, my friend—the recipe that turns a simple Tuesday into a special occasion and makes holiday dinners effortlessly impressive. What I love most about these Crab Stuffed Salmon Pinwheels is that they celebrate the joy of cooking: taking a few fantastic ingredients, using a simple but clever technique, and creating something that truly delights the people you share it with.
So, the next time
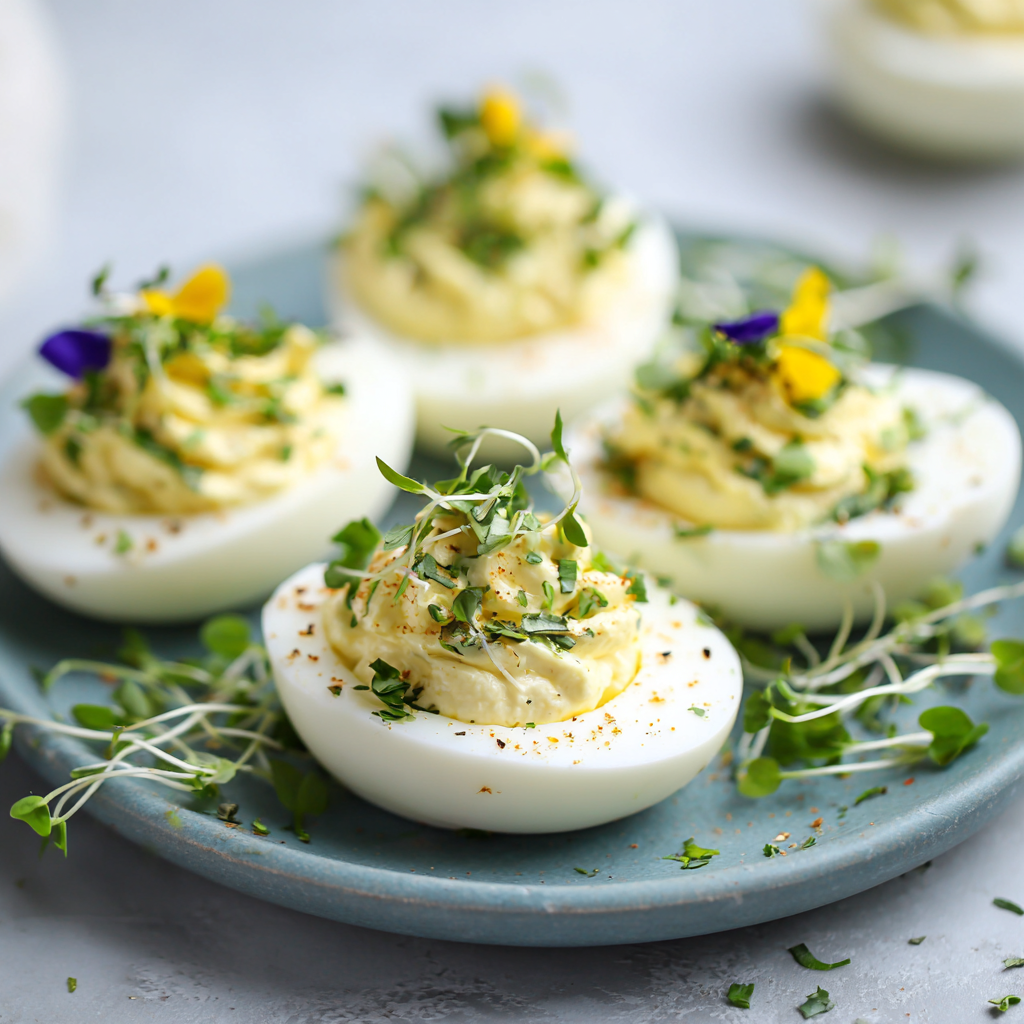
Lemon Herb Ricotta Deviled Eggs : Light, Fluffy & Perfect for Spring
Lemon Herb Ricotta Deviled Eggs – Light, Fluffy & Perfect for Spring
Hey there, friends! Beau here, welcoming you back to my kitchen at Feastical. Can you feel it? That little shift in the air, the extra hour of golden sunlight, the first brave blooms pushing through the soil? Spring isn’t just a season on the calendar; it’s a full-body sigh of relief and a burst of creative energy, especially in the kitchen. It’s the time we start craving food that feels as bright and renewed as the world outside our window. We want flavor that sings, colors that pop, and dishes that gather people around the table without keeping us tied to the stove all day.
And that, my friends, is exactly where our beloved deviled eggs saunter in. Now, don’t get me wrong—I will defend a classic, mayo-heavy, paprika-dusted deviled egg to my last breath at a summer potluck. They’re iconic for a reason! But for spring? I want something that feels a little more elegant, a little lighter on its feet, but still delivers that soul-satisfying, creamy-rich bite we all love.
So, I started tinkering. I wanted clouds. I wanted a filling so airy and light it practically floats onto the spoon. I wanted the zesty, sunny kiss of lemon and the fresh, green confetti of herbs in every bite. After a few happy (and a couple of hilarious) kitchen experiments, I landed on this magical combination: Lemon Herb Ricotta Deviled Eggs. By folding whole-milk ricotta into the filling, we create a texture that’s incredibly fluffy and subtly rich, while cutting through the heaviness. The lemon zest and juice wake everything up, and the herbs make it taste like you just gathered them from the garden.
These aren’t just deviled eggs; they’re little, edible promises of warmer days. They’re perfect for your Easter brunch spread, a baby or bridal shower, a Mother’s Day gathering, or just because you want a Tuesday afternoon snack that feels like a celebration. They come together in under 20 minutes, look gorgeous on any platter, and never fail to get those “what IS in these?” compliments. So, let’s grab our favorite bowl and whisk, and make something beautiful together!
The Picnic That Inspired a Lighter Bite
This recipe has a little bit of my Grandma Ethel in its DNA, though she’d probably raise an eyebrow at the ricotta. My most vivid childhood food memories orbit around her towering platters of deviled eggs for every family reunion. They were a production. She’d hum while she carefully popped the yolks through a sieve, claiming it was the only way to get them “silky smooth.” The filling was rich, decadent, and always, always dusted with a perfect red circle of paprika from her special tin.
A few springs ago, my wife and I planned an ambitious picnic—the kind with a real wicker basket and a checkered blanket. I wanted to bring a nod to Grandma Ethel’s tradition, but a full mayo-based version felt too heavy for the fresh asparagus and strawberry salad we’d packed. Staring into the fridge, I saw a container of ricotta I’d bought for lasagna. On a whim, I swapped half the mayo for a big spoonful of it. I grated some lemon zest over the bowl, thinking of the lemon trees in our backyard, and snipped some chives from the window box.
The result was a revelation. The filling was cloud-light, yet still satisfying. The lemon made it taste sunny, and the fresh chives were like a bite of spring itself. When we bit into them on that blanket, with the sun on our faces, it felt like I’d successfully updated a classic for a new season—both literally and figuratively. Now, every time I make these, I think of that perfect picnic and hope they bring a little bit of that easy, sunny joy to your table, too.
Gathering Your Sunshine Ingredients
Here’s the beautiful part: the ingredient list is short, sweet, and focused on quality. Each one plays a starring role, so let’s break it down. This isn’t just a list; it’s your flavor roadmap.
- 6 large eggs, hard-boiled and peeled: The foundation! I find older eggs (about 7-10 days old) peel more easily than super-fresh ones. For the absolute perfect hard-boiled egg with a creamy, not chalky, yolk and no green ring, check my chef’s hack in the instructions below.
- ¼ cup whole-milk ricotta cheese: Our secret weapon for fluffiness! The mild, slightly sweet creaminess of ricotta lightens the filling beautifully. For the best texture, let it drain in a fine-mesh sieve for 10 minutes if it seems watery. A good, full-fat ricotta makes all the difference here.
- 1½ tbsp mayonnaise: This binds everything together and adds that familiar, tangy richness. Chef’s Insight: For an even brighter, tangier twist, you can substitute an equal amount of full-fat plain Greek yogurt. It’s fantastic!
- Zest of ½ lemon + 1 tsp lemon juice: Sunshine in two forms! The zest gives powerful, aromatic lemon oil without the sour punch, while the juice adds the necessary bright acidity. Always zest your lemon before you juice it—it’s a game-changer.
- 1 tbsp chopped fresh herbs: The green confetti! I love a mix of parsley for freshness, dill for its grassy note, and chives for a mild onion flavor. Use what you love or have on hand. Pro Tip: In a pinch, 1 teaspoon of a high-quality dried dill can work, but fresh is truly magical here.
- Salt and pepper to taste: Don’t underestimate these. They are the conductors that make the whole flavor orchestra sing. Season thoughtfully!
- Optional garnishes: This is where you make them look like spring on a plate! I adore microgreens (pea shoots are perfect), tiny edible flowers like pansies, a sprinkle of paprika for that classic touch, or just a tiny leaf of fresh dill.
Step-by-Step: Crafting Your Fluffy Clouds
Ready to make some magic? Let’s walk through this together. I’ll share all my little kitchen hacks to ensure your deviled eggs are nothing short of spectacular.
- The Perfect Hard-Boiled Egg (My Foolproof Method): Place your eggs in a single layer in a saucepan and cover with cold water by about an inch. Bring the pot to a rolling boil over high heat. As soon as it hits a full boil, put the lid on and turn the heat OFF. Let the eggs sit in that hot, covered pot for exactly 12 minutes. Meanwhile, prepare an ice bath (a big bowl of water and ice). After 12 minutes, use a slotted spoon to immediately transfer the eggs to the ice bath. Let them chill for at least 15 minutes. This method gives you tender whites and a creamy, perfectly yellow yolk every single time. Peeling under a tiny stream of running water also helps!
- Prep the Egg Whites: Once your eggs are cool and dry, gently tap them on the counter and roll them to crack the shell all over. Peel carefully. Using a sharp knife, slice each egg in half lengthwise. Pop the yolks out into a medium mixing bowl. Place the pristine white halves on your serving plate or a tray. Chef’s Hack: If you want your whites to sit flat and not wobble, take a tiny slice off the bottom of each half. It creates a stable base!
- Create the Fluffy Filling: To the bowl with yolks, add your drained ricotta, mayonnaise (or yogurt), lemon zest, lemon juice, and chopped herbs. Now, here’s my favorite part: instead of just mashing, I like to use a fork to whip and fold everything together. You’re aiming for a smooth, homogeneous, and airy mixture. Get in there and really whip it for a minute—it makes the texture incredible. Season generously with salt and freshly cracked black pepper. Taste it! Does it need more lemon? More herb? Adjust to your heart’s content.
- Fill ‘Em Up: You can spoon the filling neatly into the wells of the egg whites, but for a truly professional (and gorgeous) look, piping is the way to go. Scoop your filling into a plastic zip-top bag, push it down to one corner, and snip about a ½-inch off that corner. Instant piping bag! Gently squeeze fluffy clouds of filling into each egg white half. Swirl the bag as you lift for a pretty little peak.
- The Final Flourish (Garnish & Chill): This is where your personality shines! Scatter over your microgreens, place a tiny herb leaf on each, or add a delicate edible flower. Once garnished, cover the platter loosely with plastic wrap and pop it in the fridge for at least 30 minutes before serving. This chilling time lets the flavors really get to know each other and firms up the filling perfectly.
Serving Your Spring Masterpiece
Presentation is half the fun with a dish like this! You’ve created little bites of art, so let’s show them off. I love using a simple, rustic wooden board or a pristine white platter—both make the colors of the eggs and garnishes really pop. Arrange them in a swirling circle or in neat rows. Tuck in a few extra sprigs of the herbs you used around the edges of the platter for a gorgeous, organic look.
These Lemon Herb Ricotta Deviled Eggs are the ultimate team players. They’re the star of any spring or summer appetizer spread. Pair them with a crisp, dry rosé or a sparkling lemonade. They’re perfect alongside a fresh green salad with a lemon vinaigrette, a platter of roasted asparagus, or as part of a grand brunch with smoked salmon and buttery croissants. Honestly, they’re so good, I’ve been known to make a batch just for myself as a high-protein, satisfying lunch with a side of sliced cucumbers. No judgment here!
Make It Your Own: Delicious Twists & Swaps
The beauty of this recipe is its incredible flexibility. Once you master the basic fluffy formula, the flavor world is your oyster! Here are a few of my favorite riffs:
- The “Everything Bagel” Twist: Omit the lemon and herbs. To the filling, add 1 tablespoon of Everything Bagel seasoning, plus an extra teaspoon of finely minced fresh chives. Garnish with more seasoning and a tiny piece of smoked salmon on top. Unreal.
- Mediterranean Sunshine: Add 1 tablespoon of finely crumbled feta cheese to the filling along with the ricotta. Swap the herbs for fresh oregano and mint. Garnish with a sliver of Kalamata olive and a tiny drizzle of extra virgin olive oil.
- Keto/Low-Carb Friendly: This recipe is already a great fit! Just ensure your mayonnaise is made with a keto-friendly oil (like avocado oil), and you’re golden. The ricotta adds fat and protein with minimal carbs.
- Herb Garden Explosion: Go wild with soft herbs! Try a combination of tarragon (just a little—it’s potent), chervil, basil, and parsley. Each bite will be a little different and wonderfully complex.
- Spicy Chipotle Lime: For a smoky, spicy kick, replace the lemon with lime zest and juice. Add ½ teaspoon of chipotle powder (or adobo sauce from a can) to the filling. Garnish with a thin slice of jalapeño.
Beau’s Kitchen Notes & Stories
This recipe has become such a staple in my home that it’s evolved in funny ways. The first time I served them to my brother, a devout classic-deviled-egg purist, he took one bite, paused, and said, “Okay, you’ve ruined me for the old kind.” High praise!
One of my favorite kitchen “hacks” is actually a mindset one: don’t stress about making them look absolutely perfect. A slightly rustic, hand-spooned filling has its own charming, homemade appeal. I’ve also learned that if your filling seems a bit too loose after mixing (ricotta brands vary), you can pop the whole bowl in the fridge for 15 minutes to firm up before piping. And the biggest lesson? Always make a couple extra eggs. There’s a universal kitchen law that at least two egg white halves will mysteriously disappear to the taste-tester (usually me) before they even hit the platter.
Your Questions, Answered (FAQs & Troubleshooting)
Q: Can I make these ahead of time?
A: Absolutely! They are a fantastic make-ahead appetizer. You can boil and peel the eggs up to 2 days in advance. Store the whites and yolk mixture separately in airtight containers in the fridge. Assemble and garnish no more than a few hours before serving for the freshest look and taste.
Q: My filling is a bit runny. What did I do wrong?
A: No worries! This usually happens if the ricotta was particularly wet or the yolks were still warm. First, chill the mixture for 20-30 minutes. If it’s still too soft, you can gently fold in a tiny sprinkle of finely grated Parmesan cheese—it will absorb moisture and add a nice salty depth.
Q: I don’t have fresh herbs. Can I use dried?
A: You can, but the flavor will be more muted and earthy than bright and fresh. If using dried, reduce the amount to 1 teaspoon total (dried herbs are more concentrated), and consider adding an extra tiny squeeze of lemon juice at the end to compensate for the lost freshness.
Q: How long do they last in the fridge?
A: Once assembled, they’re best enjoyed within 24 hours. The whites can start to get a little rubbery and the herbs can wilt after that. They’re so delicious, though, I doubt they’ll last that long!
Lemon Herb Ricotta Deviled Eggs : Light, Fluffy & Perfect for Spring
Description
These lemon herb ricotta deviled eggs are a fresh, elegant twist on the classic version. Ricotta makes the filling extra light and creamy, while lemon and herbs add a bright, garden-fresh flavor. They’re quick to prepare, beautiful on a platter, and perfect for spring brunches, showers, or warm-weather gatherings.
Ingredients
-
6 large eggs
-
¼ cup whole-milk ricotta cheese (well drained if watery)
-
1½ tablespoons mayonnaise (or Greek yogurt)
-
Zest of ½ lemon
-
1 teaspoon fresh lemon juice
-
1 tablespoon finely chopped fresh herbs (parsley, dill, chives, or mix)
-
Salt and black pepper, to taste
Optional Garnish
-
Extra herbs
-
Microgreens
-
Light sprinkle of paprika
-
Lemon zest strands
Instructions
-
Cook the eggs
Place eggs in a saucepan and cover with cold water by about 1 inch. Bring to a boil, then cover and turn off heat. Let sit 12 minutes. -
Cool and peel
Transfer to an ice bath for 10–15 minutes. Peel and pat dry. -
Slice and separate
Cut eggs in half lengthwise. Remove yolks to a bowl and arrange whites on a plate. -
Make the filling
Mash yolks finely with a fork. Add ricotta, mayonnaise, lemon zest, lemon juice, and herbs. Whip with a fork until smooth and fluffy. Season with salt and pepper to taste. -
Fill the eggs
Spoon or pipe filling into egg white halves. -
Garnish and chill
Add garnishes if using. Chill at least 30 minutes before serving for best texture and flavor.
Notes
-
Drain ricotta if needed — excess moisture makes the filling loose.
-
Zest before juicing the lemon — it’s much easier.
-
Use fresh herbs for the brightest flavor.
-
Pipe with a zip-top bag for a neat, bakery-style look.
-
If filling is soft, chill it 20 minutes before piping.
Nutritional Breakdown (Because We’re Curious!)
While we’re all about the joy of food here at Feastical, I know some folks like to have the facts. Here’s a general nutritional estimate for two deviled egg halves (because who eats just one?). Please note, these are estimates and can vary based on your specific ingredient brands and amounts used.
Per Serving (2 halves): Calories: ~100 | Protein: 6g | Total Fat: 8g | Saturated Fat: 2.5g | Carbohydrates: 1g | Fiber: 0g | Sugar: 0.5g | Sodium: 90mg
Final Thoughts
These Lemon Herb Ricotta Deviled Eggs are so much more than just an appetizer—they’re a little taste of spring, a lightened-up classic, and a guaranteed conversation starter at any gathering. By folding whole-milk ricotta into the filling, we’ve created something truly special: a texture that’s ethereally fluffy yet satisfyingly rich, brightened with sunny lemon and confettied with fresh herbs.
What I love most about this recipe is how it bridges tradition and freshness. It honors the beloved, comforting essence of deviled eggs while feeling perfectly suited for brighter days and lighter meals. They come together in minutes but taste like you fussed for hours—the kind of effortless elegance that makes hosting feel joyful, not stressful.
Whether you’re setting them out for Easter brunch, a spring picnic, or just a weeknight treat, these eggs carry with them a sense of celebration. They remind us that good food doesn’t have to be complicated to be memorable. It just needs to be made with a little attention, a few quality ingredients, and maybe a story or two stirred in.
So here’s to sunny days, shared tables, and recipes that feel like a breath of fresh air. I hope these become a bright spot in your spring and summer gatherings, just as they have in mine.
Happy cooking, friends — and may your kitchen always be filled with flavor and light.
Beau
Pesto Deviled Eggs : Fresh, Bright & Full of Flavor
Pesto Deviled Eggs – Fresh, Bright & Full of Flavor
Hey friends, Beau here from Feastical! Let’s talk about that magical moment at any gathering—you know the one. You’ve got a plate in hand, you’re scanning the appetizer table, and your eyes lock onto something familiar yet intriguing. That’s where these Pesto Deviled Eggs live. They’re the guest of honor that shows up wearing a fabulous green accessory, turning heads and prompting that wonderful, “Oh, what’s *this*?”
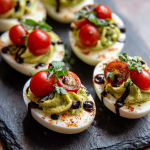
We all love a classic deviled egg. It’s a creamy, comforting bite of nostalgia. But today, we’re giving that beloved bite a sun-drenched, Italian-inspired makeover. We’re blending those rich, velvety yolks with vibrant, herbaceous basil pesto. The result? A flavor that’s like a garden party in your mouth—fresh, savory, and utterly irresistible. Topped with a juicy, sweet cherry tomato half, it’s the perfect one-bite balance. They’re deceptively simple to make, but they scream “you fussed,” in the very best way. Whether it’s a picnic, a holiday bash, or just a Tuesday night treat because you deserve it, these eggs are your new secret weapon. So, let’s roll up our sleeves, grab a bowl, and make something deliciously memorable together.
The Picnic That Started It All
This recipe has a little story, as the best ones often do. A few summers back, my friends threw a last-minute “bring-a-dish” picnic in the park. I was in a rush, staring into a fridge that held the usual suspects: eggs, a half-used jar of pesto from pasta night, and some cherry tomatoes threatening to go soft. The classic deviled egg recipe felt… expected. In a moment of “what the heck” inspiration, I swirled that glorious green pesto right into the yolk filling. The transformation was instant! That first taste was a revelation—the familiar comfort of the egg, now singing with the bright, garlicky notes of basil and Parmesan. They were the first empty plate on the blanket that day. Friends who usually passed on deviled eggs were coming back for seconds. It was a beautiful reminder that the most celebrated dishes often come from a little playful experimentation and using what you’ve got. Now, I can’t imagine a party without them. They’re my edible little memory of a perfect, sunny afternoon.
Gathering Your Flavor Allies
Here’s the beautiful part: the ingredient list is short and sweet. This is all about letting a few high-quality components shine. Let’s break it down.
- 6 large eggs: The foundation. Large eggs are the sweet spot for deviled eggs—great yolk-to-white ratio. Pro tip: Older eggs (about 7-10 days in your fridge) peel easier than super fresh ones! The membrane just lets go better.
- 2 tbsp mayonnaise: Our creamy binder. It adds richness and that signature smooth texture. For a tangier kick, swap in Greek yogurt or sour cream. If you’re a mayo purist, Duke’s or Hellmann’s are my go-tos.
- 1½ tbsp basil pesto: The STAR. This is where the magic happens. A good store-bought pesto works wonderfully in a pinch (look for one with olive oil and real Parm near the top of the ingredient list). But if you have 10 minutes, my homemade pesto will absolutely blow your mind. It’s fresher, brighter, and you control the garlic punch!
- Salt and black pepper, to taste: The essential enhancers. Don’t skip seasoning your filling! Taste as you go. The pesto and mayo have salt, so you might just need a pinch and a good crack of pepper.
For the Toppings:
- Cherry tomato halves: The perfect juicy, sweet counterpoint to the rich filling. They look like little ruby jewels on top. Pat them dry with a paper towel so they don’t slide off!
- Extra pesto drizzle & fresh basil (optional): These are your “chef’s kiss” garnishes. A tiny extra dot of pesto and a shred of fresh basil add a pop of color and an extra layer of flavor that says, “I care about the details.”
Let’s Build Some Bites: Your Foolproof Roadmap
Ready? This process is a breeze. I’ll walk you through each step with my favorite kitchen hacks to ensure deviled egg perfection.
- The Perfect Boil & Peel:Place your eggs in a single layer in a saucepan. Cover them with cold water by about an inch. Bring the pot to a full, rolling boil over high heat. Now, here’s my favorite hack: as soon as it boils, turn off the heat, cover the pot, and set your timer for 11 minutes. This “steam-boil” method is gentler and leads to more consistent, tender whites without that grey ring around the yolk. While they cook, prepare an ice bath (a big bowl of ice water). When the timer goes off, immediately transfer the hot eggs to the ice bath with a slotted spoon. Let them chill for at least 5 minutes. This stops the cooking and contracts the egg inside the shell, making peeling a dream. To peel, gently tap the egg all over on the counter, then roll it under your palm to crackle the shell. Start peeling from the wider end (where there’s an air pocket)—it usually comes off in satisfying sheets.
- Creating the Filling Masterpiece:Slice your perfectly peeled eggs in half lengthwise. Gently pop the yolks out into a medium bowl. Arrange your egg white halves on a serving plate—see? You’re already halfway there! Now, to the yolks: mash them finely with a fork. You want a uniform, crumbly base. Add the mayo, pesto, a pinch of salt, and a few cranks of black pepper. Now, get in there with the fork and stir, stir, stir until it’s incredibly smooth and creamy. No lumps allowed! This is your moment to taste. Need more pesto? Add a teaspoon. Need more zip? A tiny squeeze of lemon juice is divine. Make it yours.
- The Art of Assembly:You can simply spoon the filling back into the wells of the egg whites, and it will be delicious. But for that pro-level look, let’s pipe it. Spoon your filling into a zip-top bag, push it down to one corner, and snip about a ½-inch off that corner. Instant piping bag! Now, pipe a generous, elegant swirl into each egg white. It feels fancy and ensures every bite has the perfect filling-to-white ratio. So satisfying.
- The Grand Finale (Garnish!):Take your halved, patted-dry cherry tomatoes and gently press one onto the peak of each piped filling. If you’re feeling extra (and you should!), use a toothpick to add a tiny drizzle of pesto over the tomatoes or a small leaf or chiffonade of fresh basil. Step back and admire your work. You just made edible art!
Setting the Stage: How to Serve Them
Presentation is part of the joy! Don’t just plop these beauties on a plate. A dedicated deviled egg tray with little divots is a great investment and keeps them from sliding around. No tray? No problem. Line a flat platter or even a rustic wooden board with a bed of greens—arugula, kale, or fresh parsley work beautifully. It adds color and makes the green in the eggs pop even more. Scatter a few extra whole cherry tomatoes and basil sprigs around the platter for that abundant, “just picked from the garden” feel. For a crowd, I like to label them with a little cute sign that says “Pesto Deviled Eggs”—it sparks conversation and lets folks with allergies know what’s inside. Serve them chilled, straight from the fridge for the best texture and flavor.
Make It Your Own: Creative Twists
The basic formula is a canvas for your creativity. Here are a few of my favorite spins:
- The “Everything but the Kitchen Sink”: Add 2 tablespoons of finely crumbled crispy bacon or pancetta to the filling. Top with the tomato and a tiny sprinkle of the bacon bits. Smoky, salty, incredible.
- Sun-Dried Tomato Pesto Swap: Use a sun-dried tomato pesto instead of basil pesto. The filling turns a gorgeous rosy color and has a deeper, sweeter tomato flavor. Top with a small piece of the sun-dried tomato itself.
- Lighter & Brighter: Swap the mayonnaise for an equal amount of plain, full-fat Greek yogurt. You’ll get a fantastic tang and a protein boost. The texture remains beautifully creamy.
- Vegan Marvel: Use your favorite plant-based mayo. For the “egg,” try firm tofu blocks, sliced and shaped with a spoon or melon baller to create a well for the filling. The pesto filling is already dairy-free if you use vegan pesto (or omit the cheese in homemade).
- Herb Garden Explosion: Fold 1 tablespoon of finely chopped fresh chives or dill into the filling along with the pesto. It adds another layer of fresh herb flavor that’s absolutely divine.
Beau’s Kitchen Notes & Stories
This recipe has evolved in my kitchen over the years. The biggest game-changer was the switch to the “boil-then-steam” method for the eggs. I used to be the person chasing eggshell fragments around a bowl of water, frustrated. This method gave me my sanity back! Another funny lesson: one time, I got overzealous with the pesto and added a quarter cup. The flavor was amazing, but the filling was a… vibrant, almost neon green. My nephew called them “Hulk Eggs,” and they were a hit with the kids! So don’t be afraid of color. These eggs are also fantastic for making ahead. You can boil and peel the eggs up to two days in advance. Make the filling, store it in a sealed bag in the fridge, and pipe it the day of your event. The flavors actually meld and get better! It’s a host’s best friend.
Your Questions, Answered
Q: Help! My eggs are impossible to peel cleanly. What am I doing wrong?
A: This is the #1 deviled egg dilemma! First, try using slightly older eggs (see ingredient tip). Second, the ice bath is non-negotiable—it shocks the eggs. Third, peel them under a slow trickle of cold running water; the water helps get under the membrane. And always start at the wider end!
Q: Can I make these ahead of time?
A: Absolutely, and I highly recommend it! Store peeled, halved egg whites and the filling separately in airtight containers in the fridge for up to 24 hours. Assemble no more than 2-3 hours before serving to prevent the whites from getting soggy.
Q: My filling is a bit runny. How can I thicken it?
A> No sweat! Chill the filling in the fridge for 20-30 minutes before piping. If it’s still loose, you can mash in an extra hard-boiled egg yolk or a tablespoon of finely grated Parmesan cheese to help absorb moisture and thicken it up.
Q: I don’t have a piping bag. What’s the best alternative?
A> A zip-top bag with the corner snipped is my go-to hack (see instructions!). For a more rustic look, use a small cookie scoop or two small spoons to mound the filling neatly into the whites.
Pesto Deviled Eggs : Fresh, Bright & Full of Flavor
Description
If you love classic deviled eggs but want something a little more exciting, pesto deviled eggs are the perfect upgrade. Creamy yolks blended with basil pesto create a fresh, savory filling with a beautiful green color and bold flavor. They’re easy to make, great for parties, and always get people asking for the recipe.
Ingredients
-
6 large eggs
-
2 tablespoons mayonnaise
-
1½ tablespoons basil pesto
-
Salt and black pepper, to taste
Toppings (optional but recommended):
-
6 cherry tomatoes, halved
-
Extra pesto for drizzle
-
Fresh basil or chives
Instructions
-
Cook the eggs
Place eggs in a saucepan and cover with cold water. Bring to a boil, then turn off heat, cover, and let sit for 11 minutes. -
Cool and peel
Transfer eggs to an ice bath for 5–10 minutes. Peel once cooled. -
Slice and separate
Cut eggs in half lengthwise. Remove yolks to a bowl and place whites on a serving plate. -
Make the filling
Mash yolks with a fork until fine. Add mayonnaise, pesto, salt, and pepper. Mix until smooth and creamy. Taste and adjust seasoning. -
Fill the eggs
Spoon or pipe the filling into the egg white halves. -
Garnish
Top each with a cherry tomato half and a small drizzle of pesto or fresh herbs if desired. -
Chill and serve
Refrigerate until ready to serve.
Notes
-
Slightly older eggs peel easier than very fresh ones.
-
Ice bath is key for clean peeling.
-
Pipe the filling using a zip-top bag with the corner cut for a neat look.
-
Chill before serving for best texture and flavor.
-
Pat tomatoes dry so they don’t slide off.
Nutritional Snapshot (Per Egg Half)
Let’s keep it real: deviled eggs are an indulgence, but they’re also packed with good stuff! Each half provides a satisfying bite with a balance of protein and healthy fats to keep you energized. The eggs themselves are a fantastic source of choline (great for brain health) and high-quality protein. The olive oil in the pesto contributes heart-healthy monounsaturated fats. As always, this is an estimate, but it’s good to know what you’re enjoying!
- Calories: 80
- Protein: 3g
- Carbohydrates: 1g
- Fat: 7g
- Fiber: 0g
- Sugars: <1g
Final Thoughts
And there you have it, my friends—everything you need to transform the humble deviled egg into a vibrant, flavor-packed showstopper. This recipe is more than just a list of steps; it’s an invitation to play, to share, and to create those little moments of joy around the table. I promise you, the next time you bring out a platter of these Pesto Deviled Eggs, you’ll watch them disappear amidst smiles and “mmmm’s.” That’s the Feastical spirit—food that feels like a warm hug, a spark of excitement, and a reason to gather. I’d love to see your creations! Tag me @feastical on social media so I can celebrate with you. Now, go forth and deviled egg like the rockstar you are. Happy cooking!
– Beau
Avocado Lime Deviled Eggs : Fresh, Zesty, and Guac-Inspired
Avocado Lime Deviled Eggs – A Fresh, Guacamole-Inspired Twist
Hey friends, Beau here from Feastical! Let’s talk about a little magic that happens when two legendary foods decide to go on a date. We’re taking the unbeatable, creamy comfort of classic deviled eggs and introducing them to the bright, zesty personality of your favorite guacamole. The result? These Avocado Lime Deviled Eggs that are about to become the star of your next picnic, potluck, or “just because it’s Tuesday” snack plate.
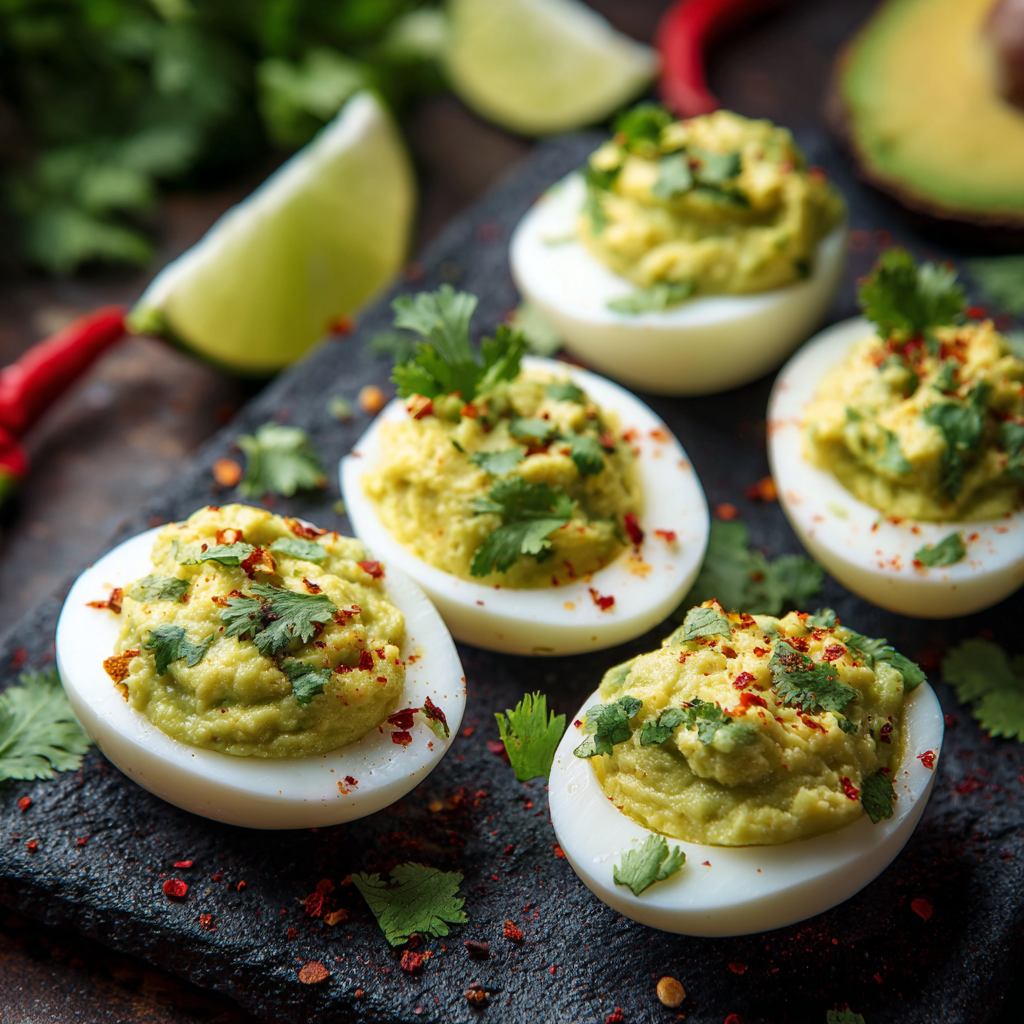
Now, I know what you might be thinking. “Beau, deviled eggs are my grandma’s territory.” And hey, respect to grandma—her version is timeless. But what if we gave it a little sunshine? Swapping out the usual mayo-heavy filling for ripe avocado and a splash of fresh lime juice doesn’t just make these lighter; it transforms them into something utterly vibrant. That gorgeous natural green color? It’s like spring decided to hang out in your egg whites. The flavor is creamy, tangy, with just the right whisper of cilantro, and it all comes together in about 15 minutes flat.
This recipe is for anyone who wants to serve something that looks fancy but is secretly a breeze to make. It’s for the foodie who loves a good conversation starter (“Wait, GREEN deviled eggs?!”). And it’s definitely for anyone who believes, like I do, that the best recipes are the ones that bring a smile to your face and a crowd to your kitchen island. So, let’s grab our favorite bowl and make some delicious, poppable, feel-good bites.
The Barbecue That Started It All
This recipe was born out of a happy little kitchen “oops” moment a few summers back. I was hosting a big, chaotic, beautiful backyard barbecue. The grill was fired up, friends were everywhere, and my mission was to provide an endless stream of snacks. I had planned to make my usual deviled eggs and a giant bowl of guacamole.
Well, you can guess what happened. In the frenzy of prepping, I ran out of mayo. Completely. Zilch. But I had a bowl of hard-boiled eggs and a bowl of guac ingredients staring back at me. A lightbulb went off. What if I just… combined the missions? I mashed the yolks with the avocado, lime, and cilantro, gave it a taste, and my eyes went wide. It was fantastic! Fresh, different, and somehow even more addictive. I piped the bright green filling into the whites, sprinkled on a little chili flake for color, and brought them out. They were gone in under five minutes, with everyone asking for the recipe. That “mistake” is now a Feastical staple, and it reminds me that sometimes the best dishes come from just rolling with it and having fun in the kitchen.
What You’ll Need for Your Guac-Eggs
Here’s your grocery list for this burst of flavor. I’ve added my little chef notes next to each one because knowing your ingredients is half the fun (and the secret to great cooking!).
- 6 large eggs: The foundation. Older eggs (about 7-10 days in your fridge) actually peel easier than super fresh ones. A little life hack for you!
- 1 perfectly ripe avocado: This is our creamy superstar. Give it a gentle squeeze near the stem; it should yield slightly but not feel mushy. No ripe avos? A firm one can be ripened in a paper bag with a banana overnight.
- 1 tbsp fresh lime juice: Fresh is non-negotiable here, friends. That bottled stuff just doesn’t have the same bright, zingy soul. It also helps keep the avocado beautifully green.
- 1 tbsp chopped fresh cilantro: The herb that screams “fiesta!” If you’re one of those folks who thinks cilantro tastes like soap (no judgment!), simply swap it for fresh chopped chives or a pinch of dried oregano.
- Salt and pepper to taste: Start with ¼ tsp of kosher salt and a few cracks of black pepper. You can always add more after mixing.
- Optional Toppings: This is where you play! I love a sprinkle of red pepper flakes for a kick and color, extra cilantro leaves for freshness, or a fine grating of lime zest right on top for an aromatic punch.
Let’s Make These Green Gems: Step-by-Step
Ready to assemble your masterpiece? Follow these simple steps, and I’ll walk you through with all my favorite kitchen hacks to guarantee success.
- Master the Hard-Boil: Place your eggs in a single layer in a saucepan. Cover them with cold water by about an inch. Bring the pot to a rolling boil over high heat. As soon as it boils, slap a lid on it, turn off the heat, and set a timer for 10 minutes. This “steam-in-the-pot” method gives you tender, perfectly cooked yolks with no scary gray ring! After 10 minutes, immediately transfer the eggs to a bowl of ice water to stop the cooking. Let them chill for at least 5 minutes before peeling.
- Peel & Halve with Care: Once cooled, tap each egg gently on the counter and roll it to crackle the shell all over. Peel under a tiny trickle of running water—the water helps get under the shell membrane. Slice each peeled egg neatly in half lengthwise.
- Scoop & Set Up: Gently pop the yolks out into a medium mixing bowl. Arrange your pristine egg white halves on a serving plate or tray. Give them a tiny dab with a paper towel to remove any excess moisture so the filling sticks better.
- Create the Dreamy Filling: To the bowl with yolks, add your ripe avocado (pitted and scooped!), fresh lime juice, chopped cilantro, salt, and pepper. Now, mash and mix! I like using a fork for this—it lets you control the texture. Want it super smooth? Go to town. Prefer a little rustic chunkiness? Stop a bit earlier. Taste it! This is the most important step. Need more lime? More salt? Adjust to make your taste buds sing.
- Fill ‘Em Up: You can simply spoon the filling into the egg white wells, or for a fancy-pants look, spoon it into a zip-top bag, snip off a corner, and pipe it in. It looks gorgeous and takes about 30 extra seconds.
- The Grand Finale (Garnish!): This is where you make them your own. Sprinkle with red pepper flakes, a tiny cilantro leaf, or that lime zest. The color contrast is just beautiful.
How to Serve Your Avocado Lime Deviled Eggs
Presentation is part of the fun! I love using a simple, dark-colored platter or a rustic wooden board—it really makes that vibrant green filling pop. Arrange them in a circle or rows, maybe with a few lime wedges and a sprig of cilantro in the center for decoration.
These are the ultimate social snack. They’re perfect for a spring brunch alongside some fruit salad and mimosas, as a light starter before a Mexican-inspired dinner of tacos or fajitas, or as the hero of a summer picnic spread. They pair wonderfully with other fresh, bold flavors. Think: a platter of crunchy veggies with salsa, tortilla chips, or even some spicy grilled shrimp. Serve them immediately for the absolute best flavor and color—they’re meant to be enjoyed fresh and shared with good company!
Make It Your Own: 5 Flavor Twists
Love the base recipe? Awesome! Now let’s get creative. Here are a few of my favorite ways to riff on these guac-eggs.
- The “Extra Kick” Version: Add 1-2 teaspoons of finely minced jalapeño or a few dashes of your favorite hot sauce (like Cholula or Tapatío) to the filling. Garnish with a thin slice of pickled jalapeño on top.
- The Smoky & Savory Version: Stir in 1 tablespoon of finely crumbled cooked bacon or ½ teaspoon of smoked paprika to the filling. It adds a wonderful depth that plays so well with the avocado.
- The “No Cilantro, No Problem” Version: As mentioned, swap the cilantro for 1 tablespoon of finely sliced chives or scallions. You could also use a teaspoon of fresh chopped dill for a totally different, herby vibe.
- The Ultra-Creamy Dreamy Version: If you miss that classic deviled egg richness, blend in 1-2 tablespoons of mayonnaise, sour cream, or Greek yogurt. It adds a silky texture and a familiar tang.
- The Vegan-Friendly Twist: Use firm or extra-firm tofu! Press and crumble it to replace the hard-boiled egg yolks. You’ll keep the avocado, lime, and seasonings. Spoon the mixture into endive leaves or hollowed-out mini sweet peppers for a delicious, plant-based bite.
A Few Notes from My Kitchen to Yours
Over the years, I’ve made these Avocado Lime Deviled Eggs more times than I can count, and I’ve learned a thing or two. First, they are truly best the day you make them. The avocado can start to oxidize and brown a bit after a few hours, though the lime juice really slows that down. If you need to prep ahead, you can hard-boil the eggs and make the filling separately up to a day in advance. Store the filling with plastic wrap pressed directly onto its surface to limit air exposure, then assemble an hour before your party.
Also, don’t stress about perfection. Some eggs will peel like a dream, others might look a little… “lived-in.” It happens to everyone! Just arrange the prettiest ones front and center. At the end of the day, it’s the incredible flavor that wins everyone over, not a photo-ready exterior. Cooking is about joy, not perfection.
Your Questions, Answered
Q: How can I prevent the avocado filling from turning brown?
A: The lime juice is your #1 defender against browning! Also, press plastic wrap directly onto the surface of the filling if storing it, and limit its time exposed to air. Making them just before serving is ideal. A little browning on the edges is normal and doesn’t affect taste.
Q: Can I make these completely ahead of time?
A: For the absolute best quality, I recommend making them within 2-3 hours of serving. However, you can prep all the components ahead: peel and halve the eggs (store covered in the fridge), and make the filling (store with pressed plastic wrap). Assemble just before your guests arrive.
Q: My yolks have a gray/green ring. What did I do wrong?
A> No worries! That means they were just a tad overcooked. The gray ring is harmless but can look less appetizing. Next time, try the method in Step 1: boiling, then covering and steaming off the heat for exactly 10 minutes before the ice bath. Perfect yolks every time!
Q: I don’t have a piping bag. Any other hacks for filling?
A> Absolutely! A simple zip-top plastic bag with a corner snipped off works perfectly. For an even more rustic look, just use a small spoon and mound the filling in nicely. It’s all delicious no matter how it gets in there!
Avocado Lime Deviled Eggs : Fresh, Zesty, and Guac-Inspired
Description
Classic deviled eggs are always a hit — but this avocado lime version brings a bright, creamy, guacamole-style twist that makes them extra fun and flavorful. The avocado replaces most of the mayo, giving you a smooth texture, fresh color, and zesty taste. They’re quick to make, great for sharing, and perfect for warm-weather gatherings or anytime you want a lighter spin on a favorite.
Ingredients
-
6 large eggs
-
1 ripe avocado
-
1 tablespoon fresh lime juice
-
1 tablespoon finely chopped fresh cilantro (or chives if preferred)
-
Salt and black pepper, to taste
Optional toppings
-
Red pepper flakes
-
Extra chopped herbs
-
Lime zest
-
Tiny diced tomato or jalapeño
Instructions
-
Hard-boil the eggs
Place eggs in a saucepan and cover with cold water by about 1 inch. Bring to a boil, then turn off the heat, cover, and let sit for 10 minutes. -
Cool and peel
Transfer eggs to an ice bath for 10 minutes. Peel and pat dry. -
Slice and remove yolks
Cut eggs in half lengthwise. Remove yolks into a bowl and arrange whites on a plate. -
Make the avocado filling
Add avocado, lime juice, cilantro, salt, and pepper to the yolks. Mash until smooth and creamy. Taste and adjust seasoning. -
Fill the eggs
Spoon or pipe the mixture into the egg white halves. -
Garnish and serve
Add your chosen toppings and serve soon after preparing for best color and flavor.
Notes
-
Use a perfectly ripe avocado — slightly soft but not mushy.
-
Fresh lime juice is important — it boosts flavor and slows browning.
-
Ice bath = easy peeling — don’t skip it.
-
For smoother filling, blend briefly or mash thoroughly with a fork.
-
Serve within a few hours — avocado fillings are best fresh.
A Lighter, Brighter Bite
One of the things I love about this twist is that it’s naturally a bit lighter than traditional deviled eggs, while still being satisfying. By using avocado, we’re adding heart-healthy monounsaturated fats, fiber, and a host of vitamins (like C, E, K, and B-6) to the protein-packed egg. It’s a snack that fuels you with good stuff. Remember, nutritional info is an estimate, but here’s a general idea per serving (2 halves):
- Calories: ~110
- Protein: 6g (Great for keeping you full!)
- Fat: 9g (Mostly the good, creamy kind from the avocado and egg yolk)
- Carbohydrates: 2g
- Fiber: 2g (Thanks, avocado!)
Final Thoughts
And there you have it, friends—my go-to recipe for deviled eggs that are anything but devilish. They’re bright, herbaceous, and packed with feel-good flavor. This Avocado Lime version is proof that sometimes the best recipes are the simple mash-ups, the happy accidents, and the dishes that aren’t afraid to be a little different.
I hope you give these a try at your next gathering (or just for a treat-yourself Tuesday). When you do, I’d love to hear about it! Tag me @Feastical or use the hashtag #FeasticalEats so I can see your beautiful creations. Now, go forth, boil some eggs, and get ready to pass the prettiest plate at the party. Happy cooking!
With a full heart and an empty plate,
Beau
Miso Sesame Deviled Eggs : Umami-Rich, Creamy & Unexpected
Miso Sesame Deviled Eggs – Your New Go-To Party Hero
Hey there, friend! Beau here from Feastical. Let me tell you, I live for those moments when a familiar recipe gets a delicious, unexpected glow-up. You know the feeling. You’re headed to a potluck, hosting a last-minute get-together, or just craving a snack with some *personality*, and the classic deviled egg pops into your head. It’s a total crowd-pleaser, a blank canvas… but sometimes, you want to paint with a bolder color.
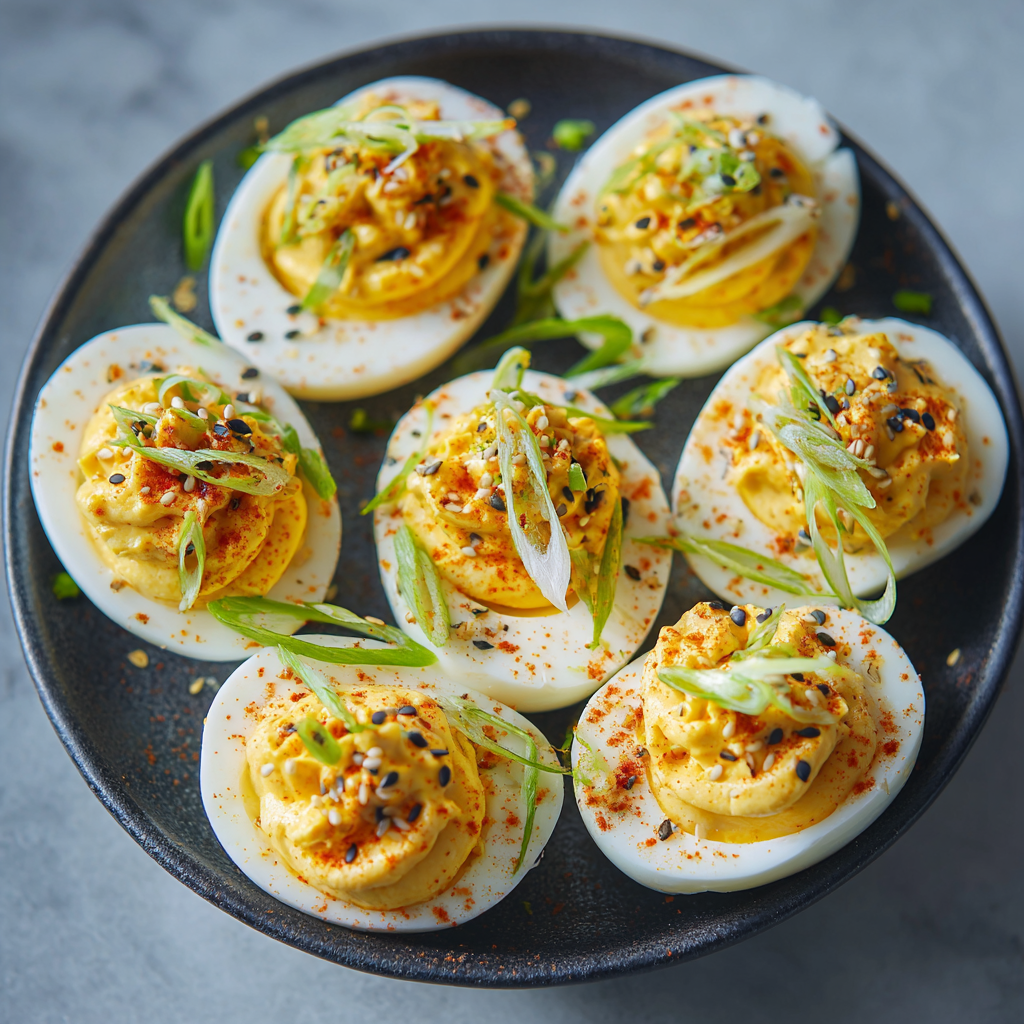
That’s exactly where these Miso Sesame Deviled Eggs come in. We’re taking that beloved, creamy comfort and giving it a serious umami hug. Imagine the deep, savory-sweet notes of mellow white miso dancing with the nutty, aromatic punch of toasted sesame oil, all wrapped up in that impossibly smooth, familiar yolk filling. It’s a flavor adventure that feels both exciting and completely right at home.
This isn’t about being fancy for fancy’s sake. It’s about layering flavors in a way that makes you (and everyone you share them with) go, “Wow, what *is* that?” It’s the kind of recipe that looks elegant but is secretly one of the easiest things you’ll make all week. So, whether you’re a deviled egg devotee or a first-time filler, grab your eggs and your sense of curiosity. We’re about to make the appetizer that disappears faster than you can say, “Wait, did you try the eggs?”
The Little Jar That Started It All
This recipe has a little story, as the best ones often do. It started years ago, back when I was just beginning to peek beyond my familiar pantry doors. I picked up a tub of white miso paste for a soup recipe, used my single tablespoon, and then stared at the rest like, “Okay, friend, now what?”
It sat there, this unassuming beige paste, whispering possibilities from the fridge door. I started sneaking it into salad dressings, glazes for fish, and even whisking it into butter for corn on the cob. Each experiment was a revelation—this magical ferment could add a round, savory depth to almost anything without overpowering it.
The “aha!” moment for these eggs hit during a laid-back weekend brunch. I was making classic deviled eggs and reached for the mustard. My eye caught that trusty miso tub instead. “What if…?” I thought. I swapped it in, added a drop of my favorite toasted sesame oil, and gave it a mix. The first taste was a silent, wide-eyed moment of pure joy. It tasted *expensive*. It tasted complex. It tasted like the secret ingredient I never knew my deviled eggs were missing. It was that beautiful kitchen accident—born from curiosity and a desire not to waste a single delicious thing—that became a permanent staple in my recipe box. Now, it’s my turn to pass that “aha!” moment on to you.
Gathering Your Flavor All-Stars
Here’s the beautiful part: the ingredient list is short and sweet. Every single item has a job to do, and together, they create something much greater than the sum of their parts. Let’s break it down.
- 6 large eggs: The foundation! Older eggs actually peel a bit easier than super-fresh ones, so if you’ve got a carton that’s been hanging out for a week, you’re in luck. Room temperature eggs are less likely to crack when they hit the hot water, but I won’t judge if you go straight from the fridge (we’ll use a hack to help!).
- 2 ½ tablespoons mayonnaise: This is our creamy dream vehicle. Use the best quality you have for the richest flavor. For a tangier twist, you can swap half with full-fat Greek yogurt or sour cream.
- 1 teaspoon white miso paste: The star of the show! White (or “shiro”) miso is milder, sweeter, and less salty than its red or brown counterparts. It’s perfect for this. If you only have red miso, start with ½ a teaspoon and taste, as it’s much stronger. Find it in the refrigerated international section of most supermarkets.
- ½ teaspoon toasted sesame oil: A little goes a VERY long way here. This isn’t the neutral sesame oil for cooking; it’s the dark, aromatic oil meant for finishing. It’s the “nutty” in our nutty-savory equation. Don’t skip it!
- Salt and pepper, to taste: Start with a tiny pinch of each. The miso brings its own saltiness, so you’ll want to mix, taste, then adjust. Freshly cracked black pepper adds a necessary bite.
For the Topping & Garnish:
- Toasted white or black sesame seeds (or both!): Toasting is key! Toss them in a dry pan over medium heat for 1-2 minutes until fragrant. It unlocks their flavor and adds a crucial little crunch.
- Thinly sliced scallions: The green parts give a fresh, oniony brightness that cuts through the richness. Slice them thin on a diagonal for a pretty look.
- Chili flakes (optional): For my friends who like a whisper of heat. A tiny sprinkle adds a beautiful color contrast and a pleasant tingle.
Let’s Make Some Magic: Step-by-Step
Ready to roll up your sleeves? This process is as satisfying as the first bite. Follow these steps, lean on my little chef hacks, and you’ll have perfect eggs every single time.
Step 1: The Perfect Hard-Boiled Egg (No Gray Yolks Allowed!)
Place your eggs in a single layer in a saucepan. Cover them with cold water by about an inch. Bring the pot to a full, rolling boil over high heat. The second it hits that boil, turn off the heat, slap the lid on, and set a timer for 10 minutes. (For extra-large eggs, go 12 minutes). This “off-the-boil” method is my ride-or-die for tender whites and vibrant yellow yolks with no dreaded green/gray ring.
Chef’s Hack: While the water’s heating, add a big splash of white vinegar. It won’t flavor the eggs, but it helps the proteins coagulate faster if a shell cracks. Also, gently stir the eggs in a circle for the first minute of boiling—this centers the yolk for a prettier final slice!
Step 2: The Ice Bath Shocker
When the timer goes off, it’s rescue time! Using a slotted spoon, immediately transfer the eggs to a large bowl filled with ice water. Let them chill for at least 5-10 minutes. This rapid cooling stops the cooking process and, most importantly, creates a tiny pocket of steam between the egg white and the membrane, making them a dream to peel.
Step 3: The Great Peel
Tap each egg gently on the counter to crackle the shell all over. Start peeling from the wider end (where the air pocket is) under a thin stream of cool running water. The water helps loosen the shell. You’ll have smooth, divot-free egg whites in no time.
Step 4: Slice & Scoop
Pat the eggs dry. Carefully slice them in half lengthwise. Pop the firm yolks out into a medium mixing bowl. Arrange the empty white halves on your serving platter. Give the yolks a good mash with a fork until they resemble fine crumbs.
Step 5: The Flavor Fusion
To the crumbled yolks, add the mayonnaise, miso paste, and toasted sesame oil. Mash and stir vigorously until you have a completely smooth, creamy, and homogenous mixture. This is where the magic binds! Now, taste it. Seriously, taste it. Season with a tiny pinch of salt and pepper only if you think it needs it—remember the miso is salty.
Chef’s Hack: For an unbelievably silky filling, push the yolk mixture through a fine-mesh sieve with a spatula. It’s an extra step, but for special occasions, it creates a mousse-like texture that’s out of this world.
Step 6: Fill ‘Em Up!
You can simply spoon the filling back into the wells of the egg whites. But for that gorgeous, bakery-style look, spoon the filling into a zip-top bag, snip off a corner (about ½-inch), and pipe it in with a swirling motion. It feels fancy and takes about 30 extra seconds.
Step 7: The Grand Finale (Garnish!)
Right before serving, garnish your hearts out! Sprinkle generously with the toasted sesame seeds, a flurry of bright green scallions, and if you’re feeling spicy, that optional pinch of chili flakes. The contrast is stunning.
Serving These Savory Gems
Presentation is half the fun! Don’t just plop these on a plate. A little styling makes them feel extra special. I love using a dark slate board or a simple white platter to make the colors pop. Tuck a few small sprigs of fresh herbs like cilantro or parsley around the edges for a garden-fresh feel.
For a Japanese-inspired spread, serve them alongside some quick-pickled cucumber slices (just rice vinegar, sugar, and salt), edamame sprinkled with sea salt, and a bowl of crispy nori strips for scooping. They’re also the perfect sophisticated partner to a frosty beer, a dry riesling, or even a glass of bubbly Prosecco. The salty, umami-rich flavors are total palate pleasers with drinks.
Make It Your Own: Delicious Twists
The fun doesn’t stop here! This recipe is a brilliant template. Once you master the base, play around with these variations.
- The “Everything Bagel” Twist: Add ¼ teaspoon of garlic powder to the filling. Top with a blend of everything bagel seasoning, extra sesame seeds, and dried minced onion.
- Spicy Sriracha Swirl: Fold 1-2 teaspoons of sriracha into the filling for a kick. Garnish with a tiny extra drizzle of sriracha and a sprinkle of black sesame seeds.
- Herb Garden Fresh: Stir 1 tablespoon of finely minced fresh chives and dill into the yolk mixture. Garnish with a tiny sprig of dill.
- Vegan Wonder: Use firm tofu! Steam extra-firm tofu blocks, then crumble and press out excess water. Blend with vegan mayo, miso, sesame oil, and a pinch of black salt (kala namak) for an “eggy” sulfur note. Pipe into halved, small boiled potatoes or cucumber rounds.
- Bacon & Smoked Paprika: For a more classic-but-elevated vibe, crumble two slices of crispy cooked bacon into the filling and add ¼ teaspoon of smoked paprika. Top with the bacon bits.
Beau’s Kitchen Notes
This recipe has evolved in the most delicious ways over the years. I’ve served these at everything from fancy dinner parties to backyard BBQs, and they never fail to impress. One time, I accidentally used dark soy sauce instead of sesame oil (don’t ask about my chaotic pantry organization that day). It was… not right. But it taught me the irreplaceable role of that toasted sesame oil!
My biggest tip? Don’t make the filling too far in advance if you can help it. The sesame oil’ flavor can mellow a bit over hours. I like to boil and peel the eggs ahead of time, but mix the filling and assemble about an hour before guests arrive for maximum flavor impact. And always, always save a few for the cook to enjoy before they hit the platter. Trust me on this one.
Your Questions, Answered!
Q: My eggs are impossible to peel! Help!
A. I feel your pain! The ice bath is non-negotiable. Also, try steaming your eggs instead: place them in a steamer basket over 1 inch of boiling water, cover, and steam for 12 minutes. The shells often slip right off. Using slightly older eggs helps, too.
Q: Can I make these ahead of time?
A. Absolutely! You can hard-boil and peel the eggs 1-2 days ahead; keep them in a sealed container in the fridge. You can also make the filling 1 day ahead and store it separately. Assemble and garnish within a few hours of serving for the best texture and look.
Q: The filling is too thick/too thin. What do I do?
A. Too thick? Add a teaspoon of mayo, yogurt, or even a tiny splash of milk or water and mix. Too thin? You can add a sprinkle of finely grated Parmesan or a touch more mashed yolk (if you have extra). Chilling it for 15 minutes can also help it firm up.
Q: I can’t find white miso. What can I use?
A. Yellow miso is a fine substitute. If you only have red miso, use half the amount (½ tsp) and taste, as it’s much saltier and more intense. In a real pinch, you could use a teaspoon of soy sauce or tamari, but you’ll lose the complex fermented depth that makes these special.
Miso Sesame Deviled Eggs : Umami-Rich, Creamy & Unexpected
Description
If you love classic deviled eggs but want something a little more bold and unforgettable, these Miso Sesame Deviled Eggs are the upgrade you’ve been waiting for. They’re creamy, savory, slightly nutty, and packed with deep umami flavor from white miso and toasted sesame oil. They look elegant, taste unique, and are still just as easy to make as the traditional version — perfect for parties, potlucks, or snack boards.
Ingredients
-
6 large eggs
-
2½ tablespoons mayonnaise
-
1 teaspoon white miso paste
-
½ teaspoon toasted sesame oil
-
Black pepper, to taste
-
Small pinch salt (only if needed)
For garnish
-
1–2 teaspoons toasted sesame seeds (white, black, or mixed)
-
1–2 scallions, thinly sliced
-
Pinch chili flakes (optional)
Instructions
-
Hard-boil the eggs
Place eggs in a pot and cover with cold water by about 1 inch. Bring to a boil, then turn off heat, cover, and let sit 10 minutes. -
Cool and peel
Transfer eggs to an ice bath for 10 minutes. Peel under cool running water and pat dry. -
Slice and separate
Cut eggs in half lengthwise. Remove yolks into a bowl and arrange whites on a serving plate. -
Make the filling
Mash yolks with mayonnaise, miso paste, sesame oil, and black pepper until very smooth. Taste before adding salt — miso is naturally salty. -
Fill the eggs
Spoon or pipe the filling into each egg white half. -
Garnish
Sprinkle with toasted sesame seeds, sliced scallions, and chili flakes if using. Chill until serving.
Notes
-
Use white (shiro) miso — it’s milder and slightly sweet, perfect for deviled eggs.
-
Go light on sesame oil — it’s strong; a little gives big flavor.
-
For ultra-smooth filling, blend briefly or press through a fine sieve.
-
Toast your sesame seeds in a dry pan for 1–2 minutes to boost flavor.
-
Taste before salting — miso and mayo already add saltiness.
Nutritional Snapshot (Per Deviled Egg Half)
Let’s keep it real—these are a treat, but they’re also packed with good stuff! Eggs are a fantastic source of high-quality protein and essential vitamins like B12 and choline, which is great for brain health. The sesame seeds add a tiny boost of calcium and healthy fats.
- Calories: ~75
- Protein: 3g (Helps keep you satisfied!)
- Carbohydrates: 1g
- Fat: 6g
- Fiber: 0g
- Sugars: <1g
Remember, this is an approximation. Using light mayo or Greek yogurt will alter these numbers. Enjoy them as part of a balanced spread!
Final Thoughts from My Kitchen to Yours
And there you have it! The Miso Sesame Deviled Egg—a simple concept turned into a conversation-starting masterpiece. This recipe is a perfect example of what I love most about cooking: taking something comforting, adding a twist from another culinary corner of the world, and creating a new favorite.
I hope you make these for your next gathering (or just for yourself on a Tuesday—you deserve it). I hope you experience that little “wow” moment with the first bite. And most of all, I hope you have as much fun making them as I do sharing them.
If you
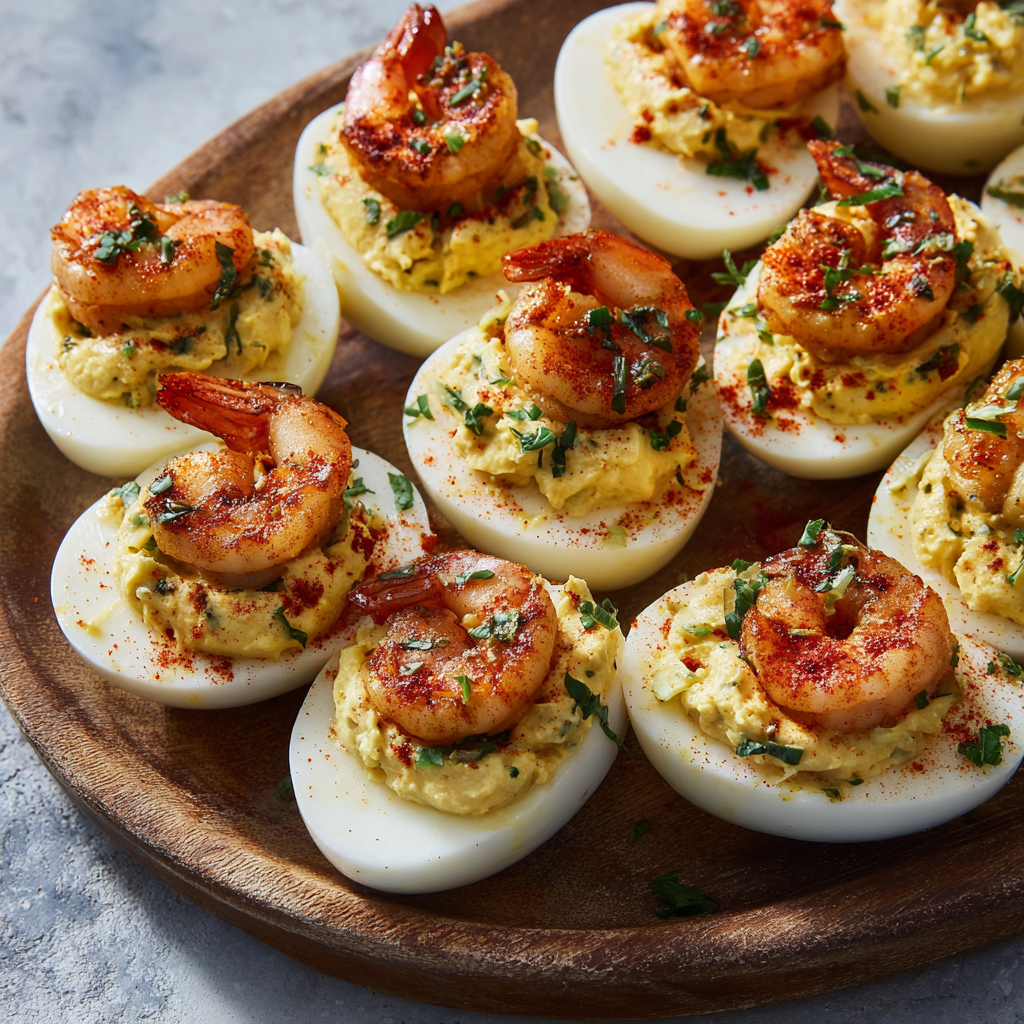
Cajun Shrimp Deviled Eggs : Bold, Spicy, and Totally Showstopping
Cajun Shrimp Deviled Eggs: Your New Party Superpower
Hey friends, Beau here from Feastical! Let’s talk about a universal truth: the deviled egg plate is the first to empty at any gathering. It’s a law of nature. But what if we took that beloved, creamy classic and gave it a serious flavor vacation to the bayou? That’s exactly what we’re doing today with these Cajun Shrimp Deviled Eggs.
Imagine this: perfectly hard-boiled eggs, their yolks whipped into a smoky, spicy, impossibly creamy filling that has just the right amount of kick. Now, crown that masterpiece with a plump, juicy shrimp, sautéed in butter and a kiss of Cajun seasoning. One bite, and you’ve got cool, rich filling, the tender bite of the egg white, and the savory punch of that shrimp. It’s a textural symphony and a flavor explosion, all in one elegant, two-bite package.
I’m telling you, these aren’t just deviled eggs; they’re a conversation starter. They’re the appetizer that makes people hover around the platter, trying to be casual about taking “just one more.” They’re surprisingly simple to make but look and taste like you fussed for hours. Whether you’re prepping for game day, a holiday bash, or just a fancy-ish Friday night at home, this recipe is your secret weapon. So, tie on your apron, and let’s turn up the heat—the delicious, totally manageable kind.
The Backyard Party That Started It All
This recipe was born out of a happy accident at one of my backyard summer bashes a few years back. I’d made my standard deviled eggs (which are pretty darn good, if I do say so myself), and I’d also whipped up a big skillet of Cajun butter shrimp for a pasta salad. As fate would have it, a few of those glorious, garlicky shrimp escaped the bowl and found themselves sitting right next to the egg platter on my overcrowded picnic table.
My buddy Mike, ever the culinary adventurer, didn’t hesitate. He plopped a shrimp right on top of a deviled egg half and took a bite. The look on his face said it all—eyes wide, followed by a definitive, “Whoa. Beau, you HAVE to try this.” One messy, delicious experiment later, with a little Cajun seasoning mixed right into the yolk filling, and a legend was born. Now, I can’t imagine serving deviled eggs any other way when I really want to impress. It’s a reminder that the best food often comes from a little improvisation and sharing a laugh with friends.
Gathering Your Flavor Arsenal
Here’s everything you’ll need to create this bold appetizer. Don’t stress about exact brands—this is about flavor spirit, not rigidity!
- 6 large eggs: The sturdy canvas for our creation. Older eggs (about a week old) actually peel easier after boiling than super fresh ones. A pro tip I learned from my grandma!
- 2½ tbsp mayonnaise: This is the magic that makes our filling rich and creamy. Use a good-quality mayo you love. For a tangier twist, sub in half Greek yogurt or even a bit of avocado.
- 1 tsp Dijon mustard: My not-so-secret weapon. Dijon adds a complex, sharp depth that plain yellow mustard just can’t match. It cuts through the richness perfectly.
- ½ tsp Cajun seasoning (plus more for shrimp & garnish): The star of the show! Look for a blend with paprika, garlic, onion, pepper, and oregano. I like Tony Chachere’s or Slap Ya Mama, but any good blend works. We’ll use this in the filling AND on the shrimp for layered heat.
- Salt to taste: Go easy at first, as your Cajun seasoning and mayo likely already contain salt. You can always add, but you can’t take away!
- 6 small shrimp, peeled and deveined: Aim for 31-40 count per pound. They’re the perfect bite-sized topping. If you’ve got larger ones, just chop them after cooking.
- 1 tsp olive oil or butter: For sautéing. I’m team butter all the way here—that rich, nutty flavor with the Cajun spice is *chef’s kiss*.
- Optional: chopped parsley or chives for garnish: A pop of green color and fresh flavor makes everything look finished and fancy. Thinly sliced green onion tops are fantastic, too!
Let’s Build Some Deliciousness: Step-by-Step
Follow these steps, and you’ll be a deviled egg deity in no time. I’ve packed in my favorite hacks to make the process smooth.
- Perfect Hard-Boiled Eggs, Every Time: Place your eggs in a single layer in a saucepan. Cover them with cold water by about an inch. Bring to a full, rolling boil over high heat. Once boiling, immediately cover the pot and remove it from the heat. Let it sit, covered, for exactly 10 minutes. Meanwhile, prepare an ice bath (a bowl of water with lots of ice). After 10 minutes, transfer the eggs to the ice bath to stop the cooking. This method gives you tender, bright yolks with no weird green ring! Let them chill for at least 15 minutes before peeling under cool running water.
- The Art of the Halve & Scoop: Gently tap each egg on the counter and roll to crackle the shell. Peel under water for cleaner results. Slice them lengthwise—a sharp, thin knife wiped clean between cuts makes for pretty edges. Pop the yolks into a medium bowl and arrange the whites on your serving platter. Pro tip: Slice a tiny piece off the bottom of each egg white half so they sit flat and won’t wobble when serving!
- Creating the Dreamy Filling: To the yolks, add your mayo, Dijon, ½ tsp Cajun seasoning, and a tiny pinch of salt. Mash it all together with a fork until it’s mostly smooth. Now, for the secret to ultra-creamy filling: press the mixture through a fine-mesh sieve with the back of a spoon. It’s an extra step, but it makes the filling silky and lump-free. Alternatively, give it a quick blitz with a hand mixer. Taste and adjust seasoning—want more heat? Add a pinch more Cajun seasoning.
- Sautéing the Shrimp: Pat your shrimp very dry with a paper towel. This is key for getting a nice sear, not a steam. Heat your oil or butter in a small skillet over medium-high heat. Toss the shrimp with a light sprinkle of Cajun seasoning. Once the fat is hot, add the shrimp. Cook for 1-2 minutes per side, just until they’re pink, opaque, and slightly curled. Don’t overcrowd the pan! Transfer them to a plate to cool slightly.
- The Grand Assembly: Spoon or pipe your yolk filling into the egg white wells. I love using a piping bag with a star tip for a fancy touch, but a zip-top bag with a corner snipped off works beautifully (or a spoon is just fine!). Top each one with a warm or room-temperature shrimp. Give the whole platter a final, light dusting of Cajun seasoning and a shower of fresh herbs.
How to Serve These Spicy Beauties
Presentation is part of the fun! I love using a rustic wooden board or a simple, elegant white platter to let the vibrant colors of the eggs and shrimp pop. Nestle some extra sprigs of parsley or chives around the edges for a lush look.
These are fantastic served slightly warm, right after assembling, or you can make them ahead and serve them chilled. If prepping ahead, store the filling, whites, and cooked shrimp separately in the fridge, then assemble within an hour of serving to keep the whites from getting rubbery. Pair them with other Southern-inspired bites like sweet potato fries, a crisp green salad with a buttermilk dressing, or a big pitcher of sweet tea (or a spicy margarita for the adults!).
Make It Your Own: Delicious Twists
Got dietary needs or just feeling creative? Run with it!
- Bacon & Chipotle Twist: Add 2 tbsp of finely chopped, crispy cooked bacon to the yolk filling. Swap the Cajun seasoning for ½ tsp of smoked paprika and ¼ tsp of chipotle powder. Top with the shrimp or just extra bacon!
- Avocado Cream Version (Lighter): Replace half the mayo with the flesh of one ripe avocado. You’ll get the creamiest, coolest green filling. Add an extra squeeze of lime juice to prevent browning.
- No-Shrimp, All-Veggie: Skip the shrimp and top with a slice of pickled okra, a sprinkle of smoked almonds for crunch, or a dab of pepper jelly for sweet heat.
- Next-Level Spicy: For heat seekers, add a few dashes of hot sauce (like Crystal or Tabasco) to the yolk mixture and use a blackened seasoning blend on the shrimp.
- Lemon-Herb Brightness: Stir the zest of one small lemon into the filling and use fresh dill as the garnish. It’s a brighter, zippier profile that’s still incredible.
Beau’s Kitchen Notebook
This recipe has evolved so much since that fateful backyard party. I started by just placing a plain shrimp on top, but quickly realized sautéing it in the same spices tied everything together. I also used to just mash the filling with a fork, but once I tried the sieve method, I never looked back—the texture is just phenomenal.
A funny story: I once brought these to a potluck and labeled them “Bayou Eggs.” My friend’s five-year-old, expecting something sweet like a pastry, took a very suspicious bite. His eyes got huge, he grabbed his milk, chugged it, and then immediately reached for another one. “They’s spicy good!” he declared. The highest praise. The moral? Don’t underestimate anyone’s palate, and always have milk handy.
Your Questions, Answered
- Q: Can I make these the night before?
A: You can, but with a strategy! Cook and peel the eggs, make the filling (store in a sealed bag), and cook the shrimp. Keep all three components separate in the fridge. Assemble no more than 1-2 hours before serving for the best texture. - Q: My egg yolks are dry and crumbly. Help!
A: No worries! This usually means the eggs were overcooked or are very fresh. Your mayo and mustard are the saviors. Add them and let the mixture sit for 5 minutes—the fats and moisture will rehydrate the yolks as you mash. You can also add just a tiny drizzle of olive oil. - Q: What’s the best way to pipe the filling without a piping bag?
A: A zip-top plastic bag is your best friend. Spoon the filling into one corner, press out the air, seal it, and snip just a small corner off. Squeeze gently for perfect little mounds. For a rustic look, just use a spoon and make a little swirl. - Q: My shrimp are rubbery. What happened?
A: They were likely overcooked. Shrimp cook incredibly fast. As soon as they turn from grey/translucent to pink and opaque and form a loose “C” shape, they’re done. Remove them from the pan immediately, even if they seem slightly under—they’ll carryover cook.

Cajun Shrimp Deviled Eggs : Bold, Spicy, and Totally Showstopping
Description
Deviled eggs are already a crowd favorite — but add Cajun-spiced shrimp on top and they turn into a next-level appetizer. These Cajun Shrimp Deviled Eggs are creamy, smoky, a little spicy, and packed with protein. They look fancy, taste bold, and are actually very simple to make. Perfect for parties, game nights, or special snacks.
Ingredients
For the eggs
-
6 large eggs
-
2½ tablespoons mayonnaise
-
1 teaspoon Dijon mustard
-
½ teaspoon Cajun seasoning (plus more to taste)
-
Pinch of salt and black pepper
For the shrimp
-
6 small shrimp, peeled and deveined
-
1 teaspoon butter or olive oil
-
Light sprinkle Cajun seasoning
Optional garnish
-
Chopped parsley or chives
-
Light dusting of paprika or Cajun spice
Instructions
-
Hard-boil the eggs
Place eggs in a pot and cover with cold water. Bring to a boil, then turn off heat, cover, and let sit 10 minutes. Transfer to an ice bath for 10–15 minutes. Peel. -
Prepare the egg whites
Slice eggs in half lengthwise. Remove yolks into a bowl and place whites on a serving plate. -
Make the filling
Mash yolks with mayonnaise, Dijon mustard, Cajun seasoning, salt, and pepper until smooth and creamy. Taste and adjust spice level. -
Cook the shrimp
Pat shrimp dry. Heat butter or oil in a small pan over medium heat. Sprinkle shrimp lightly with Cajun seasoning. Cook about 1–2 minutes per side until pink and opaque. Remove from heat and cool slightly. -
Fill the eggs
Spoon or pipe the yolk mixture into each egg white half. -
Top and garnish
Place one shrimp on each filled egg. Sprinkle with herbs and a tiny pinch of Cajun seasoning if desired.
Notes
-
Dry the shrimp well before cooking so they sear instead of steam.
-
Use a zip-top bag for piping — fill it and snip the corner for neat presentation.
-
For extra creamy filling, mix with a hand mixer or push through a sieve.
-
Control the heat by adjusting Cajun seasoning — blends vary in spiciness.
-
Make ahead smartly — store whites, filling, and shrimp separately and assemble shortly before serving.
Nutritional Info (Because We’re Curious!)
Alright, let’s break it down. This info is for two deviled egg halves (one full egg + one shrimp). Remember, these are estimates and can vary based on your specific ingredient brands and sizes.
These Cajun Shrimp Deviled Eggs are a fantastic source of high-quality protein from both the eggs and shrimp, keeping you satisfied. The fats are mostly the healthy, unsaturated kind from the mayo and egg yolks. They’re also very low in carbs, making them a great option for many eating styles. As with any appetizer, the joy is in the flavor-packed bite, and these deliver maximum taste without weighing you down. Enjoy them as part of a balanced spread!
- Calories: ~140
- Protein: 9g
- Fat: 11g
- Carbohydrates: 1g
Final Thoughts
And there you have it, friends—everything you need to transform a humble deviled egg into a bona fide showstopper. This recipe is all about layering bold, comforting flavors and sharing something made with your own two hands that’s guaranteed to bring smiles.
I hope you give these Cajun Shrimp Deviled Eggs a try at your next gathering (or just because it’s Tuesday—you deserve it!). When you do, I’d love to hear about it. Tag me over on Feastical or social media with your creations. Now, go forth, spice things up, and remember: the best meals are the ones we share. Happy cooking!
– Beau
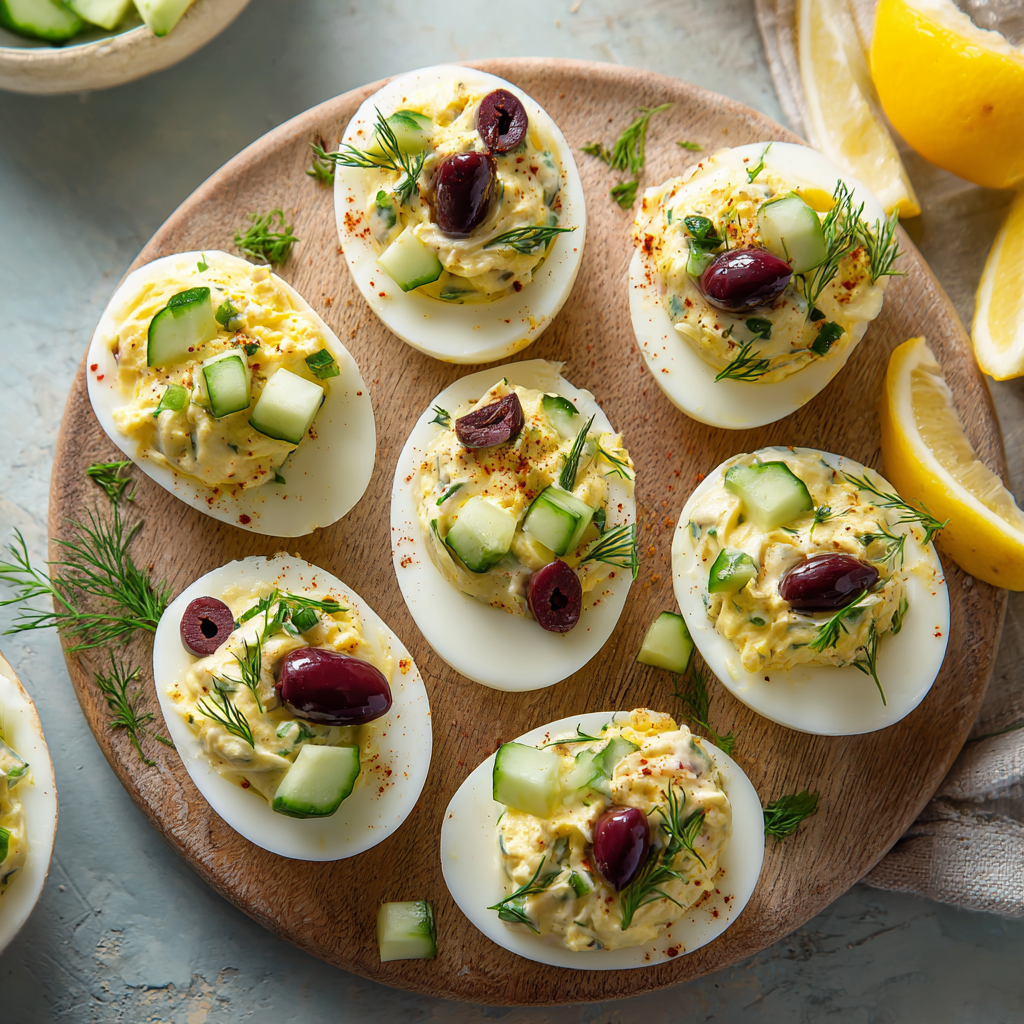
Mediterranean Deviled Eggs : Fresh, Tangy & Herb-Infused
Mediterranean Deviled Eggs: Your New Go-To Party Hero
Hey friends, Beau here from Feastical! Let’s talk about that one appetizer that never, ever gets left behind on the party platter. You know the one. It’s the first to disappear, the subject of quiet “did you try these?” conversations, and the dish that has people casually hovering near the table, hoping for a second round. Yep, I’m talking about deviled eggs. The classic is a total legend for a reason, but today? Today we’re giving it a sun-drenched, herb-kissed glow-up.
I’m so excited to share these Mediterranean Deviled Eggs with you. We’re swapping out the usual heavy mayo for tangy, protein-packed Greek yogurt, and we’re folding in the bright, sunny flavors of the Aegean coast: fresh lemon, a whisper of garlic, and a generous handful of herbs. The result is a filling that’s unbelievably creamy, refreshingly light, and packed with flavor that just sings. It’s like your favorite deviled egg took a vacation to a Greek island and came back with a fantastic tan and a new lease on life.
Whether you’re prepping for a big summer bash, need a standout dish for potluck season, or just want to treat yourself to a snack that’s both satisfying and wholesome, these little flavor bombs are your answer. They come together in a snap, look gorgeous on any plate, and have this magical way of making everyone feel like you fussed for hours. (We’ll keep our simple secrets between us, okay?) So, let’s grab our eggs and our zest for life, and make something spectacularly delicious together.
A Plateful of Sunshine & Memories
My love for a good deviled egg runs deep, straight back to my Grandma Lou’s checkered tablecloth. Her version was the classic, paprika-dusted kind, and they were like little gold nuggets at every family picnic. But the memory that truly inspired this recipe happened a few years back on a windy, sun-drenched terrace overlooking the sea in Santorini.
After a morning of exploring, my partner and I stumbled into this tiny, family-run taverna. We ordered a little of everything, and among the spread of feta, olives, and grilled octopus was a simple plate of what looked like deviled eggs. One bite was a revelation. The filling was lighter, tangier, and fragrant with dill and oregano. They were cool, creamy, and the perfect counterpoint to the salty sea air and briny olives. I must have asked the owner about them three times, miming cooking actions much to everyone’s amusement. That taste of the Mediterranean, simple yet profound, stuck with me. This recipe is my edible postcard from that day—an attempt to bottle that feeling of breezy, carefree joy and share it with you at your own table.
Gathering Your Sunshine Ingredients
Here’s the beautiful part: the ingredient list is short, sweet, and mighty. Each one plays a starring role in creating that fresh, coastal flavor. Let’s break it down.
- 6 large eggs: The foundation! I find older eggs peel a bit easier than super-fresh ones, but any large eggs will work perfectly. This is your canvas.
- ¼ cup Greek yogurt (plain, full-fat or 2%): Our creamy superstar swap. Full-fat gives incredible richness, but 2% works great for a slightly lighter option. Chef’s Insight: Please avoid non-fat here; a bit of fat carries the flavor and gives us that lush texture we crave.
- 1 tsp lemon juice: Freshly squeezed, always! This is the “tangy” in our title. It brightens up the whole filling and makes the herbs pop.
- 1 small garlic clove, finely grated or mashed: Just a whisper! Grating it creates a paste that distributes flavor evenly without any harsh chunks. If you’re not a garlic fan, you can skip it, but it adds a wonderful savory depth.
- 1 tbsp chopped fresh dill or parsley: Hello, freshness! Dill gives that classic Greek vibe, while parsley is a bit more versatile and peppery. Want to go wild? Use a mix of both, or add some chopped chives.
- Salt and black pepper, to taste: The essential enhancers. Season thoughtfully—the yogurt needs a good friend in salt to really shine.
For The Toppings (Choose Your Adventure!)
- Sliced Kalamata olives or diced cucumber: Kalamatas give a gorgeous, briny, salty punch. Diced cucumber adds a fantastic, refreshing crunch. I often do half and half for a pretty plate!
- Extra herbs for garnish: A tiny sprig or sprinkle makes them look professionally pretty.
- Lemon zest (optional): A little zest on top adds an incredible fragrant aroma. It’s the pro move that takes 2 seconds but impresses endlessly.
Let’s Make Some Magic: Step-by-Step
Follow these steps, lean on my little hacks, and you’ll have a flawless platter of sunshine in no time. We’ve got this!
Step 1: The Perfect Hard-Boiled Egg
Place eggs in a single layer in a saucepan and cover with cold water by about an inch. Starting with cold water helps prevent cracking. Bring the pot to a rolling boil over high heat. The moment it hits a full boil, turn off the heat, cover the pot with a tight-fitting lid, and set your timer for 10 minutes. This “passive cooking” method is my holy grail for perfectly cooked yolks with no dreaded green ring! While they wait, prepare an ice bath (a big bowl of cold water with plenty of ice). When the timer dings, use a slotted spoon to immediately transfer the eggs to the ice bath. Let them chill for at least 5 minutes. This shock stops the cooking and makes peeling a world easier.
Step 2: The Art of Assembly & Filling
Gently tap each egg on the counter and roll it lightly to crackle the shell, then peel under cool running water. Pat them dry. Slice each egg in half lengthwise. Now, here’s a fun trick: pop the yolks out into a medium bowl and place the whites on your serving plate. To the yolks, add your Greek yogurt, fresh lemon juice, grated garlic, chopped herbs, a good pinch of salt, and a few cracks of black pepper. Mash it all together with a fork until it’s super smooth and creamy. Taste it! This is your moment. Need more salt? More lemon? More dill? Adjust it now until it makes you do a little happy dance.
Step 3: The Grand Finale (Spoon or Pipe!)
You can simply spoon the filling back into the egg white cavities—it’s charming and rustic. But if you want to get fancy, spoon the filling into a zip-top bag, snip off a corner, and pipe it in. It looks gorgeous and feels extra special. Once all your eggs are filled, it’s topping time! Crown each one with a slice of Kalamata olive or a little pile of diced cucumber. A final sprinkle of fresh herbs or a tiny bit of lemon zest is the confetti on this party. And just like that, you’ve transformed six humble eggs into a vibrant, irresistible masterpiece.
How to Serve These Sunny Bites
Presentation is half the fun! Don’t just plop these on a plate. Give them the stage they deserve. I love using a simple, dark slate board or a bright, colorful ceramic platter. The contrast makes the yellow filling and colorful toppings pop. Scatter a few extra whole herbs, lemon slices, or olives around the platter for a lush, abundant look. These eggs are the ultimate team player. They’re fabulous alongside a big, crunchy Greek salad, some grilled lemon-oregano chicken skewers, or as part of a massive mezze spread with hummus, pita, and dolmas. For drinks, pair them with a crisp rosé, a citrusy cocktail, or simply some sparkling water with a squeeze of lemon. They’re perfect for brunch, a light lunch, or as the star of your appetizer table.
Make It Your Own: Delicious Twists
Love the base recipe? Here are a few ways to run with it and make it uniquely yours!
- Smoky Spanish Twist: Swap the dill for smoked paprika (a teaspoon in the filling, plus a sprinkle on top). Top with a sliver of roasted red pepper and a tiny anchovy fillet if you’re feeling bold.
- Green Goddess Vibes: Blend the yolks with a ripe avocado instead of half the yogurt, and add lots of chopped basil, chives, and tarragon. Top with a tiny basil leaf.
- Spicy Feta Frenzy: Crumble a tablespoon of high-quality feta into the filling. Add a very small pinch of crushed red pepper flakes. Top with a tiny mint leaf.
- Everything Bagel Style: Keep the filling as is, but roll the outer edge of the filled egg white in “Everything Bagel” seasoning. It adds incredible texture and flavor.
- Dairy-Free/Paleo: Replace the Greek yogurt with a high-quality, plain vegan yogurt or a few tablespoons of good olive oil mayo mixed with an extra squeeze of lemon.
Beau’s Kitchen Notes
This recipe has become a Feastical staple, and it’s evolved in my kitchen. I used to be strictly Team Dill, but one day I was out and used parsley with a hefty pinch of dried oregano. Wow—it was a whole different, equally delicious island! My biggest lesson? Don’t skip the ice bath. I learned that the hard way at a Fourth of July party, trying to peel warm eggs that turned into lumpy, cratered messes. Never again. Now, I always make a few extra eggs, just in case a couple tear during peeling (it happens to the best of us!). The filling also tastes even better if you let it mingle in the fridge for an hour before piping, but honestly, they’re fantastic right away. Food is about joy, not perfection.
Your Questions, Answered
Can I make these ahead of time?
Absolutely, and I often do! You can hard-boil and peel the eggs up to 2 days in advance; keep them in a sealed container in the fridge. You can also make the filling 1 day ahead, store it separately in a bag or tub, and pipe it into the whites the day of your event. For best texture and looks, I recommend adding the fresh toppings right before serving.
My filling is a bit runny. What happened?
No worries! This usually means the yolks were a touch undercooked or the yogurt had excess liquid. Fix it by popping the filling in the fridge for 20-30 minutes to firm up. You can also add a tiny sprinkle of finely grated parmesan or a pinch of almond flour to thicken it without affecting the flavor.
Help! My eggs are impossible to peel cleanly.
We’ve all been there. The ice bath is key, but also, slightly older eggs peel better than super fresh ones. After the ice bath, try cracking and rolling the egg, then peeling it under a slow stream of cool water; the water helps get under the membrane. And be gentle—sometimes it’s not you, it’s the egg!
What’s the best way to transport these to a party?
Use a deviled egg carrier (a game-changer!) or a baking sheet. Arrange the filled eggs snugly, cover the whole tray tightly with plastic wrap, and then aluminum foil to prevent sliding. Keep them chilled until you’re ready to set them out. Bring toppings in a small baggie to add on-site.
Print
Mediterranean Deviled Eggs : Fresh, Tangy & Herb-Infused
Description
Deviled eggs are always one of the first appetizers to disappear — and this Mediterranean version gives the classic a fresh, zesty upgrade. By using Greek yogurt, lemon, garlic, and herbs, you get a lighter, brighter filling with plenty of flavor. They’re easy to make, great for gatherings, and perfect when you want something simple but impressive.
Ingredients
Ingredients (Serves 6 – makes 12 halves)
-
6 large eggs
-
¼ cup plain Greek yogurt (full-fat or 2%)
-
1 teaspoon fresh lemon juice
-
1 small garlic clove, finely grated (optional)
-
1 tablespoon finely chopped fresh dill or parsley
-
Salt and black pepper, to taste
Toppings (choose any):
-
Sliced Kalamata olives
-
Finely diced cucumber
-
Extra chopped herbs
-
Light sprinkle of lemon zest
-
Pinch of paprika or oregano
Instructions
-
Hard-boil the eggs
Place eggs in a saucepan and cover with cold water. Bring to a boil, then turn off heat, cover, and let sit for 10 minutes. -
Cool and peel
Transfer eggs to an ice bath for at least 5 minutes. Peel and pat dry. -
Slice and remove yolks
Cut eggs in half lengthwise. Gently remove yolks and place them in a bowl. Arrange whites on a plate. -
Make the filling
Mash yolks with Greek yogurt, lemon juice, garlic, herbs, salt, and pepper until smooth and creamy. Taste and adjust seasoning. -
Fill the eggs
Spoon or pipe the mixture into the egg white halves. -
Add toppings
Garnish with olives, cucumber, herbs, or lemon zest. Chill until ready to serve.
Notes
-
Use slightly older eggs — they peel more easily than very fresh ones.
-
Don’t skip the ice bath — it stops cooking and helps prevent green yolks.
-
Make it smoother — press the filling through a sieve or blend briefly for extra creaminess.
-
Make ahead — boil eggs up to 2 days early and store peeled in the fridge. Fill the day you serve.
-
Too runny? Chill the filling 20–30 minutes to firm it up.
Nutritional Highlights (Per Egg Half)
While we’re all about flavor first at Feastical, it’s nice to know that what tastes good can also be good for you! These Mediterranean Deviled Eggs are a fantastic source of high-quality protein and healthy fats to keep you satisfied. By using Greek yogurt, we’re adding extra protein and probiotics while cutting back on saturated fat compared to traditional mayo-based fillings. Eggs provide choline for brain health, and the fresh herbs and lemon bring antioxidants and vitamin C. It’s a win-win: a party-pleasing treat that also nourishes you. Remember, these figures are estimates and can vary based on specific ingredients used.
- Calories: ~70
- Protein: 4g
- Carbohydrates: 1g
- Fat: 5g
- Fiber: 0g
- Sugars: <1g
One Last Bite of Wisdom
And there you have it, friends—my favorite way to bring a burst of Mediterranean sunshine to your table, no passport required. These deviled eggs are proof that a few simple, quality ingredients, combined with a little love and a lot of flavor, can create something truly memorable. They’re the appetizer that sparks conversation, the snack that feels like a treat, and the recipe I hope you’ll make your own. So the next time you need a dish that’s guaranteed to disappear, remember this one. Thank you for letting me share my kitchen and my stories with you. Now, go forth and make something feastical! Don’t forget to tag me @feastical when you do—I love seeing your creations.
With a full heart and an empty platter,
Beau
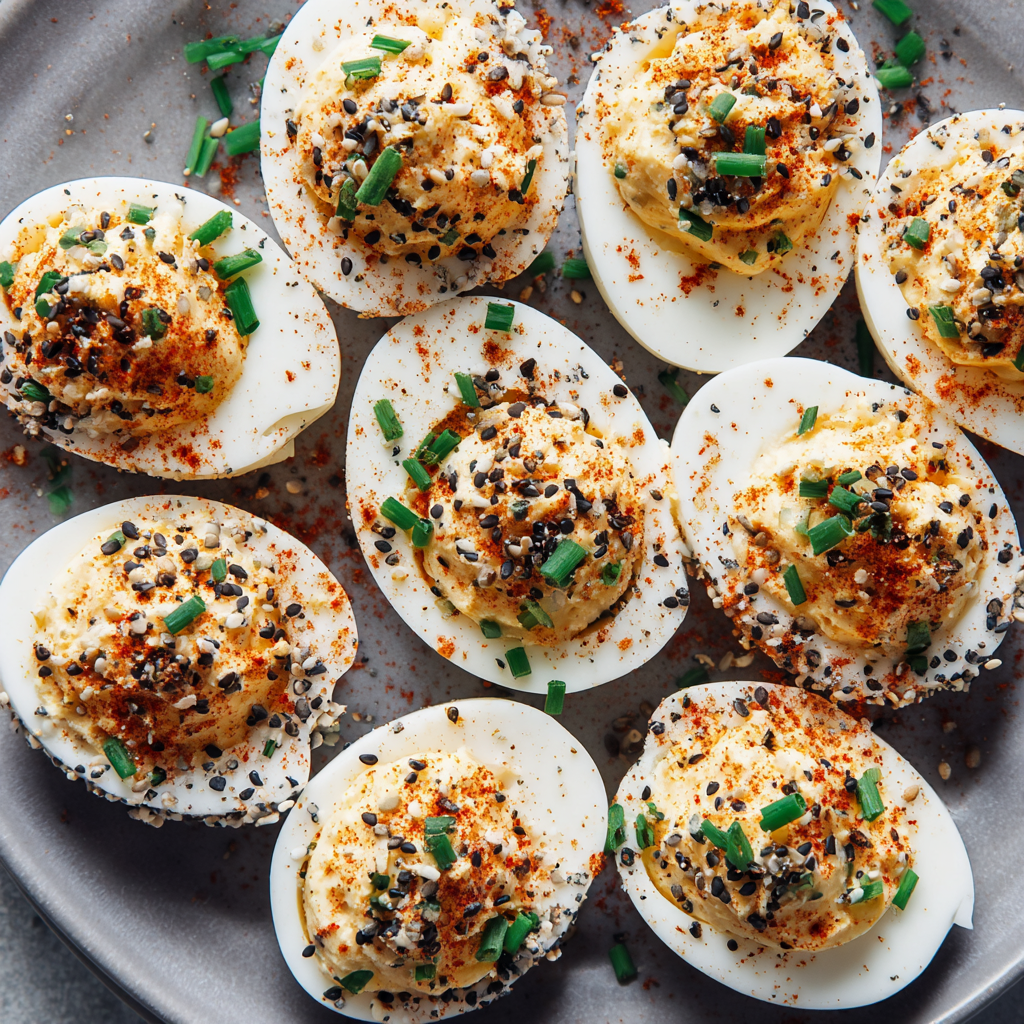
Everything Bagel Deviled Eggs : Savory, Snackable, and Crowd-Friendly
Everything Bagel Deviled Eggs: The Party Appetizer That Actually Gets Eaten
Hey there, friend! Beau here, welcoming you back to my kitchen at Feastical. Let’s talk about a universal truth: the appetizer table at any gathering is a competitive landscape. There are the veggie platters that people pick at, the cheese boards that get a little love, and then there are the rockstars—the dishes that vanish before you’ve even finished setting out the napkins. Today, we’re making one of those rockstars. We’re taking a beloved classic, giving it a serious flavor glow-up, and creating the ultimate savory bite: Everything Bagel Deviled Eggs.
If you’ve ever stood over a plate of traditional deviled eggs and thought, “These are good, but I wish they had a little… crunch, a little garlicky punch, a little *je ne sais quoi*,” then you and I are on the same wavelength. The solution is hiding in your spice drawer or at your local grocery store: everything bagel seasoning. That magical blend of toasted sesame seeds, poppy seeds, garlic, onion, and salt is a one-way ticket to Flavor Town, and when it meets the cool, creamy perfection of a deviled egg? Pure, snackable magic happens.
This isn’t just a recipe; it’s a game-plan for your next potluck, game day spread, or “I-need-a-snack-that-feels-fancy” Tuesday night. They’re incredibly simple to make, endlessly customizable, and they have this uncanny ability to make people feel both nostalgic and delighted by something new. So, let’s roll up our sleeves, put on some good music, and transform the humble egg into the most talked-about dish on the table. Trust me, once you bring these out, you’ll be taking recipe requests all night. Let’s dig in!
The Deviled Egg Diplomacy of My Grandma Jean
Before we get to the how-to, I have to tell you about my Grandma Jean. That woman could throw a bridge party like nobody’s business. The clink of ice in tall glasses, the soft rustle of cards, and the low hum of gossip were the soundtrack of my childhood afternoons at her house. And at the center of it all, on her best cut-glass plate, was always a towering pyramid of deviled eggs.
Her recipe was simple—mayo, a whisper of yellow mustard, a sprinkle of paprika—but she executed it with the precision of a heart surgeon. They were perfect. I’d watch, mesmerized, as her steady hands piped the filling using a corner of a plastic baggie (a true old-school hack). To me, those eggs weren’t just food; they were a symbol of togetherness, of grown-up parties, of being part of something special.
This recipe is my loving, slightly rebellious homage to her. I’ve kept her spirit of simple, crowd-pleasing joy but injected it with my own chef’s curiosity. I think she’d raise an eyebrow at the “everything bagel” part, but after one bite, she’d give that slow, approving nod that was better than any trophy. It’s a reminder that the best recipes aren’t just lists of ingredients; they’re vessels for memory, and it’s more than okay to add your own chapter to the story.
Gathering Your Flavor All-Stars
Here’s what you’ll need to make these savory beauties. I’ve tossed in some “why it works” notes and swaps because knowing the *why* makes you a more confident cook!
- 6 large eggs, hard-boiled and peeled: The foundation! Large eggs give you a good yolk-to-white ratio. For the absolute easiest peel, use eggs that are a week or two old. Fresh eggs are stubborn! My pro tip: steam, don’t boil. Place eggs in a steamer basket over 1 inch of boiling water, cover, and steam for 12 minutes. The shells practically jump off.
- 2½ tbsp mayonnaise: This is our creamy binder. Use a good-quality, full-fat mayo like Duke’s or Hellmann’s/Best Foods for the richest texture and flavor. For a tangier twist, sub in half Greek yogurt or sour cream.
- 1 tsp Dijon mustard: My secret weapon! Dijon adds a complex, sharp depth that plain yellow mustard can’t match. It cuts through the richness beautifully. If you only have yellow, use it, but know that Dijon is a game-changer here.
- Salt and black pepper, to taste: Season as you go! The everything bagel topping has salt, so taste your filling before you go wild. Freshly cracked black pepper is a must for that little aromatic kick.
- 1½ tbsp everything bagel seasoning: The star of the show! You can find this blend anywhere now. I love the Trader Joe’s version, but brands like McCormick make great ones too. Feel free to make your own by toasting equal parts sesame seeds, poppy seeds, dried minced garlic, dried minced onion, and flaky salt.
- Optional: chives or cream cheese bits for garnish: The finishing touches! Thinly sliced chives add a fresh, oniony pop and gorgeous color. Tiny dollops or crumbles of cold cream cheese lean into the “bagel” theme and add a wonderful, tangy creaminess.
Let’s Build Some Flavor Bites: A Step-by-Step Guide
Alright, team. Let’s transform these simple ingredients into your new favorite snack. I’m walking you through each step with the tips and tricks I’ve learned from a lifetime of egg-peeling and party-plate-filling.
Step 1: The Perfect Peel (The Most Important Pre-Step!)
Once your eggs are cooked (via your preferred method—I’m team steam!), immediately transfer them to a bowl of ice water. Let them chill completely, about 15 minutes. This stops the cooking and contracts the egg inside the shell, making peeling 100% easier. Gently tap the egg all over on the counter, then roll it between your hands to loosen the shell. Start peeling from the wider end, where there’s usually an air pocket. Peeling under a trickle of running water can also help the shell slide right off. Pat the peeled eggs dry.
Step 2: Slice & Scoop with Finesse
Using a sharp knife, slice each egg neatly in half lengthwise. Wipe your knife clean between cuts for pretty, smooth edges. Gently pop the yolks out into a medium mixing bowl. Arrange the whites on your serving platter—this way, you’re not handling them after they’re filled. If a white is torn or ugly, don’t stress! It’s getting a delicious hat of filling anyway.
Step 3: Create the Dreamy, Creamy Filling
Now, to the yolks! Mash them thoroughly with a fork until you have a fine, crumbly texture. Add the mayonnaise and Dijon mustard. Here’s my chef hack: start mixing with the fork, then switch to a small whisk. Whisk vigorously until the mixture is utterly smooth, creamy, and lump-free. We’re going for a luxurious, pipeable consistency. Season with a pinch of salt and a few cranks of pepper. Taste it! This is your moment to adjust. Want more tang? Add a smidge more mustard. Creamier? A teaspoon more mayo.
Step 4: The Fill-Up (Fancy or Rustic, Your Call!)
You can simply spoon the filling back into the whites for a charming, rustic look. But if you want to impress (and it’s surprisingly easy), piping is the way to go. Spoon the filling into a zip-top bag, snip off a corner (about ½-inch), and pipe away! No fancy tips needed. Swirl it, pile it high, make it pretty. The filling is your canvas.
Step 5: The Everything Bagel Transformation
This is the fun part. You have two brilliant options: 1) Pour your everything bagel seasoning into a shallow dish and gently dip the top of each filled egg into it for a full, even coating. Or, 2) Hold a pinch of seasoning between your fingers high above the platter and sprinkle it over all the eggs for a more rustic, “snow-dusted” look. I’m a dipper—I love that full crunchy coverage.
Step 6: Garnish & Chill
If using, now’s the time for those thin slices of chive or tiny cream cheese bits. Then, cover the platter loosely with plastic wrap and pop it in the fridge for at least 30 minutes before serving. This chill time lets the flavors marry and the filling set up perfectly, making them even more delicious.
How to Serve These Savory Stars
Presentation is part of the joy! Ditch the old plastic deviled egg tray (we’ve all used it, no shame). Instead, choose a simple, beautiful platter. A slab of slate, a wooden board, or a vintage ceramic plate all work wonderfully. Arrange the eggs in a circle or rows, and tuck little sprigs of fresh dill or parsley in the gaps for a pop of green.
What to serve them with? They’re the undisputed champion of the appetizer table, so build a spread around them. They pair beautifully with a bright, crisp white wine like Sauvignon Blanc, a light beer, or even a spicy Bloody Mary. For a full “brunch vibe,” set them out with smoked salmon, capers, and a bagel board. For a cocktail party, surround them with other bold flavors like spicy nuts, sharp cheeses, and olives. The key is that these eggs are bold, so they can hold their own next to other strong flavors.
Make It Your Own: 5 Flavorful Twists
Once you’ve mastered the base recipe, the world is your deviled egg oyster! Here are a few of my favorite riffs:
- The “Lox” Style: Fold 2 tablespoons of finely chopped cold-smoked salmon into the yolk filling. Garnish with a tiny piece of salmon and a single caper on top. It’s a bagel-and-lox party in an egg.
- Spicy Sriracha Swirl: Add 1-2 teaspoons of Sriracha (or your favorite hot sauce) to the yolk mixture. Pipe the filling, then use a toothpick to swirl a little extra Sriracha on top for a gorgeous, spicy marbled effect.
- Everything Avocado: Replace half the mayonnaise with mashed ripe avocado for an ultra-creamy, slightly green, and healthy-fat-packed version. The avocado’s mild flavor lets the everything seasoning still shine.
- Bacon & Chive: Fold 2 tablespoons of finely chopped, crispy cooked bacon into the filling. Garnish with chives. Because bacon makes everything better—it’s a scientific fact.
- The “Everything” Vegan: Use well-drained firm tofu instead of egg yolks! Crumble it super finely. Bind it with vegan mayo, a touch of tahini (for richness), and black salt (kala namak) for an authentic “eggy” sulfur flavor. Fill halved small boiled potatoes or mushroom caps instead of egg whites!
A Few Notes from My Kitchen to Yours
This recipe has become a Feastical staple, and it’s evolved from my early days of over-seasoning (lesson learned: taste as you go!). I once brought a batch to a picnic and forgot the seasoning at home. Panic! I ended up crushing up some plain bagel chips and sprinkling those on top in a pinch. Was it the same? No. Was it still delicious and did people eat them all? Absolutely. The moral: don’t panic, improvise.
I also highly recommend making a double batch. Every single time I think, “Oh, six eggs is plenty,” I’m proven wrong. They disappear at a speed that defies physics. Doubling the recipe takes barely any extra time and guarantees you’ll get to enjoy more than just one yourself. Finally, if you’re prepping for a big event, you can boil and peel the eggs up to two days ahead. Keep them whole in a sealed container in the fridge. Make the filling the day of for the best texture and flavor. Happy deviling!
Your Questions, Answered!
Q: Help! My filling is watery/gummy. What happened?
A: This usually traces back to the yolks. If they’re overcooked (see those green-gray rings?), they can become dry and mealy, making the texture off. Perfectly cooked yolks are bright yellow. Also, ensure your mayo isn’t old or separated. If your filling seems too stiff, add a teaspoon of mayo or a few drops of water. If it’s too loose, chill it for 20 minutes to firm up.
Q: Can I make these ahead of time?
A: You bet! Assemble them completely (including seasoning) up to 24 hours in advance. Store them in a single layer on their platter, covered tightly with plastic wrap, in the fridge. The seasoning may lose a *tiny* bit of its crunch but the flavor will be amazing.
Q: My eggs cracked while boiling! Are they ruined?
A: Not at all! This happens to everyone. Often, the egg white will seal the crack as it cooks. If some white leaks out, it’s purely cosmetic. These eggs are still perfect for deviling—just use those uglier halves for yourself (the chef’s treat!) and save the prettiest ones for the platter.
Q: I don’t have a piping bag. Any other hacks?
A: Of course! A zip-top bag with the corner snipped is my go-to (as mentioned). For even more control, spoon the filling into the corner of a sturdy plastic bag, twist the top to push the filling down, then snip. You can also use a small cookie scoop or even a teaspoon—just use a second spoon to help scrape it off neatly into the white.
Everything Bagel Deviled Eggs : Savory, Snackable, and Crowd-Friendly
Description
Looking for an easy appetizer that people actually finish? These Everything Bagel Deviled Eggs are creamy, savory, and packed with crunch from everything bagel seasoning. They’re quick to make, great for parties, and use simple ingredients. Perfect when you want something classic with a bold twist.
Ingredients
-
6 large eggs
-
2½ tablespoons mayonnaise
-
1 teaspoon Dijon mustard
-
Salt and black pepper, to taste
-
1½ tablespoons everything bagel seasoning
-
Optional: chopped chives for garnish
Instructions
-
Boil the eggs
Place eggs in a pot and cover with water. Bring to a boil, then lower heat and simmer 10 minutes. -
Cool and peel
Transfer eggs to ice water and cool for 10–15 minutes. Peel and pat dry. -
Slice and remove yolks
Cut eggs in half lengthwise. Gently remove yolks and place them in a bowl. Set whites on a plate. -
Make the filling
Mash yolks with a fork until fine. Mix in mayonnaise and Dijon mustard until smooth. Season with salt and pepper. -
Fill the eggs
Spoon or pipe the yolk mixture back into the egg whites. -
Add seasoning
Sprinkle or dip the tops in everything bagel seasoning. -
Chill
Refrigerate 20–30 minutes before serving for best flavor.
Notes
-
Use slightly older eggs — they peel more easily than very fresh ones.
-
Ice bath matters — it stops cooking and helps shells come off clean.
-
For extra smooth filling: mix with a small whisk instead of just a fork.
-
No piping bag? Use a zip-top bag and snip the corner.
-
Taste before salting — the bagel seasoning already contains salt.
-
Make ahead: boil eggs up to 2 days early; fill the same day for best texture.
Nutritional Information (Because We’re Curious!)
Okay, let’s talk turkey… or in this case, eggs! While these are a treat, they’re also packed with good stuff. This estimated breakdown is for two halves
Final Thoughts
If there’s one recipe that proves a simple twist can turn a classic into a sensation, it’s these Everything Bagel Deviled Eggs. They take the comforting, familiar joy of a deviled egg—the food of family gatherings and quiet nostalgia—and give it a bold, crunchy, utterly moreish upgrade that feels both exciting and deeply satisfying.
This isn’t just about following steps; it’s about embracing a mindset. Cooking, at its best, is a blend of respect for tradition and the courage to play. My Grandma Jean’s perfect, simple eggs taught me about care and presentation. This recipe builds on that foundation, adding a layer of modern, bold flavor that gets people talking—and more importantly, eating.
So the next time you’re staring at a carton of eggs, wondering what to bring to the party or make for a special snack, remember this: you’re not just making deviled eggs. You’re creating little bites of creamy, crunchy, garlicky joy. You’re crafting a dish that disappears first, that sparks conversation, and that might just become someone else’s food memory one day.
Thank you for letting me share this recipe—and a little piece of my kitchen story—with you. Now go forth, boil those eggs, and get ready for the compliments. Don’t forget to tag @Feastical if you share your creations—I love seeing your twists!
With gratitude and good appetite,
Beau
Feastical
Creamy Coconut Veggie Curry with Bell Peppers, Cauliflower & Spinach
Your New Favorite Cozy Night In: Creamy Coconut Veggie Curry
Hey friends, Beau here from Feastical! Let’s talk about that magical moment when you want a dinner that feels like a total treat but doesn’t ask you to spend your entire evening dancing around the stove. You know the feeling—you’re craving something rich, something comforting, something that makes you go “Mmmm” with the first bite, but you also want to feel good after eating it. You want veggies, you want flavor, and you definitely want to keep it simple.
Well, pull up a chair, because this Creamy Coconut Veggie Curry is about to become your weeknight hero. We’re talking tender cauliflower florets, sweet strips of bell pepper, and a handful of vibrant spinach, all swimming in the most luxuriously silky, ginger-kissed coconut sauce. It’s a hug in a bowl. It’s plant-powered comfort food at its absolute best. And the best part? It all comes together in one pot in about 30 minutes. Seriously, by the time your rice cooker dings, this vibrant, aromatic curry is ready to go. So, grab your favorite deep skillet or Dutch oven, and let’s turn a regular Tuesday into a Feastical.
The Memory That Inspired the Pot
This recipe always takes me back to a tiny, hole-in-the-wall restaurant I stumbled upon years ago during a particularly rainy trip. I was cold, a little lost, and the smell of toasted spices and coconut milk wafting out the door was literally magnetic. I ordered the “vegetable curry” without a second thought. What arrived was this steaming, unpretentious clay pot, brimming with colorful veggies in a sauce so perfectly balanced—creamy, tangy, gently spicy—that I forgot all about the downpour outside. I must have asked the chef three questions (through some enthusiastic gesturing) about what was in it.
While I never got the exact recipe, that feeling of discovery, warmth, and pure satisfaction is what I’ve tried to bottle up every time I make this dish at home. It’s my kitchen recreation of that moment of perfect, simple comfort. It’s the reason I always use fresh ginger and a big squeeze of lime—those bright, high notes cut through the richness just right. For me, this curry isn’t just dinner; it’s a delicious, edible reminder that the coziest finds are often the simplest ones.
Gathering Your Curry Crew (Ingredients & Smart Swaps)
Here’s the beautiful cast of characters that’ll make this curry sing. Don’t stress if you’re missing an item—cooking is about creativity! I’ve got your back with swaps.
- 1 tbsp coconut oil or olive oil: Coconut oil adds a subtle, sweet fragrance that plays nicely with the other flavors, but a good olive oil works perfectly if that’s what you have. The goal is just to get those aromatics sizzling.
- 1 small onion, diced: The sweet, savory base of almost every great dish. Yellow or white onion is perfect here.
- 3 garlic cloves, minced: Flavor foundation, part one. Don’t be shy!
- 1 tbsp fresh ginger, grated: Flavor foundation, part two—and non-negotiable for that bright, zingy kick! I keep a knob of ginger in the freezer and grate it frozen—no peeling needed and zero waste.
- 1 red & 1 yellow bell pepper, sliced: Color, sweetness, and a lovely texture. Use any color combo you love! Got an orange or green pepper? Throw it in!
- 3 cups cauliflower florets: Our hearty, “meaty” veg that soaks up the sauce beautifully. Try to cut them into even-sized pieces so they cook uniformly.
- 1½ cups canned coconut milk (full-fat or light): This is the secret to the creaminess. Full-fat gives you that luscious, restaurant-style richness. Light coconut milk is a great lower-calorie option that’s still delicious. Always shake the can well before opening!
- ½ cup vegetable broth: This thins the sauce to the perfect, spoonable consistency. Low-sodium is my go-to so I can control the salt.
- 1 tbsp lime juice (plus extra for serving): The magic brightener! Fresh is best—it lifts the entire dish. Have a lemon? That works in a pinch.
- 1 tbsp curry powder: The spice blend superstar. “Curry powder” varies by brand, so use one you like. I love a medium-spicy Madras style.
- 1 tsp ground turmeric: Adds earthy flavor, a gorgeous golden hue, and a boost of goodness.
- Salt and pepper to taste: Your essential flavor finishers.
- 2 cups baby spinach: We stir this in at the end for a pop of green and nutrients. It wilts down to almost nothing, so don’t worry if your mountain looks huge!
- Fresh cilantro, for garnish (optional): I know, it’s a “love it or hate it” herb. I’m Team Cilantro, but if you’re not, fresh basil or a sprinkle of green onion is lovely.
- Cooked rice or naan, to serve: The ultimate sauce-mopping vehicles. Jasmine rice, brown rice, or quinoa are all fantastic.
Let’s Get Cooking: Your Step-by-Step Roadmap to Curry Bliss
Ready? Tie on your apron, and let’s build some flavor. I’ll walk you through each step with my favorite chef hacks.
- Sauté the Aromatics – Wake Up the Flavors! In a large, deep skillet or Dutch oven, heat your oil over medium heat. Toss in the diced onion and give it a stir. We’re not looking for color here, just softness and sweetness. After about 2 minutes, add the minced garlic and grated ginger. Now, lean in and take a big whiff—this is the best smell in the world! Cook for another 1-2 minutes, just until fragrant. Chef’s Tip: Don’t let the garlic brown or it can turn bitter. We’re in the fragrance zone, not the browning zone.
- Add the Veggies – Bring in the Color & Crunch! Time for the bells and cauliflower! Stir them into the aromatic goodness until everything is coated in those lovely oils. Let them cook, stirring occasionally, for about 5 minutes. You’ll hear a slight sizzle and see the peppers begin to soften just a touch. This little pre-cook helps develop their flavor before the simmer. Chef’s Hack: If you’re in a super rush, you can skip this sauté and add them straight to the simmering liquid, but those extra 5 minutes add a ton of depth.
- Create the Creamy Dream – The Simmer! Now, pour in the coconut milk and vegetable broth. It’s going to look so pretty! Sprinkle in the curry powder, turmeric, a good pinch of salt, and a few grinds of black pepper. Give it a really good stir to dissolve the spices into the liquid. Crank the heat up to bring it to a lively simmer—you’ll see bubbles forming around the edges. Once it’s there, reduce the heat to low, pop a lid on it, and let it do its thing for 10-12 minutes. Chef’s Note: This gentle simmer is key. It cooks the cauliflower to tender perfection without breaking the beautiful coconut sauce.
- The Grand Finale – Spinach & Zing! Lift the lid—your kitchen should smell incredible. Check that the cauliflower is tender by piercing a floret with a fork. Perfect? Great! Now, stir in that mountain of fresh spinach and the tablespoon of lime juice. The spinach will wilt almost instantly in the hot sauce. Give it one final stir, taste it (the most important step!), and adjust the seasoning. Need more salt? A touch more lime? Make it yours. Chef’s Secret: Adding the lime juice at the end preserves its bright, fresh acidity. If you cook it too long, that zing mellows out.
How to Serve It Up (The Fun Part!)
This is where your inner artist gets to play. I love serving this curry family-style—plopping the whole pot right in the middle of the table so everyone can dig in. Start with a big fluffy bed of steamed jasmine rice in shallow bowls. Ladle a generous portion of the curry right over the top, making sure to get plenty of that golden sauce. The colors are stunning!
For the garnish, I’m a big believer in texture and freshness. A scattering of fresh cilantro leaves is my go-to. But here are some other incredible add-ons: a sprinkle of toasted coconut flakes, a handful of chopped roasted peanuts or cashews for crunch, a few thin slices of fresh red chili for heat, or even a dollop of mango chutney on the side. Don’t forget those extra lime wedges! A final squeeze right before you eat makes every single bite sing. And of course, warm, buttery naan or fluffy roti on the side is never, ever a wrong answer. It’s the ultimate sauce-getter.
Make It Your Own: Delicious Twists & Swaps
This recipe is a fantastic blueprint. Once you’ve mastered the base, play around! Here are a few of my favorite riffs:
- Protein Power-Up: Add a can of rinsed chickpeas or red lentils with the cauliflower for a heartier, protein-packed meal. For a non-veg option, diced chicken breast or shrimp sautéed with the onions works beautifully.
- Swap the Veggies: The veggie combo is totally flexible! Sweet potatoes (diced small), green beans, peas, carrots, or broccoli would all be amazing. Just adjust the simmer time based on how long your chosen veg needs to become tender.
- Thai-Inspired Twist: Swap the curry powder for 2 tbsp of red or green Thai curry paste (sauté it with the onions). Add a tablespoon of brown sugar or maple syrup and a splash of soy sauce or tamari with the coconut milk. Garnish with basil instead of cilantro.
- Creamy Dreamier: Want it even richer? Stir in a tablespoon of smooth, natural peanut butter or almond butter into the sauce during the last few minutes of simmering. It adds an incredible depth and creaminess.
- Spice Level Adjustment: To turn up the heat, add a diced fresh chili (like a serrano or jalapeño) with the onions, or a big pinch of red pepper flakes with the spices. For a milder curry, just stick with the curry powder—it’s usually quite gentle.
Beau’s Kitchen Notes & Stories
This curry has been on a journey with me. The first time I made it, I was so eager I dumped all the spinach in at the beginning. Let’s just say we had a very, *very* dark green, slightly slimy curry. Lesson learned: delicate greens go in last! Over the years, I’ve learned that toasting the curry powder in the oil for about 30 seconds before adding the liquid can unlock even more complex flavor, but it’s an extra step I only do when I’m not in my classic 30-minute rush.
It’s also become my number-one “clean out the fridge” hero. That lone zucchini? Half a bag of frozen peas? Toss it in! The forgiving nature of the creamy sauce makes almost any veggie taste like it belongs. And if I’m bringing it to a friend who needs a meal, I’ll often pack the rice and curry separately with a little note that says “Reheat gently and combine!”—it’s a gift that always feels (and tastes) like love.
Your Curry Questions, Answered!
Q: My sauce is too thin! How can I thicken it?
A: No worries! First, let it simmer uncovered for an extra 5-10 minutes; the excess moisture will evaporate. If it still needs help, make a quick slurry: mix 1 teaspoon of cornstarch with 1 tablespoon of cold water until smooth, then stir it into the simmering curry. It should thicken up within a minute or two.
Q: Can I make this ahead of time?
A: Absolutely! In fact, the flavors get even better the next day. Let it cool completely, then store it in an airtight container in the fridge for up to 3 days. Reheat it gently on the stove over low heat, adding a tiny splash of broth or water if it seems too thick.
Q: Is there a substitute for coconut milk? I’m allergic.
A> You bet. For a different but still creamy profile, try using a plain, unsweetened cashew or almond milk beverage. To add back the richness, stir in a couple tablespoons of cashew butter or sunflower seed butter at the end. The flavor will be different but still deliciously creamy.
Q: My curry tastes a bit bland. What did I miss?
A> The three most common fixes are: 1) Salt. Season in layers. Add a pinch with the onions, and don’t forget to taste and adjust at the very end. 2) Acid. That lime juice is CRUCIAL. Add a bit more until the flavor pops. 3) Spice Bloom. Next time, try sautéing your curry powder in the oil for 30 seconds before adding the liquid to “bloom” the spices and intensify their flavor.

Creamy Coconut Veggie Curry with Bell Peppers, Cauliflower & Spinach
Description
Creamy Coconut Veggie Curry (One-Pot, 30 Minutes)
Ingredients
-
1 tbsp coconut oil or olive oil
-
1 small onion, diced
-
3 garlic cloves, minced
-
1 tbsp fresh ginger, grated
-
1 red bell pepper, sliced
-
1 yellow bell pepper, sliced
-
3 cups cauliflower florets
-
1½ cups canned coconut milk (full-fat or light), shaken
-
½ cup vegetable broth
-
1 tbsp curry powder
-
1 tsp ground turmeric
-
Salt and black pepper, to taste
-
2 cups baby spinach
-
1 tbsp lime juice (plus more for serving)
For serving: cooked rice or naan, fresh cilantro (optional)
Instructions
-
Sauté aromatics
Heat oil in a large skillet or pot over medium heat. Add onion and cook about 2–3 minutes until softened. Stir in garlic and ginger and cook 1 minute until fragrant. -
Add vegetables
Add bell peppers and cauliflower. Cook 4–5 minutes, stirring occasionally, to lightly soften. -
Build the sauce
Pour in coconut milk and vegetable broth. Stir in curry powder, turmeric, salt, and pepper. Mix well. -
Simmer
Bring to a gentle simmer, reduce heat to low, cover, and cook 10–12 minutes until cauliflower is tender. -
Finish
Stir in spinach and lime juice. Cook 1–2 minutes until spinach wilts. Taste and adjust salt or lime. -
Serve
Spoon over rice or serve with naan. Garnish with cilantro and an extra squeeze of lime.
Notes
-
Add 1 can chickpeas for more protein
-
Swap cauliflower for broccoli or sweet potato cubes
-
Stir in 1 tbsp peanut butter for extra richness
-
Use Thai curry paste instead of curry powder for a different flavor
Nourishment in Every Bite (Approximate, per serving)
While I’m all about flavor first, it feels great to know what’s fueling your body. This info is for one serving of curry (about ¼ of the recipe), not including rice or naan. Remember, these are estimates based on specific ingredients (like full-fat coconut milk).
- Calories: 310
- Protein: 6g – Thanks, cauliflower and spinach!
- Carbohydrates: 25g – Mostly from the nutritious vegetables.
- Fat: 22g – The healthy fats from coconut milk keep it satisfying.
- Fiber: 6g – That’s a solid boost toward your daily goal, helping you feel full and fueled.
- Sugars: 5g – Naturally occurring from the sweet bell peppers and onions.
This dish is a fantastic source of vitamins C and K (from the peppers and spinach), and the turmeric brings its own celebrated properties. It’s naturally vegan, gluten-free, and packed with plant-based goodness that truly satisfies.
Final Thoughts from My Kitchen to Yours
And that’s it, friends! Your path to a truly fantastic, creamy coconut veggie curry. I hope this recipe brings as much warmth, ease, and deliciousness to your table as it has to mine. Remember, cooking isn’t about perfection; it’s about the joy of creating something with your own two hands and sharing it. So whether you follow this to the letter or go wild with your own veggie combo, you’re doing it right.
If you make it (and I truly hope you do), tag me over at @Feastical or drop a comment on the blog.