
Christmas Gingerbread Truffles
Your New Favorite Holiday Bite: No-Bake Gingerbread Truffles
Hey friends, Beau here! Can you smell it? That magical, spicy-sweet aroma of gingerbread that seems to float through the air the moment December hits? It’s the scent of cozy sweaters, twinkling lights, and gatherings filled with laughter. For me, that flavor is the holidays. But let’s be real, between shopping, decorating, and trying to remember where you stored all the gift wrap, who has time to bake and decorate a gingerbread house from scratch?
That’s exactly why I’m so head-over-heels for these Gingerbread Truffles. They capture all the warm, spiced, soul-soothing goodness of your favorite holiday cookie, but without ever turning on your oven. We’re talking a rich, creamy center with a delightful crunch, all wrapped up in a smooth, snowy white chocolate coat. They look like a million bucks on a dessert platter, but I promise you, they are deceptively simple to make. Whether you’re a kitchen newbie or a seasoned pro, this is the kind of foolproof recipe that brings everyone together. So, let’s roll up our sleeves, put on some festive tunes, and create a treat that’s basically a hug in truffle form.
A Sweet Slice of Memory
This recipe always takes me right back to my grandma’s kitchen. Every Christmas Eve, she’d make her famous gingerbread men. The whole house would smell like molasses and spice, and my brother and I would fight over who got to press in the raisin buttons. One particularly chaotic year, a whole tray of cookies came out, well, let’s just say they were a little… *crisp*. A baking mishap turned them into gingerbread rocks! But my grandma, never one to waste a thing, just smiled, tossed those hardened soldiers into a towel, and whacked them with a rolling pin until they were fine crumbs. She mixed them with a little cream cheese, rolled them into balls, and drizzled them with the white chocolate she had left over from her famous fudge. And just like that, a kitchen “disaster” became our family’s most requested holiday treat. These truffles are my homage to her—a reminder that the best creations often come from a little bit of love and a happy accident.
Gathering Your Truffle-Making Gear
You only need a handful of simple ingredients to create this holiday magic. Here’s the lineup for about 56 bite-sized pieces of joy (trust me, you’ll want this many!).
- 2 (16 oz) boxes of Gingersnap Cookies: This is the flavor foundation! We’re using store-bought gingersnaps for maximum ease and that perfect spicy-sweet crunch. Pro Chef Tip: Don’t skimp on the brand here; grab one you know and love, as their molasses and spice level will directly influence your truffles.
- 16 oz Cream Cheese, softened: Our magical binder and the source of that luscious, creamy texture. Insider Hack: Let it sit on the counter for a good 30-45 minutes before you start. A soft cream cheese blends seamlessly, while a cold one will leave you with a lumpy, frustrating mess.
- 32 oz White Almond Bark (2 lbs), melted: This is our snowy, dreamy coating. I love almond bark (also called candy coating) for this because it melts like a dream, sets beautifully, and doesn’t have the finicky tempering requirements of real chocolate. Easy Swap: If you prefer, you can use high-quality white chocolate chips, but add a teaspoon of coconut oil to help them thin out for dipping.
- Sprinkles, Edible Glitter, or Crushed Gingersnaps for decorating (optional): This is where you let your personality shine! A little festive bling makes these truffles look professionally made and adds a fun textural contrast.
Let’s Make Some Magic: The Step-by-Step Guide
Okay, team, it’s go time! This process is a breeze, and I’ll be right here with you, sharing all my little hacks to make it even smoother.
- Crush Those Cookies!First, we need to turn those sturdy gingersnaps into a fine, sandy crumb. You have a couple of options here. The easiest way is to use a food processor. Just pulse the cookies in batches until they look like dark, spicy sand. No food processor? No problem! Toss the cookies into a large zip-top bag, squeeze out the air, and get therapeutic with a rolling pin. Crush them until you have a consistent, fine texture. A few tiny bits are okay for character, but you want it mostly fine for a smooth truffle center.
- The Big Mix-Up.In a large mixing bowl, combine your beautiful gingersnap crumbs with that perfectly softened cream cheese. Now, get in there with your hands! A spatula works, but I find using my hands is the fastest and most effective way to ensure everything is evenly incorporated. You’re looking for a mixture that holds together when you pinch it, kind like a thick, fragrant cookie dough. Chef’s Secret: If you have a stand mixer with a paddle attachment, you can let it do the work on low speed for about a minute. Just scrape down the sides to make sure no dry pockets remain.
- Roll, Roll, Roll Your Balls.Now for the fun part! Using a small cookie scoop (a #60 scoop, which holds about a tablespoon, is perfect), portion out the mixture. Roll each portion between your palms to form a smooth, one-inch ball. Place each one on a baking sheet lined with parchment paper. Pro Tip for Neatness: If the mixture starts sticking to your hands, give them a quick rinse in cold water and dry them off. The slight moisture will prevent sticking without adding extra liquid to your truffles.
- The Chill Out Session.This step is non-negotiable, my friends. Pop that entire tray into the freezer for at least 30-45 minutes. You want these guys to be firm and cold all the way through. This “flash freeze” is what prevents them from falling apart when we dip them into the warm almond bark. A firm truffle = a perfectly coated truffle.
- The Grand Dip & Decorate.While the truffles are chilling, melt your almond bark according to the package directions. I like to do this in a deep, microwave-safe bowl, melting in 30-second bursts and stirring well in between. Key Hack: For the absolute smoothest dipping process, transfer about a third of the melted coating to a tall, narrow cup or glass. This gives you the depth you need to fully submerge the truffle. Using a fork or a dipping tool, lower a cold truffle into the coating. Tap the fork gently on the edge of the bowl to let the excess drip off. Then, gently slide the coated truffle back onto the parchment-lined tray. Now, act fast! While the coating is still wet, shower it with your chosen sprinkles or decorations. If you wait, the shell will set and nothing will stick!
- The Final Set.Let the truffles sit at room temperature until the coating is completely hard and firm. This usually takes about 15-20 minutes. If you’re in a hurry, you can pop them in the fridge for 5-10 minutes to speed things up. And voilà! You’ve just created a stunning, professional-looking holiday treat.
Sharing the Sweetness: How to Serve Your Truffles
Presentation is half the fun! These truffles are superstars on any holiday dessert table. I love piling them high on a beautiful cake stand or a rustic wooden board. For a real showstopper, arrange them in a festive pattern—maybe a tree shape or a simple wreath. They also make the most heartfelt, homemade gifts. Tuck a dozen into a clear cellophane bag, tie it with a big red ribbon, and stack them in a festive tin. Give them to your mail carrier, your kid’s teacher, your neighbors… you’ll instantly become the most popular person on the block. Serve them alongside a pot of strong coffee, a mug of hot cocoa, or even a glass of cold milk. They are the perfect little bite of festive cheer.
Make Them Your Own: Delicious Recipe Twists
Once you’ve mastered the classic, feel free to get creative! Here are a few of my favorite ways to mix things up:
- Spice Lover’s Dream: Add an extra pinch (about 1/4 to 1/2 teaspoon) of ground cinnamon, cloves, or even a dash of black pepper to the crumb mixture for an extra-warm, complex spice kick.
- The Surprise Center: For a gooey, fun surprise, press a mini marshmallow or a soft caramel square into the center of each truffle before you roll it into a ball. When you bite in, you get a burst of melty goodness!
- Dark Chocolate Dip: Not a white chocolate fan? No worries! Melt dark or semi-sweet chocolate chips with a teaspoon of coconut oil and use that for dipping instead. The bittersweet chocolate paired with the spicy gingerbread is a match made in heaven.
- Dairy-Free Delight: You can easily make this recipe dairy-free! Use your favorite vegan cream cheese and dairy-free white chocolate for coating. The gingersnaps are often naturally vegan, but just double-check the ingredient list to be sure.
- Boozy Bliss (For the Grown-Ups): Add a tablespoon of spiced rum, bourbon, or Irish cream to the truffle mixture along with the cream cheese. It adds a wonderful, grown-up depth of flavor.
Beau’s Kitchen Chronicles
Over the years, I’ve made hundreds of batches of these truffles, and let me tell you, I’ve learned a thing or two. The first time I made them, I was impatient and didn’t chill the balls long enough. Let’s just say I ended up with gingerbread “blobs” instead of perfectly round truffles—still delicious, but not exactly pretty! Another time, I tried to melt the almond bark on too high a heat and it seized up into a grainy mess. The fix? A tiny splash of neutral oil (like vegetable or canola) and vigorous stirring can sometimes bring it back. The moral of the story: patience and low, slow heat are your best friends in the kitchen. This recipe has evolved from my grandma’s salvage operation into my most requested holiday gift. Every time I make them, I think of her, and that’s the best ingredient of all.
Your Truffle Questions, Answered!
Let’s tackle some common questions to ensure your truffle-making is a smashing success.
- Q: My truffle mixture is too soft/sticky. What did I do wrong?A: This usually happens if the cream cheese was too warm or you didn’t crush the cookies finely enough. Don’t panic! Just cover the bowl and pop it into the fridge for 20-30 minutes to firm up. It will be much easier to roll after a little chill session.
- Q: Can I make these ahead of time?A: Absolutely! They are the perfect make-ahead treat. Once fully set, store them in a single layer in an airtight container in the fridge for up to 2 weeks. You can also freeze them for up to 3 months. Just thaw in the refrigerator before serving.
- Q: My almond bark/chocolate is too thick for dipping. Help!A: This is a common issue. Simply thin it out by stirring in a teaspoon of solid coconut oil or paramount crystals at a time until it reaches a smooth, dippable consistency. Think of it like warm pancake batter.
- Q: Why did my coating crack after dipping?A: Cracking often occurs if the truffle centers are too cold and the temperature difference between the frozen center and warm coating is too extreme. Let the truffles sit out of the freezer for 5-10 minutes before dipping to let them warm up just a tiny bit. It makes all the difference!

Christmas Gingerbread Truffles
Description
No-Bake Gingerbread Truffles
Prep Time: 30 min | Chill Time: 30–45 min | Yield: ~56 bite-sized truffles
Cozy, spiced, creamy, and coated in dreamy white chocolate—these truffles are holiday magic in every bite.
Ingredients
Truffle Base:
-
2 (16 oz) boxes gingersnap cookies
-
16 oz cream cheese, softened
Coating:
-
32 oz white almond bark or white chocolate, melted
-
Optional: sprinkles, edible glitter, or crushed gingersnaps for decoration
Optional Twists:
-
Extra spices: cinnamon, cloves, black pepper
-
Surprise center: mini marshmallow or soft caramel
-
Dark chocolate dip
-
Dairy-free: vegan cream cheese + dairy-free chocolate
-
Boozy: 1 tbsp spiced rum, bourbon, or Irish cream
Instructions
1. Crush the Cookies
-
Use a food processor or a rolling pin inside a zip-top bag.
-
Aim for fine crumbs with a few tiny bits for texture.
2. Mix With Cream Cheese
-
Combine crumbs and softened cream cheese in a large bowl.
-
Mix by hand or use a stand mixer on low until evenly incorporated.
-
Mixture should hold together when pinched.
3. Shape the Truffles
-
Using a tablespoon or small cookie scoop, form 1-inch balls.
-
Place on a parchment-lined baking sheet.
-
If sticky, rinse hands with cold water.
4. Chill
-
Freeze for 30–45 minutes until firm.
-
Ensures truffles hold their shape during dipping.
5. Dip & Decorate
-
Melt almond bark in 30-second bursts, stirring between.
-
Use a tall, narrow cup for dipping.
-
Submerge truffles, tap off excess, and return to parchment.
-
Decorate immediately while coating is wet.
6. Set
-
Let truffles sit at room temperature 15–20 minutes or chill 5–10 minutes in the fridge until coating hardens.
Notes
-
Too soft? Chill mixture 20–30 min.
-
Thick chocolate? Stir in coconut oil or paramount crystals until smooth.
-
Cracking coating? Let truffles warm slightly before dipping.
-
Extra flavor? Add a splash of apple cider, spices, or liquor to the base.
Nutrition
- Calories: 188 kcal per truffle
- Sugar: 14 g
- Fat: 11 g
- Carbohydrates: 20 g
Quick Bite of Info
Okay, let’s talk real talk. These are a decadent holiday treat, and we’re here to enjoy every single bite! But for those who like to know the details, here’s a general nutritional breakdown per truffle (based on a yield of 56). Remember, these are estimates and can vary based on your specific ingredients.
- Calories: 188 kcal
- Fat: 11 g
- Saturated Fat: 7 g
- Carbohydrates: 20 g
- Sugar: 14 g
- Protein: 2 g
- Sodium: 90 mg
- Cholesterol: 15 mg
As always, my philosophy is to savor the foods you love, especially when they’re made with love and shared with people you care about. So enjoy every spicy, sweet, creamy bite!
Wrapping It All Up With a Bow
Well, there you have it, my friends—the complete guide to creating the most irresistible, no-fuss holiday treat. These Gingerbread Truffles are more than just a dessert; they’re a memory maker, a gift from the heart, and a guaranteed way to spread a little extra joy this season. I hope this recipe brings as much warmth and happiness to your kitchen as it has to mine. Remember, cooking isn’t about being perfect; it’s about the love you stir into every batch.
Now I’d love to hear from you! Did you add a fun twist? Have a kitchen story of your own? Share your truffle triumphs (or hilarious mishaps) with me in the comments below or over on Instagram by tagging @Feastical. Happy holidays, and happy cooking!
With love and a full plate,
Beau

Pulled BBQ Chicken Sliders
Your New Go-To Recipe for When Life Gets Deliciously Busy
Hey friends, Beau here! Let’s be real for a second. Some days, you want to spend hours in the kitchen, letting the aromas of a slow-simmered sauce fill the house. And other days? Well, other days you’re staring into the fridge at 5 PM, your stomach is growling, and you need something downright delicious on the table, stat. You want that “wow” factor without the “ow, my aching feet” factor.
If you’re nodding your head, you’ve come to the absolute right place. I’m about to let you in on one of my all-time favorite kitchen secrets: these insanely good Pulled BBQ Chicken Sliders. They are the culinary equivalent of a trusty best friend—always there for you, incredibly reliable, and they make everything more fun.
We’re talking tender, shredded chicken hugged by sweet and smoky barbecue sauce, all piled high on a soft, pillowy slider bun. Maybe you add a cool, crunchy scoop of coleslaw on top, maybe you don’t. The beauty is in the simplicity. In about the time it takes to decide what to watch on TV, you can have a plate of these little beauties ready to go. They’re perfect for a hectic weeknight, a last-minute game day gathering, or when you just need a comfort food fix that doesn’t require a physics degree to pull off. So, grab your favorite bowl and let’s make some magic happen, the easy way.
The Backyard BBQ That Started It All
This recipe will always remind me of my friend Leo’s legendary—and slightly chaotic—annual backyard barbecue. Picture this: It’s a sweltering July afternoon. The grill is overflowing with burgers and hot dogs, a cooler is packed to the brim with ice and drinks, and someone’s uncle is strumming a slightly out-of-tune guitar. It’s pure, unadulterated summer chaos.
One year, I was tasked with bringing an “appetizer.” Of course, I got busy and completely forgot to prep anything until I was walking out the door. Panic set in! But then I saw it, sitting in my fridge like a shining beacon of hope: a leftover rotisserie chicken from two nights prior. I grabbed it, a bottle of my favorite BBQ sauce, and a bag of Hawaiian rolls I had in the pantry. Ten minutes later, I arrived at the party with a platter of these warm, saucy sliders. Friends, they were gone in sixty seconds flat. They were the hit of the party, and Leo still jokes that my “desperation dish” upstaged his meticulously grilled burgers. That’s the power of a simple, feel-good recipe. It’s not about being fancy; it’s about being fantastic.
Gathering Your Flavor All-Stars
One of the best things about this recipe is the short and sweet ingredient list. This is all about maximizing flavor with minimal effort. Here’s what you’ll need:
- 2 cups shredded rotisserie or cooked chicken: This is our superstar shortcut! A store-bought rotisserie chicken is a gift from the kitchen gods—it’s already perfectly seasoned and juicy. You can also use any leftover baked, grilled, or poached chicken you have. Pro Chef Tip: Don’t toss those bones and skin! Simmer them with some veggies to make a quick, flavorful stock for another recipe.
- 1/2 to 3/4 cup of your favorite BBQ sauce: This is where your personality shines. Love a smoky, Texas-style sauce? Go for it. Prefer a sweet and tangy Kansas City classic? Perfect. I’m a huge advocate for using a good store-bought sauce to save time, but if you have a homemade one you’re proud of, this is its moment! Start with 1/2 cup and add more until it’s as saucy as you like it.
- 8-10 slider buns or Hawaiian rolls: The vessel matters! Soft, squishy slider buns are classic, but Hawaiian rolls are a game-changer. Their slight sweetness pairs magically with the smoky BBQ sauce. If you can’t find them, any soft dinner rolls will work beautifully.
- Optional toppings: coleslaw, pickles, sliced onions: These are the supporting cast that can steal the show. A cool, creamy coleslaw adds a fantastic textural contrast. A few pickle chips bring a welcome tangy punch. And some thinly sliced red onions (quickly pickled in a little vinegar if you’re feeling fancy) add a sharp, crunchy bite.
Let’s Get Building: Your Foolproof Steps to Slider Heaven
Alright, team. It’s go time. This process is so simple, you’ll have it memorized after one try. I’ll walk you through each step with a few of my favorite chef hacks to make it even better.
- Shred the Chicken. Get your cooked chicken into a medium-sized mixing bowl. The easiest way to shred it is with your hands (it’s therapeutic, I swear!), but you can also use two forks, pulling them in opposite directions. Chef Hack: If the chicken is a bit cold from the fridge, pop it in the microwave for 20-30 seconds to warm it up slightly. It will shred much more easily and tenderly.
- Sauce it Up! Now, pour that glorious BBQ sauce over the shredded chicken. I always start with 1/2 cup and use a spatula to mix and coat every single strand. Take a look. Does it look saucy enough for you? If not, add the remaining 1/4 cup. Remember, you can always add more sauce, but you can’t take it away! Little Chef Insight: For an extra layer of flavor, add a teaspoon of apple cider vinegar or a dash of Worcestershire sauce to the mix. It brightens everything up!
- Warm it Through. This step is non-negotiable for maximum deliciousness. You have two great options here:
- Skillet Method (My Favorite): Transfer the saucy chicken mixture to a skillet over medium heat. Stir it for 3-5 minutes until it’s heated through and maybe even a little caramelized around the edges. This adds a wonderful depth of flavor.
- Microwave Method (For Super Speed): No shame in the game! Cover your bowl with a damp paper towel and microwave in 30-second bursts, stirring in between, until hot. This takes about 1-2 minutes total.
- Build Your Sliders. While your chicken is warming, you can get your buns ready. I like to give them a very light toast—just enough to make them sturdy and warm, but not so much that they lose their softness. Then, using a spoon or a small scoop, pile that warm, saucy chicken high onto the bottom bun. Don’t be shy!
- Top it Off. This is your canvas. Add a forkful of that crunchy coleslaw right on top of the chicken, followed by a pickle spear or a few onion slices. Place the top bun on, give it a gentle press, and behold your masterpiece.
How to Serve These Pulled BBQ Chicken Sliders Like a Pro
Presentation is part of the fun! I love serving these sliders on a big, rustic wooden board or a large platter. Pile them all up, let them touch, and watch them disappear. For a casual get-together, I’ll often set out a “slider bar” with small bowls of the different toppings—coleslaw, pickles, onions, even some extra BBQ sauce and hot sauce—so everyone can build their own perfect bite.
As for sides? Keep it just as easy. A simple bagged salad with a zesty vinaigrette cuts through the richness perfectly. A big bowl of rippled potato chips or crispy potato wedges is a no-brainer. And if you want to lean all the way into the BBQ theme, a scoop of store-bought baked beans warmed up on the stove is the ultimate companion. The goal is to be eating with your friends and family, not slaving over a hot stove all night.
Mix It Up! 5 Fun Twists on the Classic
Once you’ve mastered the basic blueprint, the world is your oyster… or, well, your slider! Here are a few of my favorite ways to mix things up:
- The Buffalo Blue: Swap the BBQ sauce for buffalo sauce! Toss your chicken in 1/2 cup of buffalo sauce and top with a drizzle of creamy blue cheese or ranch dressing and some crisp celery sticks.
- Hawaiian Luau: Use those sweet Hawaiian rolls as your base. Mix a tablespoon of pineapple juice into your BBQ sauce and top the chicken with a thin ring of fresh pineapple and a slice of crispy bacon.
- Spicy Chipotle Kick: For those who like it hot, stir 1-2 minced chipotle peppers in adobo sauce into your BBQ. The smoky heat is incredible. Top with a cool, creamy avocado slice or a dollop of sour cream to balance it out.
- Aloha BBQ & Cheddar: A classic combo! Pile your BBQ chicken onto the bun and top with a generous handful of sharp cheddar cheese. Pop the whole assembled slider under the broiler for a minute until the cheese is melted and bubbly.
- Carolina-Style Tang: Love a vinegar-based BBQ? Mix your chicken with a Carolina Gold mustard-based BBQ sauce and top with a vinegar-based coleslaw for a tangy, Southern-inspired treat.
Beau’s Kitchen Notes & Stories
This recipe has become such a staple in my life that it’s evolved in the most delightful ways. I’ve made it on a boat, in a tiny apartment kitchen with only a hot plate, and for a crowd of twenty hungry friends after a hike. The core remains the same, but I love how adaptable it is.
One of my favorite kitchen fails-turned-wins involved these sliders. I once accidentally grabbed a bottle of extra-spicy ghost pepper BBQ sauce instead of the regular kind. After one taste that nearly blew my head off, I had to think fast. I stirred in a big spoonful of honey and a squeeze of lime juice, and it created this incredible sweet-heat balance that everyone raved about. It just goes to show that sometimes the best recipes are born from a little happy accident!
Your Pulled BBQ Chicken Slider Questions, Answered!
Q: My chicken mixture turned out a little dry. What did I do wrong?
A: No worries, this is an easy fix! Dry chicken usually means it needed more sauce or it was heated for too long. Next time, be a little more generous with the BBQ sauce. If it’s already cooked, just stir in an extra tablespoon or two of sauce or even a splash of chicken broth to rehydrate it.
Q: Can I make these sliders ahead of time for a party?
A: Absolutely! You can shred the chicken and mix it with the sauce up to two days in advance. Keep it stored in an airtight container in the fridge. When you’re ready to serve, just warm it up in a skillet or the microwave. I don’t recommend assembling the sliders too far ahead, as the buns can get soggy.
Q: What’s the best way to store leftovers?
A> Store any leftover BBQ chicken mixture separately from the buns in the fridge for up to 3-4 days. The chicken reheats like a dream! Assembled sliders are best eaten right away, but if you have one or two left, wrap them tightly in plastic wrap—they’ll be a little soft, but still tasty for lunch the next day.
Q: The flavor is a little flat. How can I make it pop?
A> Great question! This is where you can play chef. Try adding a pinch of smoked paprika, a dash of garlic powder, or a tablespoon of brown sugar to the BBQ sauce before mixing it with the chicken. A splash of apple cider vinegar or a squeeze of fresh lime juice at the end can also work wonders to brighten all the flavors.

Pulled BBQ Chicken Sliders
Description
Pulled BBQ Chicken Sliders
Ready in 10 minutes | Serves 4 (8–10 sliders)
Tender, saucy chicken piled high on soft buns—perfect for weeknights, game day, or any time you need comfort food fast.
Ingredients
Chicken:
-
2 cups shredded rotisserie or cooked chicken
Sauce:
-
½–¾ cup BBQ sauce (your favorite!)
-
Optional: 1 tsp apple cider vinegar or a dash of Worcestershire sauce for extra flavor
Buns & Toppings:
-
8–10 slider buns or Hawaiian rolls
-
Optional toppings: coleslaw, pickles, sliced onions
Instructions
1. Shred the Chicken
-
Use your hands or two forks to shred the cooked chicken.
-
If slightly cold, microwave 20–30 seconds for easier shredding.
2. Mix with BBQ Sauce
-
Add ½ cup BBQ sauce and stir to coat.
-
Taste and add more sauce if needed.
-
Optional: stir in apple cider vinegar or Worcestershire sauce for brightness.
3. Warm the Chicken
Skillet Method (Best):
-
Heat chicken over medium in a skillet for 3–5 minutes until hot and slightly caramelized.
Microwave Method (Quickest):
-
Cover with a damp paper towel and heat in 30-second bursts, stirring until warmed through.
4. Prepare the Buns
-
Lightly toast buns if desired.
-
Spoon warm, saucy chicken onto each bottom bun.
5. Top & Serve
-
Add coleslaw, pickles, or onions if using.
-
Place top bun and serve immediately.
Notes
-
Dry chicken? Add extra BBQ sauce or a splash of chicken broth to rehydrate.
-
Make ahead: Shred chicken and mix with sauce up to 2 days in advance; warm before serving.
-
Store leftovers: Chicken in airtight container 3–4 days; buns separately.
Nutrition
- Calories: 220 Cal per slider
- Fat: 6g
- Carbohydrates: 25g
- Protein: 14g
A Quick Look at the Nutrition (Because We Care!)
Now, I’m not a nutritionist, but I believe in being mindful about what we eat. Here’s a rough breakdown per slider (using about 2 oz of chicken and a standard slider bun, without optional toppings). Remember, these are estimates and can vary based on the specific brands of BBQ sauce and buns you use.
- Calories: ~220
- Protein: 14g (Great for keeping you full!)
- Fat: 6g
- Carbohydrates: 25g
To lighten things up, you can use a low-sugar or sugar-free BBQ sauce and opt for whole-wheat slider buns. Loading up on fresh veggie toppings like onion and pickles adds flavor and nutrients without many calories. It’s all about balance, friends!
Prep time: 5 minutes | Cook time: 5 minutes | Total time: 10 minutes | Serves: 4 (makes 8–10 sliders)
Final Thoughts from My Kitchen to Yours
And there you have it! Your new secret weapon for effortless, crowd-pleasing meals. These Pulled BBQ Chicken Sliders are more than just a recipe; they’re a reminder that the best food doesn’t have to be complicated. It’s about good ingredients, a little bit of love, and sharing it with the people who matter most.
I hope this recipe finds its way into your regular rotation and becomes a beloved classic in your home, just like it is in mine. If you make them, I’d be absolutely thrilled if you tagged me on social @FeasticalBeau or dropped a comment on the blog. Seeing your kitchen creations is my favorite part of the day.
Now go forth, make a mess, and enjoy every last bite. Until next time, keep it simple, soulful, and satisfying!
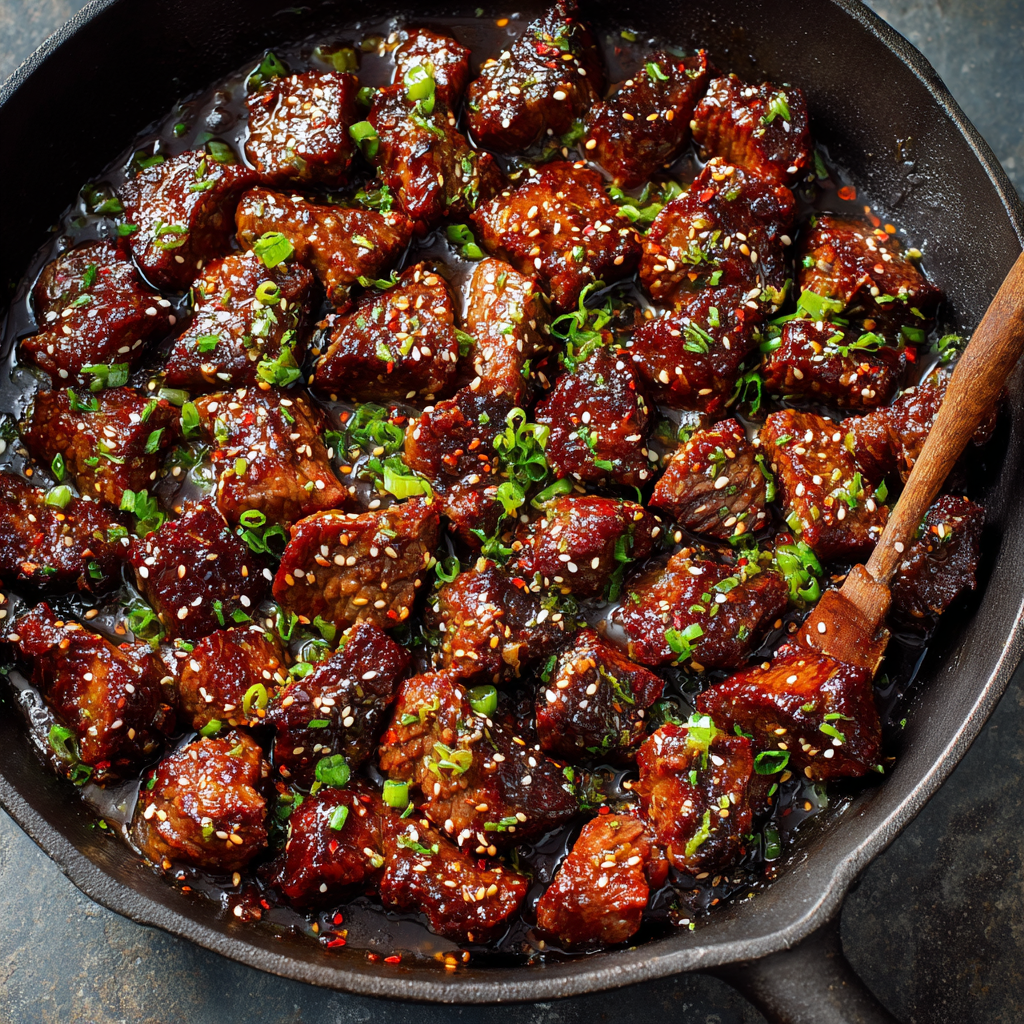
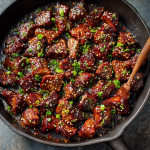
Sweet & Sticky Steak Bites
Sweet & Sticky Steak Bites: Your New 30-Minute Obsession
Hey friends, Beau here! Let’s be real for a second. Some nights, you stare into the fridge and just want something good. Not fussy, not a five-act culinary opera, but something that hits every single flavor note and makes you feel like a total kitchen rockstar with minimal effort. You want that “wow” factor without the “ow, my feet hurt from standing so long” factor.
Well, my friend, you have just found your golden ticket. These Sweet and Sticky Steak Bites are my go-to for exactly those kinds of days. We’re talking tender, seared steak pieces, coated in a glossy, finger-licking-good glaze that’s a perfect symphony of sweet, salty, and just a hint of spicy warmth. The smell alone will bring everyone wandering into the kitchen, spatula in hand, asking, “Is it ready yet?”
The best part? This isn’t some guarded family secret passed down through generations. It’s a brilliantly simple formula that works every single time, and it’s on your table in under 30 minutes. Whether you’re serving it over a fluffy bed of rice, tossing it with noodles, or just spearing them straight from the skillet with a toothpick (no judgment here, I do it too), these steak bites are about to become a regular in your dinner rotation. So, let’s fire up that stove and make some magic happen!
The Night These Steak Bites Saved the Day
I’ll never forget the first time I truly fell in love with this recipe. It was a few years back, and I was catering a casual, last-minute backyard party for a friend. I had a grand plan involving a fancy marinated tri-tip, but as fate would have it, my main dish was… well, let’s call it “over-rested” to the point of no return. A kitchen disaster was unfolding in slow motion.
Panic started to set in. I had 20 hungry people arriving in an hour, and my star player was benched. Then I saw it: a beautiful piece of sirloin I’d bought as a backup. In a moment of pure, adrenaline-fueled inspiration, I cubed it up, whipped together a simple sauce from pantry staples, and seared those bites in a screaming hot pan. The sauce bubbled and thickened, clinging to the steak in this gorgeous, sticky glaze. I threw them on a platter, scattered a handful of green onions over the top, and held my breath.
They were gone in under five minutes. Not just eaten, but devoured. People were raving, asking for the recipe, and declaring it the best thing they’d eaten all summer. That’s when I knew this wasn’t just a backup plan; it was a main event. It taught me that the best recipes aren’t always the most complicated—they’re the ones that bring joy, solve problems, and taste like a triumph.
Gathering Your Flavor All-Stars
This is where the magic starts. The ingredient list is short and sweet (and salty, and savory!), but each one plays a crucial role. Here’s the lineup:
- 1 lb sirloin or flank steak, cut into bite-sized pieces: Sirloin is my top pick for its great balance of tenderness and beefy flavor, while flank steak brings a fantastic, robust texture. The key is to cut against the grain for the most tender bites imaginable.
- 1/4 cup low-sodium soy sauce: This is our salty, umami base. Using low-sodium lets us control the salt level, especially since the sauce reduces and concentrates. For a gluten-free version, tamari or coconut aminos are perfect substitutes.
- 1/4 cup brown sugar: Our primary sweetener that creates that incredible, sticky body in the glaze. It caramelizes beautifully with the soy sauce.
- 2 tablespoons honey: This adds a floral, deep sweetness that balances the molasses notes of the brown sugar. Maple syrup works in a pinch if you’re out of honey!
- 2 tablespoons minced garlic: Don’t be shy! Fresh is best here, giving us that pungent, aromatic punch that forms the soul of the sauce.
- 1 tablespoon grated fresh ginger: The zingy, warm counterpart to the garlic. I keep a knob of ginger in the freezer and just grate it frozen—no peeling needed and it lasts forever!
- 1 tablespoon sesame oil: A little drizzle of liquid gold. Toasted sesame oil isn’t for cooking; it’s for flavor. It gives the entire dish that classic, nutty, Asian-inspired aroma.
- 1 teaspoon red pepper flakes (or to taste): This is your dial. Want just a whisper of heat? Use 1/4 tsp. Want to wake up your sinuses? Go for a full tablespoon! It’s your kitchen, your rules.
- Salt and black pepper, to taste: For seasoning the steak itself. A simple but essential start.
- Green onions and sesame seeds, for garnish: The finishing confetti! They add a fresh crunch, a pop of color, and a toasty nuttiness that makes the dish look as good as it tastes.
Let’s Get Cooking: Your Foolproof Roadmap to Deliciousness
Ready to transform these simple ingredients into something spectacular? Follow these steps, and you really can’t go wrong. I’ve packed in all my favorite chef hacks to ensure your success.
- Prep and Season Your Star Player. Pat your steak pieces completely dry with a paper towel. This is a non-negotiable step for a perfect sear! Moisture is the enemy of browning. Season them generously with salt and black pepper. Let them sit while you make the sauce so the seasoning can adhere.
- Whisk Up the Magic Potion. In a medium bowl, combine the soy sauce, brown sugar, honey, garlic, ginger, sesame oil, and red pepper flakes. Whisk it until the sugar has dissolved and everything is one happy, fragrant family. Give it a taste—this is your chance to adjust the heat level if you want.
- Sear Like a Pro (This is the Most Important Step!). Heat a large, heavy-bottomed skillet or cast-iron pan over medium-high heat until it’s seriously hot. You should see a faint wisp of smoke. Add a tiny drizzle of a neutral oil (like avocado or canola) if your steak is very lean. Now, here’s the secret: DON’T CROWD THE PAN! Add the steak bites in a single layer with some space between them. If you pile them in, they’ll steam instead of sear. Work in batches if you have to. Let them sear, untouched, for 1-2 minutes per side until you get a beautiful, brown crust. They don’t need to be cooked through yet—we’ll finish them in the sauce.
- The Grand Glaze Finale. Once all your steak bites are beautifully browned, return them all to the pan. Immediately pour that glorious sauce over everything. It will sizzle and bubble—that’s the sound of flavor being made! Reduce the heat to medium and let it simmer for 3-4 minutes, stirring frequently. You’ll see the sauce slowly reduce, thicken, and cling to each piece of steak in a shiny, sticky glaze.
- Finish and Serve with Flair. Once the sauce has thickened to your liking, remove the pan from the heat immediately. Stir in most of your green onions and sesame seeds, saving a little for the top. This locks their flavor right into the glaze. You’re done! You’ve just created a masterpiece.
How to Serve These Saucy Bites
This is the fun part! These steak bites are the ultimate team players. Here are a few of my favorite ways to serve them up:
- The Classic Comfort Bowl: My #1 pick. Pile a scoop of steaming jasmine or white rice into a bowl, top it with a generous helping of the steak bites and all that extra glaze, and finish with the remaining green onions and sesame seeds. The rice soaks up the extra sauce perfectly.
- Noodle Night Hero: Toss them with cooked lo mein noodles, ramen noodles, or even zucchini noodles for a low-carb option. Add a splash of the pasta water to loosen the sauce and create a silky coating for the noodles.
- The Ultimate Appetizer: Stick a toothpick in each bite and watch them disappear from a platter in seconds. They’re the life of any party.
- Veggie-Packed Stir-Fry: Turn it into a complete meal! After searing the steak, sauté some quick-cooking veggies like bell peppers, snap peas, or broccoli in the same pan before adding the steak and sauce back in.
Make It Your Own: Delicious Twists & Swaps
One of the best things about this recipe is its flexibility. Feel free to play around and make it suit your taste or dietary needs!
- Spicy Gochujang Glaze: Add 1-2 tablespoons of Korean gochujang paste to the sauce mixture for a deep, complex, and spicy kick.
- Pineapple Teriyaki Twist: Stir in 1/4 cup of crushed pineapple (with its juice) into the sauce. It adds a tropical sweetness and a little acidity that’s absolutely divine.
- Mushroom Lover’s Dream: Sear a handful of sliced cremini mushrooms in the pan after the steak. Their earthy flavor soaks up the sauce like little sponges.
- Gluten-Free & Paleo Friendly: Simply swap the soy sauce for coconut aminos and the brown sugar for an equal amount of coconut sugar. It works like a charm!
- Extra Garlicky & Herby: Stir in a final tablespoon of cold butter and a handful of fresh chopped cilantro or Thai basil at the very end for a richer, more aromatic finish.
Beau’s Kitchen Confidential
Over the years, this recipe has become a true chameleon in my kitchen. I’ve made it for first dates, busy Tuesday nights, and even as a fancy-ish dinner for my in-laws (it worked like a charm). The one constant evolution is the heat level—I’ve learned my friends can handle a lot more spice than I initially thought! My biggest piece of advice, beyond the searing tip, is to mise en place (that’s just a fancy way of saying have all your ingredients prepped and measured before you start cooking). When things move this fast, being organized is the key to a stress-free, joyful cooking experience. And remember, a little char on the steak isn’t a mistake—it’s flavor!
Your Questions, Answered!
I’ve gotten a lot of questions about this recipe over on Instagram. Here are the most common ones to help you out!
- My sauce isn’t thickening! What did I do wrong? Don’t panic! This usually means the heat was too low, or you didn’t let it simmer long enough. Crank the heat up to medium and let it bubble away for another minute or two, stirring constantly. If you’re really in a pinch, mix 1 teaspoon of cornstarch with 1 tablespoon of cold water and stir it into the simmering sauce—it’ll thicken up almost instantly.
- Can I use a different cut of meat? Absolutely! Sirloin and flank are my top choices, but skirt steak or even a tenderloin (filet mignon) would be incredibly luxurious. Just be mindful that thinner cuts like skirt steak will cook much faster.
- My steak came out tough. How can I prevent that? Two things: First, make sure you’re cutting against the grain. Look for the lines running through the steak and slice perpendicular to them. This shortens the muscle fibers, making each bite more tender. Second, avoid overcooking during the searing phase. We just want color, not a well-done steak, as it will finish cooking in the sauce.
- How should I store and reheat leftovers? Store them in an airtight container in the fridge for up to 3 days. To reheat, gently warm them in a skillet over low heat with a tiny splash of water or beef broth to loosen the glaze. The microwave can make the steak rubbery, so the stovetop is best!
Sweet & Sticky Steak Bites
Description
Sweet & Sticky Steak Bites
Ready in 30 minutes | Serves 4
Tender steak cubes in a sweet, salty, and slightly spicy glaze—perfect over rice, noodles, or straight from the skillet.
Ingredients
Steak Bites:
-
1 lb sirloin or flank steak, cut into bite-sized pieces (against the grain)
-
Salt and black pepper, to taste
Glaze:
-
¼ cup low-sodium soy sauce (or tamari/coconut aminos for GF)
-
¼ cup brown sugar
-
2 tbsp honey (or maple syrup)
-
2 tbsp minced garlic
-
1 tbsp grated fresh ginger
-
1 tbsp sesame oil (for flavor)
-
1 tsp red pepper flakes (adjust to taste)
Garnish:
-
Green onions, sliced
-
Sesame seeds
Instructions
1. Prep & Season the Steak
-
Pat steak pieces completely dry.
-
Season generously with salt and black pepper.
2. Make the Glaze
-
In a medium bowl, whisk together soy sauce, brown sugar, honey, garlic, ginger, sesame oil, and red pepper flakes. Adjust heat to taste.
3. Sear the Steak
-
Heat a large skillet or cast-iron pan over medium-high until hot (light smoke).
-
Add a small drizzle of neutral oil if the steak is lean.
-
Add steak in a single layer; don’t crowd the pan.
-
Sear 1–2 minutes per side until browned. Work in batches if needed.
4. Combine & Glaze
-
Return all steak to the pan.
-
Pour the glaze over the steak; simmer on medium heat 3–4 minutes, stirring, until thickened and sticky.
5. Finish & Garnish
-
Stir in most of the green onions and sesame seeds, reserving some for topping.
-
Serve immediately over rice, noodles, or as an appetizer.
Notes
-
Tender Steak: Cut against the grain.
-
Perfect Sear: Avoid overcrowding the pan; moisture prevents browning.
-
Thick Glaze: Simmer on medium; add 1 tsp cornstarch mixed with 1 tbsp water if needed.
-
Storage: Refrigerate up to 3 days. Reheat gently in a skillet with a splash of water or broth.
Nutritional Info (For Your Inner Food Scientist)
I’m all about balance! While this is definitely a feel-good comfort food, it’s helpful to know what you’re enjoying. Here’s a rough breakdown per serving (based on 4 servings). Please note, this is an estimate and can vary based on your specific ingredients and portion sizes.
- Calories: ~320
- Protein: 25g (Excellent source for muscle repair and keeping you full!)
- Fat: 12g
- Carbohydrates: 24g (Primarily from the brown sugar and honey, giving you that quick energy.)
- Sodium: This will vary, but using low-sodium soy sauce helps keep it in check.
To lighten it up, you can reduce the brown sugar by half and lean on the honey, or use a sugar substitute that browns well. Serving it with a big side of steamed veggies or a crisp salad is a great way to round out the meal!
Your Next Favorite Dinner is Waiting
And there you have it! From my slightly-panicked kitchen to yours, these Sweet and Sticky Steak Bites are more than just a recipe—they’re a reminder that incredible food doesn’t have to be complicated. It’s about big flavor, simple techniques, and the pure joy of sharing something delicious with the people you love.
I absolutely cannot wait for you to try this. When you do, make sure to tag me @FeasticalBeau on Instagram or pop over to Feastical.com and leave a comment. I love seeing your creations and hearing your stories. Now go forth, sear with confidence, and get ready for the compliments to roll in. Happy cooking!
With a full heart and a sticky-fingered high-five,
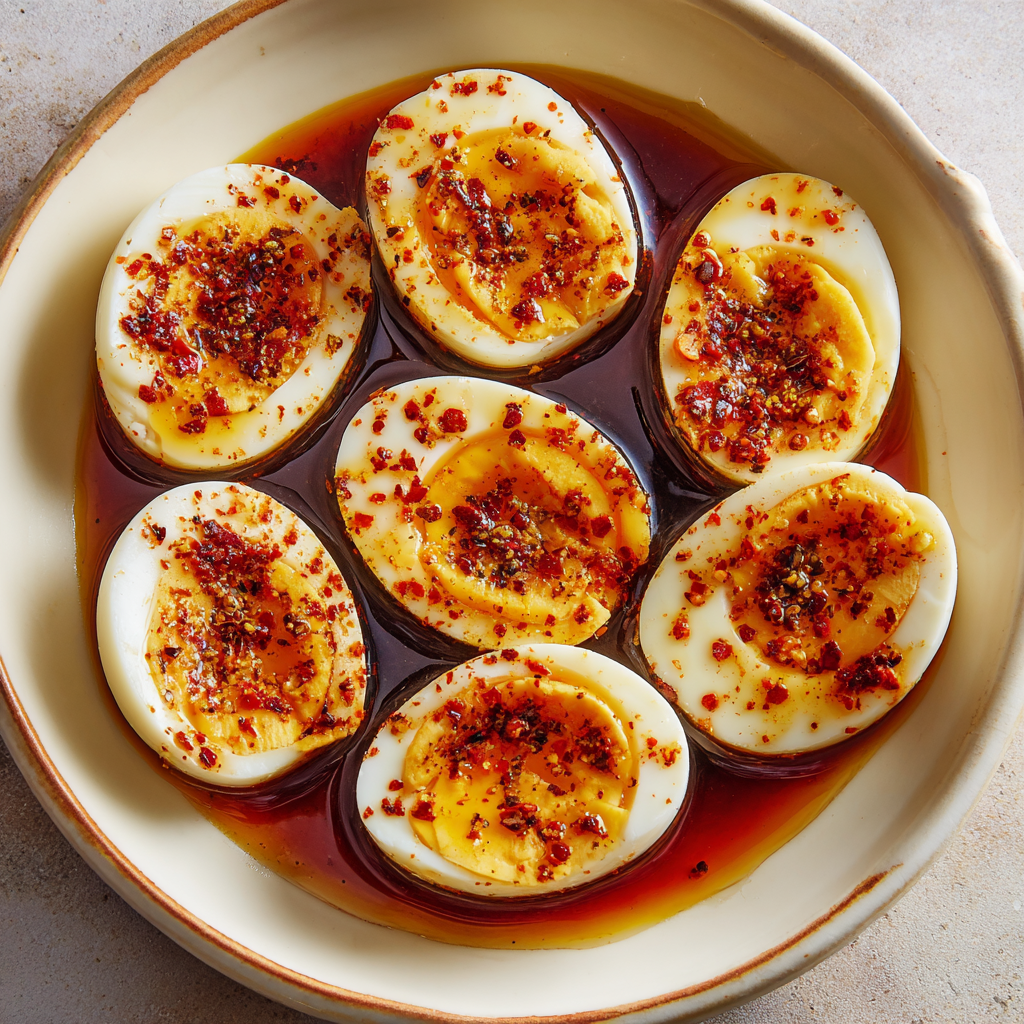
Butter-Soaked Boiled Eggs (Spicy Southern Style)
Butter-Soaked Boiled Eggs (Spicy Southern Style): Your New Favorite Snack Attack
Hey, friends! Beau here, welcoming you back to my kitchen. You know me—I’m all about those recipes that feel like a secret handshake between you and your food. The ones that are so stupidly simple, so wildly delicious, that you can’t believe you haven’t been making them your whole life. Well, pull up a stool, because today we’re diving headfirst into one of those very recipes: Butter-Soaked Boiled Eggs.
Now, I know what you’re thinking. “Beau, a hard-boiled egg? Really? Isn’t that for salad bars and diet plans?” And to that I say, oh, my dear friend, just you wait. We’re about to take that humble, often-overlooked egg and perform a little kitchen magic. We’re giving it a warm, buttery bath infused with the kind of spices that make your taste buds sit up and do a little two-step.
This isn’t just an egg; it’s an experience. It’s the perfect bridge between a quick protein hit and a deeply satisfying, soulful snack. They’re rich, a little spicy, and so much more than the sum of their parts. If you’ve ever stared into the fridge feeling snacky but uninspired, this recipe is about to become your new best friend. So, let’s grab our favorite bowl and turn the ordinary into the extraordinary.
The Accidental Discovery That Started It All
This recipe was born out of pure, unadulterated hunger and a near-empty fridge. Picture it: It’s a lazy Sunday afternoon after a huge family potluck the night before. The fridge is a graveyard of casserole dishes with one spoonful left in each, and my stomach is rumbling. My eyes land on a bowl of leftover hard-boiled eggs, destined for a boring Monday morning salad.
But then, my gaze shifts to the little saucepan on the stove, still holding a puddle of melted garlic butter from the morning’s toast. A crazy idea sparks. What if…? I grab the eggs, slice them in half, and give them a generous, glugging pour of that golden, spiced butter. I let them sit for a minute, the butter slowly seeping into the creamy yolks. I took one bite, and it was a revelation. The creamy yolk, the firm white, the warm, spicy, luxurious butter… it was a flavor explosion I never knew I needed. My wife walked in, saw the look on my face, tried one, and immediately said, “This goes on the blog. Now.” And so, a Feastical classic was born.
Gathering Your Flavor Arsenal
The beauty of this recipe is in its simplicity. You probably have most of this in your pantry right now! Here’s what you’ll need to gather up.
- 6–8 Hard-Boiled Eggs, peeled and halved: The star of the show! I find the slightly older eggs in your fridge are actually easier to peel. Pro-tip: After boiling, shock them in an ice bath to stop the cooking and make peeling a breeze.
- 1/4 cup (half stick) Butter, melted: This is our rich, velvety vehicle for flavor. I use unsalted butter so I can control the salt level myself. For a dairy-free twist, a high-quality olive oil or even ghee works wonderfully!
- 1/2 teaspoon Old Bay Seasoning: This is the secret weapon, folks. It brings a complex, celery-salt-forward, slightly seafoody vibe that is just magic. No Old Bay? A good Cajun seasoning blend is a fantastic stand-in.
- 1/4 teaspoon Garlic Powder: We’re using powder here because it blends seamlessly into the butter, giving you that consistent garlicky punch in every single bite.
- 1/4 teaspoon Onion Powder: Same idea as the garlic powder—it builds a savory, aromatic base note that fresh onion can’t quite achieve in this application.
- 1/4 teaspoon Crushed Red Pepper Flakes: This is where the “spicy” in our Spicy Southern Style comes from! Feel the power here—add a pinch for a gentle warmth or a full teaspoon if you like to live on the edge.
- 1/4 teaspoon Black Pepper: Freshly cracked is always best for that bright, sharp bite.
- Optional: Pinch of Lemon Pepper or Cajun Seasoning: This is your playground! A little lemon pepper adds a zesty, bright note, while extra Cajun seasoning amplifies the heat and earthiness.
Let’s Make Some Magic: Your Step-by-Step Guide
Ready? This comes together so fast, you better have your plate ready. We’re talking 15 minutes from start to glorious finish.
Step 1: The Perfect Boil & Peel
First things first, you need perfectly hard-boiled eggs. My no-fail method? Place your eggs in a single layer in a saucepan and cover them with cold water by about an inch. Bring the pot to a rolling boil, then immediately slap a lid on it, turn off the heat, and let it sit for exactly 12 minutes. After that, drain the hot water and plunge the eggs into a bowl of ice water. Let them cool completely. This shock stops the cooking and creates a little pocket of steam between the egg and the shell, making them a dream to peel. Once peeled, slice them in half lengthwise.
Step 2: Create the Flavor Bomb Butter
While your eggs are chilling in their ice bath (or if you’re using pre-boiled eggs), let’s make the magic sauce. In a small saucepan over low heat, melt your butter gently. You don’t want it to sizzle or brown, just become a beautiful, golden liquid. Once melted, take it off the heat. Now, grab your seasonings and stir them all into the warm butter. That’s Old Bay, garlic powder, onion powder, red pepper flakes, black pepper, and any of your optional add-ins. Give it a good whisk until it’s all one happy, speckled, aromatic family.
Step 3: The Grand Butter Soaking
Take your halved eggs and arrange them cut-side up in a shallow dish. A pie plate or an 8×8 baking dish works perfectly here. You want them in a single layer so each one gets its fair share of the buttery goodness. Now, for the main event. Slowly, deliberately, pour that seasoned butter right over the tops of the eggs. Try to get a little bit in every nook and cranny, letting it pool in the wells of the yolks. Listen to that gentle sizzle if the butter is still warm—it’s the sound of flavor being born.
Step 4: The Patience Part (The Hardest Step!)
I know, I know. You want to dig in. But trust me on this. Let the eggs just sit there and bask in their buttery spa treatment for a solid 2-3 minutes. This allows the warm butter to be absorbed into the yolk and white, infusing every single molecule with flavor. This is the step that transforms them from “buttered eggs” to “butter-SOAKED” eggs.
Step 5: Serve It Up!
That’s it! You’re done. You can serve them immediately while they’re still warm and the butter is glistening. They are an absolute revelation this way. Alternatively, you can pop the whole dish in the fridge and let them chill. The butter will solidify around the eggs, creating a different, but equally delicious, chilled and savory treat.
How to Serve These Buttery Gems
These eggs are the ultimate versatile player. Here are a few of my favorite ways to enjoy them:
The Snack Plate Hero: Arrange them on a board with some pickled vegetables, sharp cheese, crackers, and sliced salami for the ultimate snack attack platter that’s sure to impress guests.
The Salad Game-Changer: Chop them up and toss them into a simple green salad, a classic potato salad, or a Cobb salad. They add a punch of flavor that makes bottled dressings weep with envy.
The Brunch Star: Serve them alongside some crispy bacon, buttered toast for dipping, and a fresh fruit salad. It elevates your brunch spread from simple to spectacular with almost zero effort.
Straight Outta the Dish: Honestly? Don’t even plate them. Just stand over the kitchen counter with a fork and enjoy them one by one. I won’t judge. I’ve been there.
Make It Your Own: Flavor Twists & Swaps
Once you’ve mastered the base recipe, the world is your buttery oyster! Here are a few ways to mix it up:
1. Everything Bagel Bliss: Swap the Old Bay and other spices for two tablespoons of Everything Bagel Seasoning. It’s savory, sesame-seedy, and absolutely divine.
2. Herbs & Sunshine: Stir in two tablespoons of freshly chopped herbs like dill, chives, and parsley into the melted butter, along with a big squeeze of fresh lemon juice. This is a brighter, fresher take that’s perfect for spring.
3. Smoky & Spicy Chipotle: Replace the red pepper flakes with 1 teaspoon of finely chopped chipotle in adobo sauce and a 1/4 teaspoon of smoked paprika. This gives you a deep, smoky heat that is just incredible.
4. The “No-Dairy” Dream: As mentioned, swap the butter for a high-quality extra virgin olive oil or avocado oil. The flavor profile will be different, but still incredibly delicious and rich.
5. Truffle Zest Indulgence: Feeling fancy? After melting the butter, stir in a teaspoon of truffle zest or truffle oil. It’s an incredibly luxurious twist that turns a simple snack into a gourmet experience.
Beau’s Kitchen Notes & Stories
This recipe has become a staple in our house, especially for last-minute gatherings. I once doubled the batch for a game-day party, and they were gone before the first quarter ended. A friend’s kid, who famously hated eggs, tried one and asked for three more. That’s the power of butter and spice, my friends!
Over time, I’ve learned that the type of butter matters. A good, high-fat European-style butter makes the sauce even richer and more luxurious. I’ve also started adding the butter while it’s still very warm, as I find it soaks into the yolks just a little bit better. Don’t be afraid to get creative and make it your own—that’s what cooking is all about!
Your Questions, Answered!
Q: Can I make these ahead of time?
A: Absolutely! You can boil and peel the eggs up to 3 days in advance. I would recommend adding the warm butter sauce just before serving for the best texture and flavor, but they are still tasty chilled.
Q: My butter solidified after I poured it on the cold eggs. What did I do wrong?
A: You didn’t do anything wrong! If your eggs are straight from the fridge, the cold will cause the butter to firm up. This is actually a delicious way to eat them—like a spiced butter shell on the egg. If you want that “soaked” effect, just let the eggs sit on the counter for 15-20 minutes to take the chill off before you add the warm butter.
Q: I’m not a big spice fan. Can I tone down the heat?
A: Of course! Just leave out the red pepper flakes entirely. The dish will still be packed with amazing flavor from the Old Bay, garlic, and onion. It’ll be savory and rich without the kick.
Q: What’s the best way to store leftovers?
A: Pop them in an airtight container in the fridge for up to 3 days. They’re great cold, but I sometimes let them come to room temp for 10 minutes before eating to soften the butter a bit.

Butter-Soaked Boiled Eggs (Spicy Southern Style)
Description
Butter-Soaked Boiled Eggs (Spicy Southern Style)
A simple, indulgent snack that transforms ordinary hard-boiled eggs into a buttery, spicy delight. Perfect for snack plates, brunch, or a quick protein boost.
Ingredients
-
6–8 hard-boiled eggs, peeled and halved
-
¼ cup (½ stick) unsalted butter, melted
-
½ tsp Old Bay seasoning (or Cajun seasoning)
-
¼ tsp garlic powder
-
¼ tsp onion powder
-
¼ tsp crushed red pepper flakes (adjust to taste)
-
¼ tsp freshly cracked black pepper
-
Optional: pinch of lemon pepper or extra Cajun seasoning
Flavor Twists:
-
Everything Bagel seasoning instead of Old Bay
-
Fresh herbs + lemon juice for a bright take
-
Chipotle + smoked paprika for smoky heat
-
Olive oil or avocado oil for a dairy-free version
-
Truffle zest or truffle oil for a luxurious indulgence
Instructions
1. Perfect Hard-Boiled Eggs
-
Place eggs in a single layer in a saucepan; cover with cold water by 1 inch.
-
Bring to a rolling boil, cover, and turn off heat. Let sit 12 minutes.
-
Drain and shock in ice water to stop cooking. Peel and halve lengthwise.
2. Make the Spiced Butter
-
Melt butter over low heat in a small saucepan (do not brown).
-
Stir in Old Bay, garlic powder, onion powder, red pepper flakes, black pepper, and any optional seasonings. Whisk until combined.
3. Butter Soak
-
Arrange eggs cut-side up in a shallow dish.
-
Slowly pour warm spiced butter over the eggs, letting it fill the yolk wells.
-
Let sit 2–3 minutes for maximum flavor absorption.
4. Serve
-
Serve warm immediately, or chill for a savory, butter-coated treat.
-
Optional garnishes: chopped parsley, chives, or extra seasoning.
Notes
-
Warm the eggs to get the full “butter-soaked” effect if using chilled eggs.
-
Butter quality matters—European-style butter gives richer flavor.
-
Adjust spice levels to your preference; omit red pepper for a mild version.
-
Make ahead: boil and peel eggs up to 3 days in advance. Add butter just before serving.
Nutrition
- Calories: 80Cal per egg
- Fat: 7g
- Carbohydrates: 1g
- Protein: 6g
The Nourishing Bite (Because We Care!)
Let’s talk about what’s fueling you! These Butter-Soaked Boiled Eggs are a fantastic source of high-quality protein, thanks to the eggs. The fat from the butter and the yolk helps keep you feeling full and satisfied, making this a perfect snack to curb those afternoon cravings. They’re also naturally low in carbohydrates. While they are a richer snack due to the butter, it’s all about balance. Enjoying one or two as part of a varied diet is a delicious way to get a powerful protein punch. Remember, food is meant to be both nourishing and joyful—and this recipe is definitely both!
| Nutrition (per 2 halves / 1 egg): | |
| Calories | ~120 |
| Protein | 6g |
| Fat | 10g |
| Carbohydrates | <1g |
Final Thoughts from My Kitchen to Yours
Well, there you have it. The recipe that started with a hungry man and a puddle of butter is now one I’m so excited to share with you. It’s a testament to the fact that the best food doesn’t have to be complicated. It just has to be made with a little bit of curiosity and a whole lot of heart.
I hope these Butter-Soaked Boiled Eggs find a spot in your snack rotation and bring as much joy to your kitchen as they have to mine. Give them a try, get creative with the flavors, and let me know how it goes over on Instagram @Feastical—I love seeing your creations!
Until next time, keep your whisks busy and your hearts full.
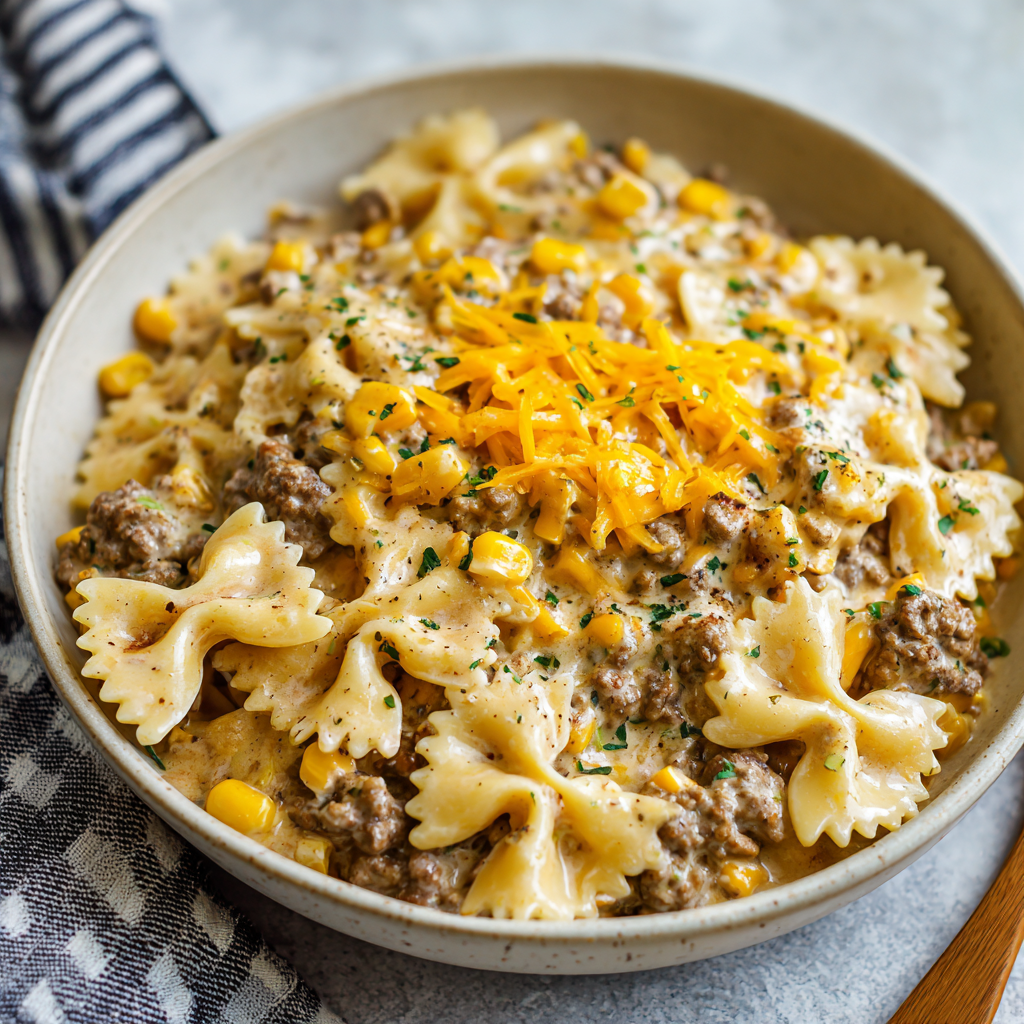
Slow Cooker Creamy Ranch Beef & Corn Bowties
Your New Favorite “Set It and Forget It” Comfort Food Is Here!
Hey friends, Beau here! Let’s be real for a second. Some days, you want to channel your inner gourmet chef, spending hours lovingly crafting a masterpiece. And other days? Well, other days you just want to throw a handful of ingredients into a pot, walk away, and have a magical, soul-warming dinner waiting for you a few hours later. You want the kind of meal that makes your house smell incredible and has everyone gathered around the table asking, “Is it ready yet?”
If you’re having one of *those* days (or weeks!), you have absolutely come to the right place. Today, I’m sharing one of my all-time most-requested slow cooker wonders: my Creamy Ranch Beef & Corn Bowties. This dish is the culinary equivalent of your favorite cozy sweater. It’s hearty, it’s cheesy, it’s packed with flavor, and it requires shockingly little effort from you. The slow cooker does almost all the work, gently melding the savory ground beef, sweet corn, and that irresistible, tangy ranch seasoning into a creamy, dreamy sauce that clings perfectly to every nook and cranny of bowtie pasta.
So, if you’re ready to give yourself the gift of a stress-free dinner that tastes like you fussed all day, grab your slow cooker. We’re about to make some magic happen.
The Accidental Family Favorite
This recipe has a fun little backstory. It was born out of one of those “what on earth do I have in my pantry?” kind of nights. I had a pack of ground beef, a lonely box of bowtie pasta, and a rogue packet of ranch seasoning staring back at me from the spice rack. I remember it was a rainy Tuesday, and I was craving something that felt both indulgent and easy. I threw it all together in the slow cooker, crossed my fingers, and went about my day.
When I lifted the lid hours later, the aroma that hit me was pure comfort. I stirred in the cheese, tossed in the cooked pasta, and took my first bite. It was a total “Aha!” moment. The creamy, tangy sauce, the tender beef, the sweet pops of corn—it was a perfect, harmonious bite. I served it to my family that night, and it was an instant, resounding hit. Now, it’s one of those recipes my kids ask for by name, and it’s my go-to meal to bring to new parents or friends who need a pick-me-up. It’s proof that sometimes the best recipes aren’t meticulously planned; they’re happily discovered.
Gathering Your Cast of Characters
One of the best things about this recipe is its beautiful simplicity. Here’s everything you’ll need to create this cozy masterpiece. Don’t be afraid to make it your own—I’ve included some of my favorite swaps and chef insights for each ingredient!
- 1 lb Ground Beef (80/20 blend is perfect): This gives us our rich, savory base. The little bit of fat adds so much flavor! Chef’s Insight: For a leaner option, ground turkey or chicken works wonderfully. For a vegetarian twist, a plant-based ground crumble is fantastic.
- 3 cups Bowtie Pasta (Farfalle): I love bowties here because their fun shape and ruffled edges are perfect for catching all that creamy sauce. Chef’s Insight: Any short pasta like penne, rotini, or shells will do the job beautifully.
- 1 can (15 oz) Sweet Corn, drained: These little golden kernels add a pop of sweetness and a lovely texture contrast. Chef’s Insight: Frozen corn (thawed) is a great fresh-tasting alternative. You could also try fire-roasted corn for a smoky twist!
- 1 packet Ranch Seasoning Mix: This is the flavor powerhouse! It brings that herby, tangy, unmistakable ranch flavor that makes this dish so addictive. Chef’s Insight: If you’re watching sodium, you can use a half packet or try a homemade salt-free ranch blend.
- 1 cup Cream Cheese, softened: This is our secret weapon for ultra-creamy, luscious sauce. Chef’s Tip: Let it sit on the counter for 30-60 minutes before you start. A soft cream cheese blends into the sauce seamlessly, while cold cream cheese can leave little lumps.
- 1/2 cup Milk: This helps to thin the sauce to the perfect, spoonable consistency. Whole milk will give you the creamiest result, but any milk you have on hand will work.
- 1 cup Shredded Cheddar Cheese: Because more cheese is always a good idea. It adds a sharp, cheesy depth. Chef’s Insight: Feel free to mix up the cheeses! A Monterey Jack blend or a pepper jack for a little kick would be delicious.
- 1/2 tsp Garlic Powder & 1/2 tsp Black Pepper: These simple additions enhance all the other flavors. The garlic powder adds a warm undertone, and the fresh black pepper gives it a little bite.
Let’s Get Cooking! (The Easy Way)
Alright, friends, it’s time to work our slow-cooker magic. I’ll walk you through each step. Remember, the goal here is ease and flavor, so don’t overthink it!
Step 1: Brown That Beautiful Beef. Grab a skillet and place it over medium heat. Crumble in your ground beef and cook it up until it’s nicely browned and no pink remains. This step is crucial for building flavor—that Maillard reaction (aka the tasty browning) is worth the extra pan! Once it’s cooked, drain off any excess grease. Chef’s Hack: I like to use a slotted spoon to transfer the beef directly from the skillet to the slow cooker, leaving most of the grease behind in the pan.
Step 2: The Dump-and-Stir Magic. Now, take that browned beef and plop it right into the bowl of your slow cooker. To that, add your drained corn, the entire packet of ranch seasoning, your softened cream cheese, milk, garlic powder, and black pepper. Now, give it all a really good stir. Don’t worry if the cream cheese isn’t perfectly blended yet—it will melt and become one with the sauce as it cooks. Chef’s Hack: Dot the cream cheese in small spoonfuls around the slow cooker instead of plopping in one big block. It will melt and incorporate much faster!
Step 3: Let the Slow Cooker Do Its Thing. Pop the lid on securely, set your slow cooker to LOW, and walk away for 4 hours. Yes, really! Go read a book, tackle that pile of laundry, or just put your feet up. You’ve earned it. The low, gentle heat will slowly meld all the flavors together and create a creamy, cohesive sauce.
Step 4: Pasta Time! About 20 minutes before your slow cooker timer goes off, it’s time to cook the bowties. Bring a large pot of salted water to a boil and cook your pasta according to the package directions until it’s al dente (has a slight bite to it). Chef’s Crucial Tip: We cook the pasta separately to avoid it becoming a mushy, starchy mess in the slow cooker. Trust me on this one! Once it’s cooked, drain it well.
Step 5: The Grand Finale. Carefully open your slow cooker—hello, amazing aroma!—and stir in the drained, cooked bowtie pasta and the shredded cheddar cheese. Give it all a big, gentle stir. The residual heat will melt the cheddar cheese beautifully, making the sauce even creamier and more luxurious. Let it sit for about 5-10 minutes with the lid off to thicken up slightly.
How to Serve Up This Cozy Masterpiece
This dish is a complete meal in a bowl, but a little flair never hurts! I love serving this family-style, right out of the slow cooker (keep it on the “warm” setting if you have it). Ladle generous portions into shallow bowls.
For a gorgeous finish, I like to add a little fresh garnish. A light sprinkle of chopped fresh parsley or chives adds a pop of color and a fresh flavor contrast. If you’re feeling a little extra (I usually am!), a final dusting of black pepper or even a few extra shreds of cheddar on top makes it look restaurant-worthy.
What to serve on the side? A simple, crisp green salad with a bright vinaigrette is the perfect partner to cut through the richness of the pasta. A loaf of crusty garlic bread is also non-negotiable in my house for scooping up every last bit of that creamy sauce. No saucy bowtie left behind!
Make It Your Own: Delicious Twists & Swaps
One of my favorite things about a great recipe is its versatility. Here are a few ways you can riff on this classic to keep things exciting!
- The “Everything” Upgrade: Sauté 1/2 a diced onion and 2-3 minced garlic cloves with the ground beef. Add a cup of frozen peas along with the corn for a veggie-packed version.
- Spicy Southwest Style: Use a Mexican-blend cheese and add a 4-ounce can of diced green chiles. Swap the ranch seasoning for a packet of taco seasoning, and top with a dollop of sour cream and sliced jalapeños.
- Chicken Lovers’ Dream: Replace the ground beef with 1.5 lbs of diced, raw chicken breast or thighs. The chicken will become incredibly tender as it slow-cooks in the creamy sauce.
- “Lightened-Up” Version: Use ground turkey, low-fat cream cheese, and skim milk. You can also use a whole wheat or chickpea pasta for an extra fiber boost.
- Extra Veggie Power: Stir in 2 cups of fresh spinach during the last 10 minutes of cooking, just until it wilts. It’s an easy way to sneak in those greens!
Beau’s Kitchen Notebook
Over the years, this recipe has become a true workhorse in my kitchen, and I’ve learned a thing or two. I used to be tempted to just throw the uncooked pasta right into the slow cooker to save a pot, but I learned the hard way that it almost always leads to a gummy, starchy texture. Cooking it separately is the one non-negotiable step for perfection!
Another funny story: I once accidentally used a packet of Italian dressing mix instead of ranch. I was in a serious hurry! And you know what? It was still delicious. It just goes to show that cooking is an adventure, and sometimes the “mistakes” lead to new family favorites. Don’t be afraid to play with your food!
Your Questions, Answered!
Q: Can I cook this on HIGH instead of LOW?
A: You can! If you’re short on time, you can cook it on HIGH for about 2-2.5 hours. Just keep an eye on it, as the dairy can sometimes behave differently on higher heat. I still prefer LOW for the most developed flavor and tender texture.
Q: My sauce seems a bit thin. How can I thicken it up?
A: No worries! This can happen. First, let it sit for 10-15 minutes with the lid off; it will often thicken as it cools slightly. If it’s still too thin, make a quick slurry by mixing 1 tablespoon of cornstarch with 2 tablespoons of cold water. Stir it into the slow cooker, and let it cook on HIGH for another 10-15 minutes until thickened.
Q: Can I freeze the leftovers?
A: You can, but a heads-up: cream-based sauces can sometimes separate or become a bit grainy when thawed. It will still taste great, but the texture might not be as silky-smooth. For best results, I recommend storing leftovers in an airtight container in the fridge for up to 3-4 days.
Q: I don’t have a slow cooker. Can I make this on the stovetop?
A: Absolutely! Brown the beef in a large pot or Dutch oven. Drain the grease, then add all ingredients *except* the pasta and cheddar cheese. Let it simmer on low for about 20-30 minutes, stirring occasionally. Then, stir in the cooked pasta and cheddar cheese until melted and combined.

Slow Cooker Creamy Ranch Beef & Corn Bowties
Description
Slow Cooker Creamy Ranch Beef & Corn Bowties
The Ultimate “Set It and Forget It” Comfort Food
This hearty, cheesy pasta dish is creamy, comforting, and effortless. Perfect for busy days, it lets your slow cooker do the heavy lifting while you relax. Tender ground beef, sweet corn, and tangy ranch seasoning come together in a luscious sauce that hugs every bowtie pasta piece.
Ingredients
-
1 lb ground beef (80/20 blend)
-
3 cups bowtie pasta (farfalle)
-
1 can (15 oz) sweet corn, drained
-
1 packet ranch seasoning mix
-
1 cup cream cheese, softened
-
½ cup milk
-
1 cup shredded cheddar cheese
-
½ tsp garlic powder
-
½ tsp black pepper
Optional garnishes: chopped parsley or chives, extra shredded cheddar
Instructions
1. Brown the Beef
-
In a skillet over medium heat, cook ground beef until no pink remains.
-
Drain excess grease and transfer beef to the slow cooker using a slotted spoon.
2. Combine Ingredients in Slow Cooker
-
Add drained corn, ranch seasoning, cream cheese, milk, garlic powder, and black pepper.
-
Stir well—cream cheese will melt during cooking.
3. Slow Cook
-
Cover and cook on LOW for 4 hours (or HIGH for 2–2.5 hours).
4. Cook the Pasta
-
About 20 minutes before the slow cooker finishes, cook bowtie pasta in salted water until al dente. Drain well.
5. Finish the Dish
-
Stir the cooked pasta and shredded cheddar into the slow cooker.
-
Let sit 5–10 minutes with the lid off to thicken slightly.
-
Garnish with parsley, chives, or extra cheese if desired.
Notes
-
Extra Veggies: Add 2 cups fresh spinach or 1 cup frozen peas during the last 10 minutes.
-
Spicy Twist: Swap cheddar for Mexican blend cheese, add diced green chiles, and use taco seasoning instead of ranch.
-
Chicken Version: Replace beef with 1.5 lbs diced chicken breast or thighs.
-
Lightened-Up: Use ground turkey, low-fat cream cheese, skim milk, and whole wheat pasta.
Nutrition
- Calories: 450 Cal per serving
- Fat: 22g
- Carbohydrates: 38g
- Protein: 26g
Nutritional Info (For Your Peace of Mind)
I’m all about balance! While this is a comforting, indulgent dish, it’s always good to know what you’re enjoying. Here’s a general breakdown per serving (based on 6 servings). Please note that this is an estimate and can vary based on the specific ingredients and brands you use.
- Calories: ~450
- Protein: 26g (Great for keeping you full and satisfied!)
- Fat: 22g
- Carbohydrates: 38g
To lighten it up, refer to the variations above! Using lean ground turkey, low-fat dairy, and loading up on extra veggies are all easy ways to tweak the nutritional profile to fit your needs.
Dig In & Enjoy the Comfort
And there you have it, my friends! My go-to recipe for when life gets busy, but the craving for a truly satisfying, homemade meal does not. This Slow Cooker Creamy Ranch Beef & Corn Bowties is more than just a recipe; it’s a reminder that fantastic food doesn’t have to be complicated. It’s about gathering, sharing, and enjoying the simple, delicious things in life.
I truly hope this recipe finds its way into your regular rotation and brings as much joy to your table as it has to mine. If you make it (and I really hope you do!), tag me on social @Feastical so I can see your beautiful creations! Now, go forth and enjoy your well-deserved, effortlessly delicious dinner. You’ve got this!
With a full heart and an even fuller plate,

Bacon Brie Crescent Wreath
Your New Party Hero: The Bacon Brie Crescent Wreath
Forget Fancy, Let’s Get Feastical!
Hey friends, Beau here! Let me paint you a picture. It’s the height of the holiday season, or maybe it’s just a fancy game day Sunday. Your kitchen counter is a glorious battlefield of snack plates, dips, and cheerful chaos. You want to bring something to the table that makes people stop mid-sentence, their eyes widening as they point and ask, “What IS that masterpiece?” You want something that looks like you slaved for hours, but secretly, you’re a kitchen wizard who knows a few brilliant shortcuts.
Well, my food-loving friend, you’ve just found your secret weapon. Meet the Bacon Brie Crescent Wreath. This isn’t just a recipe; it’s an experience. Imagine golden, buttery crescent dough, twisted into a beautiful ring, cradling pockets of molten, creamy brie, smoky crispy bacon, and the sweet-tart punch of cranberry. It’s a pull-apart, shareable, gooey, flaky, sweet-and-savory dream come true. It’s the edible centerpiece your table has been dreaming of, and I’m about to show you just how ridiculously easy it is to create. So, preheat those ovens and grab your favorite baking sheet—we’re about to make some magic.
The Wreath That Started It All
This recipe takes me right back to my first “grown-up” holiday party I ever hosted. I was so determined to impress my friends that I attempted a from-scratch, five-layer croquembouche. It was a glorious, caramel-dripped disaster that ended up looking more like a lopsided haystack than a French tower of cream puffs. My kitchen was a warzone, and my confidence was crumbling faster than my failed pastry.
In a panic, I scanned the fridge. I had a log of brie from the cheese board, some leftover bacon from breakfast, a lonely can of crescent rolls, and a jar of cranberry sauce. With nothing left to lose, I started twisting, filling, and folding. Twenty-two minutes later, I pulled out this golden, bubbling, fragrant wreath. It was imperfectly beautiful, and the second my friends dug in, the room fell silent except for the sounds of happy chewing. That wreath saved the day and taught me the most important lesson I carry into Feastical: the best food isn’t about being perfect; it’s about being shared, savored, and made with a dash of love (and a few brilliant shortcuts).
Gathering Your Cast of Characters
Here’s the beautiful part: you only need a handful of simple ingredients to create maximum wow-factor. Let’s break them down, because knowing your ingredients is the first step to becoming a kitchen rockstar.
- 2 tubes refrigerated crescent roll dough: This is our golden, flaky foundation. Don’t be shy about using this brilliant shortcut! It’s our ticket to a beautiful pastry without the fuss of homemade dough. Pro Chef Tip: Keep it chilled until the very last second—it’s much easier to work with when cold.
- 8 oz brie cheese, cut into chunks: The star of our show! That creamy, melt-in-your-mouth texture is pure magic. Rind On or Off? I leave it on! It’s completely edible and adds a lovely, subtle earthy flavor. But if the texture isn’t your thing, feel free to slice it off. No judgment here!
- 6 slices cooked bacon, chopped: Hello, smoky, salty goodness! This is our flavor anchor. For a vegetarian twist, swap this for 1 cup of finely chopped sautéed mushrooms (cremini or shiitake are fantastic). Sauté them with a little thyme and garlic until they’re golden and all their liquid has evaporated.
- 1/4 cup whole berry cranberry sauce or fig jam: This is the secret weapon that balances everything. The sweet and tart pop cuts through the rich cheese and bacon. I’m a whole-berry cranberry sauce guy for the little bursts of fruit, but a smooth fig jam is equally elegant and delicious.
- 1 egg, beaten (for egg wash): This isn’t just for show! A simple egg wash is what gives our wreath that gorgeous, professional-looking golden-brown sheen.
- 1 tbsp chopped fresh rosemary or thyme: A sprinkle of fresh herbs makes it smell like a professional bakery just opened in your kitchen. Rosemary is bold and piney, while thyme is a little more earthy and subtle. You can’t go wrong!
- Optional: honey for drizzling: A final drizzle of honey right when it comes out of the oven adds a beautiful gloss and a touch of floral sweetness that ties the whole flavor profile together. Highly recommended!
Let’s Build Some Deliciousness: Your Step-by-Step Guide
Ready to assemble your masterpiece? Follow these steps, and you’ll have a showstopper in no time. I’ve packed this section with all my favorite chef hacks to ensure your wreath is perfect on the first try.
- Preheat and Prep: Fire up your oven to 375°F (190°C). This is our sweet spot for getting a golden, fully cooked exterior without burning the delicate crescent dough. Line a standard baking sheet with parchment paper. This is non-negotiable for easy cleanup and preventing any cheesy disasters from sticking to the pan.
- Unroll and Arrange: Open your crescent roll tubes (that *pop* is so satisfying!) and unroll the dough. You’ll see it’s perforated into triangles. Don’t separate them just yet! Instead, place the two sheets of dough side-by-side on your parchment-lined pan, pinching the perforated seams together to form two solid rectangles. Now, here’s the fun part: arrange them into a circle on the baking sheet, with the short, straight sides forming the inner circle and the long, pointed ends facing outwards. They should overlap slightly in the center to create a ring shape. Think of it as a sunshine with lots of rays!
- The Art of the Fill: This is where the magic happens. On the wide, inner part of your dough circle (the part closest to the center hole), start layering your goodies. First, place your chunks of brie, then sprinkle the chopped bacon (or your sautéed mushrooms), and finally, add small, strategic dollops of the cranberry sauce or fig jam. Chef Hack: Don’t overfill! It’s tempting to load it up, but too much filling can cause leaks and make the dough soggy. A little of each ingredient in each section goes a long way.
- Fold and Tuck: Now, take the pointed end of each dough triangle and fold it over the filling, gently stretching it just a bit, and tuck the tip underneath the inner ring of dough. You’re essentially creating little dough packages. As you work your way around, you’ll see the beautiful wreath shape coming to life. It doesn’t have to be perfect—rustic is charming!
- The Golden Glow-Up: Take your beaten egg and, using a pastry brush (or your fingers in a pinch), gently brush it all over the visible dough. This egg wash is the key to that deep, appetizing golden brown color and a beautifully crisp texture. Once brushed, sprinkle the entire wreath with your chopped fresh rosemary or thyme.
- Bake to Perfection: Slide your creation into the preheated oven and bake for 20-22 minutes. You’re looking for a deeply golden brown crust and you’ll likely see some of that glorious brie bubbling out the sides. Your kitchen will smell absolutely incredible. That’s how you know it’s working!
- The Hardest Part: Let it Rest! I know, I know. You want to dive in immediately. But trust me on this: let the wreath cool on the baking sheet for at least 5-10 minutes. This allows the molten cheese to set just enough so that when you pull it apart, you get beautiful, gooey strands instead of a lava-flow all over your counter. This is a crucial step for both presentation and saving your taste buds from a scorching!
How to Serve Your Culinary Masterpiece
Presentation is part of the fun! I love placing the entire wreath, baking sheet and all, right in the center of the table. It’s a conversation starter all on its own. Let your guests pull apart their own pieces—it’s interactive, fun, and feels wonderfully communal.
While this wreath is a star all by itself, it plays well with others. For a full brunch spread, pair it with a bright, simple arugula salad with a lemony vinaigrette to cut through the richness. If it’s for a cocktail party or game day, it’s the perfect centerpiece surrounded by other finger foods like spicy wings, fresh veggies, and a creamy dip. And don’t forget a final flourish! A light drizzle of honey over the warm wreath just before serving elevates it to a whole new level of deliciousness.
Make It Your Own: Delicious Variations
Once you’ve mastered the basic blueprint, the world is your oyster! This recipe is incredibly flexible. Here are a few of my favorite twists to keep things exciting:
- Apple & Sage: Swap the bacon for ½ cup of finely diced sautéed apples and the rosemary for fresh chopped sage. The sweet apple with the creamy brie and fragrant sage is a fall flavor explosion.
- Sun-Dried Tomato & Pesto: Go Mediterranean! Use a basil pesto instead of the cranberry sauce, and swap the bacon for chopped sun-dried tomatoes and a sprinkle of mozzarella cheese alongside the brie.
- Everything Bagel: For the ultimate brunch vibe, skip the cranberry and herbs. Before baking, sprinkle the egg-washed dough generously with everything bagel seasoning. The flavors of garlic, onion, and sesame seeds are a perfect match for the cheese and bacon.
- Spicy ‘Nduja: Feeling adventurous? Add a few small dollops of ‘nduja (a spreadable spicy Italian salami) in with the brie. It adds an incredible, warming heat that’s absolutely addictive.
Beau’s Kitchen Confidential
This recipe has evolved so much since that first desperate holiday party. I’ve learned that a little leaky cheese isn’t a failure—it’s a badge of honor, a sign of a generously filled wreath! I’ve also started making a double batch for larger parties; just use two baking sheets and you’ve got festive wreaths for days. One of my favorite kitchen memories is my nephew, who is usually suspicious of “fancy cheese,” tentatively pulling off a piece. He saw the oozy brie and was hesitant, but after one bite, his eyes lit up and he immediately went back for a second, bigger piece. That’s the power of this wreath—it turns everyone into a believer.
Your Questions, Answered!
Over the years, I’ve gotten a lot of questions about this recipe. Here are the answers to the most common ones to ensure your success!
- Q: Can I make this ahead of time?
A: Absolutely! You can assemble the entire wreath up to the point of baking, cover it tightly with plastic wrap, and refrigerate it for up to 8 hours. When you’re ready, just brush with the egg wash, sprinkle with herbs, and pop it in the oven. You may need to add 1-2 extra minutes to the bake time since it’s going in cold.
- Q: My dough got too soft and sticky to work with. Help!
A: This happens to the best of us! The key is to work quickly and keep the dough cold. If you feel it getting warm and limp, just pop the entire baking sheet into the freezer for 5 minutes to firm it up. It’s a total game-changer.
- Q: Can I use puff pastry instead of crescent dough?
A: You can! Thaw a sheet of puff pastry and roll it out slightly. The texture will be a bit more buttery and flaky, and less layered than the crescent rolls. It’s a delicious alternative—just be sure to score the top lightly with a knife so it can expand beautifully.
- Q: The bottom of my wreath is a little soggy. What happened?
A: This usually means the filling leaked. Next time, make sure your bacon is well-cooked (not overly greasy) and your sautéed mushrooms are completely dried out. Also, remember my “don’t overfill” rule! Using the parchment paper also helps air circulate and prevents steaming, which can cause sogginess.
Let’s Talk Nourishment
Look, we’re all friends here. This Bacon Brie Crescent Wreath is a celebration food, a treat meant to be shared and enjoyed with gusto during special gatherings. It’s not an everyday salad, and that’s perfectly okay! Food is about joy and connection, too.
That said, I believe in being transparent. The approximate nutritional information per serving (if you get about 10 servings from one wreath) is around 230 calories, with 7g of protein, 16g of carbs, 15g of fat, and 4g of sugar. Remember, these are estimates and can vary based on the specific brands you use. If you’re looking for a lighter twist, the vegetarian mushroom version is a great option, and you can always use a low-fat crescent roll dough if it’s available in your store. But my personal philosophy? When you’re serving up a warm hug in the form of a cheesy, bacon-y wreath, it’s all about balance—enjoy every single delicious bite!

Bacon Brie Crescent Wreath
Description
Looking for a snack that wows without hours in the kitchen? This Bacon Brie Crescent Wreath is buttery, flaky, and packed with melty brie, crispy bacon, and a touch of sweet-tart cranberry. It’s perfect for holidays, game day, or any party where you want your guests to stop mid-bite and ask, “What IS that?”
Ingredients
Looking for a snack that wows without hours in the kitchen? This Bacon Brie Crescent Wreath is buttery, flaky, and packed with melty brie, crispy bacon, and a touch of sweet-tart cranberry. It’s perfect for holidays, game day, or any party where you want your guests to stop mid-bite and ask, “What IS that?”
Instructions
-
Preheat and Prep:
Preheat your oven to 375°F (190°C). Line a baking sheet with parchment paper. -
Arrange the Dough:
Unroll the crescent dough (keep triangles together). Place the two sheets side-by-side, pinching seams to form two rectangles. Shape the rectangles into a circle on the baking sheet, short ends forming the inner circle, long points facing out. Slightly overlap for a wreath shape. -
Add the Filling:
On the inner part of each dough triangle, place chunks of brie, sprinkle chopped bacon, and add small dollops of cranberry sauce. Tip: Don’t overfill to prevent leaks. -
Fold and Tuck:
Fold the pointed ends over the filling and tuck under the inner ring to form neat packages. Rustic shapes are charming! -
Egg Wash & Herbs:
Brush the dough with beaten egg and sprinkle fresh rosemary or thyme over the wreath. -
Bake:
Bake for 20–22 minutes until golden brown and bubbly. -
Rest:
Let cool 5–10 minutes before serving to set the cheese slightly. -
Serve:
Place the wreath on a platter and let guests pull apart pieces. Optional: drizzle honey over the warm wreath.
Notes
-
Apple & Sage: Swap bacon for ½ cup sautéed apples and rosemary for sage.
-
Sun-Dried Tomato & Pesto: Use basil pesto instead of cranberry, bacon for sun-dried tomatoes, and sprinkle mozzarella with brie.
-
Everything Bagel Twist: Skip herbs and cranberry; sprinkle dough with everything bagel seasoning.
-
Spicy ‘Nduja: Add small dollops of spicy Italian salami for heat.
Pro Tips:
-
Keep dough cold until ready to assemble. If it becomes sticky, chill 5 minutes in the freezer.
-
Don’t overfill to avoid soggy bottoms or leaks.
-
Make ahead: assemble up to 8 hours before baking; add 1–2 minutes to baking time if chilled.
Nutrition
- Calories: 230 Cal Per Serving
- Sugar: 4 g
- Fat: 15 g
- Carbohydrates: 16 g
- Protein: 7 g
Your Next Kitchen Adventure Awaits
And there you have it! Your complete guide to creating a Bacon Brie Crescent Wreath that will steal the show at any gathering. Remember, the goal isn’t flawless perfection; it’s about the laughter around the table, the “oohs” and “aahs” as your friends and family pull apart that first piece, and the memory you create together. This recipe is a testament to the fact that the most memorable dishes are often the simplest, made with a little creativity and a whole lot of heart.
I’d love to see your creations! If you make this wreath (or one of the fun variations), be sure to tag me @Feastical on social media so I can share in your success. Now go forth, bake with confidence, and get ready to be the hero of the party. Until next time, keep your kitchen messy and your heart full.
Final Thoughts: You Are the Party Hero
So, there you have it. The Bacon Brie Crescent Wreath is more than a recipe—it’s your ticket to becoming a legend in your own kitchen. It proves that you don’t need a culinary degree to create something spectacular, just a few quality ingredients and the courage to embrace a brilliant shortcut.
Remember the lesson from my croquembouche disaster: the goal isn’t perfection; it’s connection. It’s the shared experience of pulling apart that warm, gooey, flaky masterpiece with the people you love. So preheat that oven, embrace the “rustic” look, and get ready for the silence that falls over a room when people are truly, happily, eating.

Crispy Fried Gnocchi Bites with Pecorino and Herb Dust
Forget What You Knew About Gnocchi: These Crispy Bites Are a Game-Changer
Hey friends, Beau here! Let’s be real for a second. We all have those days. You know the ones. The sky is a little grey, your to-do list is a mile long, and all your soul is craving is something warm, crispy, and deeply, profoundly comforting. You could reach for the same old bag of chips, but today, I’m inviting you to join me in a little kitchen magic that transforms a humble pantry staple into pure, golden joy.
We’re talking about taking soft, pillowy gnocchi and giving it a glorious, crispy makeover. These aren’t your nonna’s simmered-in-sauce gnocchi (though I love those, too!). These are Crispy Fried Gnocchi Bites with Pecorino and Herb Dust. Imagine: little golden nuggets with a shatteringly crisp exterior that gives way to a tender, chewy center. They’re kissed with salty, tangy Pecorino cheese and finished with a confetti of fresh herbs. And the best part? They’re ridiculously fun to make and absolutely made for dipping into a warm, vibrant marinara sauce.
This recipe is my go-to for impromptu get-togethers, a killer snack while binge-watching my favorite cooking shows, or even a fun, “fancy-feeling” appetizer that comes together in under 30 minutes. It’s a recipe that proves that with a few simple tricks, you can turn the everyday into the extraordinary. So, tie on your apron, and let’s make some kitchen memories together.
The Happy Accident That Started It All
I have to confess, this recipe was born from a happy little kitchen “oops.” Picture this: It was a chaotic Tuesday evening, and I was testing a new gnocchi recipe for a creamy sage sauce. I got a phone call, got distracted, and before I knew it, I had boiled the entire batch into a state of… let’s call it extreme tenderness. They were practically falling apart! My first instinct was to toss them and start over, but something stopped me.
I remembered a trick my dad used to do with leftover pasta – he’d pan-fry it until the edges got crispy. A lightbulb went off. I gently patted my over-boiled gnocchi dry, tossed them in a hot skillet with a glug of olive oil, and stood back. What emerged from that pan was nothing short of a revelation. The outside transformed into a delicate, golden crust, while the inside stayed soft and cloud-like. I sprinkled them with cheese, and in that moment, a new Feastical favorite was born. It just goes to show that sometimes the best recipes come from our biggest “mistakes.”
Gathering Your Gnocchi Dream Team
One of the things I love most about this recipe is its simplicity. You probably have most of this in your pantry right now! This list makes a generous double batch because, trust me, you’ll want leftovers. (They reheat beautifully in the air fryer, by the way!).
- Kosher Salt: We’ll salt the gnocchi cooking water generously. This is our first and best chance to season the gnocchi from the inside out. Think of it like seasoning pasta water – it’s essential!
- 2 (16-oz) packages Gnocchi: Store-bought, shelf-stable gnocchi are the MVP here. They’re consistent, easy to find, and hold up perfectly to frying. No need for fresh here!
- 4 large Eggs: Our binding agent! Whisking them with a bit of pepper creates the glue that helps our crispy coating stick. Pro-tip: if you’re running low, you can stretch 3 eggs with a splash of milk or water.
- Freshly Ground Black Pepper: A must for the egg wash. Its sharp, aromatic flavor cuts through the richness.
- 1 1/3 cups Italian-style Breadcrumbs: The key to that perfect, golden crunch. The Italian-style ones come pre-mixed with delicious herbs like oregano and basil, giving you a flavor head start.
- 2/3 cup grated Pecorino Romano, plus more for topping: Ah, my favorite part! Pecorino is saltier and tangier than Parmigiano-Reggiano, and it creates an incredible, savory crust. Chef’s Insight: For a milder flavor, you can absolutely swap in Parmigiano-Reggiano.
- 6 tbsp All-Purpose Flour: This is our first coating layer. It creates a dry surface for the egg wash to adhere to, ensuring the breadcrumbs have something to grip onto. No soggy coatings here!
- Peanut or Vegetable Oil, for frying: We need a neutral oil with a high smoke point. Peanut oil is my top choice for its clean taste, but vegetable or canola oil work wonderfully too.
- 2 tbsp finely chopped Sun-Dried Tomatoes (optional twist): This is where we level up! These little gems add a chewy texture and a punch of sweet, concentrated tomato flavor to the breading. A total game-changer.
- Zest of 1 Lemon (optional twist): Don’t skip this! The zest doesn’t make it taste lemony, but it brightens up the entire dish, balancing the salt and fat with a touch of citrusy sunshine.
- 2 tbsp finely chopped fresh Parsley: For that fresh, “herb dust” finish. It adds a pop of color and a bright, clean flavor right at the end.
- Marinara Sauce (homemade or store-bought), warmed, for serving: The perfect dipping partner. A good, high-quality store-bought sauce is 100% acceptable in my kitchen – no judgment here!
Let’s Get Crispy: Your Foolproof Frying Guide
Ready to make some magic? Follow these steps, and you’ll be a gnocchi-frying pro in no time. I’ve packed this section with all my favorite chef hacks to ensure your success.
- Cook the Gnocchi: Bring a large pot of well-salted water to a rolling boil. Gently add the gnocchi. Now, here’s the key: we are not cooking them all the way through. The moment they float to the surface (which should only take 1-2 minutes), they are DONE. Scoop them out with a slotted spoon or strain them immediately. Chef’s Hack: Do NOT overcook them at this stage, or they can become mushy and difficult to bread.
- The Cool Down: Spread the drained gnocchi in a single layer on a baking sheet or a large plate. Let them cool completely. I sometimes pop them in the fridge for 10-15 minutes to speed this up. This step is non-negotiable – if they’re hot, the breading will slide right off and create a steamy, sad situation in your frying oil.
- Set Up Your Breading Station: This is my favorite kitchen ritual. Get three shallow bowls. In the first, place your flour. In the second, whisk the eggs with a generous pinch of salt and pepper until smooth. In the third, mix the breadcrumbs, grated Pecorino, lemon zest, and chopped sun-dried tomatoes (if using). Line them up: flour, egg, breadcrumbs. This is your assembly line to crispy perfection!
- Bread Those Bites: Working in small batches, toss the cooled gnocchi in the flour, shaking off any excess. Then, dunk them into the egg wash, making sure they’re fully coated. Finally, roll them in the breadcrumb mixture, pressing gently to ensure an even, generous coating. Place the breaded gnocchi on a clean plate or baking sheet. Pro-tip: Use one hand for the dry ingredients (flour and breadcrumbs) and the other for the wet (egg) to avoid “club fingers.”
- Heat the Oil: Pour about 2 inches of oil into a heavy-bottomed pot or deep skillet. Attach a deep-fry or candy thermometer to the side and heat the oil over medium-high heat until it reaches 350°F (175°C). Chef’s Insight: If you don’t have a thermometer, test the oil by dropping in a single breadcrumb. If it sizzles and turns golden brown within 15 seconds, you’re good to go!
- Fry to Golden Glory: Carefully lower a batch of the breaded gnocchi into the hot oil using a slotted spoon or spider strainer. Don’t overcrowd the pan! Fry for 2-3 minutes, turning occasionally, until they are a deep, uniform golden brown. The sound will change from a violent sizzle to a gentle fry when they’re close to done.
- Drain and Finish: Use your slotted spoon to transfer the crispy gnocchi bites to a plate lined with paper towels to drain any excess oil. While they’re still piping hot, shower them with a little extra grated Pecorino and that beautiful, finely chopped parsley. The residual heat will “wilt” the parsley just enough and make the cheese extra fragrant.
How to Serve These Golden Gems
Presentation is part of the fun! I love serving these family-style on a big, rustic wooden board or in a wide, shallow bowl. Pile them high so they look abundant and inviting. Pour the warm marinara sauce into a small, cute bowl right in the center for dipping, or scatter a few little ramekins of sauce around the platter for easy access from all sides.
This isn’t just an appetizer; it’s a vibe. Serve them as the star of a game-day spread, a show-stopping starter before a pasta dinner, or the main event for a fun “snack dinner” night. Pour some crisp, cold Italian white wine or a hoppy IPA, and you’ve got yourself a party. The combination of the hot, salty, crispy gnocchi with the cool, smooth, tangy marinara is a textural dream you have to experience to believe.
Make It Your Own: Delicious Twists & Swaps
The beauty of this recipe is its versatility. Once you master the basic method, the flavor world is your oyster! Here are a few of my favorite ways to mix it up:
- Spicy ‘Nduja & Honey Drizzle: For the adventurous! Mix 2 tablespoons of soft ‘nduja (a spreadable Italian salami) into your breadcrumb mixture. After frying, drizzle the hot gnocchi with a tiny bit of warm honey and a sprinkle of flaky sea salt. Sweet, spicy, salty, crispy – it’s everything.
- Garlic & Herb Parmesan: A classic twist. Swap the Pecorino for Parmigiano-Reggiano and add 1 teaspoon of garlic powder and 1 tablespoon of dried Italian herbs to the breadcrumbs. Simple, familiar, and always a crowd-pleaser.
- Air Fryer Magic: Want to cut down on oil? You can absolutely make these in the air fryer! Arrange the breaded gnocchi in a single layer in your air fryer basket, spray lightly with cooking spray, and air fry at 400°F (200°C) for 8-12 minutes, shaking halfway through, until golden and crispy.
- Gluten-Free & Dairy-Free Friendly: This recipe is easily adaptable. Use your favorite gluten-free gnocchi, GF all-purpose flour, and GF breadcrumbs. For dairy-free, swap the Pecorino for a tablespoon of nutritional yeast for a cheesy flavor, or simply omit it.
- Truffle Dusted: Feeling fancy? After they come out of the fryer, finish them with a light grating of fresh black truffle or a drizzle of truffle oil instead of the extra Pecorino. Serve with a truffle-infused aioli for the ultimate decadent bite.
Beau’s Kitchen Confidential
This recipe has truly evolved in my kitchen. I started with just plain fried gnocchi, but over time, I found that the breading adds an incredible textural contrast that’s just too good to pass up. The addition of the lemon zest and sun-dried tomatoes came after a trip to Sicily, where they put lemon on everything – and for good reason! It lifts the whole dish.
A funny story: I once tried to bread a whole batch while the gnocchi were still warm because I was impatient. Let’s just say it turned into a clumpy, eggy mess that looked more like gnocchi porridge than crispy bites. We had to order pizza that night, but it taught me a valuable lesson: patience is the most important ingredient in a chef’s pantry. Let those little potato pillows cool down!
Your Gnocchi Questions, Answered!
Q: My breading is falling off in the oil! What did I do wrong?
A: This almost always boils down to two things: 1) The gnocchi weren’t cooled completely before breading, or 2) The oil wasn’t hot enough. A proper, hot oil will “set” the breading almost instantly, sealing it on. If the oil is too cool, the coating will absorb oil and slide off. Always use a thermometer for the best results!
Q: Can I prepare these ahead of time?
A: Absolutely! You can bread the gnocchi completely and arrange them in a single layer on a baking sheet. Cover them with plastic wrap and refrigerate for up to 4 hours before you plan to fry them. Frying them straight from the fridge works perfectly.
Q: What other dipping sauces do you recommend?
A> Oh, the possibilities! Marinara is the classic, but don’t stop there. A creamy garlic aioli, a spicy chipotle mayo, a creamy pesto dip, or even a simple lemony Greek yogurt sauce would be incredible. Get creative with your favorites!
Q: My gnocchi are burning on the outside but still cold inside. Help!
A> This means your oil is too hot! The outside is cooking too quickly before the heat can penetrate to the center. Immediately remove the batch, let the oil temperature come back down to 350°F, and try again. Controlling your oil temp is the secret to perfect frying.

Crispy Fried Gnocchi Bites with Pecorino and Herb Dust
Description
Hey friends, Beau here! Forget the same old gnocchi—these crispy bites are golden, crunchy, and melt-in-your-mouth tender inside. Perfect for impromptu get-togethers, snack nights, or show-stopping appetizers, this recipe transforms humble gnocchi into pure comfort food magic in under 30 minutes.
Ingredients
For the Gnocchi Bites:
-
Kosher salt (for boiling water)
-
2 (16-oz) packages store-bought gnocchi
-
4 large eggs
-
Freshly ground black pepper
-
6 tbsp all-purpose flour
-
1 1/3 cups Italian-style breadcrumbs
-
2/3 cup grated Pecorino Romano (plus more for topping)
-
Peanut, vegetable, or canola oil for frying
Optional Flavor Twists:
-
2 tbsp finely chopped sun-dried tomatoes
-
Zest of 1 lemon
-
2 tbsp finely chopped fresh parsley (for garnish)
-
Marinara sauce (warmed, for serving)
Creative Variations:
-
Spicy ‘Nduja & Honey: Add ‘nduja to breadcrumbs, drizzle honey after frying.
-
Garlic & Herb Parmesan: Swap Pecorino for Parmigiano, add garlic powder and dried Italian herbs.
-
Air Fryer Option: Air fry breaded gnocchi at 400°F for 8–12 minutes, shaking halfway.
-
Gluten-Free & Dairy-Free: Use GF gnocchi, GF flour & breadcrumbs, omit or replace cheese with nutritional yeast.
-
Truffle Finish: Sprinkle fresh truffle or drizzle truffle oil instead of extra Pecorino.
Instructions
1. Cook the Gnocchi
-
Bring a large pot of salted water to a rolling boil.
-
Add gnocchi and cook until they float (1–2 minutes). Scoop immediately—do not overcook.
2. Cool the Gnocchi
-
Spread gnocchi in a single layer on a plate or baking sheet to cool completely.
-
Optional: refrigerate for 10–15 minutes for easier handling.
3. Set Up the Breading Station
-
Bowl 1: Flour
-
Bowl 2: Whisked eggs with salt and pepper
-
Bowl 3: Breadcrumbs + Pecorino + optional lemon zest and sun-dried tomatoes
4. Bread the Gnocchi
-
Toss cooled gnocchi in flour, shake off excess.
-
Dunk in egg wash, then coat with breadcrumb mixture. Press gently.
-
Place breaded gnocchi on a clean plate or baking sheet.
5. Fry to Golden Perfection
-
Heat 2 inches of oil in a heavy-bottomed pot or deep skillet to 350°F.
-
Fry gnocchi in small batches, turning occasionally, 2–3 minutes until deep golden brown.
-
Drain on paper towels. Sprinkle immediately with extra Pecorino and parsley.
Notes
-
Breading falling off? Ensure gnocchi are fully cooled and oil is at 350°F.
-
Make-ahead: Bread gnocchi, cover, and refrigerate up to 4 hours. Fry straight from fridge.
-
Oil too hot? Remove batch and let oil cool slightly to avoid burning outside before inside cooks.
-
Gnocchi cooling hack: Pop them in the fridge 10–15 minutes for easier breading.
Nutrition
- Calories: 310 Cal Per Serving
- Carbohydrates: 28g
- Protein: 10g
Let’s Talk Nourishment
While these crispy bites are firmly in the “treat yourself” category, it’s always good to know what you’re enjoying! This nutritional info is an estimate per serving (remember, this recipe makes a generous 8 servings).
Per serving (approx):
Calories: 310 | Protein: 10g | Carbohydrates: 28g | Fat: 18g | Sugar: 2g
The majority of the fat comes from the frying oil, which is why using a neutral, high-quality oil is important. The carbs come from the gnocchi and breadcrumbs, providing that energy boost and satisfying crisp. The protein from the eggs and cheese helps make these bites surprisingly satisfying. As with all good things, the key is balance and enjoyment!
Final Thoughts: More Than Just a Snack
So there you have it. What started as a distracted Tuesday mistake has become one of my most cherished kitchen creations. These Crispy Fried Gnocchi Bites are more than just a recipe; they’re a reminder that some of the best moments in life—and cooking—come from unexpected places. They’re proof that you don’t need complicated techniques or fancy ingredients to create something truly magical. All you need is a little heat, a little crunch, and the willingness to see the potential in a simple “oops.”
This recipe is my love letter to simple, joyful cooking. It’s for those days when you want to treat yourself and anyone lucky enough to be standing in your kitchen. It’s a testament to the fact that the most memorable meals aren’t always the most elaborate, but the ones made with a dash of curiosity and a whole lot of heart.
Now, I’d love to hear from you. Did you stick with the classic Pecorino or try the spicy ‘nduja twist? Did you master the perfect crunch in the air fryer? Share your creations and kitchen stories with me online using #FeasticalGnocchi. Let’s keep the conversation and the inspiration cooking.
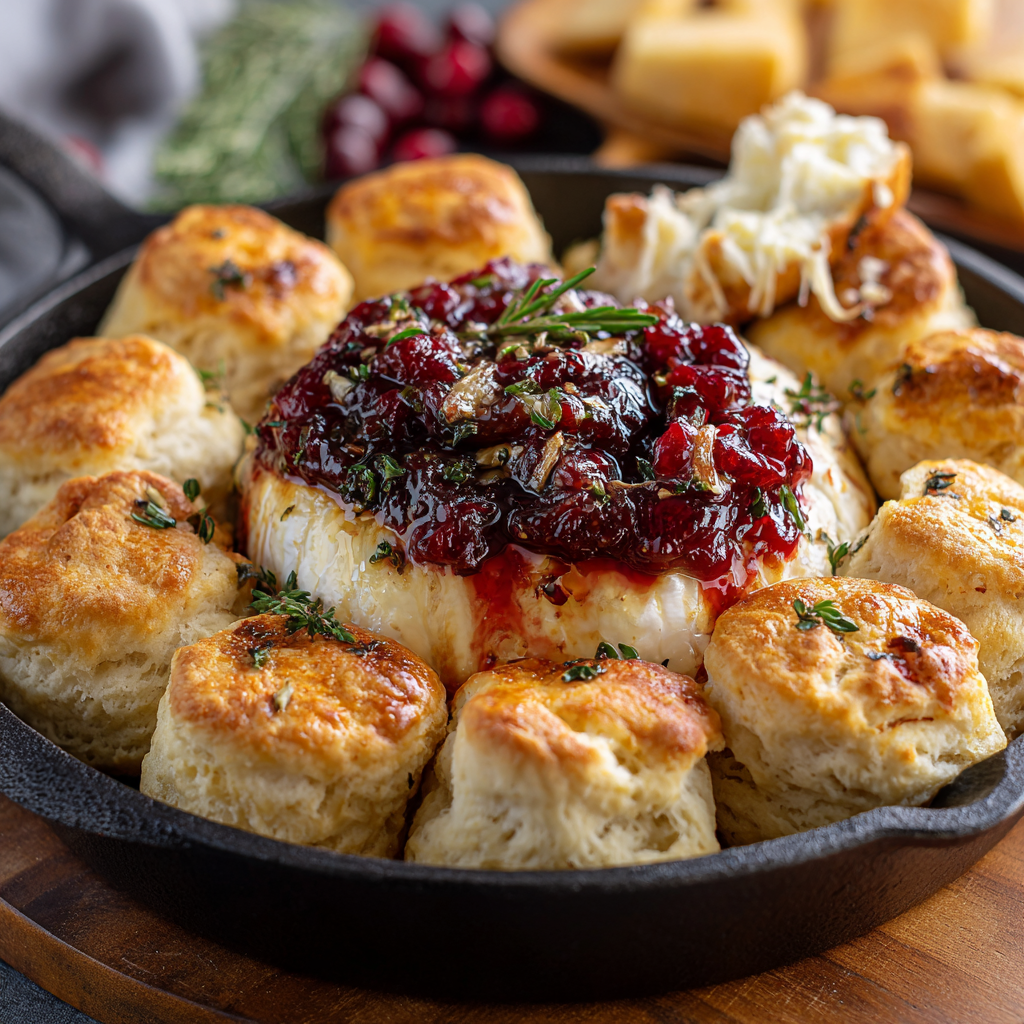
Cranberry Brie Biscuit Dip
Cranberry Brie Biscuit Dip: Your New Go-To Party Hero
Forget Fancy Platters, Let’s Make a Skillet of Joy
Hey friends, Beau here from Feastical! Let’s get real for a second. What’s the one thing that makes a party truly unforgettable? Is it the perfectly curated playlist? The tasteful decorations? Nope. It’s that one dish that makes everyone’s eyes light up, the one that disappears in five minutes flat, leaving nothing behind but a few crumbs and a whole lot of happy, full bellies. Today, I’m giving you the ultimate secret weapon for your next gathering: my insanely easy, outrageously delicious Cranberry Brie Biscuit Dip.
Imagine this: a warm, cast-iron skillet filled with creamy, melty brie cheese, swirled with a tart and sweet cranberry sauce, all surrounded by a ring of golden-brown, buttery, pull-apart biscuits. It’s a dip. It’s a bread bowl. It’s a whole experience. The best part? You only need a handful of ingredients and about half an hour. Whether you’re hosting a holiday feast, a game day get-together, or just treating yourself to a cozy night in, this recipe is your ticket to culinary hero status. So, tie on that apron, grab your favorite skillet, and let’s create some magic that tastes just like a warm hug.
The Happy Accident That Started It All
This recipe, like many of my favorites, was born from a little bit of chaos and a whole lot of “what do I have in the fridge?” It was the day after Thanksgiving a few years back. My kitchen looked like a food bomb had gone off, and friends were swinging by for an impromptu leftovers party. I had a lonely wheel of brie, a half-eaten container of cranberry sauce, and a forgotten can of biscuits staring me down. Separately, they were good. But together? I had a hunch.
I tossed it all in a skillet, crossed my fingers, and popped it in the oven. The smell that wafted through my house was nothing short of miraculous—savory, cheesy, and sweet all at once. When I pulled that bubbling, golden creation out of the oven, the first “oohs” and “aahs” started before anyone even took a bite. We demolished it in minutes, using the biscuit pieces to scoop up every last bit of melty cheese and cranberry. It was an instant classic, a recipe that felt less like cooking and more like creating a centerpiece for connection and joy. Now, it’s a Feastical tradition, and I’m so thrilled to share it with you.
Gathering Your A-Team: The Ingredients
This recipe is a beautiful lesson in simplicity. You only need a few key players, and each one brings its own special talent to the party. Here’s the lineup:
- 1 (8 oz) wheel of Brie Cheese: This is our creamy, dreamy star. We’re removing the rind because it can be a little tough when baked. Pro Chef Tip: Pop the brie in the freezer for 15-20 minutes before you start. It firms up the cheese, making it a breeze to cube without turning into a gooey mess!
- 1/2 cup Whole Berry Cranberry Sauce: The tangy, sweet counterpoint to the rich brie. Homemade is fantastic if you have it, but don’t you dare stress! A good-quality canned sauce works perfectly. I love the texture and little berry bursts you get from the whole-berry style.
- 1 can Refrigerated Biscuit Dough (the “Grands” style works great!): Our trusty, buttery vehicle for all that dip-y goodness. This is our ultimate kitchen hack, giving you that fresh-baked biscuit flavor without any fuss. Flaky or buttermilk—you can’t go wrong.
- 2 tbsp Melted Butter: This is our golden ticket. Brushing it on the raw biscuit dough guarantees a beautiful, bronzed, and crispy top. It’s the difference between good and “can I have the recipe?” great.
- 1 tsp Chopped Fresh Rosemary or Thyme: A tiny but mighty ingredient. The earthy, aromatic herbs cut through the richness and make the whole dish smell like a professional bakery. If you only have dried, use about 1/2 teaspoon.
Let’s Build This Beautiful Beast: Step-by-Step
Ready to see how it all comes together? It’s so simple, you’ll have it memorized after the first time. Follow these steps, and you’re guaranteed perfection.
- Preheat and Prep. Fire up your oven to 375°F (190°C). While it’s warming up, grab your favorite oven-safe skillet (a 9-inch cast-iron is my go-to) and give it a light coating of cooking spray or a quick wipe with butter. This ensures our biscuits don’t put up a fight when it’s time to serve.
- Get Your Biscuits in Formation. Open that can of biscuits—I know, the *pop* is so satisfying! Now, take each biscuit and cut it into quarters. These little pieces will create the perfect “moat” around our dip. Arrange them in a single layer around the outer edge of your prepared skillet, forming a ring. You’re building the edible bowl right now!
- The Star-Studded Center. Now for the main event. Take your cubed-up brie and scatter it evenly in the center of the skillet, right inside the ring of biscuits. Don’t worry about making it perfect; the melty magic will take care of that. Next, lovingly dollop your cranberry sauce right on top of the brie cubes. You can swirl it gently with a knife if you’re feeling fancy, but I often just leave it in glorious, rustic dollops.
- The Golden Touch. Grab your melted butter and a pastry brush (or just use the back of a spoon). Generously brush the tops of all your biscuit pieces. This is the step that gives them that gorgeous, golden, glossy finish. Once they’re all shiny, sprinkle the chopped rosemary or thyme over the entire skillet—biscuits and all. The herby fragrance will have you counting down the minutes.
- Bake to Bubbly Perfection. Carefully slide your masterpiece into the preheated oven. Now, the hardest part: waiting. Bake for 20-25 minutes. You’re looking for the biscuits to be a deep golden brown and to sound hollow when tapped, and for the brie in the center to be completely melted and bubbling furiously. Your kitchen will smell absolutely incredible.
- Serve with Immediate Joy. This is crucial: serve it warm, straight from the skillet! Place the hot skillet on a trivet right in the middle of the table and watch everyone gather ‘round. The cheese is at its ultimate stretchy, gooey peak right out of the oven.
How to Serve This Show-Stopper
Presentation is part of the fun with this dish! I’m a firm believer that serving it in the skillet isn’t just easy—it’s part of the charm. It feels rustic, welcoming, and inviting. Just plop that hot skillet right in the center of your coffee table or dining table with a stack of small plates and a warning that it’s piping hot.
While the biscuits are the natural (and best) scooping tool, I sometimes like to offer a few extra dippers on the side for variety. A sliced, crusty baguette is always a win. For a lighter option, apple slices or pear slices are phenomenal with the cranberry and brie. And for the ultimate sweet-and-salty combo, you can’t beat pretzel crisps or crackers. Encourage your guests to tear off a warm biscuit, dive right into the cheesy center, and create their own perfect bite.
Make It Your Own: Fun Recipe Twists
One of the best things about this recipe is its versatility. Once you’ve mastered the classic, feel free to get creative and play with the flavors!
- Jalapeño Popper Twist: Add a little heat! Before baking, sprinkle 1-2 tablespoons of finely diced jalapeño (seeds removed for less heat) and 2 tablespoons of real bacon bits over the brie and cranberry.
- Fig & Walnut Elegance: Swap the cranberry sauce for fig jam. Sprinkle 1/4 cup of chopped walnuts over the top along with the herbs for a wonderful crunch and sophisticated flavor.
- Everything Bagel Vibe: Embrace the savory side! Instead of rosemary, brush the biscuits with the melted butter and then sprinkle generously with everything bagel seasoning. The poppy seeds, sesame seeds, garlic, and onion will take this in a completely different, utterly addictive direction.
- Orange Zest Zing: Brighten it up! Add the zest of one orange to the cranberry sauce before dolloping it on. The citrus aroma and flavor cut through the richness beautifully and make the whole dish taste even more festive.
Beau’s Chef’s Notes & Kitchen Confessions
Over the years, this recipe has seen a few tweaks and witnessed a lot of happy kitchen moments. I once made it for a friend’s potluck and arrived to find three other people had brought the exact same dish—it had become that much of a legend in our circle! We just laughed and had a “dip-off,” which, let me tell you, is the best kind of competition.
One thing I’ve learned: don’t skip the step of cubing the brie. I tried just putting the whole wheel in once, and while it looks cool, the rind doesn’t melt as well and can be tricky to scoop. Cubing ensures every single bite is oozy and perfect. Also, if you’re using homemade cranberry sauce that’s on the looser side, that’s totally fine! It will just create a beautiful marbled effect with the cheese. Embrace the imperfection—that’s where the real flavor lives.
Your Questions, Answered!
I’ve gotten a lot of questions about this dip over the years, so here are the answers to the most common ones.
- Q: Can I make this ahead of time?
A: You can do some prep! You can cube the brie (keep it chilled), make the cranberry sauce, and even arrange the biscuit pieces in the skillet. Cover everything tightly with plastic wrap and refrigerate separately. When you’re ready, assemble, brush with butter, and bake. You may need to add 2-3 extra minutes to the bake time since you’re starting with a cold skillet.
- Q: My cheese solidified after a few minutes. What happened?
A: Brie is a superstar when warm, but it does start to firm up as it cools. That’s why serving it immediately is key! If it does cool down, just pop the whole skillet back in a 350°F oven for 5-10 minutes to re-melt the magic.
- Q: Can I use a different cheese?
A: Absolutely! Camembert is a fantastic, similar substitute. For a sharper flavor, you could try using a soft goat cheese, though it won’t be as melty. I’d stick with soft-ripened cheeses for the best texture.
- Q: I don’t have an oven-safe skillet. What can I use?
A: No problem at all! Any 9-inch pie dish or similar-sized baking dish will work beautifully. The goal is just to have something with a bit of a lip to contain all the bubbly goodness.

Cranberry Brie Biscuit Dip
Description
Hey friends, Beau here! Forget fancy platters—this skillet of joy is the ultimate party hero. Picture a warm cast-iron skillet filled with creamy, melty brie cheese, swirled with tart-sweet cranberry sauce, surrounded by buttery, pull-apart biscuits. About 30 minutes, a handful of ingredients, and you’re the star of any gathering.
Ingredients
Main Dish:
-
1 (8 oz) wheel of brie cheese, rind removed
-
½ cup whole-berry cranberry sauce (homemade or canned)
-
1 can refrigerated biscuit dough (Grands or similar)
-
2 tbsp melted butter
-
1 tsp fresh chopped rosemary or thyme (or ½ tsp dried)
Optional Twists:
-
1–2 tbsp finely diced jalapeño + 2 tbsp bacon bits (for heat & bacon)
-
¼ cup chopped walnuts + fig jam instead of cranberry (for fig & walnut version)
-
Everything bagel seasoning (savory twist)
-
Zest of one orange (bright citrus zing)
Instructions
1. Preheat & Prep
-
Preheat oven to 375°F (190°C).
-
Lightly grease a 9-inch oven-safe skillet with butter or cooking spray.
2. Prepare the Biscuits
-
Cut each biscuit into quarters.
-
Arrange the pieces in a single layer around the outer edge of the skillet to form a ring.
3. Add the Center
-
Cube the brie and place it in the center of the skillet.
-
Dollop cranberry sauce over the brie. Swirl lightly if desired.
4. The Golden Touch
-
Brush the tops of biscuit pieces with melted butter.
-
Sprinkle chopped rosemary or thyme over biscuits and cheese.
5. Bake
-
Bake for 20–25 minutes until biscuits are golden brown and brie is melted and bubbly.
-
Optional: bake 2–3 extra minutes if starting with a cold skillet.
6. Serve
-
Serve warm directly from the skillet.
-
Use biscuits, apple/pear slices, baguette slices, or crackers for dipping.
Notes
-
Make-Ahead: Cube brie, prepare cranberry sauce, and arrange biscuits. Refrigerate separately. Assemble, brush with butter, and bake when ready.
-
Cheese Firming Hack: Freeze brie for 15–20 minutes before cubing for easy handling.
-
Reheating: If the cheese cools, reheat at 350°F for 5–10 minutes to restore gooey perfection.
-
Cheese Substitutes: Camembert works beautifully; soft goat cheese gives a tangy twist.
-
No Skillet? Any 9-inch pie dish or similar works fine.
Nutrition
- Calories: 220 Cal Per Serving
- Fat: 13g
- Carbohydrates: 20g
A Quick Bite on Nutrition
Now, let’s be clear: this is a celebration dish, a treat-yourself moment, and it’s all about indulgence. But I believe in transparency, so here’s a general breakdown per serving (assuming this recipe serves 8). Remember, these are estimates and can vary based on your specific ingredients.
Each serving provides a good amount of protein and calcium from the brie, and cranberries are packed with antioxidants and vitamin C. The biscuits and sauce contribute carbohydrates for energy. It’s a rich dish, so a little goes a long way! Enjoy it mindfully as part of a balanced diet, savoring every delicious, cheesy bite without an ounce of guilt. Food is joy, and this dip is pure happiness on a plate.
Your New Party Secret is Safe With Us
And there you have it, my friends—the complete guide to the Cranberry Brie Biscuit Dip that will steal the show at every single gathering. It’s more than just a recipe; it’s a conversation starter, a memory maker, and proof that the best food is often the simplest.
I hope you and your loved ones adore this recipe as much as my friends and I do. When you make it, I’d love to see your creation! Tag me @Feastical on social media so I can share in your culinary victory. Now, go forth, preheat that oven, and get ready for the compliments to roll in. Happy cooking!
Of course! Here are some final thoughts crafted to perfectly cap off your wonderful recipe post.
Final Thoughts: Your New Party Legend Awaits
So there you have it, friends—the story, the method, and the magic behind the dip that’s destined to become a legend in your own home.
This Cranberry Brie Biscuit Dip is more than just a recipe; it’s a reminder that the best moments often come from a little improvisation and a lot of heart. It proves you don’t need complicated techniques or a pantry full of obscure ingredients to create something truly spectacular. All you need is a handful of humble components, a hot skillet, and the willingness to create a little joy.
It’s the culinary equivalent of a warm welcome, a dish that doesn’t just feed people but brings them together, leaning in, laughing, and scooping up every last bit of cheesy, cranberry goodness.
So the next time you’re staring into the fridge before a party, or just want to make a weeknight feel special, remember this skillet of joy. Whip it up, watch it disappear, and get ready to accept your new title: the Party Hero.

Baked Goat Cheese with Caramelized Onions
Baked Goat Cheese with Caramelized Onions: Your New Go-To Party Hero
Hey friends, Beau here from Feastical! Let’s talk about magic. Not the rabbit-out-of-a-hat kind (though that’s cool, too), but the kind that happens in your oven when a few simple, humble ingredients decide to throw a party. I’m talking about my absolute favorite, no-fail, always-gets-raves appetizer: Baked Goat Cheese with Caramelized Onions and Fig Jam.
Picture this: a creamy, tangy log of goat cheese gets all warm and spreadable. It’s nestled on a sweet, sticky layer of fig jam and then absolutely buried under a mountain of deeply golden, impossibly sweet caramelized onions. You pop it in the oven until everything is bubbly, fragrant, and begging to be devoured. The second you bring it to the table, flanked by a battalion of crispy crackers or thick slices of a crusty baguette, you become a culinary rockstar. It’s the dish that makes people’s eyes light up, the one that disappears in minutes, and the one they’ll be asking you for the recipe for. The best part? It’s deceptively simple. So, grab your favorite skillet, and let’s make some kitchen magic together.
A Dish That Tastes Like Coming Home
This recipe isn’t just a list of ingredients to me; it’s a time machine. It instantly transports me back to my first real dinner party in my first real apartment. The place was about the size of a postage stamp, and I was determined to host a “sophisticated” gathering. I was nervous. Would the food be good enough? Would people have fun?
I decided to start with this baked goat cheese because it felt fancy but was within my rookie chef skill set. As the onions slowly turned into a sweet, golden tangle and that incredible aroma filled my tiny kitchen, my anxiety just melted away. When my friends arrived, that warm, cheesy, fragrant dish was the first thing they encountered. It broke the ice immediately. We stood around the kitchen island, scooping up massive amounts onto crackers, laughing, and talking over each other. In that moment, I truly understood the power of a great appetizer. It’s not just about feeding people; it’s about connecting them. This dish was the hero of that night, and it’s been a staple in my life ever since.
Gathering Your Flavor All-Stars
This recipe is a beautiful lesson in how a few quality ingredients can create something greater than the sum of their parts. Here’s what you’ll need:
- 1 log (8 oz) of goat cheese (chèvre): This is our star player. Look for a plain, soft log. Its tangy, creamy character is the perfect counterpoint to the sweet onions and jam. Chef’s Insight: Let it sit at room temperature for 15-20 minutes before baking—it’ll spread like a dream!
- 2 large yellow onions, thinly sliced: Yellow onions are my go-to for caramelizing because they have the perfect balance of sweetness and sharpness that mellows out beautifully. Pro Tip: Don’t rush this step! Low and slow is the only way to achieve that deep, rich flavor.
- 1/2 cup of fig jam: This is the secret weapon hiding at the bottom of the dish. It adds a complex, fruity sweetness that makes people go, “Wow, what is that?” Substitution Tip: No fig jam? Apricot preserves or even a good-quality onion marmalade work wonderfully.
- 2 tbsp olive oil & 1 tbsp butter: We’re using this dynamic duo to cook our onions. The butter adds incredible flavor, and the olive oil prevents it from burning. It’s the best of both worlds!
- 1/2 tsp salt: Crucial for drawing the moisture out of the onions and building layers of flavor from the very beginning.
- 1 tsp sugar (optional): A little cheat code to help the caramelization process along, especially if you’re short on time. It gives the onions a head start on browning.
- Fresh thyme leaves (optional, for garnish): A sprinkle of fresh thyme at the end adds a lovely, earthy aroma and a pop of green that makes the dish look professionally finished.
- Crackers or a baguette, for serving: Your trusty vehicles for getting this deliciousness from plate to mouth. I’m a sucker for a thinly sliced, toasted baguette, but sturdy crackers like water crackers or even pita chips are fantastic.
Let’s Get Cooking: Your Foolproof Roadmap to Deliciousness
Ready to build this flavor masterpiece? Follow these steps, and you really can’t go wrong. I’ve packed them with all my favorite little hacks to make the process smooth and satisfying.
- Preheat and Prep: First things first, get your oven preheated to 375°F (190°C). This gives it plenty of time to reach the perfect temperature. While it’s warming up, thinly slice your two onions. Chef’s Hack: If you wear swim goggles or have a pair of kitchen goggles, now’s the time to break them out! No tears allowed for this fun cooking session.
- The Art of Caramelizing: In a large skillet, heat the 2 tbsp of olive oil and 1 tbsp of butter over medium-low heat. Once the butter has melted, add all your sliced onions. Sprinkle them with the 1/2 tsp of salt and the optional 1 tsp of sugar. Give everything a good stir to coat the onions in the fat and seasoning. Now, here’s the most important part: be patient. You’ll cook these onions, stirring every 5-7 minutes, for about 30-40 minutes. They will first wilt, then turn translucent, then slowly become a pale gold, and finally, a deep, rich, brown. If they start to stick or look dry, add a tablespoon of water to the pan to deglaze it and scrape up any tasty browned bits. This is where the flavor lives!
- Assemble Your Masterpiece: Once your onions are a gorgeous caramel color, take them off the heat and let them cool for a few minutes. Grab a small baking dish (an 8×8-inch or a small pie dish works perfectly). Spread the 1/2 cup of fig jam evenly across the bottom. This is your flavor foundation. Place the whole log of goat cheese right in the center of the jam. Now, lovingly pile all those warm, caramelized onions on top of and all around the goat cheese log, covering it completely.
- Bake to Bubbly Perfection: Slide your beautiful creation into the preheated oven and bake for 15-18 minutes. You’re looking for the cheese to be heated all the way through and soft to the touch, and the edges of the jam and onions to be just starting to bubble. A little golden-brown on the top of the onions is a beautiful thing! Pro Tip: If you want a more dramatic, browned top, you can pop it under the broiler for the last minute or two—but watch it like a hawk!
- The Grand Finale: Carefully remove the dish from the oven (it’ll be hot!). Let it sit for just a couple of minutes before garnishing with those fresh thyme leaves. This brief rest makes it the perfect, spreadable temperature and saves your guests from scorched tongues!
How to Serve It Up in Style
Presentation is part of the fun! I love placing the warm baking dish right in the center of a large wooden board or a pretty platter. Surround it with an abundant array of your chosen dippers. Think of it as creating a delicious landscape.
I always include a mix of textures: crispy, thin baguette slices, a handful of sturdy sea salt crackers, and maybe even some crunchy endive leaves or sweet apple slices for a fresh, low-carb option. Don’t forget to place a small spreading knife or a few little cheese spreaders right next to the dish. This isn’t just an appetizer; it’s an experience. Encourage everyone to dig in, scoop up a generous amount, and create their own perfect bite.
Make It Your Own: Delicious Twists & Swaps
One of the best things about this recipe is its flexibility. Feel free to play around and make it suit your taste or what you have in the fridge!
- The Herby Delight: Before baking, roll the goat cheese log in a mixture of chopped fresh herbs like rosemary, thyme, and oregano. It creates a beautiful, fragrant crust.
- Spicy Kick: Love a little heat? Add a pinch of red pepper flakes to the onions while they’re caramelizing, or drizzle the finished dish with a spicy honey before serving.
- Bacon Lover’s Dream: Cook 4-5 slices of bacon until crispy, then crumble it. Stir half into the caramelized onions and use the other half as a garnish on top. Because, well, bacon.
- Dairy-Free & Vegan Twist: You can still enjoy this! Use a high-quality vegan goat-style cheese (they’re getting really good!) and substitute the butter with more olive oil or a vegan butter alternative.
- Mushroom Medley: Sauté 8 oz of sliced cremini mushrooms with the onions for an extra-deep, earthy, umami flavor. It’s a heartier, more rustic version.
Beau’s Kitchen Chronicles
This recipe has been on quite a journey with me. I’ve made it for first dates, holiday parties, and even just a cozy Friday night in with my partner. I remember one time, early on, I was so impatient that I cranked the heat to high to caramelize the onions faster. Big mistake! They burned on the outside and were still raw in the middle, giving the whole dish a bitter taste. It was a tough lesson, but it drilled the “low and slow” mantra into my head forever. Now, I see those 30-40 minutes of stirring not as a chore, but as my kitchen therapy time. It’s when I sip a glass of wine, put on some music, and just breathe in the incredible smell of something wonderful coming together.
Your Questions, Answered!
Over the years, I’ve gotten a lot of great questions about this recipe. Here are the ones I hear most often.
- Q: Can I make any part of this ahead of time?
A: Absolutely! You can caramelize the onions up to 3 days in advance and store them in the fridge. You can also assemble the entire dish (jam, cheese, onions) a day ahead, cover it, and keep it in the fridge. Just add a few extra minutes to the baking time since it’ll be going in cold. - Q: My onions are burning instead of caramelizing! Help!
A: This almost always means your heat is too high. Immediately lower the heat to low, add a tablespoon or two of water to the pan to stop the cooking and scrape up the browned bits, and continue cooking slowly. Patience is key! - Q: My goat cheese split and looks a bit greasy. What happened?
A: This can happen if the oven is too hot. Goat cheese has a delicate structure. Make sure your oven is properly calibrated and you’re baking at 375°F, not higher. A quick bake is all you need to warm it through. - Q: What other jams can I use besides fig?
A: So many! Apricot, peach, or cherry preserves are all fantastic. A savory-sweet onion marmalade or a pepper jelly would also be incredible. Get creative with your favorite flavors!

Baked Goat Cheese with Caramelized Onions
Description
Hey friends! Beau here. Imagine a creamy, tangy log of goat cheese, nestled on sweet fig jam and topped with deeply golden caramelized onions. Warm, bubbly, and irresistible, this appetizer disappears in minutes and makes you look like a kitchen rockstar. Perfect for parties, game nights, or cozy evenings.
Ingredients
Main Dish:
-
1 log (8 oz) plain goat cheese (chèvre), room temperature
-
2 large yellow onions, thinly sliced
-
½ cup fig jam (or apricot preserves/onion marmalade)
-
2 tbsp olive oil
-
1 tbsp butter
-
½ tsp salt
-
1 tsp sugar (optional, helps caramelization)
-
Fresh thyme leaves (optional, for garnish)
For Serving:
-
Thinly sliced baguette, crackers, or endive leaves
Instructions
1. Preheat & Prep
-
Preheat oven to 375°F (190°C).
-
Thinly slice onions. Pro Tip: wear goggles if tears are a concern!
2. Caramelize the Onions
-
Heat olive oil and butter over medium-low heat in a large skillet.
-
Add onions, salt, and optional sugar. Stir to coat.
-
Cook low and slow for 30–40 minutes, stirring every 5–7 minutes.
-
Onions will wilt, turn translucent, then golden, then deep brown.
-
Add 1 tbsp water if sticking.
-
3. Assemble the Dish
-
Spread fig jam evenly in a small baking dish (8×8-inch or pie dish).
-
Place goat cheese log in the center.
-
Pile caramelized onions on top and around the cheese.
4. Bake to Perfection
-
Bake 15–18 minutes until cheese is soft and onions are bubbly.
-
Optional: broil 1–2 minutes for a browned top (watch carefully!).
-
Remove from oven and rest 2 minutes before serving.
-
Garnish with fresh thyme leaves.
Notes
-
Caramelize onions up to 3 days ahead; refrigerate.
-
Assemble dish a day ahead; bake with extra 2–3 minutes since cold from fridge.
Nutrition
- Calories: 180 Cal Per Serving
- Sugar: 10g
- Fat: 11g
- Carbohydrates: 16g
- Protein: 5g
Nourishment Note (Because We Care!)
While this dish is definitely an indulgent treat, it’s made with real, whole ingredients. Goat cheese is a good source of protein and calcium and is often easier to digest for some people than cow’s-milk cheese. Onions are packed with antioxidants and prebiotic fibers that are great for gut health. And using a high-quality jam means you’re controlling the ingredients without any weird additives. As with all the good things in life, it’s all about balance and enjoyment. So savor every delicious, feel-good bite!
Approximate Nutrition per Serving (based on 6 servings):
Calories: 180 | Protein: 5g | Carbohydrates: 16g | Fat: 11g | Sugar: 10g
Your Next Culinary Adventure Awaits
And there you have it, my friends. My heart-on-a-plate, my party-saving, my never-fail baked goat cheese with caramelized onions. It’s more than just a recipe; it’s a reminder that the most memorable food is often the simplest, made with a little patience and a lot of love.
I hope this dish finds its way into your kitchen and becomes a part of your own story—the star of your next game night, the centerpiece of your holiday table, or the simple joy of a Tuesday night well spent. If you make it (and I really hope you do!), tag me @Feastical on social media so I can see your beautiful creations. Now, go preheat that oven and get ready for the compliments to roll in. Happy cooking!

Parmesan Tortellini Bites
The Snack That Started a Party: Parmesan Tortellini Bites
Hey friends, Beau here from Feastical! Let me paint you a picture. You’ve got a big game on the TV, friends are starting to trickle in, and the air is buzzing with that happy, pre-fun energy. You need a snack. Not just any snack, but the snack. The one that disappears from the platter in minutes, the one that has everyone huddled around the kitchen island, begging for the recipe. The snack that makes you look like a culinary rockstar with what feels like zero effort.
Well, my foodie friend, you’ve just found it. Meet your new secret weapon: Crispy Parmesan Tortellini Bites.
Imagine this: a tender, cheesy tortellini, hugged by a golden, crunchy crust that’s loaded with savory Parmesan and a kiss of garlic. They’re hot, they’re poppable, and when you dip them into a warm, tangy marinara sauce… it’s a flavor explosion that hits every single happy button. They’re everything you love about those legendary toasted ravioli from your favorite Italian joint, but perfectly bite-sized for maximum snacking efficiency. I’m talking about a snack so good, it might just upstage the main event. So, grab your apron (or don’t, I’m not the boss of you), and let’s make some magic happen.
The Accidental Appetizer That Stole the Show
I have to confess, this recipe wasn’t born from hours of meticulous planning in a test kitchen. Nope. This was a classic “what-do-I-have-in-the-fridge-before-friends-come-over” miracle. It was a chaotic Sunday afternoon years ago. My beloved college football team was playing a huge rivalry game, and my apartment was about to be packed. I had a package of cheese tortellini destined for a simple dinner, some leftover breadcrumbs, and a nub of Parmesan cheese that was begging for a purpose.
In a moment of pure, hungry inspiration, I decided to bread a few of those cooked tortellini and give them a quick fry. The result was pure, unadulterated chaos—the good kind. The first batch vanished before I could even get the second one into the oil. My friends abandoned the pre-game commentary to crowd into my tiny kitchen, their eyes locked on the sizzling pot. Those humble tortellini bites became the star of the day, and a Feastical staple was born. It’s a reminder that sometimes, the best recipes come from a little bit of kitchen chaos and a whole lot of hunger.
Gathering Your Flavor Arsenal
One of the best things about this recipe is its beautiful simplicity. You only need a handful of ingredients to create something truly spectacular. Here’s the lineup:
- 1 (9 oz) package refrigerated cheese tortellini – This is our star! The refrigerated kind holds its shape beautifully during cooking and frying. You can absolutely use frozen (just thaw it first), but the texture from the fresh pasta is just *chef’s kiss*.
- 1/2 cup grated Parmesan cheese – We’re not just topping with this; it’s in the crust. Use the real deal, freshly grated if you can. The pre-grated stuff in a can doesn’t melt as well and lacks that punchy, salty flavor we’re after.
- 1/2 cup breadcrumbs (Italian-style preferred) – These are the foundation of our crispy coating. The Italian-style ones already have herbs and seasoning built-in, which is a fantastic flavor shortcut. No Italian-style? No problem! Just add a pinch of dried oregano and basil to your plain breadcrumbs.
- 1/2 tsp garlic powder – This is our flavor secret weapon. It distributes the garlic flavor evenly throughout the crust without any risk of burning, unlike fresh garlic.
- 2 eggs, beaten – This is our glue! The beaten egg acts as the perfect sticky agent to help our Parmesan-breadcrumb mixture cling to every nook and cranny of the tortellini.
- Oil for frying or air-frying – For frying, a neutral oil with a high smoke point is key. I love avocado oil or canola oil. For air-frying, a quick spritz of cooking spray is all you need to achieve that golden perfection.
- Marinara sauce, for dipping – The perfect tangy partner for our cheesy, crispy bites. I love using a high-quality store-bought sauce and warming it up with a fresh basil leaf stirred in. It makes all the difference!
Let’s Get Crispy: Your Foolproof Guide
Alright, team, it’s go-time. This process is as easy as 1-2-3 (literally, it’s a three-step coating process), and I’ll be with you every step of the way with my favorite chef hacks.
- Cook & Cool the Tortellini: First, cook your tortellini according to the package directions. But here’s my first pro-tip: cook them for 1 minute less than it says! They’re going to get another round of heat in the oil or air fryer, and this ensures they stay tender and don’t get mushy. Once they’re cooked, drain them and give them a few minutes to cool down. A hot tortellini is a sticky tortellini, and we want a clean coating process.
- Create the Magic Crust: While the pasta is cooling, let’s make the coating. In a medium bowl, mix together your grated Parmesan, breadcrumbs, and garlic powder. Give it a good whisk with a fork to break up any clumps and ensure every single bite is perfectly seasoned. I sometimes add a pinch of black pepper here for a little extra warmth.
- The Coating Station: This is where the magic happens. Set up your assembly line: one bowl with your beaten eggs, one bowl with your Parmesan-breadcrumb mixture, and a clean plate or baking sheet for your coated tortellini. This “station” method keeps things organized and mess-free. Now, working in small batches, drop a handful of tortellini into the beaten egg. Use a fork to toss them around, making sure they’re fully coated. Let the excess egg drip off, then transfer them to the breadcrumb mixture.
- Get ‘Em Coated: Use a spoon to gently toss the tortellini in the breadcrumb mixture, pressing lightly to make sure every millimeter gets covered in that cheesy, crunchy goodness. Place the finished bites on your clean plate. Repeat until all your tortellini are dressed to impress!
- The Grand Finale: Cooking!
- For Frying (The Classic Crispy Route): Pour about 1 inch of oil into a heavy-bottomed pot or deep skillet and heat it to 350°F (175°C). If you don’t have a thermometer, test it by dropping in a small breadcrumb—if it sizzles immediately, you’re good to go. Fry the tortellini in batches for 2-3 minutes, until they’re a deep, golden brown. Don’t overcrowd the pot! This keeps the oil temperature steady, which is the key to a non-greasy, super-crispy crust. Use a slotted spoon to transfer them to a paper towel-lined plate.
- For Air-Frying (The Lighter, Easier Route): Arrange your coated tortellini in a single layer in your air fryer basket. Give them a generous spritz of cooking spray—this is crucial for browning! Air fry at 375°F (190°C) for 8-10 minutes, shaking the basket halfway through, until they’re golden and crispy. No preheating the oil, no mess, all the crunch.
Plating Up for Maximum “Wow”
Presentation is part of the fun! You don’t just want to dump these glorious golden bites into a bowl. Let’s make them look as incredible as they taste.
I love using a wide, shallow platter or even a small wooden board. Pile the hot tortellini bites high in the center. Right next to them, place a small bowl of that warm marinara sauce. For a pop of color and freshness, scatter some finely chopped fresh parsley or basil over the top of the tortellini. It makes the colors pop and adds a lovely fresh aroma.
Stick a handful of decorative cocktail picks or small forks nearby to make grabbing and dipping a breeze. This isn’t just a snack; it’s an experience. Set it out on the counter and watch your guests gravitate towards it like moths to a flame. It’s a beautiful thing.
Make It Your Own: Delicious Twists & Swaps
The basic recipe is a straight-up home run, but the fun doesn’t stop there. Feel free to get creative and tailor these bites to your mood or dietary needs!
- Meat Lover’s Dream: Swap the cheese tortellini for a refrigerated three-cheese and meat tortellini. The savory flavor of the meat inside pairs perfectly with the Parmesan crust.
- Spicy ‘Nduja Kick: For my friends who like a little heat, mix 1-2 tablespoons of ‘nduja or a teaspoon of red pepper flakes into your marinara sauce before warming it up. The spicy, oily ‘nduja melts into the sauce and creates an incredible dipping experience.
- Panko Power: For an even crunchier, shatteringly crisp coating, swap the regular breadcrumbs for Panko breadcrumbs. Their light, flaky texture creates a truly next-level crunch.
- Baked, Not Fried: If you want to avoid frying or don’t have an air fryer, you can bake these! Arrange the coated tortellini on a parchment-lined baking sheet, give them a heavy spritz of oil, and bake at 425°F (220°C) for 12-15 minutes, flipping halfway through.
- Gluten-Free & Vegan Friendly: Use your favorite gluten-free or vegan tortellini. For the coating, use gluten-free breadcrumbs and a vegan Parmesan alternative. For the egg wash, a simple mix of 3 tablespoons of plant-based milk and 1 tablespoon of cornstarch works wonders as a binder.
Beau’s Brain Dump & Kitchen Confessions
Over the years, I’ve made these bites more times than I can count, and they’ve evolved in little ways. I once, in a moment of sheer madness, tried to coat uncooked tortellini. Don’t be like past Beau. It creates a gummy, undercooked mess. Always cook them first!
Another fun story: I was once making a double batch for a huge family gathering and ran out of breadcrumbs halfway through. In a panic, I crushed up some plain potato chips for the second half. The result? Surprisingly delicious! A little salty, super crunchy. It just goes to show that sometimes, the best kitchen innovations come from happy little accidents.
Your Questions, Answered!
I’ve gotten a lot of questions about this recipe over on Feastical’s social media. Here are the ones I see most often!
- Can I make these ahead of time? You bet! You can coat the tortellini and arrange them in a single layer on a baking sheet a few hours ahead of time. Keep them covered in the fridge until you’re ready to fry or air-fry. You can even freeze them on the sheet, then transfer to a freezer bag for up to a month. Cook from frozen, adding a few extra minutes to the cooking time.
- My coating is falling off! What did I do wrong? The most common culprit is not letting the cooked tortellini cool enough. If they’re too hot and steamy, the egg wash slides right off. Give them a good 10-15 minutes to cool down. Also, make sure you’re letting the excess egg drip off before moving to the breadcrumbs.
- Why are my air-fried bites not as crispy as the fried ones? That spritz of oil is non-negotiable for the air fryer method! It helps conduct heat and promotes browning and crisping. Don’t skip it. Also, make sure they’re in a single layer with a little space between each one for the air to circulate.
- What other dipping sauces do you recommend? Marinara is the classic, but don’t be afraid to experiment! A creamy Alfredo sauce, a spicy sriracha mayo, a cool and creamy ranch, or even a balsamic glaze for a sweet and tangy twist are all phenomenal.

Parmesan Tortellini Bites
Description
Hey friends! Beau here. Picture this: tender cheese tortellini encased in a golden, crispy Parmesan-and-garlic crust, ready to be dipped in warm, tangy marinara. They’re bite-sized, poppable, and the ultimate crowd-pleasing snack for game day, parties, or anytime you need a quick, indulgent hit of comfort food.
Ingredients
Tortellini Bites:
-
1 (9 oz) package refrigerated cheese tortellini (or thawed frozen tortellini)
-
½ cup grated Parmesan cheese (freshly grated is best)
-
½ cup breadcrumbs (Italian-style preferred; plain breadcrumbs + ¼ tsp dried oregano & basil works too)
-
½ tsp garlic powder
-
2 eggs, beaten
-
Oil for frying (neutral, high smoke point: canola, avocado) or cooking spray for air-frying
For Dipping:
-
Marinara sauce, warmed
-
Optional garnish: fresh parsley or basil
Instructions
1. Cook & Cool the Tortellini
-
Boil tortellini according to package instructions, but 1 minute less than directed to prevent overcooking.
-
Drain and let cool 10–15 minutes so the coating sticks properly.
2. Prepare the Coating
-
In a medium bowl, mix Parmesan, breadcrumbs, and garlic powder. Optional: add a pinch of black pepper.
-
Set up a coating station:
-
Bowl 1: beaten eggs
-
Bowl 2: Parmesan-breadcrumb mixture
-
Plate or baking sheet: coated tortellini
-
3. Coat the Tortellini
-
Toss cooled tortellini in the beaten eggs, letting excess drip off.
-
Transfer to the breadcrumb mixture, pressing lightly to cover completely.
-
Place coated tortellini on plate/baking sheet. Repeat until all tortellini are coated.
4. Cook the Tortellini
Frying (Classic Method):
-
Heat 1 inch of oil to 350°F (175°C). Test with a breadcrumb—should sizzle immediately.
-
Fry in batches, 2–3 minutes until deep golden brown. Don’t overcrowd.
-
Remove with a slotted spoon and drain on paper towels.
Air-Frying (Lighter Method):
-
Arrange tortellini in a single layer; spritz generously with cooking spray.
-
Air fry at 375°F (190°C) for 8–10 minutes, shaking halfway, until golden and crisp.
Notes
-
Cook tortellini first—coating raw pasta creates a gummy mess.
-
Cool tortellini before coating for better adhesion.
-
Small batches maintain oil temperature and crispiness.
-
Air fryer: spritz oil and leave space between tortellini for even cooking.
Nutrition
- Calories: 230 Cal Per Serving
- Sodium: 450mg
- Fat: 12g
- Saturated Fat: 4g
- Carbohydrates: 22g
- Protein: 9g
- Cholesterol: 45mg
Let’s Talk Nourishment
Now, I’m all about feel-good food, and that includes being mindful of what we’re putting into our bodies. While these are definitely a “treat-yo-self” kind of snack, it’s good to know what you’re enjoying. This nutritional info is an estimate based on the air-fried version, as it’s a bit lighter.
Prep Time: 15 min | Cook Time: 10 min | Total Time: 25 min | Yields: About 30 bites (5 servings)
Per Serving (approx. 6 bites):
Calories: 230 | Protein: 9g | Carbohydrates: 22g | Fat: 12g | Saturated Fat: 4g | Cholesterol: 45mg | Sodium: 450mg | Fiber: 1g | Sugar: 2g
Remember, these numbers can vary based on the specific brands of ingredients you use and your cooking method (deep-frying will increase the fat content). The protein from the cheese and eggs, and the carbs from the pasta and breadcrumbs, make these a surprisingly satisfying snack that provides a quick burst of energy—perfect for a party or a pre-dinner pick-me-up!
Your New Go-To Party Hero
And there you have it! The full story behind my all-time favorite party snack. These Parmesan Tortellini Bites are more than just a recipe; they’re a guaranteed good time. They’re proof that you don’t need fancy ingredients or complicated techniques to create something truly memorable and delicious.
So the next time you’re staring into the fridge before a gathering, remember this recipe. Embrace the chaos, bread those tortellini, and get ready for the compliments to roll in. I absolutely love seeing your kitchen creations, so if you make these, be sure to tag me @Feastical on social media so I can see your masterpiece!
Now go forth, cook with confidence, and make someone’s day a little more delicious. Happy snacking!